Holaaa mis hivers amigos! Espero estén muy bien el día de hoy! Feliz inicio de semana!
Hoy haremos un creativo cotillón para el pequeño de la casa utilizando material de provecho. Acompáñame hasta el final!
Hello my hivers friends! I hope you are very well today! Happy start of the week! Today we will make a creative party favors for the little one in the house using useful material. Join me until the end!
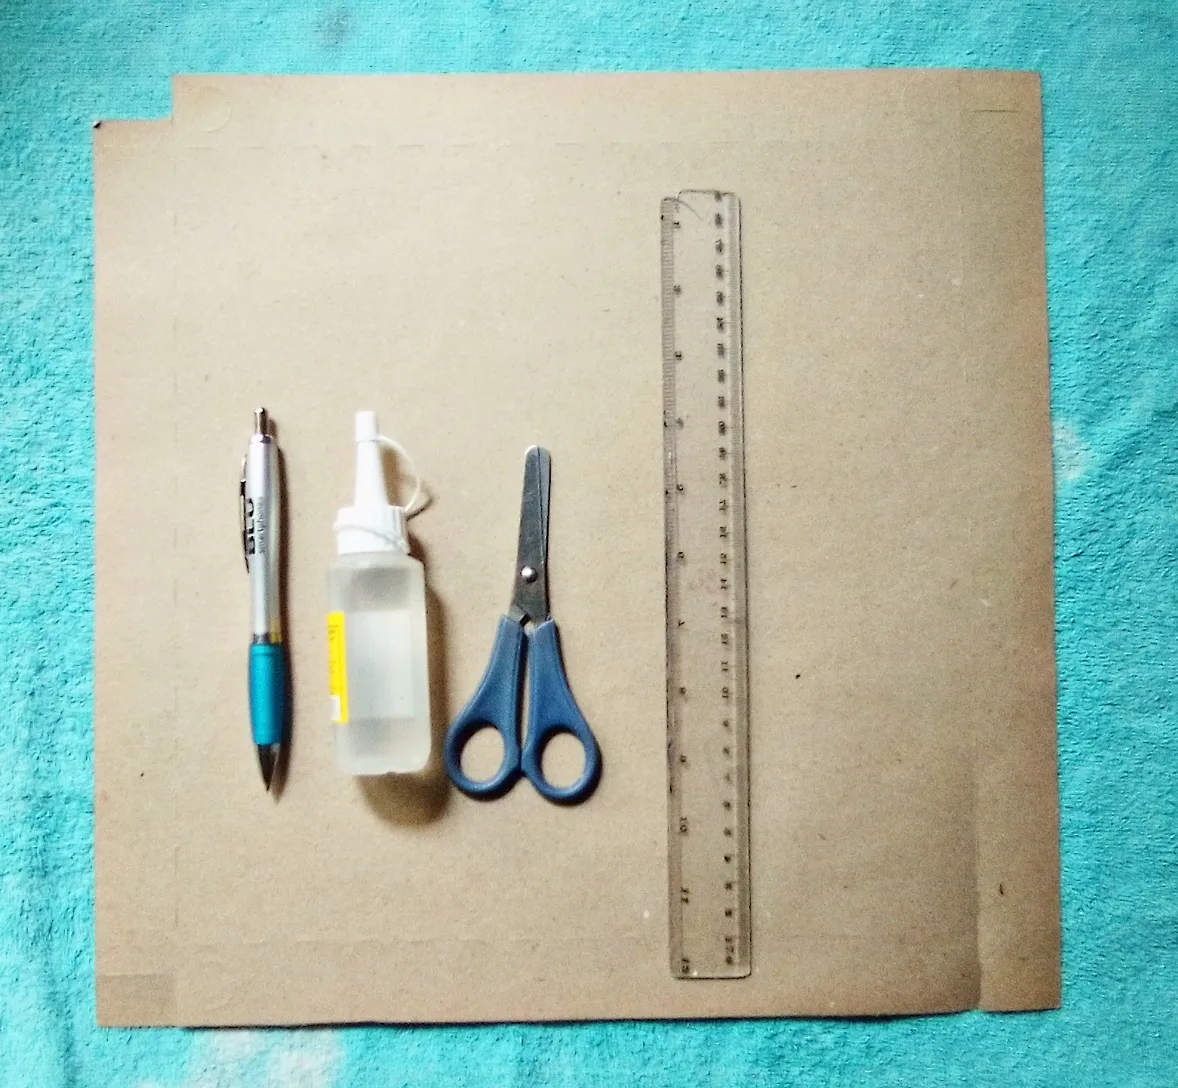
Materiales: // Materials:
- Cartón
- Bolígrafo
- Tijera
- Regla
- Silicón
- Paperboard
- Ballpoint
- Scissor
- Rule
- Silicone
Manos a la Obra!
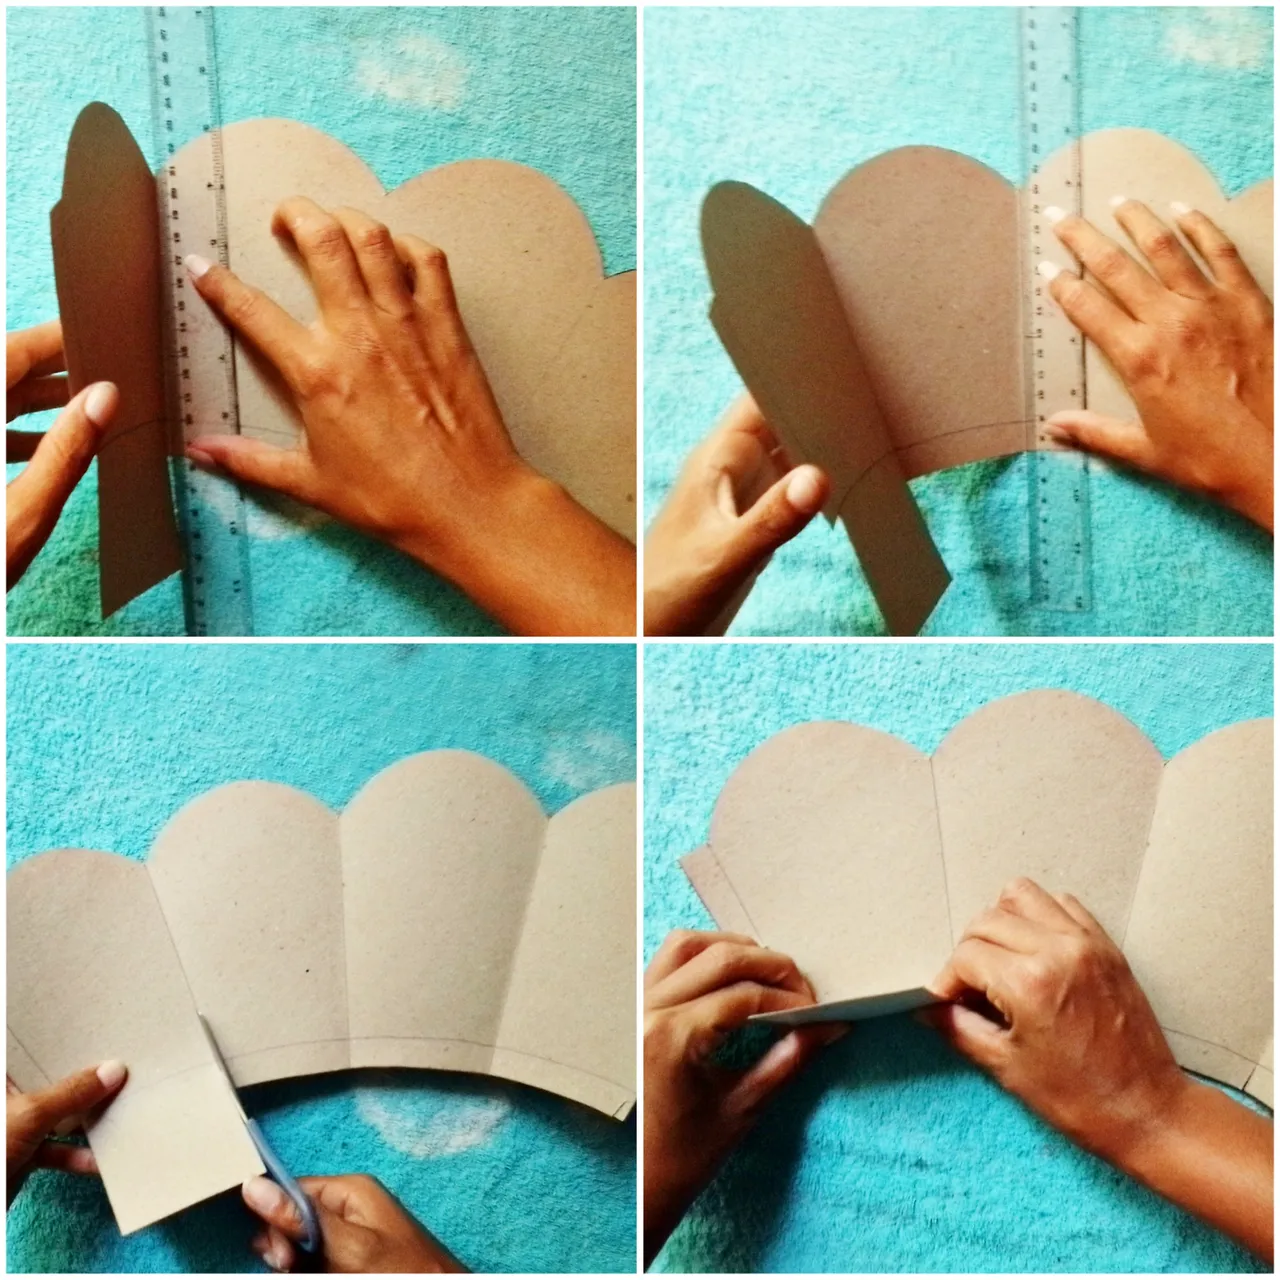
Paso 01: Trazaremos en el cartón el patrón de nuestro súper cotillón. El cotillón tendrá una altura de 15 centímetros aproximadamente. Luego de haber trazado el patrón procedemos a recortarlo.
Step 01: We will trace the pattern of our super party favors on the cardboard. The party favors will have a height of approximately 15 centimeters. After having traced the pattern, we proceed to cut it out.

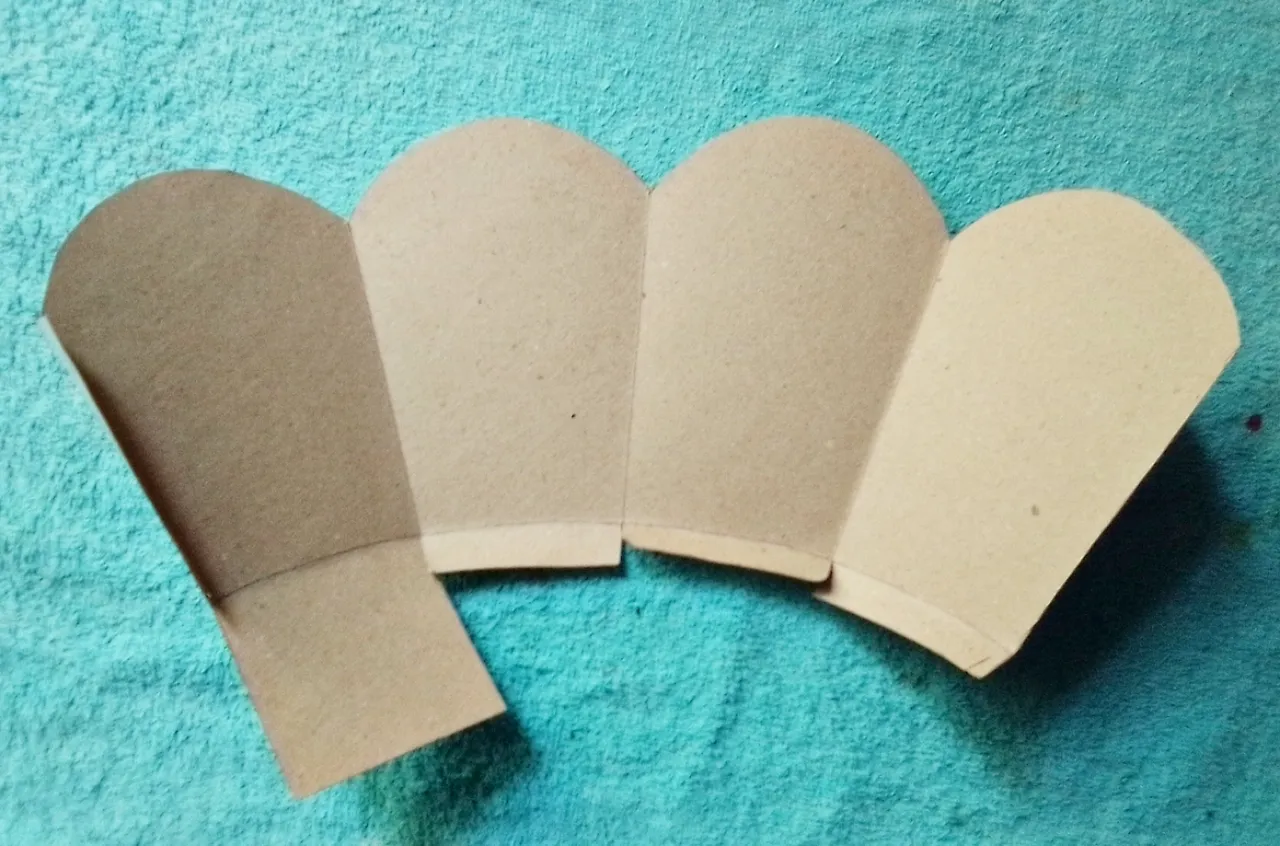
Paso 02: Con la ayuda de la regla comenzaremos a doblar parte por parte cómo se muestra en la imagen. Una vez dobladas, te quedará de esa manera.
Step 02: With the help of the ruler we will begin to fold part by part as shown in the image. Once folded, it will fit that way.
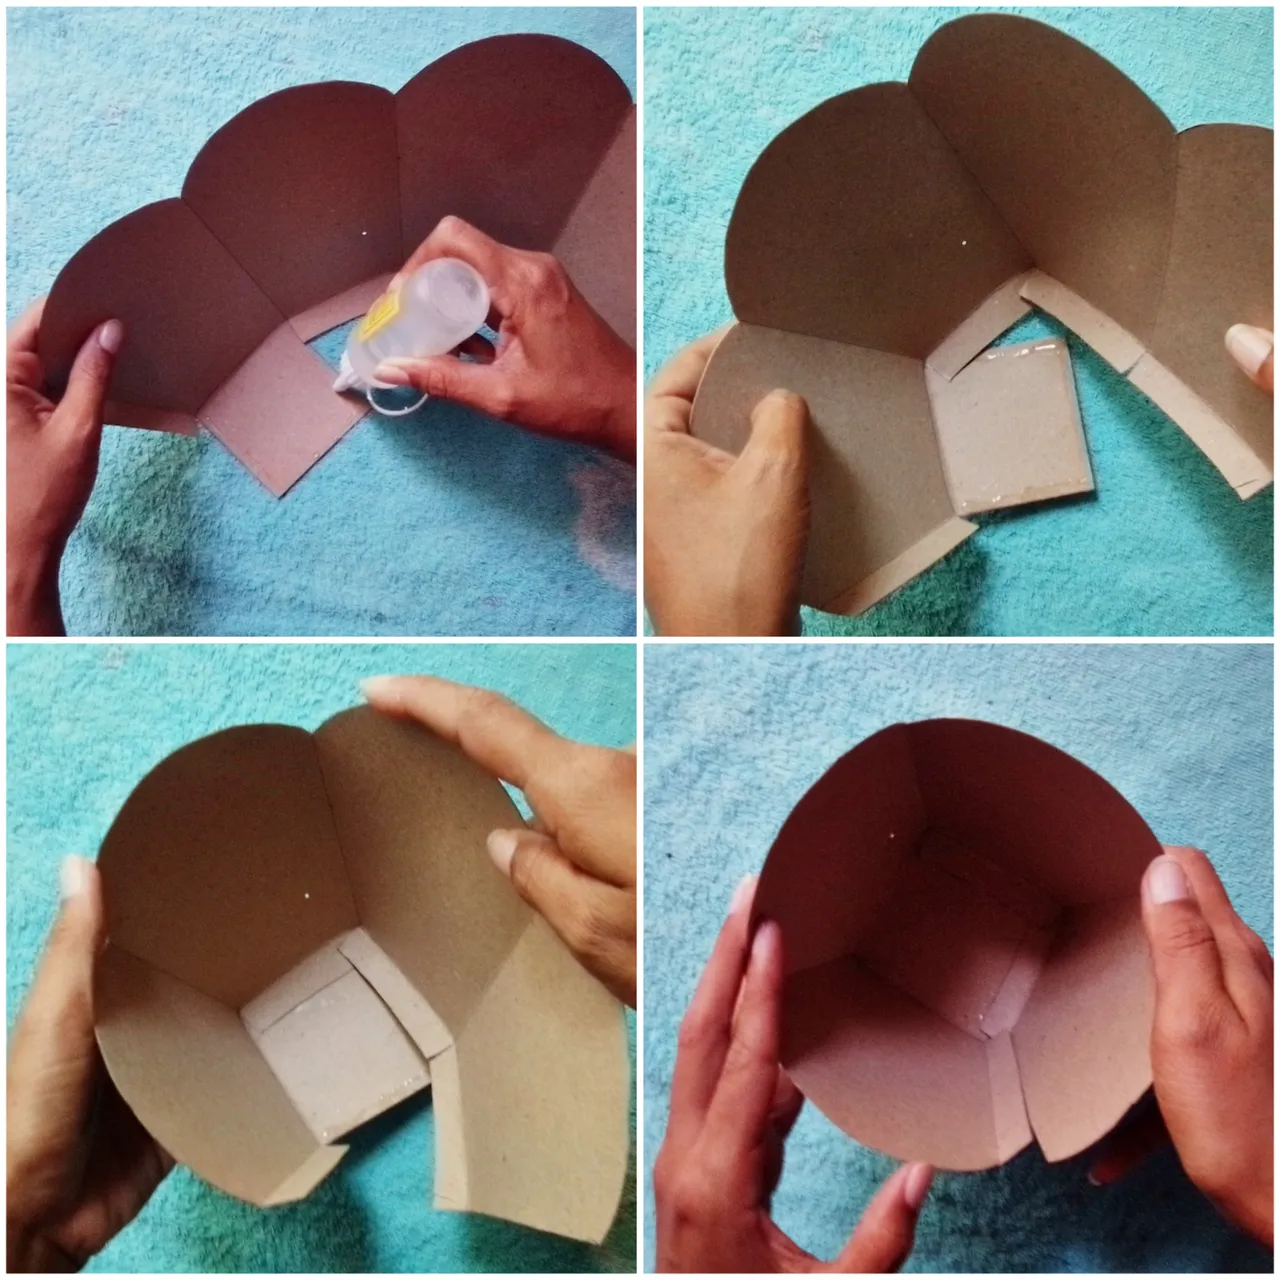
Paso 03: Pondremos silicón en la parte cuadrada que será el soporte y uniremos parte por parte. Y te quedará de la siguiente manera.
Step 03: We will put silicone in the square part that will be the support and we will join part by part. And it will fit you as follows.

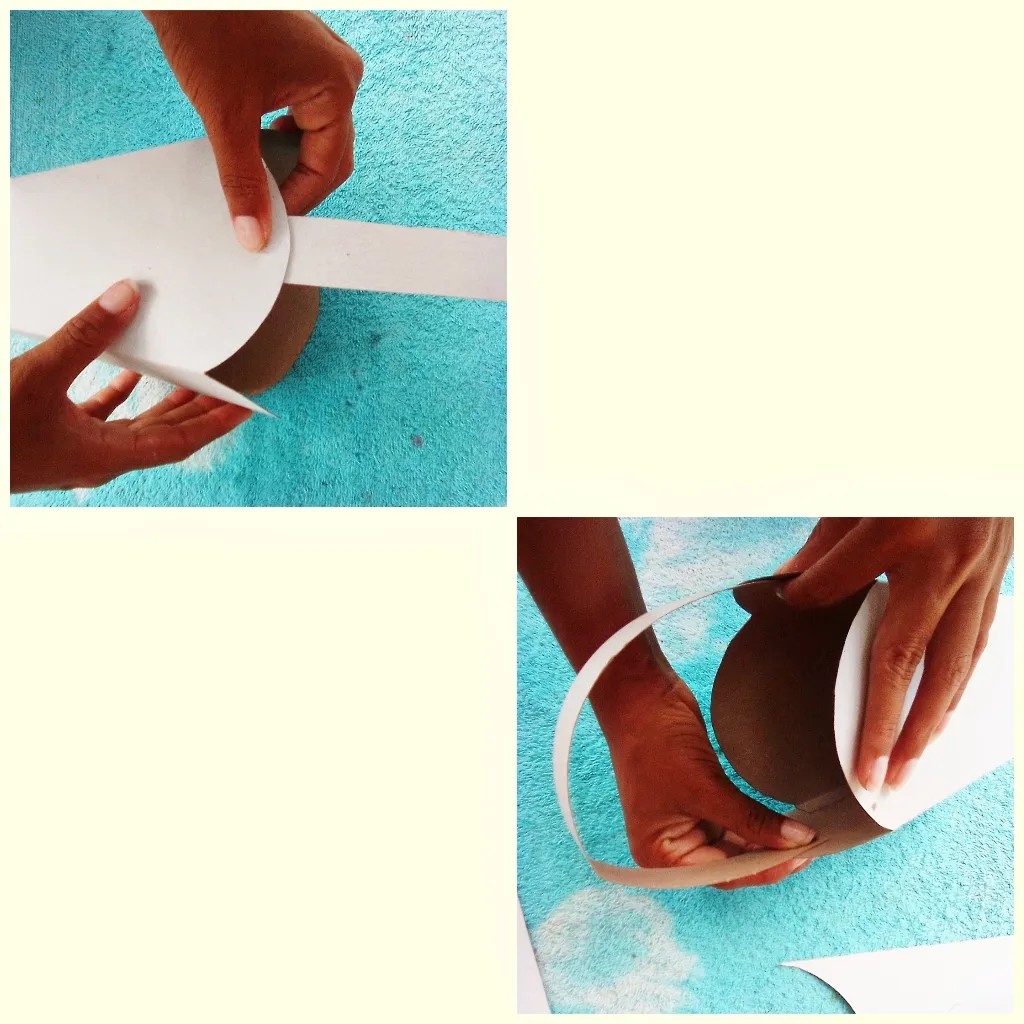
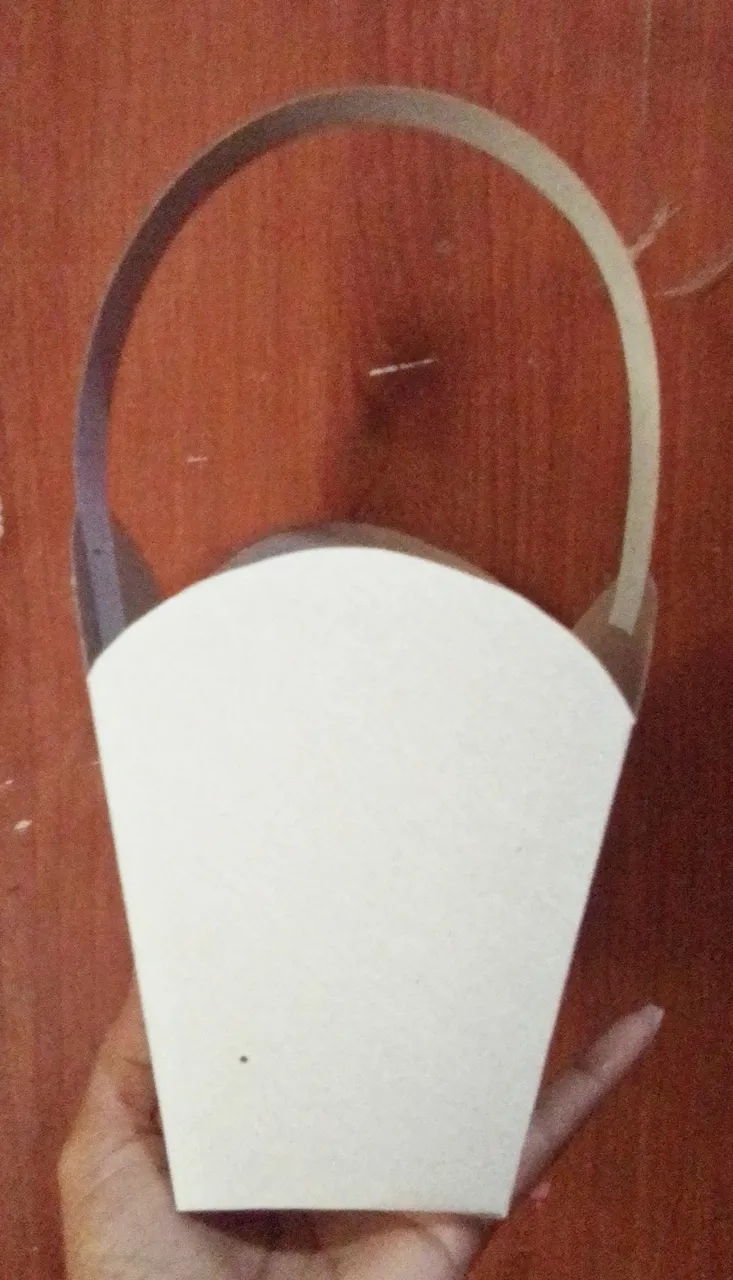
Paso 04: Lo último que haremos será cortar una tira de 25 centímetros que pegaremos a los laterales del cotillón que servirá de agarre.
Step 04: The last thing we will do is cut a 25-centimeter strip that we will glue to the sides of the party favors that will serve as a grip.
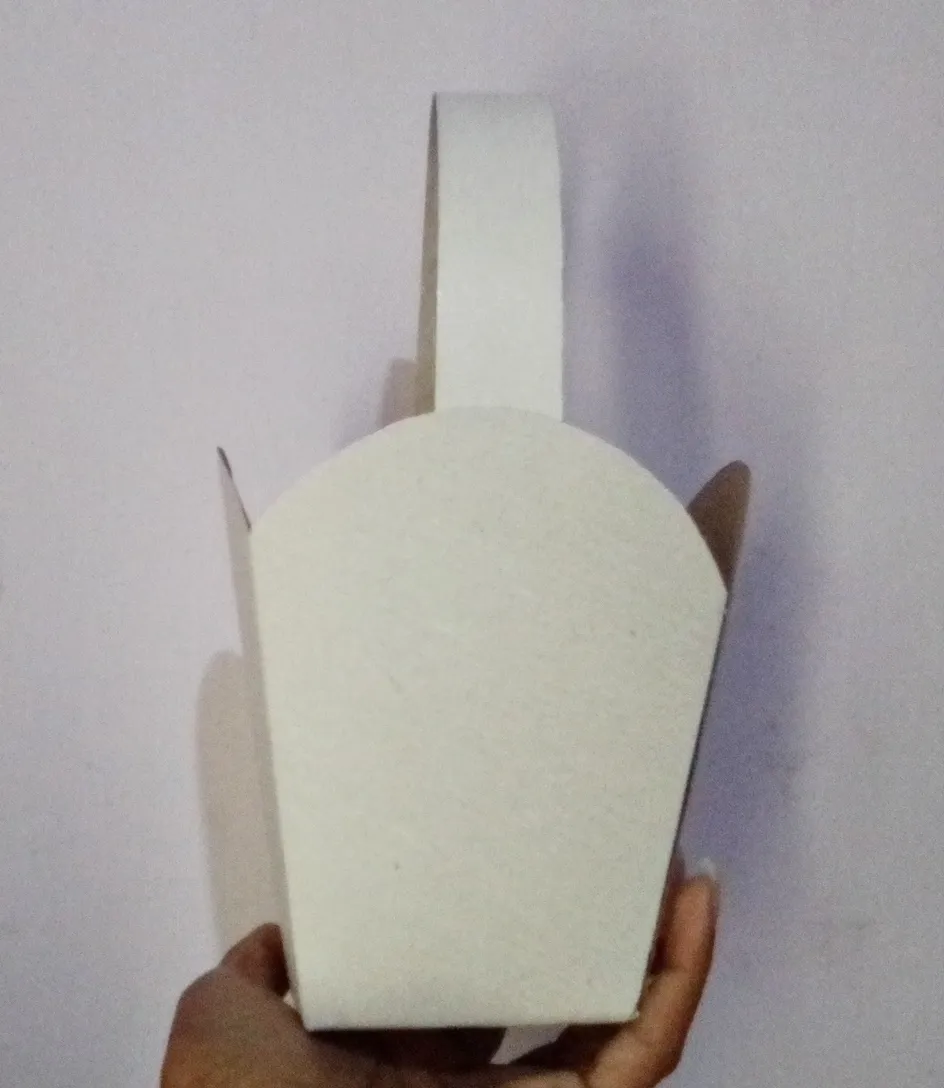
Resultado 01! // Outcome 01!
Éste es el primer resultado que obtendrás luego de haber puesto en práctica todos los pasos anteriores.
This is the first result that you will get after having put all the previous steps into practice.
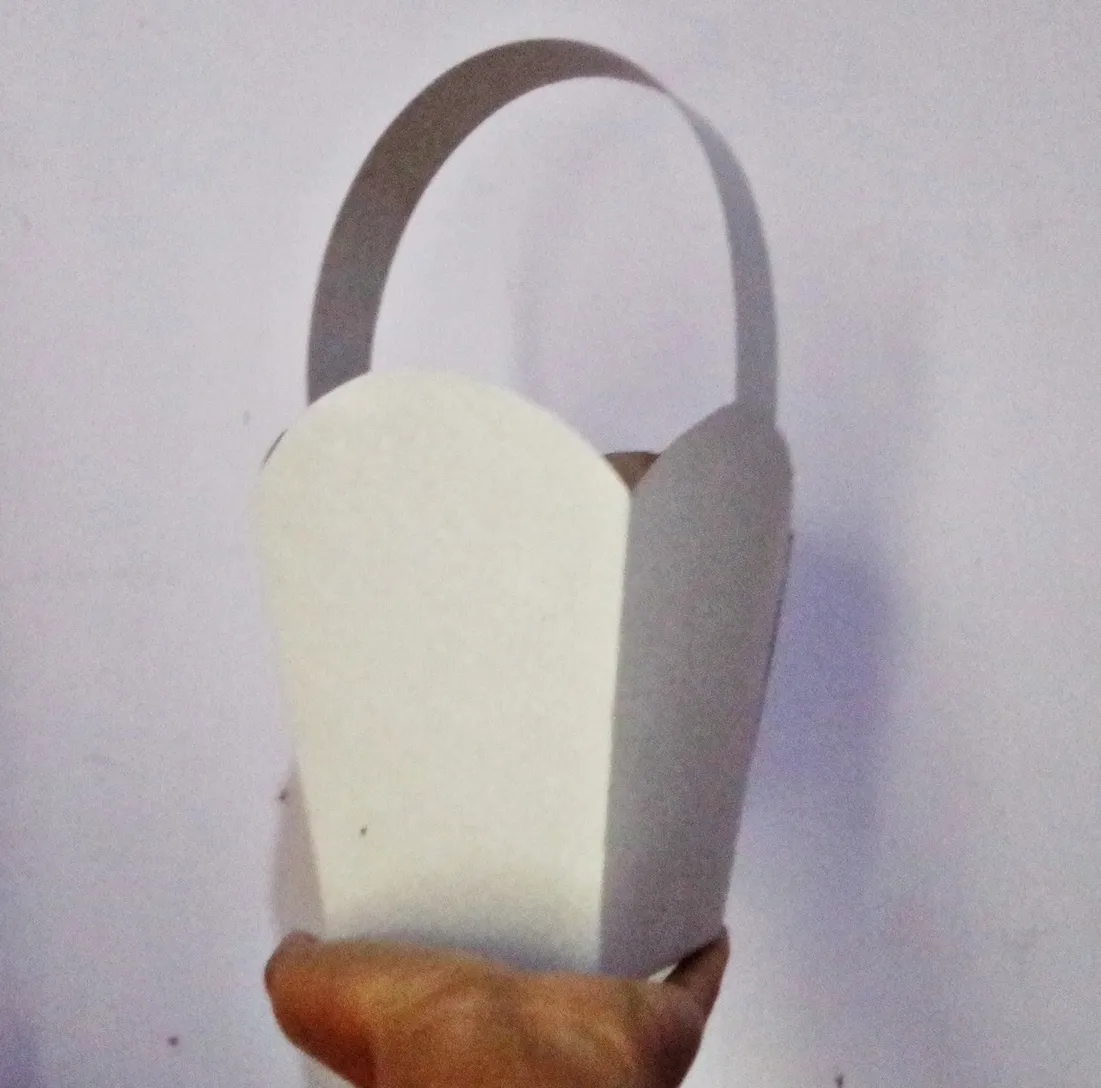
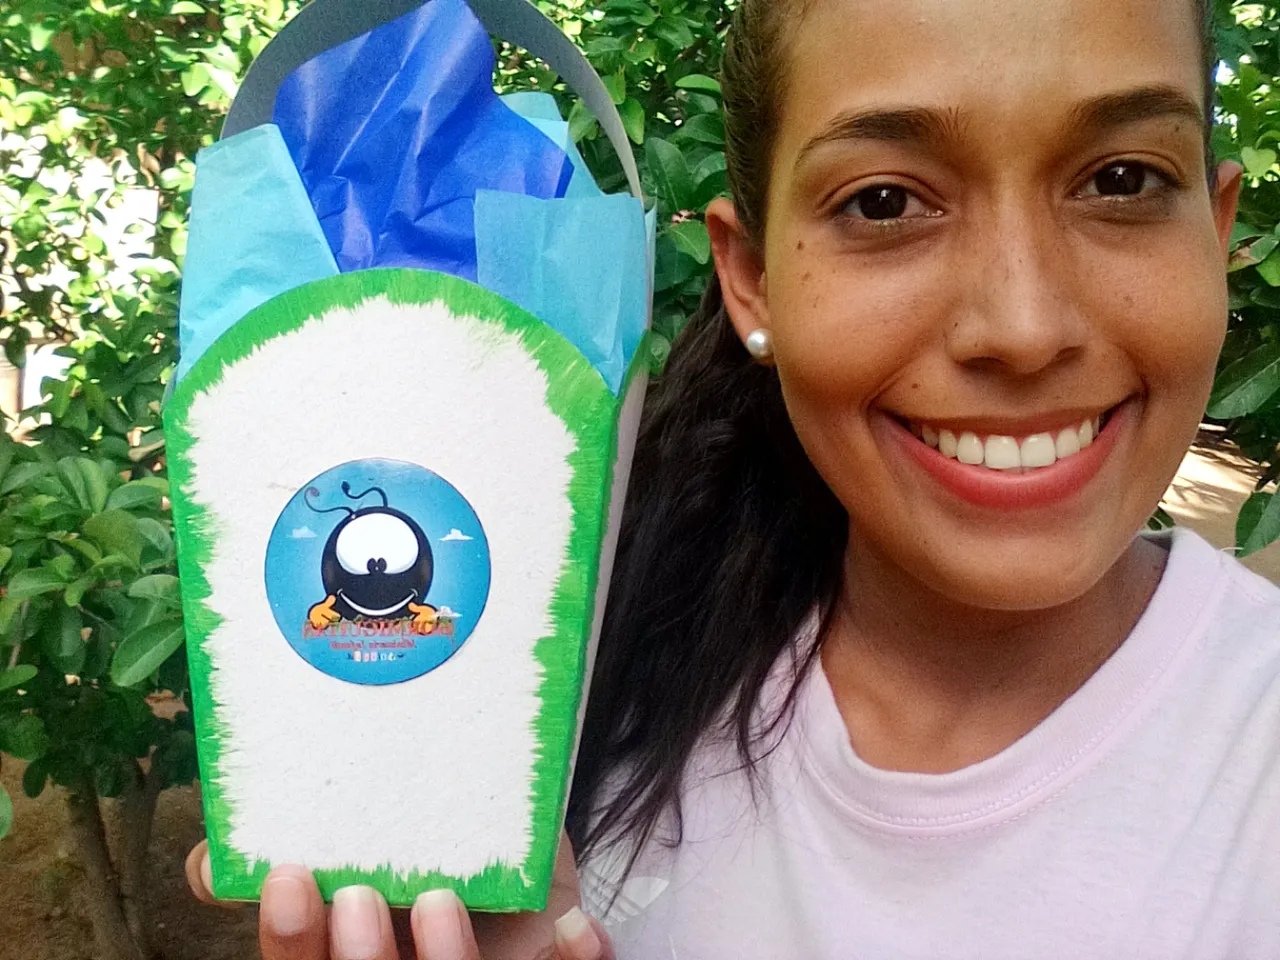
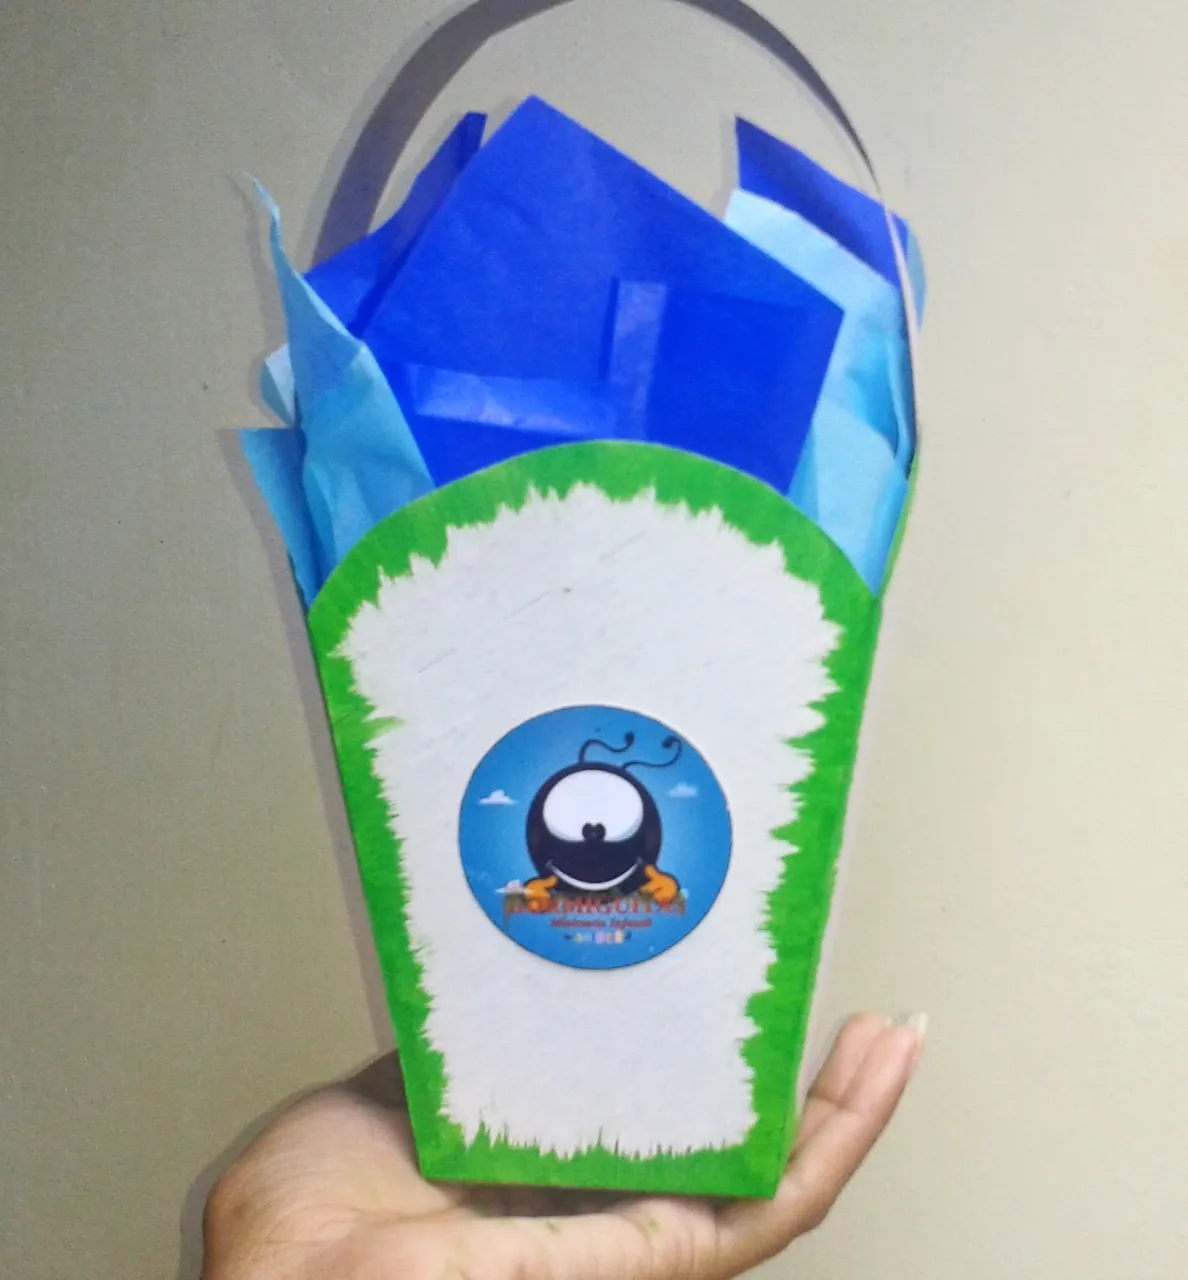
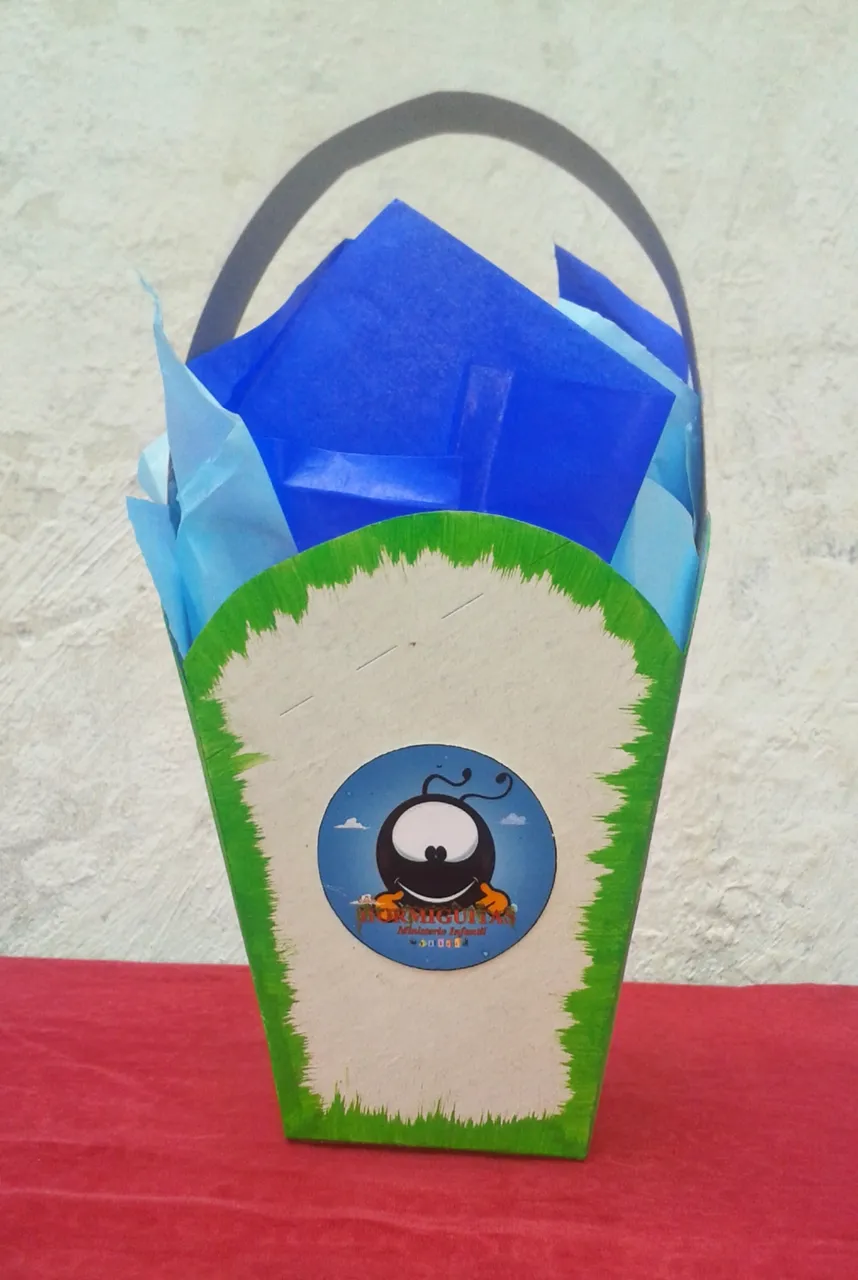
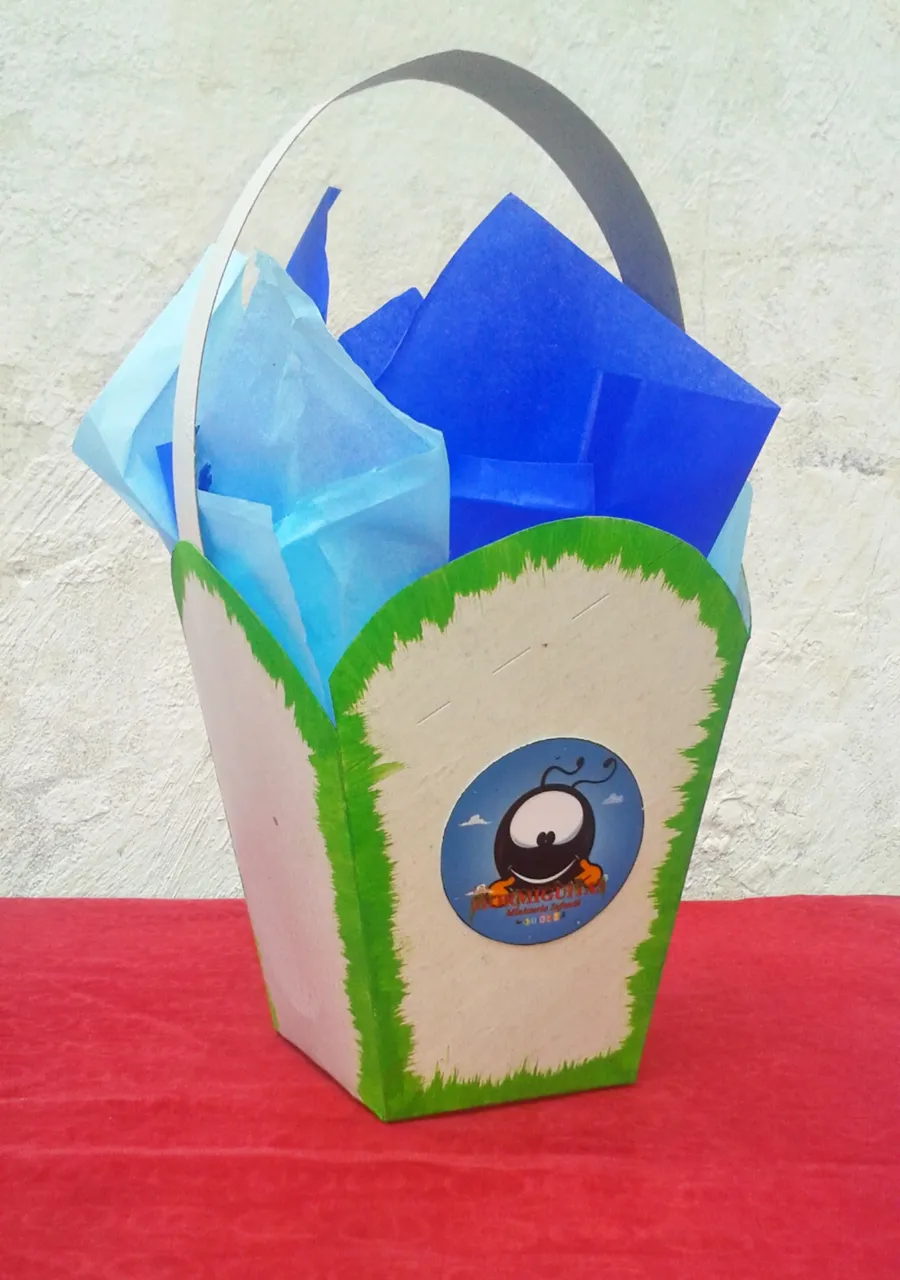
Resultado 02! // Outcome 02!
Ahora si quieres que tu cotillón quede aún más lindo puedes decorarlo a tu imaginación para que tengas éste otro resultado. Espero te haya gustado!
Now if you want your party favors to be even more beautiful, you can decorate it to your imagination so that you have this other result. I hope you liked it!
Gracias por leer hasta el fin!
Bendiciones de Dios para todos! Un fuerte abrazo desde la distancia! Hasta el próximo post! @riversmm95
God's blessings to all! A big hug from a distance! Until the next post! @riversmm95