DECORACIÓN NAVIDEÑA EN TAZA
TAZA VESTIDA DE NAVIDAD
Hola comunidad Hive, bendecido día.
La navidad es la época de vestirnos de colores y sabores donde en las casas la estrella de Belén nos ilumina con su resplandor, por eso le damos la bienvenida elaborando un vestido para nuestra taza de tomar el café de la mañana o el chocolate caliente con galletas.
Materiales:
- Fieltro rojo 26cm x 8.5cm.
- Fieltro blanco 26cm x 9cm.
- cortecitos de fieltro verde y blanco
- 36 mostacilla roja
- 1 Estrella pequeña dorada
- cinta dorada
- Nylon (hilo)
- aguja
- Tijeras, alfileres
- molde arbolito.
- 1 taza
CHRISTMAS DRESSED MUG
Hello Hive community, blessed day.
Christmas is the time to dress in colors and flavors where in the houses the star of Bethlehem illuminates us with its brightness, so we welcome it by making a dress for our morning cup of coffee or hot chocolate with cookies.
Materials:
- Red felt 26cm x 8.5cm.
- White felt 26cm x 9cm.
- Green and white felt cutouts
- 36 red mustard
- 1 small golden star
- Gold ribbon
- Nylon (thread)
- needle
- Scissors, pins
- tree mold.
- 1 cup

1 Medimos el diámetro de la taza para saber la cantidad de fieltro a utilizar mi taza mide 27cm de ancho (restamos 1 cm) y de alto 9 cm.
Colocamos el fieltro blanco, seguido del rojo al cual le hemos descontado 0,50cm para dejar que el blanco sobresalga como una orilla y cosemos alrededor para asegurar las 2 telas.
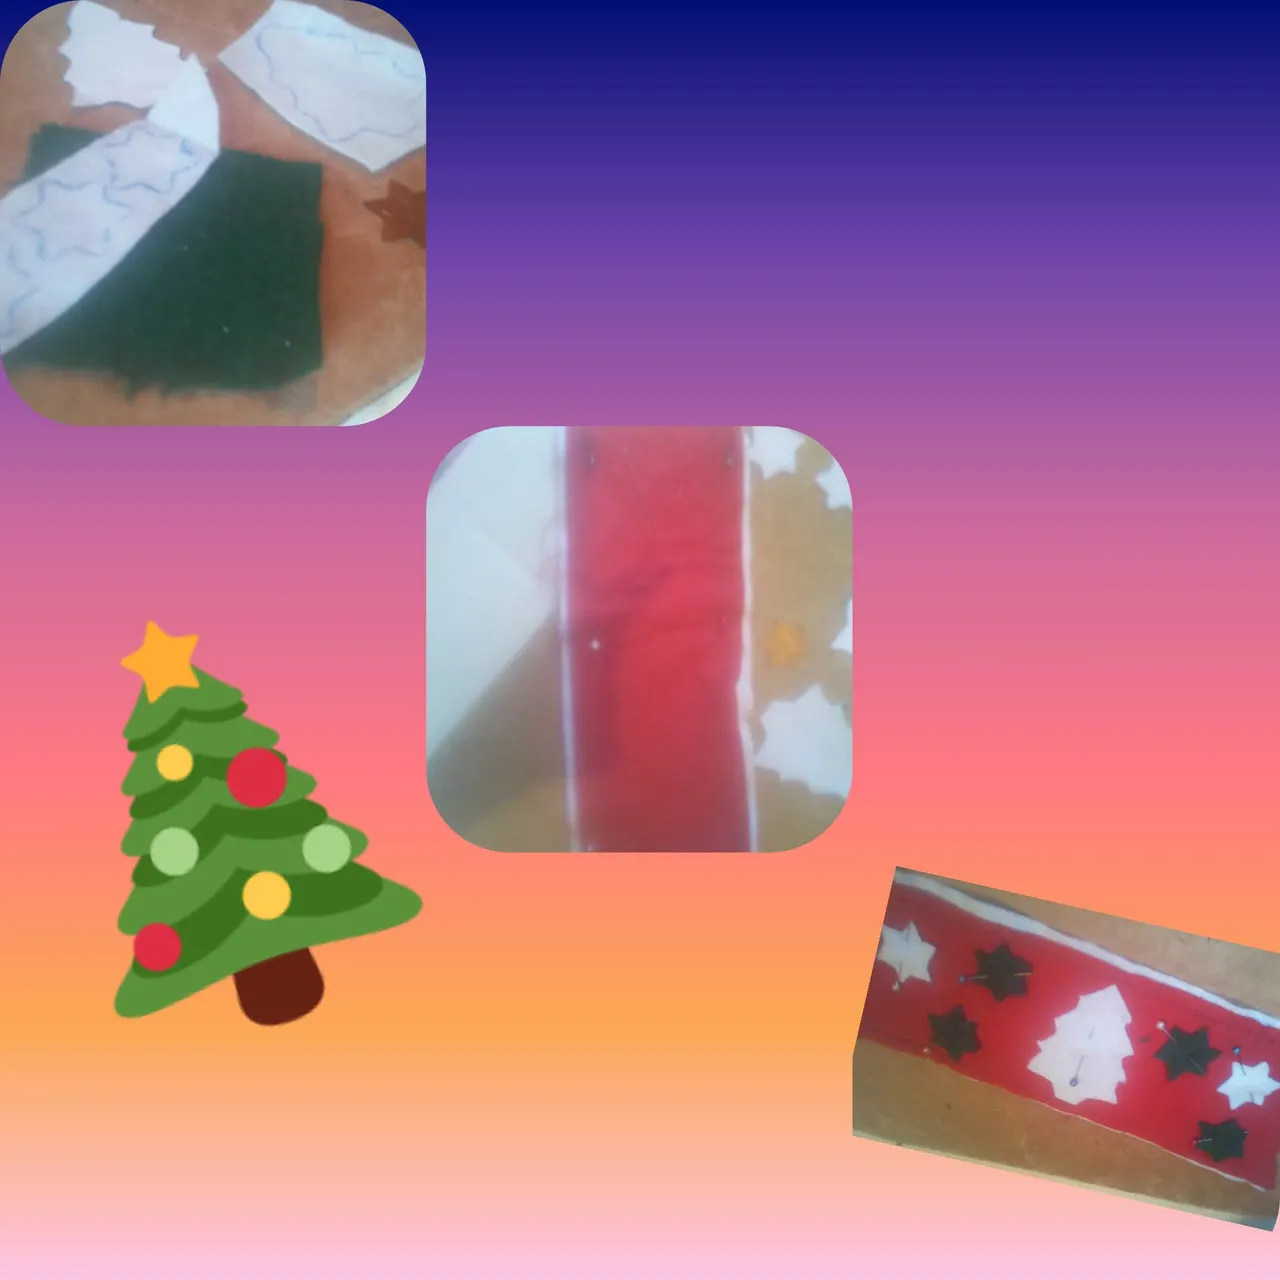
Cortamos las piezas, el arbolito y seis (06) estrellas dos (02) blancas y cuatro verde.
Distribuimos en la faja las piezas asegurándolas con alfileres para proceder a fijarlas
Elaboration:
1 Measure the diameter of the cup to know the amount of felt to use. My cup is 27cm wide (subtract 1 cm) and 9 cm high.
We place the white felt, followed by the red one to which we have subtracted 0,50cm to let the white one protrude as an edge and we sew around it to secure the 2 fabrics.
Cut the pieces, the tree and six (06) stars, two (02) white and four green.
Distribute the pieces on the sash securing them with pins to proceed to fix them.
Translated with www.DeepL.com/Translator (free version)
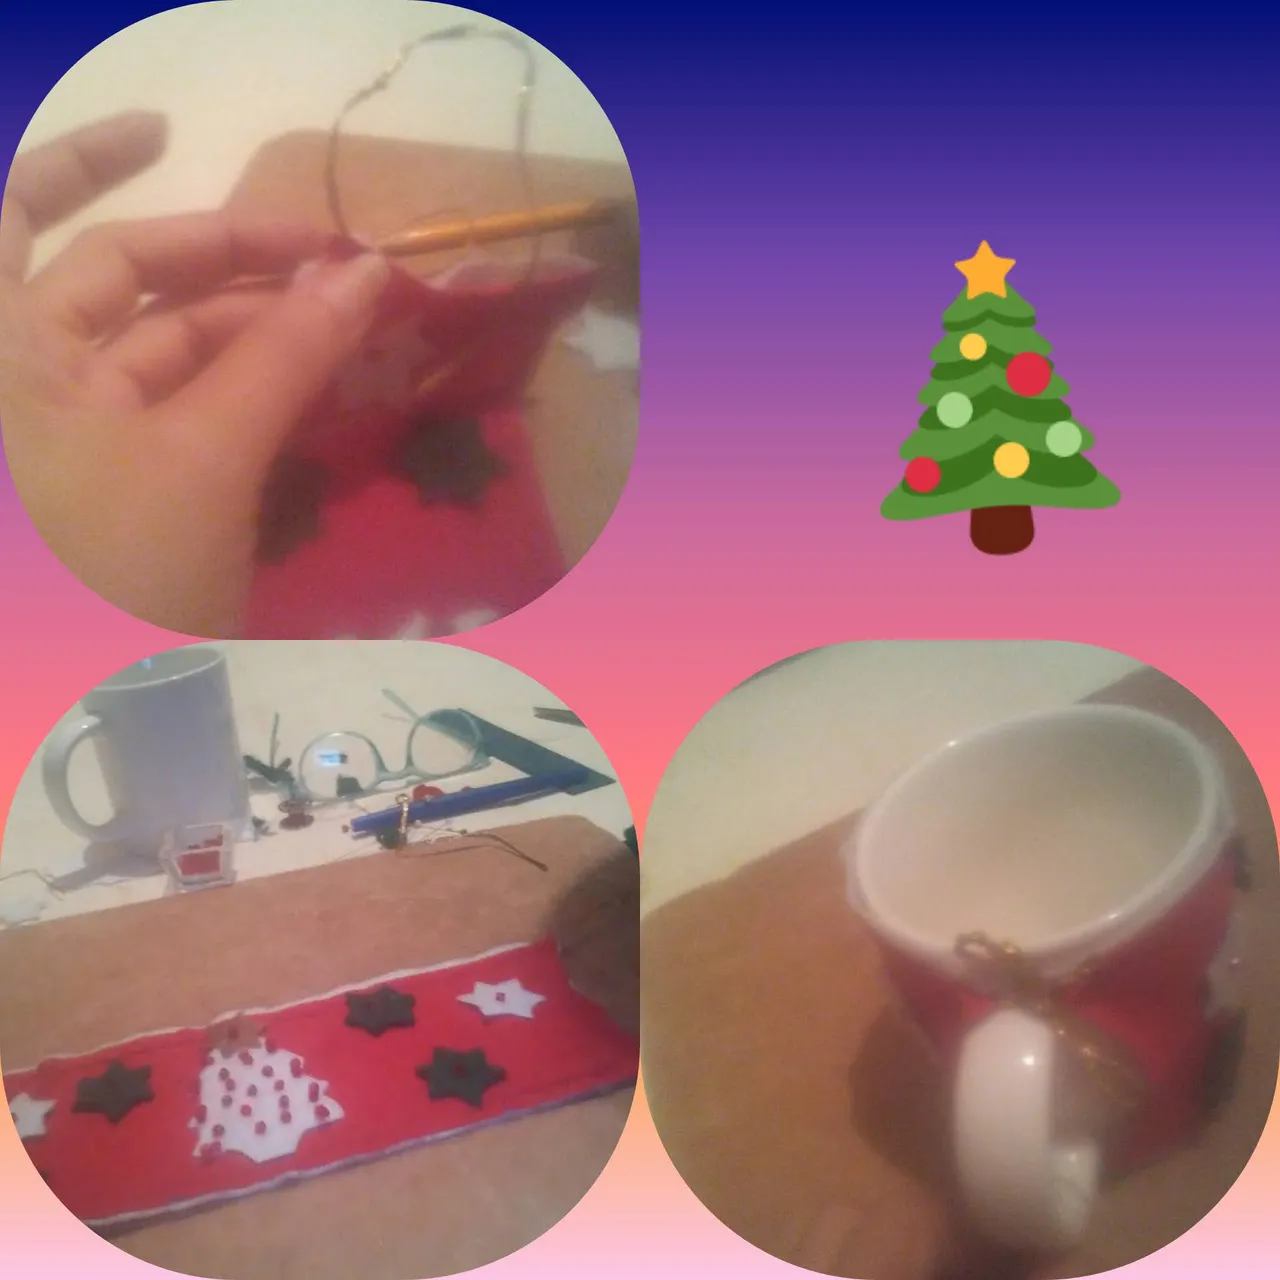
Distribuimos las mostacillas en el arbolito colocando en cada punta 2 juntas e individuales en el resto, en el centro de cada estrella colocamos 1.
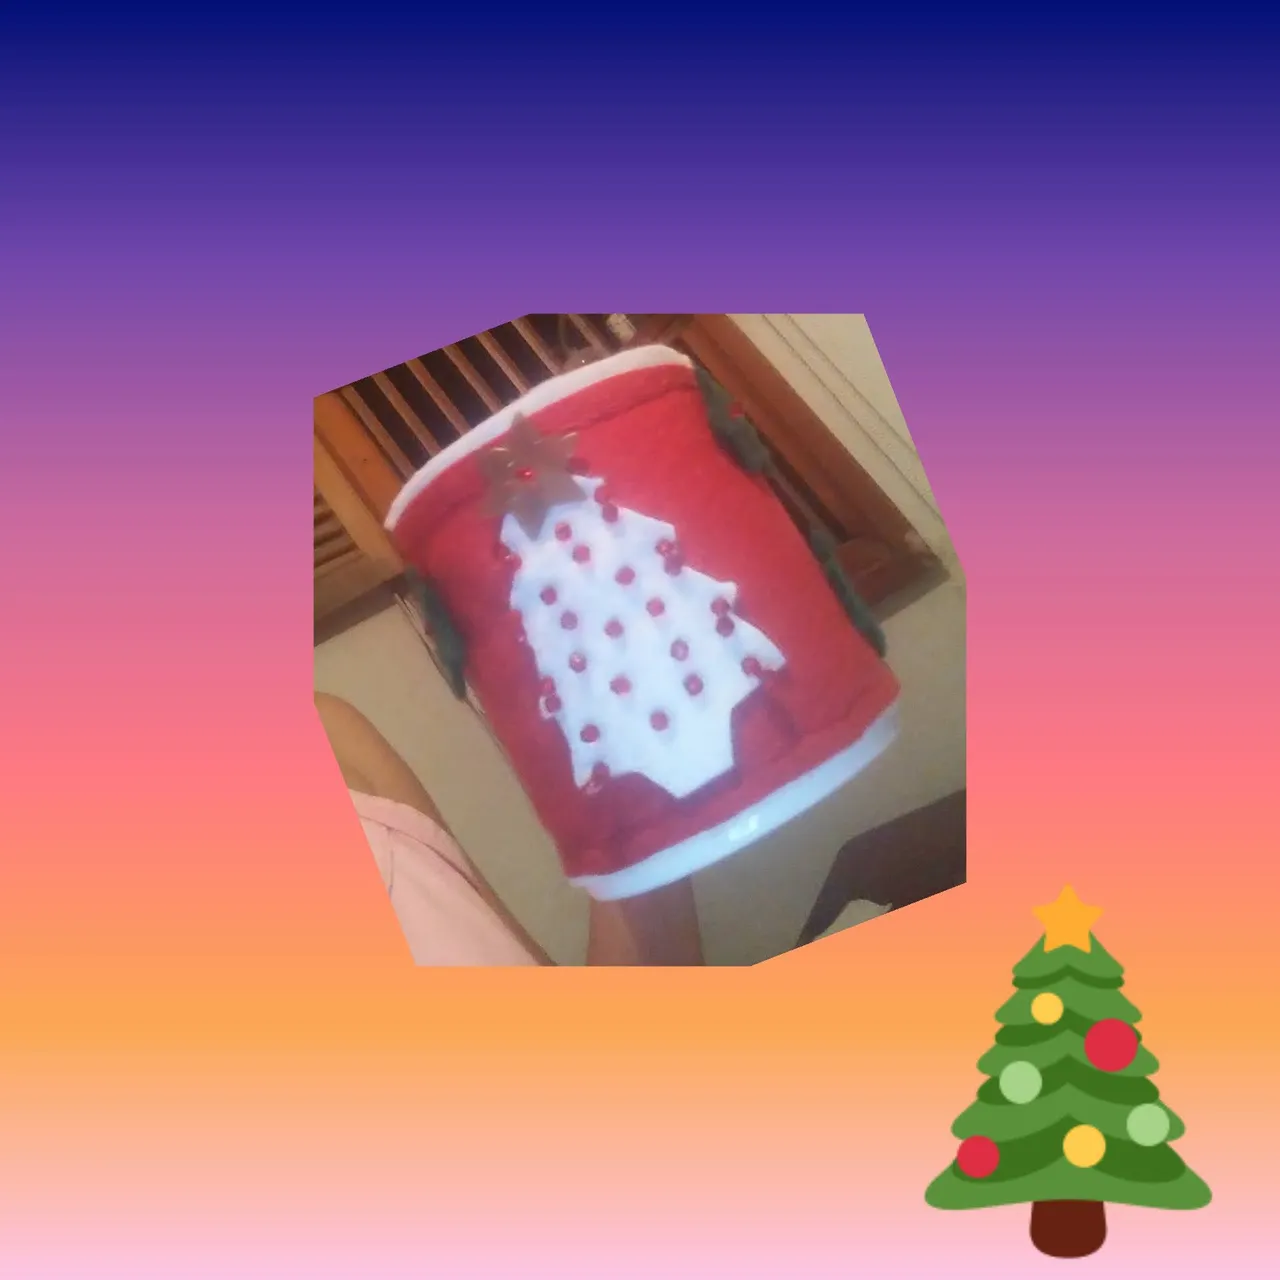
En los extremos de la pieza pegamos la cinta dorada, para unirla a la taza, de esta manera se puede quitar para lavarla.
Hemos terminado el proyecto ahora solo queda disfrutarlo, espero les guste tanto como a mi,
Distribute the beads on the tree, placing 2 together at each point and individual beads on the rest, placing 1 in the center of each star.
At the ends of the piece we glue the golden ribbon, to attach it to the cup, this way it can be removed for washing.
We have finished the project, now we just have to enjoy it, I hope you like it as much as I do,
NOTA: Las fotos fueron tomadas, editadas y el texto traducido por mi a través de mi teléfono con los programas:
- InShot.
- DeepL Traslade
NOTE: The photos were taken, edited and the text translated by me through my phone with the programs:
- InShot.
- DeepL Traslade