Hola buenas noches mis amigos de hive en esta ocasión les traigo un nuevo bricolaje realizado con material reciclable y por cierto muy fácil de hacer en casa
Hello, good night, my friends from hive, this time I bring you a new DIY made with recyclable material and by the way, very easy to do at home
se trata de un
It's about a
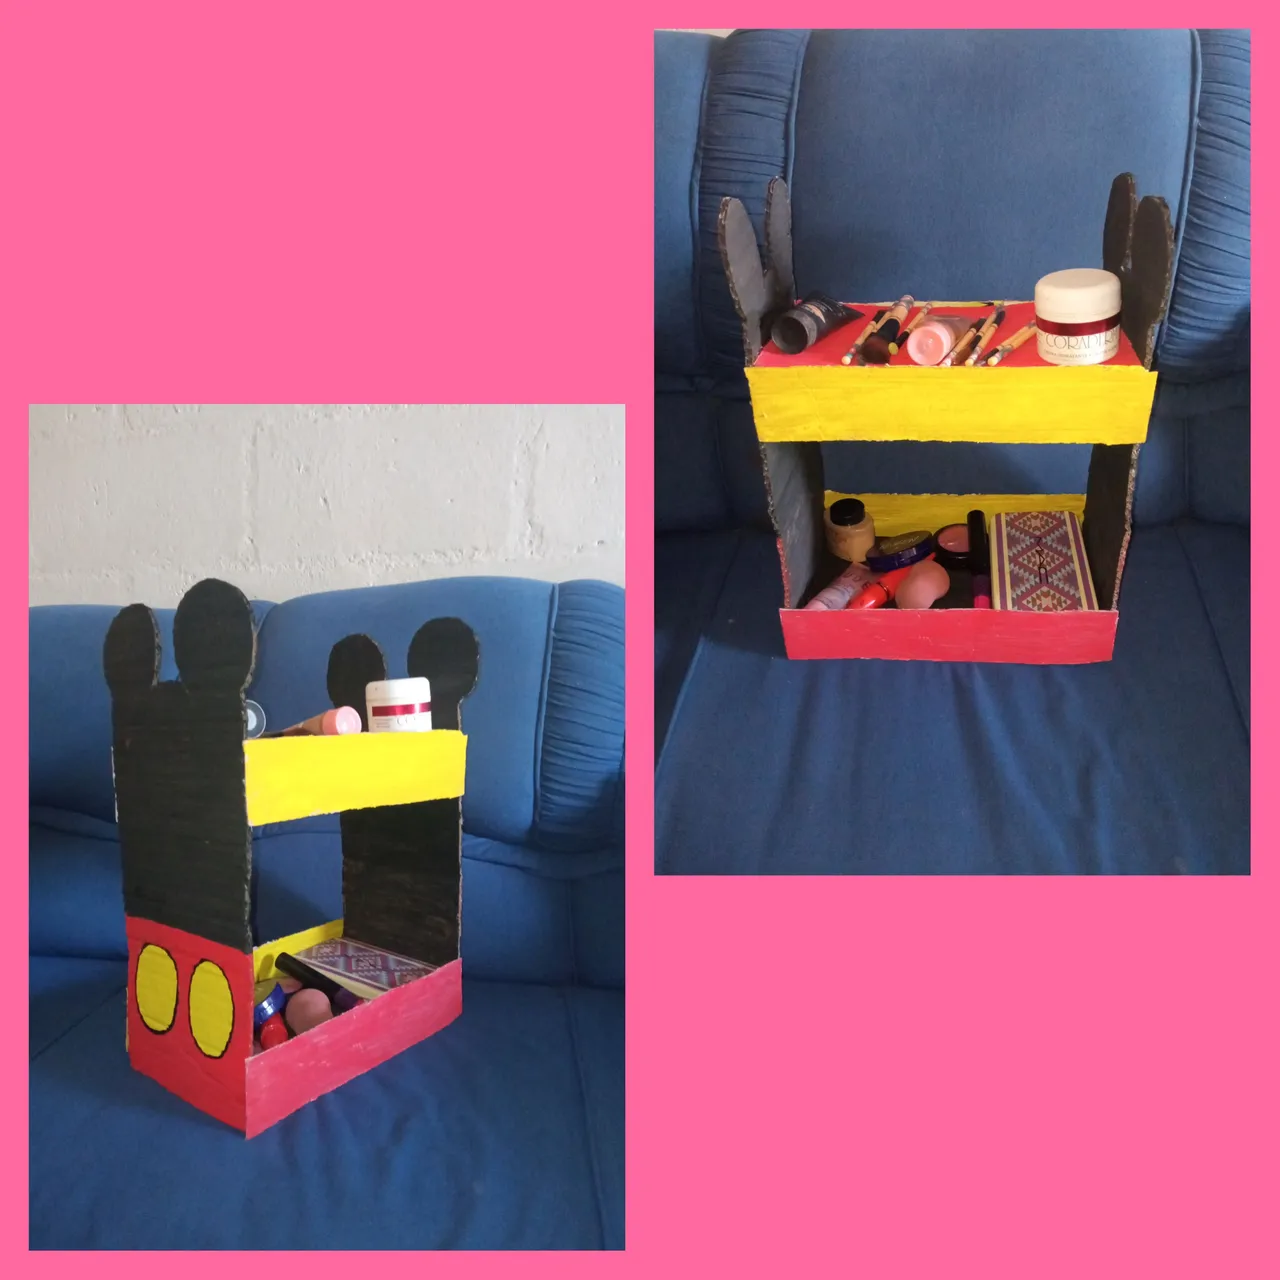
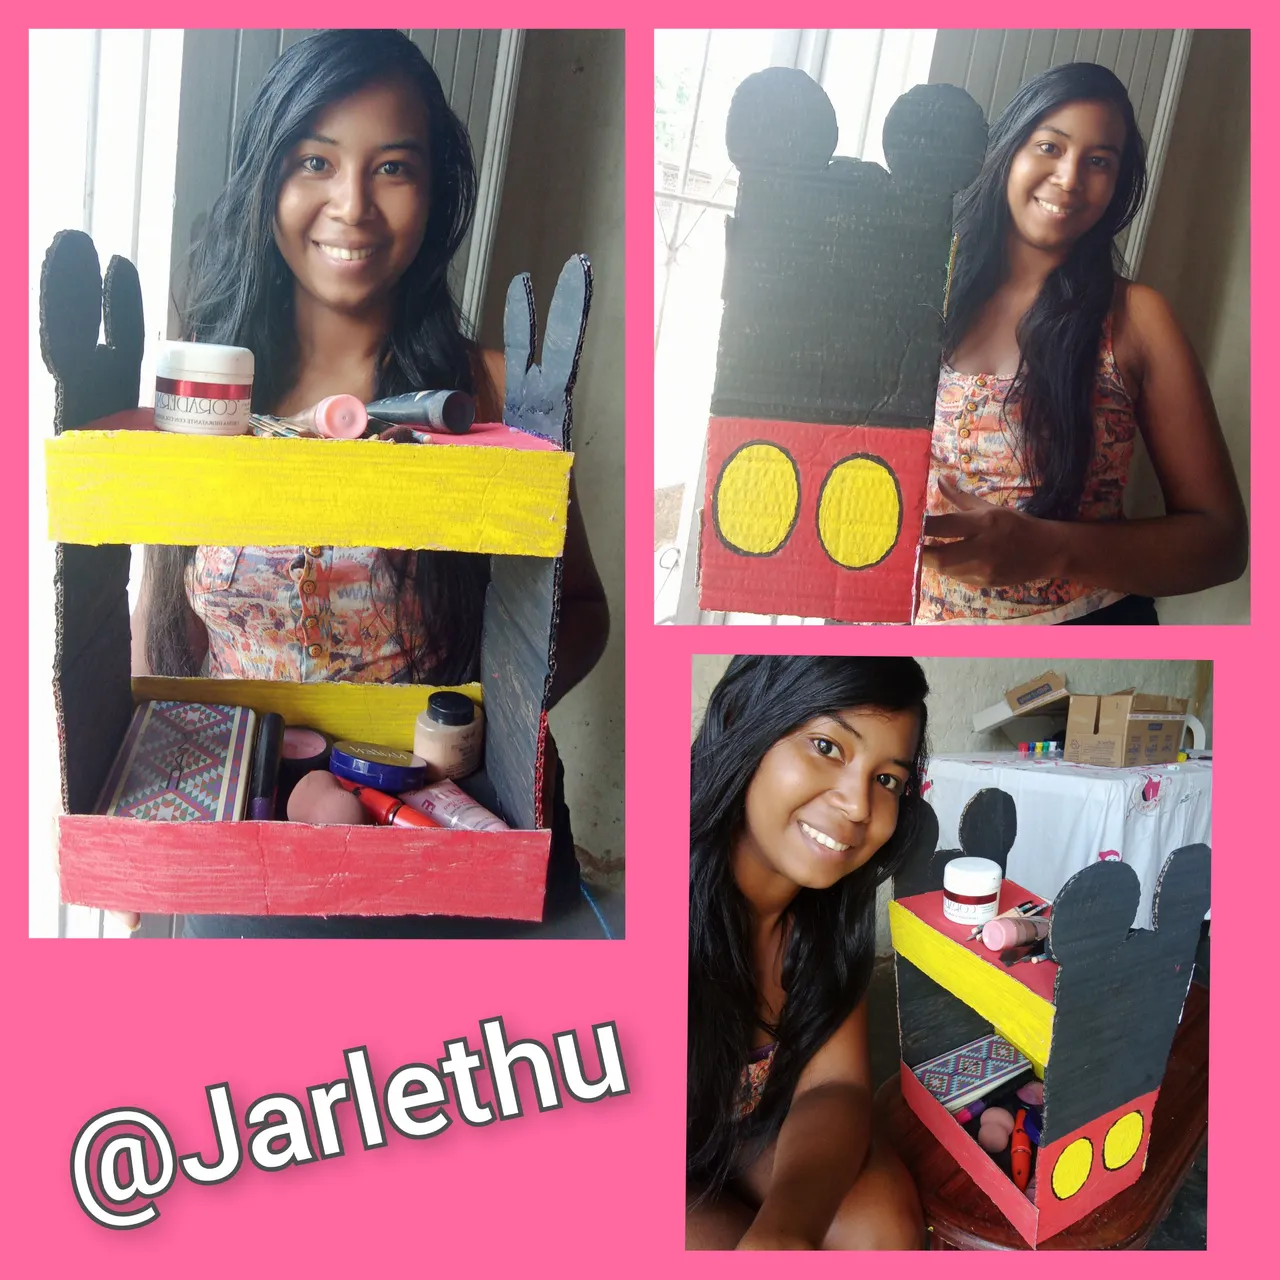
Practico organizador de maquillaje
Handy makeup organizer
para crear este hermoso organizador tenemos que tener estos siguientes materiales que les mostrare a continuación
To create this beautiful organizer we have to have these following materials that I will show you below

to create this beautiful organizer we will need the following materials
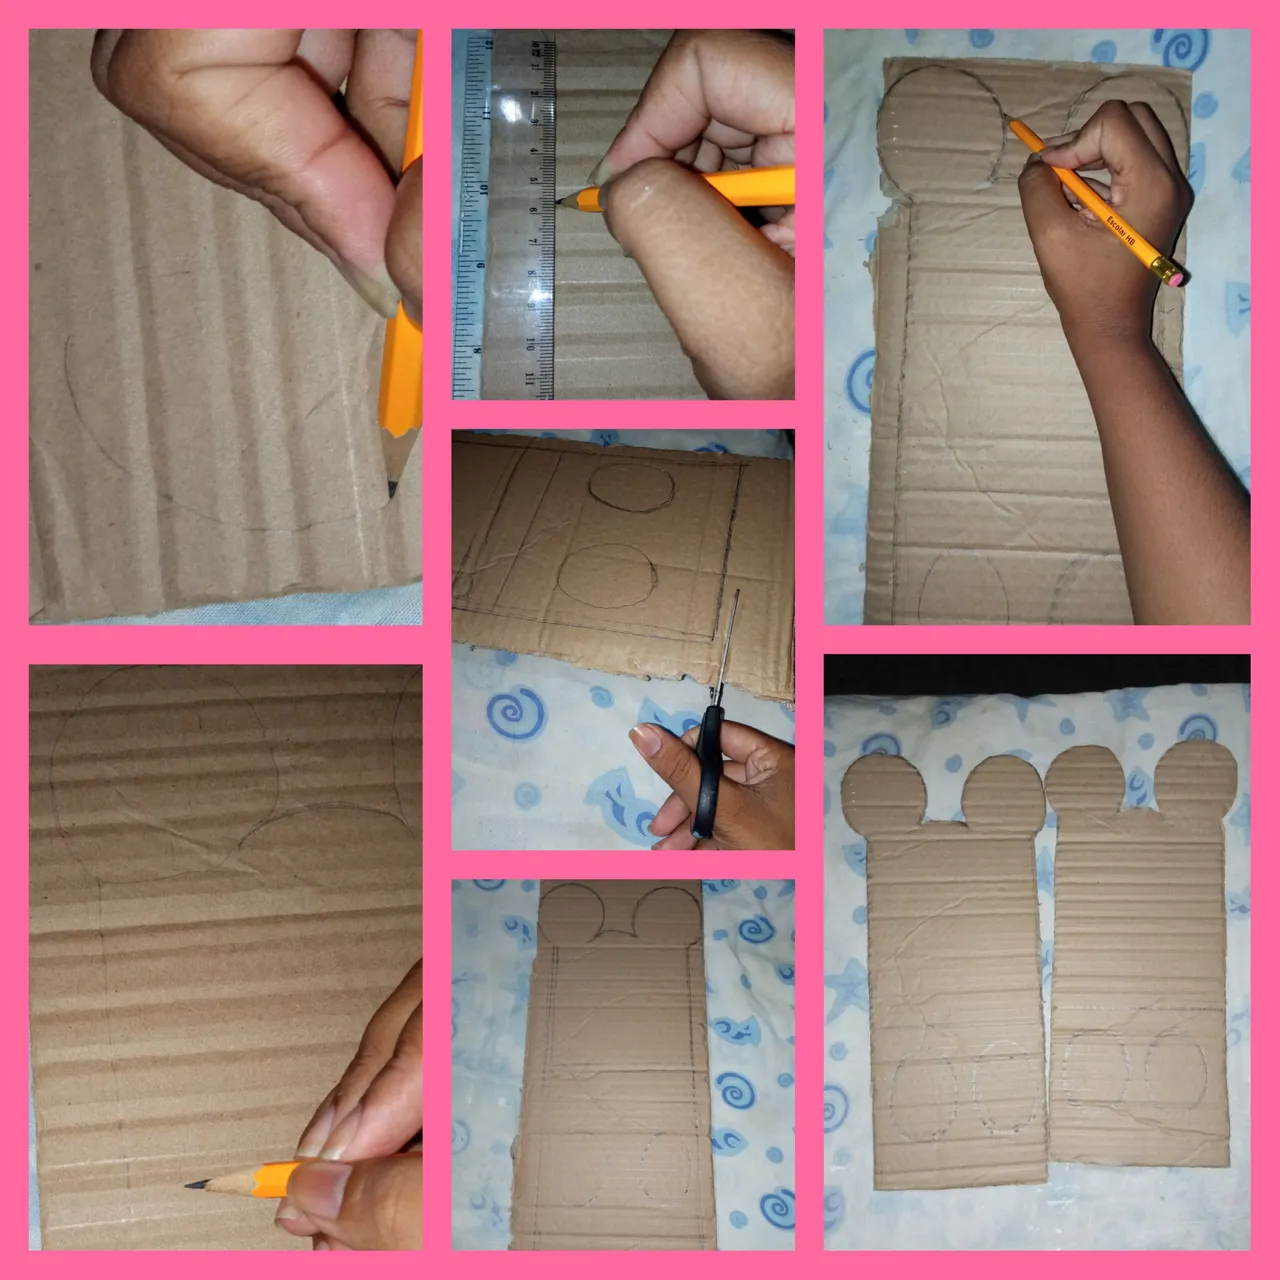
Primer paso: dibujaremos las orejas y con la regla delinearemos el cuerpo y por ultimo vamos a dibujar los pies para así ir dándole forma al mickey , tomaremos la tijera y recortaremos una vez terminado calcamos para así lograr el mismo tamaño
First step: we will draw the ears and with the ruler we will outline the body and finally we will draw the feet in order to shape the mickey, we will take the scissors and we will cut once finished we traced to achieve the same size
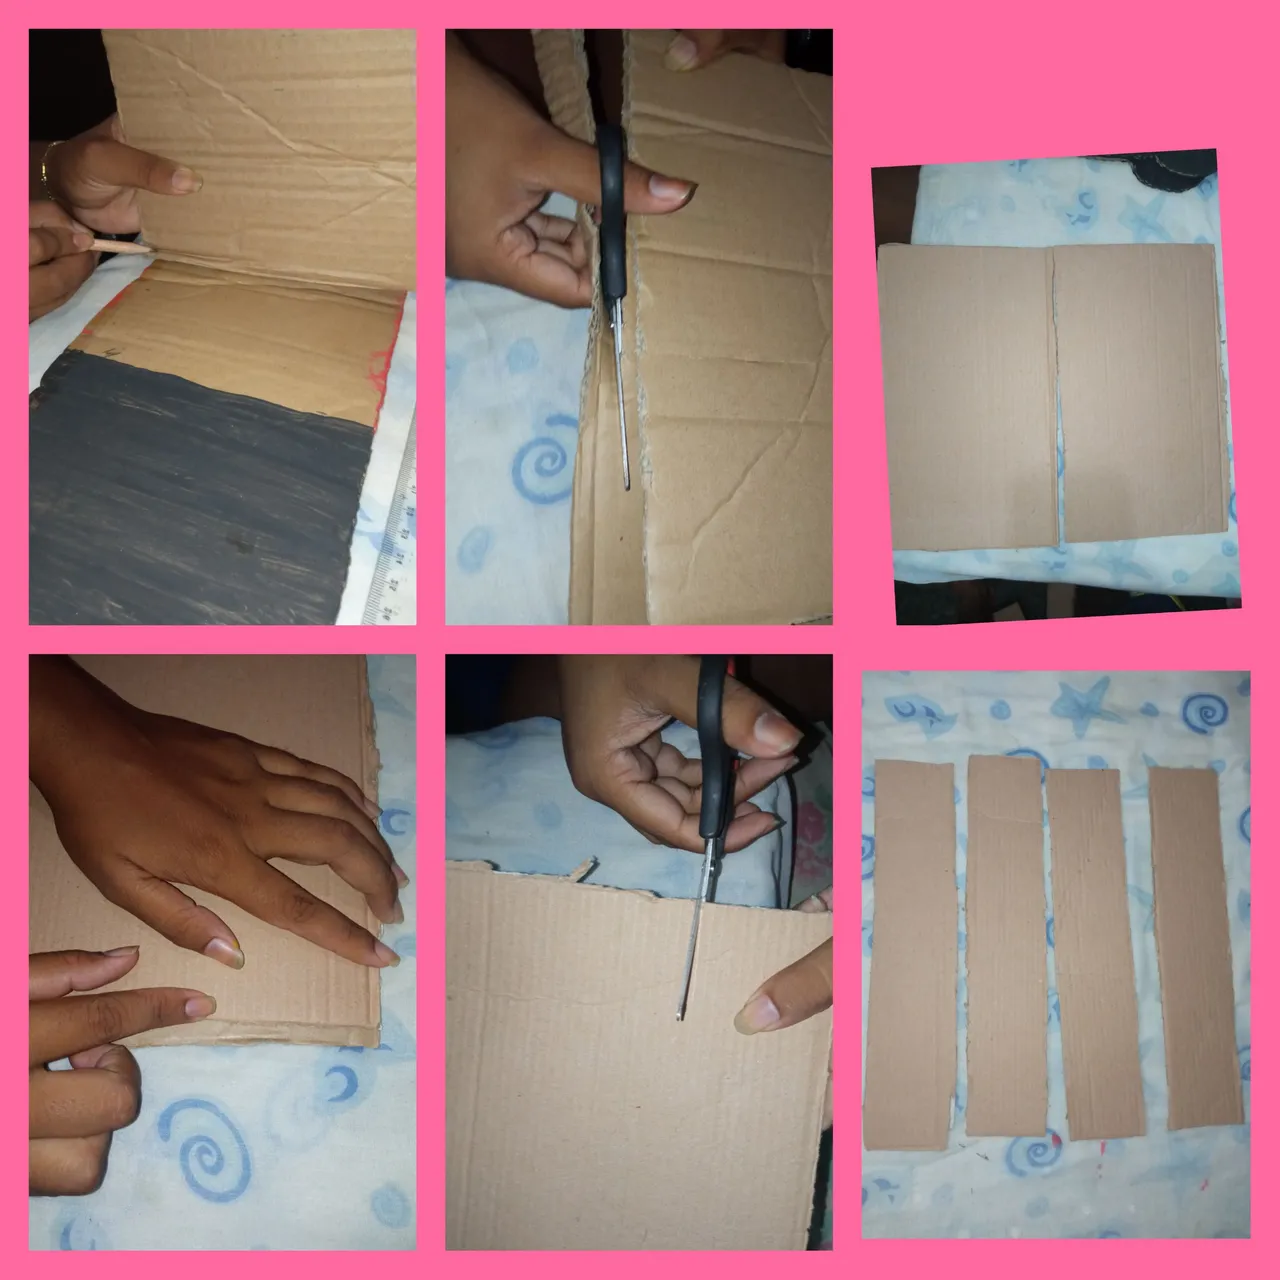
En este segundo paso; mediremos de forma horizontal una vez medido tomaremos la tijera y con la misma recortaremos de la siguiente forma luego recortaremos cuatro tiras del mismo tamaño
In this second step; we will measure horizontally once measured we will take the scissors and with it we will cut as follows then we will cut four strips of the same size
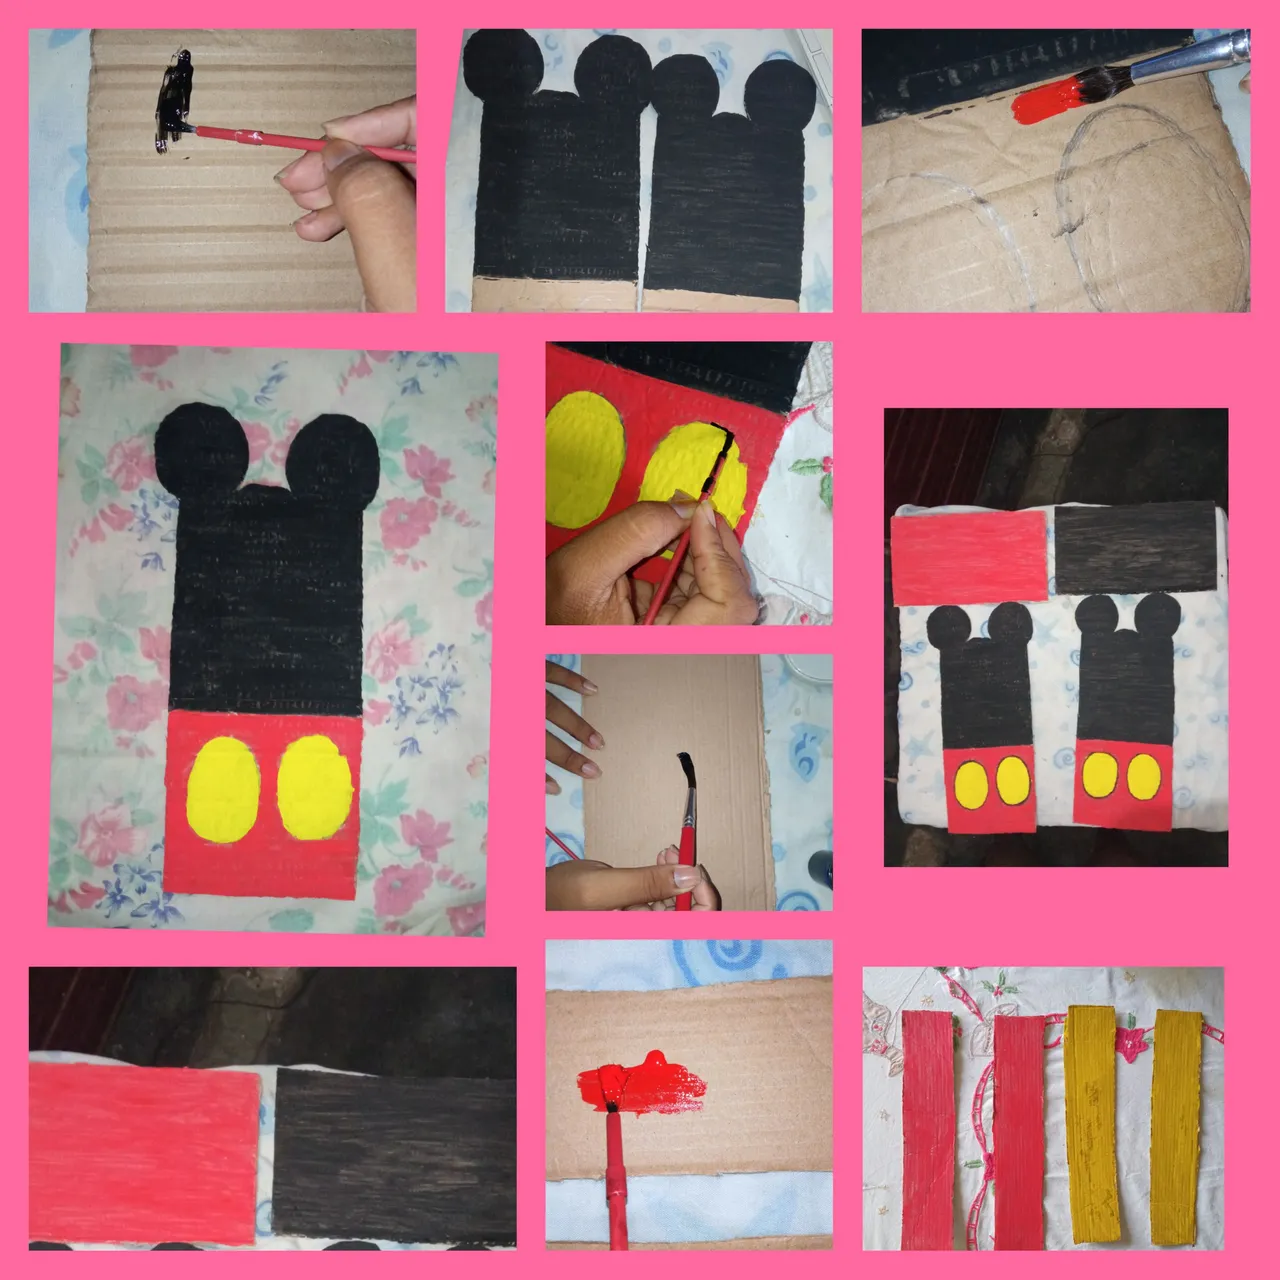
En este tercer paso: una vez obtenidos todos nuestros recortes procederemos a tomar el pincel y con el mismo pintaremos en color , negro rojo y amarillo para que el mickey mouse se vea mas llamativo
In this third step: once we have obtained all our cuts we will proceed to take the brush and with it we will paint in color, black, red and yellow so that the mickey mouse looks more striking
En este cuarto y ultimo paso: una vez pintados todos nuestros recortes proseguiremos a tomar el silicon y con el mismo pegaremos de la siguiente forma que le mostrare a continuación
In this fourth and last step: once all our cutouts have been painted, we will continue to take the silicone and with it we will paste in the following way that I will show you below