Hola buenas noches queridos amigos de esta prestigiosa plataforma de hive, hoy les vengo a mostrar un nuevo bricolaje muy fácil de realizar en casa y muy útil
Hello, good night, dear friends of this prestigious hive platform, today I come to show you a new DIY very easy to do at home and very useful.
se trata de un:
It's about a:
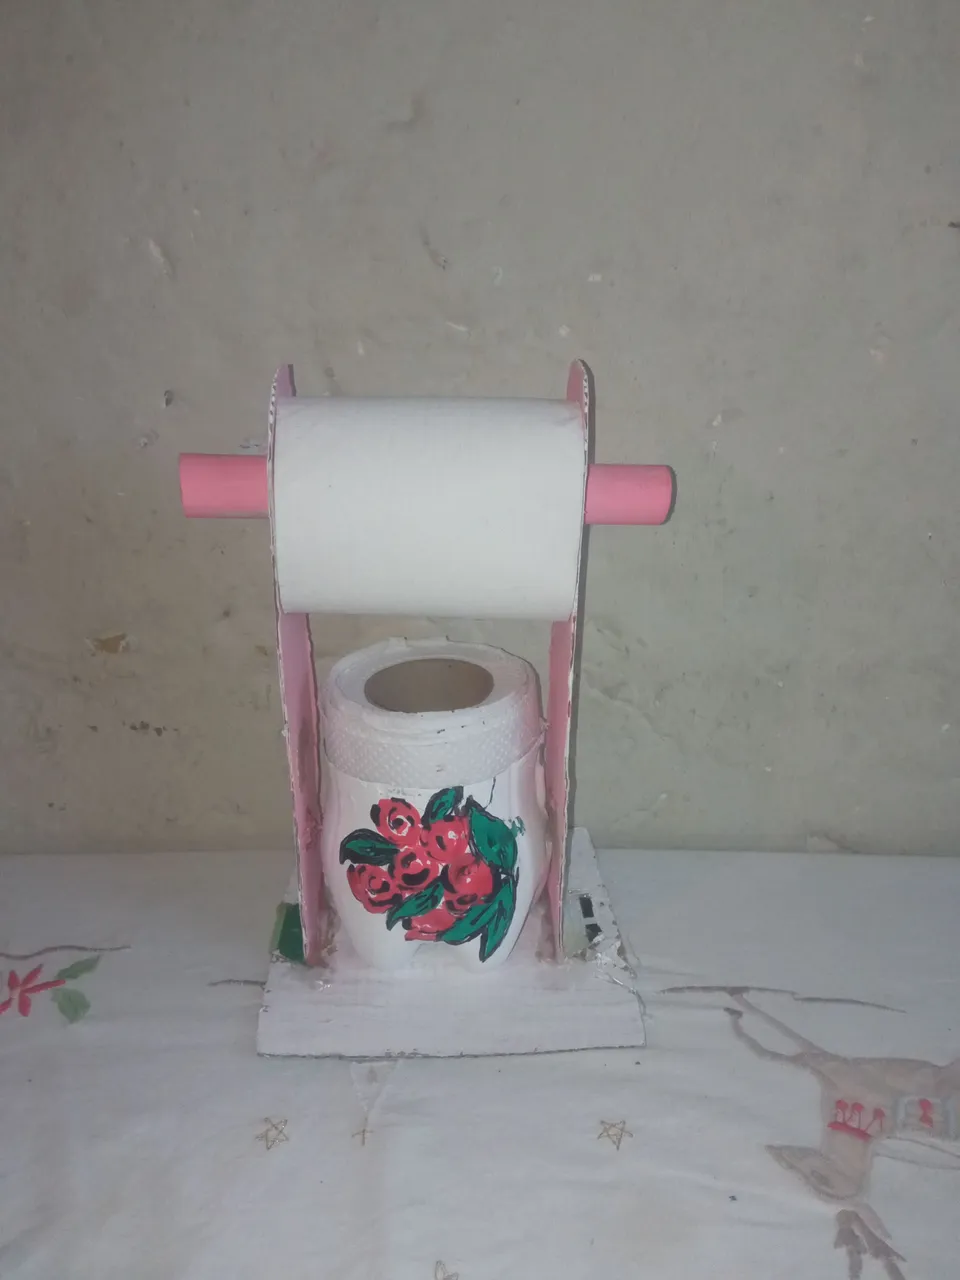
Hermoso porta papel de baño realizado con material de provecho.
Beautiful toilet paper holder made with useful material.
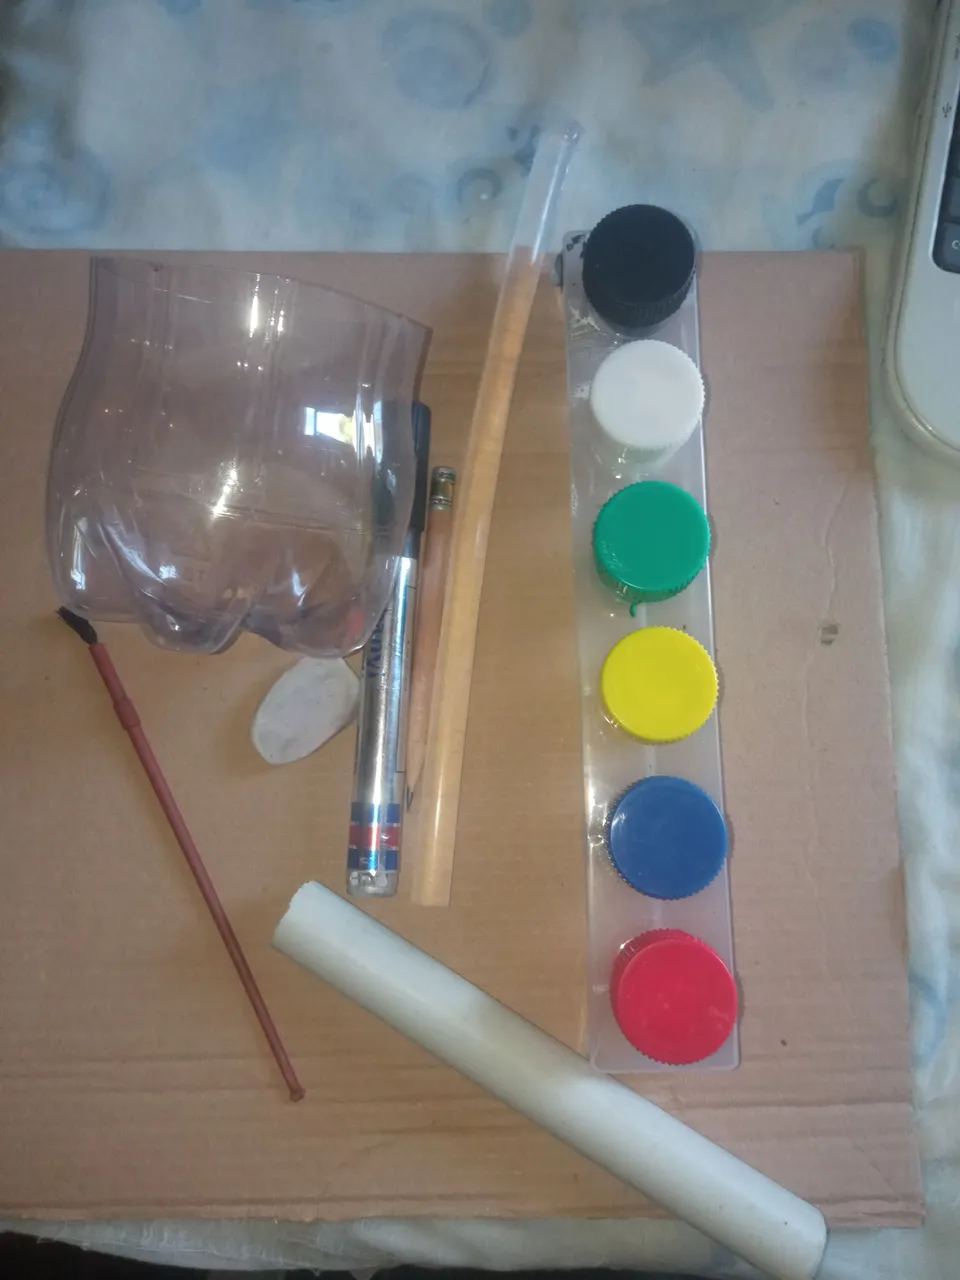
Para realizar este lindo porta papel debemos tener estos siguientes materiales que les mostrare a continuación.
To make this cute paper holder we must have these following materials that I will show you below.
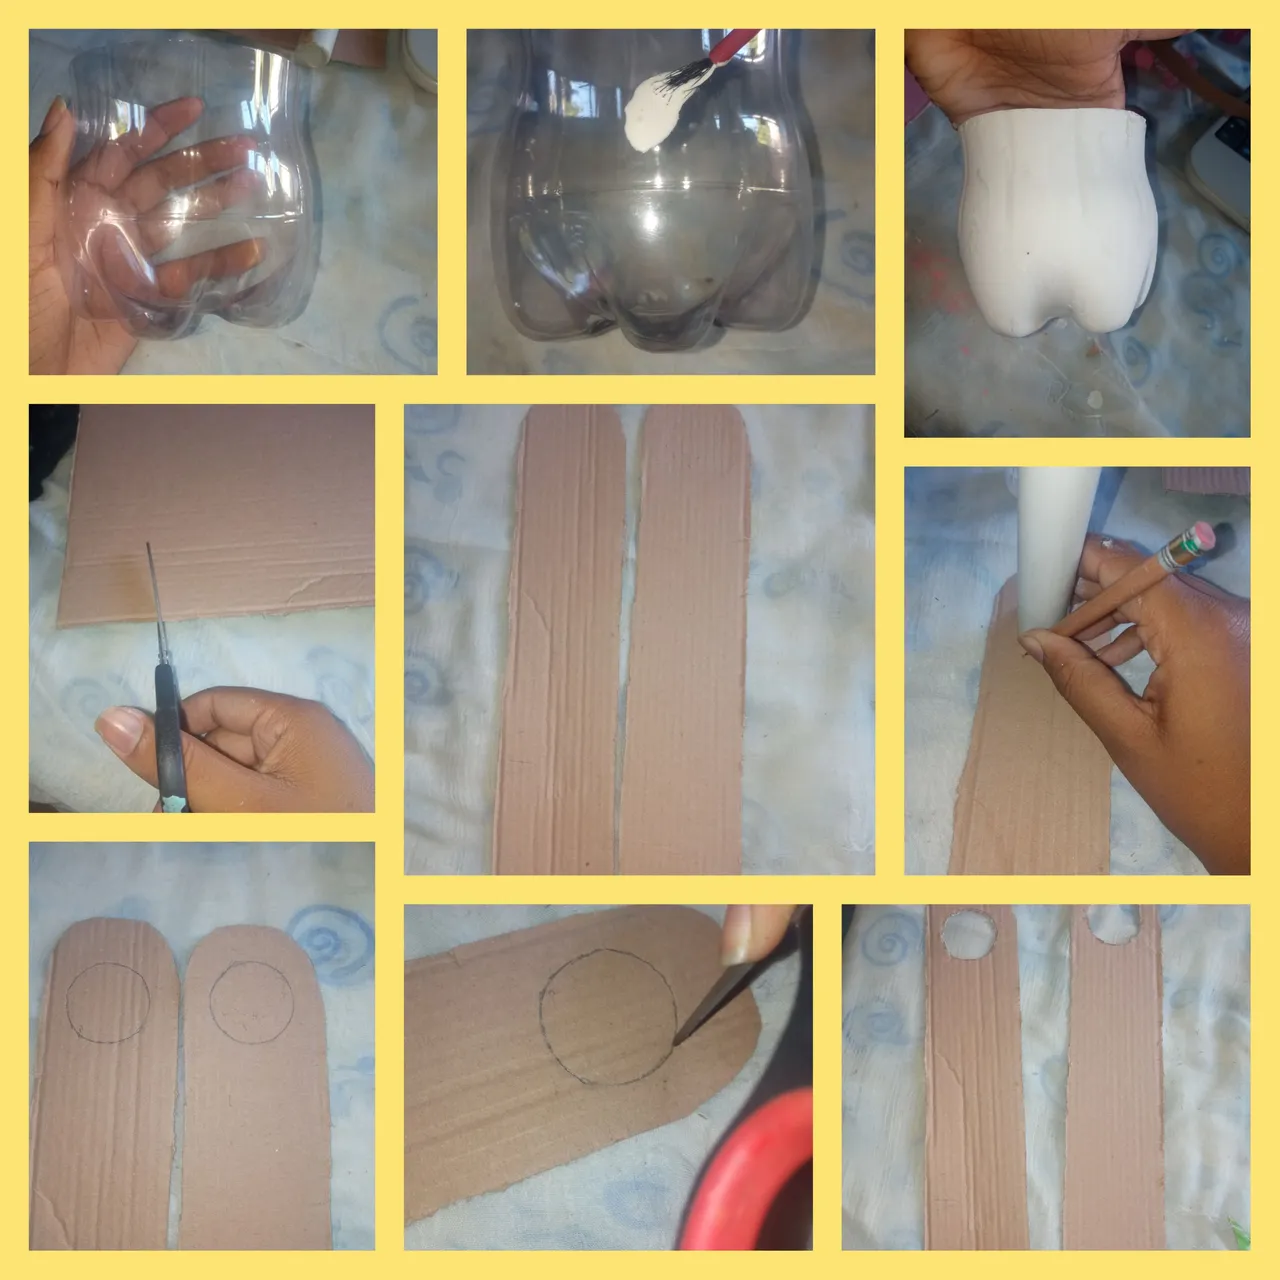
Primer paso: lo primero que haremos sera tomar la tijera y con la misma cortar el envase de refresco hasta lograr un tamaño ideal, con el pincel pintaremos de color blanco luego proseguiremos a recortar 2 tiras de cartón del mismo tamaño y con el tubo dibujaremos el redondo en nuestras tiras y lo recortaremos.
First step: the first thing we will do is take the scissors and with it cut the soda container to an ideal size, with the brush we will paint white then we will continue to cut 2 cardboard strips of the same size and with the tube we will draw the round on our strips and we will cut it out.
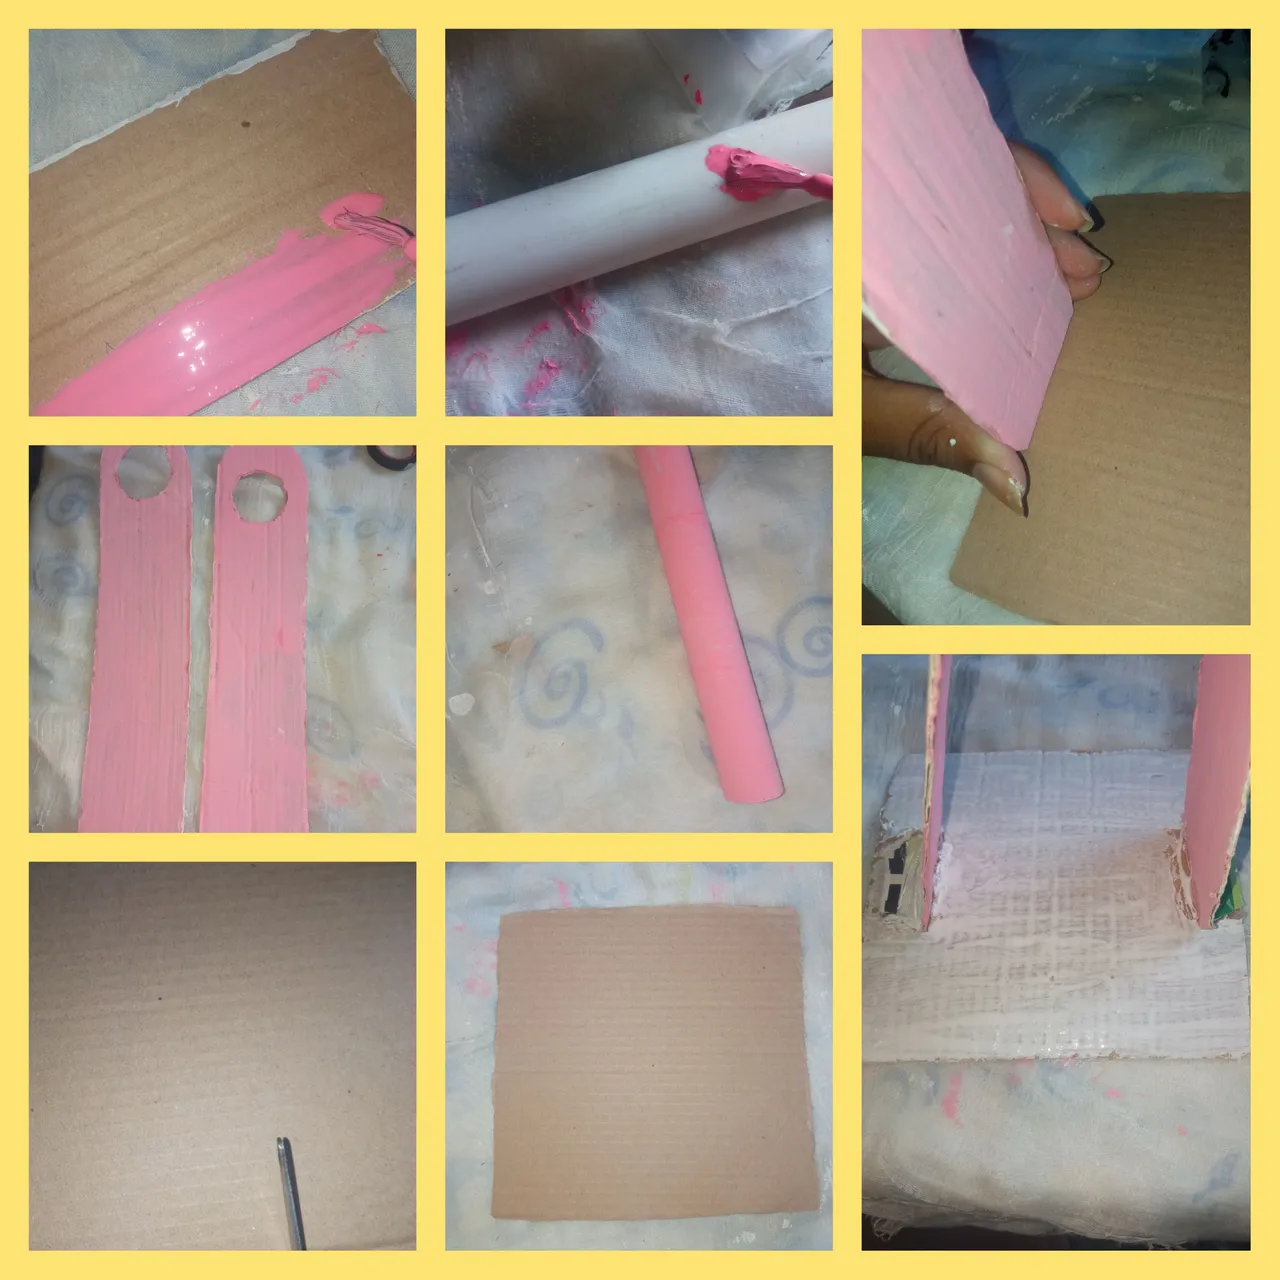
Segundo paso: tomaremos el pincel y con el mismo pintaremos en color rosa la tiras y el tubo, luego con la tijera recortaremos un cuadro y con el silicon pegaremos las tiras de forma recta.
Second step: we will take the brush and with it we will paint the strips and the tube in pink, then with the scissors we will cut out a square and with the silicone we will glue the strips straight.
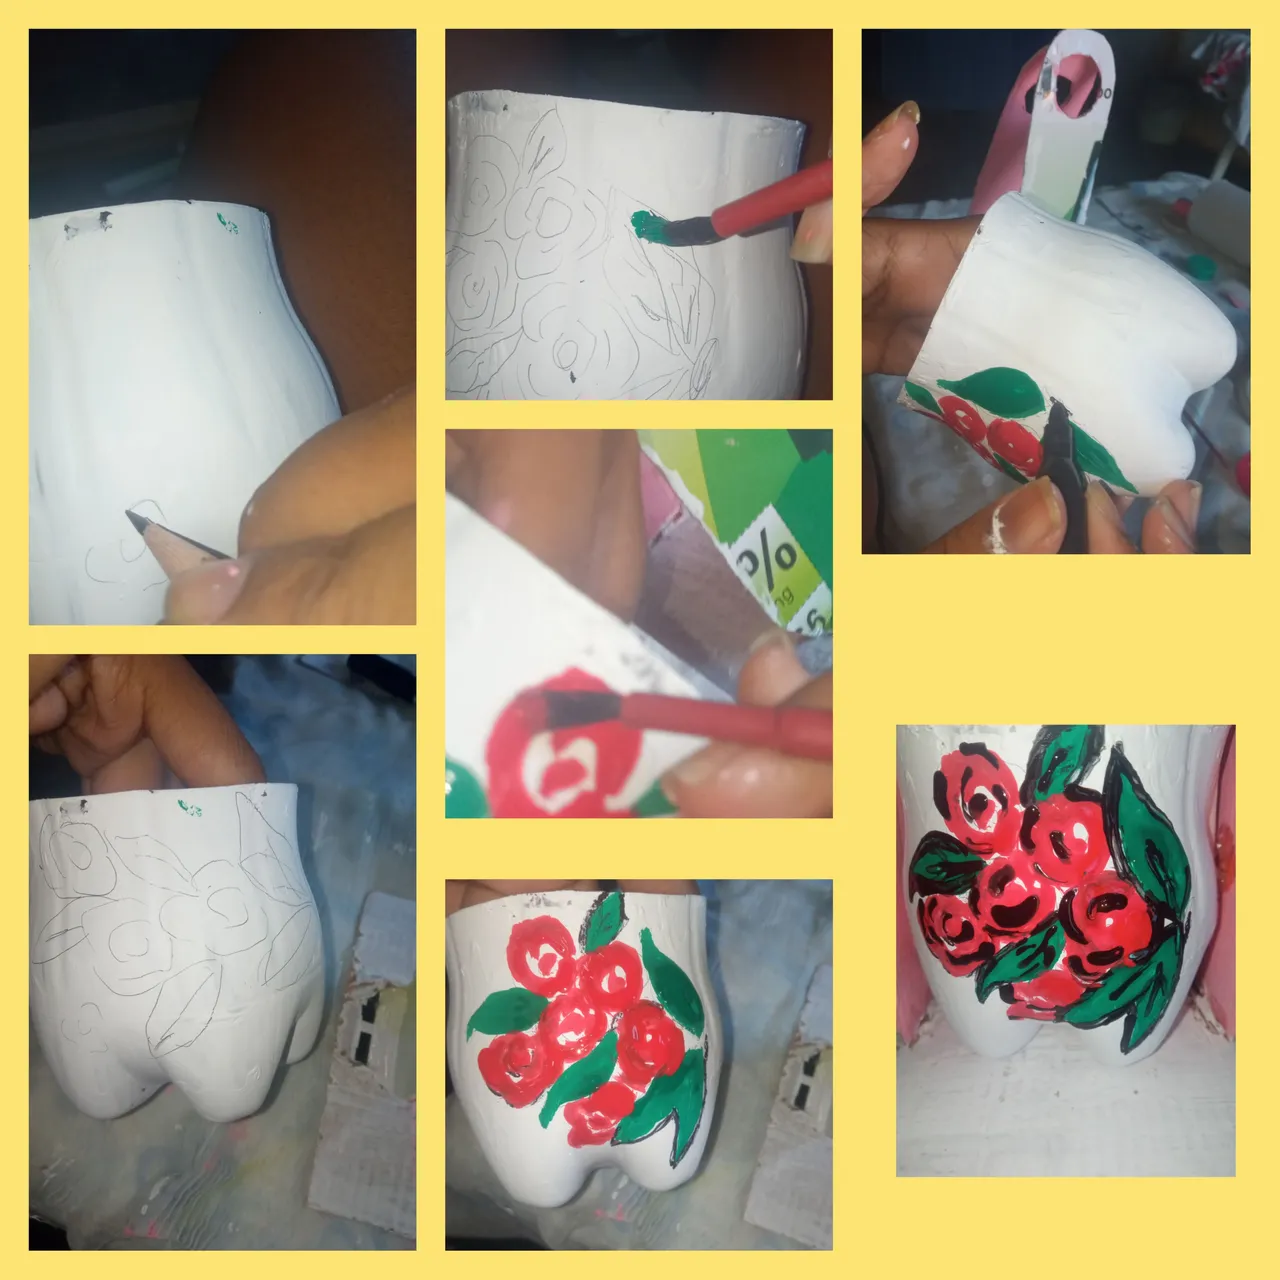
tercer paso: una vez pegada las tiras procedemos a dibujar con el lápiz una rosa y unas ramas en nuestro envase, ahora pintaremos de color verde y rojo una vez hecho esto resaltaremos con el marcador las rosas y las ramas y a continuación les mostrare como nos quedo
third step: once the strips are glued, we proceed to draw with the pencil a rose and some branches in our container, now we will paint green and red once this is done we will highlight the roses and branches with the marker and then I will show you how we are