¡Holaaaa amigos!, me alegra estar de vuelta por aquí despues de estar algunos días sin internet , espero que se encuentren muy bien y animados . Pienso que un emoticon es un símbolo unirvesal porque casi todo el mundo los conoce y utiliza , por tal motivo el día de hoy quiero compartir con ustedes cómo elaborar dos mini emoticones de tela, los invito a que me acompañen y espero que les gustes y les sea de utilidad este paso a paso :
Hello friends! I am glad to be back here after spending a few days without internet, I hope you are very well and encouraged. I think that an emoticon is a universal symbol because almost everyone knows and uses them, for this reason today I want to share with you how to make two mini fabric emoticons, I invite you to join me and I hope you like them and this step by step is useful
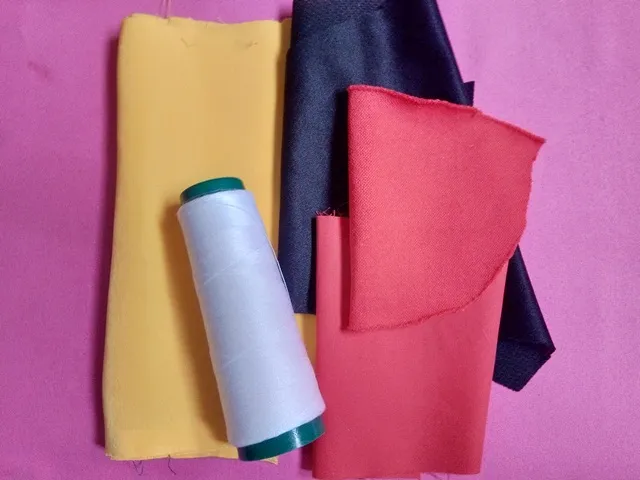
✍ Materials ✍
- Tela amarilla
- Tela de colores
- Hilo y aguja
- Tijera
- Papel
- Lapicero
- Yellow cloth
- colored fabric
- Thread and needle
- Scissor
- Paper
- Pen
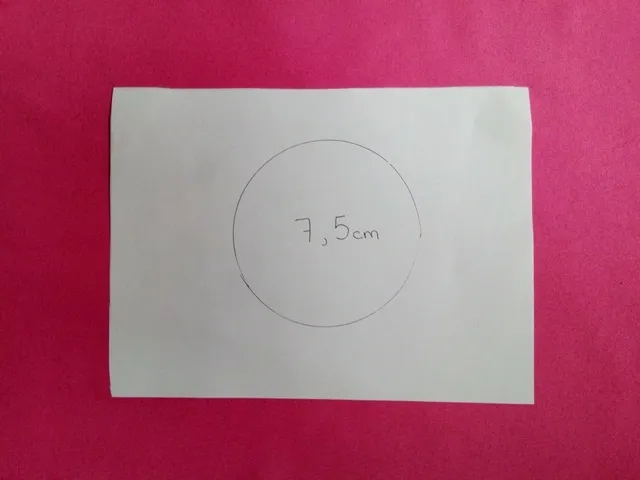
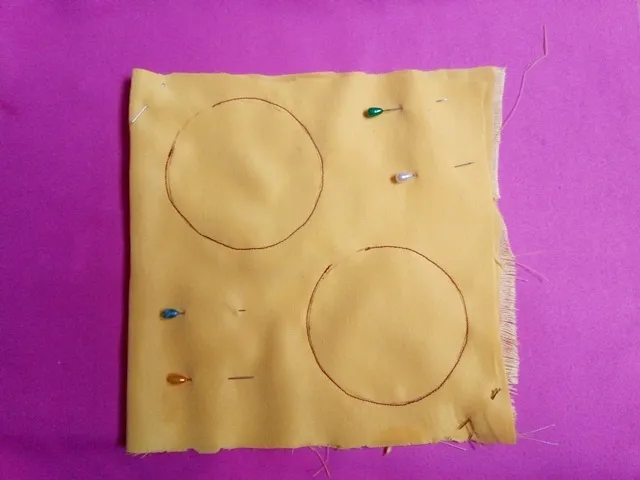
1. En una hoja de papel vamos a dibujar una circunferencia que mida 7,5 centímetros de diametro , realmente las medidas dependen de cuan grande o pequeño queramos que sea el emoticon
1. On a sheet of paper we are going to draw a circumference that measures 7.5 centimeters in diameter, really the measurements depend on how big or small we want the emoticon to be
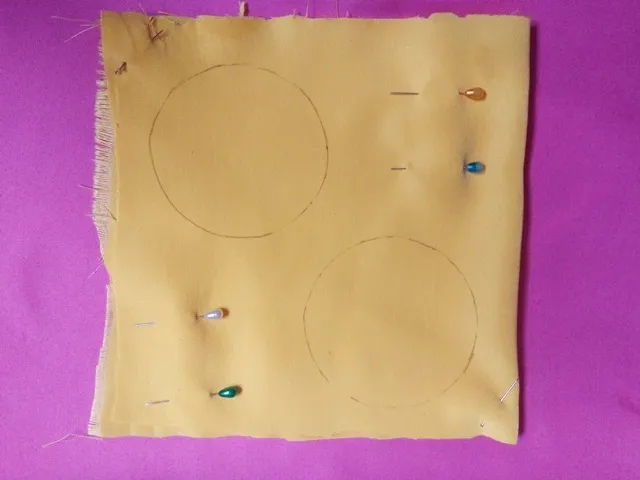
2. Seguidamente colocamos la tela doble y sobre ella trazamos la circunferencia y sujetamos la tela con alfileres , en este caso yo dibuje dos circunferencias porque haré dos emoticones. Luego vamos a coser por todo el contorno de la circuferencia dejando una pequeña abertura por donde vamos a voltear la pieza
2. Next we place the double fabric and on it we trace the circumference and hold the fabric with pins, in this case I draw two circumferences because I will make two emoticons. Then we are going to sew around the entire contour of the circle, leaving a small opening through which we are going to turn the piece.
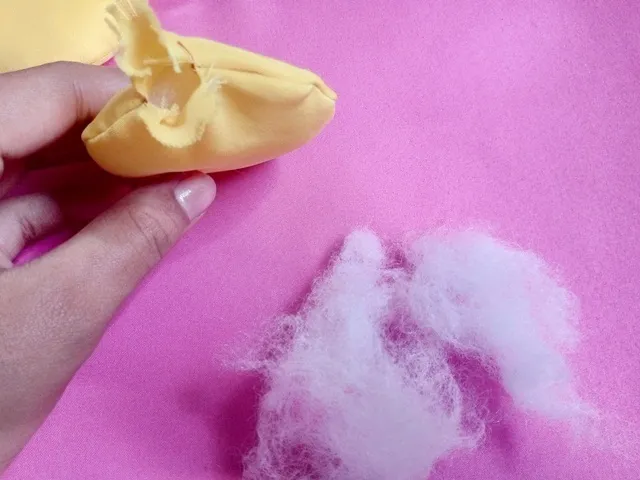
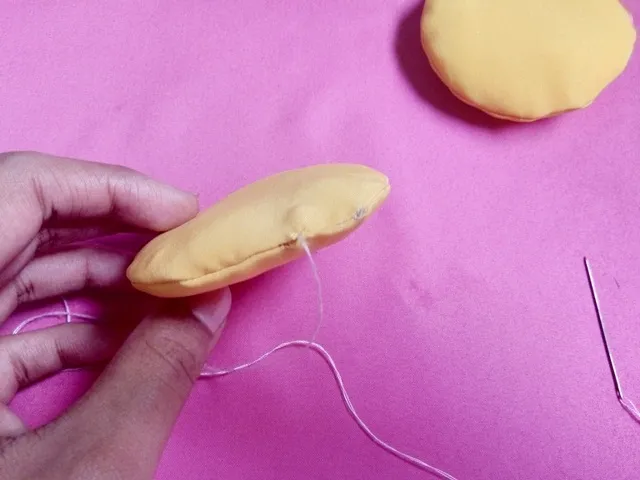
3. Ahora vamos a rellenar con algodon o pequeños retazos de tela, personalmente no me gusta colocarle demasiado relleno aunque a otras personas si, al final estos detalles dependen de únicamente de nosotros porque son nuestras creaciones . Luego de rellenar vamos a coser con "punto escondido" la pequeña abertura
3. Now we are going to fill with cotton or small pieces of fabric, personally I do not like to put too much padding although other people do, in the end these details depend solely on us because they are our creations. After filling we are going to sew the small opening with "hidden stitch".
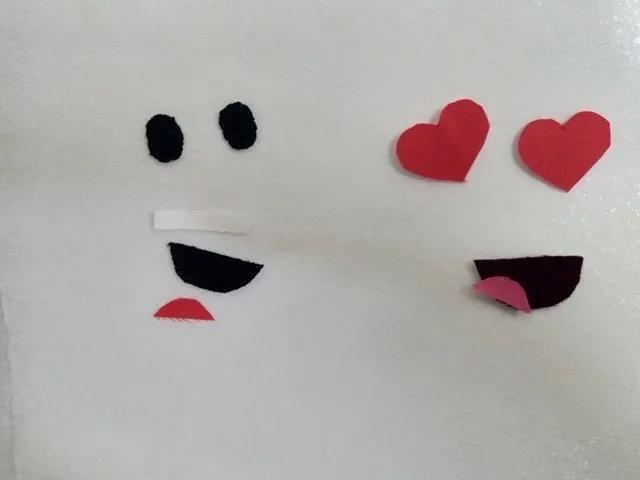
4. Por último vamos a elaborar el rostro!, preferiblemente es mejor utilzar fieltro para elaborar los ojos y la boca aunque si no tienes también puedes utilizar tela normal como hice yo en este caso
4.Finally we are going to make the face! Preferably it is better to use felt to make the eyes and mouth although if you don't have you can also use normal fabric as I did in this case
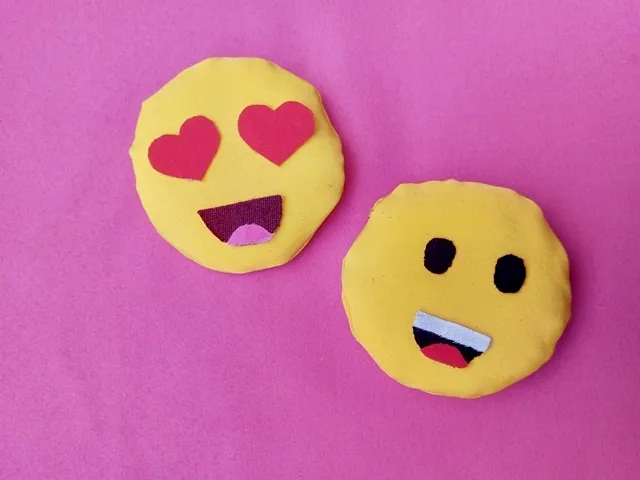
¡Emoticones listos! - Ready emoticons!😍😃
Muchas gracias por visitar mi publicación❤, Hasta la próxima, cuidense!
Thank you very much for visiting my publication ♥, Until next time, take care!