
In, this article, we are going to take a look at Svelte and I'm going to try and teach you how to create your own blog, upload it to GitHub and host it on the internet for everyone to see.
Before starting building our new blog we need to have the right tools. Let's go grab them.

1. Installing the needed tools
First, we need to download Node.js. We use Node.js to interact with package management tools like npm or Yarn and it's also needed by some other dependencies in order for them to work. In this project, I used the LTS (long-term support) version of Node.js.
- On Windows, download Node.js and launch the installer.
- On Ubuntu we can just use snap packages like this (run in terminal):
sudo snap install node --channel=12/stable --classic - On Fedora, which is what I'm using, we can simply run:
sudo dnf install nodejs
When you're ready we can move on to the next tool, the node package manager. There are two popular package managers out there, first is npm and the second one is Yarn. I usually use Yarn since it's faster, so this what I'll be covering in this guide. Let's install Yarn:
- On Windows, you can either download it from Yarn's official download page or follow the instructions to install it with Scoop. Instructions for Scoop are also on Yarn's page.
- On Ubuntu you can run:
sudo apt install yarn - On Fedora you can run:
sudo dnf install yarnpkg
Great now we are ready to move on to installing our last necessary piece, degit which we'll use to create our new Svelte blog.
Everybody should now open a terminal, yes even the Windows users (use PowerShell), and let's type:
# On Windows
yarn global add degit

# On Linux
sudo yarn global add degit
2. Creating the Svelte project
Creating a basic Svelte project can be done with a few simple commands. You should navigate now in your terminal to the location where you want to create the project. To do so, use the cd command. For example, if I am in /home/alexandru-balan/ and I have a Documents folder in there I can just type cd Documents to navigate to the documents directory.
After you navigate to the desired folder you can run:
# Instead of my-svelte-project use whatever name you want. I went with instrumentality-blog.
degit sveltejs/template my-svelte-project
cd my-svelte-project
yarn install
Let's recap. We used degit to get a Svelte project template, we went into our project folder and we installed all the dependencies, including Svelte itself. Cool!
3. CSS frameworks? (Optional)
It is common practice nowadays to use CSS frameworks. They help you create layouts faster and they keep a consistent look across various elements of your user interface. Here are 3 CSS frameworks I recommend:
- Bootstrap: by far, the most popular CSS framework out there
- Bulma: light, simple, modern
- UIkit: the best balance between light and fully-featured
I've been using UIkit for almost 3 years now, they are amazing. The framework has a low footprint, but it packs a punch when it comes to features. There has never been anything I felt unable to do when using UIkit. This what I'm going to use, but feel free to use any other CSS framework that you are comfortable with.
This step is optional, but keep in mind that doing your own CSS from scratch might be more work than you think.
In order to bundle everything up, our Svelte project uses Rollup so if we want to install our CSS framework using yarn or npm we need to also configure Rollup to read our framework (which is made of one or multiple CSS files). Let's jump straight into it.
3.1 Install UIkit (or another framework)
To install UIkit using yarn we just run: yarn add -D uikit. For other frameworks, the commands should be similar.
3.2 Configure Rollup
First, we need to install a plugin for Rollup that scan our .svelte files for any imported CSS and will include that in the final bundle. Let's run yarn add -D rollup-plugin-css-only. With this plugin installed we can proceed to configure our Rollup. To do that we'll edit the file called rollup.config.js.
At the top of the file, after all the other imports, let's import our new plugin.
import css from 'rollup-plugin-css-only';
Also, we need to tell Rollup where to put the CSS it finds. Let's edit our plugins section in this file. We need to add our new plugin after the svelte plugin:
css({ output: 'public/extra.css' }),

// After you add this line, your plugins section should look like this

plugins: [
        svelte({
            // enable run-time checks when not in production
            dev: !production,
            // we'll extract any component CSS out into
            // a separate file - better for performance
            css: css => {
                css.write('public/build/bundle.css');
            }
        }),
        css({ output: 'public/extra.css' }),
        ...
3.3 Reference the extra.css file
In our index.html file in the public directory, we need to reference this new extra.css file which will be created when we bundle everything up. To do that add the following line right after the <link> tag that has the favicon:
<link rel="stylesheet" href="/extra.css">
The order in which the CSS files are referenced is the order in which the styles are applied. First, you should apply the framework CSS, then the global styles and then other styles specific to various Svelte components.
3.4 Import the framework
Head over to the App.svelte file in the src folder and import your framework from the node_modules folder. For UIkit you would do this:
<script>
    import '../node_modules/uikit/dist/css/uikit.min.css';
    import '../node_modules/uikit/dist/js/uikit.min.js';
</script>
Some CSS frameworks also have javascript components that need to be imported. UIkit has such a module.

4. Creating your first Svelte component
Each Svelte component has three sections. The <script> which contains the JavaScript logic of the component, the <style> which contains the CSS that's respective only to that component (styles defined in a component aren't visible in other components) and then pure HTML code.
I usually create a folder inside the src directory called components or reusables where I store my components. It makes everything organized and easier to find.
So, in src/reusables I'll create a file called Article.svelte. This will serve as a template layout, style and logic for all articles on my new blog because they all should look and behave similarly.
Inside the <script> tag I'll write definitions of variables that I'll later use in the layout. These variables are usually called props and they are a way of passing data to a component from outside of it. Let's make it a little bit clearer, shall we?
This Article.svelte component, I said earlier, is just a template for actual articles. Intuitively, that means that I'll have more components called something like ActualArticle1.svelte, ActualArticle2.svelte, etc. Those actual articles are going to show up on my new blog, but they'll look and behave similarly because they inherit the Article component. In a sense, they ARE the Article component, but with different headlines, descriptions, image, etc.
<script>
    export let image = "/assets/images/placeholder.jpg";
    export let title = "Placeholder title";
    export let description = "This is a placeholder description";
    export let id;
</script>
Those are the variables that change with every article. You might have noticed that some of them already have some values attributed to them. Those are the default values, in case you don't provide any at initialization. The id however has no default value, that's because I want it to be unique for every article and I want Svelte to complain when I forget adding it to an article.
Next up, let's take a look at how the article will appear on the page, its layout to be more precise.
<div id="article-card" class="uk-card uk-card-default uk-margin-bottom">

    <div class="uk-card-media-top">

        <img src={image} alt="A placeholder">
    </div>

    <div class="uk-card-body">
        <h3 class="uk-card-title uk-text-center">{title}</h3>
        <p>{description}...</p>

        <div class="uk-flex uk-flex-center">
            <button class="uk-button" uk-toggle="target: #{id}" type="button">Read more</button>
        </div>

    </div>

</div>
I opted for a modern style based on cards with content. The UIkit framework makes it really easy to create cards, just use the classes uk-card and uk-card-default for a nice card look.
The next div element places an image at the top of my card. Notice how the earlier defined variables come into play. All you need is to enclose the variable in curly brackets: ...src={image}.... The next elements on the card are the title and the short description, followed by a button that will open the actual article.
This is where the id comes in handy. Since every Article component must open a different window with different content, we use the id to differentiate between them. The uk-toggle attribute comes from UIkit and specifies which element should be toggled. In our case, we are going to toggle a modal element that's going to host our actual content.
<div class="uk-modal-container" id={id} uk-modal>

    <div class="uk-modal-dialog">

        <div class="uk-modal-header">
            <h2 class="uk-modal-title uk-text-center">{title}</h2>
        </div>

        <div class="uk-modal-body" uk-overflow-auto>
            <button class="uk-modal-close-default" type="button" uk-close></button>
            <slot></slot>
        </div>
    </div>

</div>
One interesting aspect of the modal is that the id must be the same one that we used in the card and we must use the uk-modal attribute. Another interesting thing you might have noticed is the unusual <slot></slot> tag. That's not a normal HTML tag, it comes from Svelte and works like the variables we defined earlier the props, but for whole HTML snippets. When everything is bundled up, that <slot> tag is going to be replaced with our article content which will be comprised of multiple HTML tags like <p> paragraphs, headers <h2>, <h3>, etc. and even <code> snippets.
I'll post the <style> as well, but I won't dwell on it. Most of the lifting is done by the CSS framework itself, I'm just changing things like colors, fonts, font sizes:
<style>
    .uk-card-media-top img {
        object-fit: cover;
        width: 100%;
        height: 30vh;
    }

    .uk-button {
        color: #262229;
        font-family: 'Noto Sans', sans-serif;
        background: white;
        font-size: 1em;
        border: 1px solid #f3665b;
        transition: 0.3s all ease-in-out;
    }

    .uk-button:hover {
        background: #f3665b;
        color: white;
    }

    h2.uk-modal-title {
        font-family: 'Noto Sans', sans-serif;
        font-size: 1.2em;
        color: black;
    }

    .uk-card-body p {
        font-family: 'Noto Sans', sans-serif;
        font-size: 1em;
    }

    /*On larger devices*/
    @media only screen and (min-width: 960px) {
        .uk-card-media-top img {
            height: 50vh;
        }

        h2.uk-modal-title {
            font-size: 2em;
        }
    }
</style>
5. Create a list of articles
We should have a component that manages the actual articles and the way they are laid out. So let's create another component in src/reusables/ called ArticleList.svelte:
<script>
    import Lazy from 'svelte-lazy';
</script>

<style>
    .uk-section {
        background: white;
        padding: 2em;
    }

    .uk-flex {
        align-items: center;
    }
</style>

<section class="uk-section uk-flex uk-flex-column uk-flex-center">

</section>
I am using a component made for Svelte called svelte-lazy, which is used to load content as it enters the screen. There is no need to load dozens of articles at one when a user might only scroll enough to see 10 or 15 articles. Using this component each article will load the moment it comes into view. To install svelte-lazy run yarn add -D svelte-lazy.
Now, in order to actually see our work let's create an actual article. For this I recommend you create a folder /src/articles where you'll put all your articles. As a naming convention for the article names, I'll use A{yyyymmdd}.svelte so an article written on the 21st of June 2020 will be named A20200621.svelte. I'll actually use this name as the article id as well.
In this file I'll have to import the Article.svelte component and initialize it:
<script>
    import Article from '../reusables/Article.svelte';
</script>

<Article
title="🎉 The Instrumentality Foundation launches version 1.0 of the Instrumentality Blog 🎉"
description="Come on in and see how we made the blog. What technologies did we use, what obstacles we faced and how we overcame them"
image="/assets/images/blog02.webp"
id="A20200621">

...

</Article>
The assets/images are folders inside the public directory.
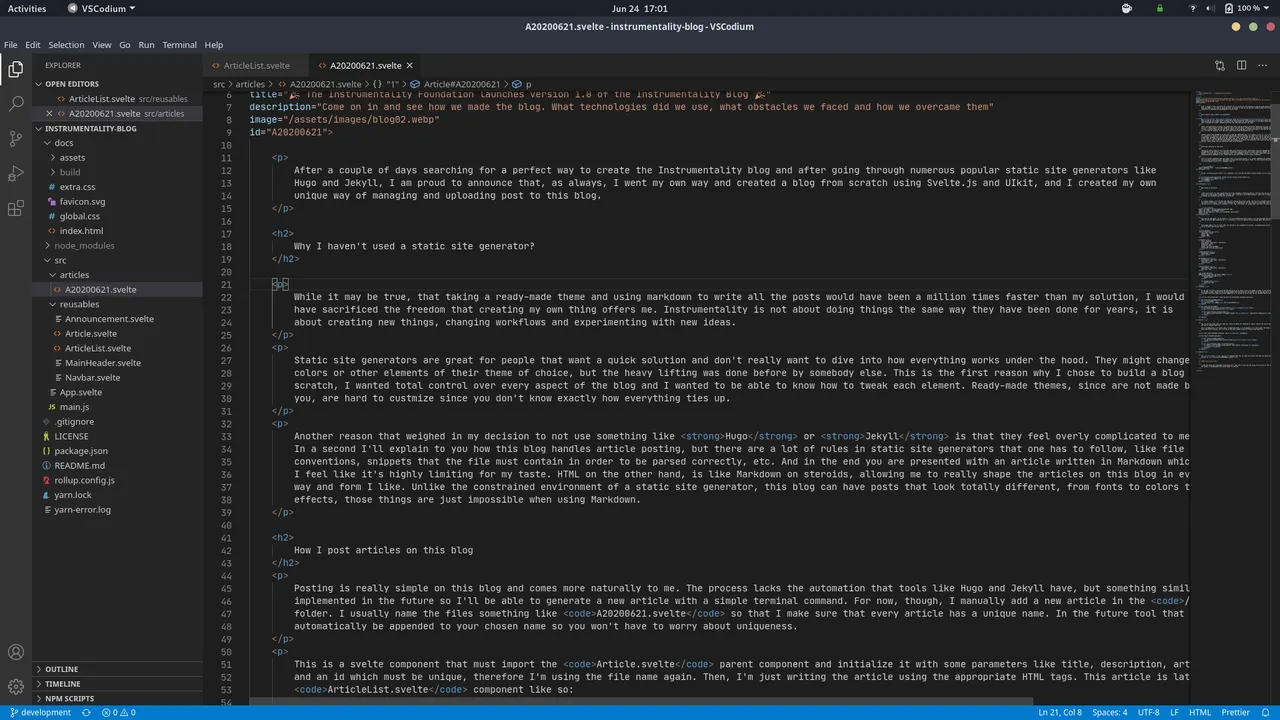
Replace the ... in the <Article></Article> component with actual HTML content of your blog. Here is a little bit of how my article looks like:
Going back to our ArticleList.svelte component we need to import the article we just created and put it inside the <section> tag. Modify the component to look like this:
<script>
    import Lazy from 'svelte-lazy';

    import A20200621 from '../articles/A20200621.svelte';
</script>

<style>
    .uk-section {
        background: white;
        padding: 2em;
    }

    .uk-flex {
        align-items: center;
    }
</style>

<section class="uk-section uk-flex uk-flex-column uk-flex-center">
    <Lazy height={500}>
        <A20200621 />
    </Lazy>

</section>
6. Bundling the project
Let's test our work!
We can launch a development version of our blog right away using yarn dev, or we can bundle everything up and serve the bundled project which is optimized by doing first yarn build and then yarn start.
If everything turned out alright I'll now move on to hosting.
7. Upload the project to GitHub or GitLab
In order to upload the project on one of this platforms, you'll need to have an account created on them. Go ahead and create an account if you don't have one. Since the process is the same on both platforms we'll focus on GitHub since it's the more popular one.
Fun fact: GitHub is owned by Microsoft. npm is owned by Github.
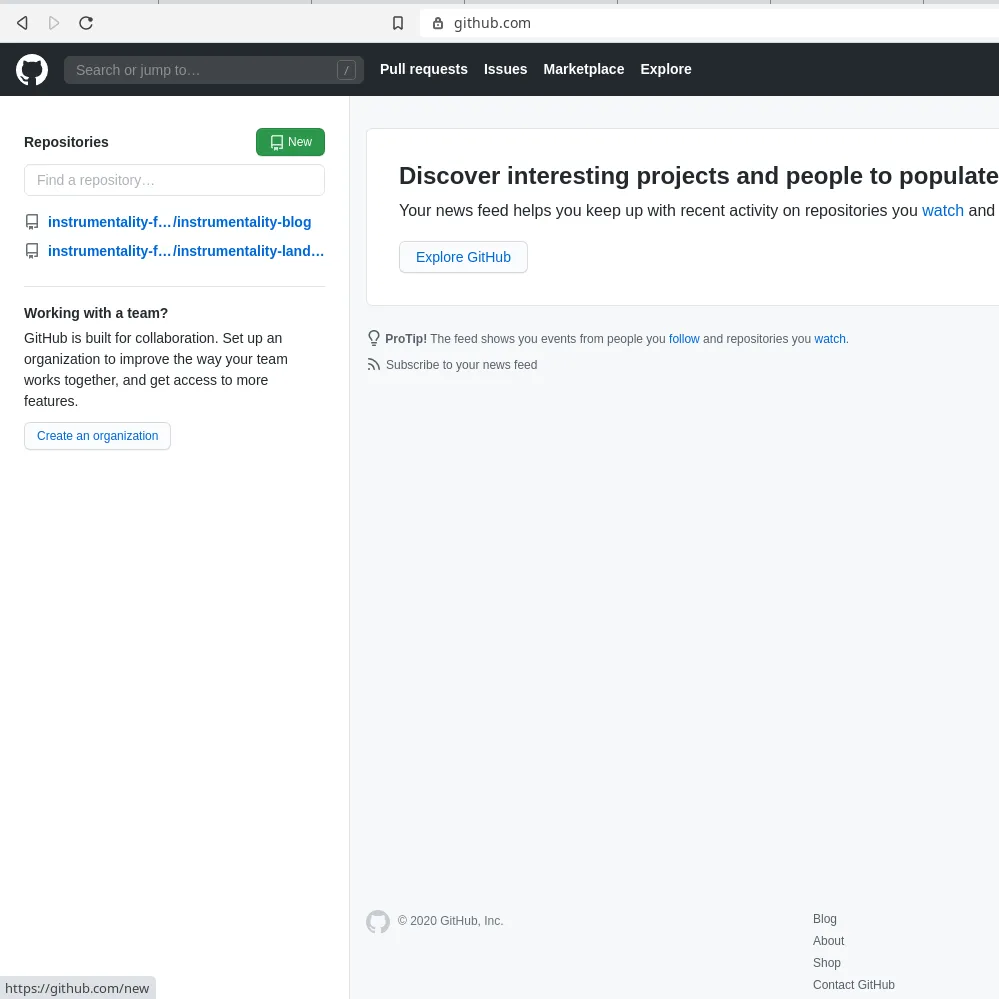
On the main page, just click the New button in the top left corner:
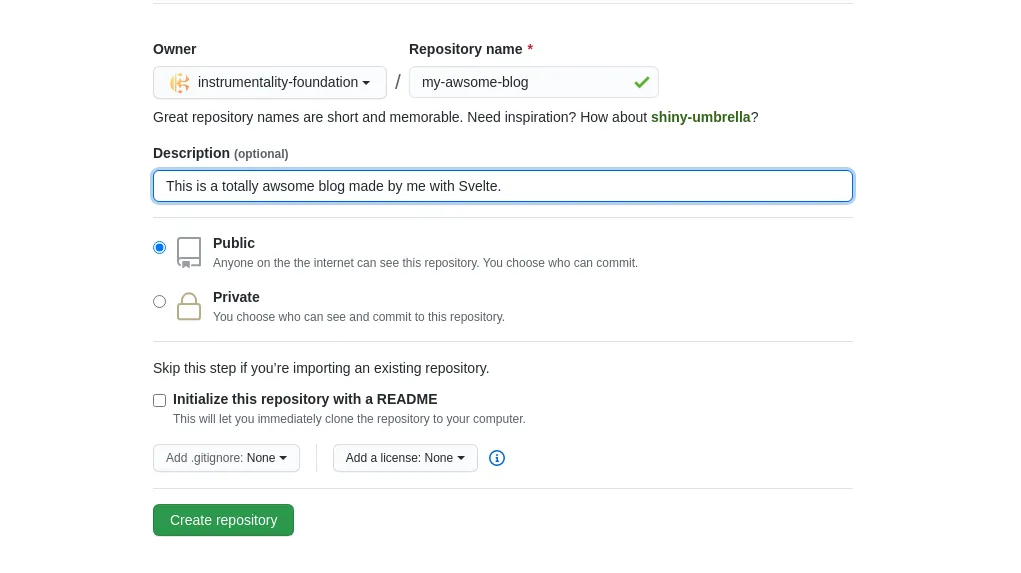
Then fill in some basic info about your project. Leave the Initialize with a README box unchecked:
Click on Create repository and follow the instructions that appear on the next page.
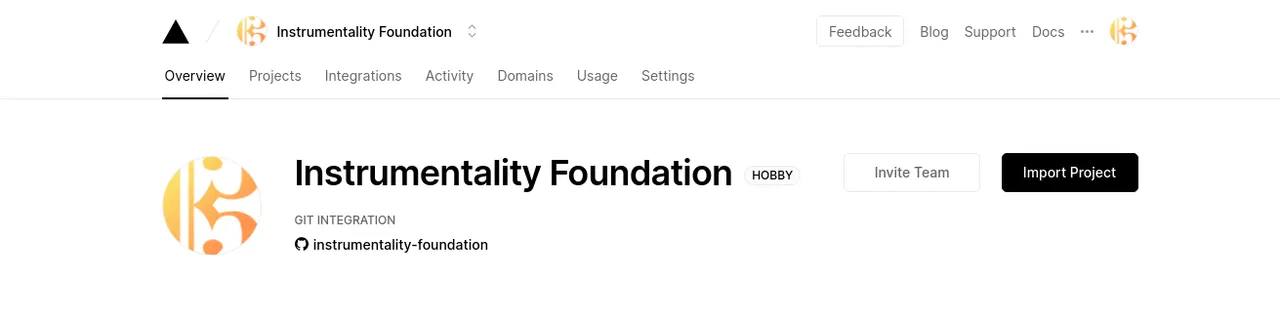
8. Hosting your project with Vercel
Here you can create an account by using the GitHub account so no need to sethttps://github.com/instrumentality-foundation/instrumentality-blog everything up from scratch.
On your dashboard click on Import Project
On the next screen choose Import git repository. On the next screen just paste the link to your GitHub repository:
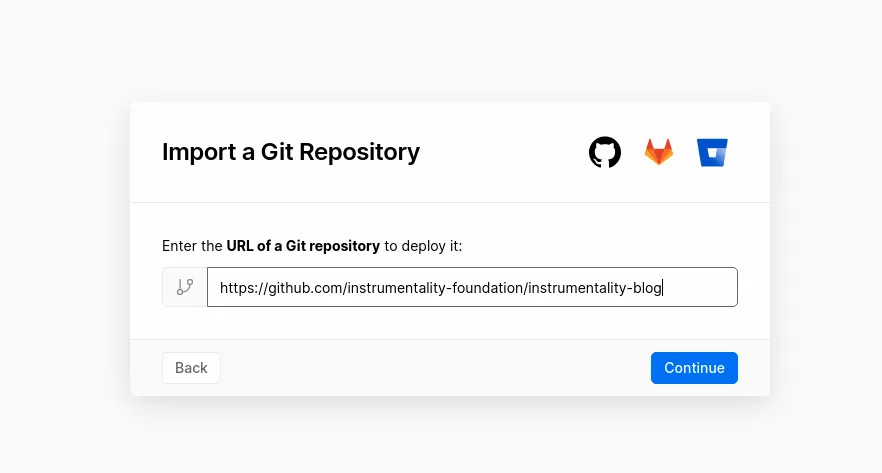
Click continue and leave everything unchanged in the next screen, Vercel should detect that you are importing a Svelte project and make all the right adjustments. After the deployment is complete, which should take a couple of seconds only you'll be able to access your blog at .vercel.app domain.
The blog I made is hosted here: https://instrumentality-blog.vercel.app/
The source code to all the project is here: https://github.com/instrumentality-foundation/instrumentality-blog
Thank you for following this guide, feel free to ask questions and point out bugs in the code if any. I'm looking forward to your feedback. I hope you found this article interesting and I hope I was able to teach you all something new today. See you next time!