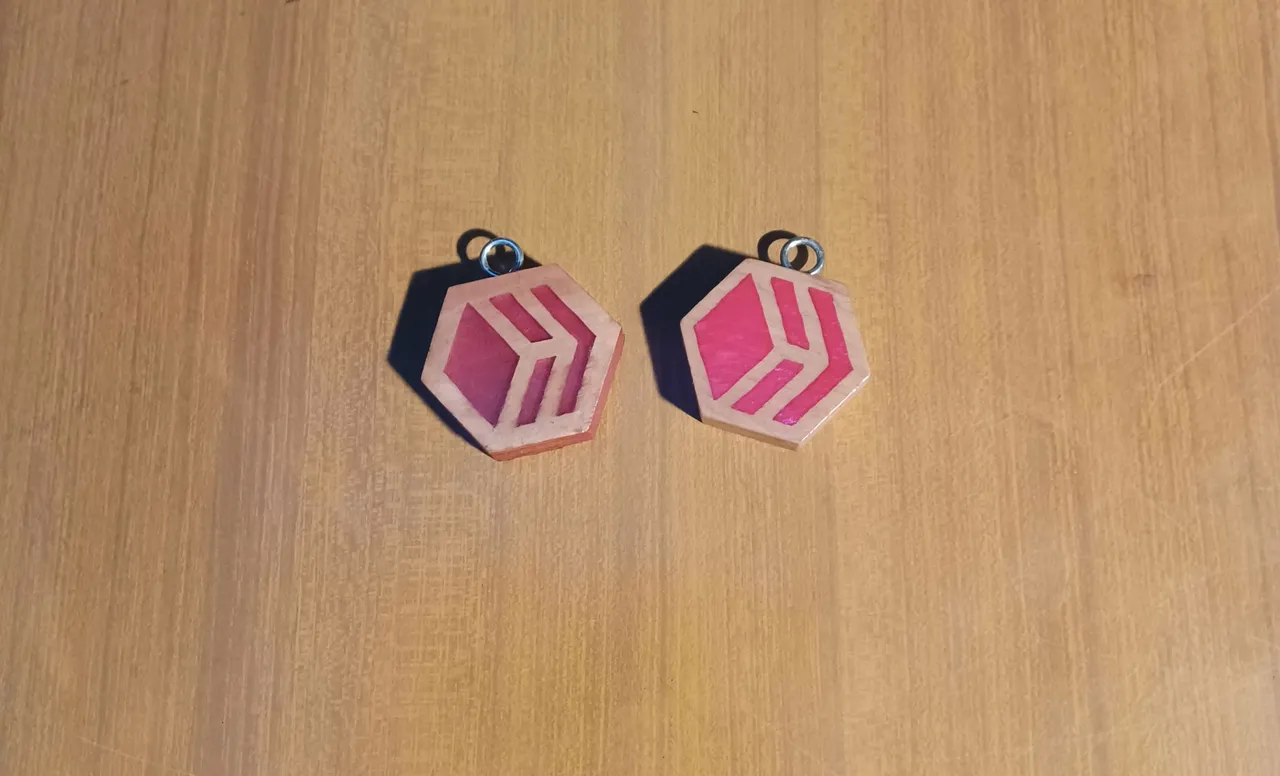
Today we'll make some keychains in wood and resin inspired by the Hive logo: keep in mind that these are just prototypes that have still some defects, I'm sure they can come out much better with soime extra work and experience.
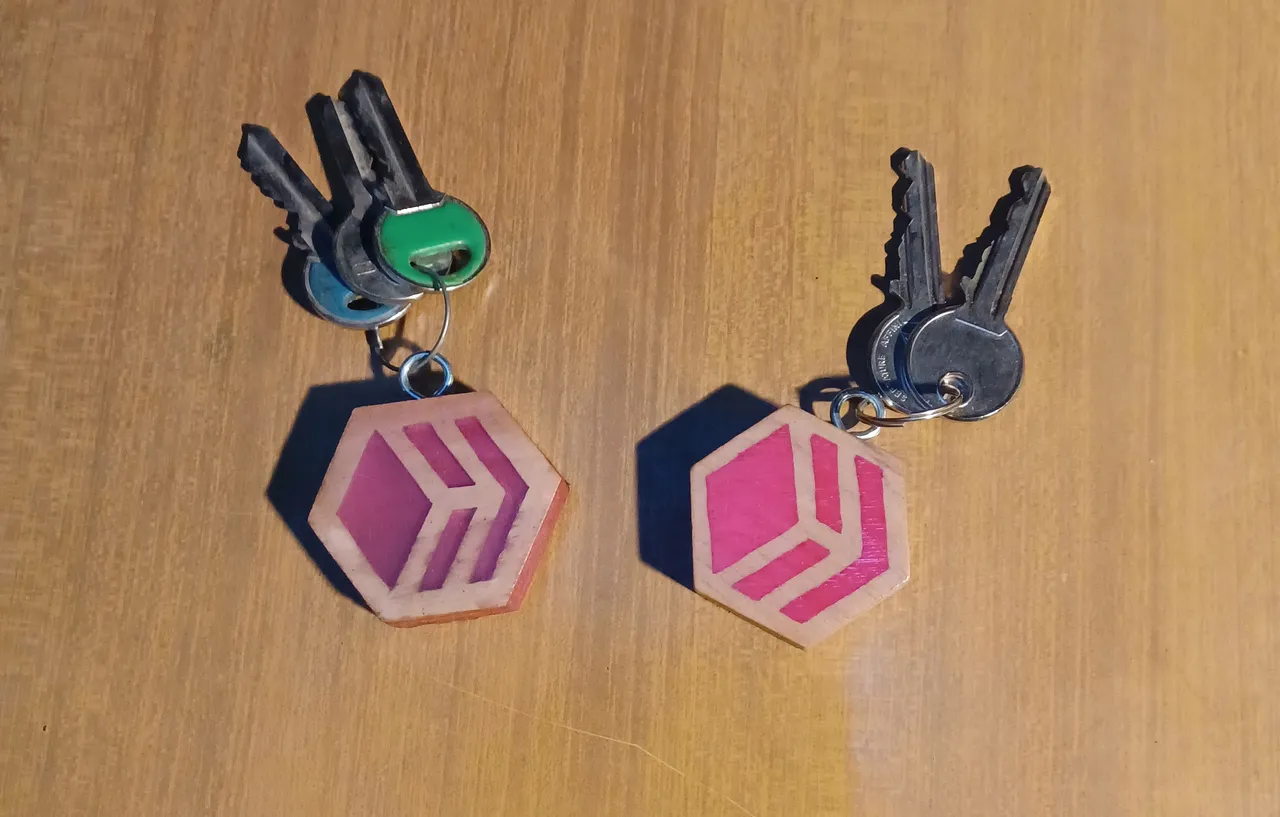
Making them even bigger they could be also used as decorations for a Christmas Tree, maybe that would be a better idea taking into consideration that a keychain takes a lot of hits during every day use.
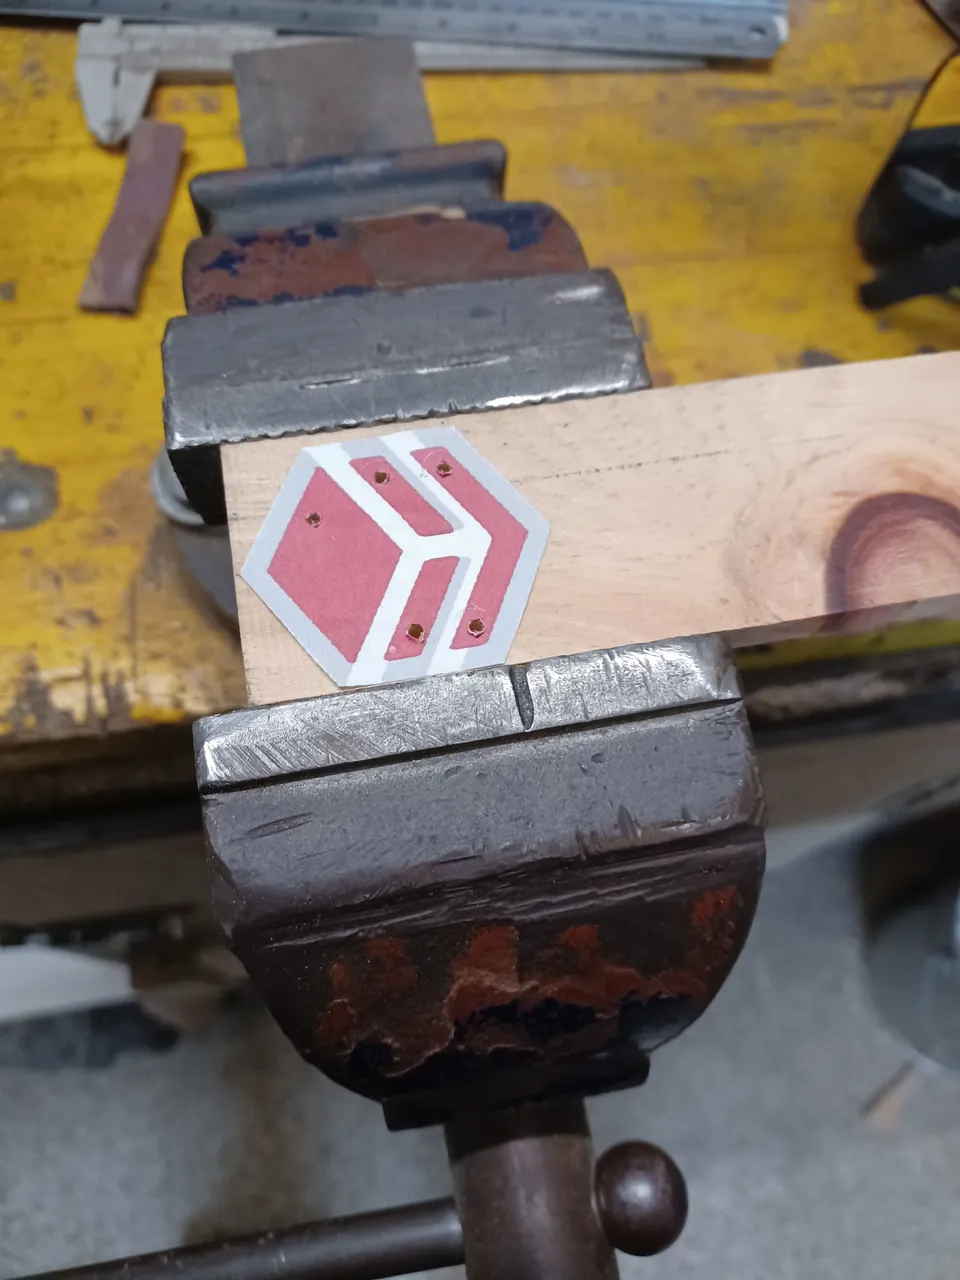
We can start by printing out the logo and glueing it on the piece of wood that we decided to use: I think it's best to use solid wood rather than plywood, it's harder and the grain that we'll see in the end will be more artistic.
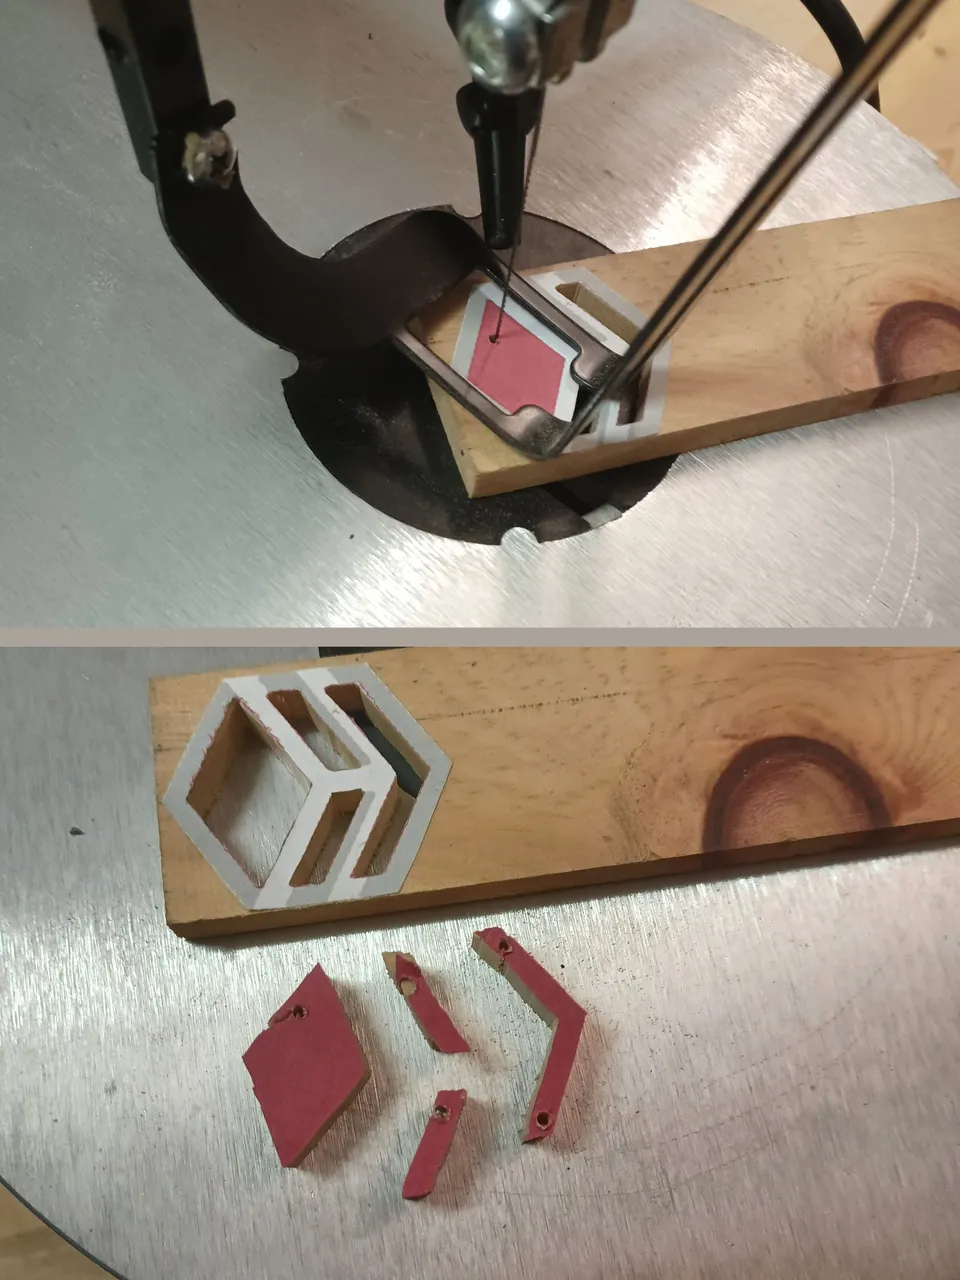
We can then make some holes inside the pattern that we have to cut out and bring the piece to the scroll saw, or we could also use a hand saw if we don't own one.
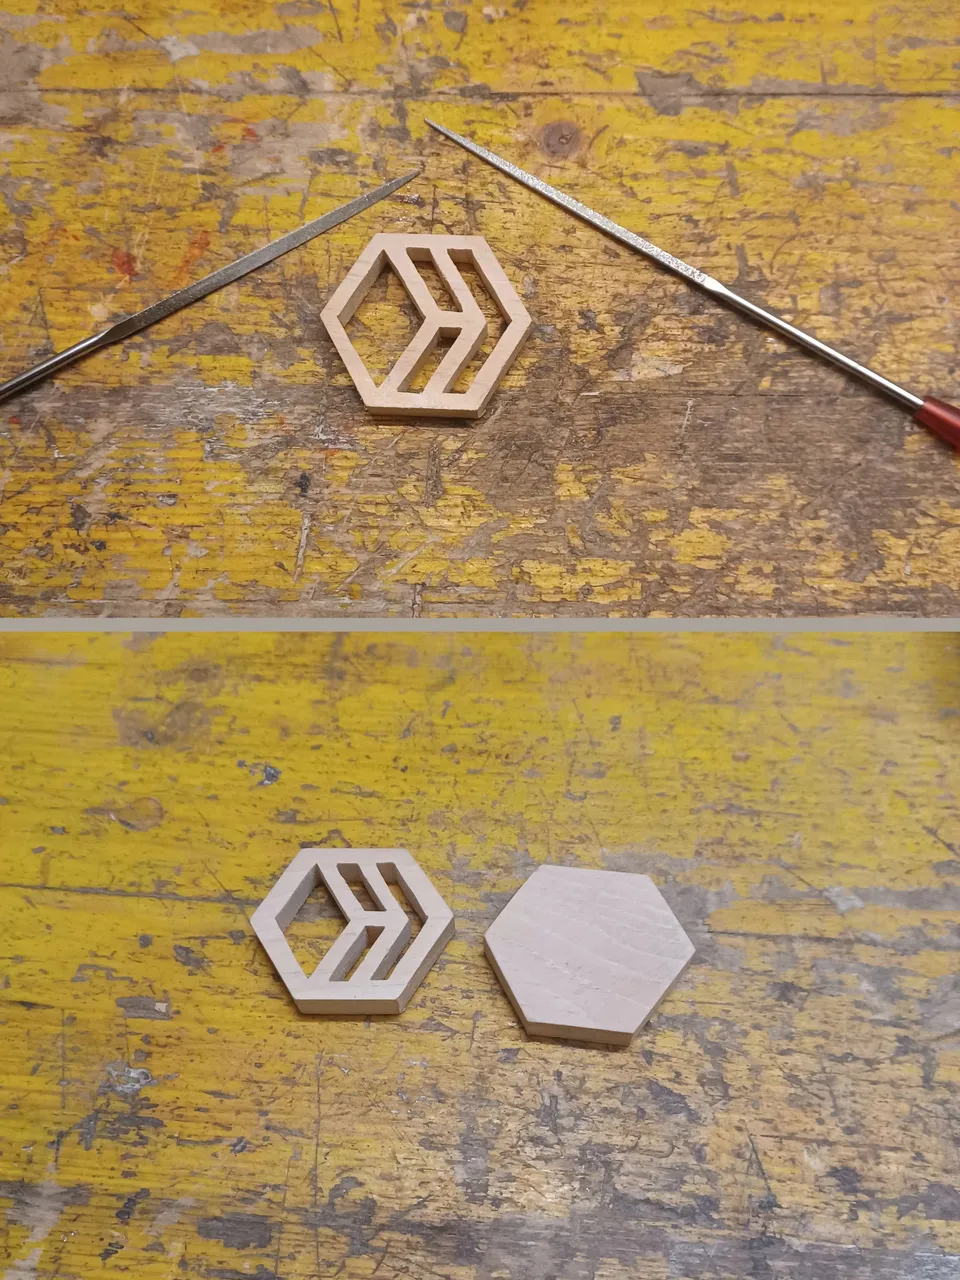
Then I used some files to try and correct some of the little defects the cuts had after the scroll saw: for sure I have to work more on that aspect and I'll try to be more precise and make straighter lines next time.
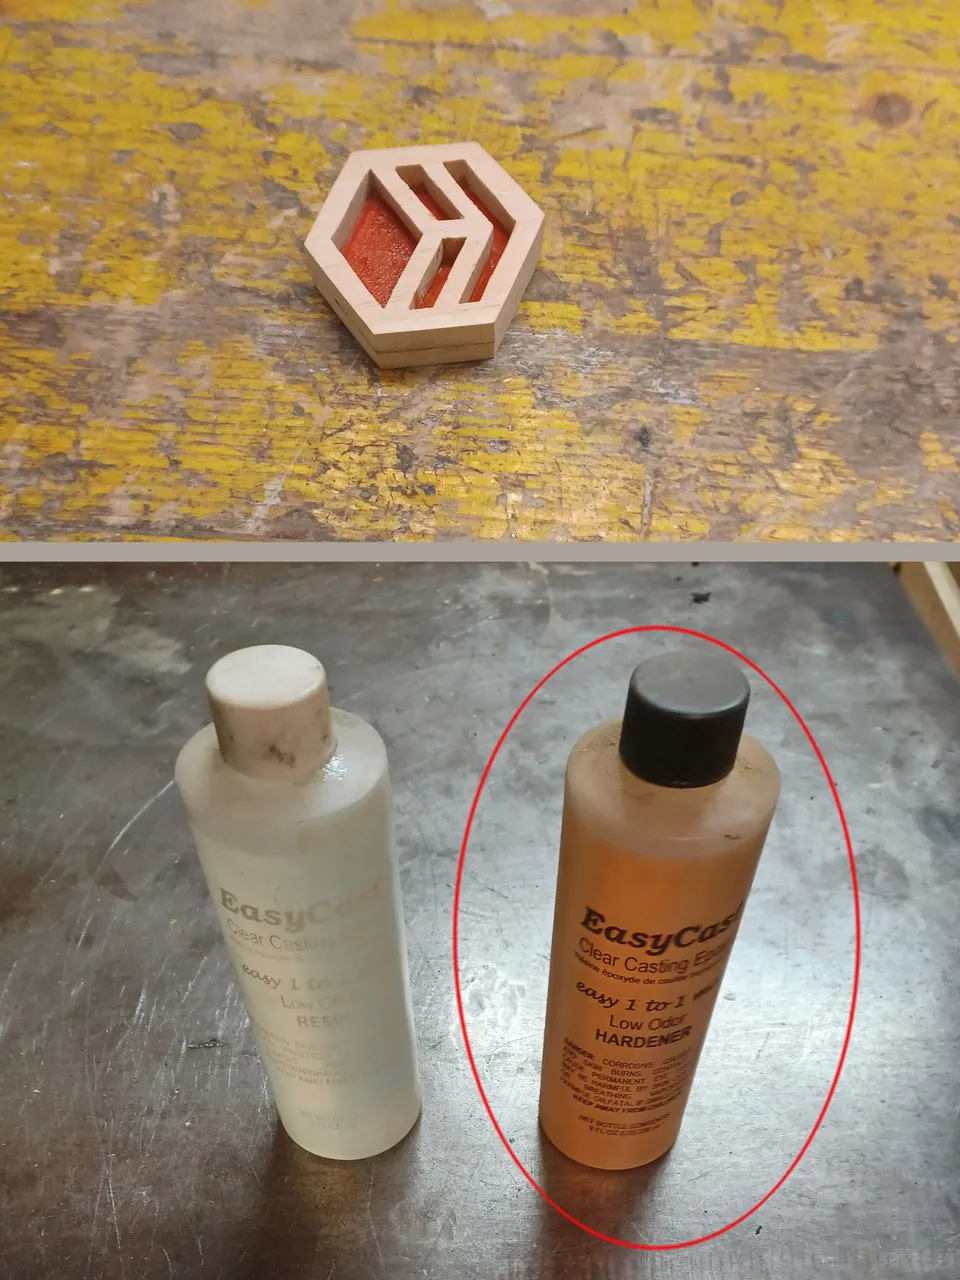
After glueing the two parts toghether and coloring red the interior design, we can start mixing the epoxy resin that we'll pour in.
As you can see in the photo the hardener is very old and became orange: this means that the final mix won't be very clear, I definetly have to buy some more for next projects.
I let the resin dry for at least 24 hours and then sanded the pieces and put on some clear coat of protective varnish and added a screw in metal ring.
I hope you like them!!!
Thank you for your attention and see you next time!!! 👐 😀
Oggi realizzeremo insieme dei portachiavi in legno e resina che ricordino il logo di Hive: tenete presente che sono dei prototipi che hanno qualche difetto, sono sicuro che potrebbero riuscire molto meglio con dell'esperienza in più e del lavoro extra.
Più grandi potrebbero essere anche degli adobbi per un albero di natale, forse sarebbe anche un'idea migliore visto che i portachiavi ricevono un sacco di urti durante l'uso quotidiano.
Possiamo iniziare stampando il logo e incollandolo sul legno che vogliamo usare: penso sia molto meglio il legno massello ripsetto ad un legno composto, in quanto è più solido e alla fine le venature daranno un effetto più artistico.
Poi possiamo realizzare dei fori all'interno del disegno che dobbiamo e ritagliare e portare il pezzo al seghetto a traforo, e se non lo abbiamo in possesso posiamo usare un seghetto a mano.
Successivamnete ho usato delle lime per perfezionare i difetti di tagli avvenuti al traforo: di sicuro devo lavorare su questo aspetto e prossima volta farò delle line più dritte e precise
Dopo aver incollato le due parti e aver colorato di rosso il design interno, possiamo mischiare la resina epossidica da colare.
Come vedete l'indurente è molto vecchio, infatti è di colore arancione e il mix finale non verrà certo trasparente, ne devo sicuramente comprare di nuovo per i prossimi progetti.
Ho lasciato la resina riposare per almeno 24 ore, ho poi carteggiato e applicato uno srato di vernice traaspaent protettiva e ho aggiunto degli anellini di metallo a vite.
Spero vi piacciano!!!
Grazie dell'attenzione e alla prossima!!! 👐 😀