¡Hola! ¿cómo están? 😀
Tutorial del programa OBS para grabar vídeos en tu ordenador 💻
Antes de comenzar que sepas OBS es un programa libre y de código abierto, para grabación de vídeos y también sirve para transmitir en vivo.


1️⃣ Descarga del programa
El primer paso será descargar el programa en nuestro ordenador, vamos a ir a nuestro navegador favorito, es decir Google Chrome, Firefox, Opera, o el de tu preferencia.
Ahora vamos a escribir la palabra OBS, es posible que en el primer resultado de la búsqueda, te aparezca una pequeña leyenda que diga anuncio, debes ir más abajo, ubicar el primer resultado que aparezca, sin la palabra anuncio, de todas maneras voy a dejarte el enlace por si prefieres hacer click acá directamente: https://obsproject.com/es y si es el enlace oficial en castellano.
La versión que he descargado a fecha de hoy ha sido la 28.1.2, esto puede ir cambiando de una semana a otra o incluso de un día para otro, siempre están haciendo actualizaciones de forma regular.
2️⃣ Instalación
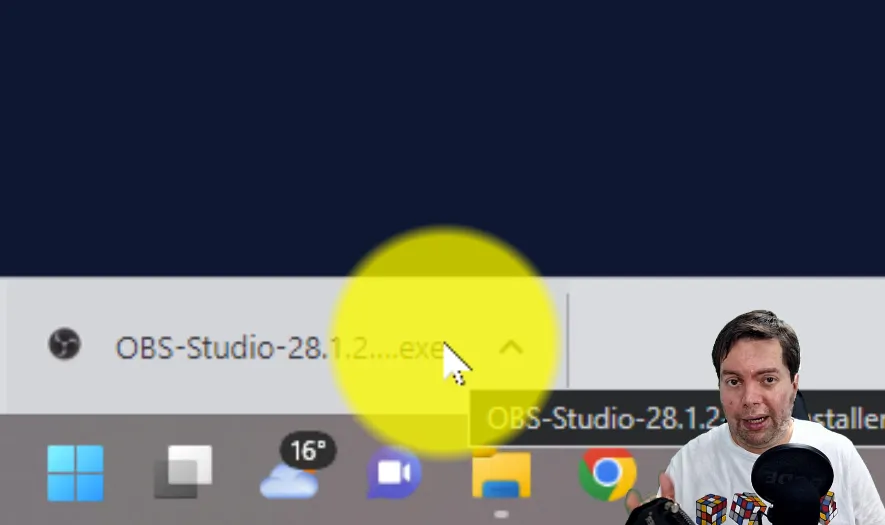
Muy bien ya hemos descargado el programa de la página web oficial, ahora lo que tenemos que hacer es abrir ese archivo, y hacer lo típico, es decir, siguiente, luego siguiente, y por último finalizar.
Por lo general casi todos los programas debes hacer lo mismo, darle a siguiente repetidas veces, y por último finalizar.
3️⃣ Agregar 1 escena

Fuente: Gif animado creado por mi
Para este paso es necesario que tengas abierto el programa, si lo estás instalando por primera vez desde cero, en la parte inferior izquierda, concretamente en la sección de escenas, debería estar completamente vacío. Para crear nuestra primera escena vas a hacer clic en el botón que tiene una cruz o un símbolo de más "+", para agregar un nombre a tu escena. Está escena será como una carpeta, que nos permitirá agregar los dispositivos que queramos.
Cuando digo agregar dispositivos me refiero por ejemplo a: "micrófono, webcam, captura de una ventana, etc.
Se pueden crear escenas diferentes, con la finalidad de que podamos mostrar diferentes entornos, a ver por ejemplo en la escena 1 que solo se muestre nuestra cámara web, y cuando pasemos a la escena 2, que aparezca una presentación en Power Point y que ahora nuestra cámara web este a un extremo a un tamaño reducido.
➡️ Hoy solo vamos a concentrarnos en crear nuestra primera escena.
Vamos poco a poco, no quiero que se agobien 🤪 aquí mucho por aprender
4️⃣ Agregando dispositivos

Fuente: Gif animado creado por mi
Ahora vamos a dirigirnos al panel llamado fuentes, y vamos a hacer algo muy similar a lo que ya hicimos en escenas, es decir, vamos a ir al símbolo de más "+", para que podemos agregar el dispositivo que queramos hacer visible o audible en nuestra grabación.
Cuando elijas una opción deberás crear nuevo que ya aparece seleccionado por defecto y asignar un nombre a tú dispositivo, puedes elegir el nombre que tú quieras, pero es necesario que ese nombre, te ayude a identificar o recordar con facilidad de qué dispositivo se trata.
Identifica el dispositivo 👇

Fuente: Gif animado creado por mi
En mi caso he agregado el micrófono papalook, que corresponde al sonido de mi cámara web, esta lista es única para cada quien, no verás en la lista los mismos que yo tengo, ni coincidirá en la cantidad a elegir tampoco. Verifica como se llama la marca o modelo de lo quieres añadir, si es el sonido del micrófono incorporado de tu ordenador es posible que se llame "Realtek", igual puedes probar y si no te gusta eliminarlo o colocar mute.
Para eliminar dispositivos es tan fácil como darle a símbolo de menos "-", que está justo a lado del símbolo "+" que diste clic previamente.
Configuración especial para el Audio 🔊

Fuente: Gif animado creado por mi
Para que se pueda escuchar en la grabación o transmisión el sonido, debes ir a el mezclador de sonidos, y en el dispositivo de "micrófono", (el que has agregado), justo al lado está el icono de ajustes, representado por una pequeña rueda dentada ⚙️ haz clic ahí, luego selecciona "propiedades de audio avanzadas" y cuando se abra la ventana de opciones, ve a la monitorizacón del audio y si aparece como "monitorización desactivada", colocala en "monitorización y salida" y luego le das al botón cerrar.
Fuente: Diseñado por mi en Canva
Fuente del logo: OBS
Listo con esta explicación, ya lo único que tienes que hacer, es seguir agregando los diferentes dispositivos que necesites, si tienes alguna duda te invito a ver el vídeo, dónde puedes ir viendo el paso a paso, con todo lujo de detalles, he intentado representar de la mejor manera posible y a modo de resumen en el post toda la explicación que te doy a través del vídeo tutorial.
Si tienes alguna duda, pregunta, sugerencia, o simplemente quieres pasar a saludar, ve al final de este post y déjame tu mensaje ✍️ estaré encantado de responderte en la máxima brevedad posible ⏱️

Hello! how are they? 😀
OBS program tutorial to record videos on your computer 💻
Before you start, you should know that OBS is a free and open source program for recording videos and also for broadcasting live.
1️⃣ Download the program
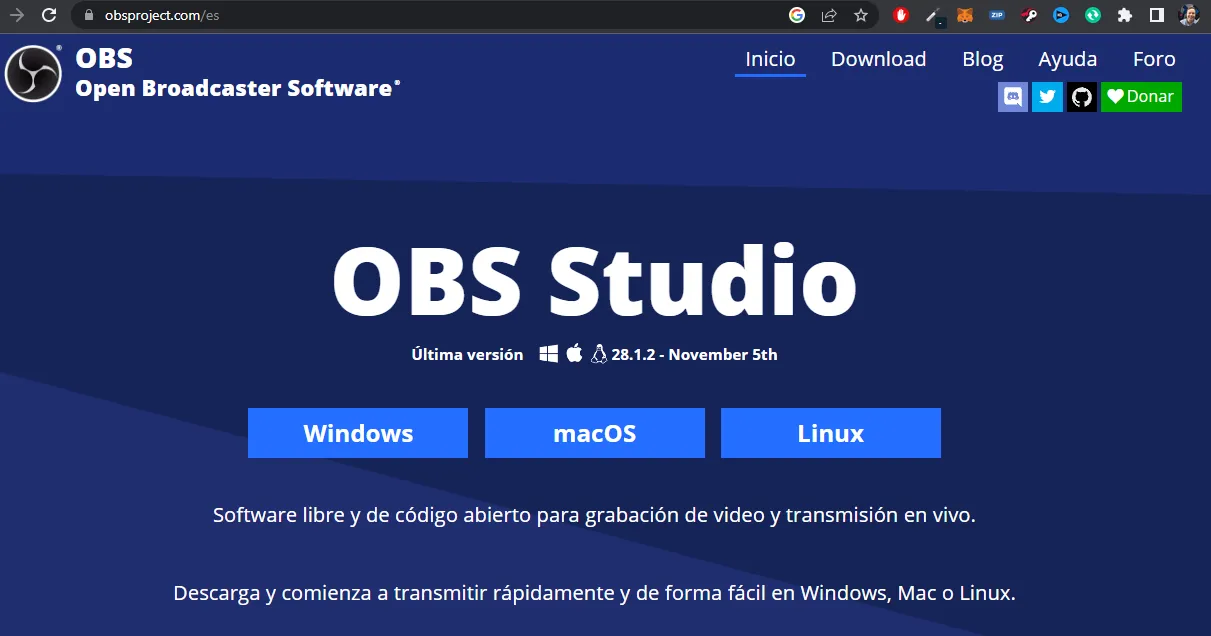
Source: Screenshot taken by me
The first step will be to download the program on our computer, we are going to go to our favorite browser, that is, Google Chrome, Firefox, Opera, or the one of your preference.
Now we are going to write the word OBS, it is possible that in the first search result, a small legend will appear that says advertisement, you must go further down, locate the first result that appears, without the word announcement, anyway I will leave the link in case you prefer to click here directly: https://obsproject.com/es and if it is the official link in Spanish.
The version that I have downloaded to date has been 28.1.2, this can change from one week to another or even from one day to the next, they are always making updates on a regular basis.
Source: Screenshot taken by me
2️⃣ Installation
Very well, we have already downloaded the program from the official website, now what we have to do is open that file, and do the typical thing, that is, next, then next, and finally finish.
In general, almost all the programs must do the same, hit the next button several times, and finally finish.
3️⃣ Add 1 scene
Source: Animated gif created by me
For this step it is necessary that you have the program open, if you are installing it for the first time from scratch, in the lower left part, specifically in the scenes section, it should be completely empty. To create our first scene you are going to click on the button that has a cross or a plus symbol "+", to add a name to your scene. This scene will be like a folder, which will allow us to add the devices we want.
When I say add devices I mean for example: "microphone, webcam, capture a window, etc.
Different scenes can be created, so that we can show different environments, let's see, for example, in scene 1 that only our webcam is shown, and when we go to scene 2, that a Power Point presentation appears and that now Our webcam is at one end at a reduced size.
➡️ Today we are just going to focus on creating our first scene.
Let's go little by little, I don't want them to get overwhelmed 🤪 there's a lot to learn here.
4️⃣ Adding devices

Source: Animated gif created by me
Now we are going to go to the panel called sources, and we are going to do something very similar to what we already did in scenes, that is, we are going to go to the plus symbol "+", so that we can add the device that we want to make visible or audible in our recording.
When you choose an option you must create a new one that is already selected by default and assign a name to your device, you can choose the name you want, but it is necessary that this name helps you easily identify or remember what device it is.
Identify the device 👇
Source: Animated gif created by me
In my case I have added the papalook microphone, which corresponds to the sound of my webcam, this list is unique for each person, you will not see the same ones that I have on the list, nor will it coincide in the amount to choose either. Check the name of the brand or model of what you want to add, if it is the sound of your computer's built-in microphone, it may be called "Realtek", you can still try and if you do not like, delete it or place mute.
To remove devices it's as easy as clicking the minus "-" symbol, which is right next to the "+" symbol you clicked on previously.
Special configuration for Audio 🔊

Source: Animated gif created by me
So that the sound can be heard in the recording or transmission, you must go to the sound mixer, and in the "microphone" device, (the one you have added), right next to it is the settings icon, represented by a small cogwheel ⚙️ click on it, then select "advanced audio properties" and when the options window opens, go to audio monitoring and if it shows as "monitoring off", put it on "monitoring and output" and then hit to the close button.
Source: Designed by me in Canva
Logo font: OBS
Ready with this explanation, and all you have to do is continue adding the different devices you need, if you have any questions I invite you to watch the video, where you can see the step by step, with great detail, I have tried represent in the best possible way and as a summary in the post all the explanation that I give you through the video tutorial.
If you have any doubts, questions, suggestions, or just want to say hello, go to the end of this post and leave me your message ✍️ I'll be happy to answer you as soon as possible ⏱️
Vídeos más vistos de mi canal 🔝🔥
Most watched videos of my channel 🔝🔥
 | @enfocate/yasxtjwg |
 | @enfocate/uwjipejw |
 | @enfocate/bmhitfva |
 | @enfocate/jebomhbm |
 | @enfocate/yamhzxyy |
▫️ ▫️ ▫️ ▫️ 🎯 ▫️ ▫️ ▫️ ▫️

▶️ 3Speak