

Hola Hivers! 👋

El día de hoy le quiero enseñar cómo pueden obtener, la fuente de la imagen o incluso de un vídeo, con el programa canva. Este será un tutorial bastante corto, muy sencillo y tiene una dificultad de 1/10.
Es muy importante que coloquemos siempre esta información en todos nuestros post, veo que muchas personas colocan, que ha sido creado usando los recursos gratis de canva, pero si podemos colocar la fuente de la manera en que te voy a explicar, vamos a ayudar a los curadores, a poder verificar que la imagen utilizada, la podemos utilizar y no tiene copyright.
Gracias a mi amigo @frankches surgió la necesidad de hablar sobre este tema, en una de nuestras reuniones curación en vivo, yo intenté explicar cómo se hacía a través de unas imágenes, pero nada mejor que un buen vídeo para explicar el paso a paso. Yo por ejemplo considero que soy una persona muy visual y me gusta que me expliquen bien las cosas.
En el post anterior, he enseñado cómo puedes crear una cuenta gratuita, y también he mostrado una alternativa para crear tener una cuenta premium, necesidad de tener tarjeta de crédito, totalmente gratuita por 30 días.
Te dejaré el enlace al final de este artículo, para que puedas verlo si aún no lo has hecho.
De todas maneras, todos los tutoriales que voy a realizar, voy a desarrollarlos solamente haciendo uso, una cuenta totalmente gratuita, versión premium, de esta manera estaremos todos en igualdad de condiciones.
➡️ Pasos a seguir:

1️⃣ El primer paso es abrir canva e iniciar sesión en la misma, para que podamos usarla, puedes registrarte con un email o pinchando en el ícono de gmail para que el registro sea automático y no debas poner tú nombre, apellido, fecha de nacimiento, es muy sencillo, si tienes alguna dificultad, te recuerdo una vez más que abajo dejaré un acceso al post anterior.
Si tienes alguna duda o pregunta hazmelo saber en los comentarios para ayudarte.
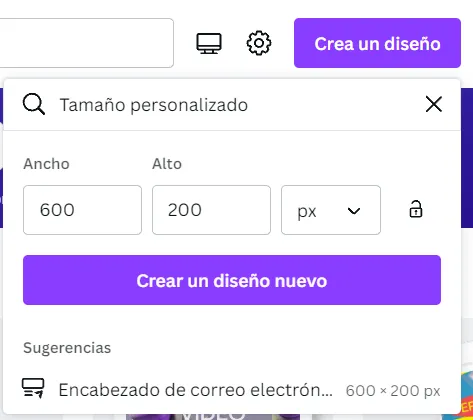
2️⃣ Luego vamos a crear el diseño, vamos a seleccionar una plantilla o vamos a crear unas dimensiones personalizadas, yo he utilizado para el ejemplo unas dimensiones de 600 píxeles de ancho, por 200 píxeles de altura.
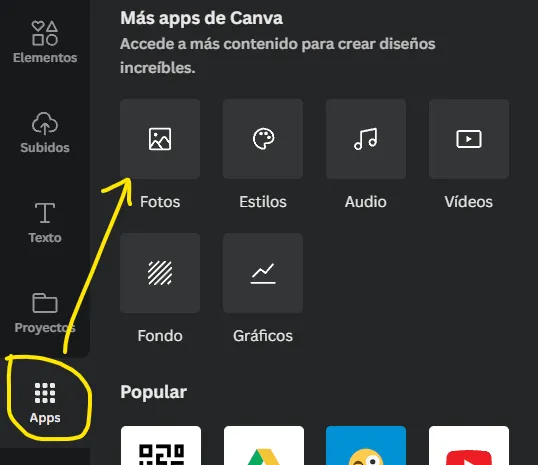
3️⃣ Ahora tenemos que ir a las aplicaciones, ubica en el panel que está del lado izquierdo de la pantalla, en la parte inferior el ícono llamado Apps y pincha sobre este 1 vez.
Se abrirá un menú del lado derecho, ubica la opción de Fotos, verás que luego ya tendrás este acceso directo agregado en el panel, no tendrás que entrar de nuevo en Apps, por lo que será mucho más sencillo acceder, de ahora en adelante.
Ahora navega dentro de las opciones para ver cual imagen te gusta.

4️⃣ Arrastra la imagen, haciendo clic con el botón izquierdo del ratón 🖱️ sostenido, hacia el lienzo y luego sueltalo, para usar el recurso.
En la imagen te dejo una pequeña animación por si tienes alguna duda al respecto.

5️⃣ Ahora dirígete de nuevo a esa imagen que arrastraste, no la que está en el lienzo, la original que sigue estando del lado izquierda, esa miniatura cuadrada.
Debes pinchar en la parte superior derecha donde puedes ver los tres punticos, con el clic izquierdo del ratón 🖱️ 1 sola vez.
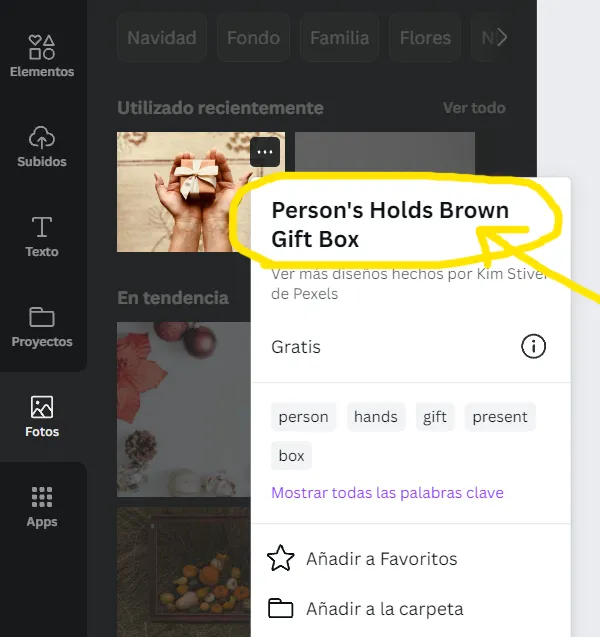
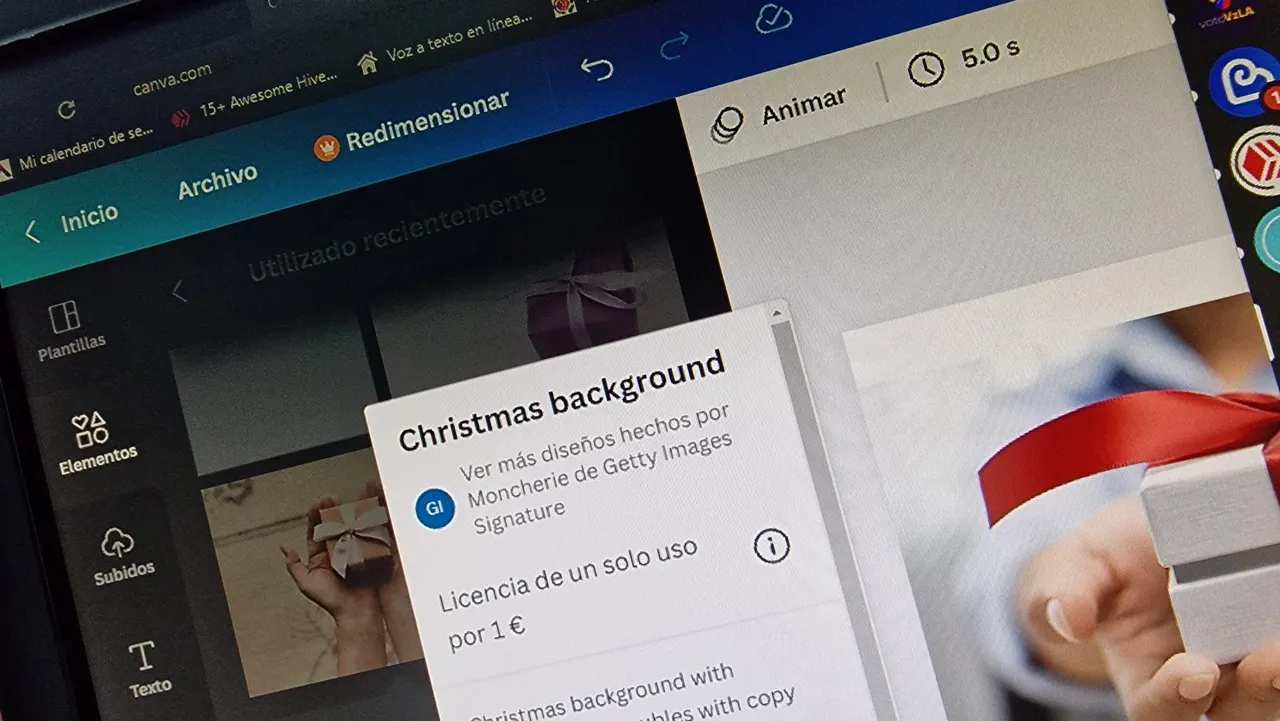
6️⃣ Luego de pinchar verás que se abre esta ventana con información sobre el recursos seleccionado.
El truco está en hacer clic sobre el título de la fotografía, es posible que en algunos casos, en vez de salir como en el ejemplo "Person's Holds Brows Gift Box", en su lugar aparezca "Untitled", o sin título.
No te preocupes que nombre tenga tú solo debes hacer clic para acceder a la fuente original.
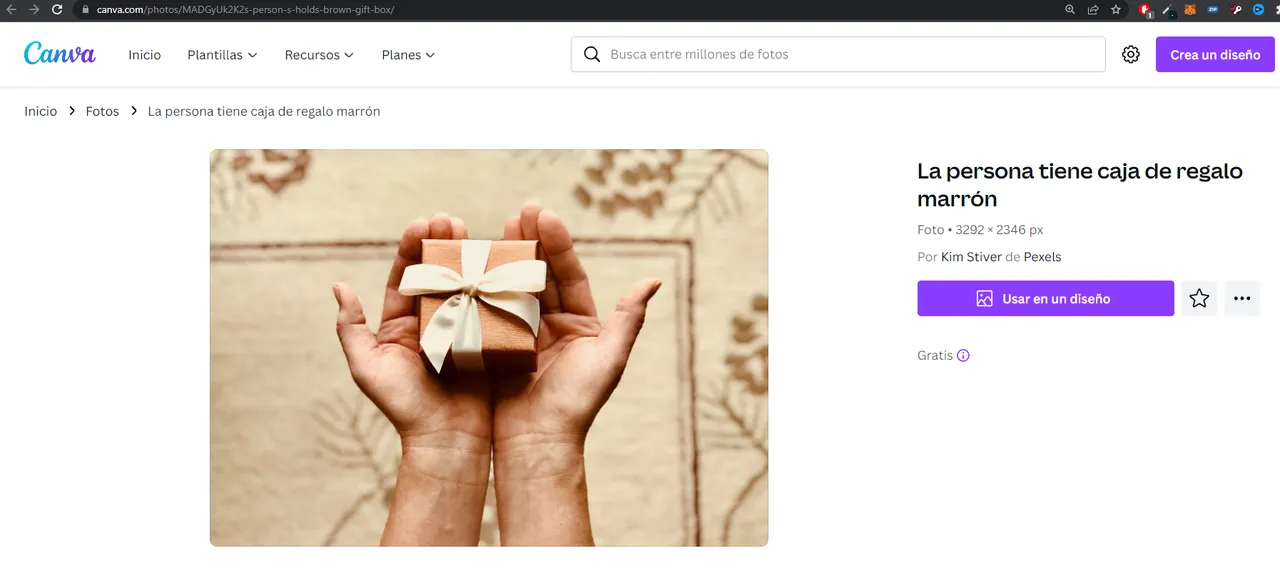
7️⃣ Finalmente nos ha llevado para esta página, luego de hacer clic en el título, tal como expliqué en el paso anterior.
Ahora solo debemos copiar el enlace que nos aparece en la barra de direcciones del navegador que estemos utilizando, yo en este caso estoy haciendo uso de google chrome.

8️⃣ Nos dirijimos a la barra de direcciones, seleccionamos todo de principio a fin, yo lo he hecho dando 2 veces clic seguidas, por lo general es un truco que funciona, pero asegurate de que aparezca sombreado todo completo y por último botón derecho del ratón y copiar ó cortar, la que tú prefieras.
Esa dirección es la que debes colocar en tu artículo, para indicar que es libre de derecho y los curadores puedan ir más rápido con la verificación.
Ahora si hasta aquí mi post, espero les haya sido de utilidad y haberles ayudado con la duda de cómo sacar la fuente de una imagen de canva.
Bienvenidos sean los comentarios ✍️ al final de este artículo
🔺

🔻

Hello Hivers! 👋
Today I want to show you how you can obtain the source of the image or even a video, with the canva program. This will be a fairly short tutorial, very easy and has a difficulty of 1/10.
It is very important that we always place this information in all our posts, I see that many people place that it has been created using the free resources of canva, but if we can place the font in the way that I am going to explain, we will help the curators, to be able to verify that the image used, we can use it and it does not have copyright.
Thanks to my friend @frankches, the need to talk about this topic arose, in one of our live healing meetings, I tried to explain how it was done through some images, but nothing better than a good video to explain the step by step. For example, I consider that I am a very visual person and I like things explained to me well.
In the previous post, I have shown how you can create a free account, and I have also shown an alternative to create a premium account, you need to have a credit card, totally free for 30 days.
I'll leave the link at the end of this article, so you can check it out if you haven't already.
In any case, all the tutorials that I am going to do, I am going to develop them only using a completely free account, premium version, in this way we will all be on an equal footing.
➡️ Steps to follow:
1️⃣ The first step is to open canva and log in to it, so that we can use it, you can register with an email or by clicking on the gmail icon so that the registration is automatic and you do not have to put your name, surname, date of birth, It is very simple, if you have any difficulties, I remind you once again that below I will leave an access to the previous post.
If you have any doubts or questions let me know in the comments to help you.
2️⃣ Then we are going to create the design, we are going to select a template or we are going to create custom dimensions, I have used dimensions of 600 pixels wide by 200 pixels in height for the example.
3️⃣ Now we have to go to the applications, locate in the panel that is on the left side of the screen, at the bottom the icon called Apps and click on it 1 time.
A menu will open on the right side, locate the Photos option, you will see that later you will already have this shortcut added to the panel, you will not have to enter Apps again, so it will be much easier to access, from now on.
Now navigate through the options to see which image you like.
4️⃣ Drag the image, by clicking the left mouse button 🖱️ holding, onto the canvas and then release it, to use the resource.
In the image I leave you a small animation in case you have any questions about it.
5️⃣ Now go back to that image you dragged, not the one on the canvas, the original one that's still on the left side, that square thumbnail.
You must click on the upper right where you can see the three dots, with the left mouse click 🖱️ 1 only time.
6️⃣ After clicking, you will see that this window opens with information about the selected resource.
The trick is to click on the title of the photograph, it is possible that in some cases, instead of appearing as in the example "Person's Holds Brows Gift Box", "Untitled" appears instead.
Do not worry what name it has, you just have to click to access the original source.
7️⃣ Finally, it has taken us to this page, after clicking on the title, as I explained in the previous step.
Now we just have to copy the link that appears in the address bar of the browser we are using, in this case I am using google chrome.
8️⃣ We went to the address bar, we selected everything from beginning to end, I have done it by clicking 2 times in a row, it is usually a trick that works, but make sure that everything is shaded and finally the right mouse button and copy or cut, the one you prefer.
That address is the one you should place in your article, to indicate that it is free of law and the curators can go faster with the verification.
Now if my post is up to here, I hope it has been useful and has helped you with the question of how to get the source of a canva image.
Welcome are the comments ✍️ at the end of this article
Vídeos más vistos de mi canal 🔝🔥
Most watched videos of my channel 🔝🔥
 | @enfocate/lhcvuxcv |
 | @enfocate/wuesikdy |
 | @enfocate/mjjgixtf |
 | @enfocate/khzifmuq |
| @enfocate/blygrfvj | |
 | @enfocate/evqodbmf |
▫️ ▫️ ▫️ ▫️ 🔺 ▫️ ▫️ ▫️ ▫️

▶️ 3Speak