

Hola muy buenas! 👋 😀
Fuente: Logo de Hive
Hola muy buenas el día de hoy les traigo un tutorial en el cual quiero enseñarte, cómo puedes vectorizar una imagen haciendo uso del programa Adobe Photoshop, es posible que, si ya conoces el programa photopea, también puedes utilizarlo, ya que este software tiene casi todas las mismas herramientas. Sin embargo, quiero dejar claro, que solo voy a explicarte cómo hacerlo a través de Photoshop.
➡️ Este tutorial se ha realizado con fines educativos
Nota importante ⚠️
Antes de comenzar el tutorial, quiero que sepas que en este vídeo es solo para enseñarte a vectorizar.
⛔ No te da derecho este conocimiento de distribuir o dar uso de cualquier tipo de diseño que no sea creado por ti.
Solo te estoy enseñando un método de "vectorización manual", no me hago responsable por el uso que le den a esta herramienta. Queda de tu parte investigar y discernir, si puedes o no utilizarla según el fin que quieras.
Para usar Photoshop debes adquirir una licencia válida en la página oficial
Ahora sí vamos a comenzar, vamos a necesitar tener las siguientes cosas:
- Photoshop
- Imagen pequeña (en baja calidad preferiblemente)
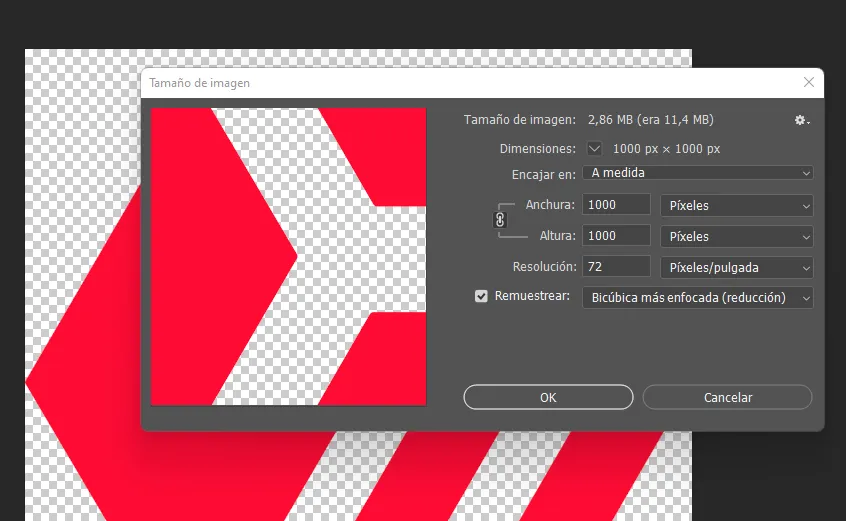
Una vez que ya tengas tu imagen abierta en el programa, vas a dirigirte en el menú superior, en el apartado imagen, ahora en el submenú tamaño de imagen y en este cuadro de diálogo vas a seleccionar el tamaño deseado, por ejemplo yo he utilizado una resolución de 300 sí quiero hacer una impresión en físico, pues establecer la resolución en 72 si solo quieres que se visualice la imagen en internet o a través de cualquier pantalla, en las dimensiones de ancho yo he establecido un valor de 1000 píxeles, puedes colocar el tamaño que quieras o ir probando diferentes tamaños y luego le das al botón "ok"
Ahora utilizar la herramienta lupa, o su atajo con el teclado con la letra Z, para que puedas ajustar el tamaño más cómodo para visualizarlo en pantalla, además puedes ayudarte tocando la barra espaciadora, si tocas está tecla verás en pantalla una manito en tu cursor, conecta Manu vas a poder mover la imagen de izquierda a derecha y de arriba abajo, para poder hacer un ajuste más fino.
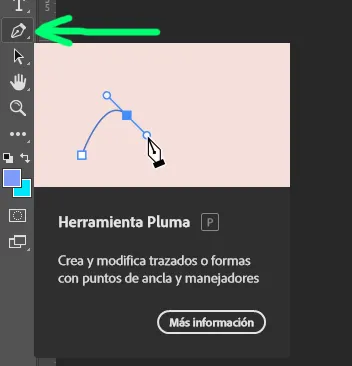
El tercer paso será ubicar la herramienta "pluma", que está ubicada en nuestra barra de herramientas del lado lateral, en la parte de abajo, para que puedas ubicar la más rápidamente te recojo utilizar la letra "P" en tu teclado, de esta manera no tendrás que ir mirando todos los iconos, hasta dar con el correcto.
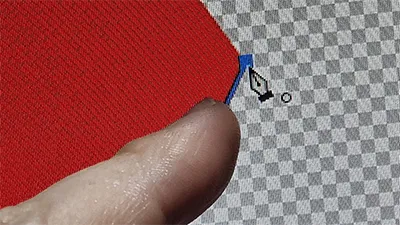
Una vez seleccionada la herramienta, vamos a ir haciendo clic en los extremos de nuestra imagen, elemento, gráfico o lo que decidamos vectorizar. Se trata de ir uniendo los puntos de una forma, hasta cerrarla, si no cerramos la forma, no podremos entonces darle un relleno.
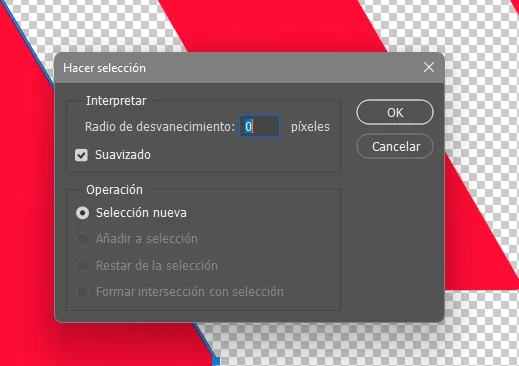
Una vez que terminamos de cerrar nuestra forma, damos clic derecho en el ratón, luego vamos al menú "hacer selección" en interpretar radio desvanecimiento lo establecemos en 0 píxeles y le damos al botón de "ok".
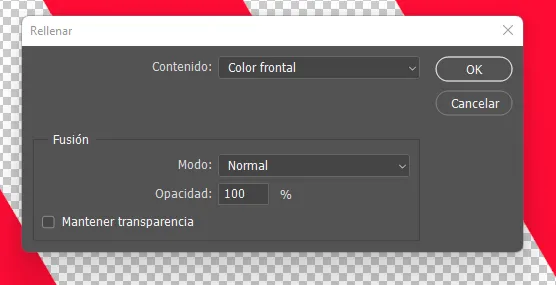
Ahora ya tenemos hecha en nuestra selección lo que nos falta es rellenar esa selección que tenemos, vamos al menú en la opción de edición, luego en el submenú rellenar, nos fijamos que tengamos en el apartado contenido el color frontal, de abajo fusión modo normal, en opacidad que esté establecido en 100% y la casilla mantener transparencia que no esté activada íbamos a dar clic en el botón ok.
Recuerda que la barra de herramientas, tienes los colores, debes verificar qué color está en el frontal y en el fondo, si se ha rellenado de un color incorrecto, modifica los colores en la barra de herramientas.
En resumen, vamos a ocupar la herramienta pluma, para crear los nodos y finalmente cerrar el trazado, luego nos queda rellenar la forma del color que quieras, esto puede ser útil para muchos casos, de hecho, puede que consigas ofertas de trabajos en internet donde busquen a una persona para vectorizar imágenes.
Muchas gracias por haber visto este tutorial, recuerda que puedes dejar tus comentarios en la parte de abajo ✍️

Hello hivers! 👋 😀
Source: Hive logo
Hello very good, today I bring you a tutorial in which I want to teach you, how you can vectorize an image using the Adobe Photoshop program, it is possible that, if you already know the photopea program, you can also use it, since this software has almost all the same tools. However, I want to make it clear that I am only going to explain how to do it through Photoshop.
➡️ This tutorial has been made for educational purposes
Important note ⚠️
Before starting the tutorial, I want you to know that this video is just to teach you how to vectorize.
⛔ This knowledge does not give you the right to distribute or make use of any type of design that is not created by you.
I am only teaching you a method of "manual vectorization", I am not responsible for the use that is given to this tool. It is up to you to investigate and discern whether or not you can use it according to the purpose you want.
To use Photoshop you must acquire a valid license on the official page
Now we are going to start, we are going to need to have the following things:
*Photoshop
- Small image (in low quality preferably)
Once you have your image open in the program, you are going to go to the top menu, in the image section, now in the image size submenu and in this dialog box you are going to select the desired size, for example I have used a resolution of 300 if I want to make a physical print, then set the resolution to 72 if you only want the image to be displayed on the internet or through any screen, in the width dimensions I have set a value of 1000 pixels, you can place the size you want or try different sizes and then click the "ok" button
Now use the magnifying glass tool, or its keyboard shortcut with the letter Z, so you can adjust the most comfortable size to view it on the screen, you can also help yourself by touching the space bar, if you touch this key you will see a little hand on your cursor on the screen , connect Manu you will be able to move the image from left to right and from top to bottom, in order to make a finer adjustment.
The third step will be to locate the "pen" tool, which is located in our toolbar on the side, at the bottom, so that you can locate the most quickly to use the letter "P" on your keyboard, in this way This way you will not have to go looking at all the icons, until you find the correct one.
Once the tool is selected, we are going to click on the ends of our image, element, graphic or whatever we decide to vectorize. It is about joining the points of a shape, until closing it, if we do not close the shape, then we will not be able to give it a fill.
Once we finish closing our shape, we right click on the mouse, then we go to the "make selection" menu in interpret fade radius, we set it to 0 pixels and we click the "ok" button.
Now we have made our selection, what we need is to fill in that selection that we have, we go to the menu in the editing option, then in the fill submenu, we check that we have the front color in the content section, below fusion normal mode , in opacity that is set to 100% and the box to maintain transparency that is not activated we were going to click on the ok button.
Remember that the toolbar, you have the colors, you must verify what color is in the front and in the background, if it has been filled with an incorrect color, modify the colors in the toolbar.
In summary, we are going to use the pen tool, to create the nodes and finally close the path, then we have to fill the shape with the color you want, this can be useful for many cases, in fact, you may get job offers on the internet where they look for a person to vectorize images.
Thank you very much for having seen this tutorial, remember that you can leave your comments at the bottom ✍️
Vídeos más vistos de mi canal 🔝🔥
Most watched videos of my channel 🔝🔥
 | @enfocate/vwrtgbti |
 | @enfocate/yamhzxyy |
 | @enfocate/feterveh |
 | @enfocate/lhcvuxcv |
 | @enfocate/wuesikdy |
 | @enfocate/mjjgixtf |
 | @enfocate/khzifmuq |
▫️ ▫️ ▫️ ▫️ 🔺 ▫️ ▫️ ▫️ ▫️
▶️ 3Speak