Big shout out to the community HiveGarden today with a new contribution to #gardenjournal. On this occasion I want to share with you one of my favorite crops and the one that has given me a lot of satisfaction, is the "Onion, I really like this crop very much, although you have to wait 4 and a half months to harvest, but still, it's worth it. What amuses me the most about this crop, is the time of transplanting, I like to get into the furrows to sow. Generally I like to plant the white onion 436, which is semi-round or the Texas Onion Grain 502 That is similar, this class of onions are very resistant to climatic changes, especially to the impacts of rain.
In truth, what makes the onion cultivation long is because it is done by transplantation, which means that it is necessary to make the seedlings for the production of the seedlings, the germination time of the seeds is 5 to 8 days, But then you have to wait 50 days, so that the seedlings are optimal for transplanting, well friends, at this moment I particularly wait for the transplant, perhaps other farmers will do it differently. Next I will explain everything about the cultivation of onions by transplantation, with the system of irrigation by gravity through furrows.
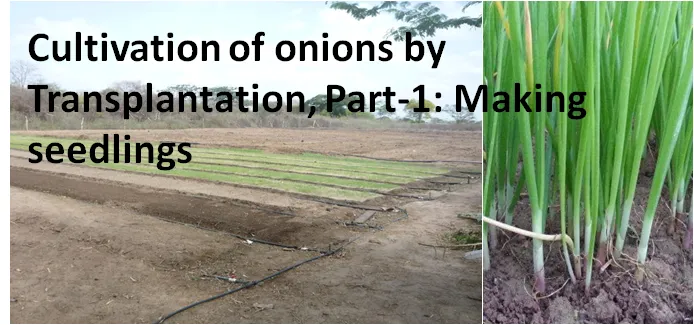
Cultivation of onions by transplantation, Part-1: Making seedlings
The cultivation of onions is typical by transplant, I mean the type of large-scale cultivation, but if it is to be done in a small garden or in pots, the seeds are sown directly into the ground. The advantage of transplanting is that you know how many plants you have planted, which allows you to make the estimates for when the harvest arrives. So the cultivation of onions begins with the preparation of seedlings for the production of seedlings.
How to get onion seeds
Onion seeds can be purchased in agricultural stores or from our own crops, many farmers at the time of harvest, leave some plants to continue with their vegetative cycle, until flowering and the rennet of the seeds, of this way, they get their seeds for the next crops.
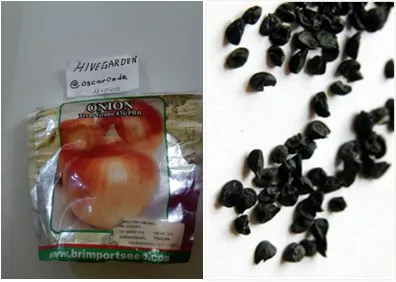
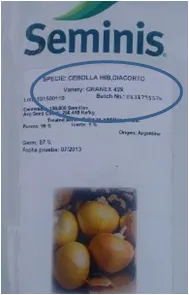
The quality of the seeds
This is important, we must use quality seeds that guarantee good performance. We must also take into account the climate and the hours of sunshine where they are going to be sown, there are crops that grow in long days, others in short days, that is, if we grow a kind of long onion day, in an environment with less After 6 hours of sun, the safest thing is that the plants will not develop well, and consequently the production will be low, so I recommend that before buying the seeds, make sure you buy the ideal ones for your land, in terms of the hours of sunshine. (Long-day, short-day and intermediate-day seeds)
The ideal soils for growing onions
Onions develop well in sandy-loam soils, with enough organic matter, it is also important to choose land with few slopes, to avoid erosion due to the speed of rainwater, since onions have short roots and with erosion they fall.
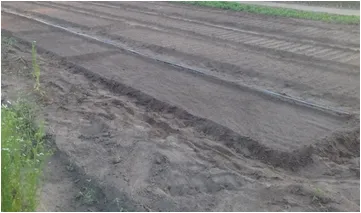
Preparation of seedbeds for the production of seedlings
As I said at the beginning, the cultivation of onions is typical of transplantation, for this reason it is necessary to make the seedbeds. The seedbeds are made on raised beds, 1 meter wide and at a height of 15 centimeters above ground level, in these beds the seeds are deposited broadcast or trickle, it is important to choose a good irrigation system that guarantees coverage of the seedbed area.
How to make the beds for onion seedlings:
As I said, once the land has been plowed, we make the beds where we are going to deposit the seeds, we will do this as follows:
First we place in the area of the land, two nylon threads in parallel, with a separation of one meter, which will be the width of the bed, generally the beds are made one meter wide, to facilitate manual cleaning tasks.
After placing the nylon, we begin to raise the beds to a height of 15 cm, this task is done manually with the use of the hoe or scaffold, the height is achieved by digging on both sides of the bed and by the same swelling of the earth moving it.
It is important that the surface of the bed is well leveled and free of clods, leaves or stones, for this we proceed to rake the entire area of the bed and then we pass a wooden ruler.
Now we make a small raised edge to the beds, this is done to strengthen the banks, and thus prevent any stream of irrigation water from slipping out and causing erosion.
Distribution of the seeds on the beds:
This work is done in two ways: hand-scattered emission (voleo) and trickle in rows
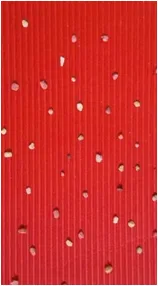
The distribution by "manual emission (broadcast)": It consists of throwing the seeds with the hand on the bed of the seedbed, for this it is important to collect few seeds, so that they do not get out of our hands , another detail, we must drop the seeds at a height of 30 centimeters, in this way we will make the distribution better and also prevent the wind from dragging them out of the bed. For each square meter of bed, 8 grams of seeds are needed, for a density of: 2000 seedlings per m2. In this method, experience is important, because you have to release the seeds little by little so that they do not stick, although it is difficult to prevent some from coming together, but you have to try to keep them separate.
Example image:
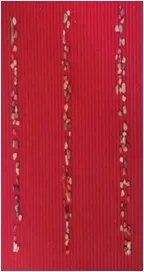
Seed distribution method "by jets in rows":
This distribution method consists of placing the seeds grouped in rows on the bed, with a separation of 10 cm between each row. Actually, I don't use this method very much, because this requires a lot of space and time. For each square meter, 4 grams of seeds are required.
Example image:
Procedure to cover the seeds after distribution:
This is another super important task, because the success of germination will depend on the ease with which the plants sprout, for this reason we must cover the seeds with a light material, such as sifted sand, river sand, rice husks, in addition to this, the thickness of the layer should not exceed 1 centimeter.
From my experience, I recommend not covering the seeds too much, so as not to have problems with germination. I tell you that once I made some seedbeds of onions, I was in charge of distributing the seeds and a friend was in charge of covering them, after 8 days 70% had germinated, for me it was something strange, because there were some spaces without seedlings, then I began to remove the layer of material that we used, where I could observe that some seeds had the cotyledon rod stuck between the earth, because they were covered with a lot of earth, well friends, they manage to come out but very stretched, so we have to avoid it.
The irrigation system for onion seedlings
It is very important to choose a good irrigation system, which is capable of covering the entire area of the seedbeds, in previous publications, related to chives, I talked about irrigation by micro-perforated hoses, this system is that I use for my seedbeds Because the water falls in the form of a drizzle, with very small drops that do not reveal the seeds, you can choose another irrigation system, but make sure that it covers the entire area of the seedbeds. It covers the entire area.

Germination time of onion seeds
The seeds in optimal conditions, germinate between 6 to 8 days.
Seedbed care, before and after germination
Once the seeds are placed in the beds, the important thing is to keep the soil moist, so that the seeds germinate satisfactorily, we must avoid excess water.
It is important to keep the seedbeds free of weeds. Cleaning work should start from the first moment when they observe any weeds.
Check the seedbeds every day to detect any stem cutter insects in time, if possible, check them at night, because many insects such as ants come out at night.
Fertilization plan:
The contribution of nutrients is part of the care of the seedlings once they germinate, I will recommend the following fertilization plan:
From 10 days after germination, fumigate with compost based on worm humus, we will do this every week until 50 days.
15 days after germination, apply foliar fertilizer with high phosphorus content (P) for rooting, we can apply it with the sprinkler, mixed with the mancozobet fungicide.
20 days after germination, apply foliar fertilizer formula N-P-K 10-52-00 and mancozobet
At 30 days after germination, apply foliar fertilizer complete formula N-P-K, and mancozobet, remember that the worm humus will be applied until the 50th day.
At 40 days, apply foliar fertilizer complete formula N-P-K with micro-nutrients mixed with sulfur-based fungicide, this is the last fertilization in the seedbeds.
_ RECOMMENDATIONS: In case you observe the presence of any pest or insects in the seedbeds, apply a mild Pyrethroid-based insecticide,
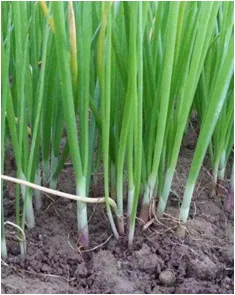
Seedlings suitable for transplantation:
Seedlings should be ready for transplanting in 50 days. which is the time where they should have reached the height between 12 and 15 centimeters, and also, with the stem with a thickness of 8 to 10 millimeters.
Well friends, I hope that this information has been of great use to you, and remember that the success of any crop is in the seedbeds, because that is where we are going to produce the plants, if we produce healthy and vigorous plants, we will have a crop to give us. good returns. Greetings and see you in the second part of this interesting onion crop, God bless you.