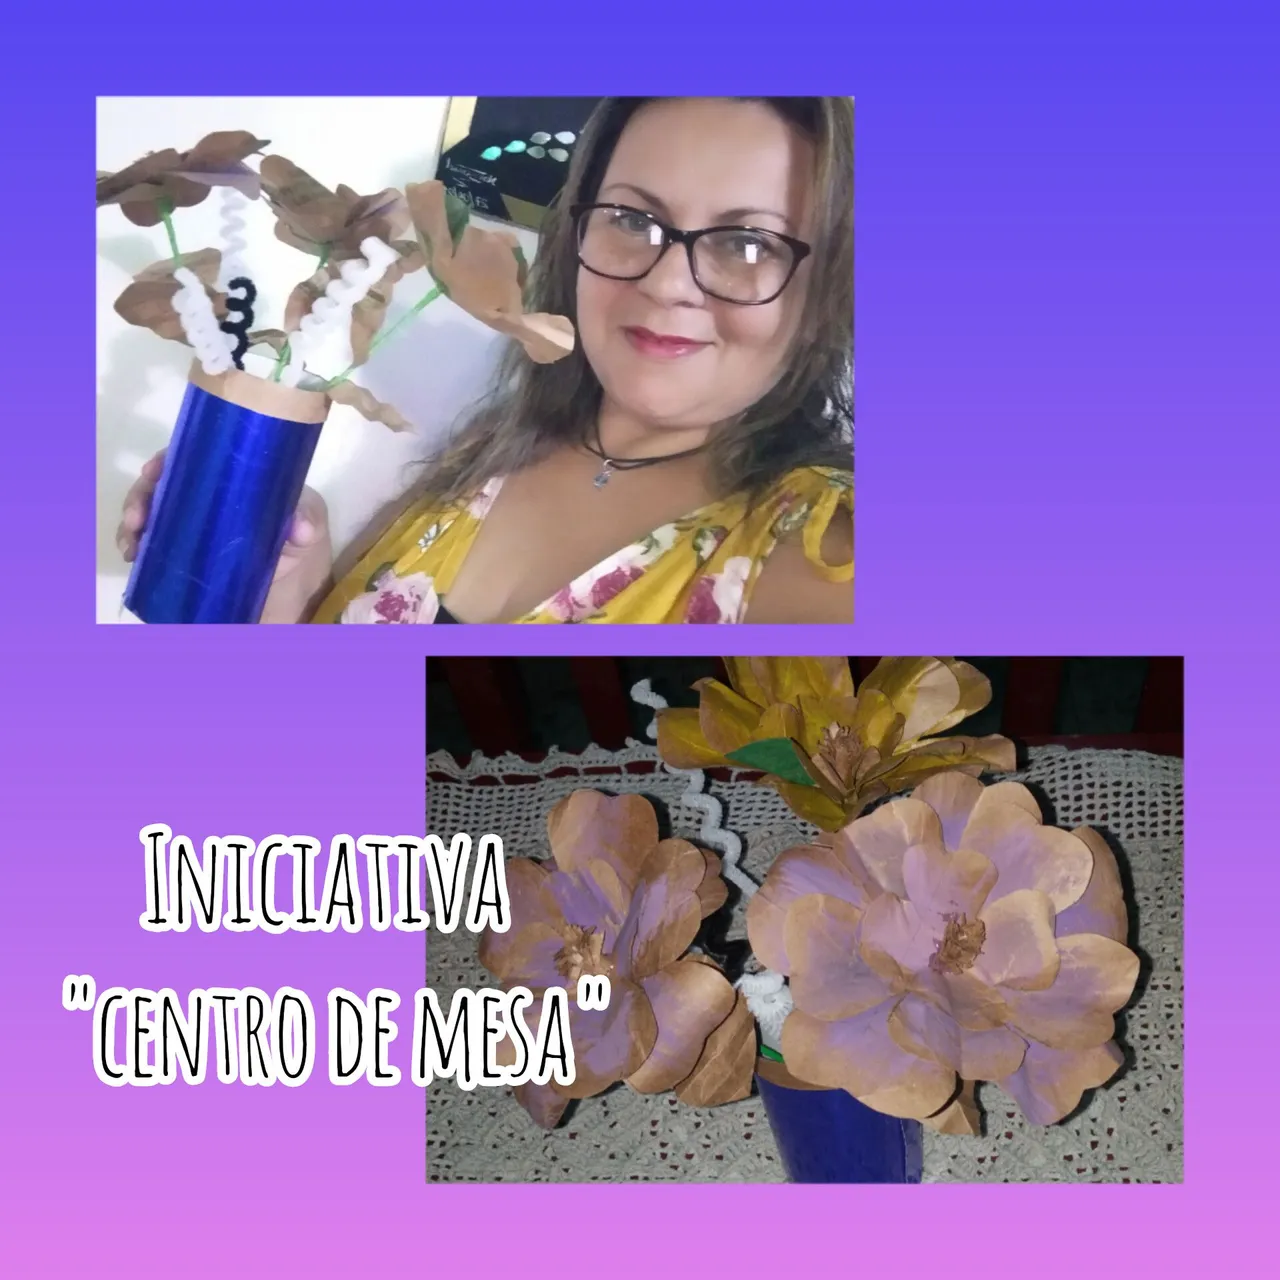
Blessed start to the week, to everyone at @womentrible. What a pleasure to be sharing with you again, this time, to show my participation. In this great idea from @chacald.dcymt, to create a centerpiece. I will show you how to make a centerpiece, with recyclable and useful material, super easy to make, inspired by that great day that I look forward to, to give it to mom, she was my inspiration since she marvels when she sees a lake created with material recyclable, you can't imagine how he looks at them, he always says something like this, "with that, you can create this, people do invent" it makes me laugh every time he says it. Well, my mother is a lover of centerpieces, and the nightstand in her room has nothing but pills and creams, now she will have a delicate floral arrangement made of things that I will surely have to explain to her. I invite you to follow me and you will see, but not before inviting @jorgelist and @linita.//
Bendecido inicio de semana, para todos en @womentrible. Que gusto estar de nuevo compartiendo con ustedes, en esta oportunidad, para mostrar mí participación. En esta gran idea de @chacald.dcymt, para, crear un centro de mesa. Les mostraré cómo realizar un centro de mesa, con material reciclable y de provecho, súper fácil de hacer, inspirado en ese gran día que con ansias espero, para regalarlo a mamá, ella fue mi inspiración ya que se maravilla cuando ve lago creado con material reciclable, no pueden imaginar cómo los observa, siempre dice algo como esto, "con eso, se puede crear esto, la gente si inventa" me da risa cada vez que lo dice. Bueno mi madre es amante a los centro de mesa, y justo la mesita de noche de su cuarto no tiene más que pastillas y cremas, ahora tendrá un delicado arreglo floral hecho de cosas que seguro le tendré que explicar. Les invito a seguirme y verán, no sin antes invitar a @jorgelist y a @linita.
Materials/ Materiales
craft paper
. Hot glue.
. Cold painting, colors (purple and yellow)
. brush.
. height chopsticks
. Crepe paper, green
. Scissors
. Cardboard
. Plastic cup
. Blue metallic cardboard.
. rule to mark
. Flower molds, different sizes.
. Clean pipes, colors (black and white).//
. Papel craf
. Pegamento caliente.
. Pintura al frío, colores (morado y amarillo)
. Pincen.
. Palillos de altura
. Papel crepé, color verde
. Tijeras
. Cartón
. Vaso plástico
. Cartulina metalizada en color azul.
. Regla para marcar
. Moldes de flores, diferentes tamaños.
. Limpia pipas, colores (negro y blanco).
.

Step/Pasos
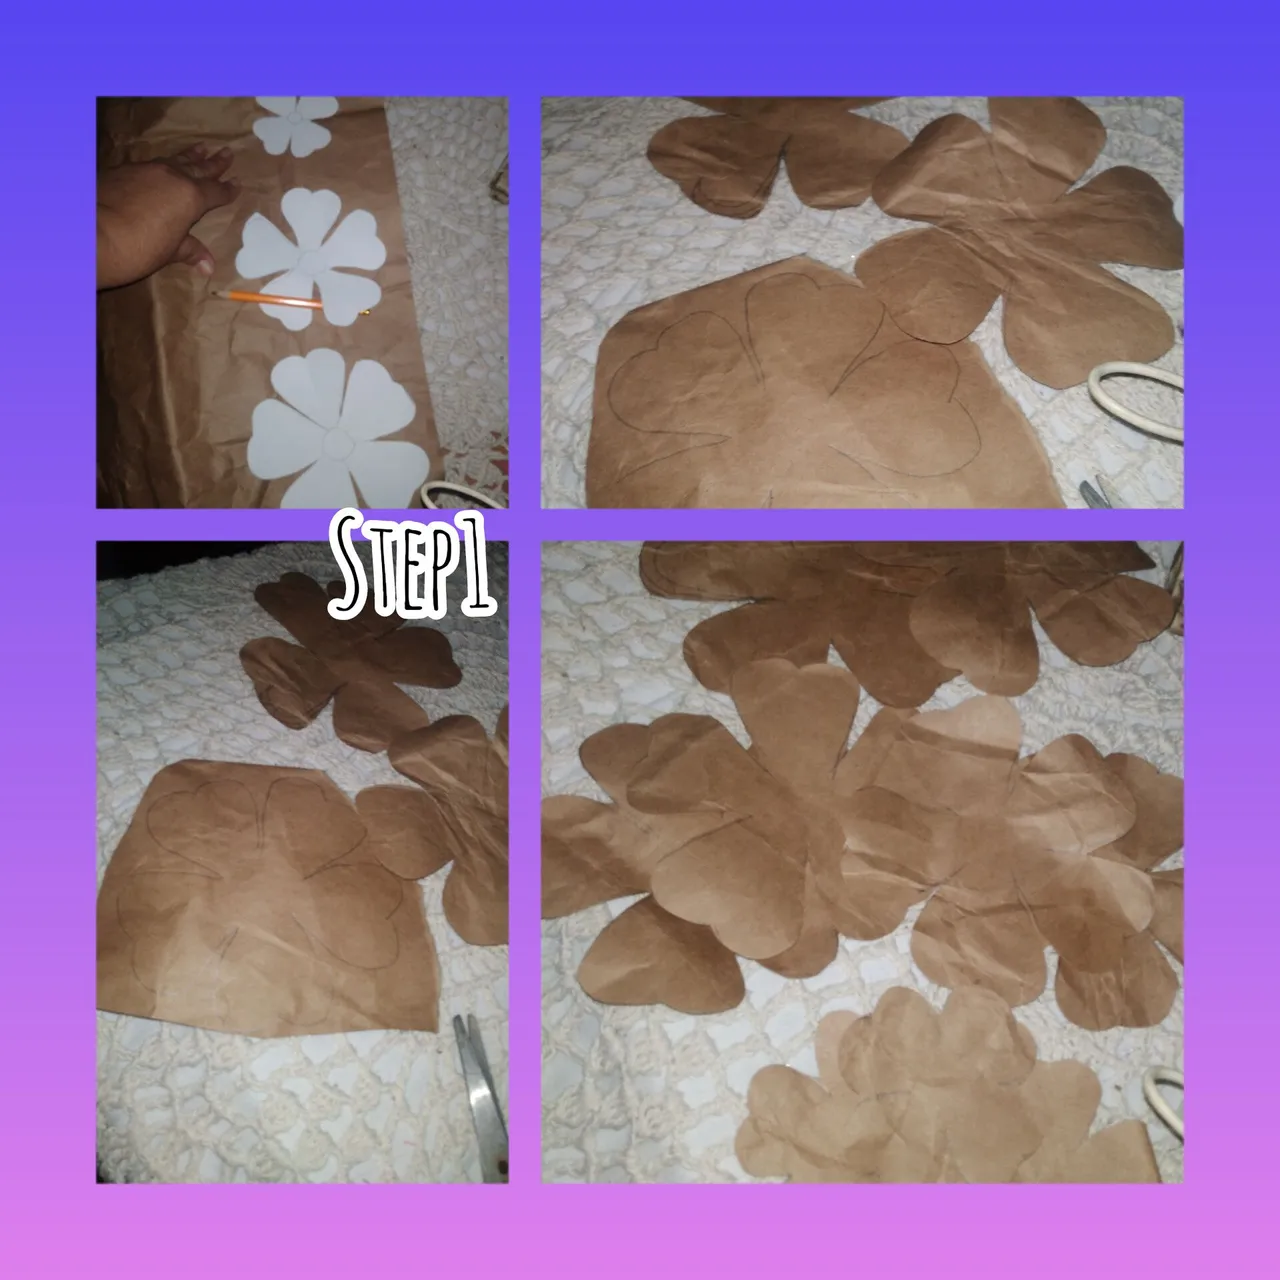
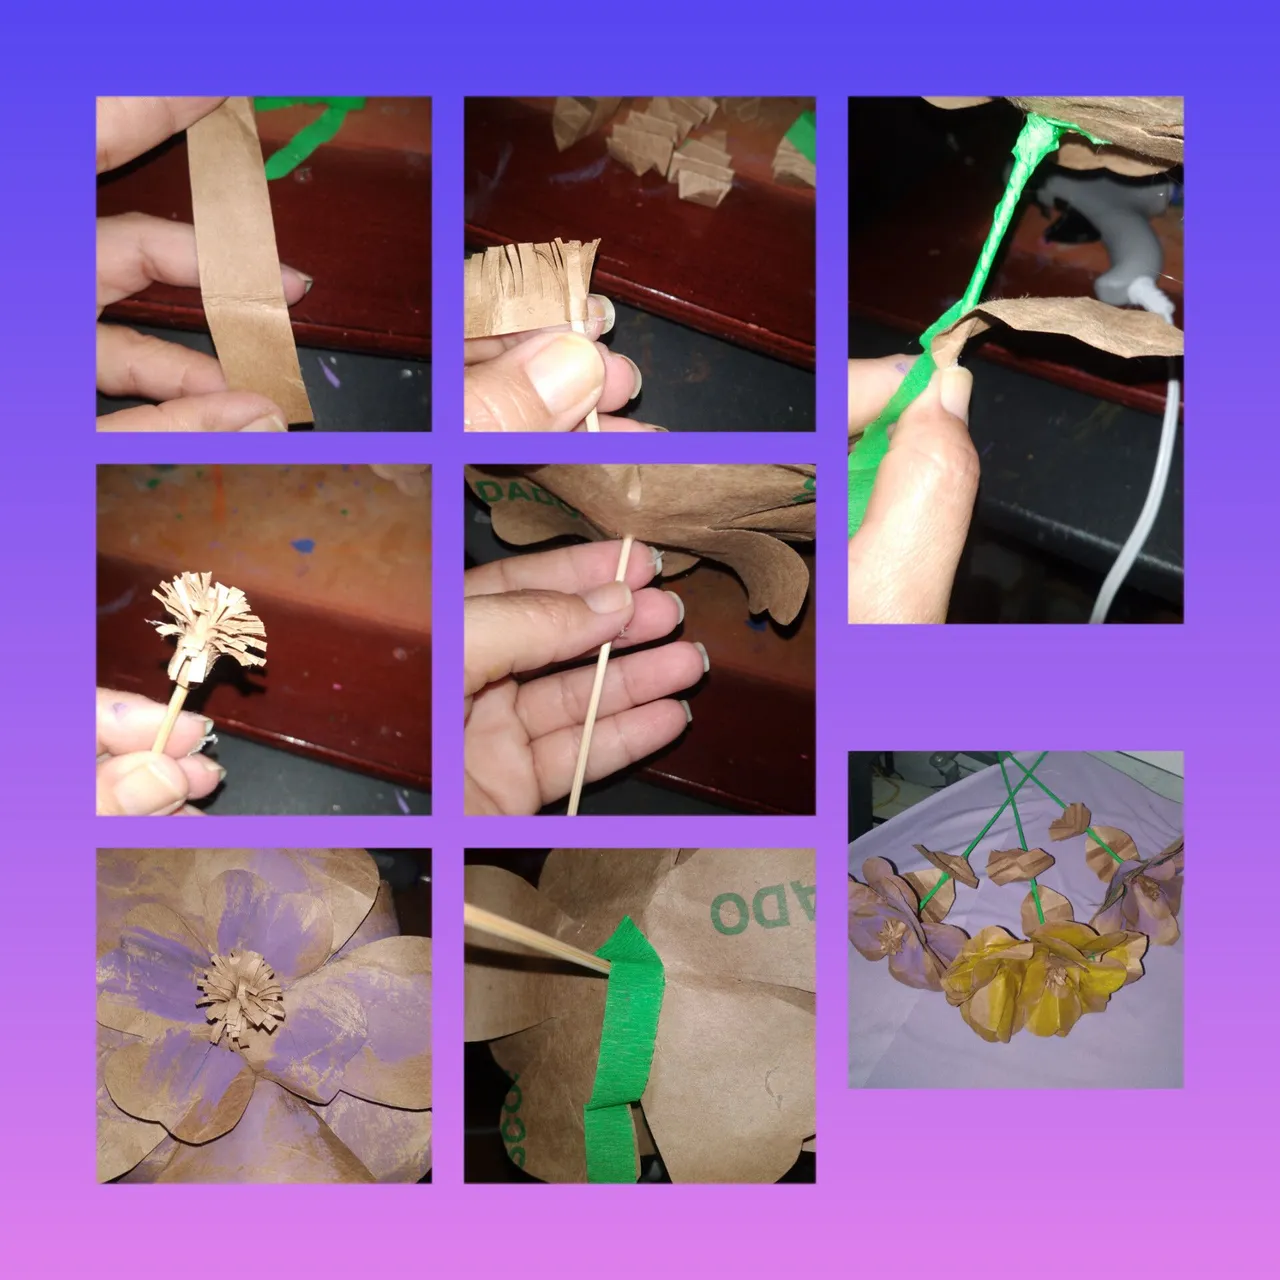
1.) Using the flower molds of different sizes, I marked with the pencil on the craf paper, after this I cut out with the scissors. This time, since it is a small arrangement, I will make only three flowers, each one consisting of three flowers of different sizes. In other words, I will mark three groups of flowers of different sizes and cut them out with scissors.
1.) Usando los moldes de flores de diferentes tamaños, marco con el lápiz sobre el papel craf, luego de esto recortó con las tijeras. En esta oportunidad, cómo se trata de un arreglo pequeño, haré solo tres flores, cada una de ella, consta de tres flores de diferentes tamaño.Es decir marcare tres grupos de flores de diferentes tamaño y recortare con las tijeras.
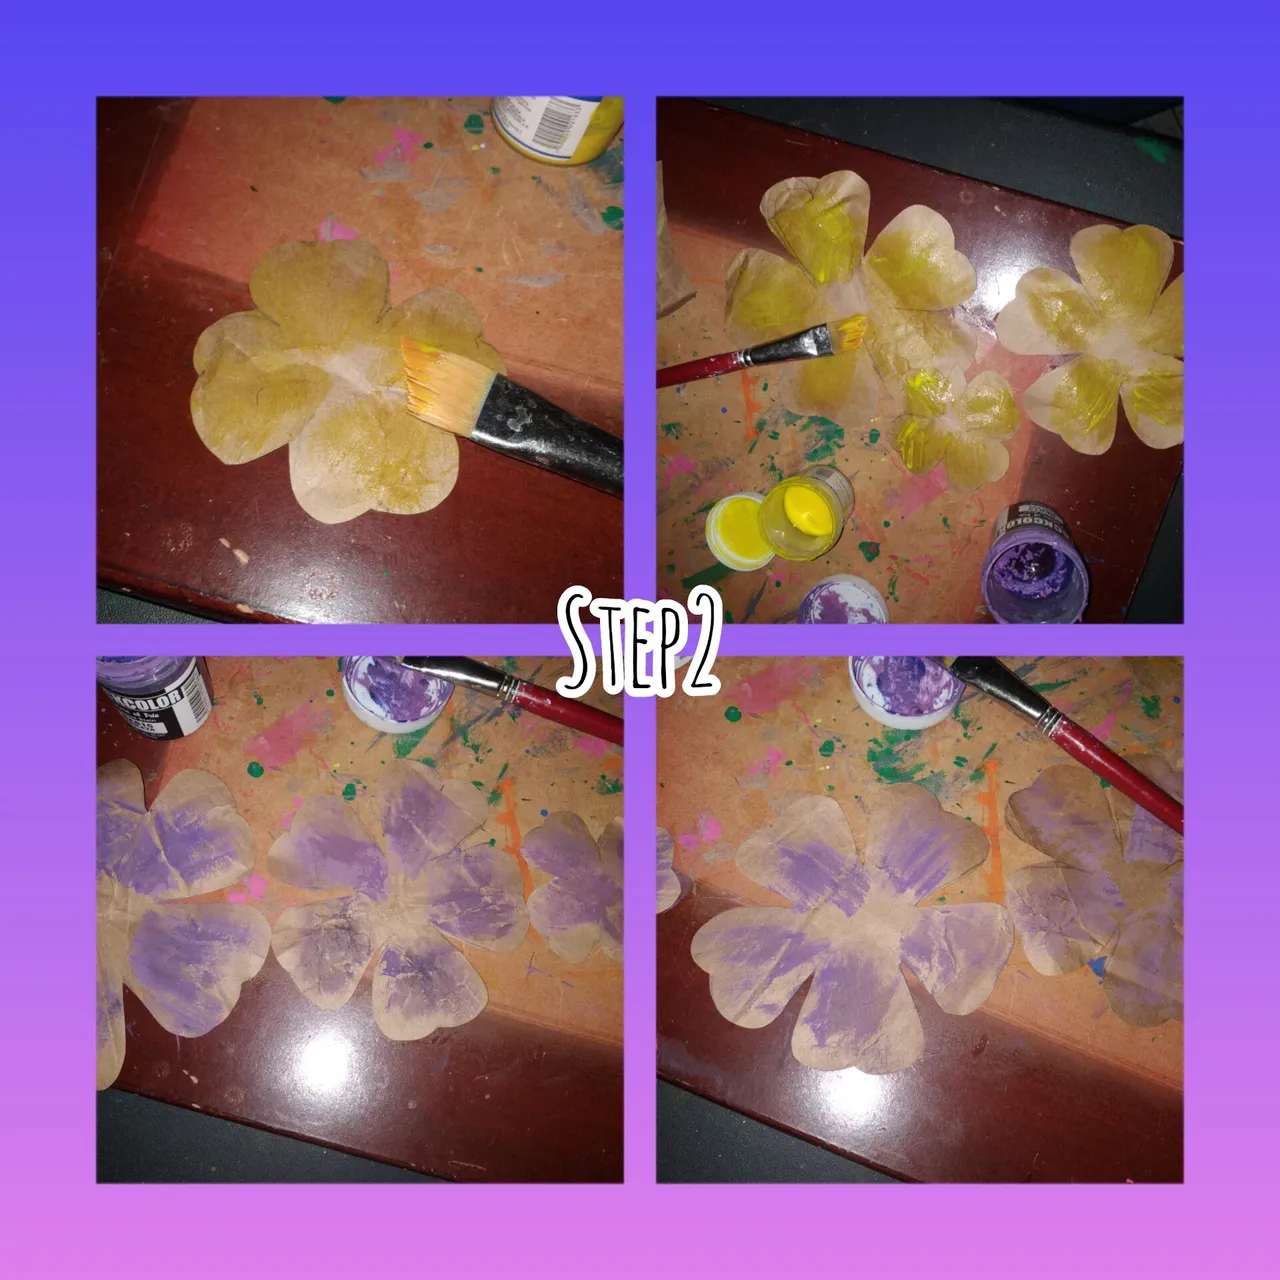
2.) Using the brush, make strokes on the flowers, I will do this from the inside of the flower to the outside, making soft movements. I will repeat in all, maintaining the harmony between colors, I must brush two groups using the purple paint tone and one yellow. I let the paint dry for the necessary time.
2.) Usando el pincel, pare pinceladas a las flores, esto lo haré de dentro de la flor a afuera, haciendo movimientos suaves. Repetire en todas, manteniendo la armonía entre colores, debo pincelar dos grupos usando el tono de pintura morada y uno de color amarillo. Dejo secar la pintura por el tiempo necesario.
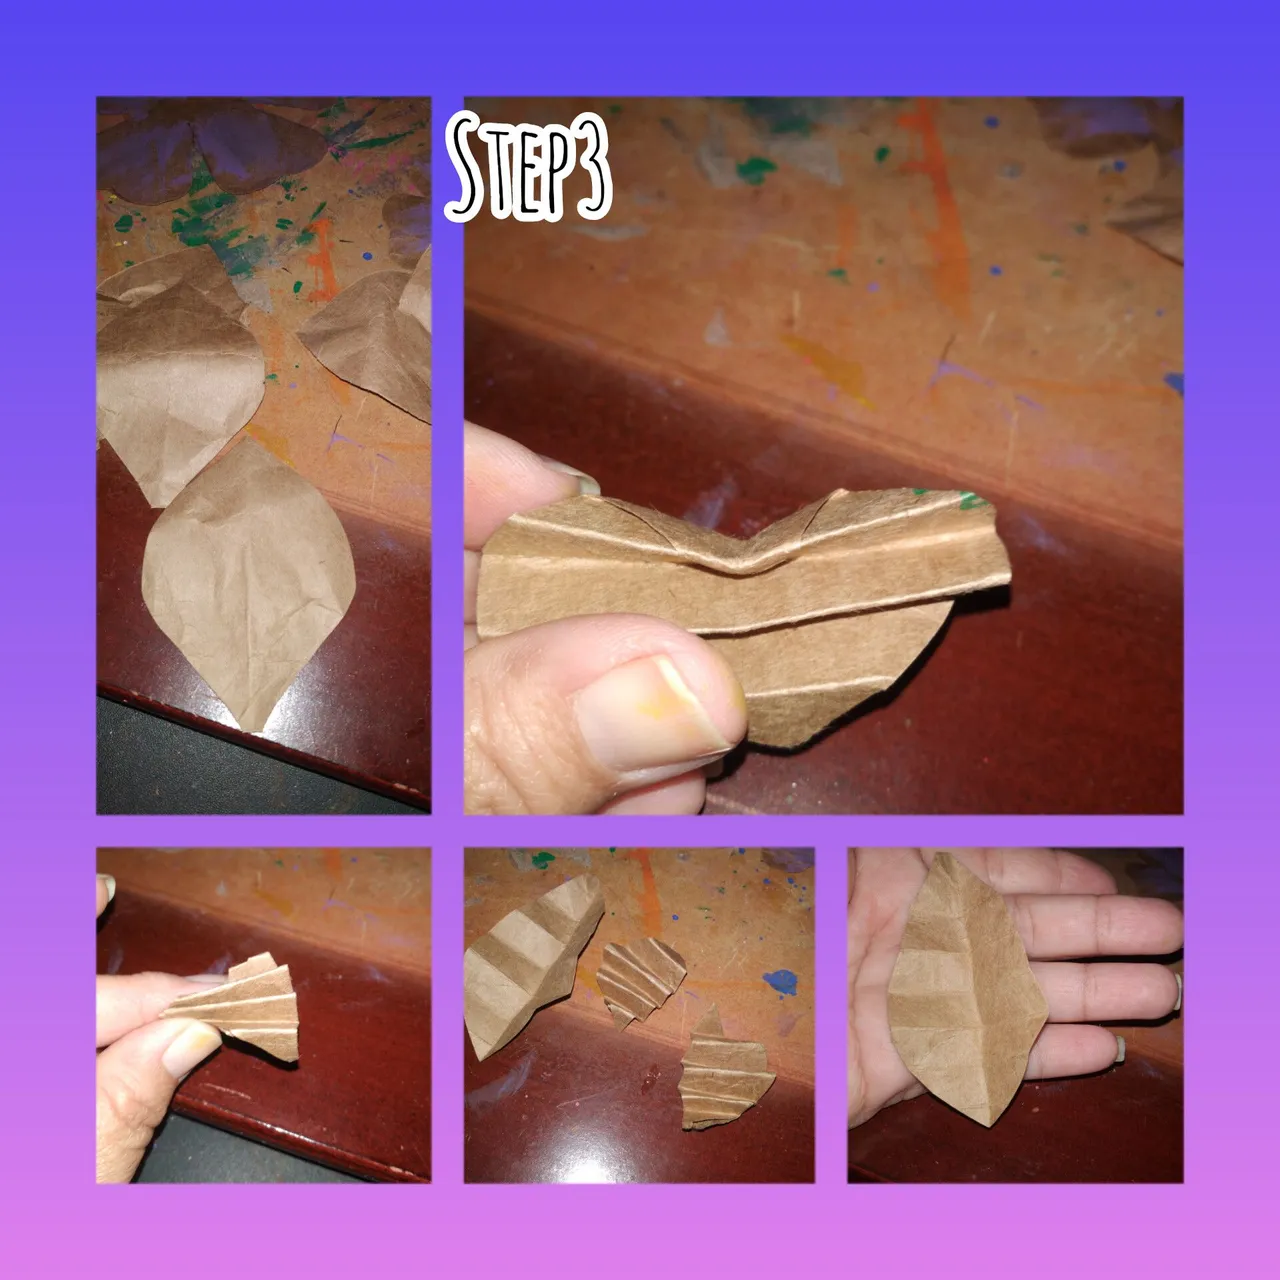
3.) On the crafs paper, I frame and cut small leaves, after cutting, I apply the origami technique, to give fluted shapes and I dot the edge with scissors. I make a total of six leaves, two for each flower.
3.) Sobre el papel crafs, marco y recortó pequeñas hojas, luego de recortar, aplico la técnica origami, para dar formas acanaladas y espunteo con las tijeras el borde. Hago un total de seis hojas, dos para cada flor.
4.) I mark a small strip of crafs paper, 3cm wide by 10 long, and with the scissors I make cuts on one side to make bangs, I put glue on one of the ends of the height stick and eating to give turns, until all the bangs are rolled up, silicone stitches should be added so that it is well fixed when turning. I choose the square part on purpose, and I left the tip, to facilitate the following process. I apply silicone to the flowers of the descending flower, I put glue on the lower part of the bangs, and I perforated the group of flowers, I put more glue so that they are well glued. I continue, cutting a small list of crepel paper and applying glue, I will cover the height toothpick and also place two leaves. In this same way. I will do the other flowers.
4.) Marco una pequeña tira de papel crafs de, 3cm de ancho por 10de largo, y con la tijera hago cortes en uno de los lados para hacer flequillos, pongo pegamento en una de las puntas de el palillo de altura y comiendo a dar vueltas, hasta tener todo el flequillo enrollado, se debe ir poniendo puntadas de silicón para que quede bien fijado al dar las vueltas. Yo escojo a propósito la parte cuatrada, y dejé la punta,para facilitar el siguiente proceso. Aplico silicón a las flores de florma desendiente, pongo pegamento en la parte inferior de el flequillo,y perforó el grupo de flores, pongo más pegamento para que estás queden, bien pegadas. Continúo, cortando un pequeño listos de papel crepel y aplicando pegamento iré cubriendo el palillo de altura y coloco además dos hojas . De esta misma forma. Haré las demás flores.
Noticias
Gratis
Google
Camara fotografica
Audio
Diccionario
App
Perfecto
Descargar
Escaner
Libros
Imágenes
Videos
Maps
Shopping
Vuelos
Finanzas
Todos los filtros
Español
Inglés
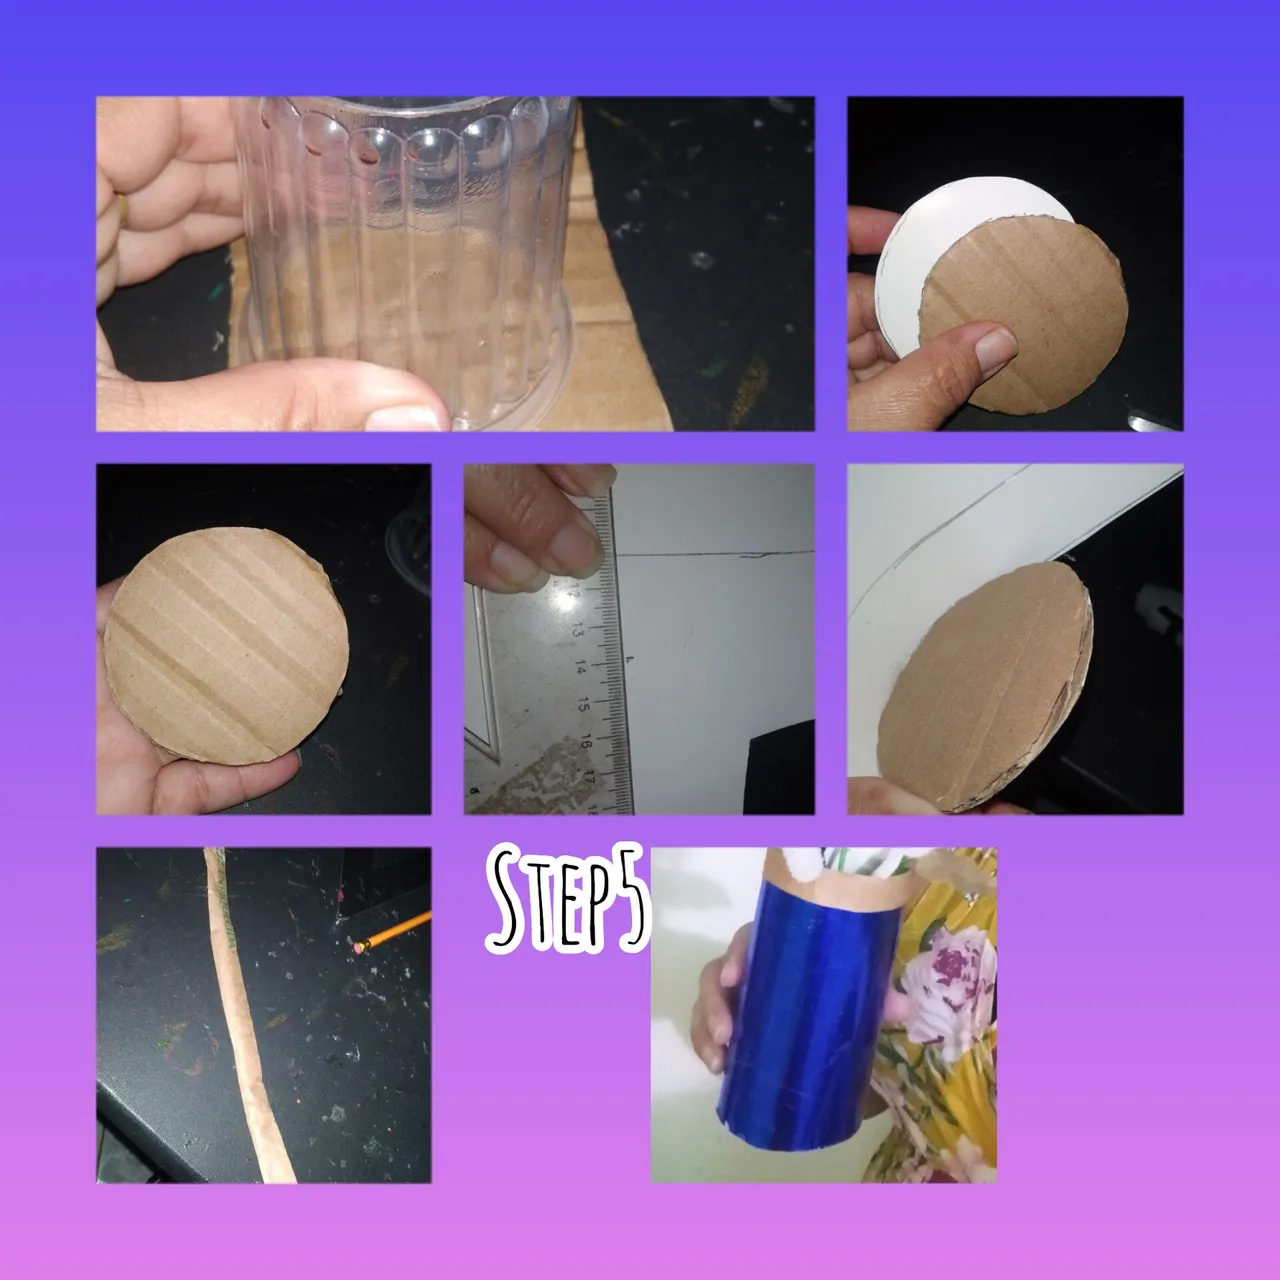
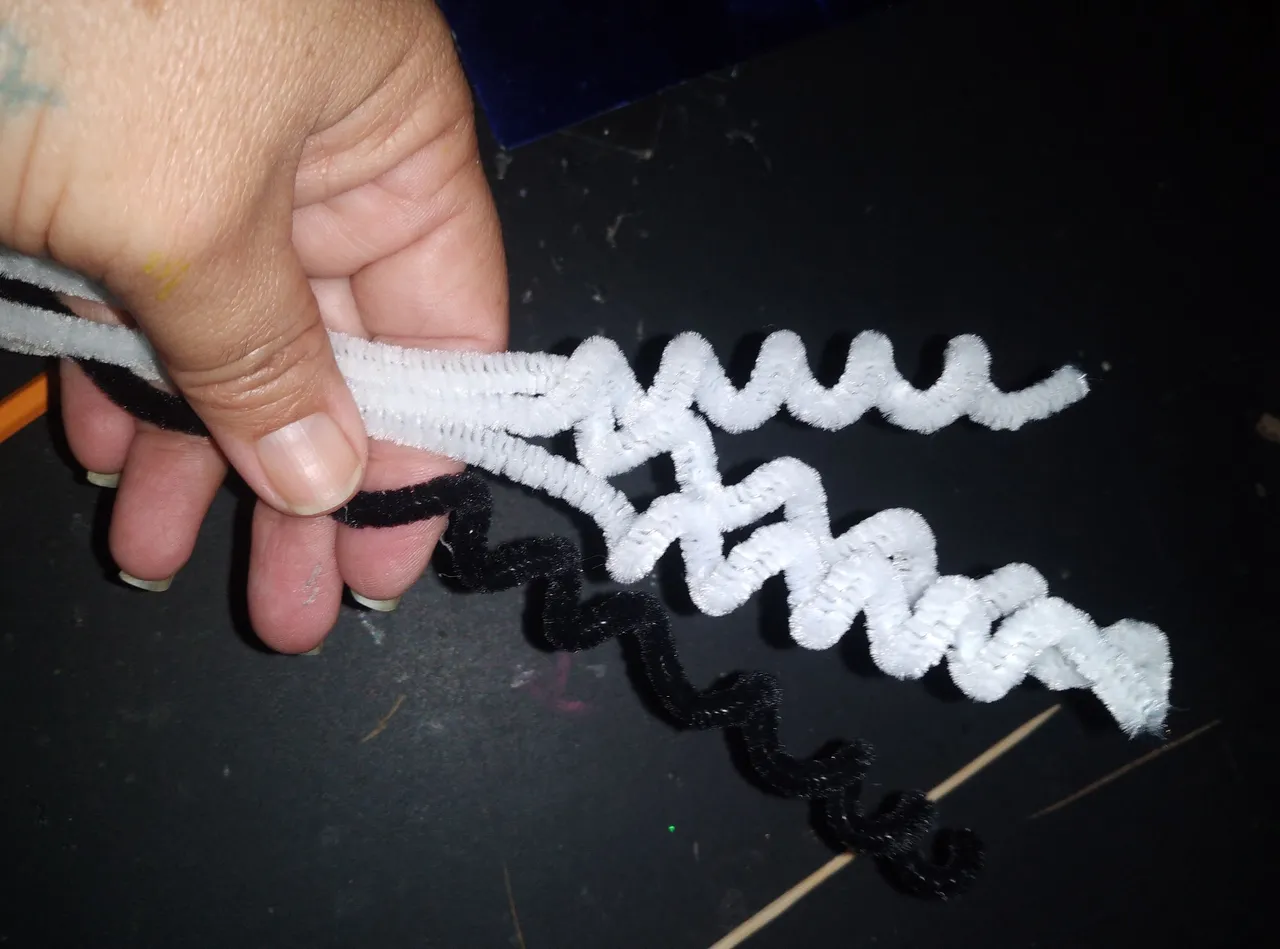
5.) Marco la parte superior de el vaso, sobre el marcon y recortó, guiandome de este círculo, marco y pego cartulina, en uno de los lados, luego marco y. Corto 14cm de ancho y 20 de largo en cartulina, aplicando silicón iré pegando por el alrededor de el círculo de cartón, de esta manera logro hacer un pequeño y delicado cilindro de un vistoso color azul brillante,corlo un listón de papel craf, y pego en la parte superior de el cilindro. Y para terminas con ayuda de el lápiz, doy vueltas a la mitad de un limpia pipas y formó un pequeño espiral. Así repito a los dos siguientes.
5.) I mark the upper part of the glass, on the marcon and cut out, guiding me from this circle, I mark and paste cardboard, on one of the sides, then I mark and. I cut 14 cm wide and 20 cm long in cardboard, applying silicone I will glue around the cardboard circle, in this way I manage to make a small and delicate cylinder of a bright blue colour, I cut a ribbon of craft paper, and paste at the top of the cylinder. And to finish with the help of the pencil, I turn half of a pipe cleaner and it formed a small spiral. So I repeat the next two.
5.) Marco la parte superior de el vaso, sobre el marcon y recortó, guiandome de este círculo, marco y pego cartulina, en uno de los lados, luego marco y. Corto 14cm de ancho y 20 de largo en cartulina, aplicando silicón iré pegando por el alrededor de el círculo de cartón, de esta manera logro hacer un pequeño y delicado cilindro de un vistoso color azul brillante,corlo un listón de papel craf, y pego en la parte superior de el cilindro. Y para terminas con ayuda de el lápiz, doy vueltas a la mitad de un limpia pipas y formó un pequeño espiral. Así repito a los dos siguientes.
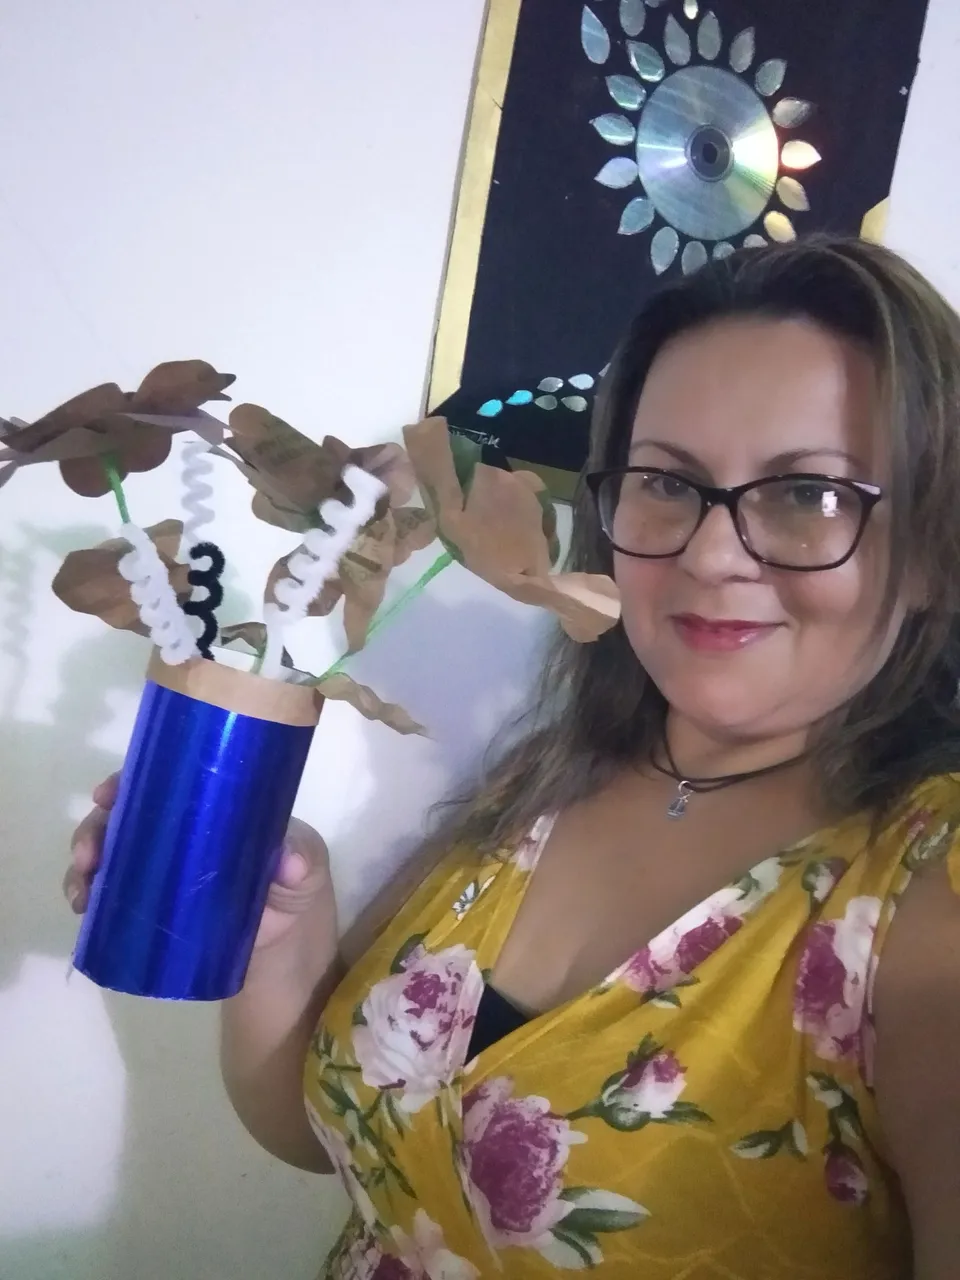
This is how the finished project looks, looking forward to the day, to use it as a decoration for mom's night table, with other gifts that I will give her. You will surely like it a lot. they enjoyed it.//
De esta forma luce el proyecto terminado, esperando con ansias el día, para usarlo como decoración de la mesa de noche de mamá, con otros regalos que le hare. De seguro le gustará mucho. lo hayan disfrutado.
The photos have been taken by my smartphone.
. Use InShot
.use Google translate.
Grateful you have followed me to the end, it will be until a soon opportunity, they are loved.//
. Las fotos han Sido tomadas por mi teléfono inteligente.
. Use InShot
.use traductor Google.
Agradecida me hayas seguido hasta el final, será hasta una pronta oportunidad, se les quiere