🔴PRACTICA A LAPICERO ⚫ESPALDA⚫
⚫BY MAJO⚫
🔻
🔻
🔻
🔻
🔻
🔻
🔻
🔻
🔻
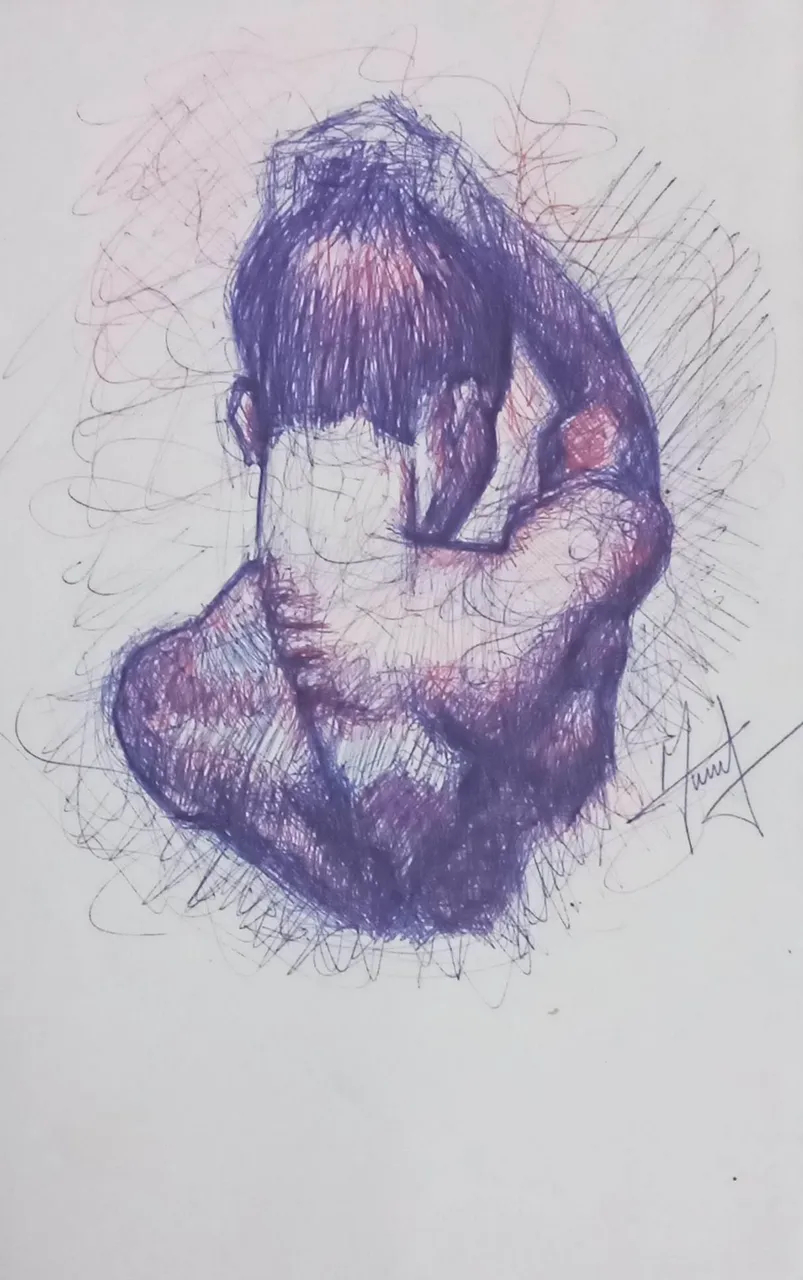
🔴Hola! un saludo a todos, les traigo otro trabajo a lapicero el cual es lo que estoy poniendo en practica para mejorar mi trazo y dibujar más rapido a la hora de hacer el boceto que era lo que me tardaba mas.
🔴Simplemente utilice el azul y el rojo, no se precian muy bien por la camara pero se puede distinguir un poco de ambos, estas practicas me gustan mucho ya que se puede observar el trazo lo cual es muy diferente al difuminado pero no deja de ser una tecnica muy buena y es la que mas uso tambien.
🔴Cada parte de la espalda de la modelo tienen lineas contrarias para asi distinguirlas y me gusta mucho como quedan ya que se puede lograr hacer la forma de los musculos sin definirlas, no solamente apliquê lineas rectas tambien curvas que van en las partes que no llevan nada y se las hago tambien en el fondo porque no me gusta que solamente sea el modelo y la firma.
🔻
🔻
🔻
🔻
🔴INGLISH
🔻
🔻
🔴hello! Greetings to all, I bring you another pencil work which is what I am putting into practice to improve my lines and draw faster when making the sketch, which was what took me the longest.
🔴Simply use blue and red, they are not appreciated very well by the camera but you can distinguish a little from both, I like these practices a lot since you can see the line which is very different from the blur but it is still A very good technique and it is the one I use the most as well.
🔴Each part of the model's back has contrary lines to distinguish them and I really like how they look since you can achieve the shape of the muscles without defining them, I not only applied straight lines but also curves that go in the parts that do not have nothing and I also do them in the background because I do not like that it is only the model and the signature.
🔻
🔻
🔻
🔻
🔴Les dejare el proceso de este trabajo:
⚫

⚫Esta fue la base, un boceto rápido, puras lineas sin tanta definición, una cosa que me ayudo fue leer la anatomía ya que con ello pude ubicar las articulaciones que son los hombros, en el brazo seria el codo y la muñeca.

⚫Al tener listo el boceto me puse a definir los musculos de la espalda y darle forma a esta, junto con la cabeza.

⚫Ya listo me puse con solamente lineas rectas, curvas a ubicar las sombras con lapicero azul para guiarme luego con el rojo.

⚫Con los dos lapicero empece a mezclarlos y dar como un tono morado, lo profundice en la zona mas oscuras donde no da la luz que son la parte baja de la espalda, del antebrazo, cabeza, rostro, siempre haciendo lineas contrarias en cada parte.
⚫Este fue el resultado, espero les haya gustado, puedan observar a pesar de la calidad de la foto cada parte y sigueme para ver mas trabajos, ayudame dejando tu upvote. Graciass!!!