Hola, artistas de Hive! He vuelto con los tutoriales y hoy les traigo el paso a paso de esta mirada. Puede parecer un poco complicada, pero es mas fácil de lo que creen! Aquí les dejo el tuto✨
Hello, Hive artists! I'm back with the tutorials and today I bring you the step by step of this look. It may look a bit complicated, but it's easier than you think! Here I leave you the tuto✨
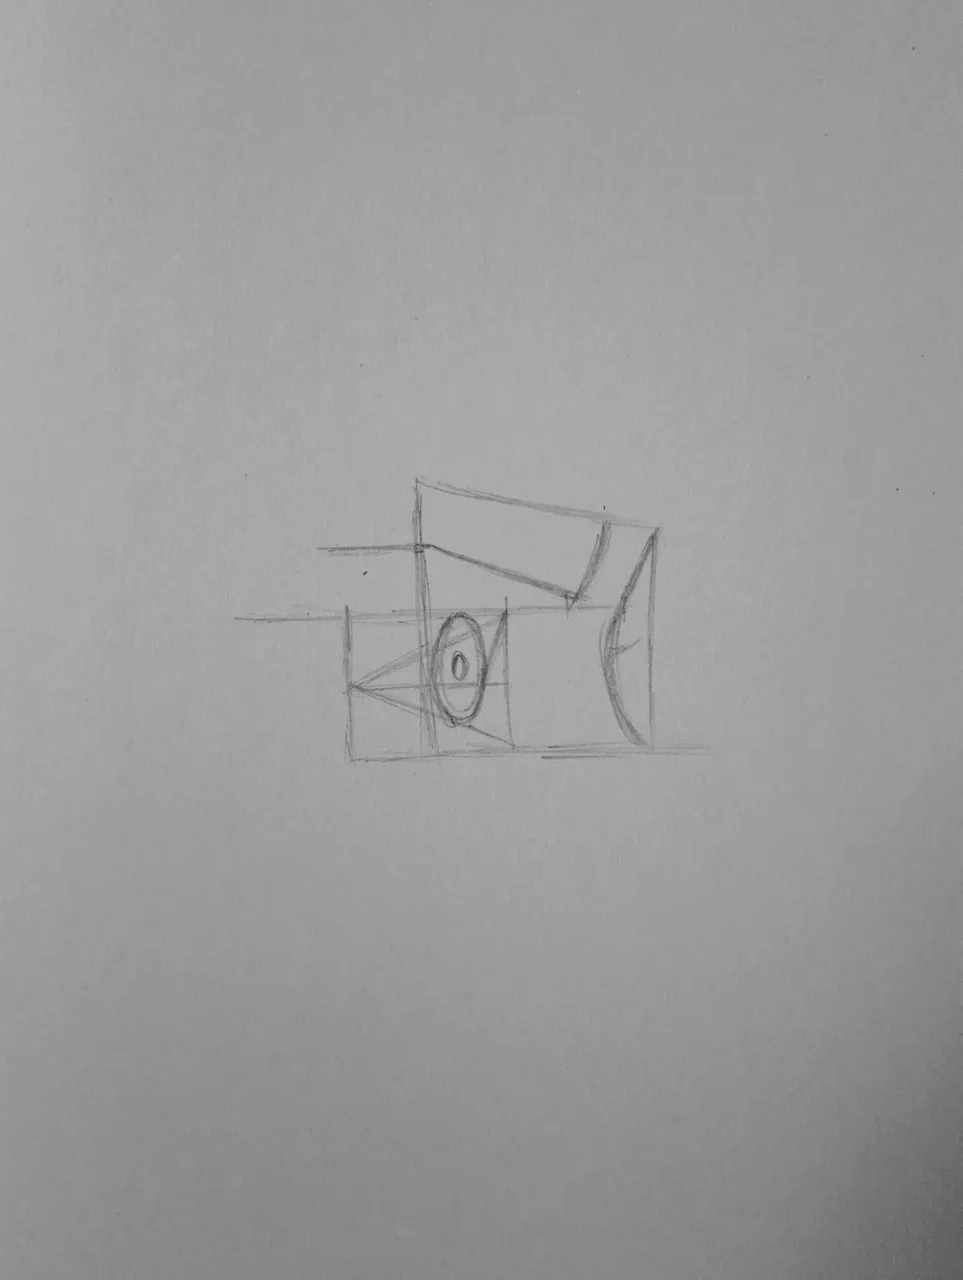
Empezamos haciendo una linea horizontal y otra vertical hasta formar una cruz. Luego de tener la cruz lista, 1cm mas abajo dibujamos una linea de 2cm de ancho aproximadamente y dos a cada lado de esta, hasta formar un cuadrado.
El cuadrado aquí vendría siendo la guía para dibujar el ojo en sí, y por ello, teniendo este cuadro haremos como una especie de triangulo, como se ve en la imagen y una línea que vaya de arriba hacia abajo para formar el ángulo, debe quedar así:
We start by making a horizontal and a vertical line until we form a cross. After we have the cross ready, 1cm down we draw a line about 2cm wide and two on each side of it, to form a square.
The square here would be the guide to draw the eye itself, and therefore, having this square we will make a kind of triangle, as seen in the image and a line that goes from top to bottom to form the angle, it should look like this:

Encima dibujamos una especie de rectángulo retorcido lo cual ya veremos para que.
On top we draw a kind of twisted rectangle which we will see what for.
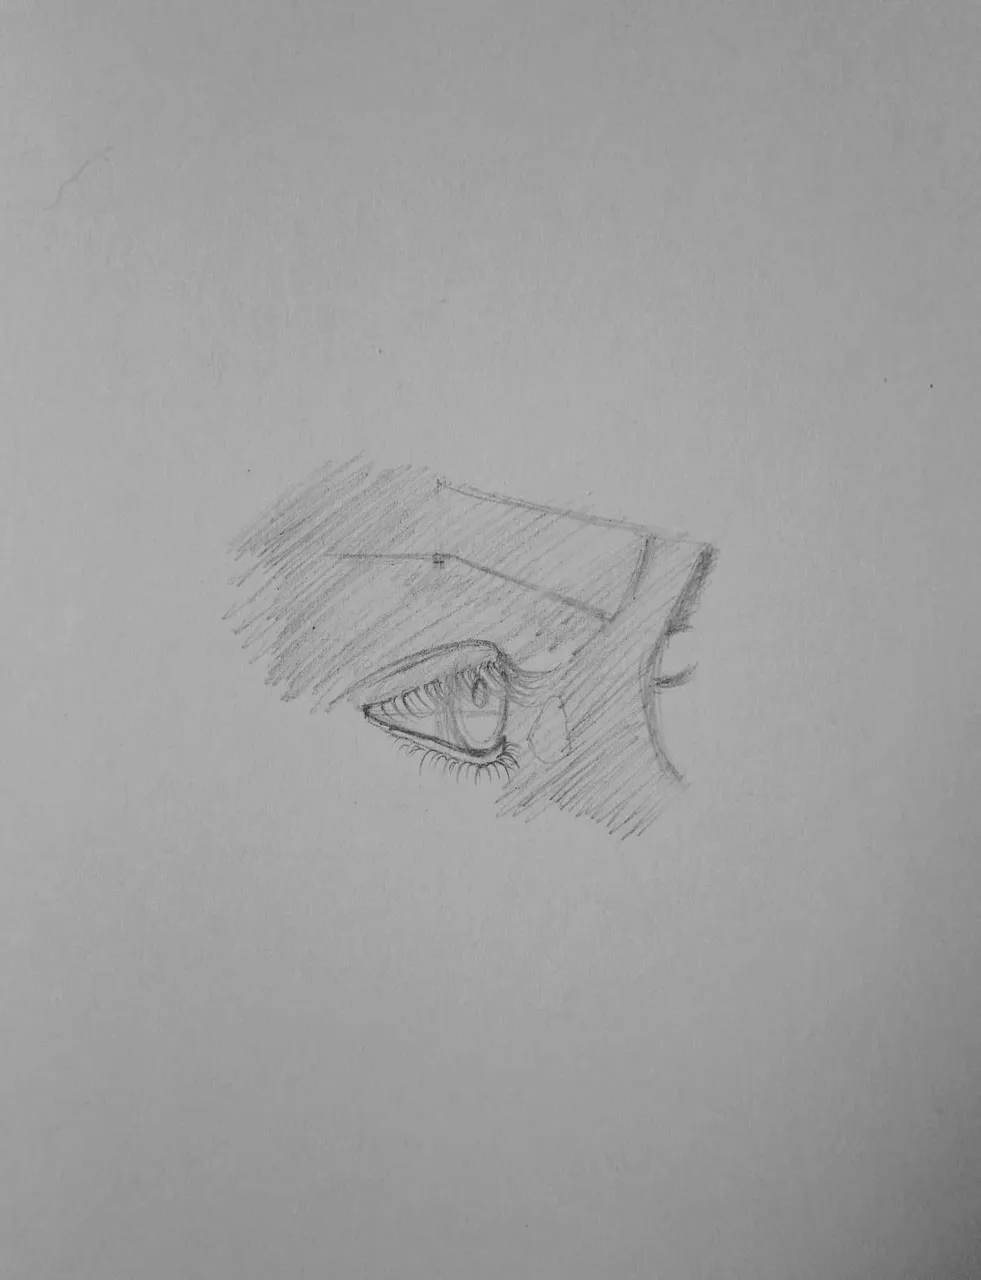
Como pueden ver, cada una de las líneas cumple su función, ya que el dibujo va tomando forma a medida que vayamos detallando.
Para el ojo dibujaremos un ovalo grande, sin salirse de una de las mitades del cuadrado y sin salirme del triangulo; para la pupila haremos un óvalo pequeño.
As you can see, each of the lines fulfills its function, since the drawing takes shape as we go detailing.
For the eye we will draw a big oval, without leaving one of the halves of the square and without leaving the triangle; for the pupil we will make a small oval.
A medida que vayamos detallando va cogiendo forma; el triangulo era nuestra guía para los párpados, lo que haremos será darle forma a éste y agregar pestañas arriba y abajo.
As we go detailing it will take shape; the triangle was our guide for the eyelids, what we will do is to give shape to it and add eyelashes above and below.

Lo siguiente que haremos será darle sombra a la piel.
The next thing we will do is to shade the skin.
Difuminamos, oscurecemos y seguimos agregando detalles a la pupila.
We blend, darken and continue adding details to the pupil
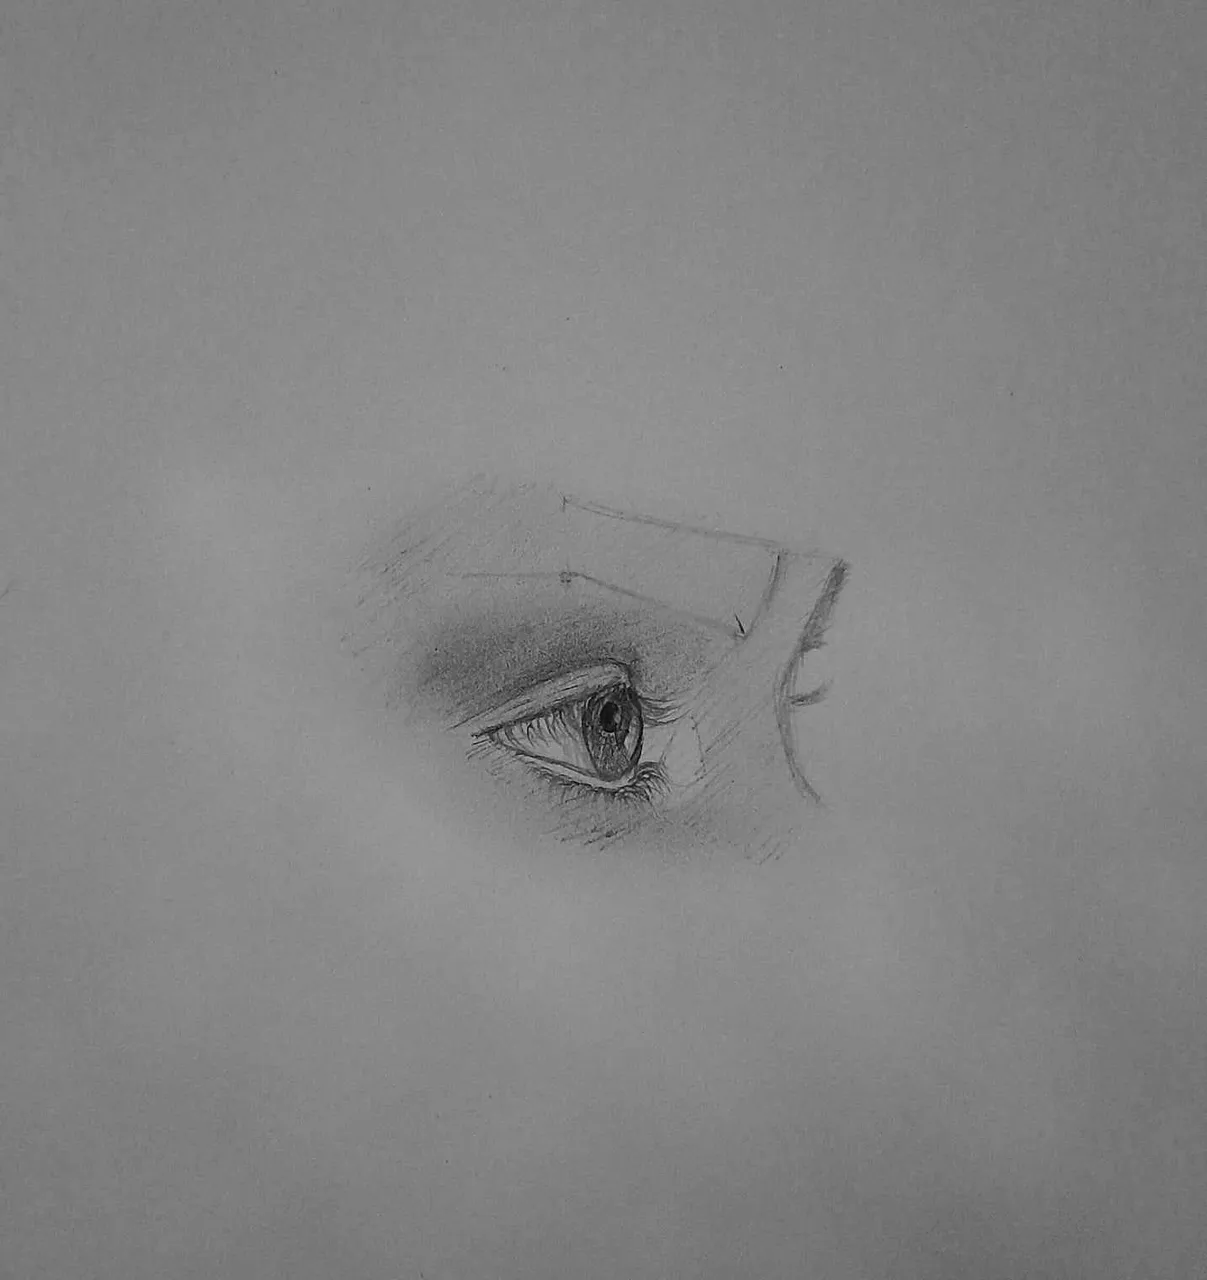
Remarcamos las pestañas con un color más saturado y las cejas pelo a pelo. Volvemos a oscurecer y difuminamos.
We highlight the eyelashes with a more saturated color and the eyebrows hair by hair. We darken and blend again.
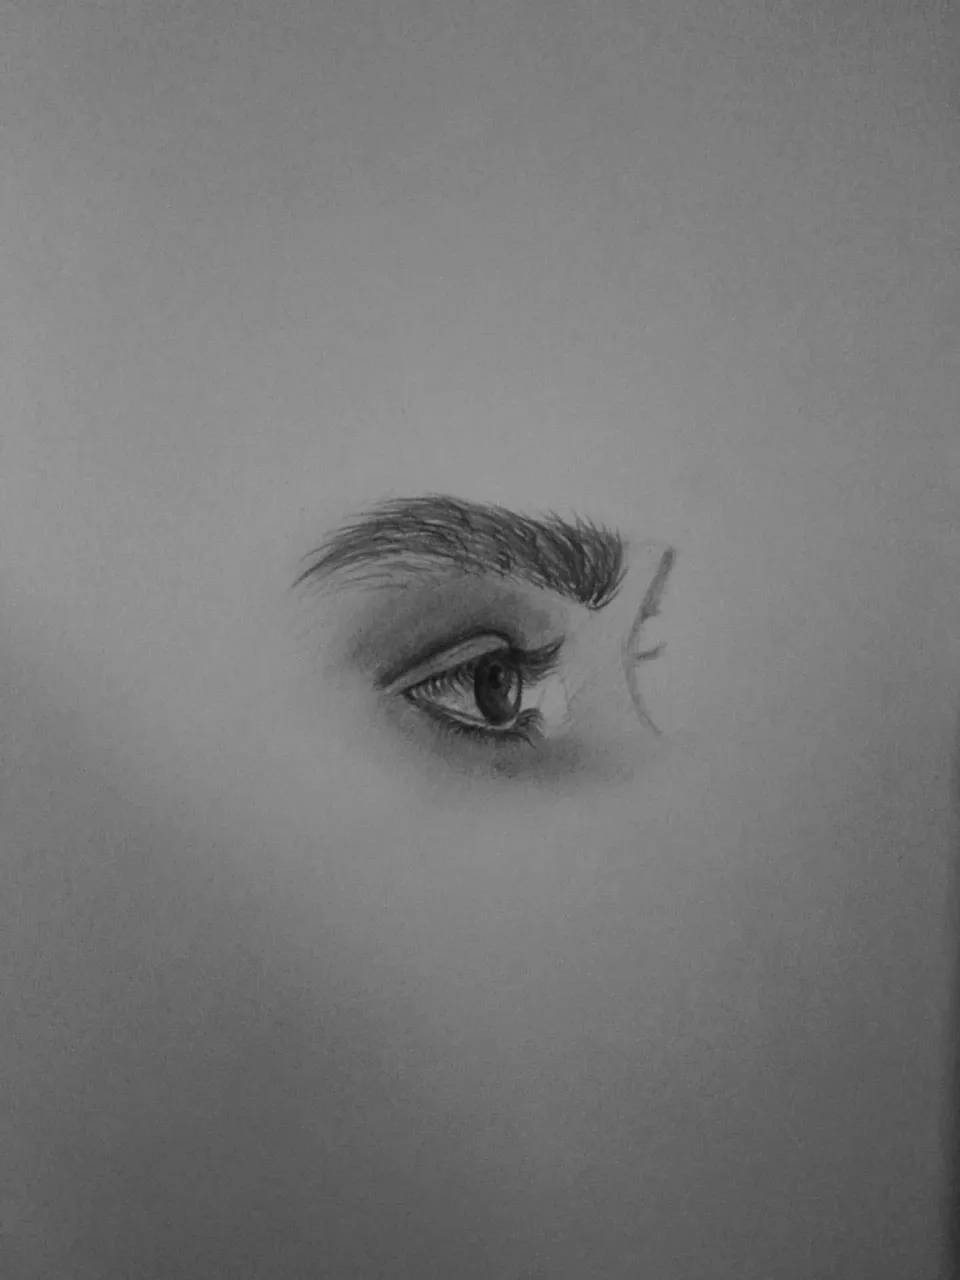
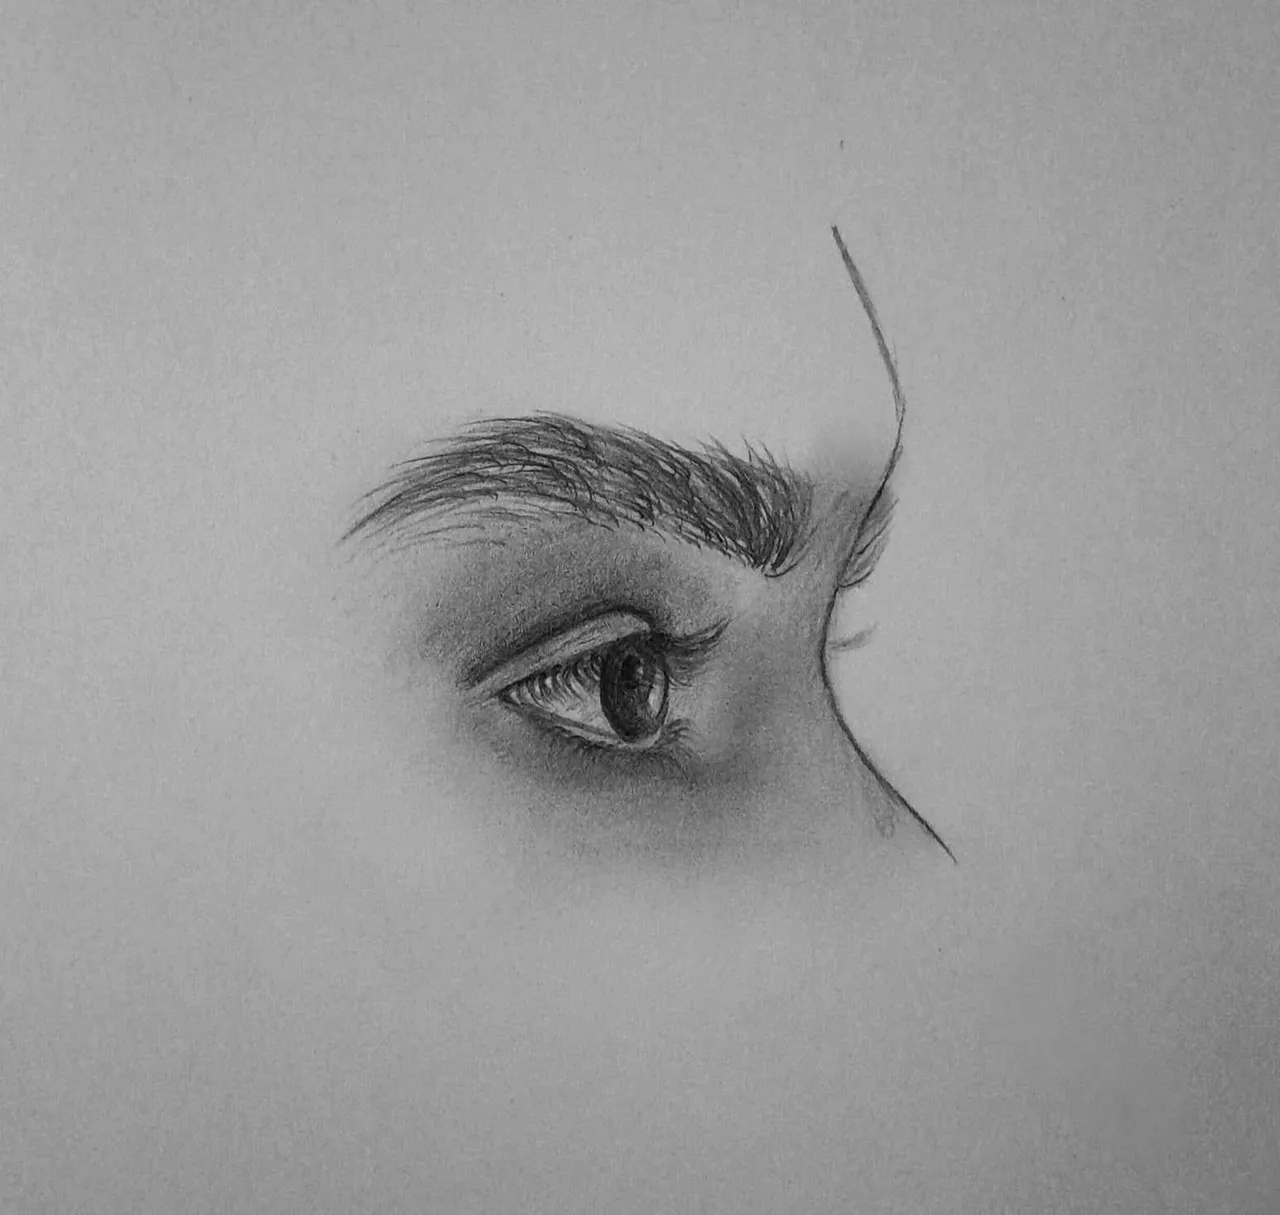
Dibujamos la parte de la frente y la nariz, las pestañas del otro ojo (que no se ve) y un poco de la otra ceja y listo.
We draw the part of the forehead and the nose, the eyelashes of the other eye (which is not visible) and a little of the other eyebrow and that's it.
Thanks for reading and watching.