Hello! to all members of the Splinterlands community. I'm @zactian. I'll write about my strategy and another weekly challenge, Sharing my favorite line up strategy fire element, in my blog today.
What Account Use
I'm using BLTZR-WIZARD-728. I'll share my main strategy in this straightforward but efficient likelihood of winning rule-set max-level cards in a modern format.
As you can see, I have put Flame Mehphit in the Thumbnail image because this battle that I'm sharing is quite interesting with the use of Flame Mephit, utilizing this fire element with range-only battle.
Share your thoughts on the possible lineups at this level in the comments section below. Does it work with this set of battle rules? Let's examine and compare it with the Going The Distance rule set.

INTO THE BATTLE:
Rule Set
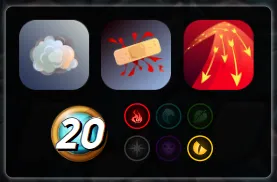
- All units that have Sneak, Opportunity, and Snipe will lose its abilities
- All unit's Healing abilities won't work in this battle.
- Only range units are playable in this battle.
Recommended summoner to use the Going the Distance set for this match:
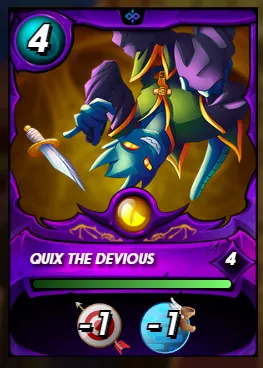
Since only fire and dragon elements are active, I choose dragon element as I plan to utilize Quix the Devious decreasing both the range and speed of the opponent, most of these units are good in terms of speed and range only in battle especially the presence of Naga Assasin in low mana cap rule set.
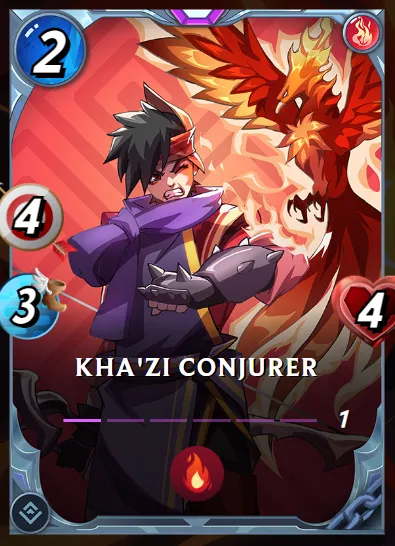
Additionally, I have recently acquired the Kha'zi Conjurer, a fire element card that has impressive stats in low mana cost: 4 range damage, 3 speed, and 4 health, combined with the Incendiary ability and a 2 mana cost. I didn't have access to this card last season, but now that I do, I plan to use it extensively in future battles. Its capabilities make it a formidable asset, enhancing my strategies as the season progresses.
Note: I only have limited cards but they are useful in some rule sets and I will try my best to win with existing cards. So if you want a high chance of winning, I advise you to rent or buy useful or stronger cards for most rule sets.
Link of the battle: RUMBLE
My Lineup
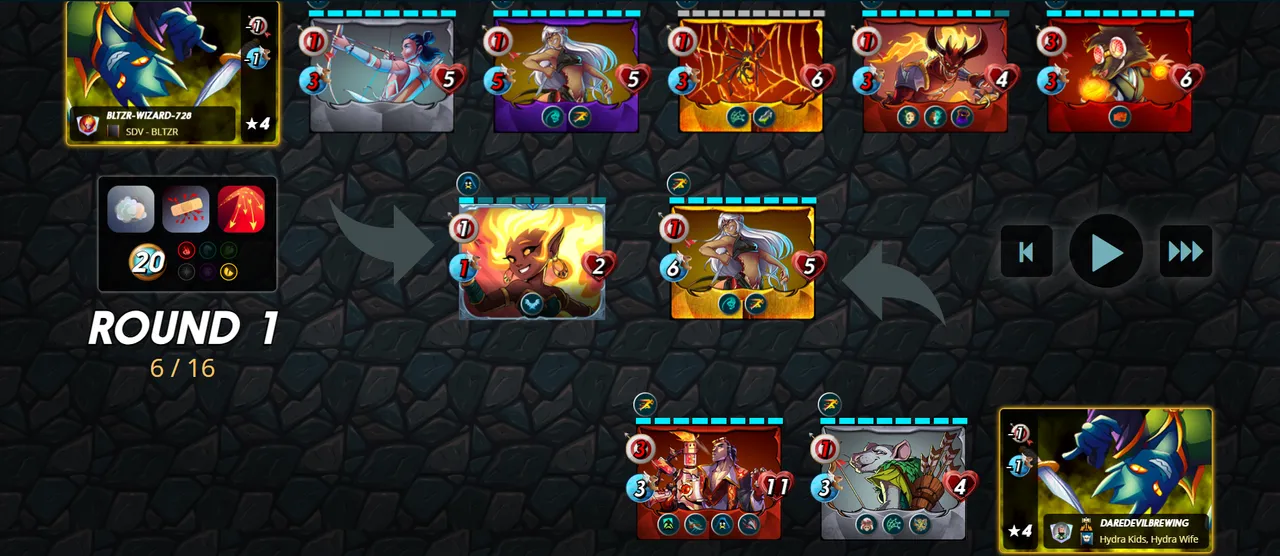
First Position - Flame Mephit
- Role: Primary Tank
- Reasoning: The Flame Mephit is an excellent choice for the front line in a 20 mana cap rule set. Its 2 mana cost and Flying ability make it a strong candidate to absorb damage while potentially dodging many of the opponent's range attacks. The Flying ability provides a tactical advantage by evading ground-based attacks, which I hope will give it the resilience needed to hold the line.
Second Position - Xenith Archer
- Role: Secondary Tank
- Reasoning: I positioned the Xenith Archer here to act as a backup tank. Should the Flame Mephit fall, the Archer is ready to take over the frontline duties. With its reasonable mana cost and solid stats, it can help maintain the defense while my other units engage the enemy.
Third Position - Naga Assassin
- Role: Support Tank
- Reasoning: The Naga Assassin is deployed in the third position to provide additional support. Its abilities, Backfire and Swiftness, make it a versatile unit that can contribute both defensively and offensively. If both the Flame Mephit and Xenith Archer are defeated, the Naga Assassin can step in to absorb damage and continue to apply pressure on the opponent.
Fourth Position - Lava Spider
- Role: Damage Dealer with Utility
- Reasoning: The Lava Spider offers extra damage output and has the potential to inflict poison on its target. Additionally, its Snare ability is valuable for neutralizing any opponent with Flying abilities, ensuring they are vulnerable to attacks. This position helps in maintaining consistent damage while providing utility to disrupt the opponent's strategies.
Fifth Position - Pyrewatch Devil
- Role: Damage and Support
- Reasoning: Positioned to deliver additional damage and offer support, the Pyrewatch Devil brings useful abilities such as Life Leech, Dispel, and Oppress. Life Leech allows it to recover health based on the damage dealt, Dispel can remove beneficial effects from enemies, and Oppress boosts damage against weaker foes, making it a crucial part of my overall strategy.
Last Position - Scavo Firebolt
- Role: Main Range Damage Dealer
- Reasoning: I placed the Scavo Firebolt in the last position to serve as my primary source of ranged damage. By positioning it here, I anticipated that the opponent would focus their attacks on my frontline tanks, allowing the Scavo Firebolt to deal its 4 range damage from a safer distance. Its Knockout ability can be a game-changer, providing a chance to deal extra damage to lower-health targets.
This is a simple strategic arrangement that I compose that aims to balance defense and offense while utilizing each unit's strengths to counter the opponent effectively.
Analyzing Battle
In this battle, the opponent strategically chose to use Quix the Devious, a summoner whose ability reduces both the Range attack and Speed of my team by 1. This choice immediately created a disadvantage for my lineup, lowering both offensive and defensive capabilities. The opponent’s team composition was structured around amplifying the power of a single, primary damage dealer through the use of supporting units.
The key to the opponent’s strategy was Venari Marksrat, who has the Martyr ability. Martyr enhances the stats of the team when a friendly unit falls in battle, allowing other units to become more powerful as the fight progresses. This ability was vital in boosting the effectiveness of the team's main damage dealer, Tinderlock.
The opponent fielded only three units, but they were selected with specific roles in mind. Naga Assassin served as the tank, positioned to absorb attacks and stall for time. Venari Marksrat played the role of support, setting the stage for the team's ultimate damage dealer, Tinderlock, to become a force on the battlefield. This setup relied on Marksrat's ability to increase Tinderlock’s power, making it the central figure for securing victory through heavy single-target damage. The compact, focused lineup worked to gradually build up their strength and overwhelm my team.
Effective or not?
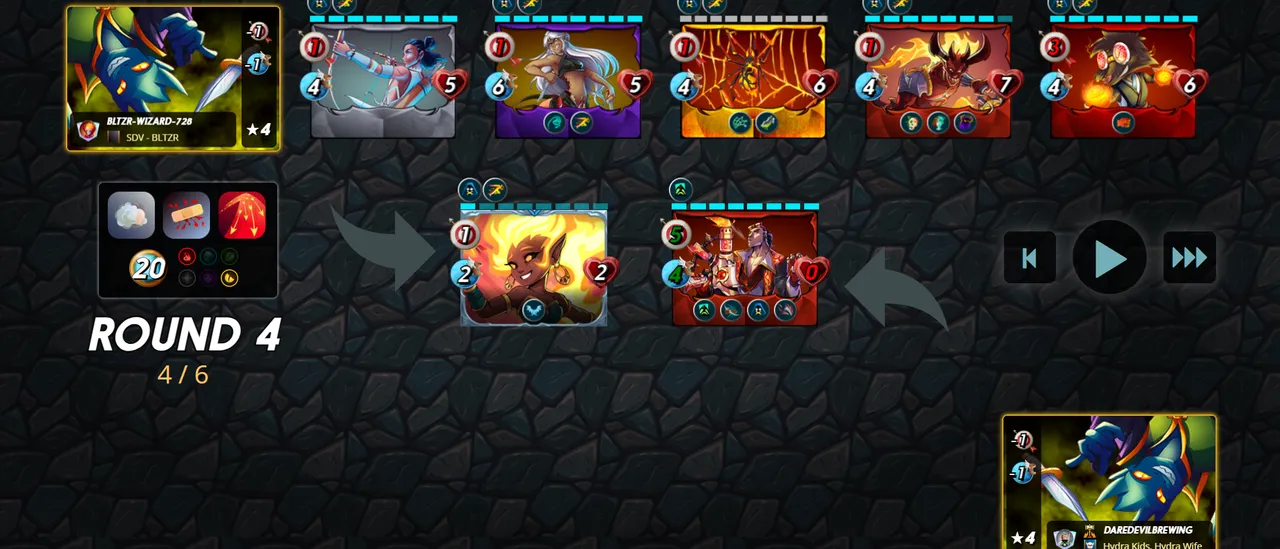
This particular battle was quite fascinating because of how my Flame Mephit effectively played its role as a tank. Flame Mephit absorbed most of the opponent's attacks, while its Flying ability allowed it to dodge and evade several hits. The success of this strategy was partly due to luck, as the opponent did not use excessively powerful cards that would have capitalized on the low mana cost, which could have tipped the scales.
During the early rounds, I had a noticeable advantage, as my lineup outclassed the opponent in both speed and damage. This early dominance allowed me to weaken the opponent’s units quickly. However, the tide of the battle shifted when Tinderlock became the last remaining unit on the opposing team. At this point, Tinderlock’s Last Stand ability was triggered, which boosted its stats by 50% and activated its Close Range ability, turning it into a formidable opponent capable of attacking from the front.
Despite this sudden surge difference in stats and especially speed, I managed to maintain control of the battle, largely due to Flame Mephit's performance. Even with the significant speed difference after Tinderlock's Last Stand, Flame Mephit continued to evade all of Tinderlock’s attacks. Luck played a major role in my victory, as the Flying ability of Flame Mephit came through at crucial moments, helping it dodge hits and ensuring that the battle ended in my favor.
While my strategy was sound in terms of speed and damage output early on, the effectiveness of the battle outcome relied heavily on the evasion abilities of Flame Mephit. Had the opponent’s Tinderlock landed its boosted attacks, the result might have been different, but fortune favored my lineup in this instance.

Thanks! for supporting me, being here, and coming this far. I'm hoping this can assist you with some of your battles. I suggest using speed to increase your chances of winning battles since it increases your ability to block oncoming strikes and launch first attacks.
Credits:
The first photo is generated using AI-generated Microsoft Edge CoPilot
And edited the Design photo Splinterlands Modern League using PicsArt
Screenshot In-game splinterlands