pixabay

Bootstrap을 사용하여 지난번에 구현한 스팀 포스팅 목록을 예쁘게 꾸며보자. html, css 초급 레벨인 나에게 Bootstrap은 아주 좋은 템플릿으로 사용될 것 같다.
html 파일 생성 및 설정
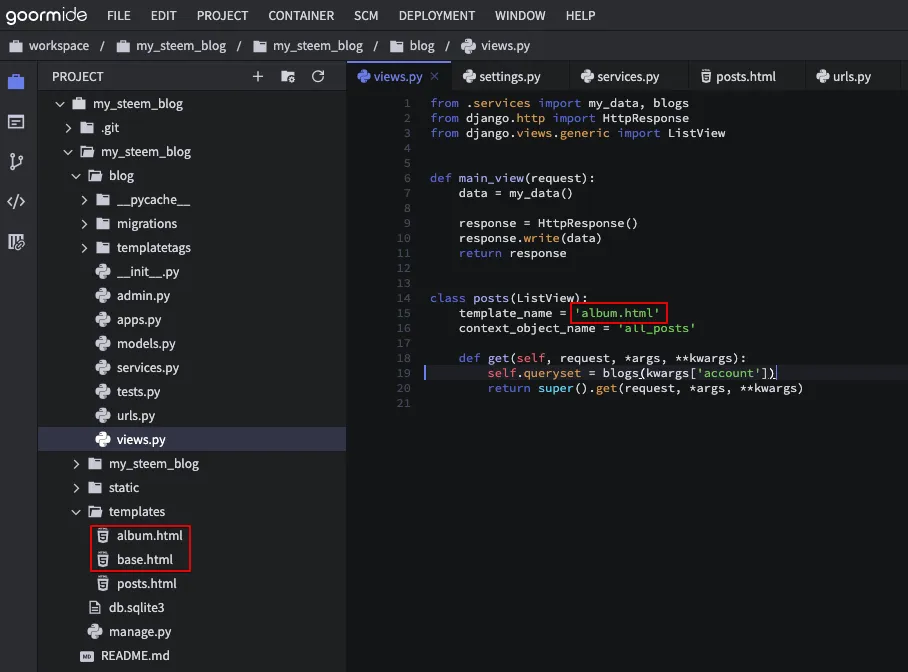
👇 지난번과 마찬가지로 templates폴더에 album.html과 base.html을 생성 후 views.py에서 template_name을 album.html로 바꿔준다.
$ touch templates/base.html
$ touch templates/album.html
👇 base.html은 말 그대로 기본 베이스가 되는 html이다. 굳이 만들지 않고 album.html에 직접 입력해도 문제는 없을 것으로 보이나 나중의 관리를 위해서 이 파일도 만들어 놓고 아래와 같이 django에서 지원하는 명령어로 Bootstrap의 css를 링크도 걸어놓는다.
# templates/base.html

{% load static %}
<link rel="stylesheet" href="https://stackpath.bootstrapcdn.com/bootstrap/4.2.1/css/bootstrap.min.css" integrity="sha384-GJzZqFGwb1QTTN6wy59ffF1BuGJpLSa9DkKMp0DgiMDm4iYMj70gZWKYbI706tWS" crossorigin="anonymous">

{% spaceless %}
{% endspaceless %}

{% block content %}
{% endblock content %}
👇 album.html은 base.html을 상속받아 구체적인 html 코드를 django 프레임워크를 통해서 구현된다. 먼저 사용되는 django 명령어를 보자. base.html을 상속받는 코드가 있는데 이는 위에서 설정한 Bootstrap의 css를 상속받는다. {% block content %}와 {% endblock content %}사이에 상세한 html 코드가 들어가면 되는데 이 또한 Bootstrap의 템플릿을 사용하면 되고, 불필요한 부분을 지운 후 그 사이에 {% for post in all_posts_list %}, {% endfor %}로 포스트 목록을 반복하여 뿌려주면 된다.
📝 Bootstrap 템플릿은 공식 샘플에서 album 소스를 사용하였다.
# templates/album.html

{% extends 'base.html' %}

{% block content %}

{% for post in all_posts_list %}
{% endfor %}

{% endblock content %}
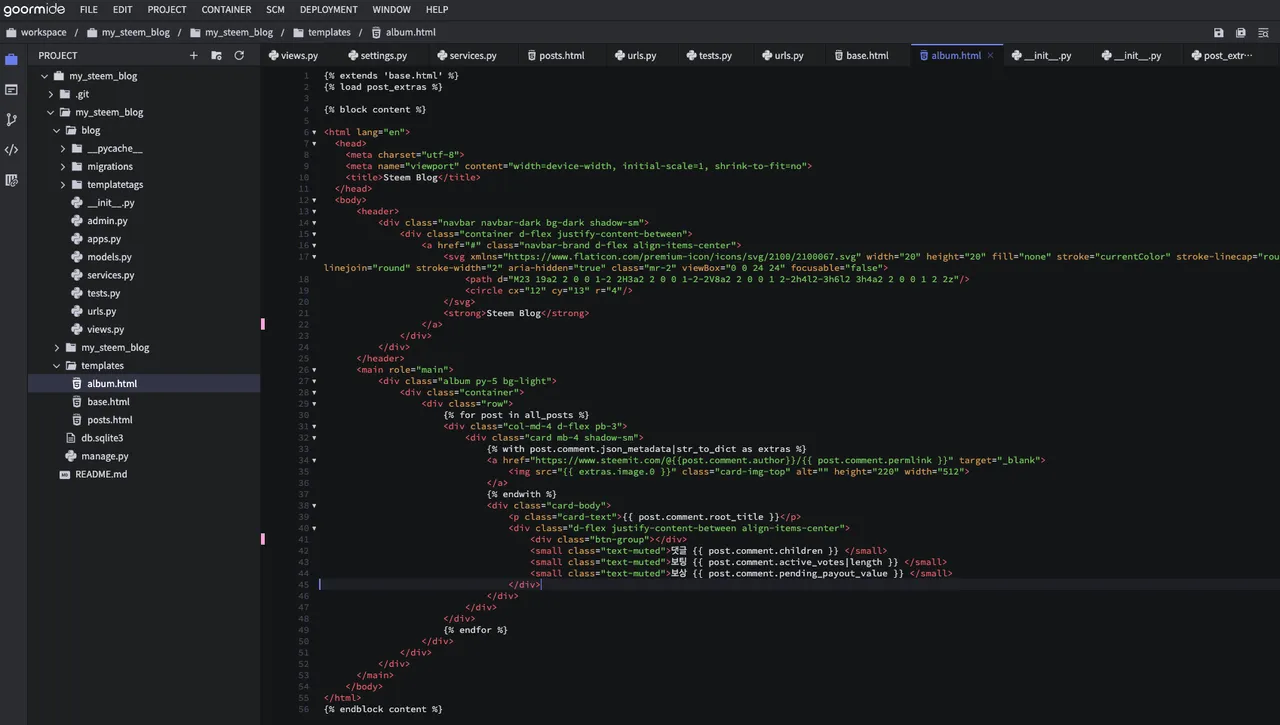
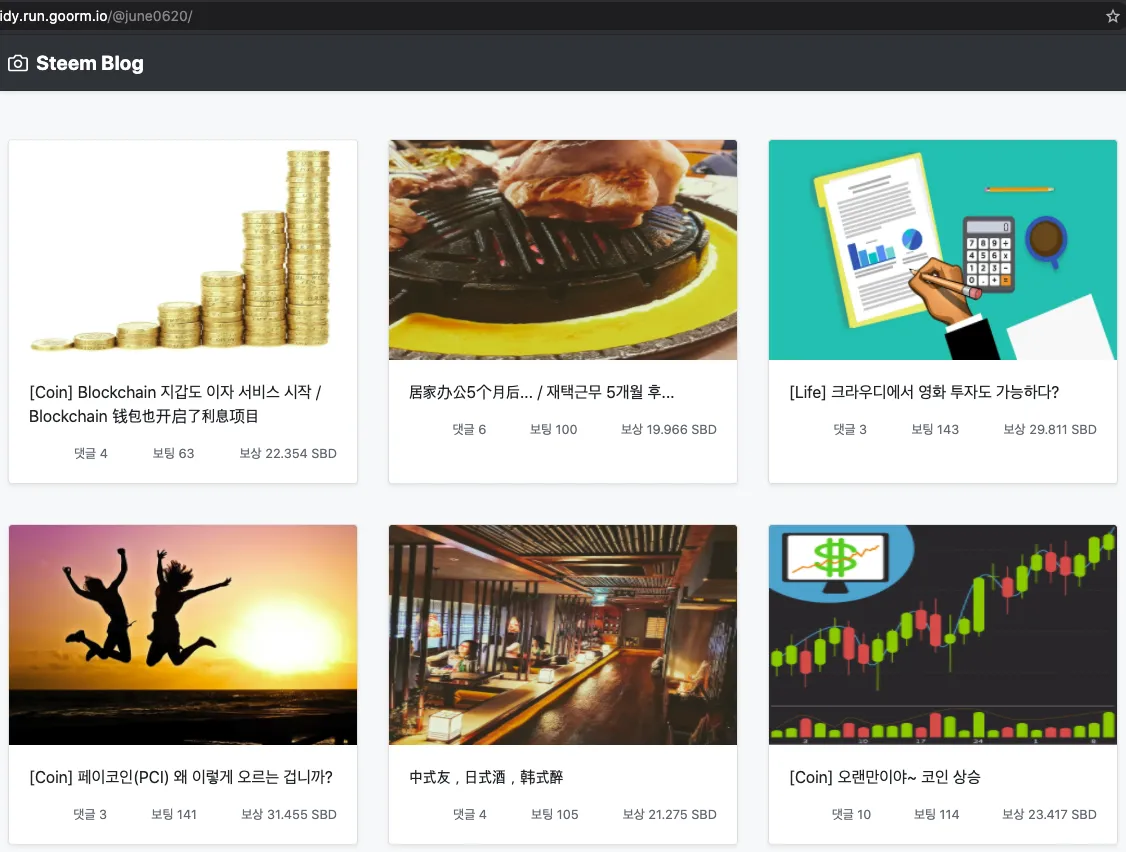
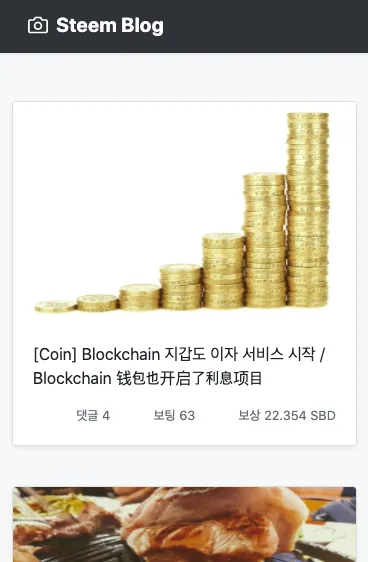
👇 전체적인 코드는 아래와 같이 꽤 단순하다. 서버 실행 후 접근하면 내 STEEM 포스팅 목록이 앨범뷰로 예쁘게 노출된다. 모바일 버전도 지원하는 반응형 웹이다.
오픈 소스의 힘으로 이제는 이렇게 쉽게 페이지 하나를 만들 수 있다니 참으로 멋지지 아니한가?
{% extends 'base.html' %}
{% load post_extras %}

{% block content %}

<html lang="en">
  <head>
    <meta charset="utf-8">
    <meta name="viewport" content="width=device-width, initial-scale=1, shrink-to-fit=no">
    <title>Steem Blog</title>
  </head>
  <body>
      <header>
          <div class="navbar navbar-dark bg-dark shadow-sm">
              <div class="container d-flex justify-content-between">
                  <a href="#" class="navbar-brand d-flex align-items-center">
                      <svg xmlns=" width="20" height="20" fill="none" stroke="currentColor" stroke-linecap="round" stroke-linejoin="round" stroke-width="2" aria-hidden="true" class="mr-2" viewBox="0 0 24 24" focusable="false">
                          <path d="M23 19a2 2 0 0 1-2 2H3a2 2 0 0 1-2-2V8a2 2 0 0 1 2-2h4l2-3h6l2 3h4a2 2 0 0 1 2 2z"/>
                          <circle cx="12" cy="13" r="4"/>
                      </svg>
                      <strong>Steem Blog</strong>
                  </a>
              </div>
          </div>
      </header>
      <main role="main">
          <div class="album py-5 bg-light">
              <div class="container">
                  <div class="row">
                      {% for post in all_posts %}
                      <div class="col-md-4 d-flex pb-3">
                          <div class="card mb-4 shadow-sm">
                              {% with post.comment.json_metadata|str_to_dict as extras %}
                              <a href="https://www.steemit.com/@{{post.comment.author}}/{{ post.comment.permlink }}" target="_blank">
                                  <img src="{{ extras.image.0 }}" class="card-img-top" alt="" height="220" width="512">
                              </a>
                              {% endwith %}
                              <div class="card-body">
                                  <p class="card-text">{{ post.comment.root_title }}</p>
                                  <div class="d-flex justify-content-between align-items-center">
                                      <div class="btn-group">
                                      </div>
                                      <small class="text-muted">댓글 {{ post.comment.children }} </small>
                                      <small class="text-muted">보팅 {{ post.comment.active_votes|length }} </small>
                                      <small class="text-muted">보상 {{ post.comment.pending_payout_value }} </small>
                                  </div>
                              </div>
                          </div>
                      </div>
                      {% endfor %}
                  </div>
              </div>
          </div>
      </main>
    </body>
</html>
{% endblock content %}
width="20" height="20" fill="none" stroke="currentColor" stroke-linecap="round" stroke-linejoin="round" stroke-width="2" aria-hidden="true" class="mr-2" viewBox="0 0 24 24" focusable="false">
<path d="M23 19a2 2 0 0 1-2 2H3a2 2 0 0 1-2-2V8a2 2 0 0 1 2-2h4l2-3h6l2 3h4a2 2 0 0 1 2 2z"/>
<circle cx="12" cy="13" r="4"/>
</svg>
<strong>Steem Blog</strong>
</a>
</div>
</div>
</header>
<main role="main">
<div class="album py-5 bg-light">
<div class="container">
<div class="row">
{% for post in all_posts %}
<div class="col-md-4 d-flex pb-3">
<div class="card mb-4 shadow-sm">
{% with post.comment.json_metadata|str_to_dict as extras %}
<a href="https://www.steemit.com/@{{post.comment.author}}/{{ post.comment.permlink }}" target="_blank">
<img src="{{ extras.image.0 }}" class="card-img-top" alt="" height="220" width="512">
</a>
{% endwith %}
<div class="card-body">
<p class="card-text">{{ post.comment.root_title }}</p>
<div class="d-flex justify-content-between align-items-center">
<div class="btn-group">
</div>
<small class="text-muted">댓글 {{ post.comment.children }} </small>
<small class="text-muted">보팅 {{ post.comment.active_votes|length }} </small>
<small class="text-muted">보상 {{ post.comment.pending_payout_value }} </small>
</div>
</div>
</div>
</div>
{% endfor %}
</div>
</div>
</div>
</main>
</body>
</html>
{% endblock content %}
.
.
.
.
[Cookie 😅]
Python 3.7.4
Django 2.2.4
steem-python 1.0.1
goorm IDE 1.3
포스트 썸네일을 steem-python으로 불러온 후 페이지에 뿌리는 작업에서 조금 애 먹었지만 다행히 여러 고수분들 글로 해결할 수 있었다. 이 부분은 다음 기회에 상세하게 다뤄봐야겠다.(#배울게많은요즘#시간멈추는시계삼)
django custom template 사용하여 코드 단순화
https://wayhome25.github.io/django/2017/06/22/custom-template-filter/

https://www.pymoon.com/entry/djang-%ED%85%9C%ED%94%8C%EB%A6%BF%EC%97%90%EC%84%9C-custom-tag-%EC%82%AC%EC%9A%A9%ED%95%98%EA%B8%B0

https://amoreopensource.wordpress.com/2019/04/23/access-jsonfield-in-django-templates-like-a-dictionary/