Hola buenas noches amigos de la comunidad holozing, espero que se encuentren bien, que hayan pasado un excelente viernes , hoy les quiero compartir un tutorial para realizar un estuche de lentes con el diseño de Woolitz personaje creado por la comunidad holozing, utilizando como material el foamis , ya que es moldeable , flexible y excelente para trabajar
Hello good evening friends of the holozing community, I hope you are well, I hope you have had a great Friday, today I want to share a tutorial to make a glasses case with the design of Woolitz character created by the holozing community, using foamis as a material, as it is moldable, flexible and excellent to work with.
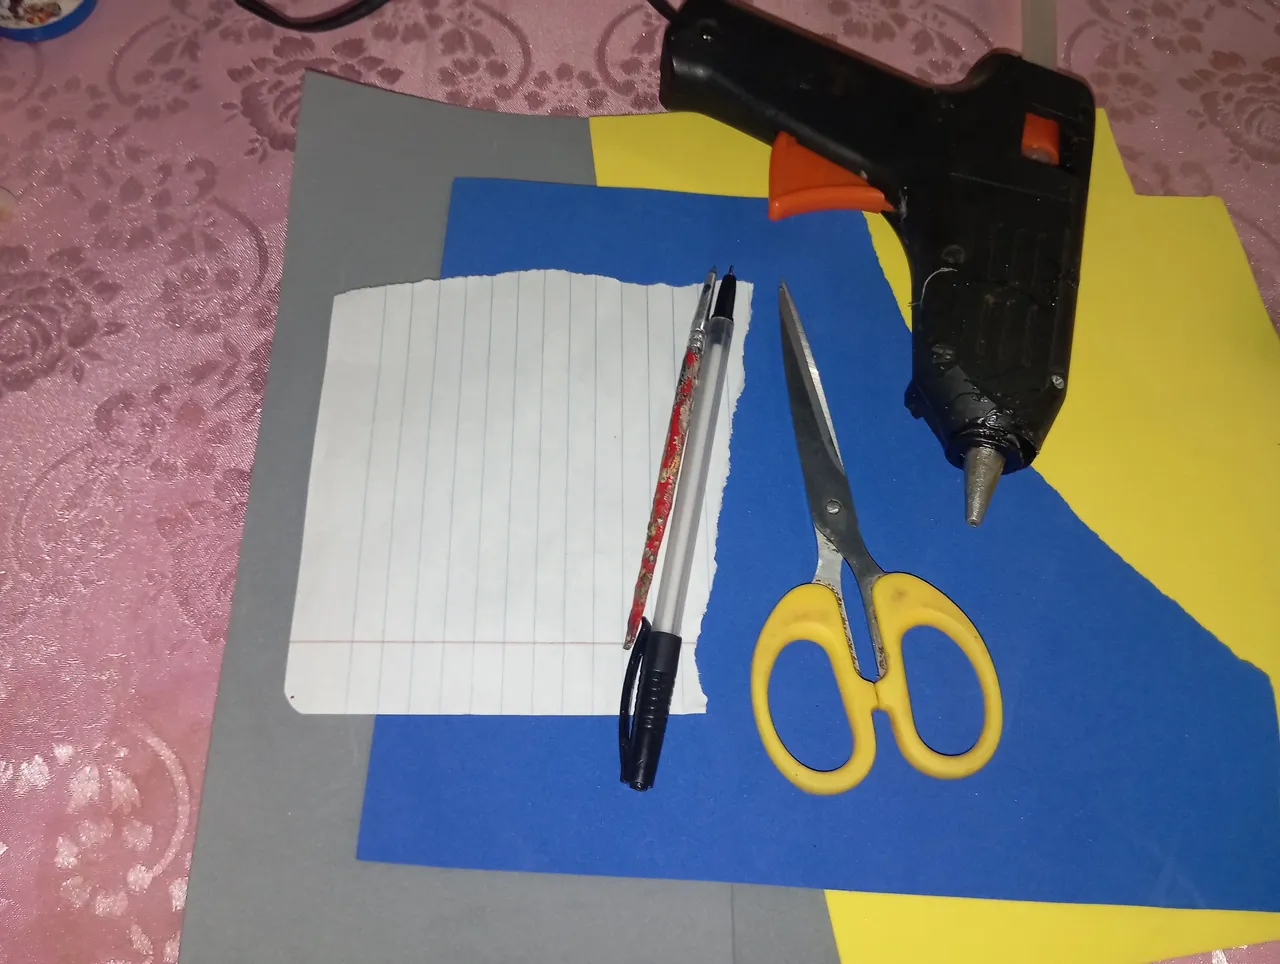
Materiales qué utilicé para realizar mi estuche :
-Foamis
-Tijera
-Silicon
-Lapiz y papel
Materials I used to make my case:
-Foamis
-Scissors
-Silicon
-Lapiz and paper
A continuación los pasos a seguir:
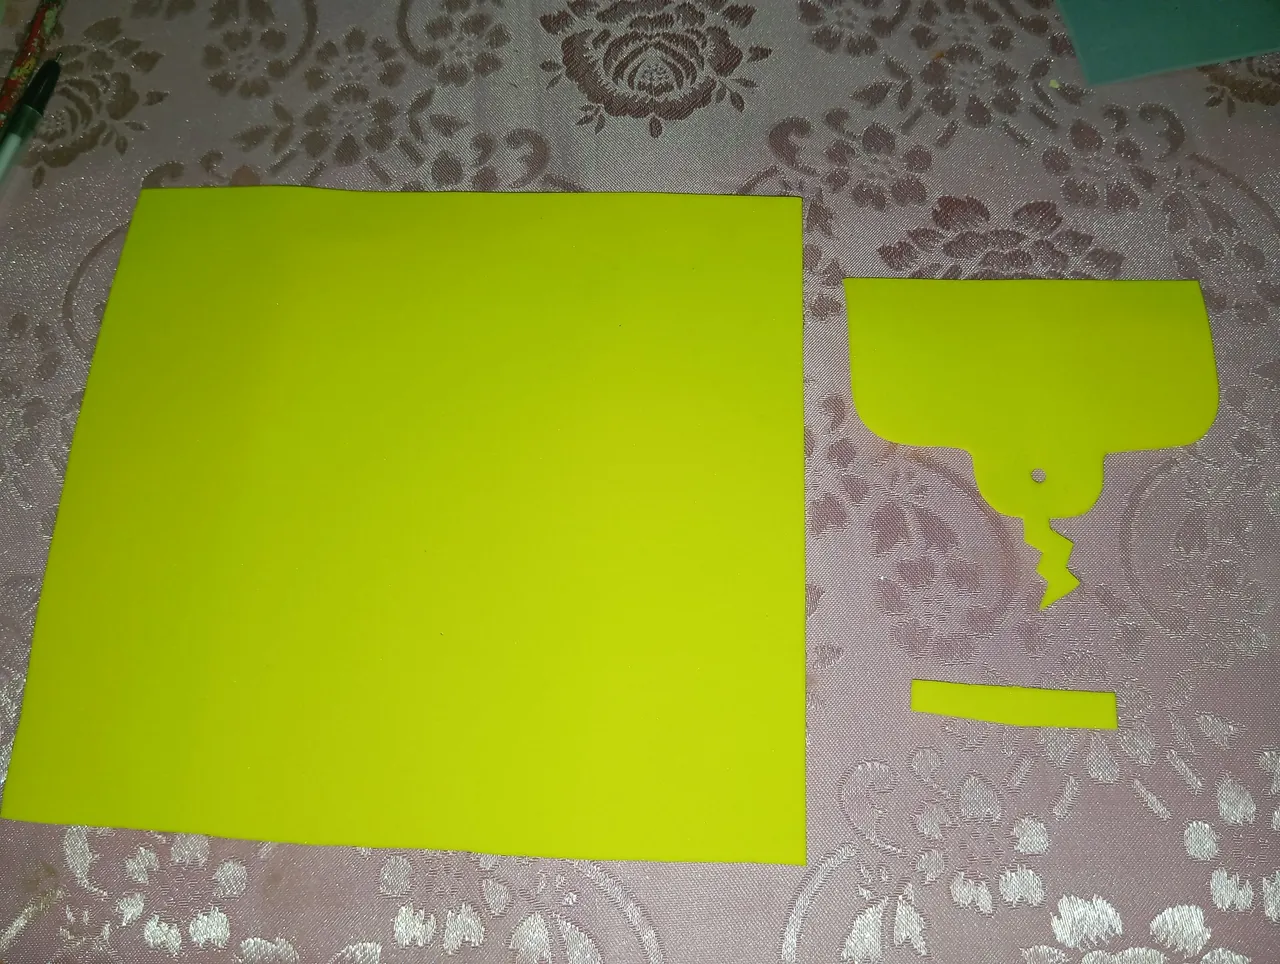
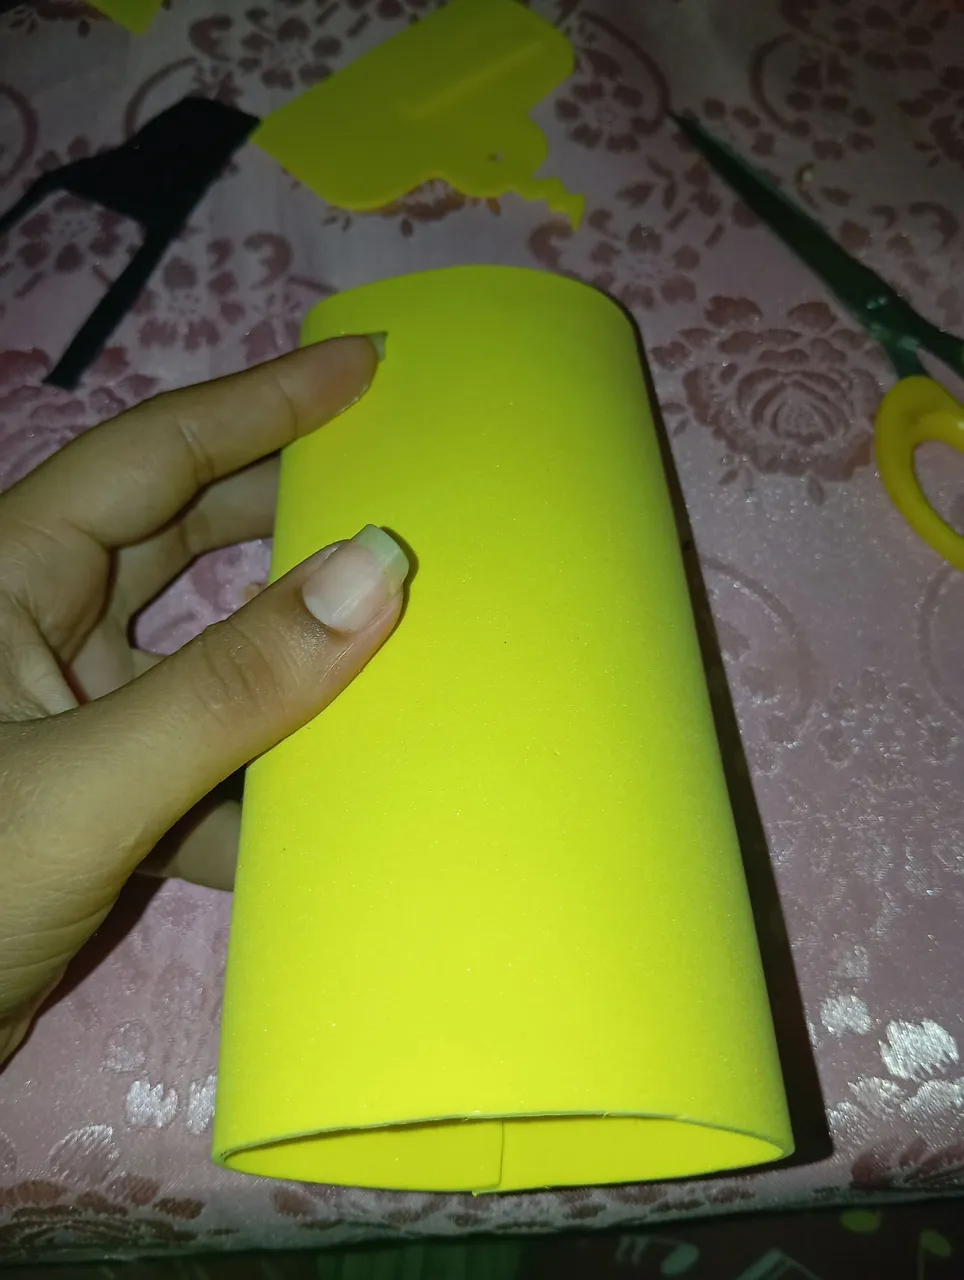
Iniciaremos realizando nuestro estuche de lentes , cómo les mencioné utilicé foamis para elaborar la , debemos iniciar recortando un cuadrado , una tira para el botón y una pieza con la cuál vamos abrir y cerrar nuestro estuche a este le realicé un rayo en el centro para que vaya a corde con el diseño
Here are the steps to follow:
We will start making our glasses case, as I mentioned I used foamis to make it, we must start by cutting a square, a strip for the button and a piece with which we will open and close our case to this I made a ray in the center to go along with the design.
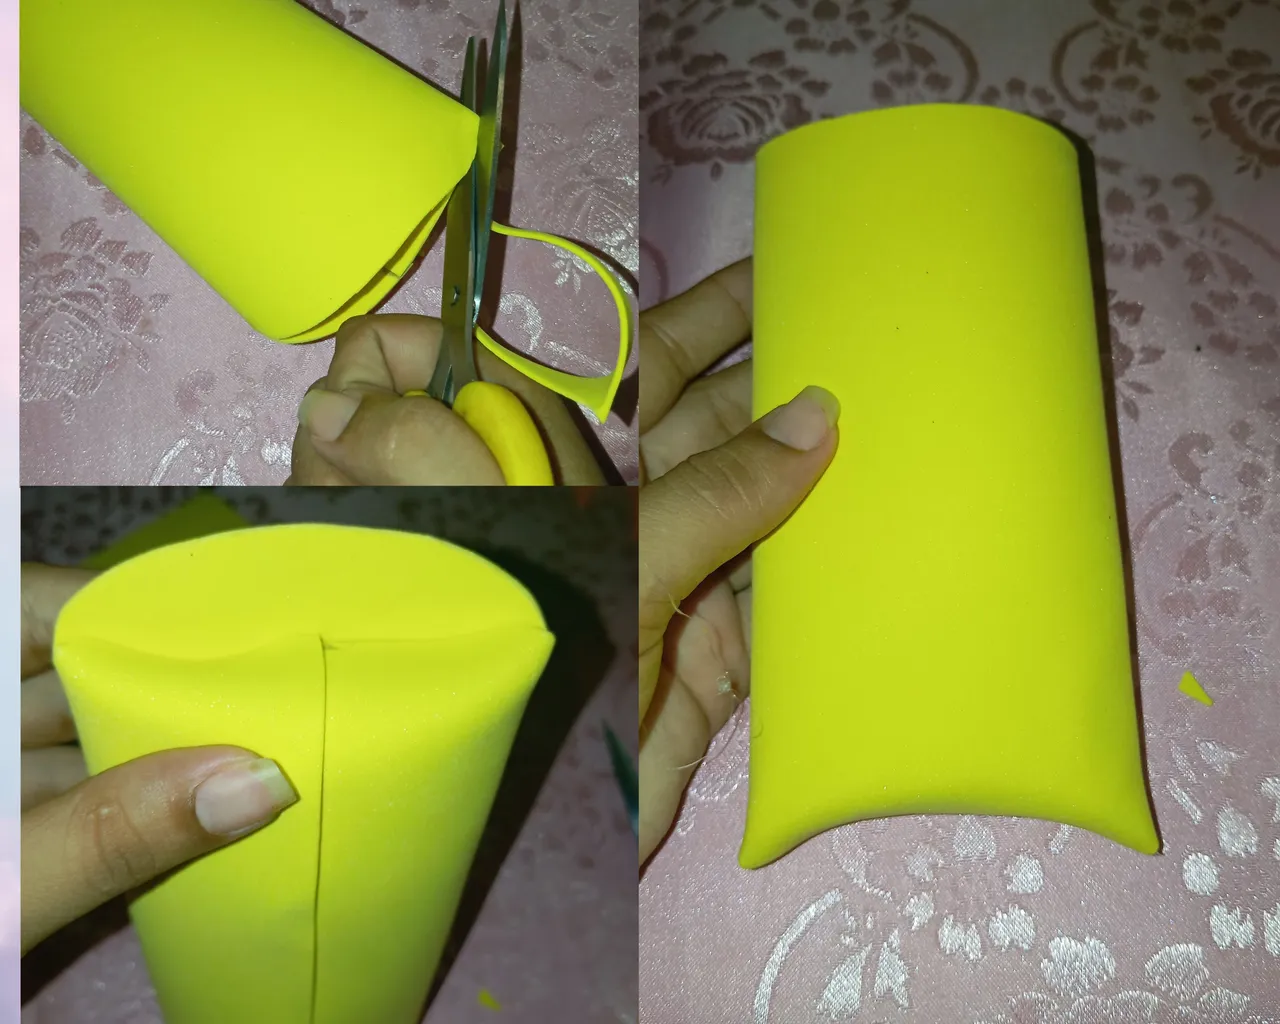
Luego vamos a continuar tomando nuestro cuadrado , agregaremos silicón al borde y pegaremos borde con borde formando una figura similar a un cilindro
Then we will continue taking our square, add silicone to the edge and glue edge to edge forming a figure similar to a cylinder.
Luego continuaremos tomando nuestra pieza , lo vamos a moldear de forma circular en la parte de abajo con la ayuda de una tijera , luego doblaremos hacia adentro uno de los bordes, agregamos silicón y pegamos dejando la parte de abajo de esa manera
Then we will continue taking our piece, we will mold it in a circular shape at the bottom with the help of a scissors, then we will fold inward one of the edges, add silicone and glue leaving the bottom in that way.
Seguidamente para culminar nuestro estuche vamos a pegar en la parte de adentro la pieza con la cuál vamos abrir y cerrar nuestro estuche , pegando en el centro del otro lado un botón de foamis con el cuál vamos a asegurar nuestros lentes
Then to finish our case we will glue on the inside the piece with which we will open and close our case, gluing in the center of the other side a foamis button with which we will secure our glasses.

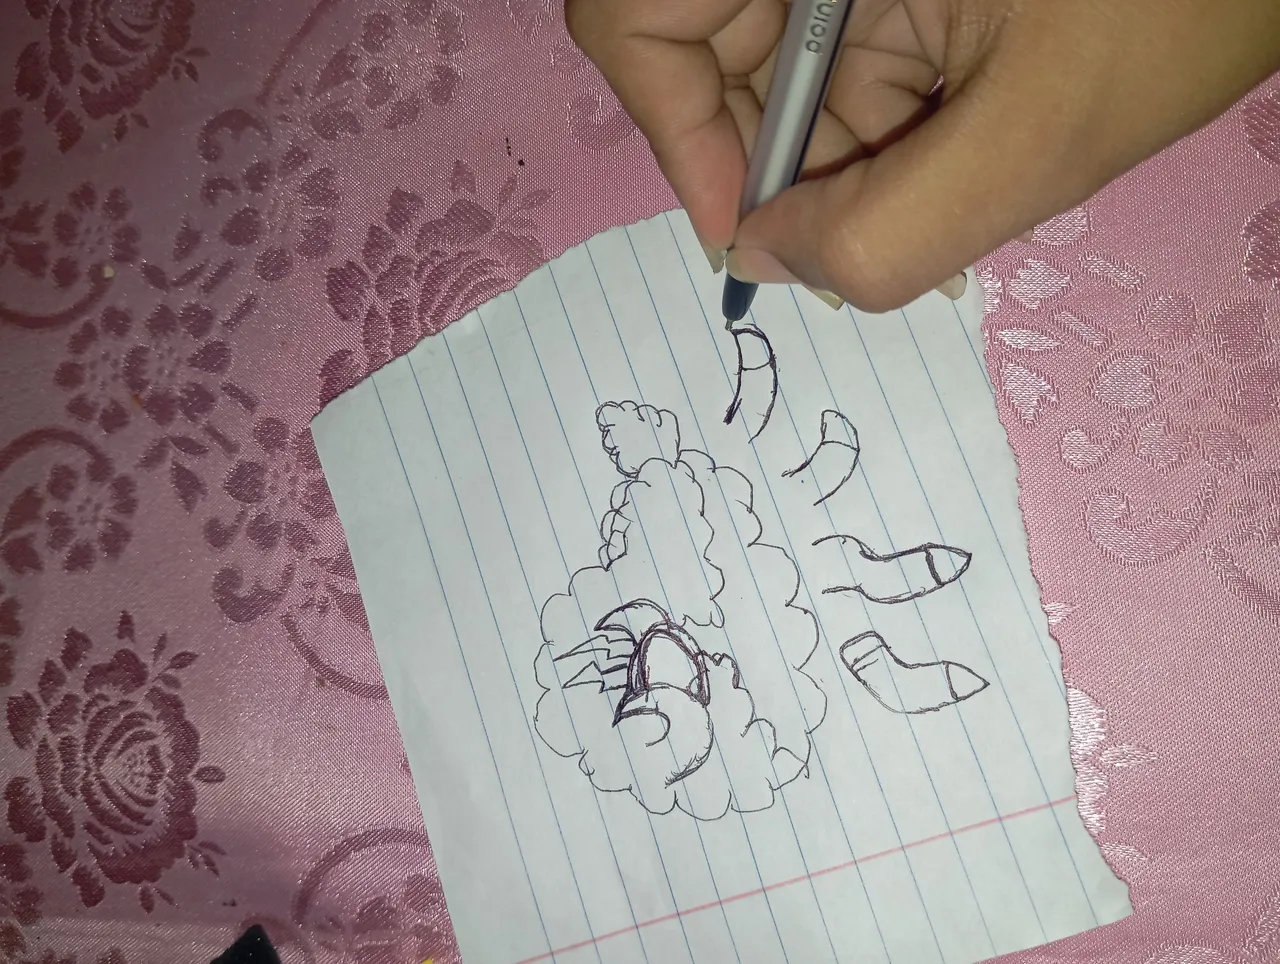
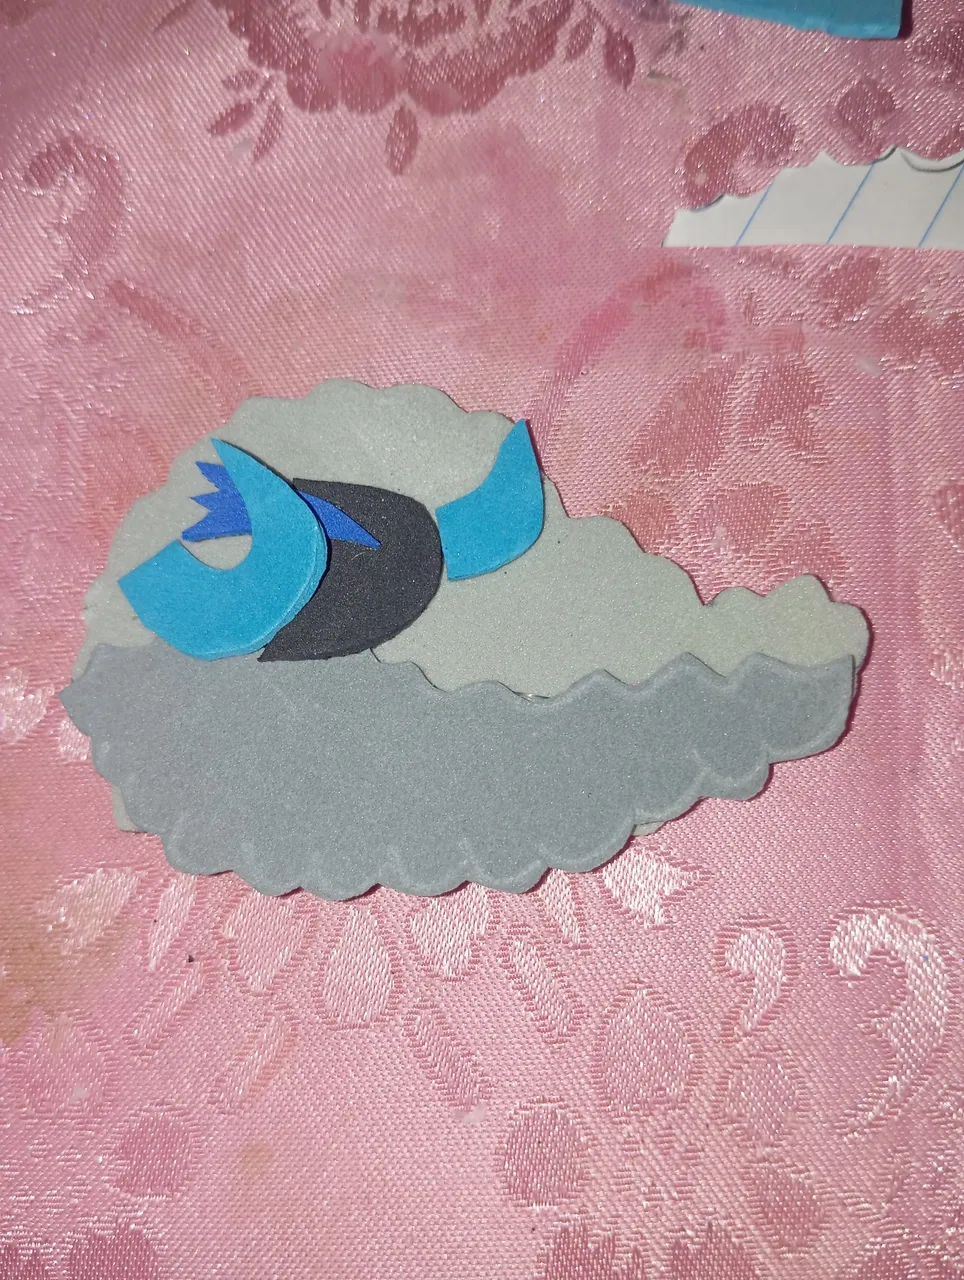
A continuación vamos a realizar el diseño de Woolitz para decorar el frente de nuestro estuche , inicié realizando un patrón ,el cuál voy a sacar pieza por pieza para trabajar
Next we are going to make the Woolitz design to decorate the front of our case, I started by making a pattern, which I am going to take out piece by piece to work with.
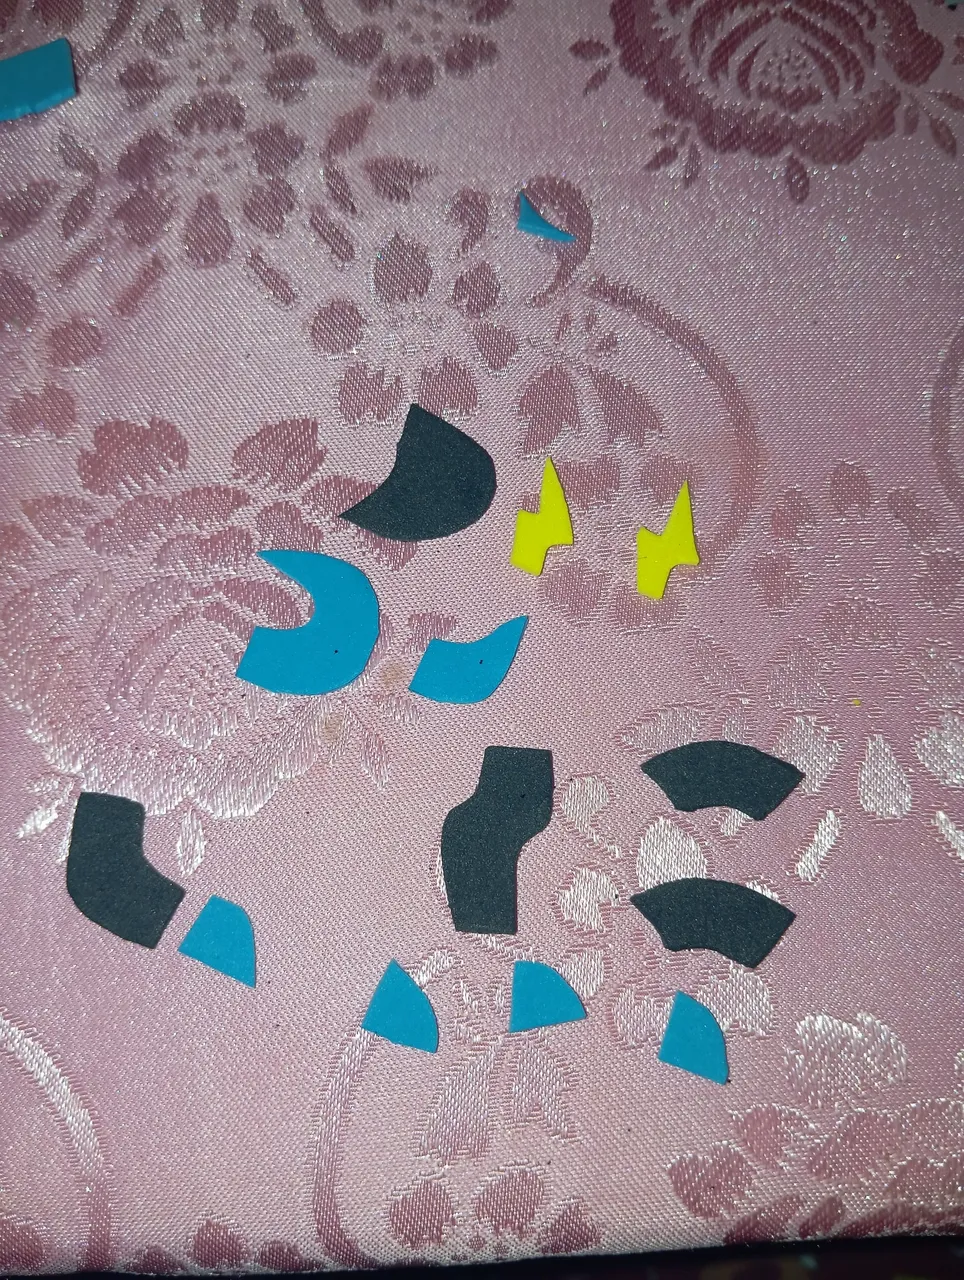
Una vez que tengamos listo nuestro patrón vamos a comenzar recortando las piezas con los colores similares al diseño original, recortaremos su cuerpo ,su cabeza,patas,cachos ,rayos , pezuñas
Once we have our pattern ready we are going to start cutting out the pieces with the colors similar to the original design, we will cut out his body, head, legs, horns, rays, hooves and hooves.
A continuación iniciaremos pegando y formando nuestro personaje Woolitz , comenzaremos pegando su cuerpo la parte gris oscura y gris clara , su cabeza , cachos y rayos
Next we will start gluing and forming our Woolitz character, we will start by gluing his body, the dark gray and light gray parts, his head, horns and spokes
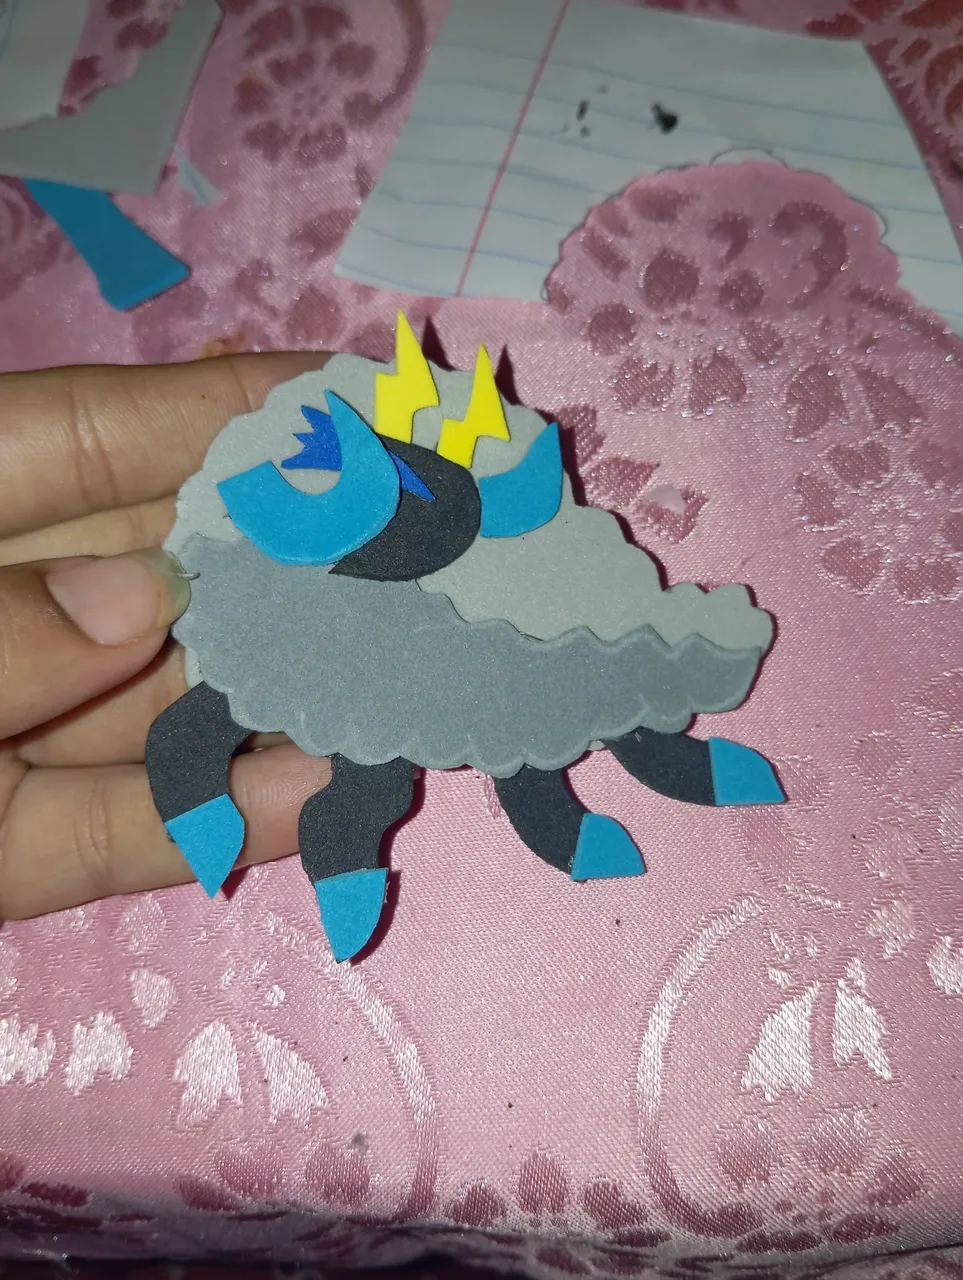
Luego vamos a continuar pegando sus patas semi separadas y sus pezuñas
Then we will continue gluing his semi separated legs and his hooves.
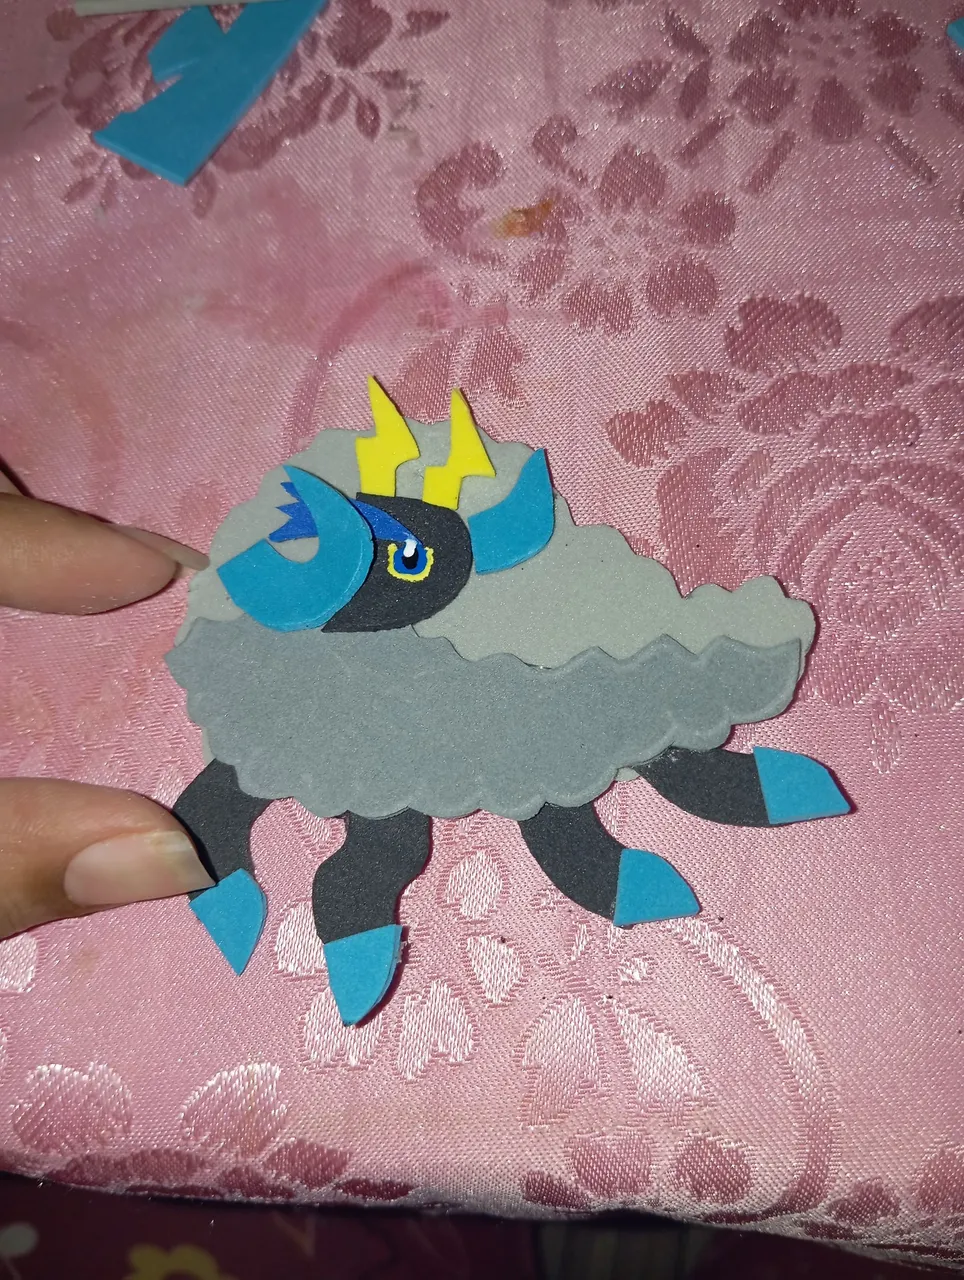
Para culminar con el diseño vamos a tomar su ojo y lo pintaremos con pintura color azul,negro y reflejo blanco
To finish with the design we will take his eye and paint it with blue, black and white paint
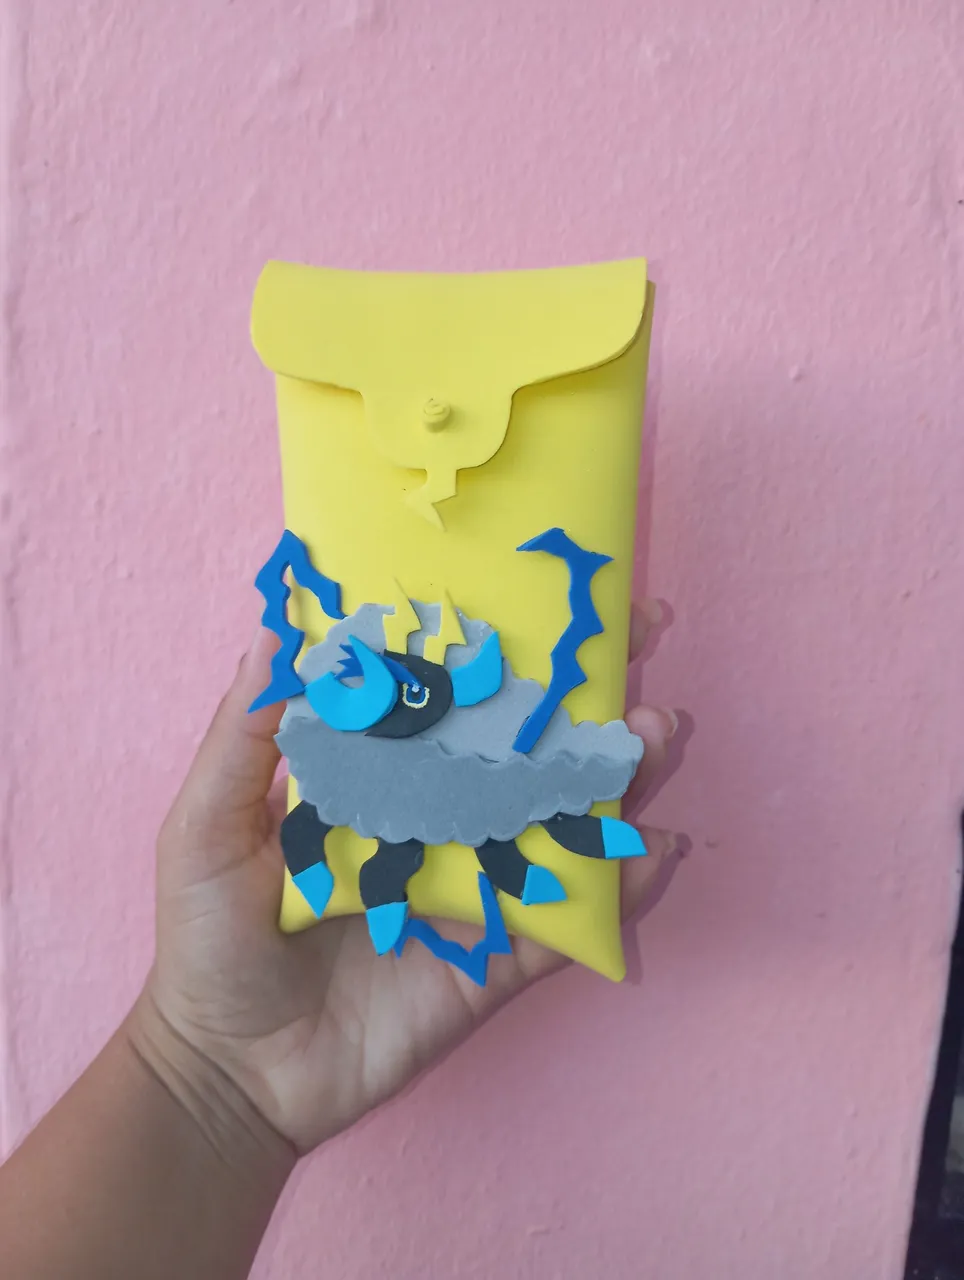
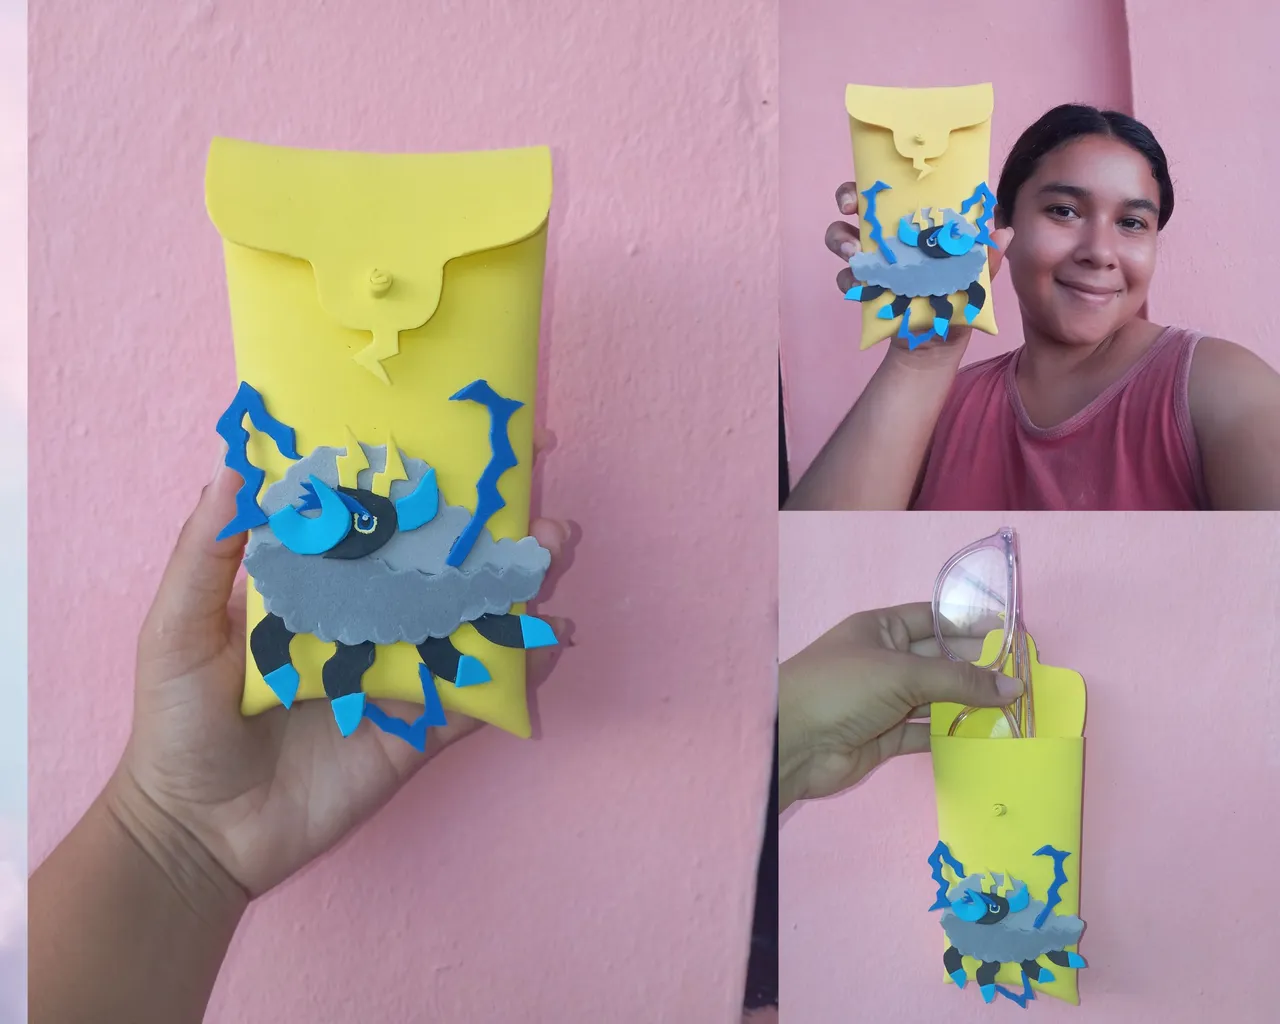
Una vez listo el estuche y el diseño de Woolitz vamos a continuar pegando en el centro del estuche , con unos rayos alrededor, finalizando nuestro estuche de lentes .
De esta manera realicé mi hermoso estuche de lentes con el personaje de Woolitz, ideal para tener en un lugar seguro nuestros lentes, y llevarlo conmigo siempre .
Créditos: el personaje pertenece a la comunidad holozing, las fotos las tomé con mi redmi 12 y traduje los textos con el traductor deepl,feliz noche amigos
Once the case and the Woolitz design are ready, we will continue gluing in the center of the case, with some rays around it, finishing our glasses case.
In this way I made my beautiful glasses case with the Woolitz character, ideal to have in a safe place our glasses, and take it with me always.
Credits: the character belongs to the holozing community, the photos were taken with my redmi 12 and I translated the texts with the translator deepl,happy evening friends.