Hola buenos días apreciados amigos espero que se encuentren bien , llenos de mucha energía, hoy les quiero compartir un hermoso diseño que le realicé al vaso de mi hijo con el personaje de Woolitz , les quiero decir que amé el resultado, quedó casi igual que el original , me siento orgullosa del trabajo y creatividad que tengo
Hello good morning dear friends I hope you are well, full of energy, today I want to share a beautiful design that I made to my son's glass with the character of Woolitz, I want to say that I loved the result, it was almost the same as the original, I am proud of the work and creativity that I have.
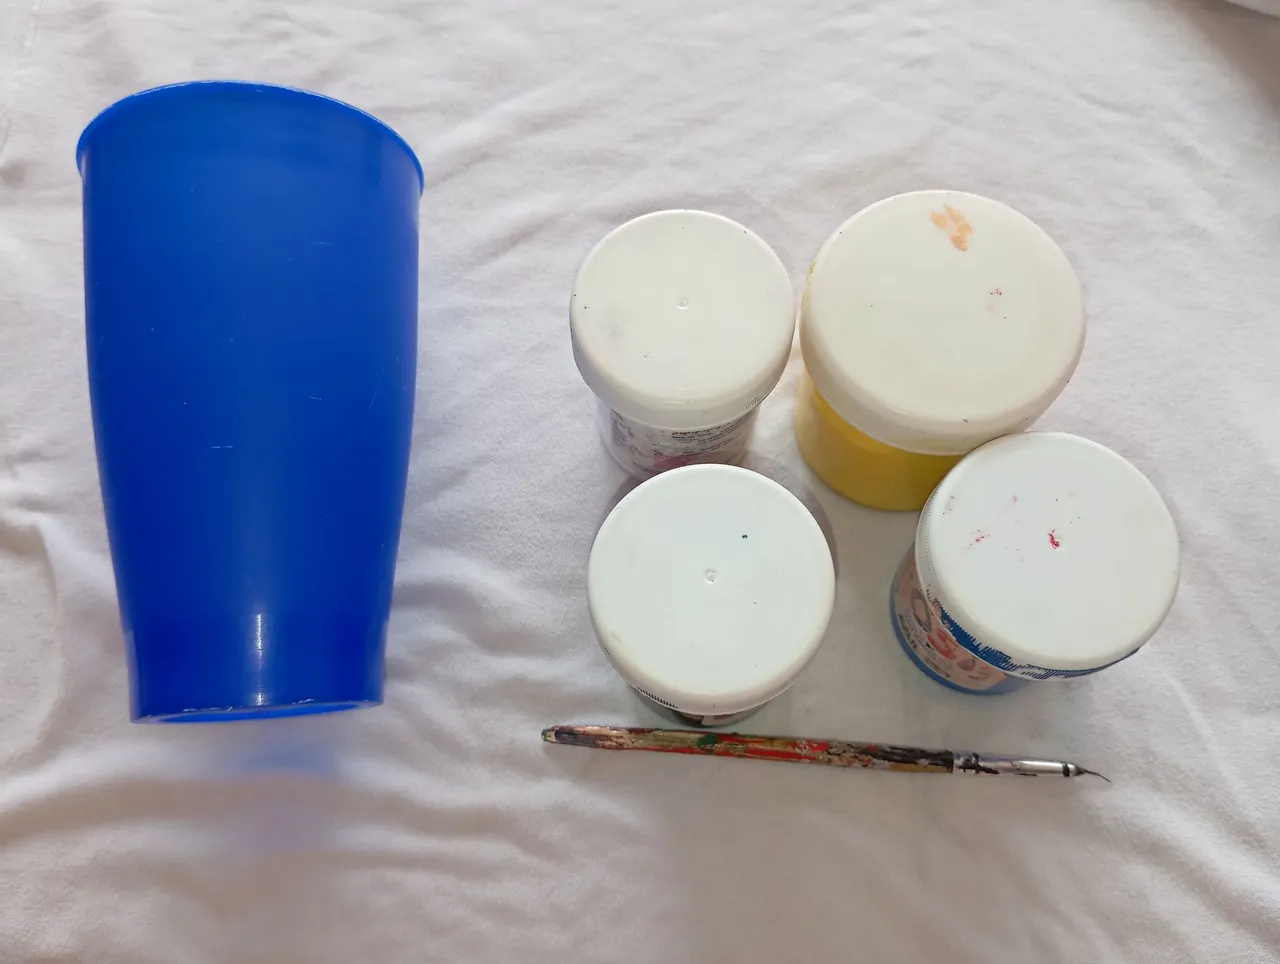
Materiales qué utilicé para diseñar mi vaso en la parte frontal:
-Pinturas
-Pincel
-Lapiz
-Vaso
Materials that I used to design my glass on the front:
-Paints
-Brush
-Pencil
-Glass
A continuación los pasos a seguir para pintar nuestro vaso:
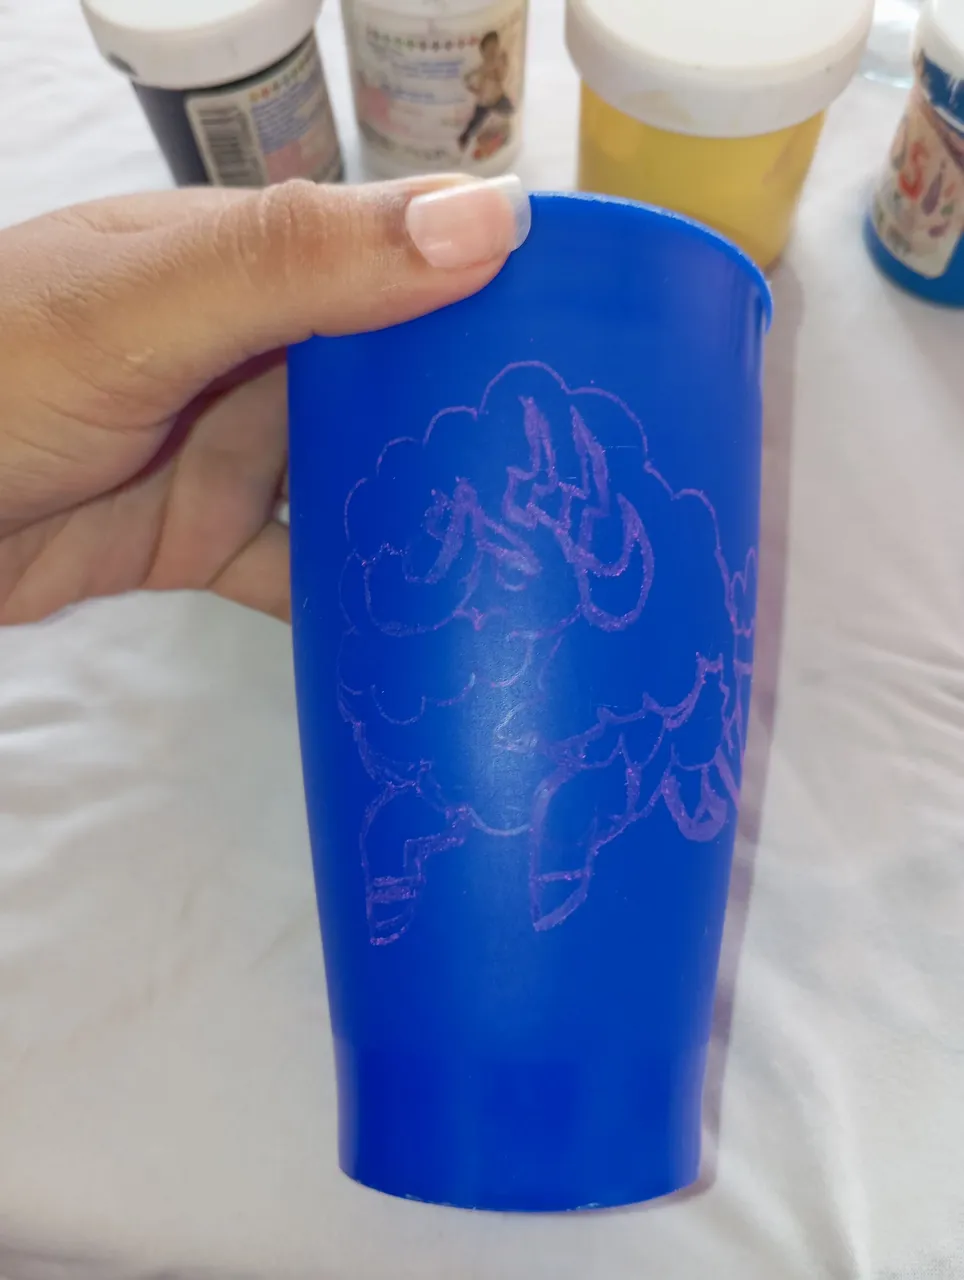
Paso número 1: iniciaremos realizando el diseño del personaje Woolitz a lápiz, para cuando vayamos a pintar no nos equivoquemos, iniciamos con su rostro,cachos, rayos y por último bajamos hacia su cuerpo esponjoso y sus patas
Here are the steps to follow to paint our glass:
Step number 1: we will start by making the design of the Woolitz character in pencil, so that when we go to paint we do not make a mistake, we start with his face, horns, rays and finally we go down to his fluffy body and legs.
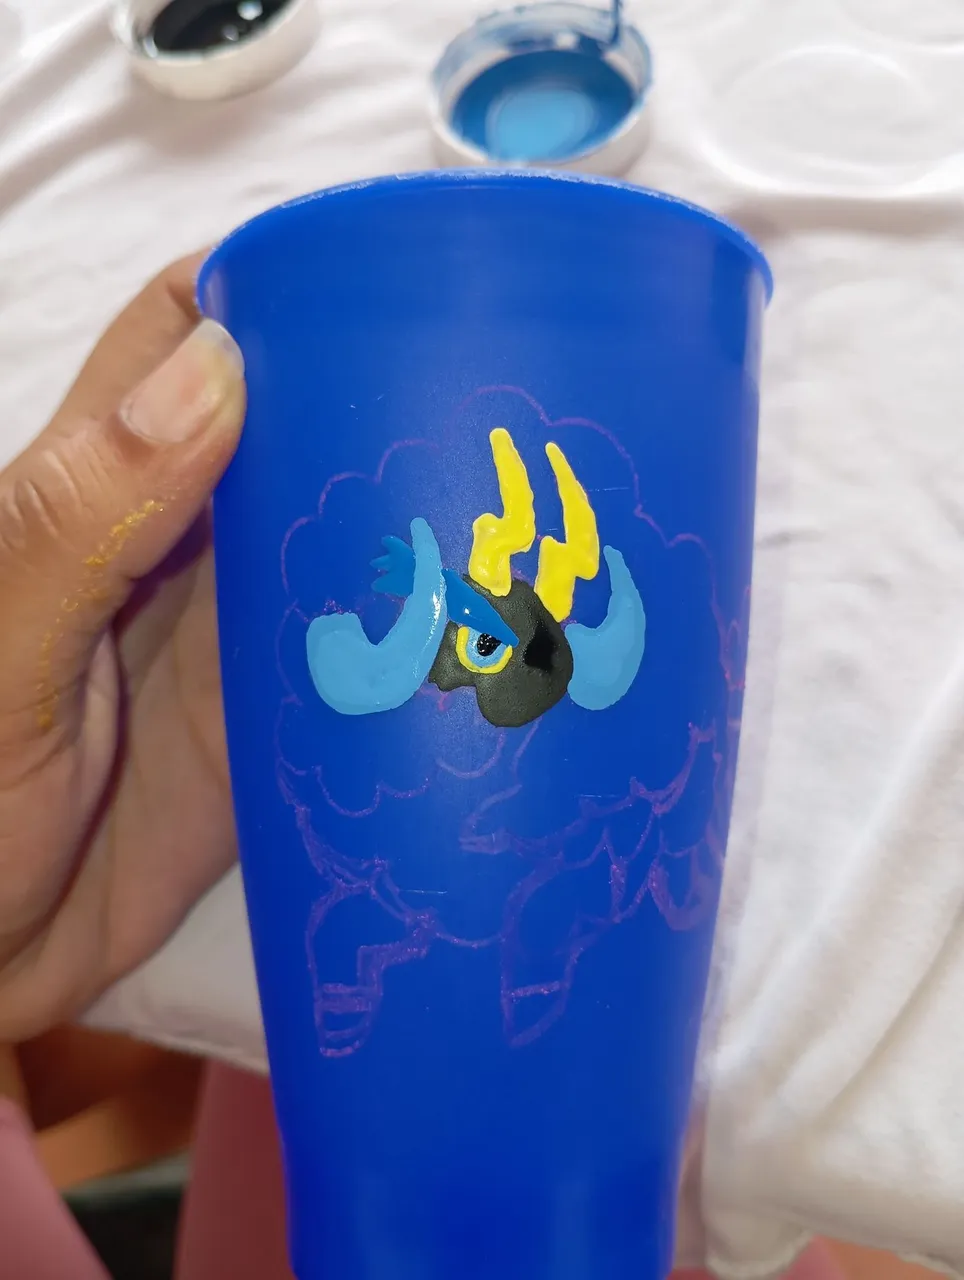
Paso número 2: a continuación en nuestro segundo paso vamos a iniciar pintando el rostro de nuestro personaje Woolitz , comenzaremos con su cabeza color negro,ojo azúl con amarillo y negro ,sus cuernos color azul claro y sus rayos amarillo amigos
Step number 2: next in our second step we will start painting the face of our Woolitz character, we will start with his head black color, blue eye with yellow and black, his horns light blue color and his rays yellow friends.
Paso número 3: seguidamente vamos a continuar agregando pintura color gris al cuerpo o pelaje esponjoso de nuestro personaje
Step number 3: next we will continue adding gray paint to the body or fluffy fur of our character.
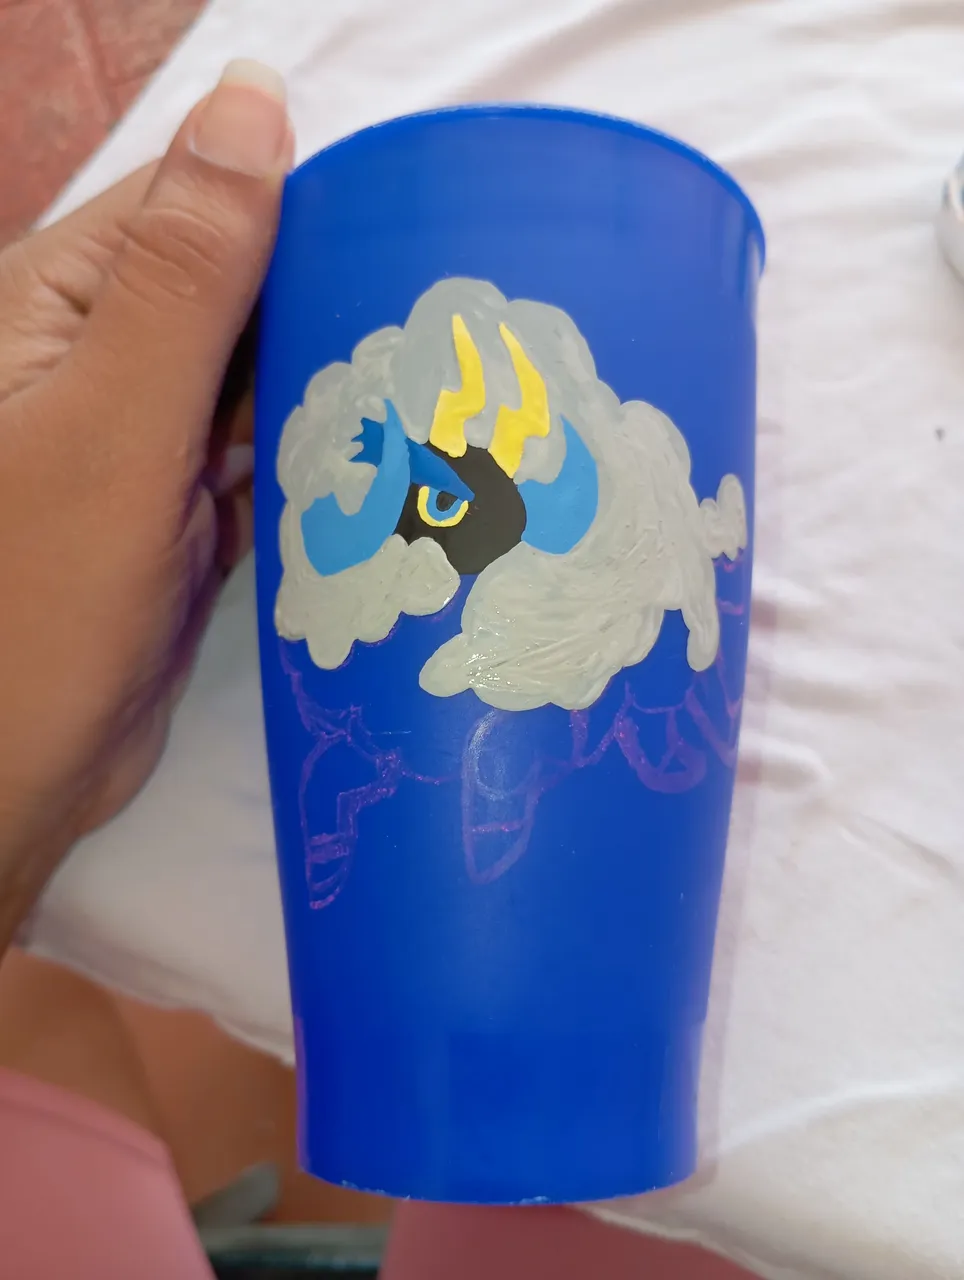
Paso número 4: luego en nuestro cuarto paso vamos a continuar agregando pintura color gris oscuro para el restante del pelaje de nuestro personaje Woolitz
Step number 4: then in our fourth step we are going to continue adding dark gray paint for the rest of the fur of our Woolitz character.

Paso número 5: en nuestro quinto paso vamos a continuar agregando pintura color negro en sus patas y azul claro en la parte de sus pezuñas, para finalizar alrededor de su cuerpo continúe pintando unos rayos azul claro culminando nuestro diseño
Step number 5: in our fifth step we will continue adding black paint on his paws and light blue paint on his hooves, to finish around his body we will continue painting light blue rays to complete our design.
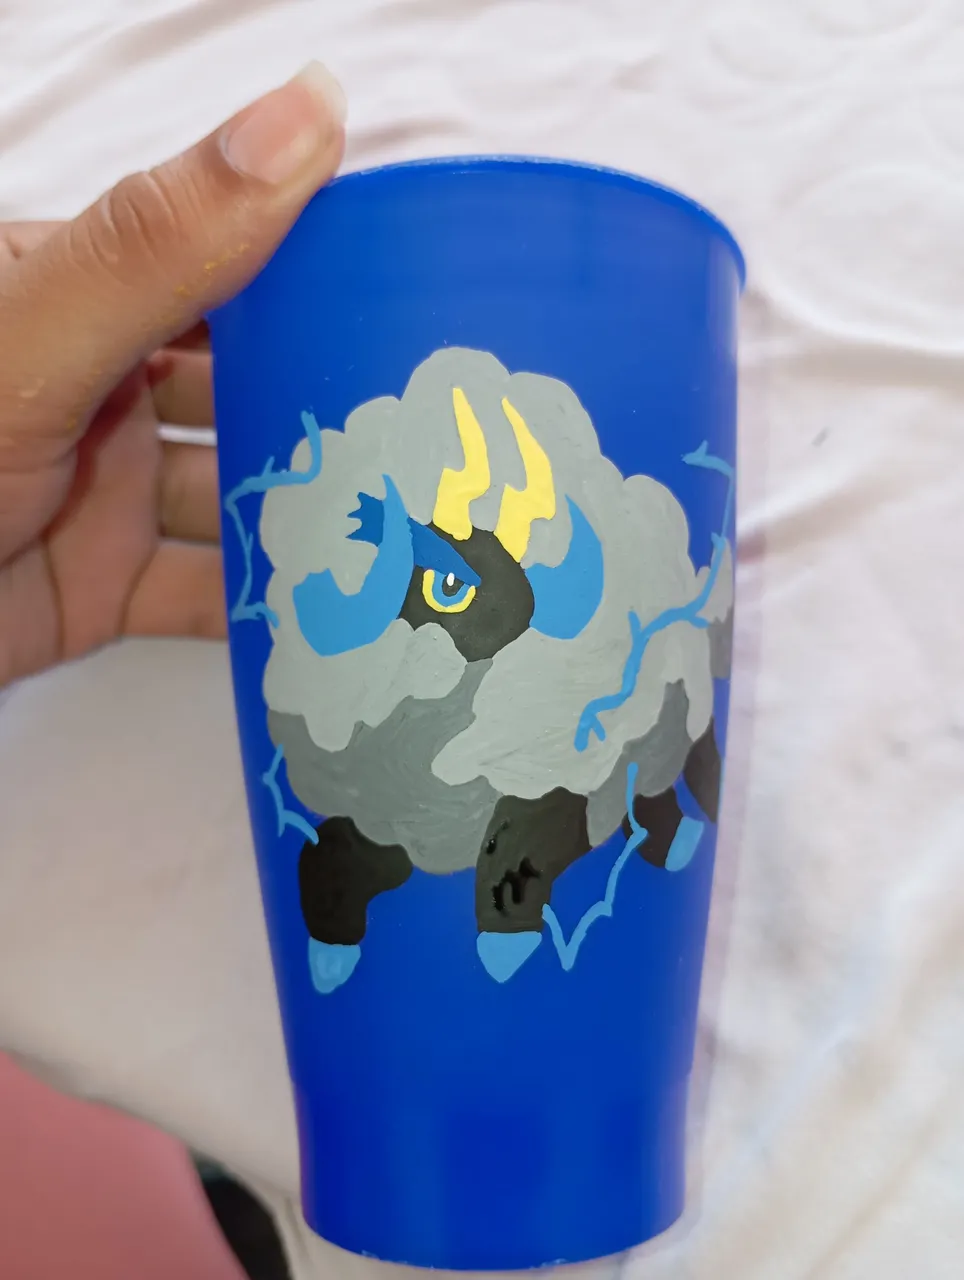
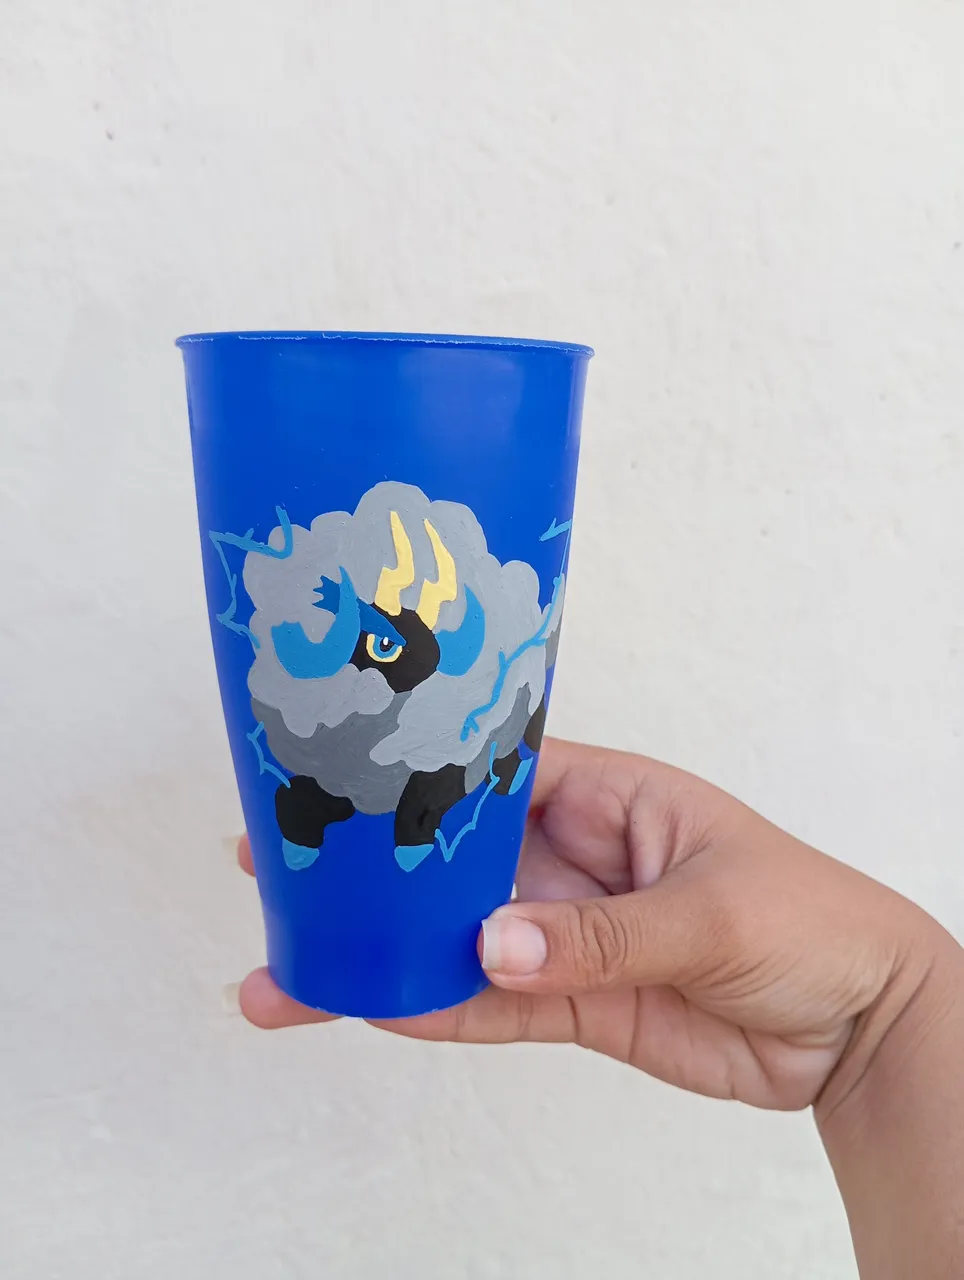
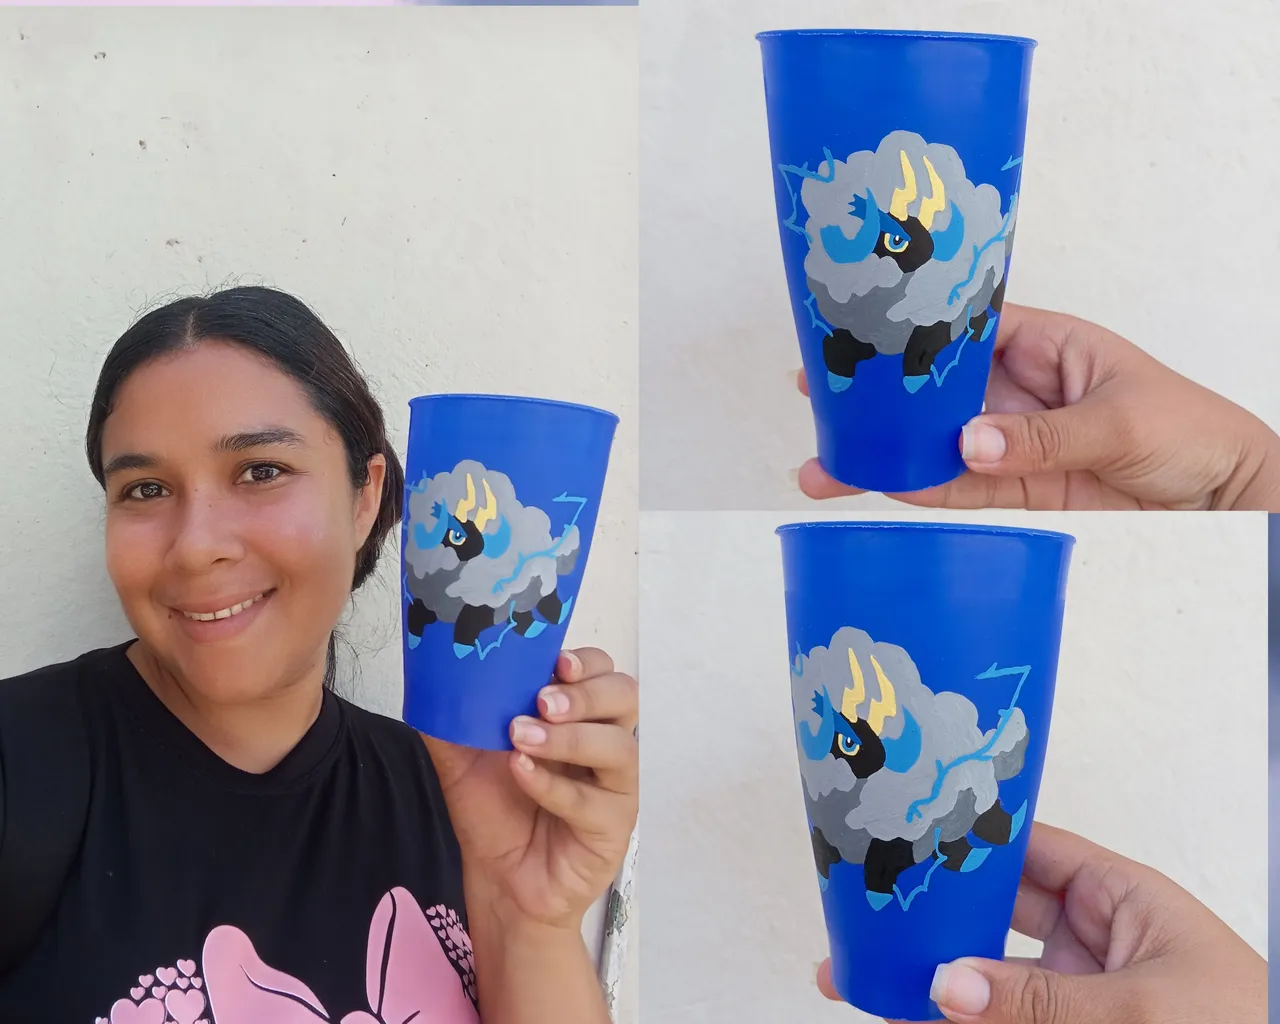
Resultado final: de esta manera realicé el hermoso personaje de Woolitz en la parte frontal de mi vaso , ideal para los niños amantes de los personajes y diseños, cómo les dije al principio del post me siento contenta por este resultado quedó muy bien.
Créditos: el personaje Woolitz pertenece a la comunidad holozing , las fotos las tomé con mi redmi 12 y traduje los textos con el traductor deepl, feliz día para todos amigos
Final result: in this way I made the beautiful Woolitz character on the front of my glass, ideal for children who love characters and designs, as I said at the beginning of the post I am happy for this result was very good.
Credits: the Woolitz character belongs to the holozing community, the photos were taken with my redmi 12 and I translated the texts with the deepl translator, happy day to all friends