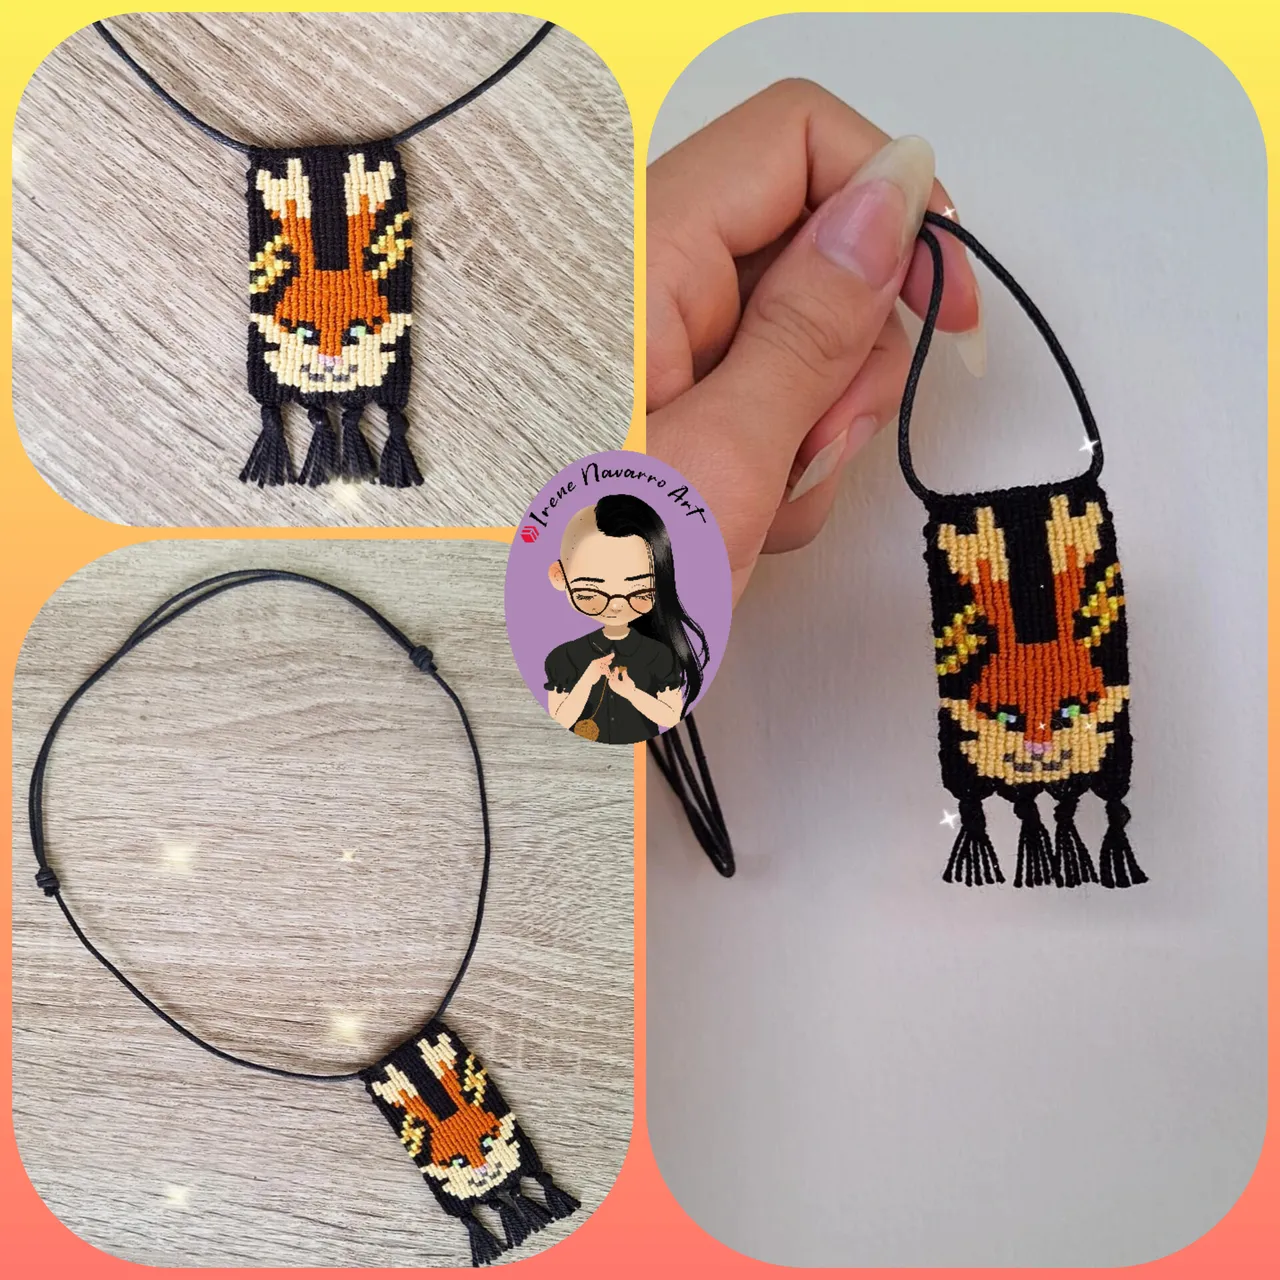
HOLO!!! Greetings to the entire community, today I come to share my most recent creation inspired by Holozing, it is a necklace made in the macramé technique with the figure of Zappit, the electric rabbit from Holozing and one of the initiating creatures of the game, I share with you the pattern and the description of the step by step, I hope it is useful to you, at the end of the post I share the result of my rewards for delegation @zingtoken and I hope you are encouraged to delegate 🥰
HOLO!!! Saludos a toda la comunidad, hoy vengo a compartir mi más reciente creación inspirada en Holozing, se trata de un collar hecho en la técnica macramé con la figura de Zappit, el conejo eléctrico de Holozing y una de las criaturas iniciadoras del juego, les comparto el patrón y las descripción del paso a paso, espero les sea de utilidad , al final del post les comparto el resultado de mis recompensar por delegación @zingtoken y espero se animen a delegar 🥰


Materials / Materiales
- 1mm acrylic crochet thread: black, white, green, light yellow, dark yellow, ocher, orange, green, pink and dark gray.
- Table
- Scissors
- 80 cm of cord
- Rule
- 2 clothespins
- Pattern
- Hilo acrílico para crochet de 1mm: negro, blanco, verde, amarillo claro, amarillo oscuro, ocre, naranja, verde, rosado y gris oscuro.
- Tabla
- Tijera
- 80 cm de cordón
- Regla
- 2 pinzas para ropa
- Patrón

Process / Proceso
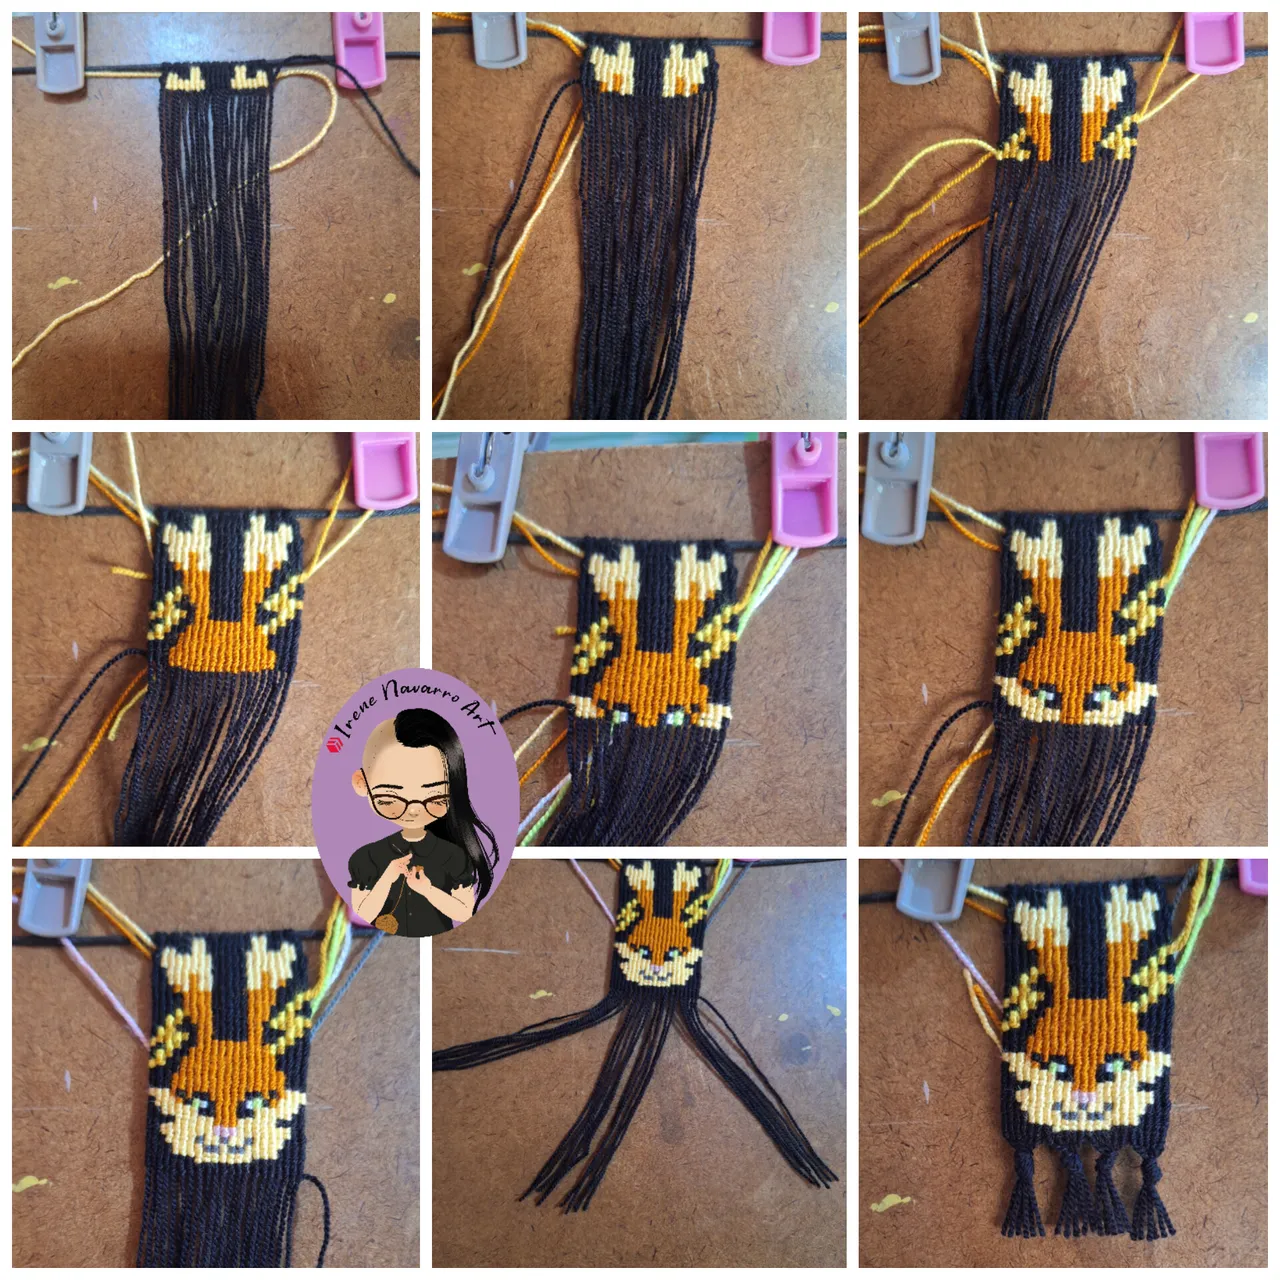
First I made the pattern in the Pixel Station application, I created a canvas 21 squares wide by 26 squares high, this means that 21 guide threads are needed and 26 rows of knots will be made, because each square represents a knot, the knots are do with the knotting threads, the knotting thread wraps twice around each of the guide threads from right to left in the odd rows and from right to left in the even rows. To make the pattern easier to read, I edited the image in Inshot and placed the corresponding numbers.
Primero elaboré el patrón en la aplicación Pixel Station, creé un lienzo de 21 cuadros de ancho por 26 cuadros de alto, esto significa que se necesitan 21 hilos guía y se harán 26 hileras de nudos, porque cada cuadro representa un nudo, los nudos se hacen con los hilos anudadores, el hilo anudador envuelve dos veces cada uno de los hilos guía de derecha a izquierda en las hileras impares y de derecha a izquierda en la hileras pares. Para facilitar la lectura del patrón edite la imagen en Inshot y coloqué los números correspondientes.

Cut 80 cm of cord to create the necklace, make a sliding knot at each end as shown in the image, this way the necklace can be adjusted and reduced in length to the liking of the person wearing it.
Cortar 80 cm de cordón para crear el collar, hacer un nudo corredizo en cada extremo como muestra la imagen, de este modo el collar podrá ajustar y reducir el largo a gusto de la persona que lo use.

Place the cord wrapping the board. With the thread cut 10 hours of 30 cm and an additional strand that is left attached to the ball. Knot the strands to the cord as shown in the images and leave the strand attached to the ball on the left, 21 guide threads are obtained and the strand attached to the ball works as a background color knotting thread.
Colocar el cordón envolviendo la tabla. Con el hilo cortar 10 horas de 30 cm y una hebra adicional que se deja unida al ovillo. Anudar las hebras al cordón como se muestra en las imágenes y dejar la hebra unida al ovillo de primer lugar a la izquierda, se obtienen 21 hilos guía y la hebra unida al ovillo funciona como hilo anudador de color de fondo.

Follow the pattern as appropriate, each square is a knot, to change the color of the knotting thread, hold it with clothespins and cross the strands behind. At the end of the pattern, make an additional row with only the black thread. Separate the strands into 4 groups and tie 4 knots. Cut the strands to form fringes.
Seguir el patrón según corresponda, cada cuadro es un nudo, para cambiar de color de hilo anudador se sujeta con las pinzas de ropa y se cruzan las hebras por detrás. Al finalizar el patrón hacer una hilera adicional solo con el hilo negro. Separar las hebras de 4 grupos y hacer 4 nudos. Cortar las hebras para formar flecos.
Result / Resultado
I liked the result, it is easy to do and has few color changes, I hope you are encouraged to do it 🥰
A mi me gustó el resultado, es fácil de hacer y tiene pocos cambios de color, espero se animen a hacerlo 🥰


Imágenes tomadas con dispositivo Samsung A54. Portada editada en Inshot
Pictures taken with Samsung A54 device. Cover edited in Inshot

Espero les haya gustado. Les invito a leer mis próximas publicaciones y siempre estaré dispuesta a responder sus preguntas y comentarios, también pueden seguirme y contactarme en cualquiera de mis redes sociales. ¡Muchas gracias!
I hope you liked it. I invite you to read my next publications and I will always be willing to answer your questions and comments, you can also follow me and contact me on any of my social networks. Thank you!
Facebook
Twitter
Instagram
Ko-Fi
Discord: irenenavarroart#0361