HOLO!!! I hope you are well, today I am here to share with you a project in the macramé technique, it is a bracelet inspired by the Healer of the Forest, for this I have designed a pattern by painting frame by frame in the Pixel Station application, so you can follow the instructions. instructions and make a similar bracelet 🥰. Before starting I would also like to share my delegation rewards, which grow every day and I feel very enthusiastic about the project, so far I have 2153 Zing, if you want to delegate you must do it to the @zingtoken account, they have also just added the referral option , so if you have not yet registered in Holozing you can use my referral link and I would greatly appreciate it, but if you are already registered you can access your referral link and invite other people, this option is available in the drop-down menu by clicking on your profile image in Holozing 🥰
HOLO!!! Espero estén bien, hoy vengo a compartir con ustedes un proyecto en la técnica macramé, se trata de un brazalete inspirado en la Sanadora del Bosque, para esto he diseñado un patrón pintando cuadro por cuadro en la aplicación Pixel Station, así que pueden seguir las instrucciones y hacer un brazalete igual 🥰. Antes de comenzar me gustaría compartir también mis recompensas por delegación, las cuales crecen cada día y me siento muy entusiasta con el proyecto, hasta ahora tengo 2153 Zing, si desean delegar deben hacerlo ala cuenta @zingtoken, además acaban de agregar la opción de referidos, así que si aun no se han registrado en Holozing pueden usar mi enlace de referido y se los agradecería mucho, pero si ustedes ya están registrados pueden acceder a su enlace de referido e invitar a otras personas, esta opción esta disponible en el menú desplegable al dar click en su imagen de perfil en Holozing 🥰

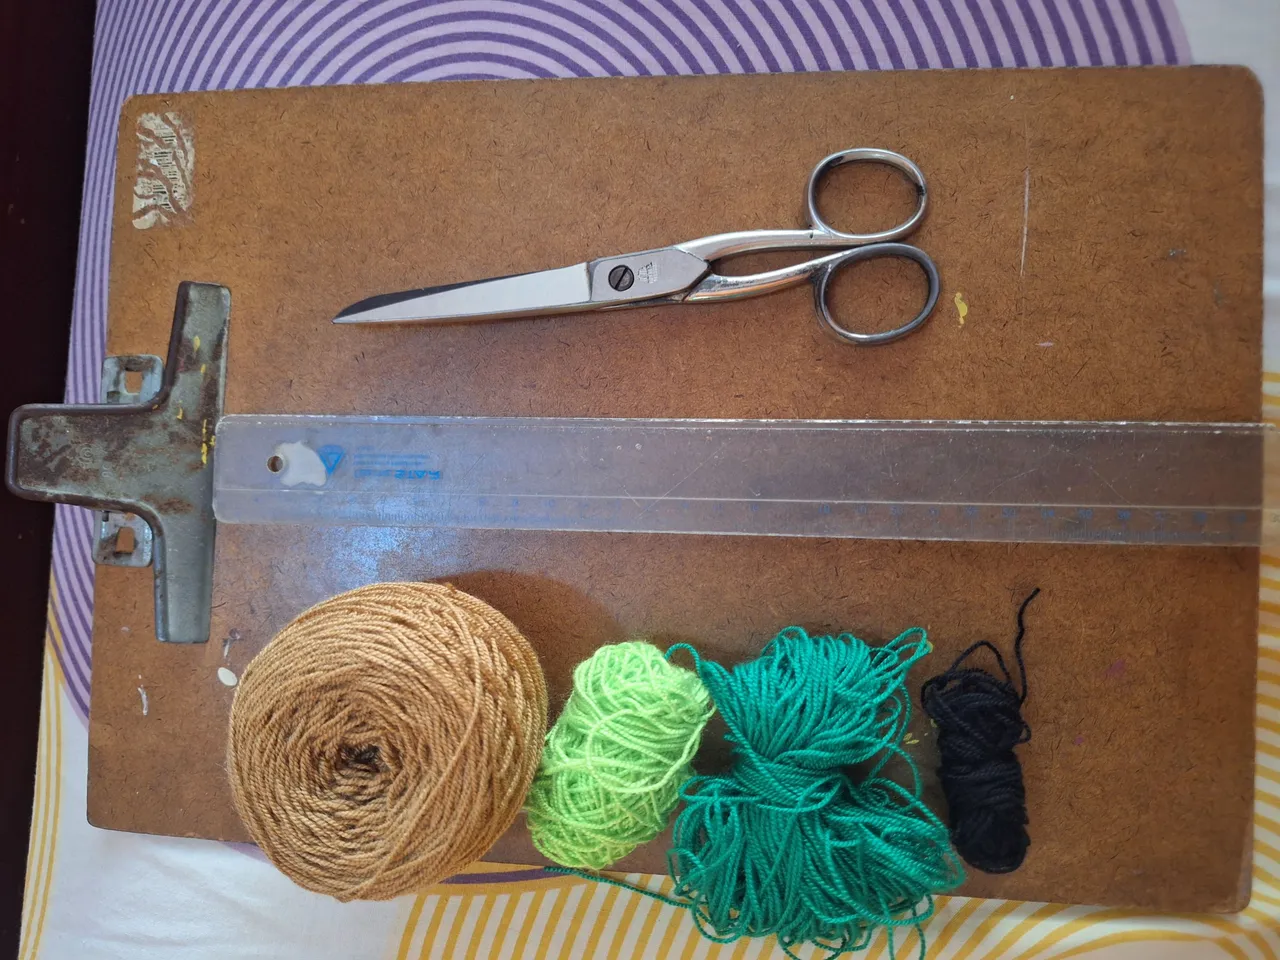
Materials / Materiales
- 1mm thick acrylic yarn: beige, light green, dark green and black.
- 30 cm ruler
- Clip board
- Scissors
- Pattern
- Hilo acrílico de 1mm de espesor: beige, verde claro, verde oscuro y negro.
- Regla de 30 cm
- Tabla con clip
- Tijera
- Patrón
Pattern/ Patrón
The pattern is made up of 17 squares high by 75 wide. This means that you must use 17 guide threads and make 75 rows of knots. When reading the pattern, it must be done vertically. Each square corresponds to a knot, where the knotting thread wraps each of the guide threads twice, from left to right in the even rows and from right to left in the odd rows. Color changes are made by crossing the knotting threads behind, using the corresponding one for each knot.
El patrón está formado por 17 cuadros de alto por 75 de ancho. Esto quiere decir que se deben usar 17 hilos guía y hacer 75 hileras de nudos, a la hora de leer el patrón se debe hacer en vertical. Cada cuadro corresponde a un nudo, en donde el hilo anudador envuelve dos veces cada uno de los hilos guía, de izquierda a derecha en las hileras pares y de derecha a izquierda en las hileras impares. Los cambios de color se hacen cruzando por detrás los hilos anudadores, usando el correspondiente para cada nudo.

Process/ Proceso
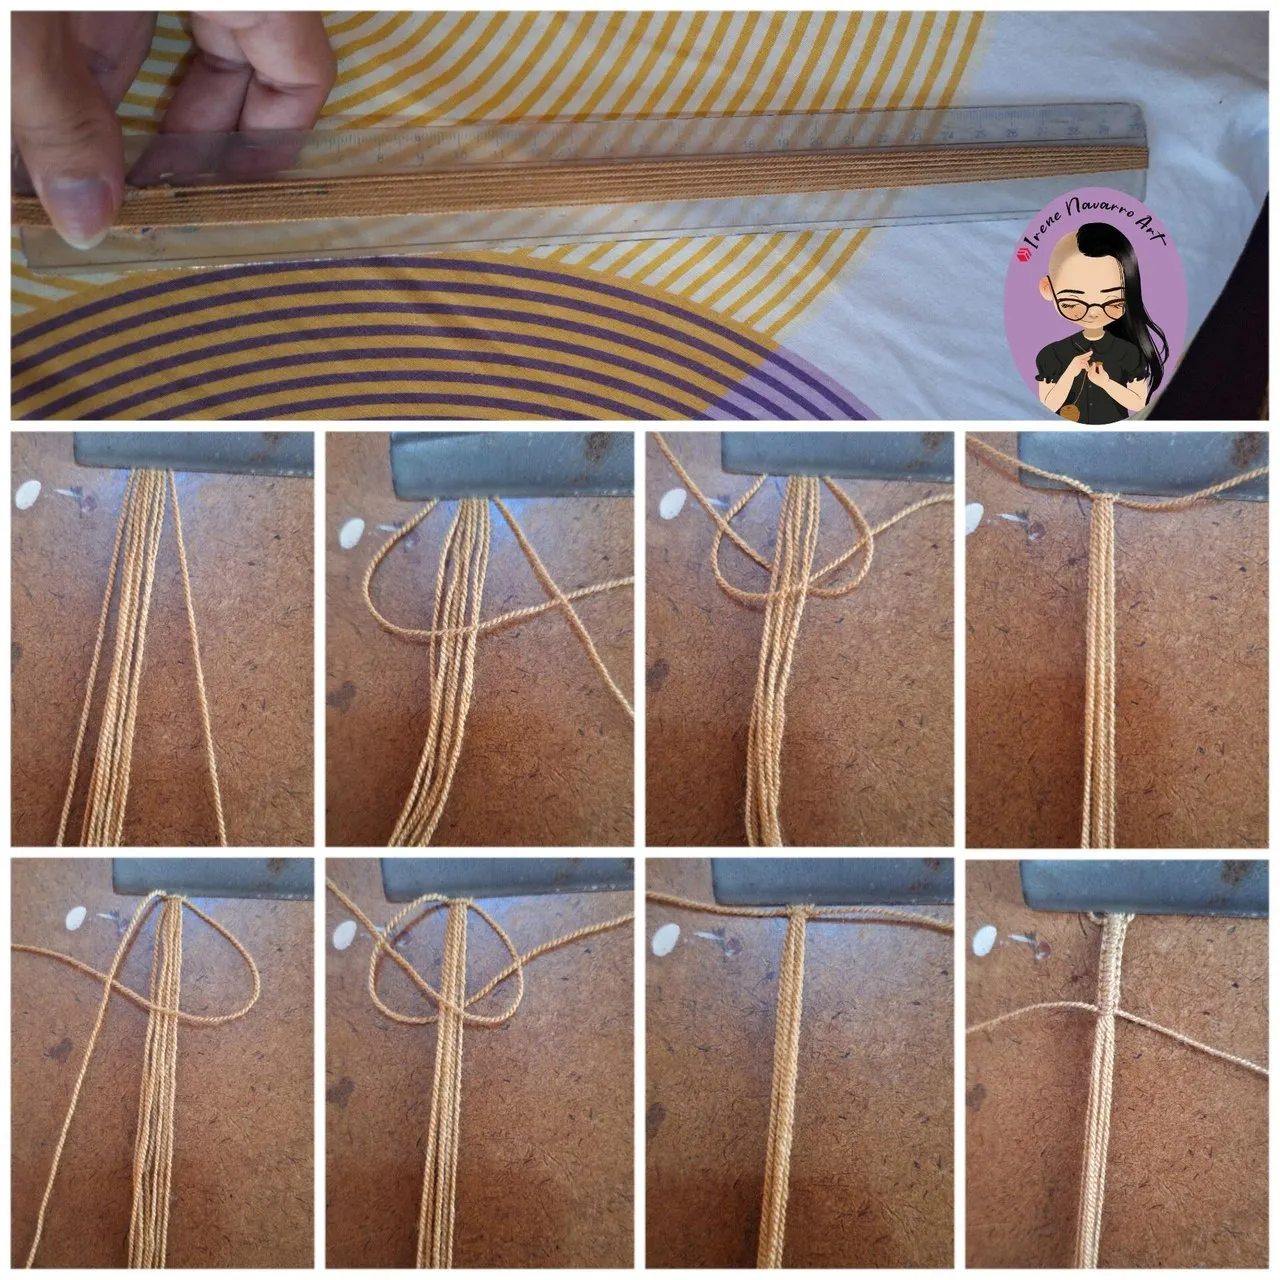
With the beige yarn cut 7 strands of 60cm, one strand of 80cm and an additional strand attached to the ball. Fasten the strands in half on the board, leaving the shortest strands in the center.
With the long strands, make 20 flat knots wrapping the center strands. The flat knots are made alternating the 4-shaped knot and the P-shaped knot, as you can see in the image.
Con el hilo beige cortar 7 hebras de 60cm, una hebra de 80 cm y una hebra adicional unida al ovillo. Sujetar las hebras por la mitad en la tabla, dejando las hebras más cortas al centro.
Con las hebras largas hacer 20 nudos planos envolviendo a las hebras del centro, los nudos planos se hacen alternando el nudo con forma de 4 y el nudo en forma de P, como pueden ver en la imagen.
Fold it into a U shape and clip it to the board, leaving the strand of the ball on the left side, thus obtaining the 17 guide threads and the knotting thread of the background color. Make 3 rows of the background color and then add the rest of the knotting threads and make the pattern starting with the leaves.
Doblar en forma de U y sujetar con el clip a la tabla, dejando la hebra del ovillo del lado izquierdo, de ese modo se obtienen los 17 hilos guía y el hilo para anudar del color del fondo. Hacer 3 hileras del color de fondo para luego agregar los demás hilos anudadores y hacer el patrón comenzando con las hojas.
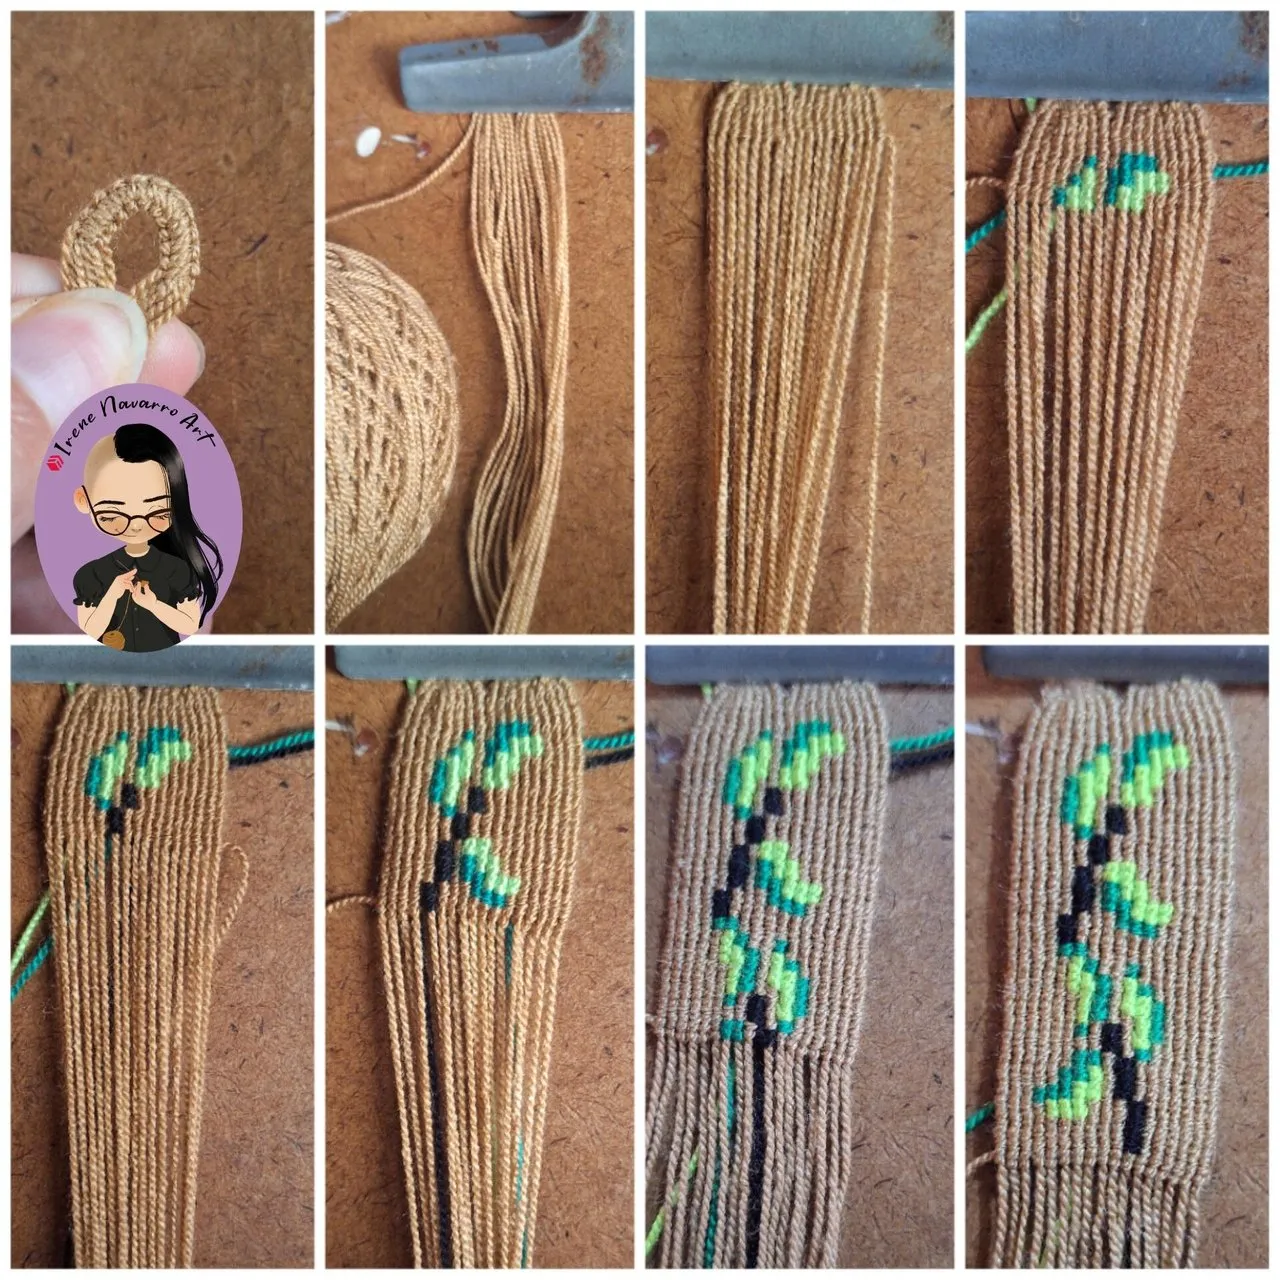
When finishing the first part of the leaf litter, make a row of knots only with the background color to start with the 4-leaf clover
Al terminar la primera parte de la hojarasca hacer una hilera de nudos solo con el color de fondo para comenzar con el trébol de 4 hojas
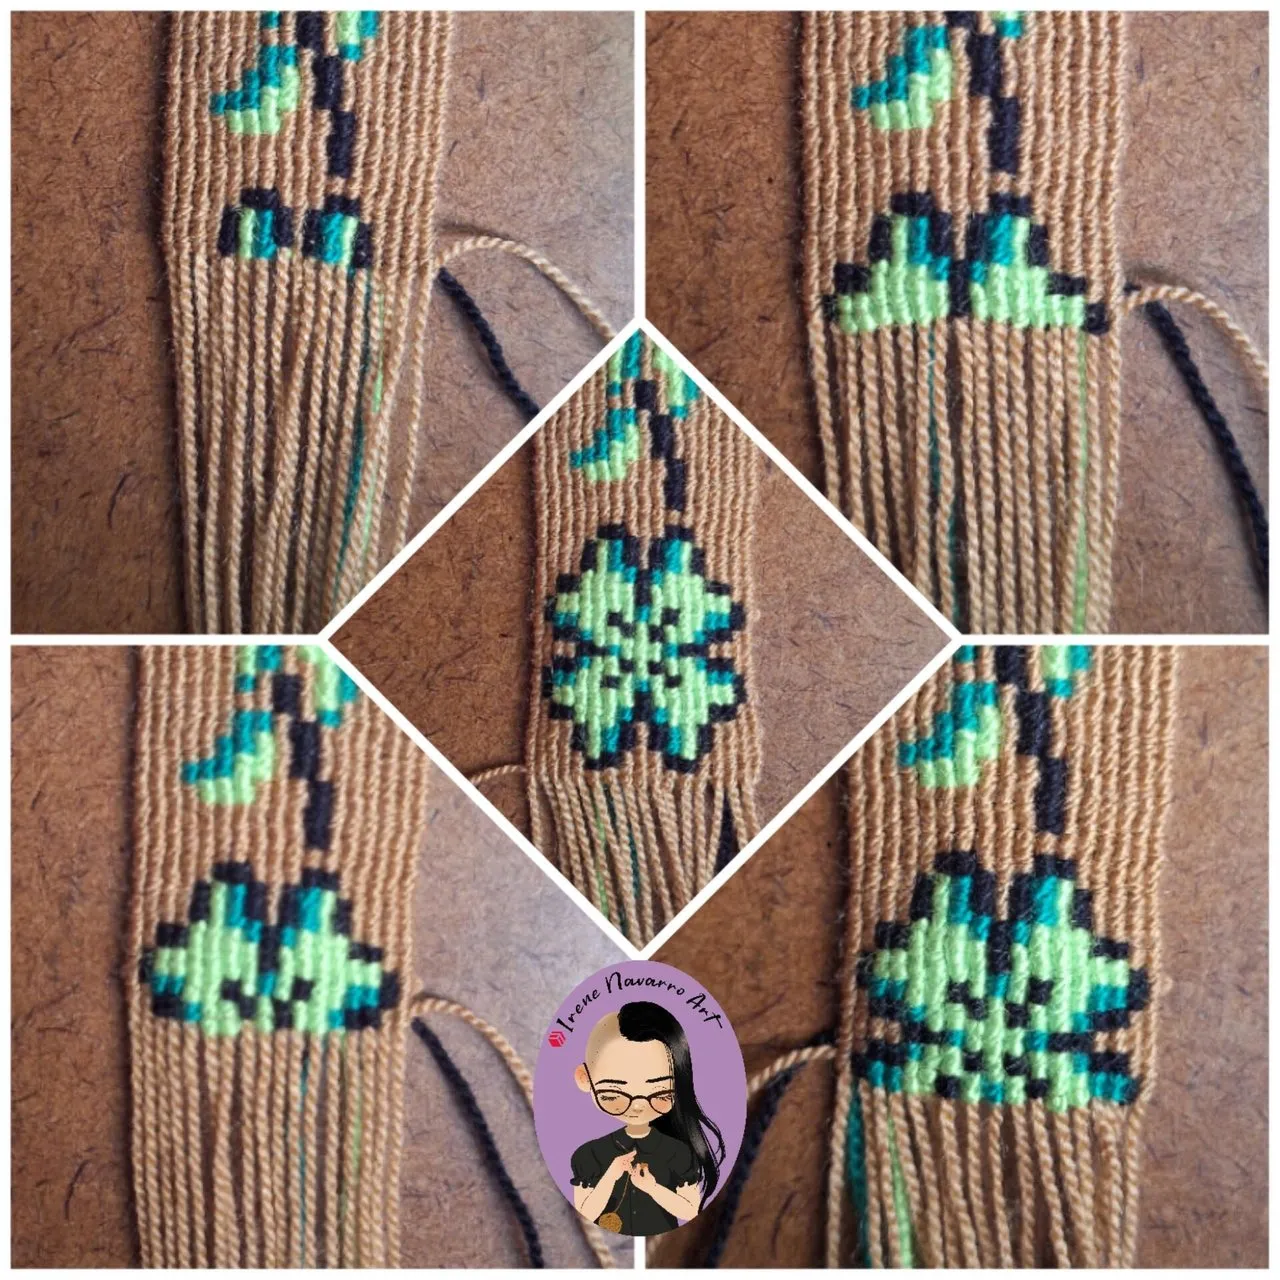
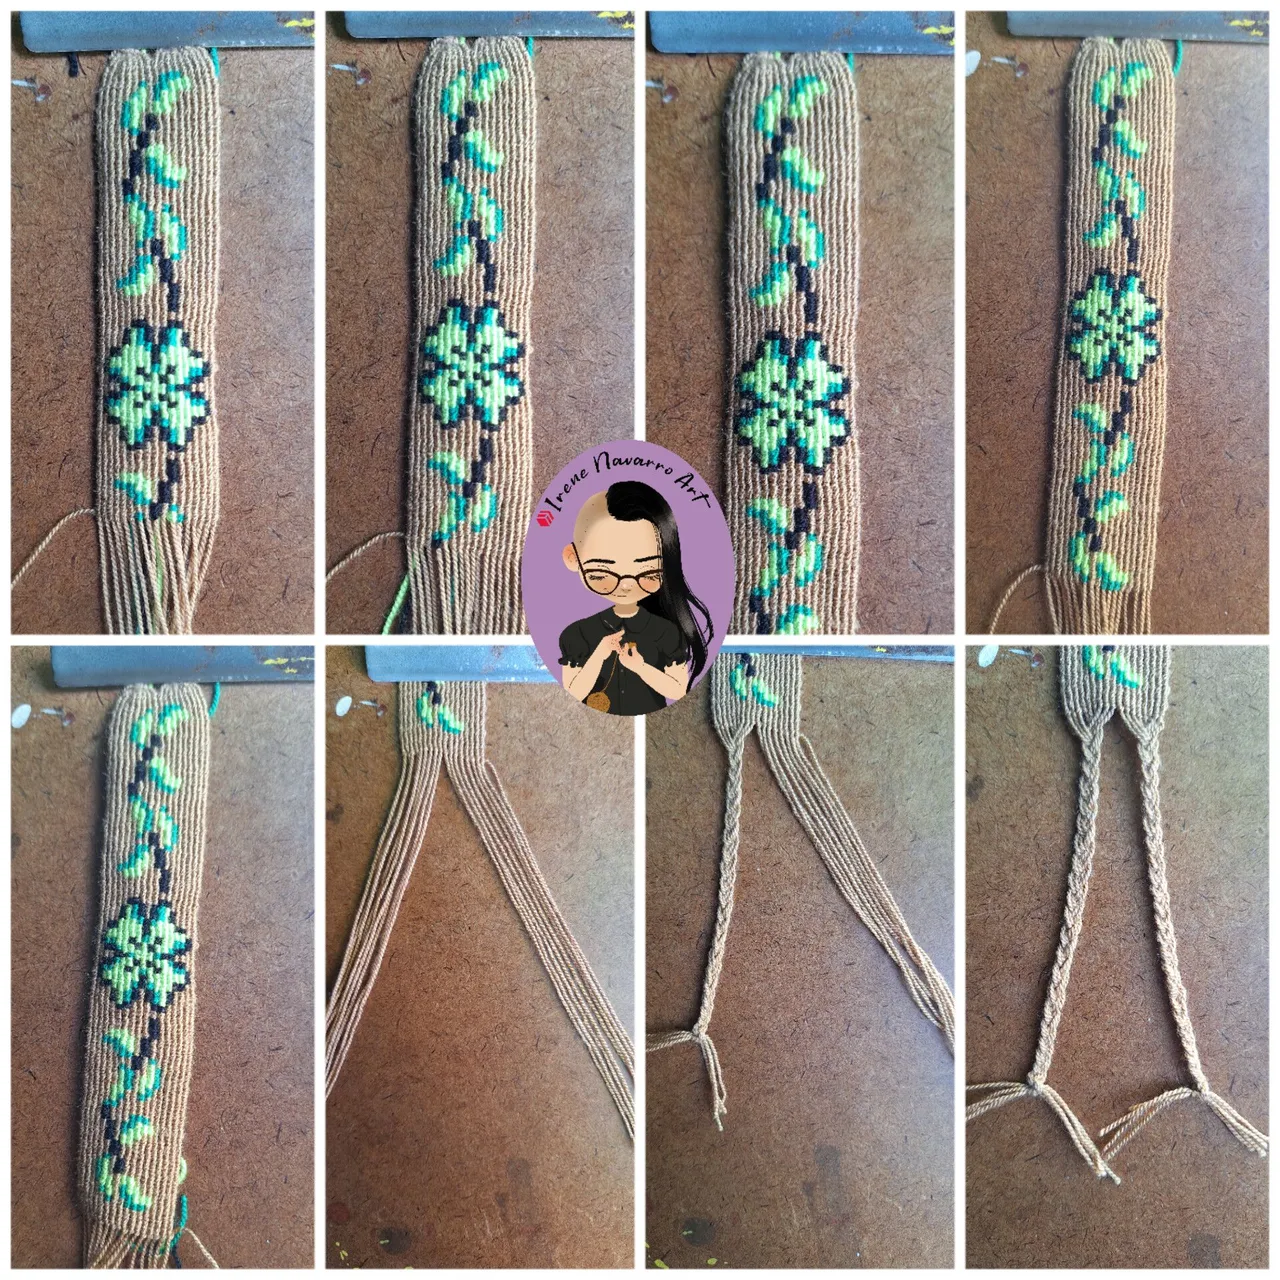
When finishing the clover make a row of background color and start the second part of the leaves, this design is like a mirror view of the first leaves. When finishing the leaves, make 3 rows of background color knots, divide the threads into two groups and make a finished braid with a knot in each part.
Al terminar el trébol hacer una hilera de color de fondo y empezar la segunda parte de las hojas, este diseño es como una vista de espejo de la primeras hojas. Al finalizar las hojas hacer 3 hileras de nudos de color de fondo, dividir los hilos en dos grupos y hacer un trenza terminada con un nudo en cada parte.
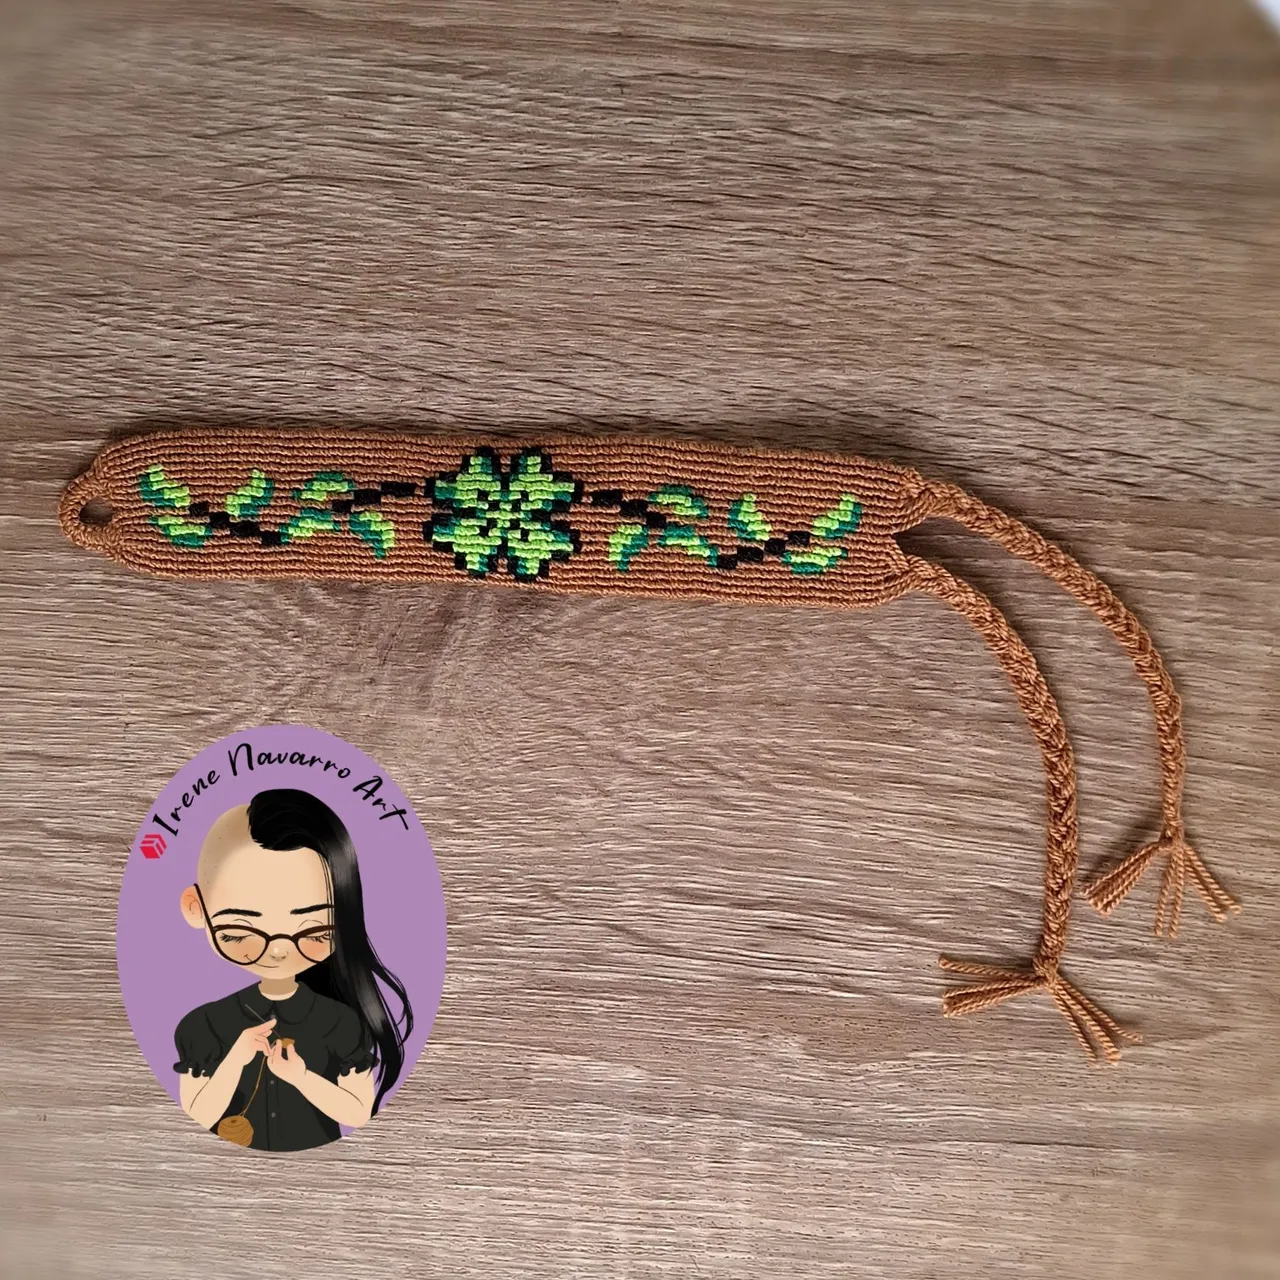
Result / Resultado
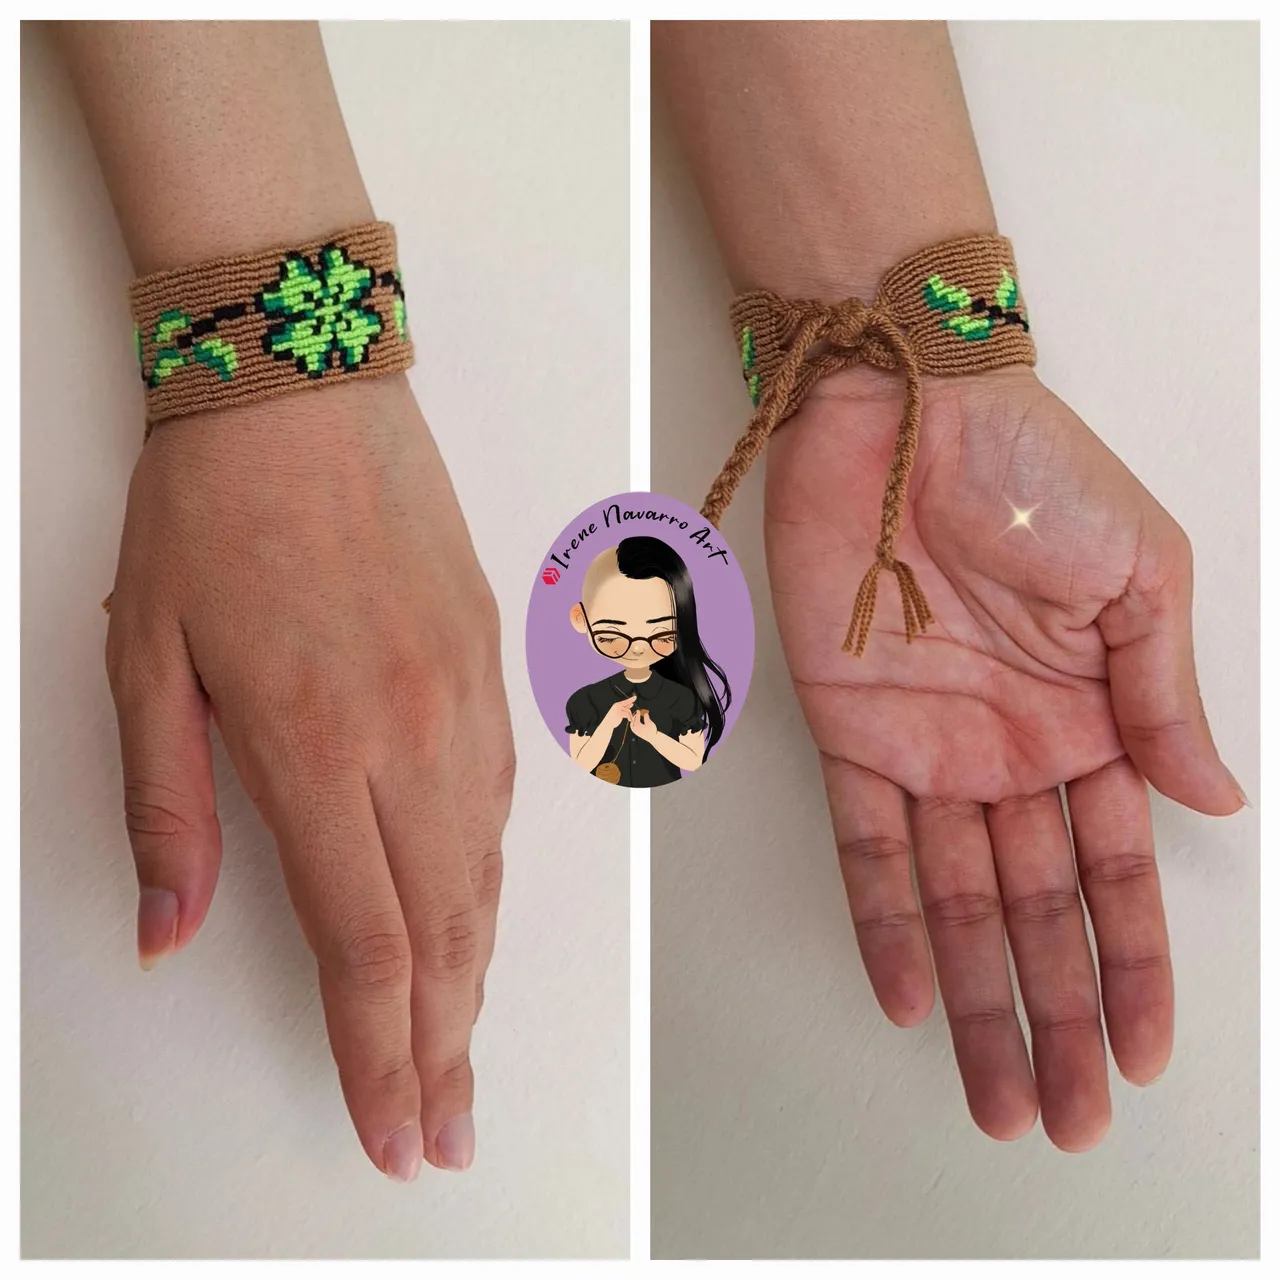
I really liked the bracelet, I think the beige background gives it a forest land look, I’m excited to make other bracelets inspired by other healers 🥰 What do you think?
A mi me gustó mucho el brazalete, creo que el fondo beige le da un aspecto de tierra de bosque, estoy entusiasmada por hacer otros brazaletes inspirados en los demás sanadores 🥰 ¿Ustedes que opinan?

Imágenes tomadas con dispositivo Samsung A54. Portada editada en Inshot
Pictures taken with Samsung A54 device. Cover edited in Inshot

Espero les haya gustado. Les invito a leer mis próximas publicaciones y siempre estaré dispuesta a responder sus preguntas y comentarios, también pueden seguirme y contactarme en cualquiera de mis redes sociales. ¡Muchas gracias!
I hope you liked it. I invite you to read my next publications and I will always be willing to answer your questions and comments, you can also follow me and contact me on any of my social networks. Thank you!
Facebook
Twitter
Instagram
Ko-Fi
Discord: irenenavarroart#0361