Hello everyone... ✨
Hello to my dear Hivers and the dear community of Holozing, very pleased and excited to be here to show you a work made with much love and especially for you.
For today in this new update of rewards of which 12 days have passed since the previous one I presented to you, I wanted to continue with my art inspired by this great project and its creatures, because for this week I wanted to do something more elaborate in my style, taking into account that my base material is quilling which are paper ribbons, so it is very difficult to make a character that is just as you see it in an image.
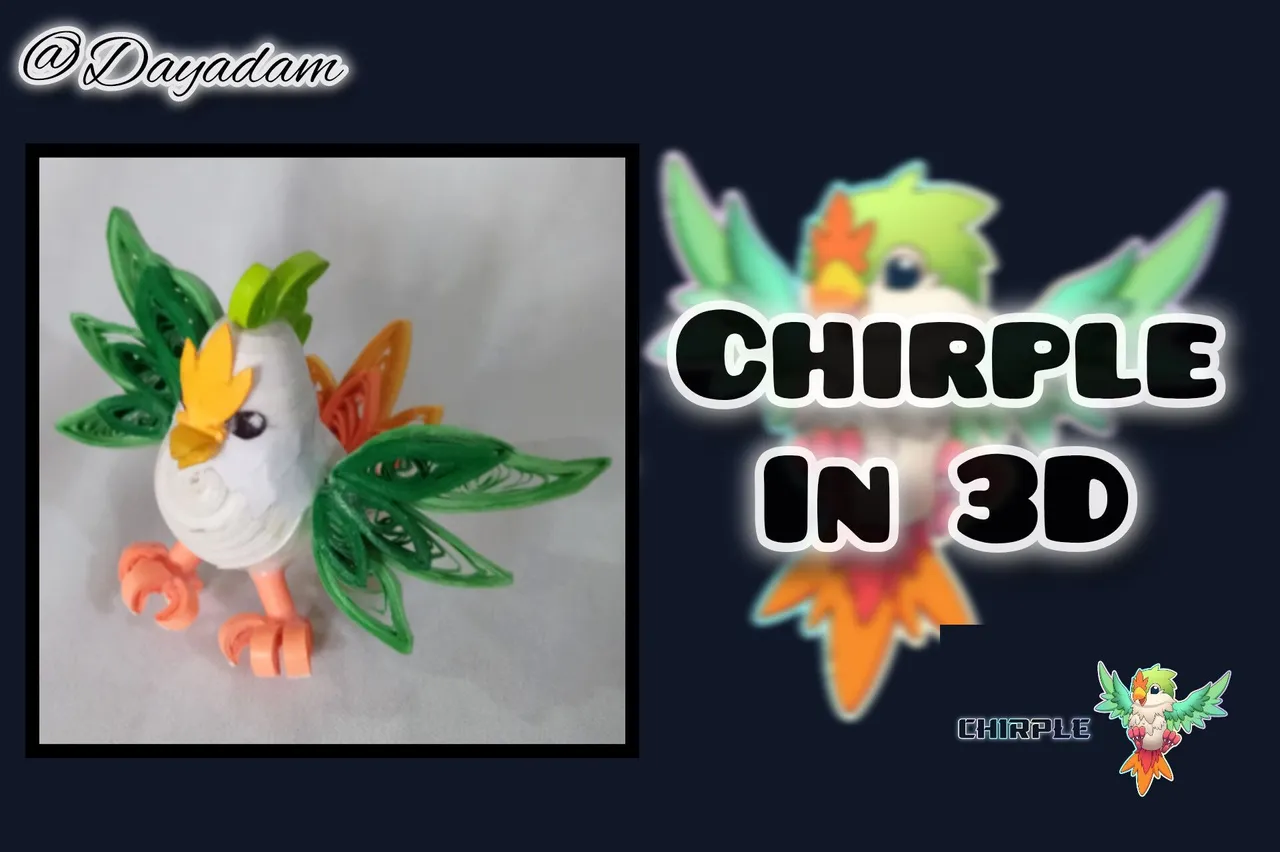
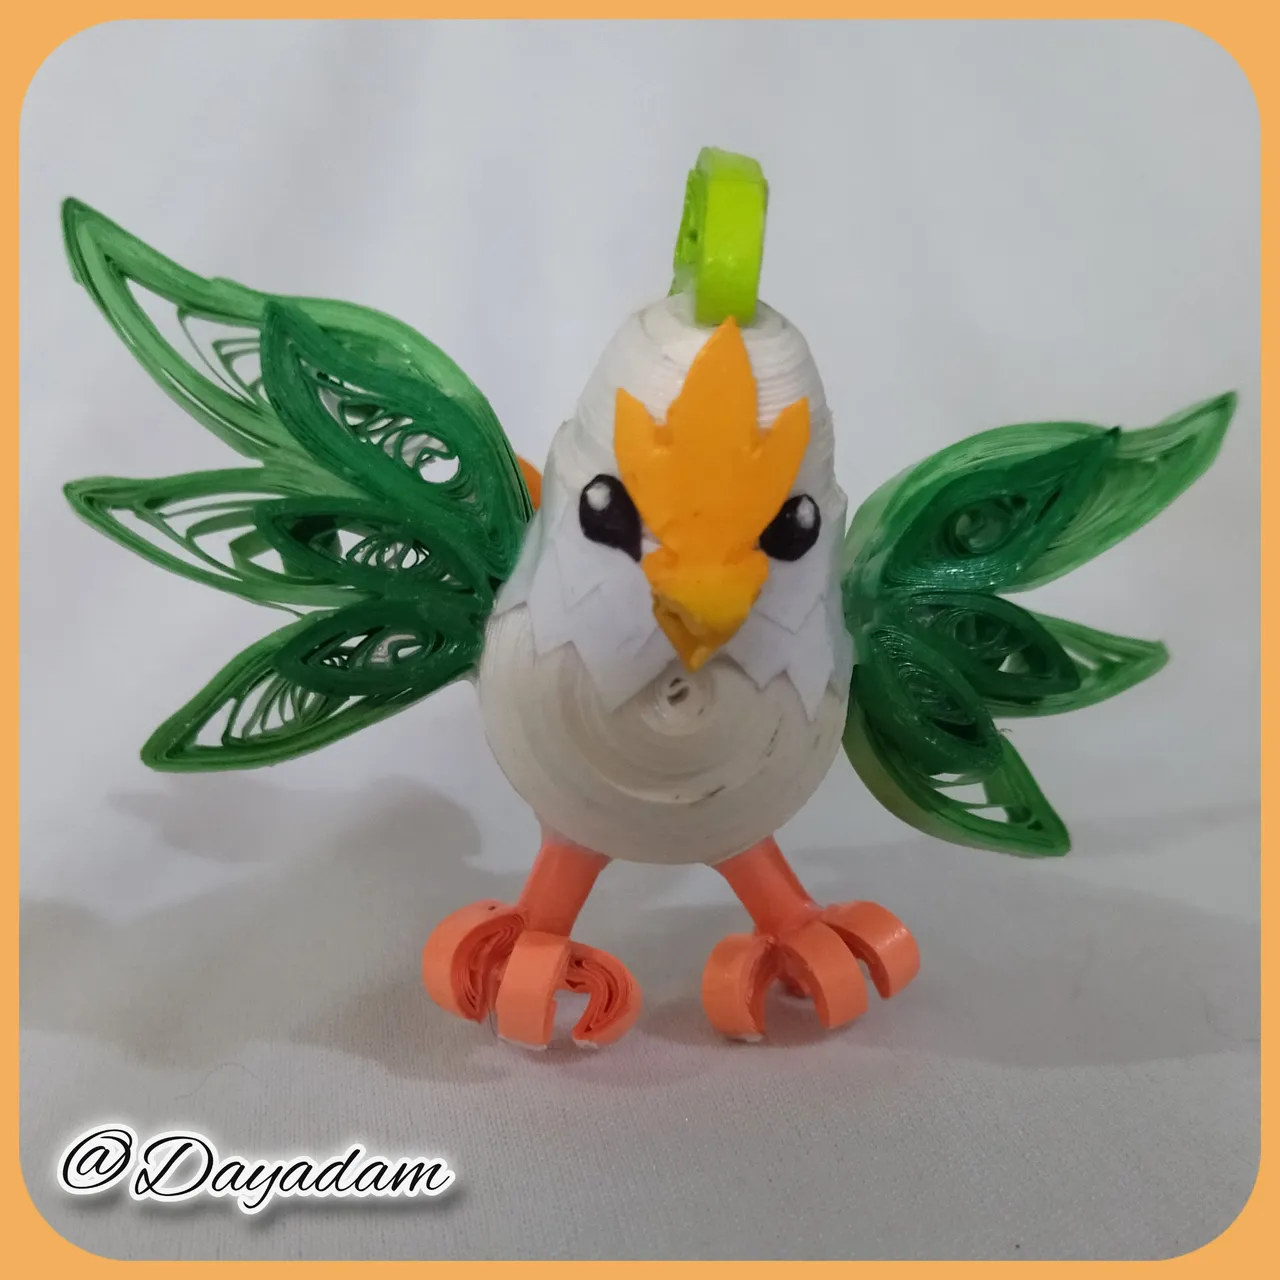
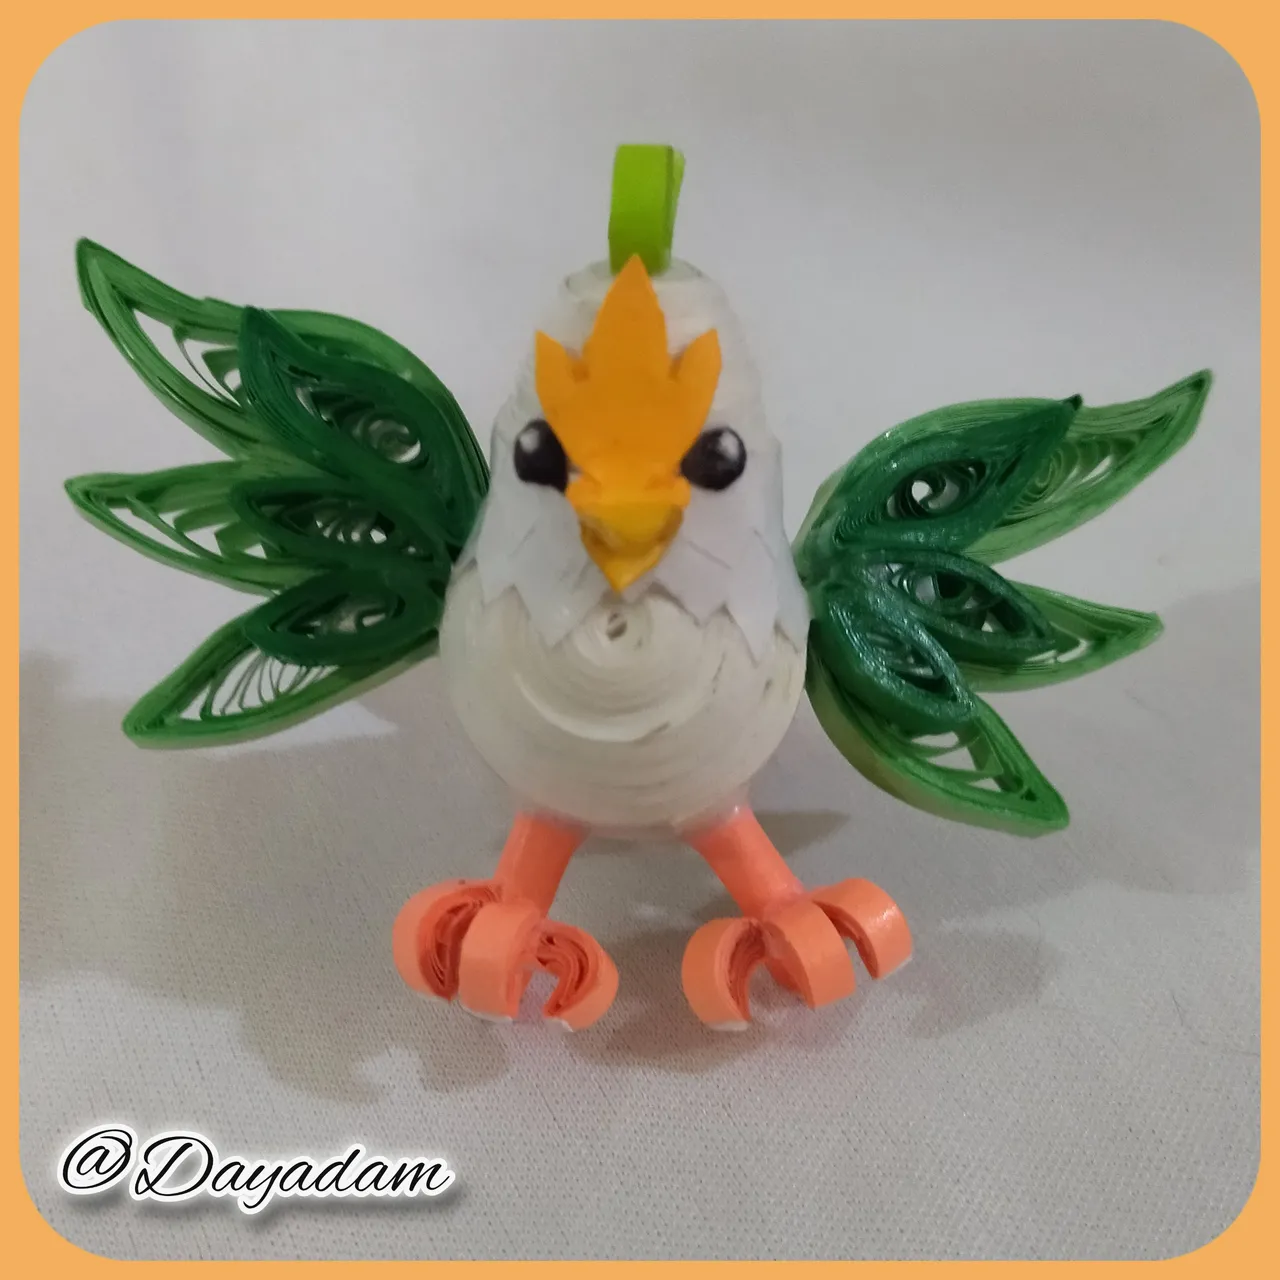
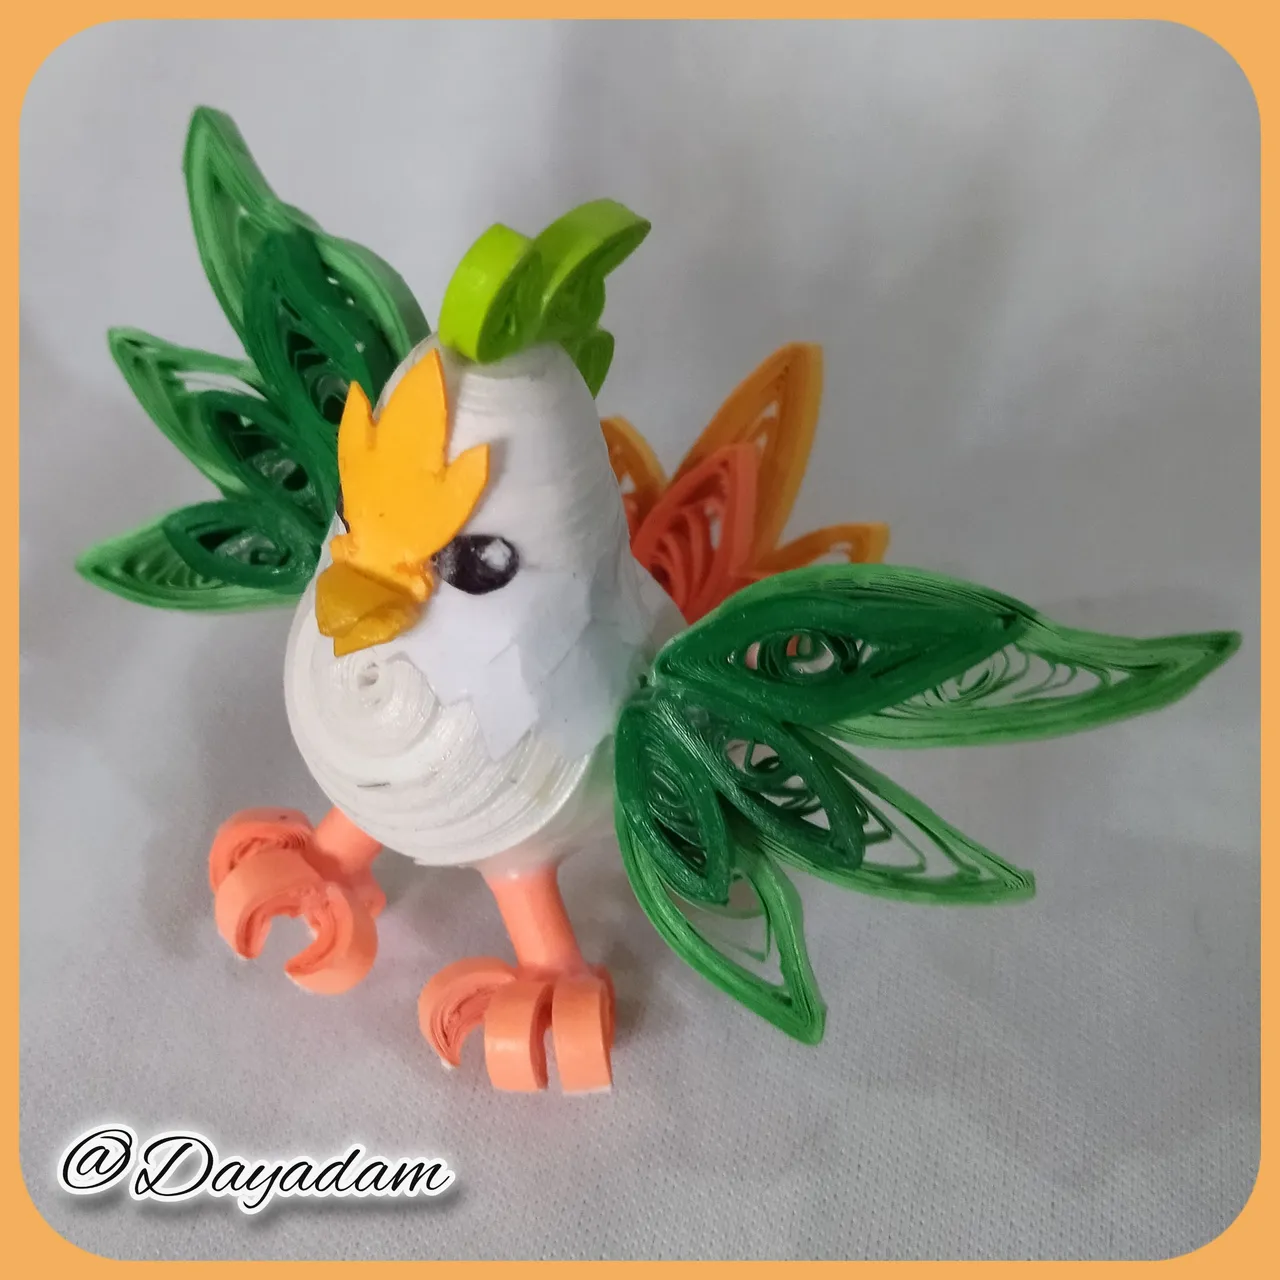
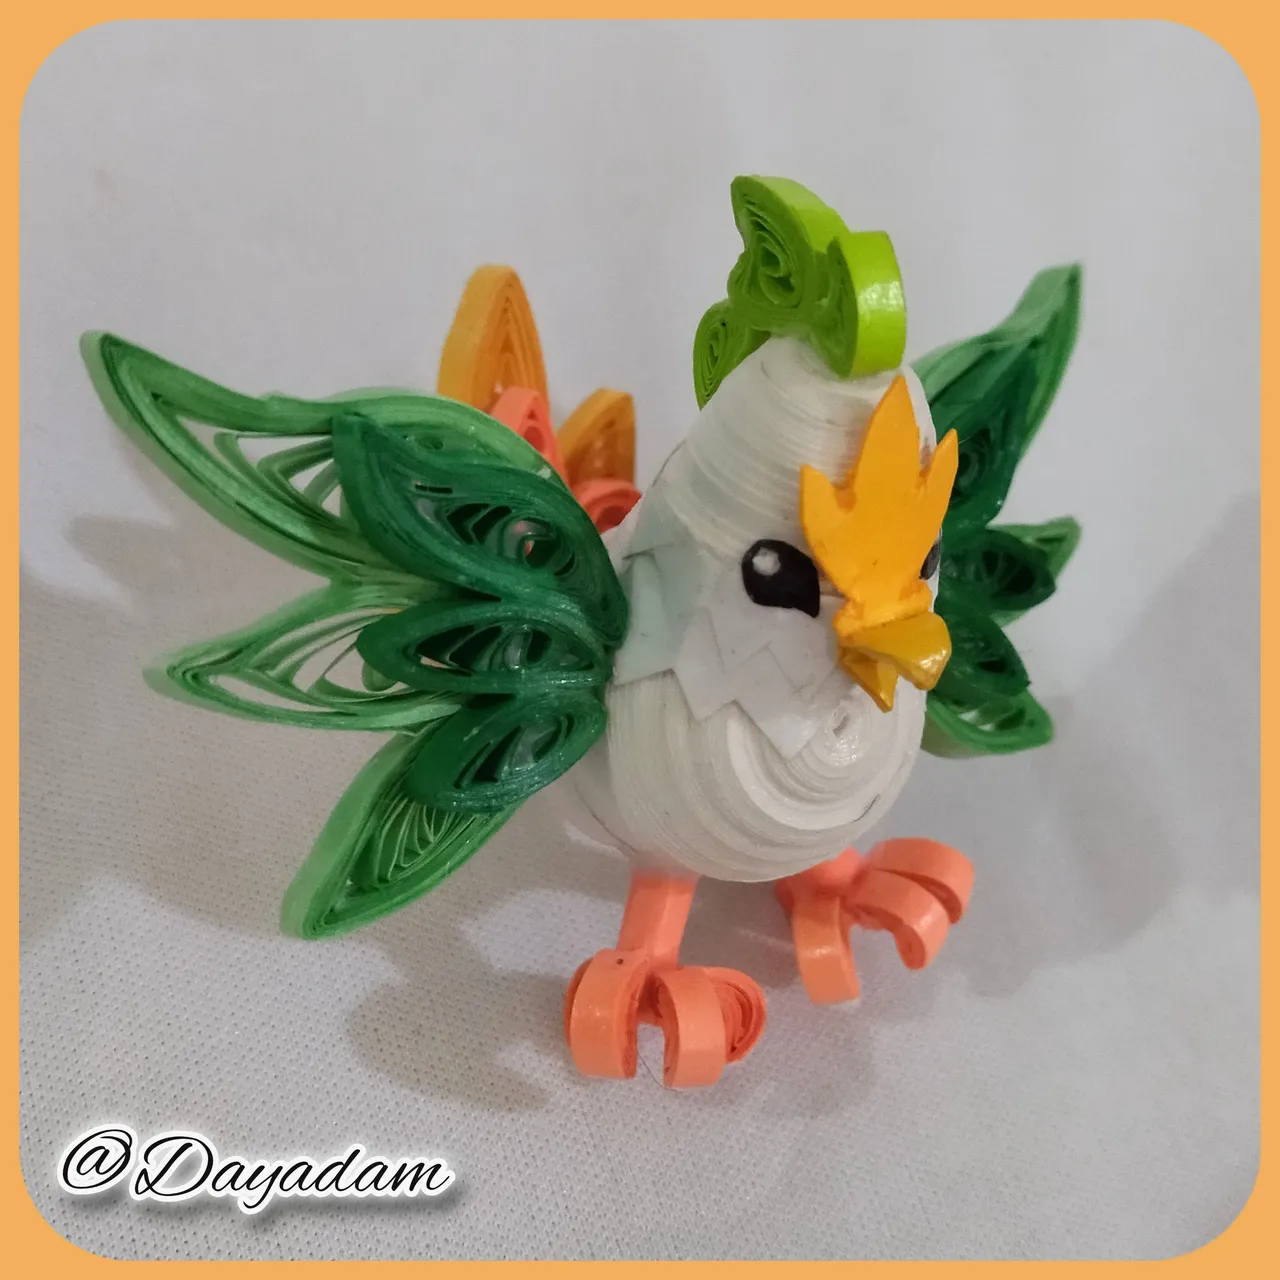
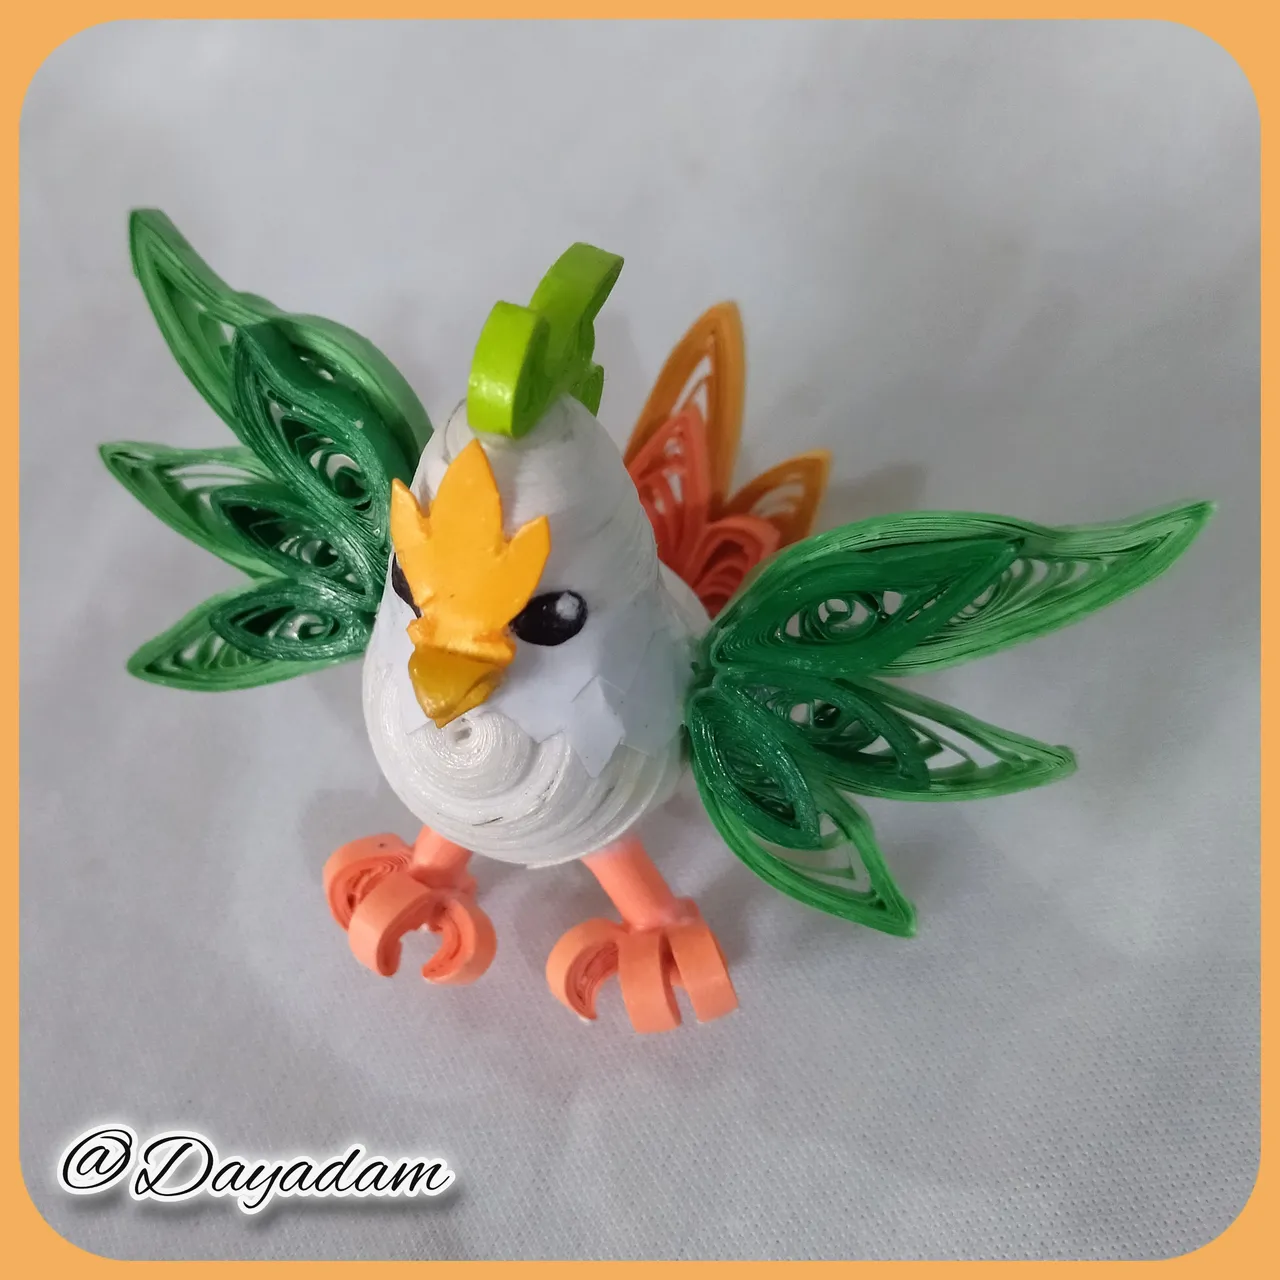
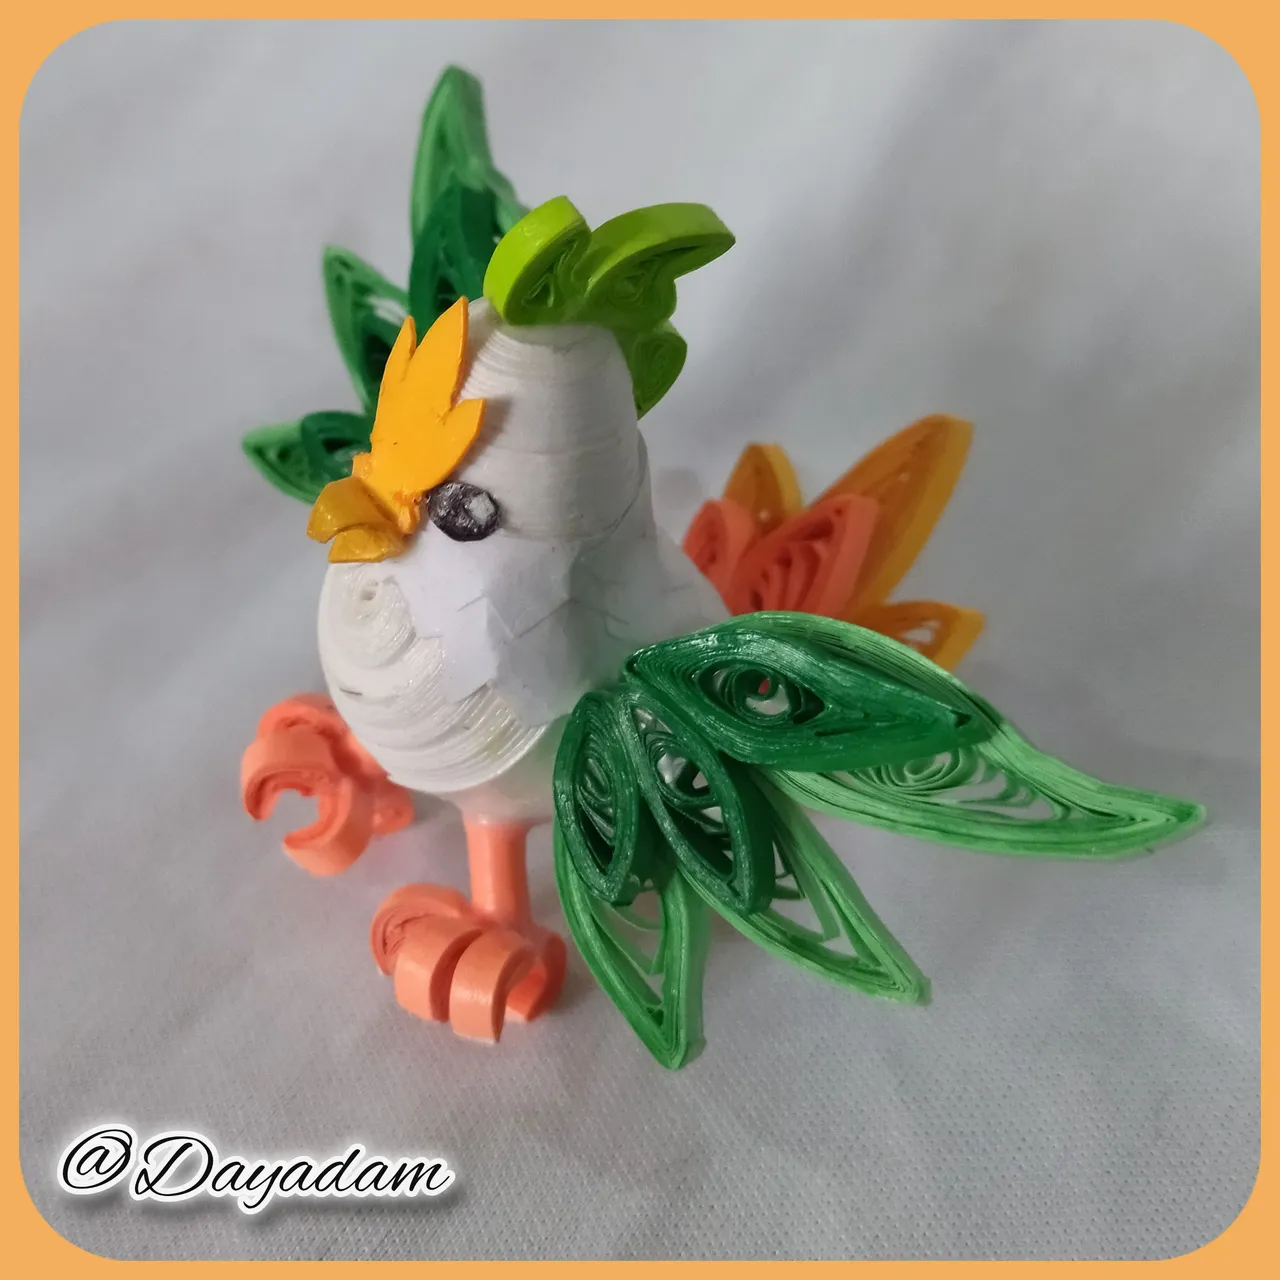
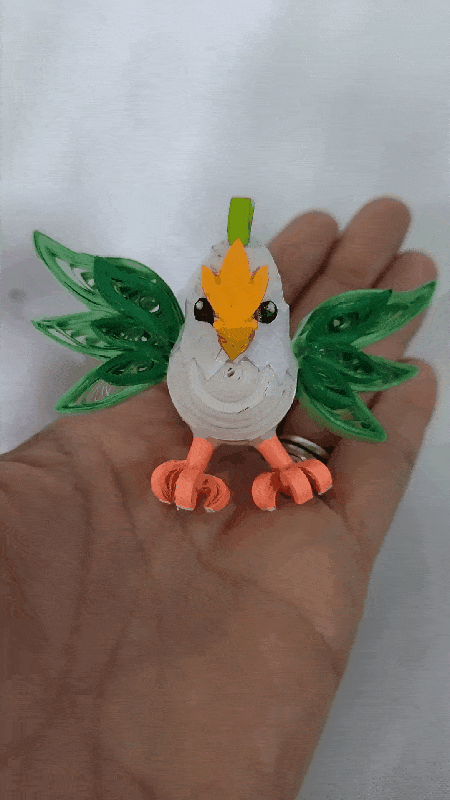
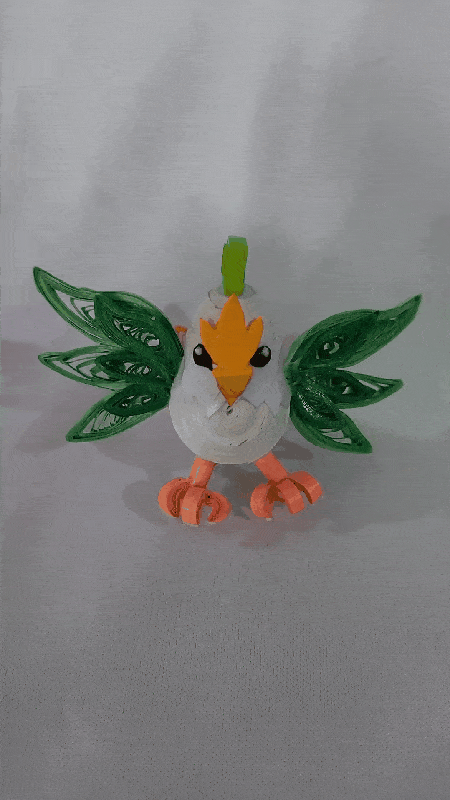
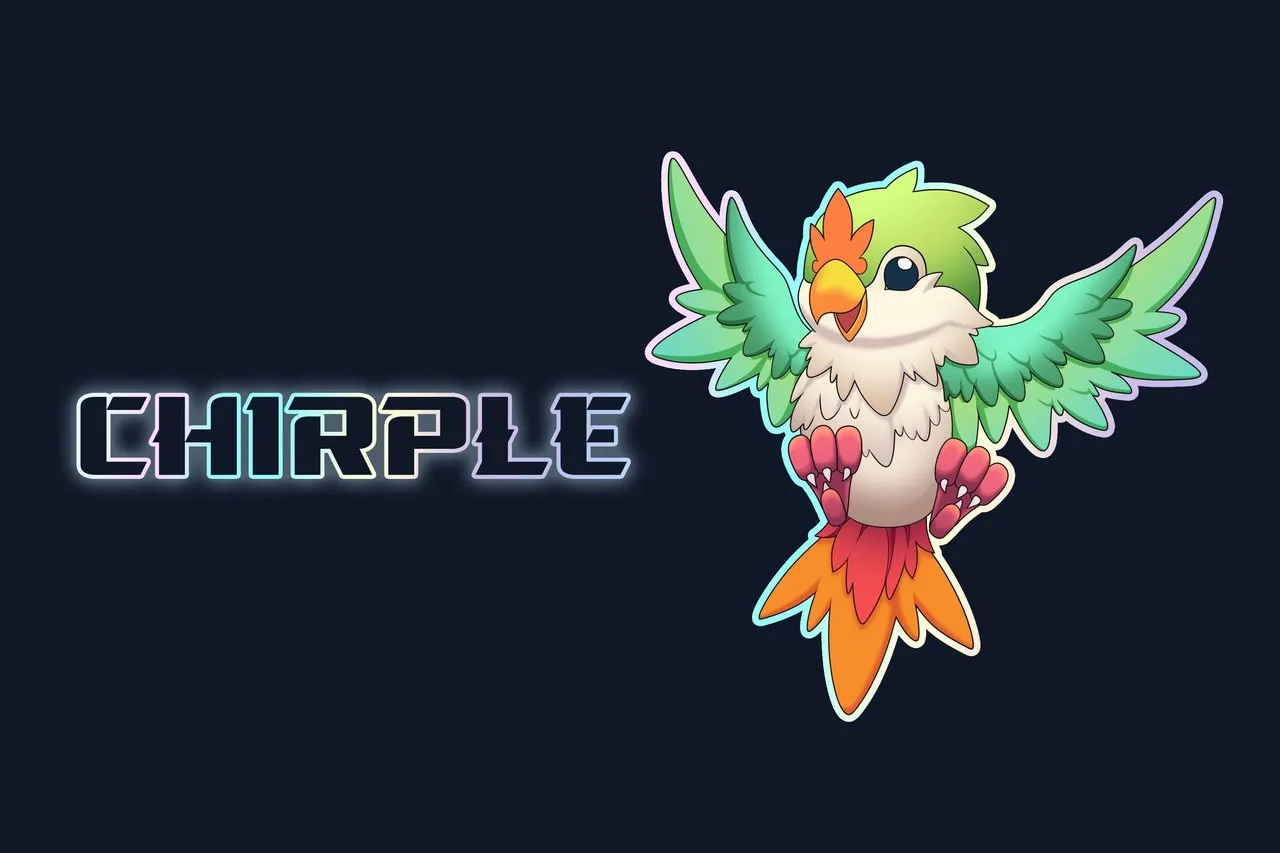
I decided to make the beautiful creature "Chirpe ", who is so adorable, full of color, in a 3D figure in the quilling technique.
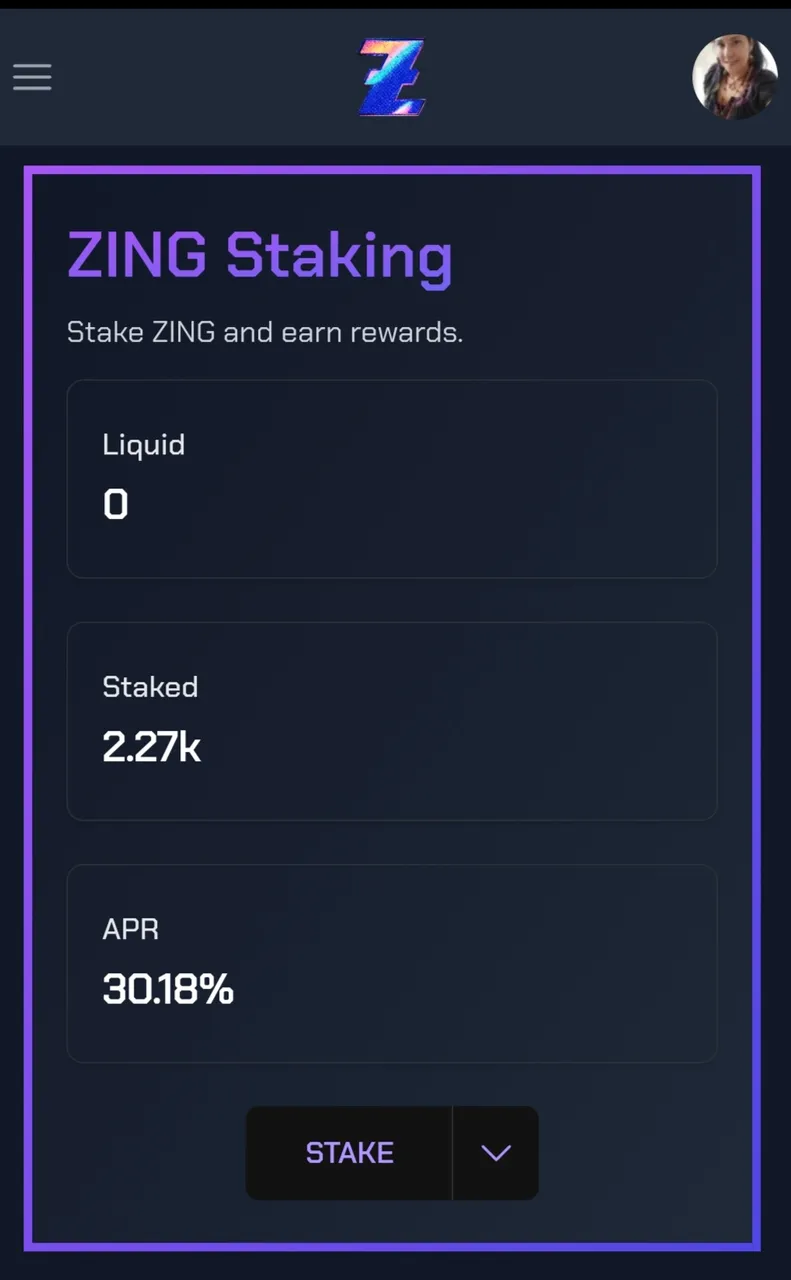
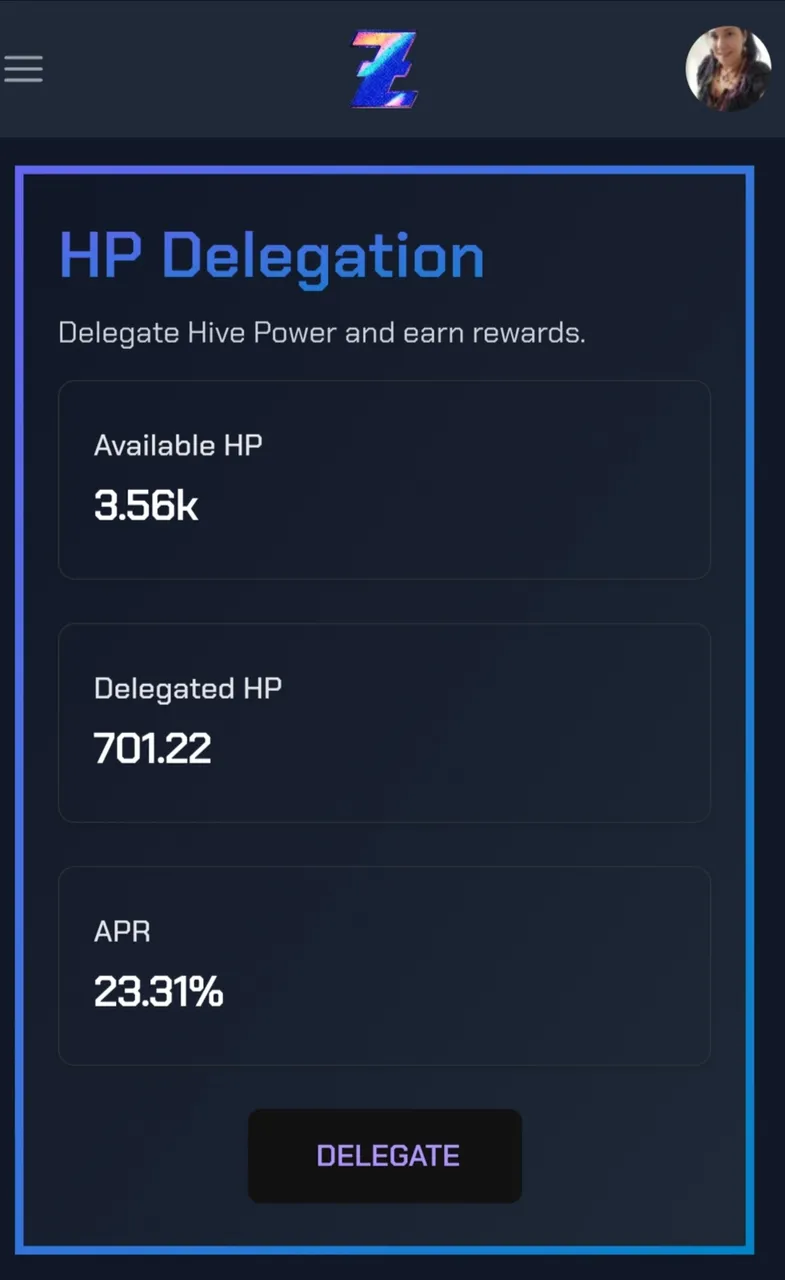
I attach images of my progress claiming the rewards for my delegation to Holozing that so far are 701.88HP, and I have an accumulated in Stake of 2,633.899 tokens $ZING..
I hope you like my work, join me in this creative process.
Let's begin:😃

Hola a Todos... ✨
Hola a mis queridos Hivers y a la querida comunidad de Holozing, muy complacida y emocionada de encontrarme por acá para mostrarles un trabajo hecho con mucho amor y especialmente para ustedes.
Para hoy en esta nueva actualización de recompensas de la cual han pasado 12 días desde la anterior que les presente, quise seguir con mi arte inspirado en este grandioso proyecto y sus criaturas, pues para esta semana quise realizar algo mas elaborado a mi estilo, tomando en cuenta que mi material base es el quilling que son cintas de papel, por ello es muy difícil hacer un personaje que quede tal cual como lo ven sus ojos en una imagen.
Decidí hacer a la bella criatura "Chirpe", que es tan adorable, llena de color, en una figura en 3D en la técnica de quilling.
Les adjunto imágenes de lo que ha sido mi progreso reclamando las recompensas por mi delegación a Holozing que hasta ahora son 701.88HP, y llevo un acumulado en Stake de 2,633.899 tokens $ZING.
Espero sea de su agrado mi trabajo, acompáñenme en este proceso creativo.
Comencemos:😃


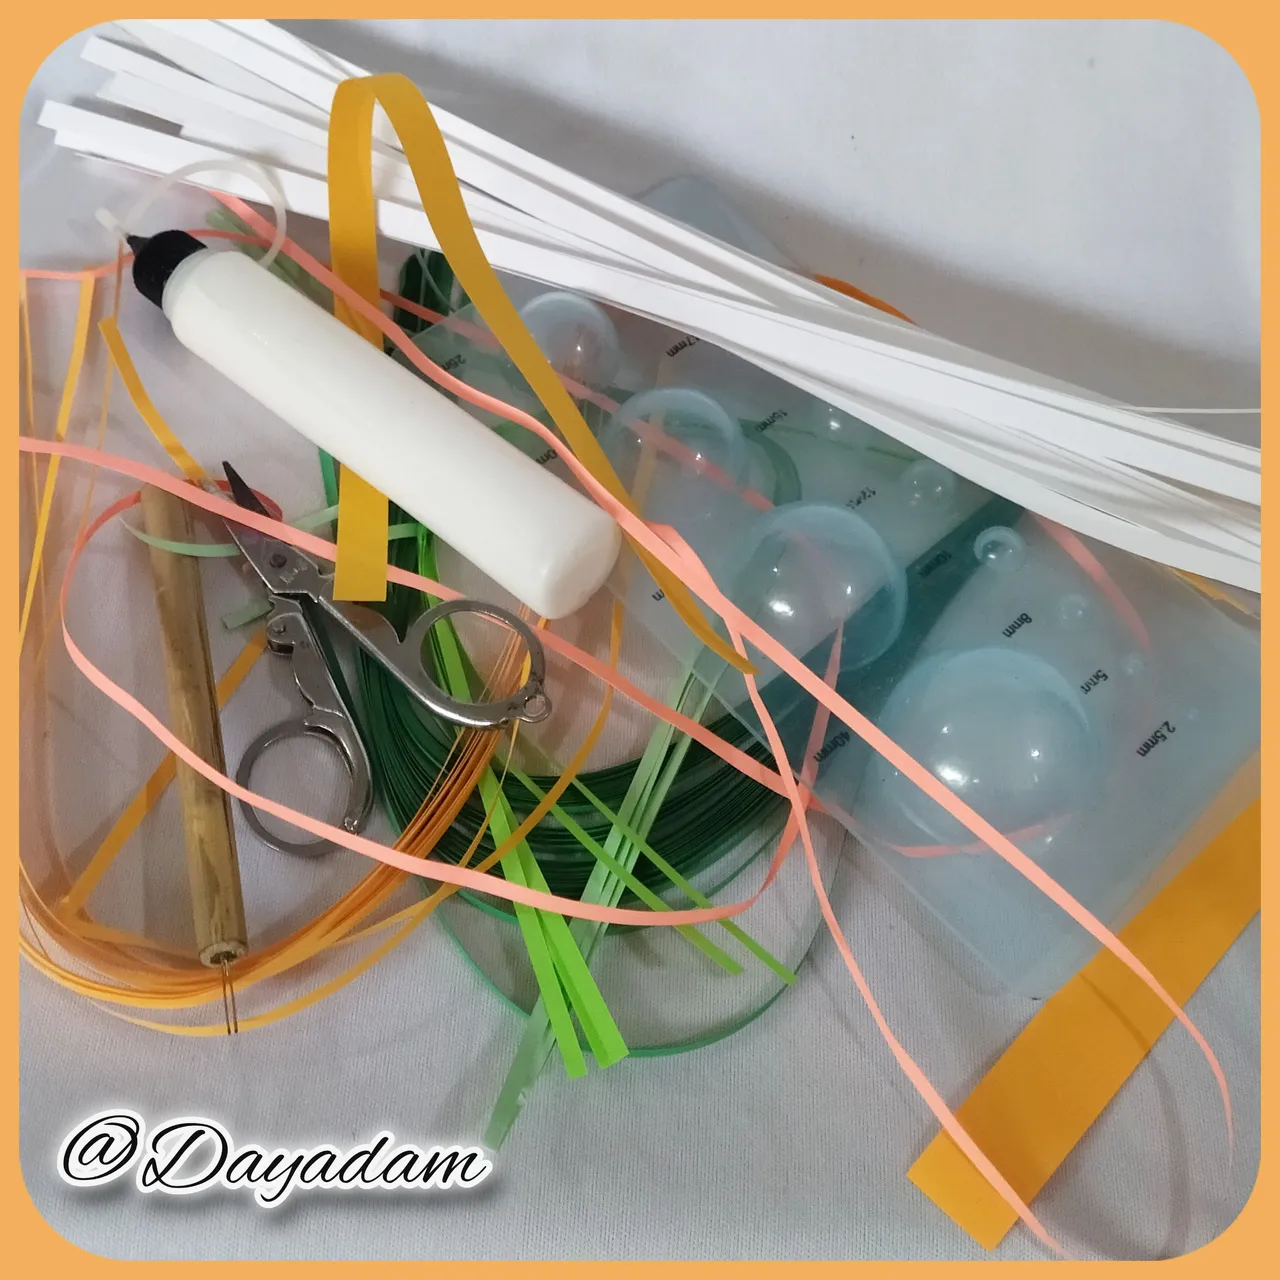
• Cintas de quilling de variados colores.
• Aguja para quilling.
• Molde para círculos.
• Pega blanca extra fuerte (de carpintería).
• Tijera.
• Pincel.
- Quilling ribbons of various colors.
- Quilling needle.
- Mold for circles.
- Extra strong white glue (carpentry glue).
- Scissors.
- Brush.

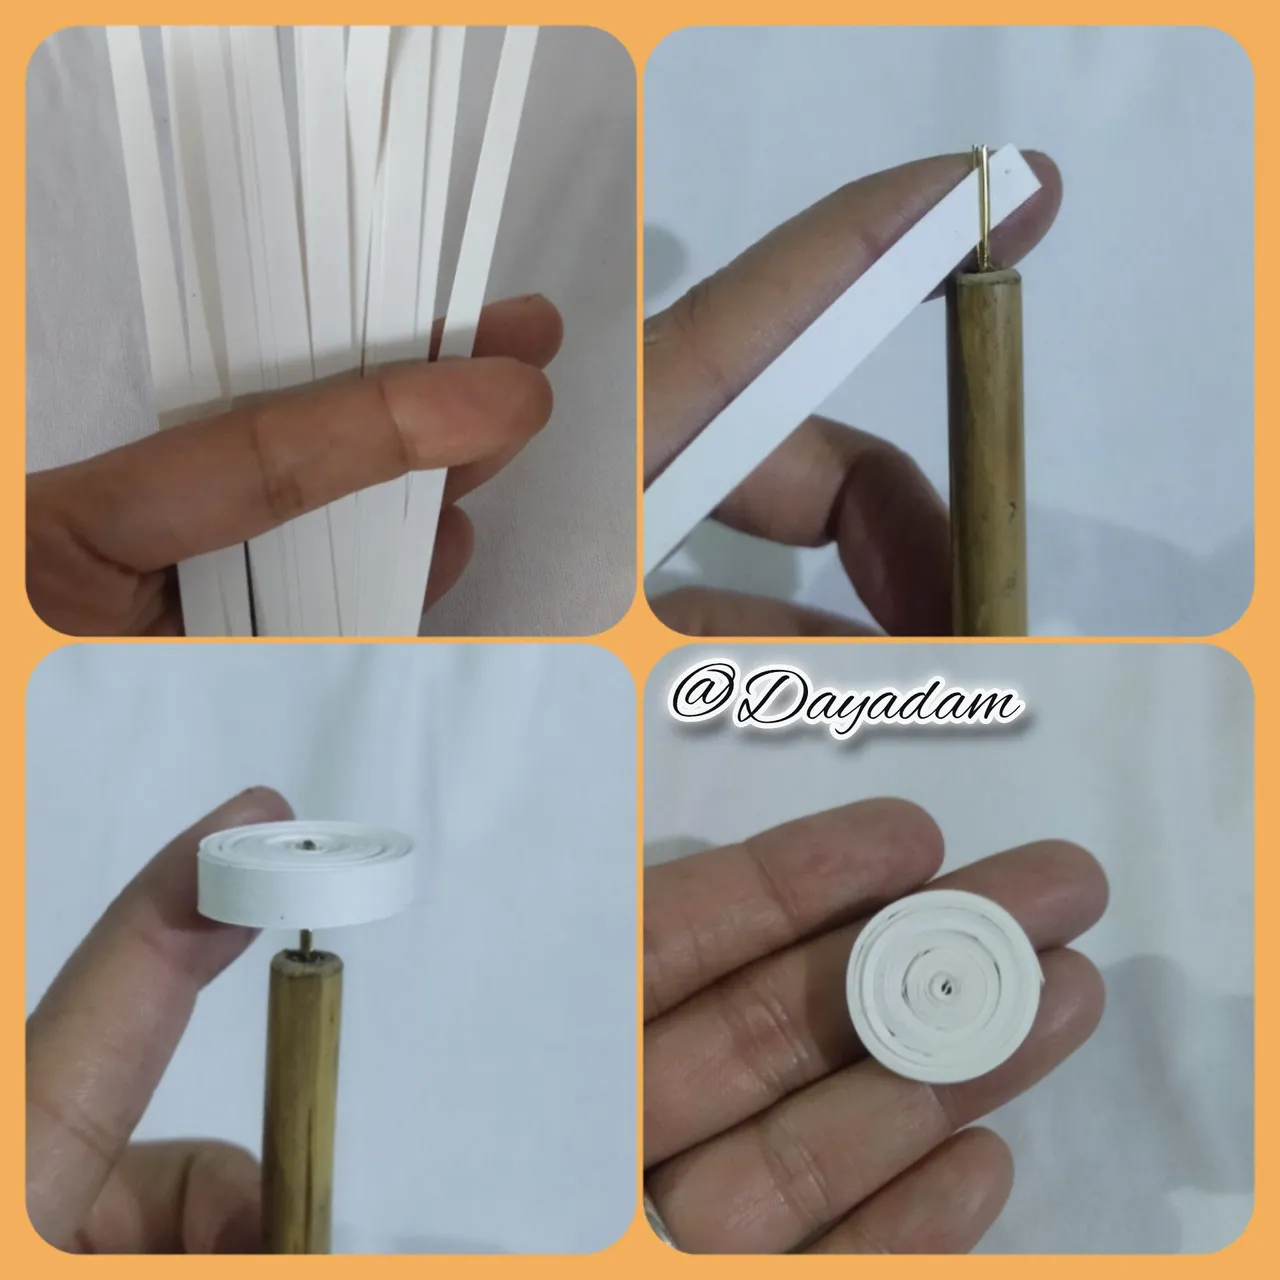
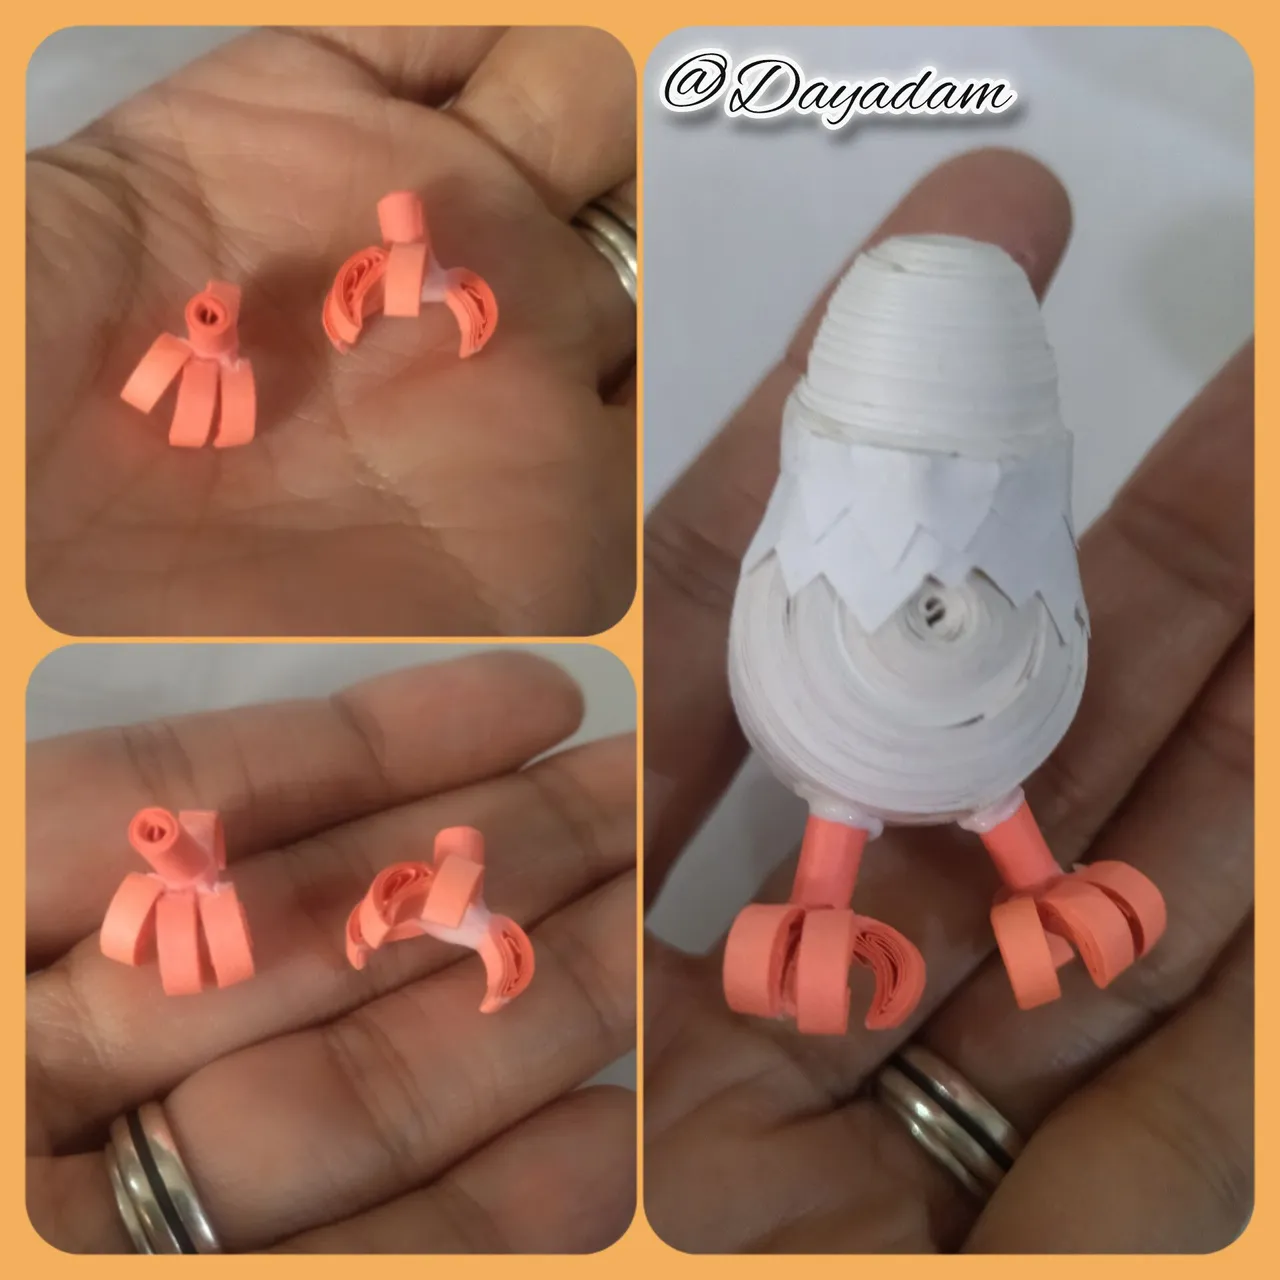
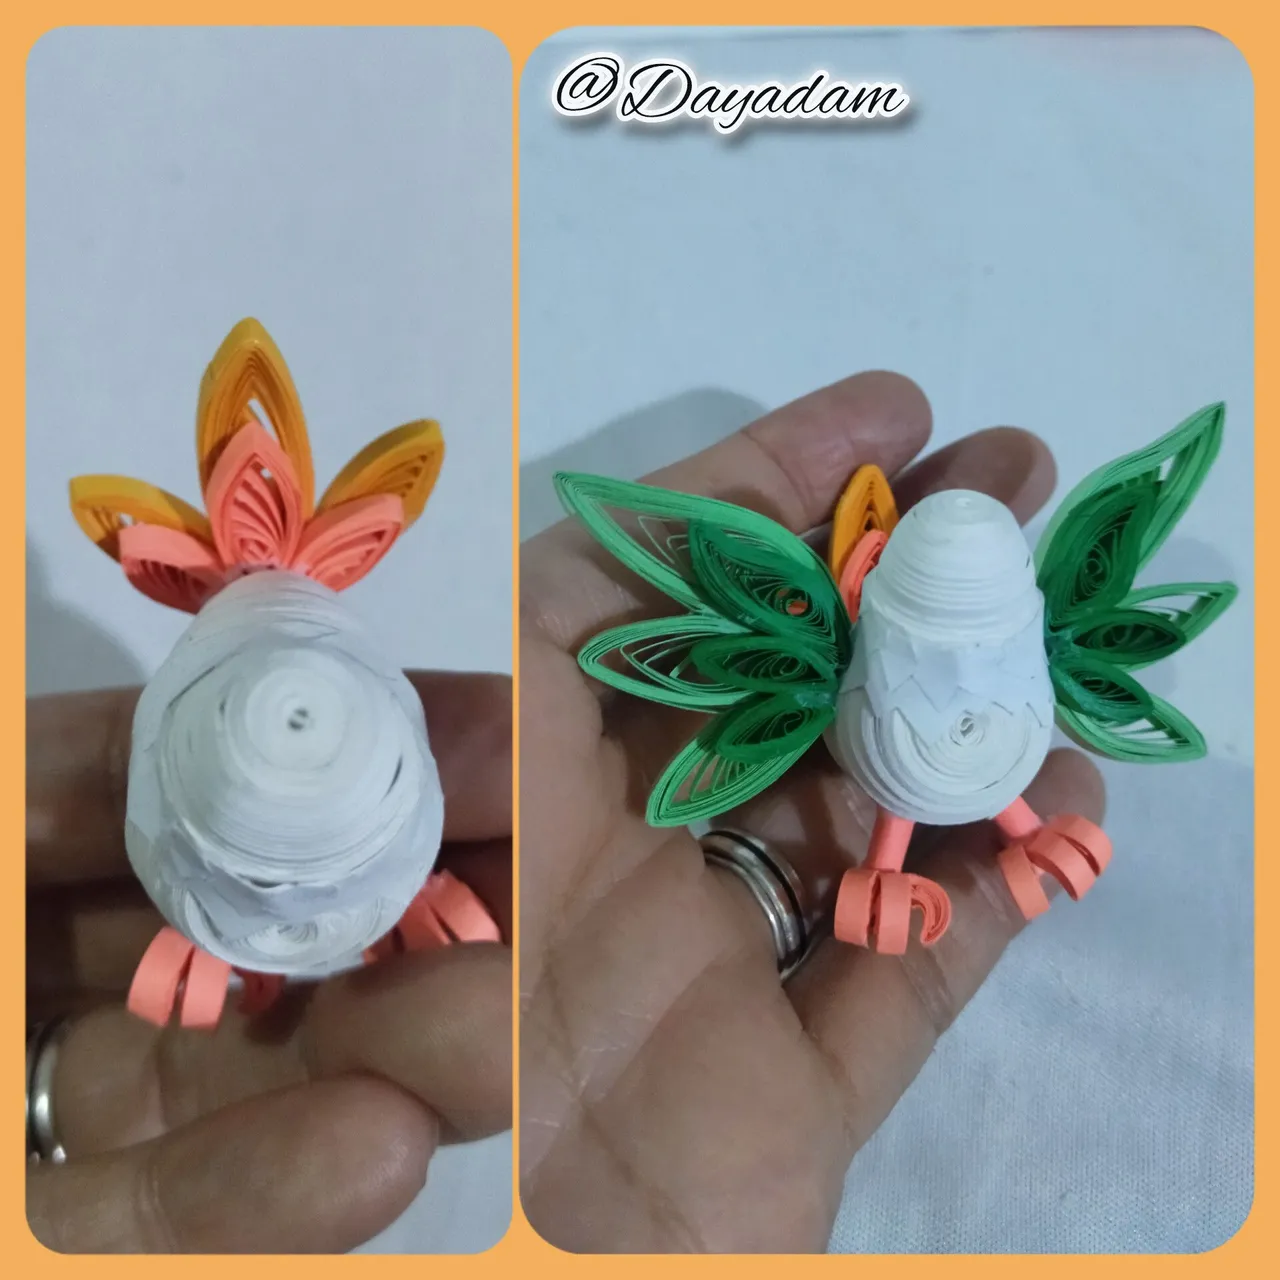
Body:
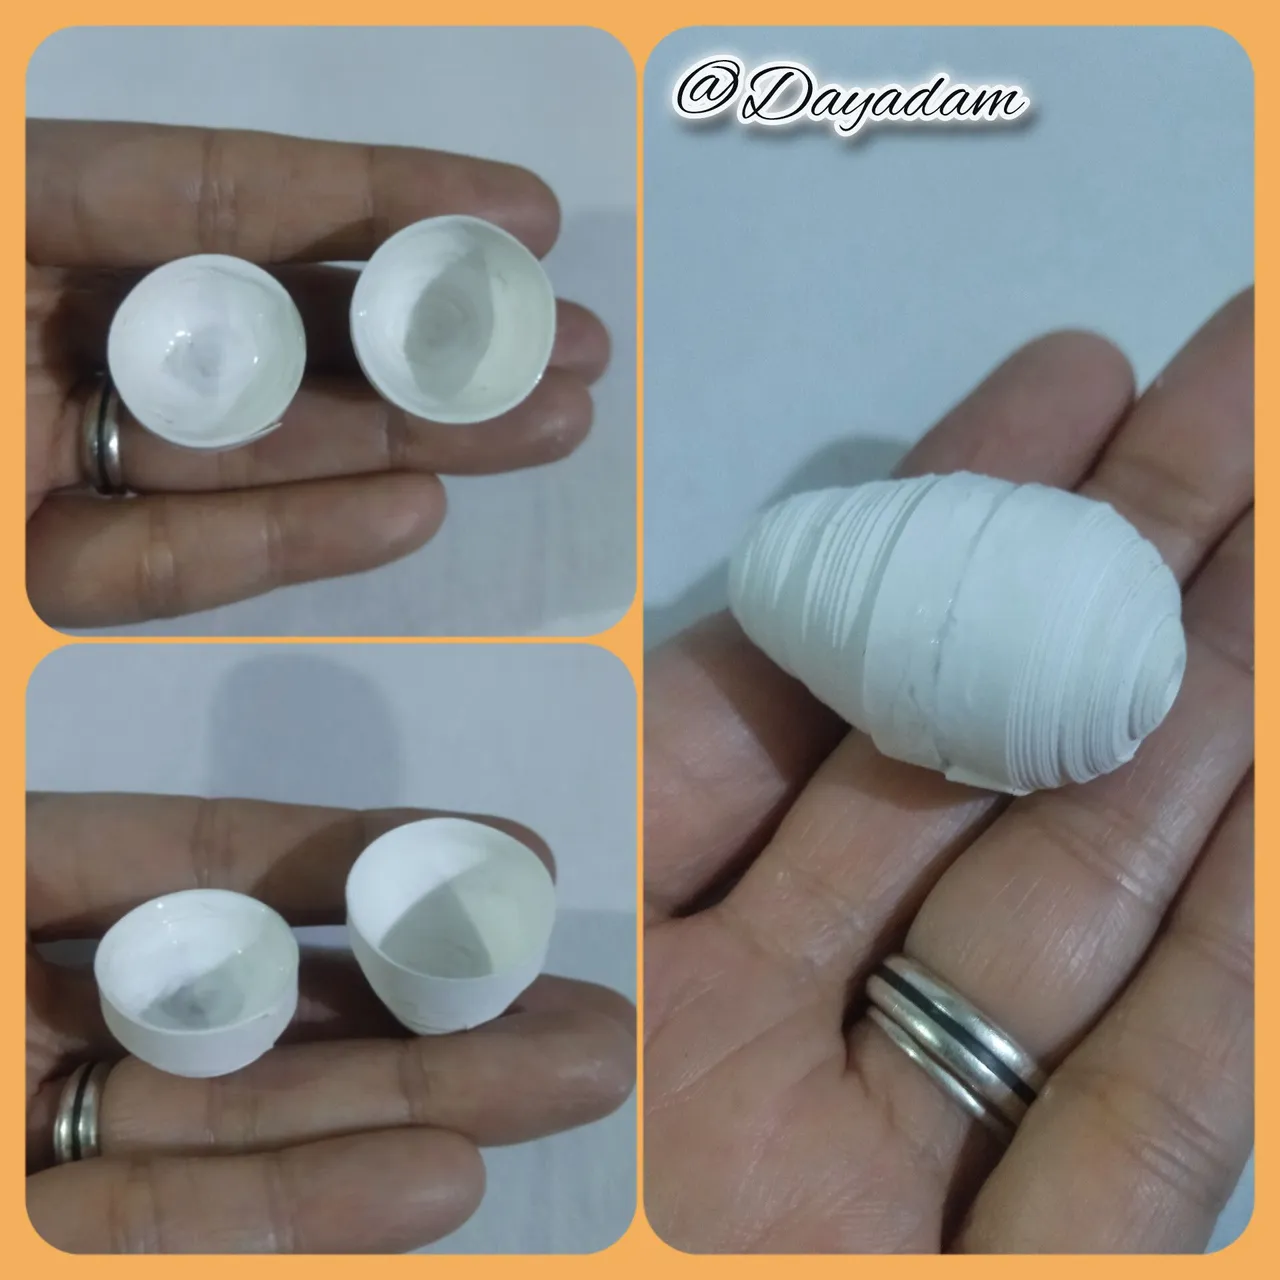
- We are going to take quilling tape 4mm wide white color of 200cms long, with the quilling needle we are going to make 2 closed circles, then we will mold both circles, I gave a little shape with a mold for circles, once ready we will apply white glue on the inside of each one, to prevent deformation, we will join both with extra strong white glue.
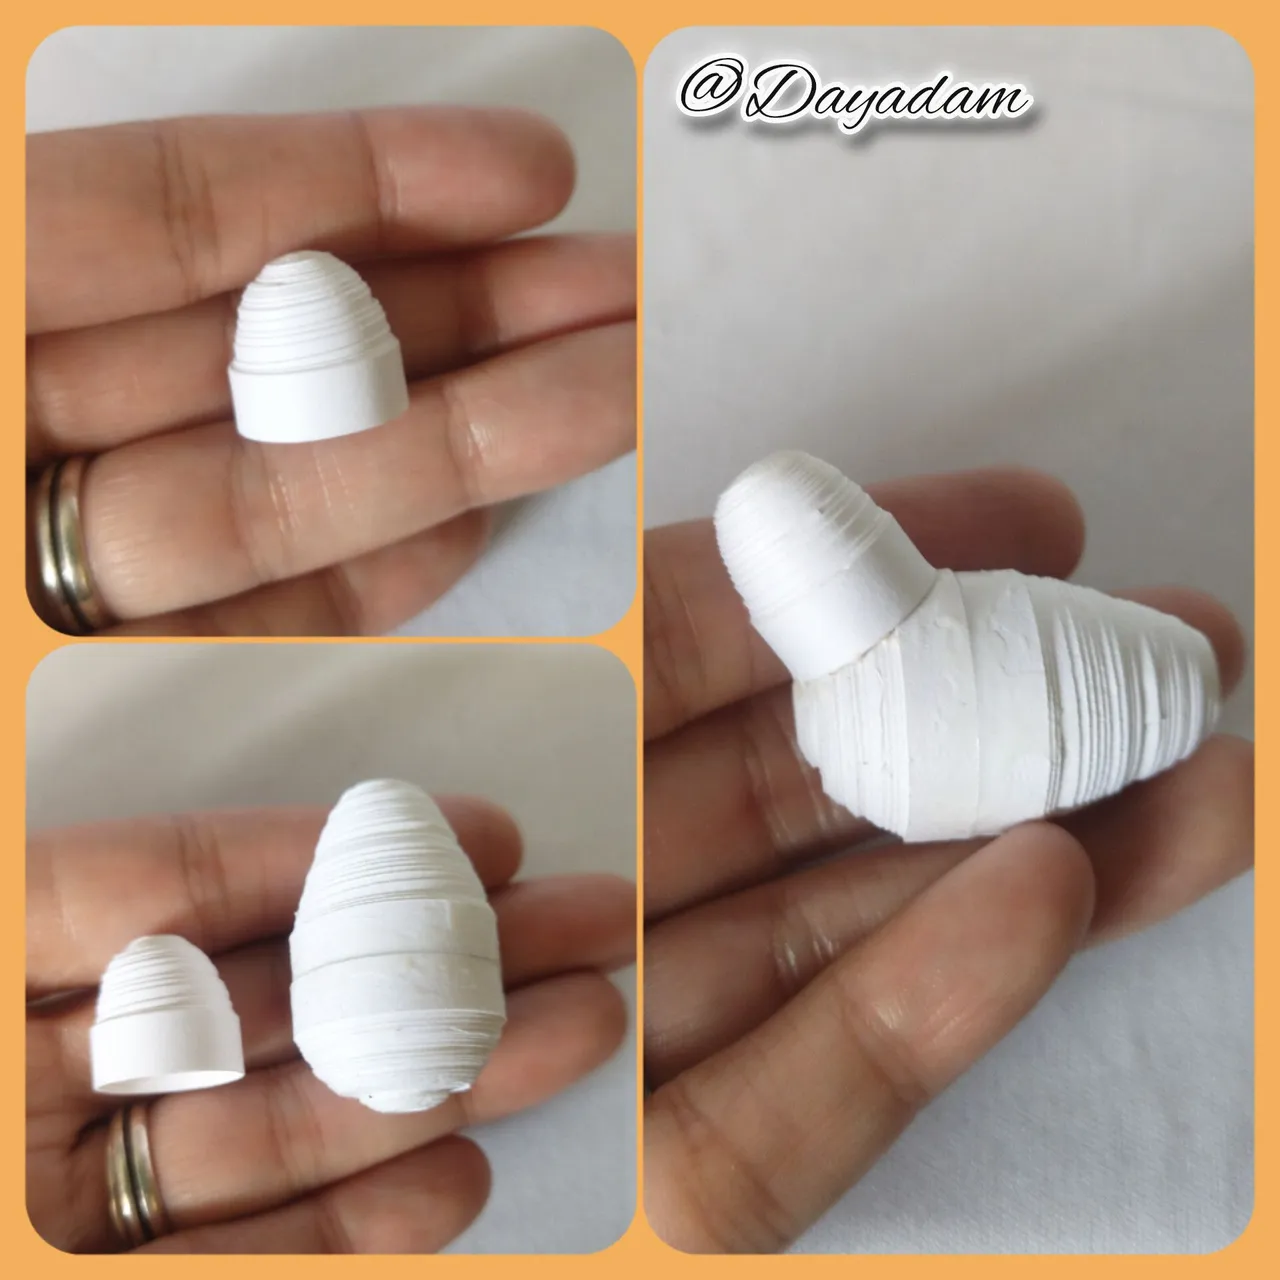
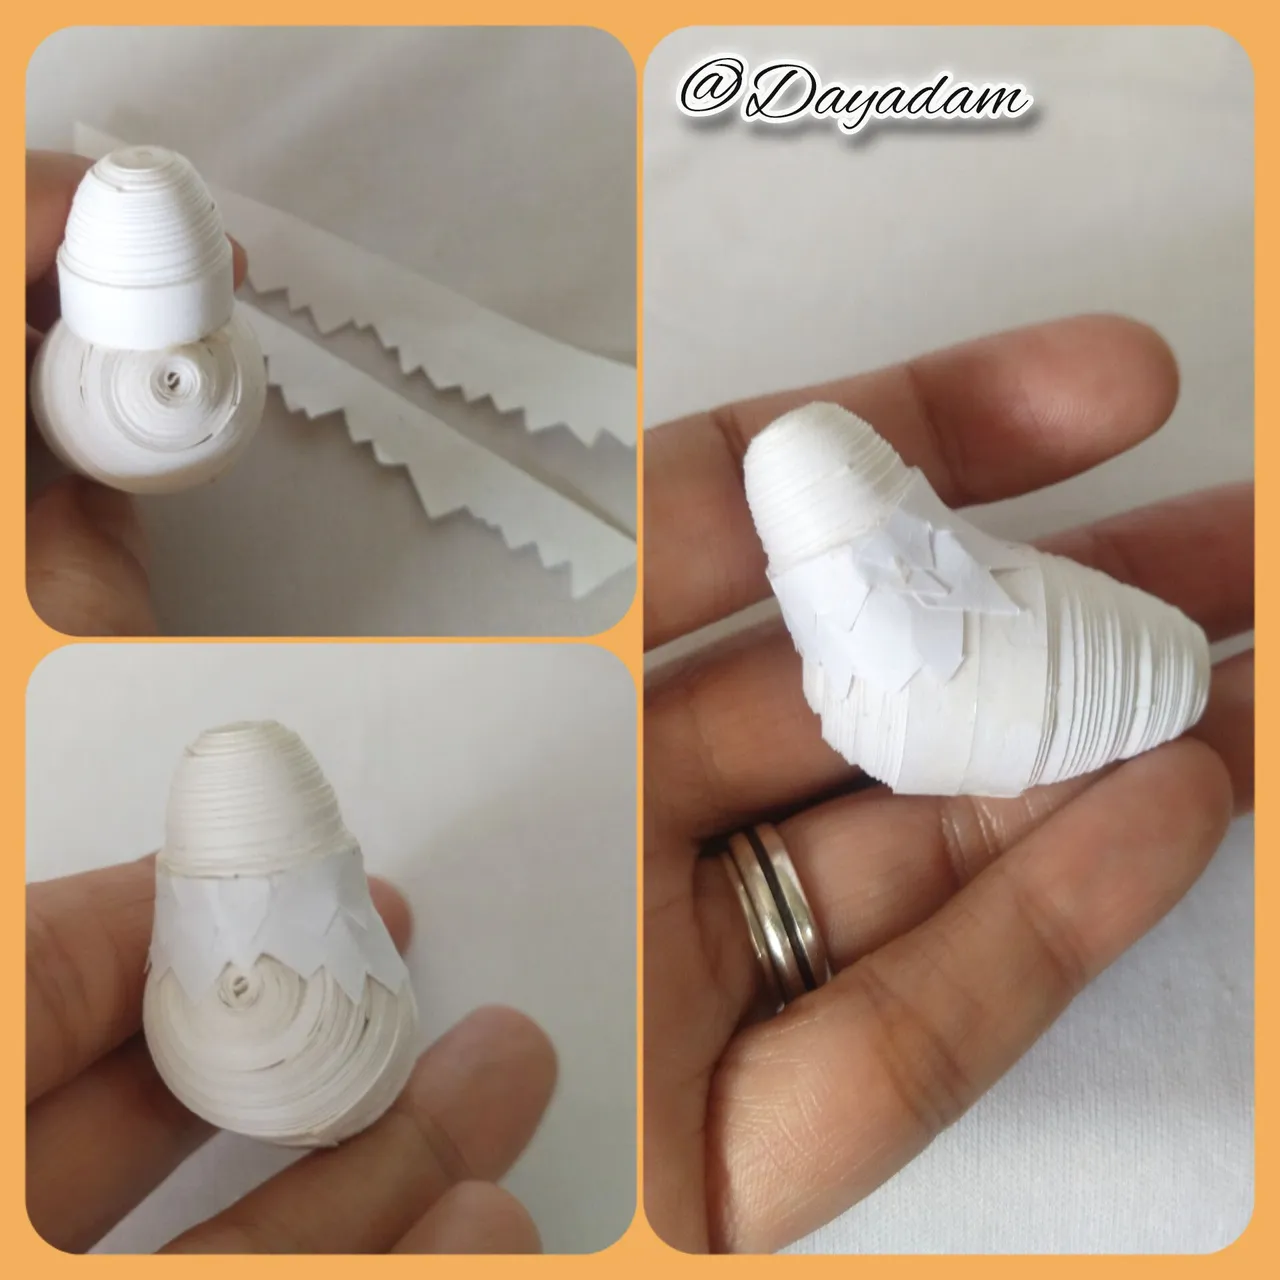
Head:
- For the head we will use 1 white ribbon of 4mm wide x 100cms long, with the quilling needle we will make 1 closed circle, we will mold forming a kind of cone, we will apply extra strong white glue in the internal part and let it dry.
- Ready both pieces, we will glue the head of the body, between the body and the head that is to say the neck place 2 pieces of tape that I chopped previously in the form of peaks.

Cuerpo:
• Vamos a tomar cinta para quilling de 4mm de ancho color blanco de 200cms de largo, con la aguja para quilling vamos a realizar 2 círculo cerrados, luego moldearemos ambos círculos, le di un poco de forma con un molde para círculos, una vez listos aplicaremos pega blanca en la parte interna de cada uno, para evitar que se deformen, uniremos ambas con pega blanca extra fuerte.
Cabeza:
• Para la cabeza utilizaremos 1 cinta blanca de 4mm de ancho x 100cms de largo, con la aguja para quilling realizaremos 1 círculo cerrado, moldearemos formando una especie de cono, aplicaremos pega blanca extra fuerte en la parte interna dejamos secar.
• Listas ambas piezas, pegaremos la cabeza del cuerpo, entre el cuerpo y la cabeza es decir el cuello coloque 2 trozos de cinta que pique previamente en forma de picos.

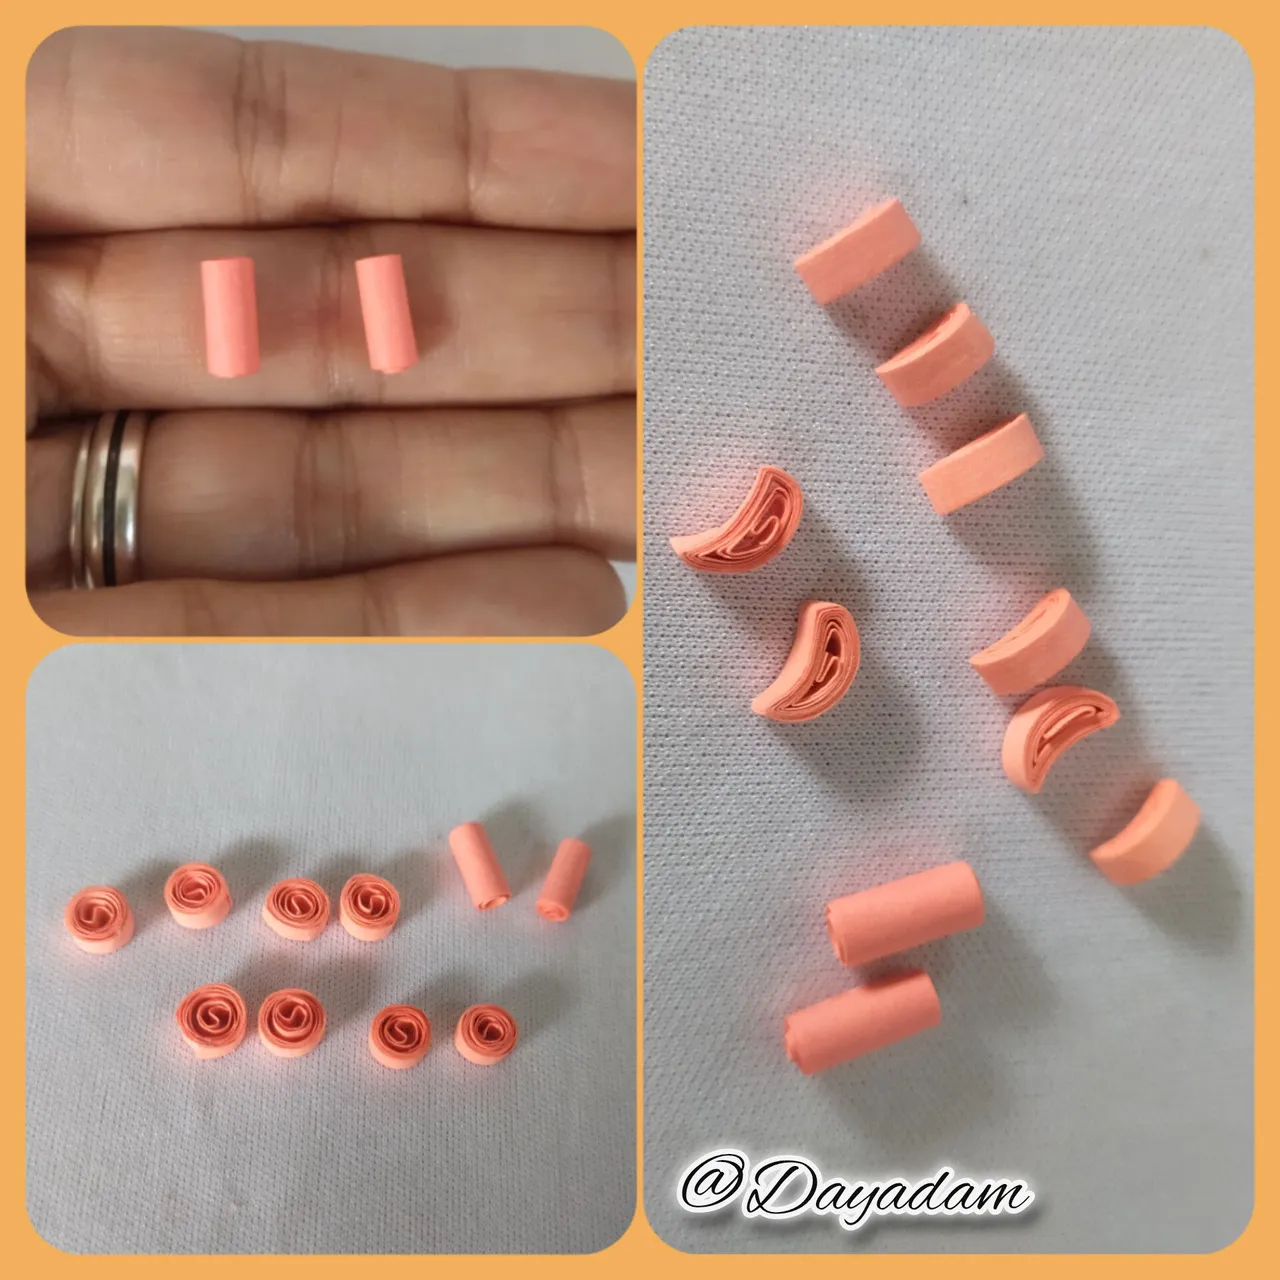
Legs:
- Then with 9mm wide coral colored quilling tape we will make 2 closed circles elongated as a kind of cylinder.
-For the claws we will make 8 open circles with 3mm wide coral colored tape, which we will mold by flattening it, then we will glue 4 by 4 on the leg that I made previously and after this I will glue it to the body.
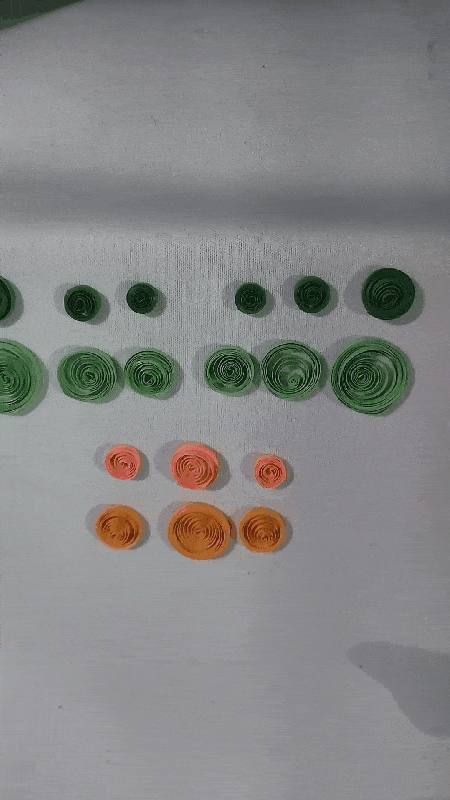
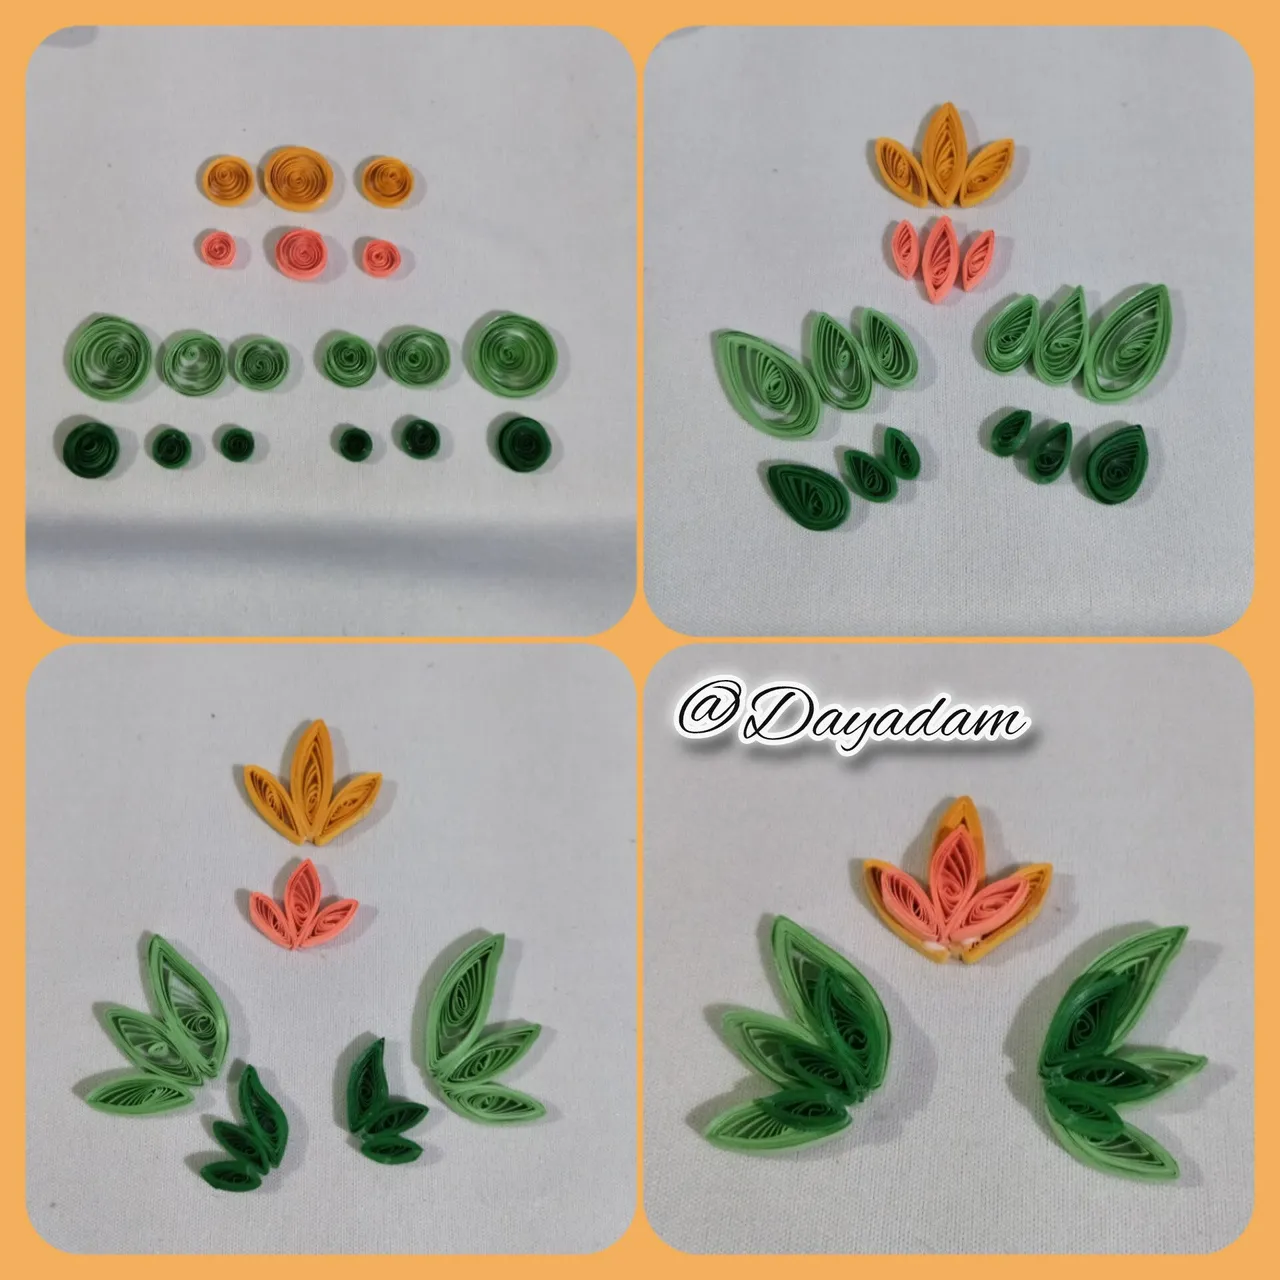
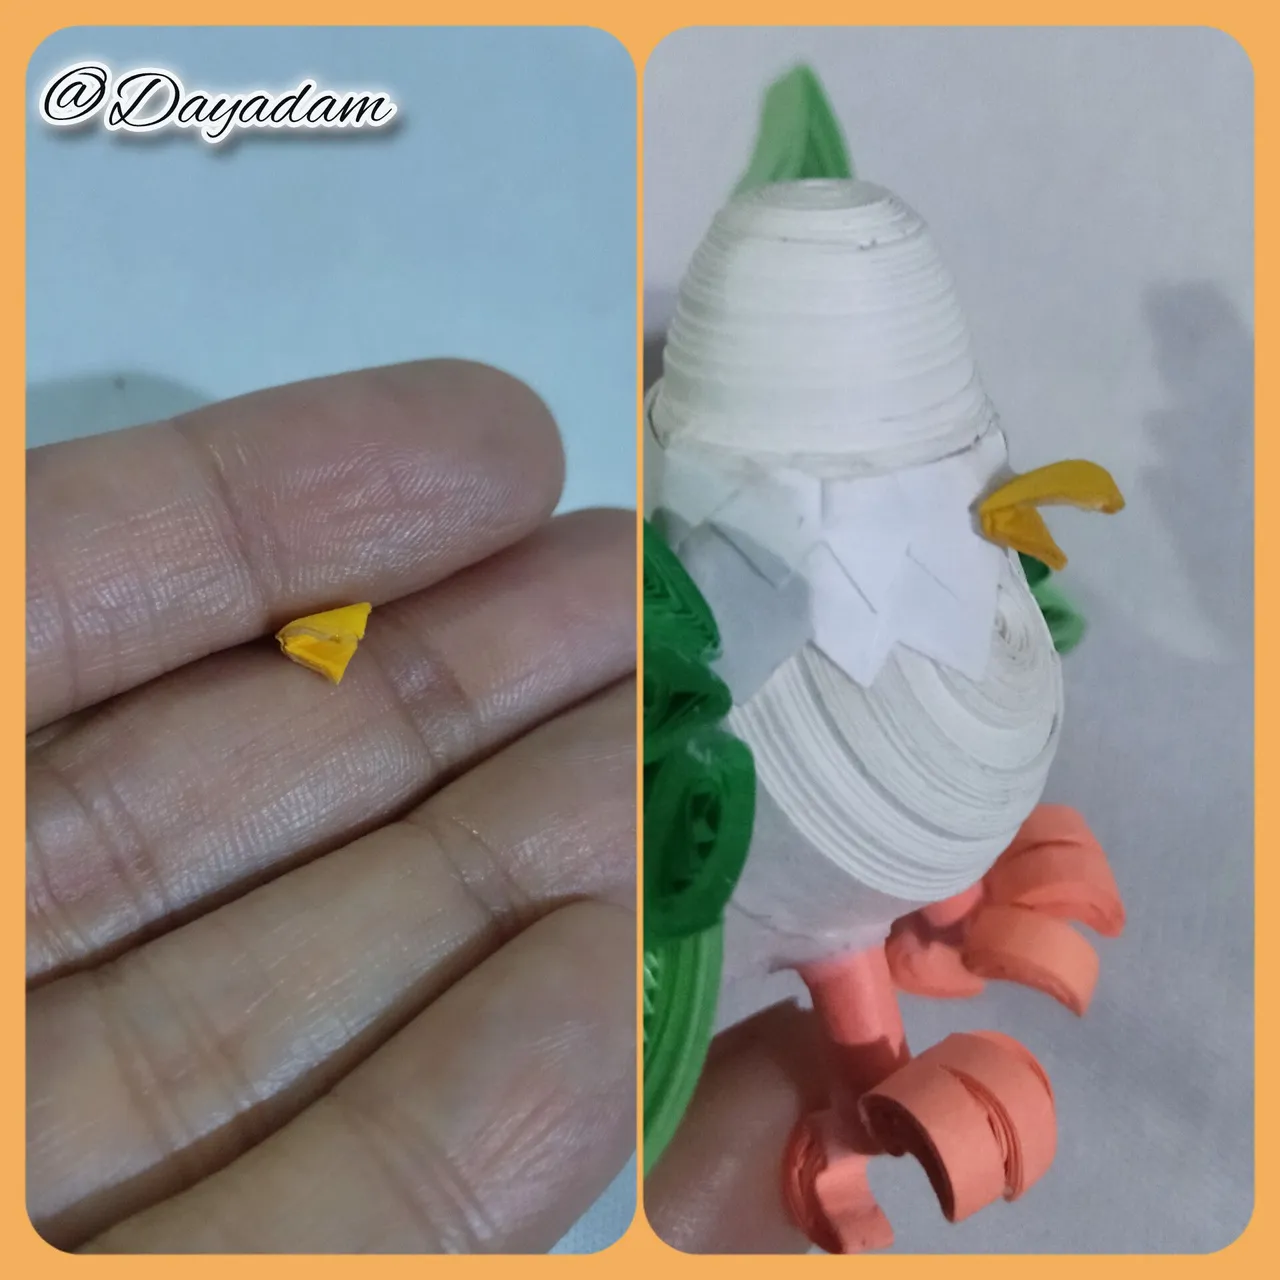
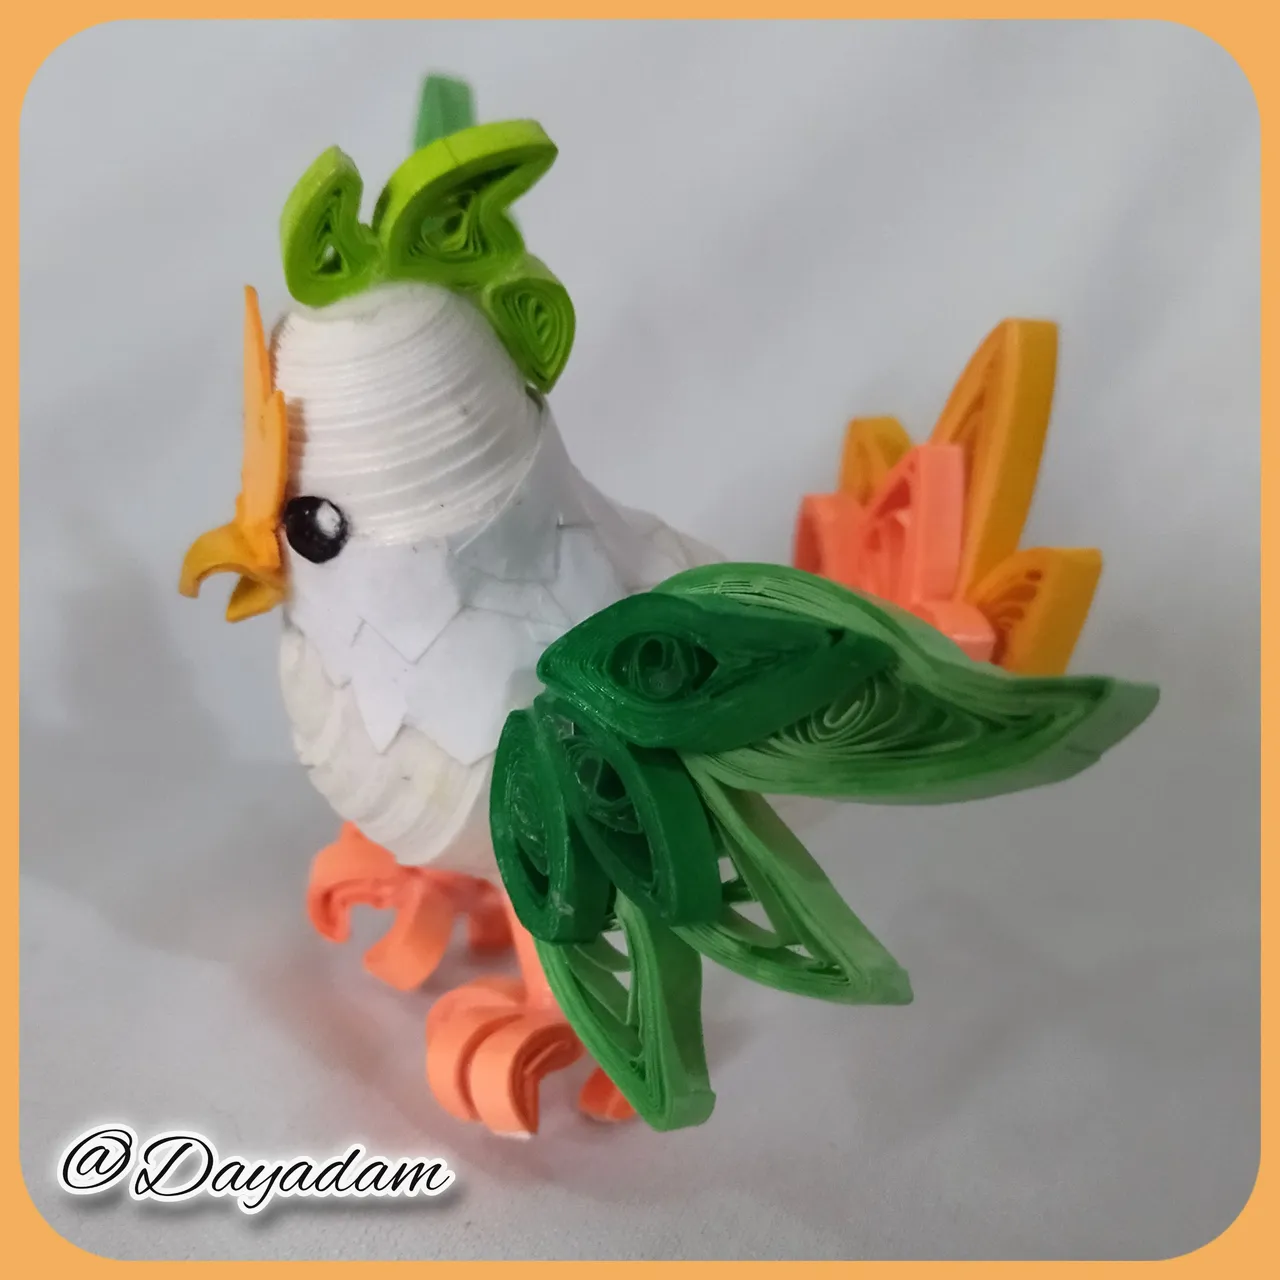
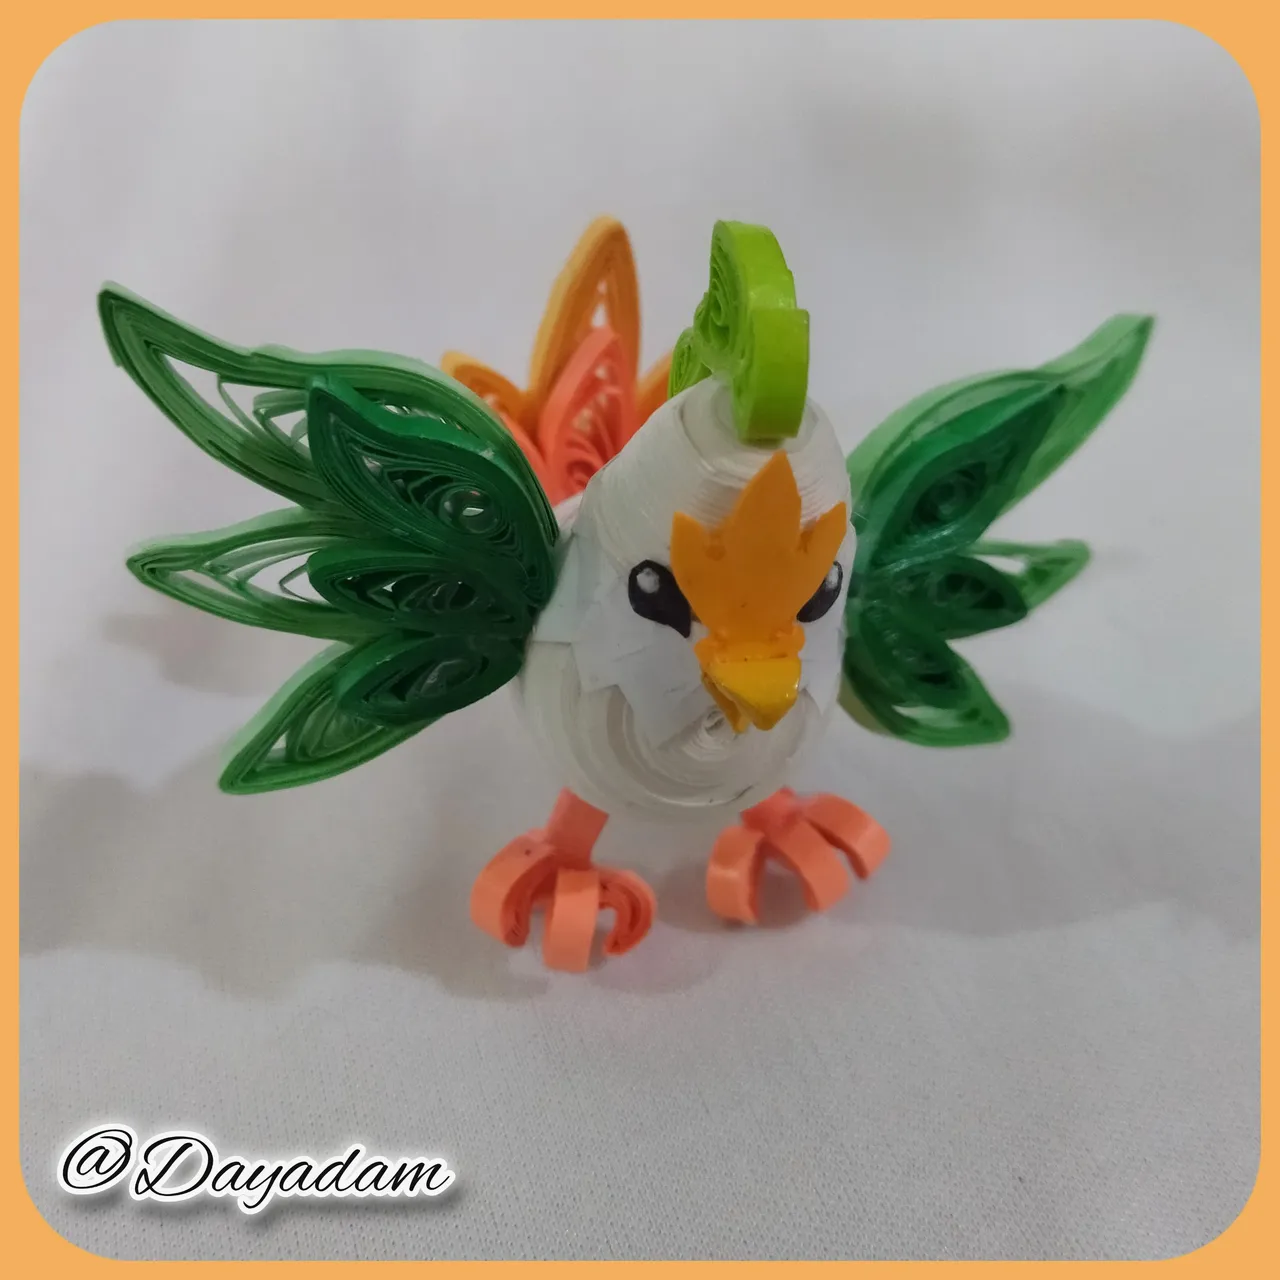
Tail and Wings:
- For these we will make with orange, coral, light green and dark green tape of 3mm wide several open circles, these we will mold them properly according to what I want to obtain, we will glue in groups and glue the wings, and the tail to the body.

Patas:
• Luego con cinta para quilling color coral de 9mm de ancho realizaremos 2 círculos cerrados alargados como una especie de cilindro.
•Para las garras realizaremos 8 círculos abiertos con cinta color coral de 3mm de ancho, los cuales moldearemos aplanando el mismo, luego pegaremos de 4 en 4 en la pata que hice previamente y seguido de esto pegue al cuerpo.
Cola y Alas:
• Para estas realizaremos con cinta color naranja, coral, verde claro y verde oscuro de 3mm de ancho diversos círculos abiertos, estos los moldearemos adecuadamente según o que deseo obtener, pegaremos en grupos y pegamos las alas, y la cola al cuerpo.
Beak:
- I made this with a piece of ochre colored tape which I folded, cut and glued to the face.
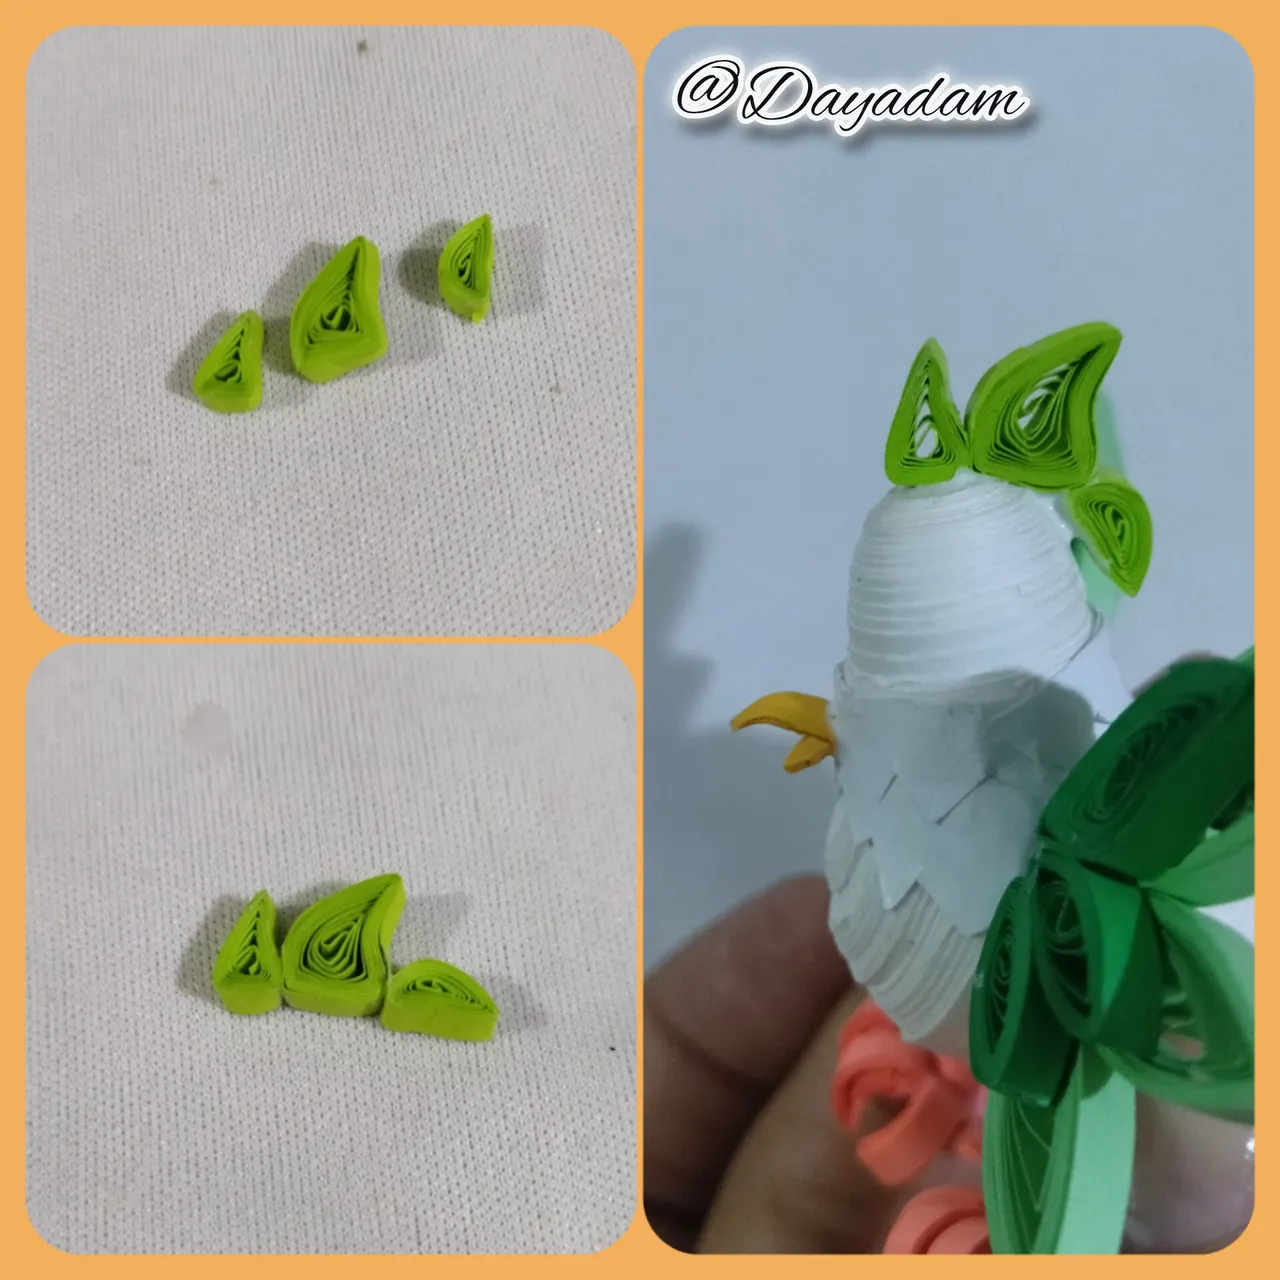
Head and forehead feathers:
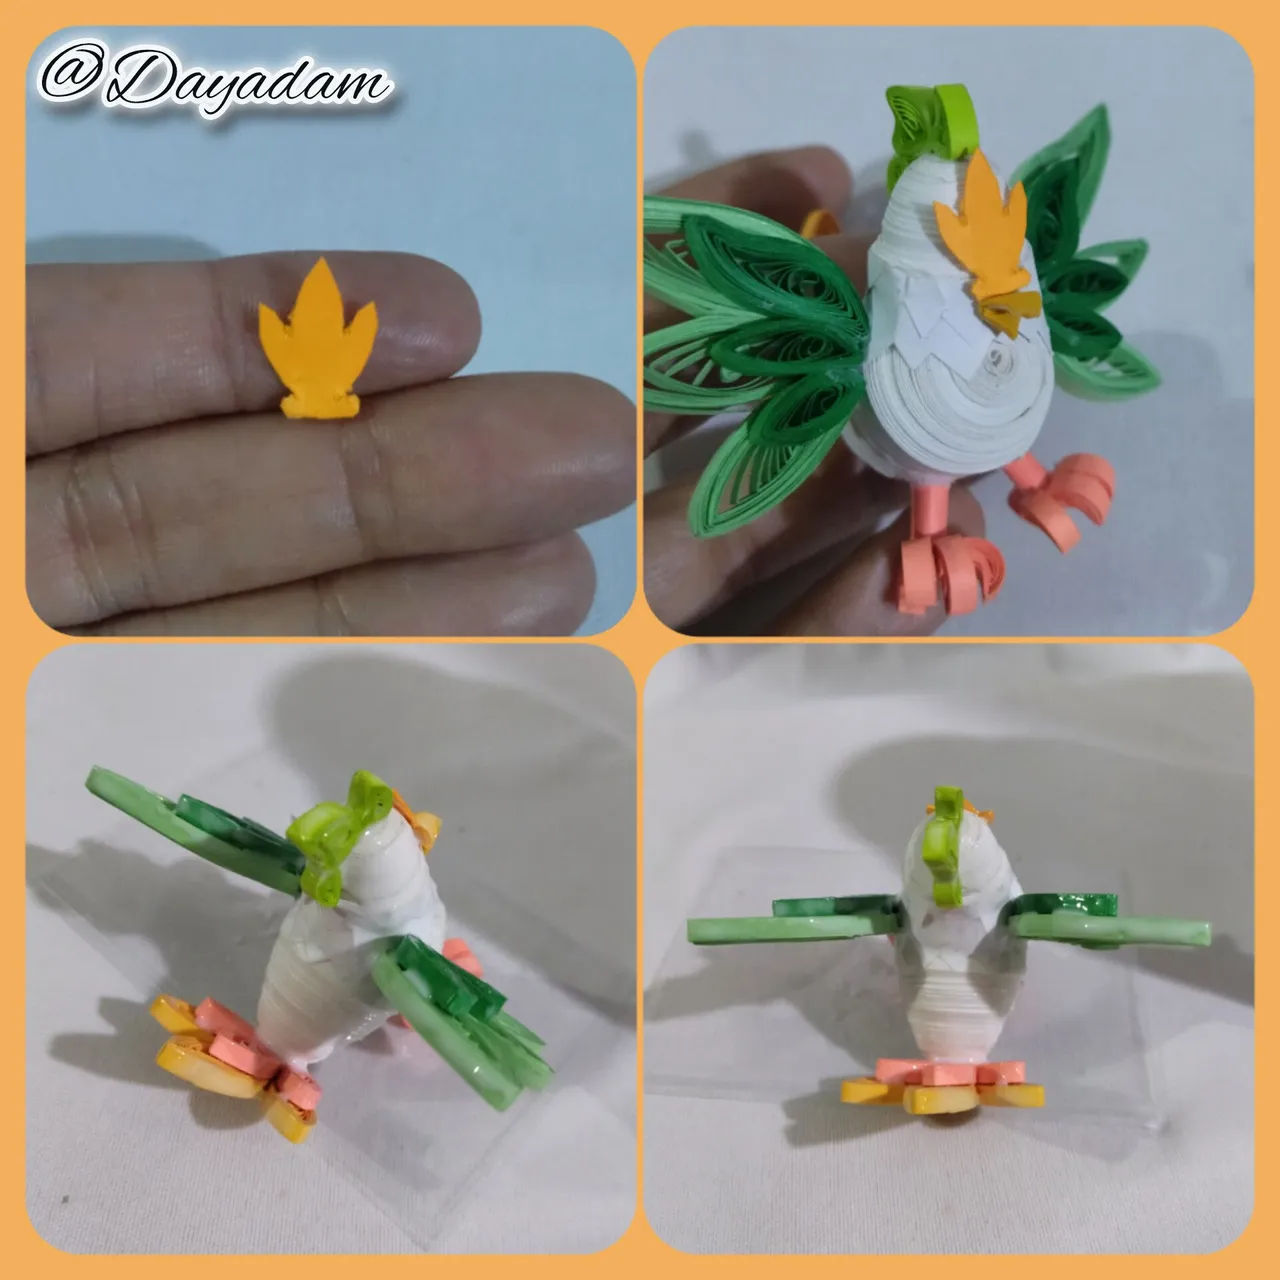
- For these we will make 3 open circles with 3mm wide fluorecent green quilling tape, which I molded and glued on the top of the head, for the forehead I cut a piece of orange tape which I proceeded to glue next to the beak.
- At this point I decided to apply several layers of extra strong white glue, to plasticize it, protect it and give it shine, let it dry between one layer and another.
-Finally we will paint the eyes, and glue them to the face of the chirp and apply some white glue to protect it.
This way we have ready this 3D figure of the beautiful Chirpe, that I materialized to share with all of you.
Pico:
• Este lo realice con un trozo de cinta color ocre el cual doble, corte y pegue a la cara.
Plumas de la cabeza y frente:
• Para estas realizaremos 3 círculos abiertos con cinta para quilling de 3mm de ancho color verde fluorecente, los cuales moldee y pegue en la parte de arriba de la cabeza, para la de la frente corte un trozo de cinta color naranja la cual procedí a pegar junto al pico.
• En este punto decidí de una vez aplicar varias capas de pega blanca extra fuerte, para plastificarlo, protegerlo y darle brillo, deje secar entre una capa y otra.
•Por ultimo pintaremos los ojos, y los pegaremos de la cara del chirpe y aplicaremos un poco de pega blanca para proteger.
De esta manera tenemos lista esta figura en 3D del bello Chirpe, que materialice para compartir con todos ustedes.


What did you think, did you like it?
I hope you did, I hope you liked my explanation, procedure and photos, I made them with love for you.
"Let out that muse that inspires you, and let your imagination fly".
Thank you all, see you next time.🐱
¿Qué les pareció, les gustó?
Espero que sí, que les haya gustado mi explicación, procedimiento y fotos, los hice con mucho cariño por y para ustedes.
"Deja salir esa musa que te inspira, y deja volar tu imaginación".
Gracias a todos, nos vemos en la próxima.🐱

