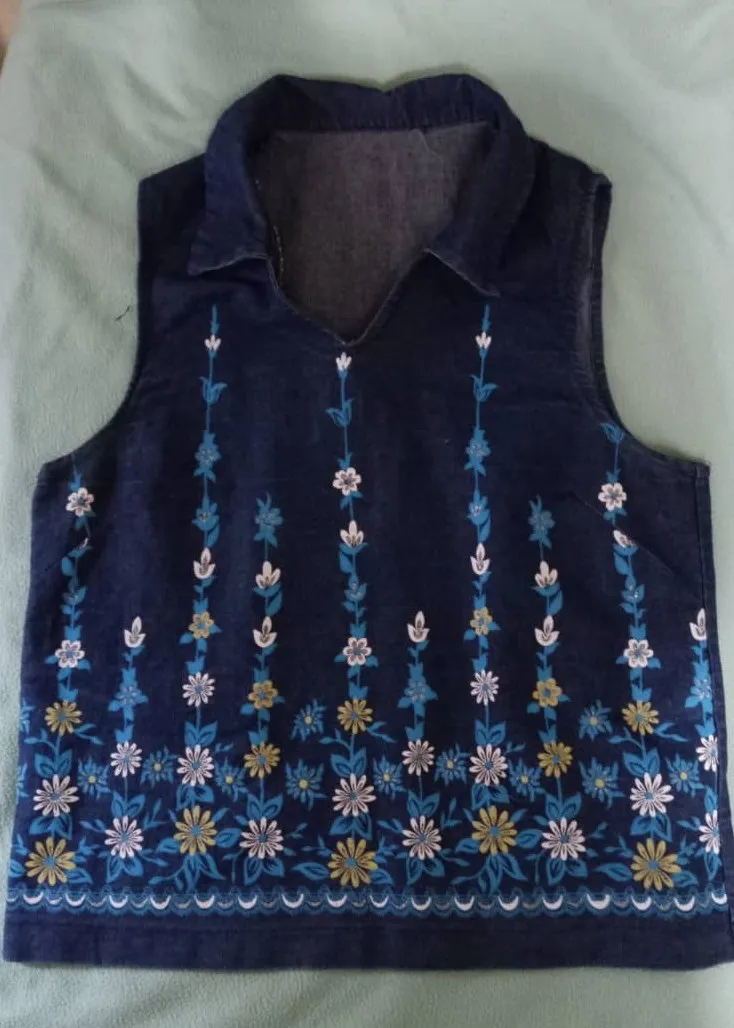
Saludos para todos los Hivers creativos de esta gran comunidad de Hive Diy, el día de hoy les voy a mostrar cómo transforme una camisa o prenda de jeans estampada en un bolso para mí laptop, en vista de que esta prenda ya me quedaba pequeña decidí utilizarla, por la resistencia de la tela, en algo que en realidad necesitaba como lo es un bolso para laptop, les cuento cómo lo realice en sencillos pasos.
Greetings to all the creative Hivers of this great Hive Diy community, today I am going to show you how I transformed a shirt or printed jeans garment into a bag for my laptop, since this garment was already too small I decided to use it, because of the resistance of the fabric, in something that I really needed as it is a laptop bag, I tell you how I did it in simple steps.
Materiales / Materials
- Prenda de vestir de jeans estampada.
- Hilo azul.
- 2 cierres.
- Tela de color blanco.
- Colgante
- Máquina de coser.
- Plancha de ropa
- Printed jeans garment.
- Blue thread.
- 2 zippers.
- White fabric.
- Pendant
- Sewing machine.
- Clothes iron.

Paso a paso / Step by Step
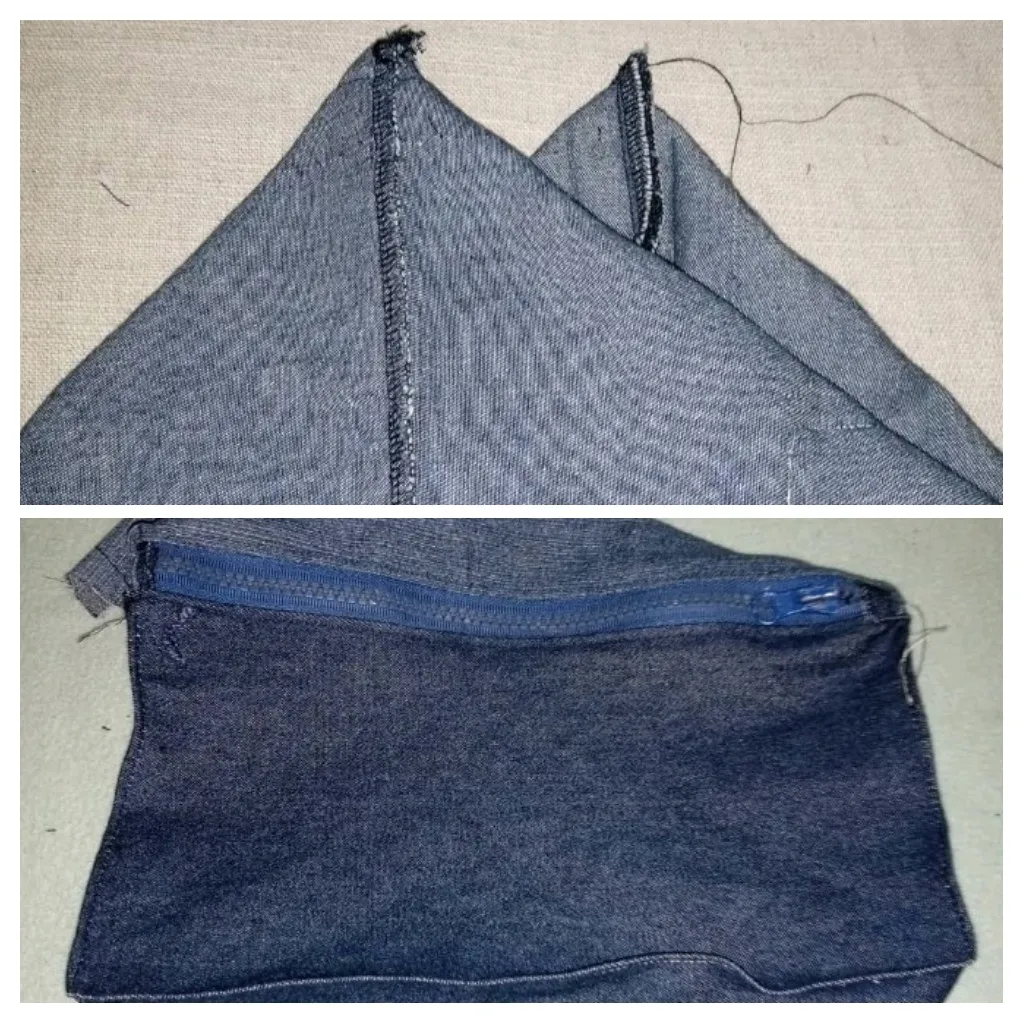
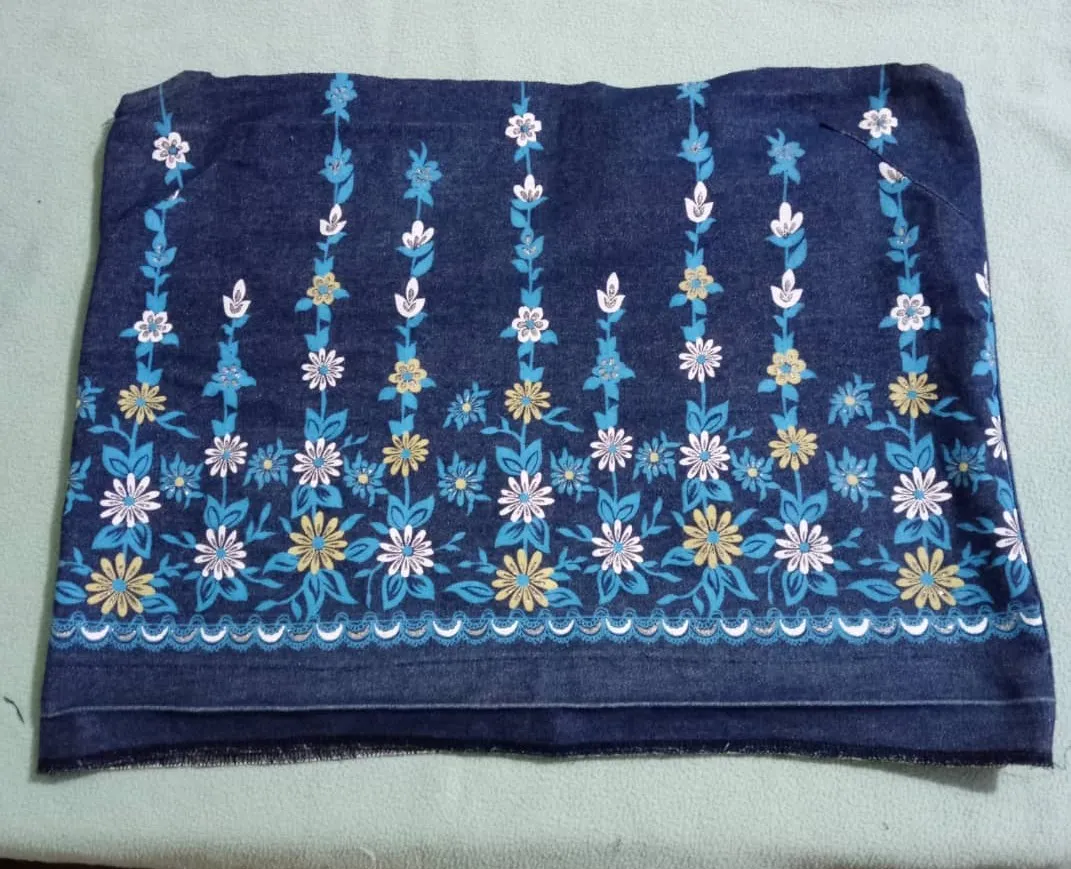
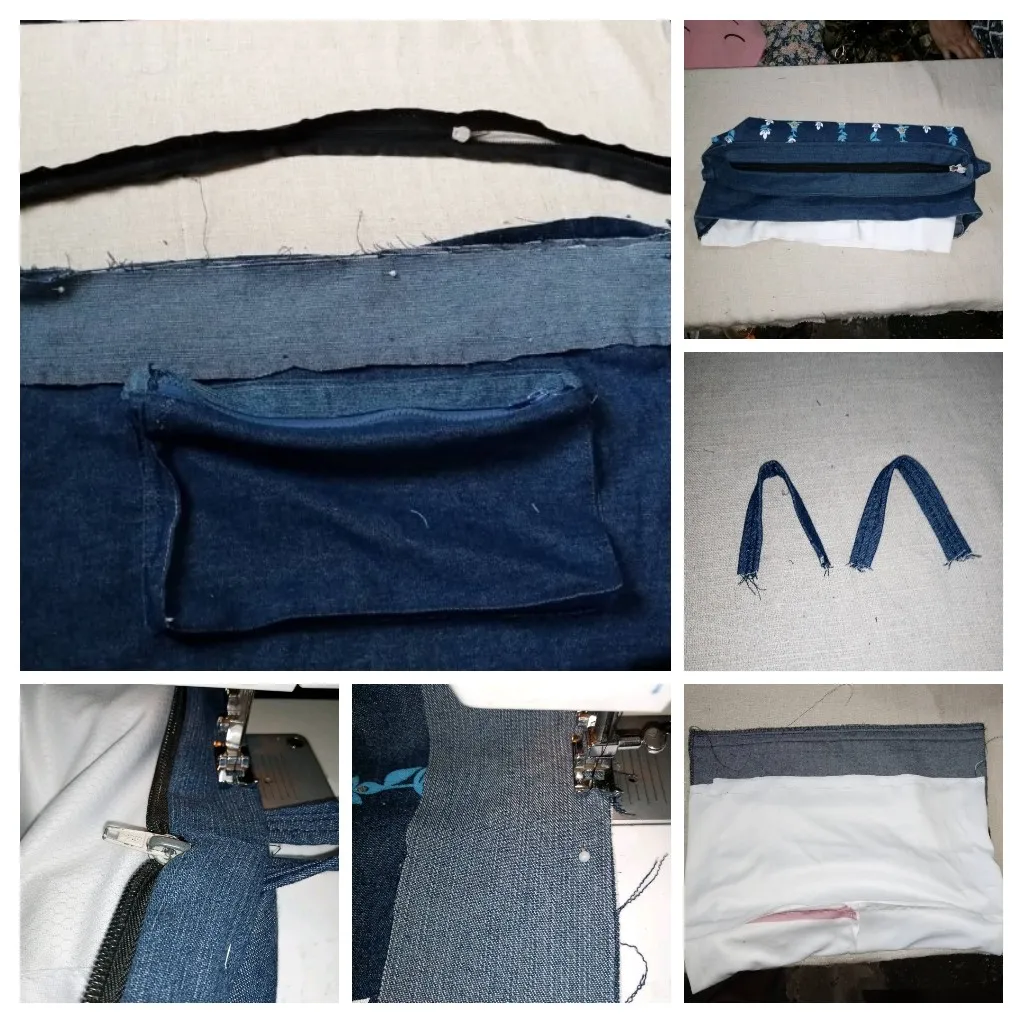
Lo primero fue tomar las medidas a mi laptop, las cuales serán la referencia para el tamaño del bolso. Corte la parte superior de la camisa y dejé todo el estampado, deshice el ruedo y lo planche, luego basándome en las medidas de la laptop me doy cuenta que puedo aprovechar la pieza completa sin necesidad de agregar o quitar más tela, pues la pieza de jeans estampada es justo lo que requiero, 40 x 34 centímetros, por qué solo uni con la máquina la parte inferior y luego doble las esquinas en forma de triángulo y en la base del mismo esto para dar forma. Ya con los centímetros necesarios para el bolso, realice un pequeño bolsillo para la parte posterior el cual le colocare un cierre, para ello tomo un trozo de tela de jeans, del sobrante de la parte superior de la camisa de 20 x 10 centímetros y aparte cuatro tiras de 3 centímetros de ancho. Para el bolsillo cosi las tiras a los tres lados y el la parte superior fijé el cierre con la máquina en el extremo superior, para luego coser el bolsillo sobre el bolso y terminar de fijar el cierre.
The first thing was to take the measurements of my laptop, which will be the reference for the size of the bag. I cut the top of the shirt and left all the print, undo the hem and iron it, then based on the measurements of the laptop I realize that I can use the whole piece without adding or removing more fabric, because the piece of printed jeans is just what I need, 40 x 34 centimeters, why I only joined with the machine the bottom and then fold the corners in a triangle shape and at the base of the same to give shape. Once I had the necessary centimeters for the bag, I made a small pocket for the back of the bag which I will place a zipper, for this I took a piece of jeans fabric, from the excess of the top of the shirt of 20 x 10 centimeters and separated four strips of 3 centimeters wide. For the pocket I sewed the strips on the three sides and on the upper part I fixed the zipper with the machine at the upper end, then I sewed the pocket on the bag and finished fixing the zipper.
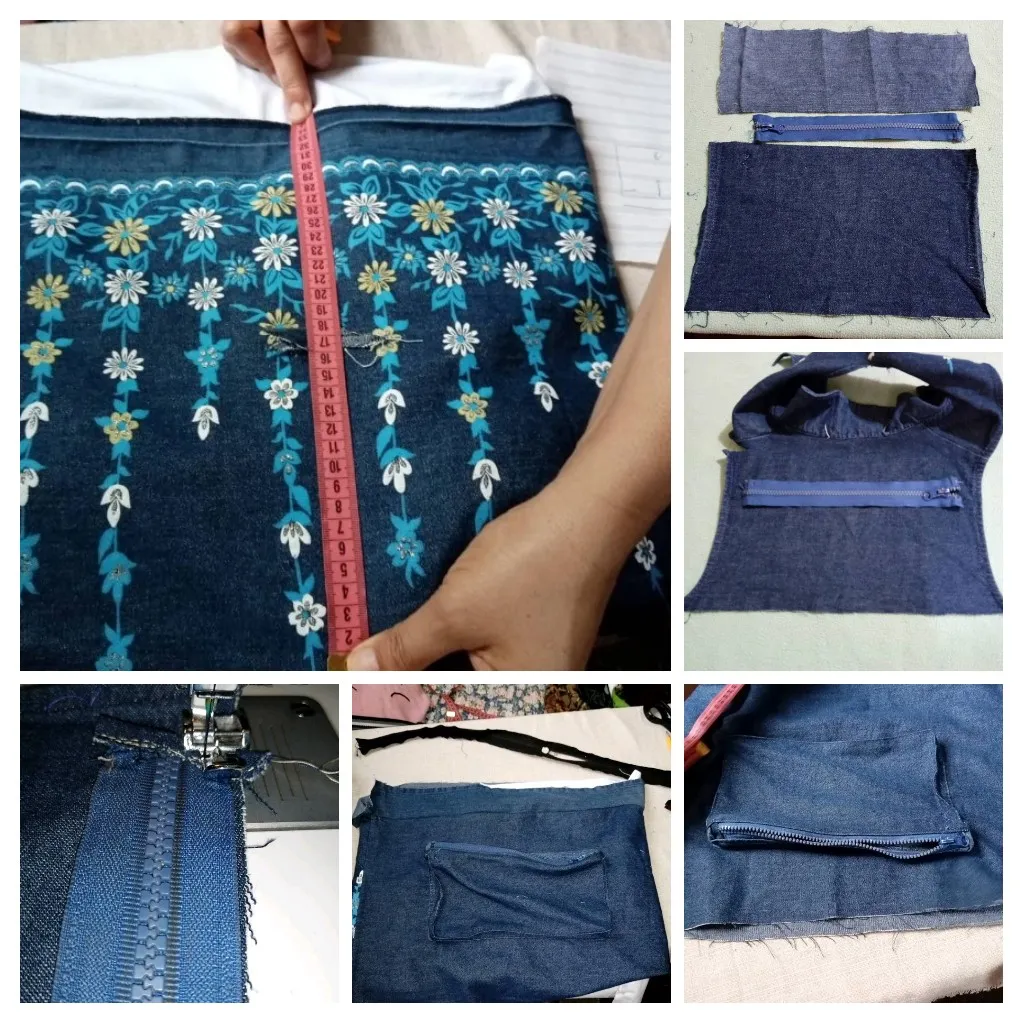
Seguidamente procedo a realizar un forro para el bolso, para ello utilizo una pieza de tela de color blanco la cual es necesario empatar para obtener lo que requiero para este forro y así coso y ensamble el forro dejando una abertura en la parte inferior. Luego corte dos tiras de jeans de 5 centímetros de ancho y 40 de largo las cuales me van a servir de soporte para el cierre. Así mismo realice dos tiras de jeans que servirán de soportes para los colgantes.
El siguiente paso es fijar a cada extremo del bolso los enganches para los colgantes y seguidamente procedo a pegar el cierre primero sobre las tiras y luego al bolso. A continuación procedo a coser el forro para ello coloco el bolso y forro al revés y procedo con la máquina para culminar sacando el bolso por la abertura que había dejado anteriormente y sellarlo al terminar.
Next I proceed to make a lining for the bag, for this I use a piece of white fabric which is necessary to tie to get what I require for this lining and so I sew and assemble the lining leaving an opening at the bottom. Then I cut two strips of jeans 5 centimeters wide and 40 centimeters long which will serve as support for the zipper. I also made two strips of jeans that will serve as supports for the pendants. The next step is to attach to each end of the bag the hooks for the pendants and then proceed to glue the zipper first on the strips and then to the bag. Then I proceed to sew the lining and place the bag and lining upside down and proceed with the machine to finish taking out the bag through the opening that I had left previously and seal it at the end.
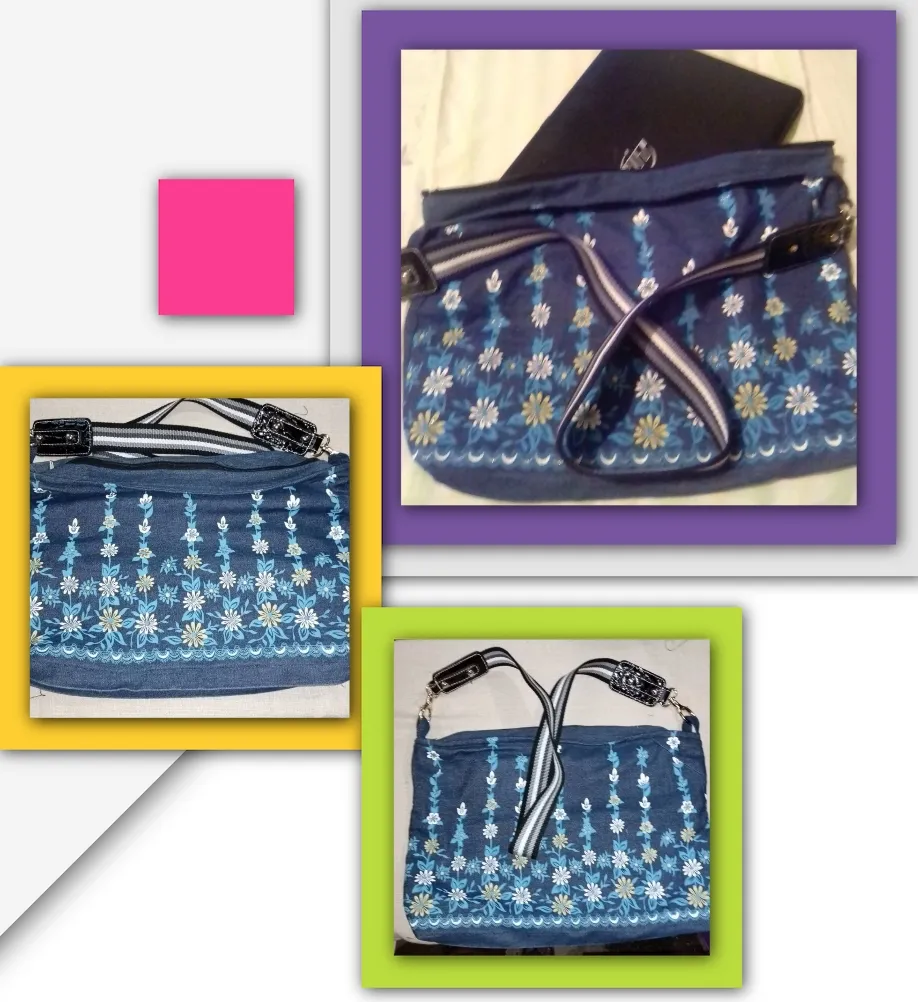
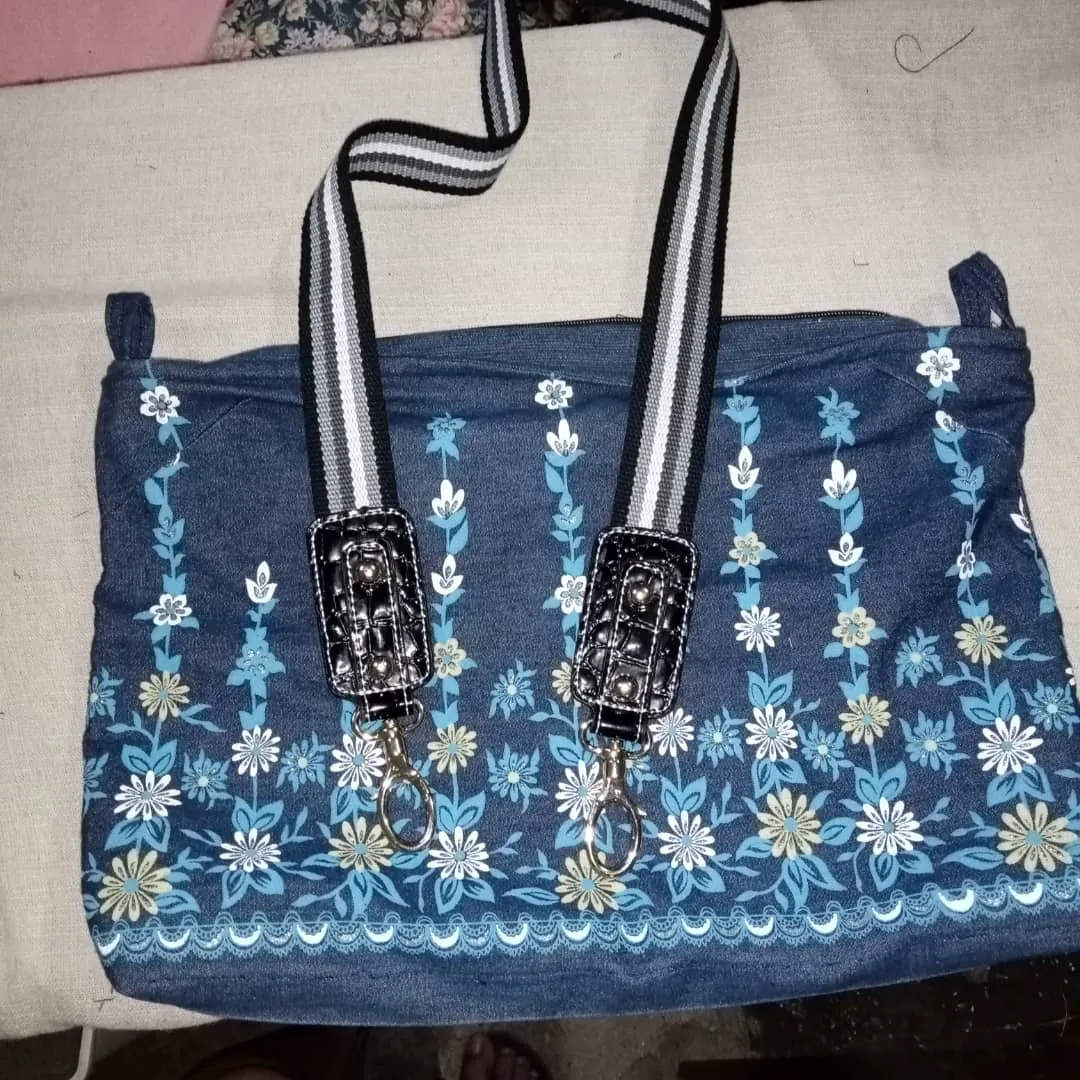
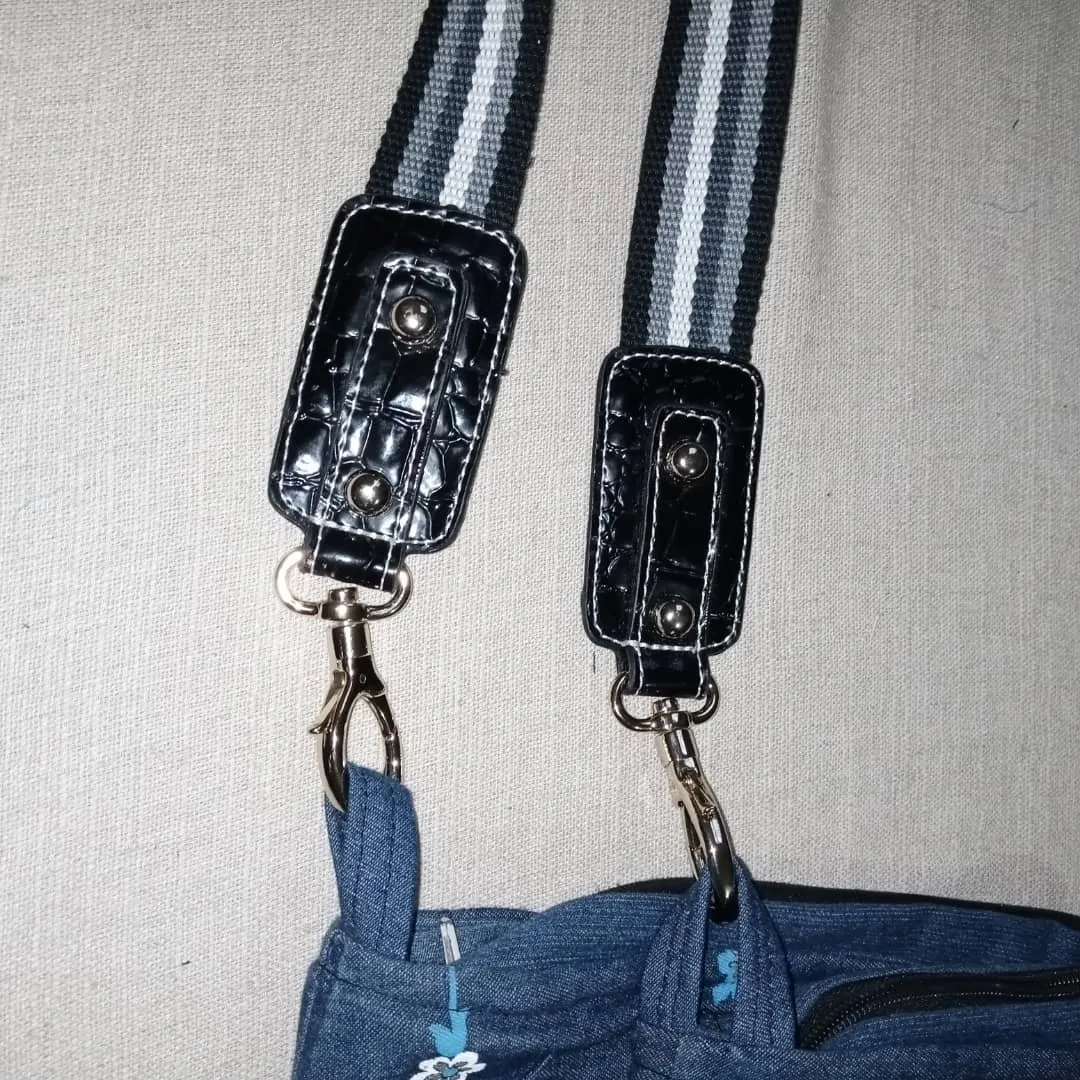
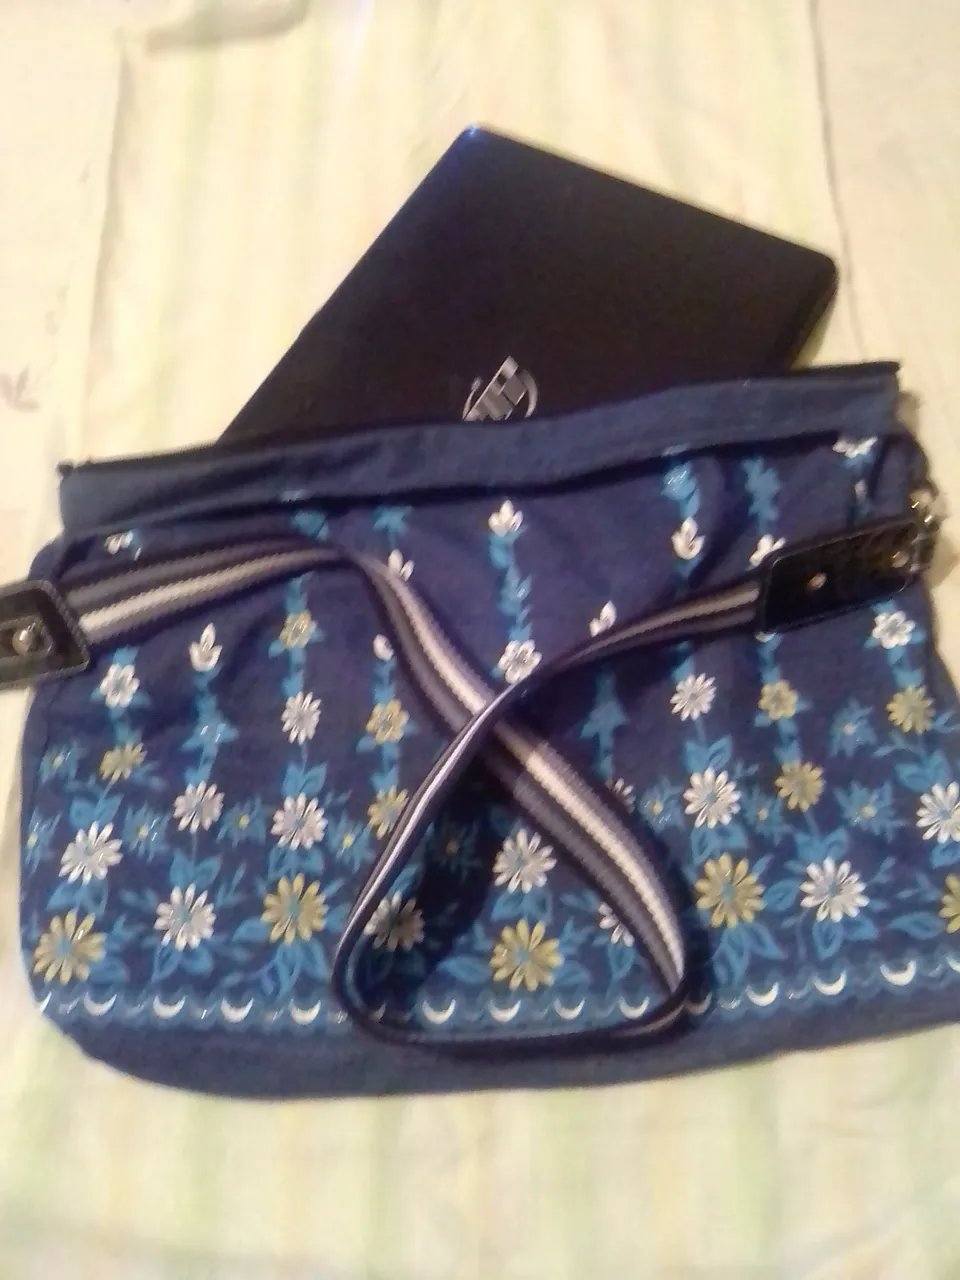
El último paso es colocar los colgantes, los que se pueden ajustar a nuestro gusto, y así tengo ya un bolso para el traslado cómodo y seguro de mi laptop, realizado con materiales del cual disponía en casa, espero se motiven a realizar en casa.
The last step is to place the hangers, which can be adjusted to our liking, and so I have a bag for the comfortable and safe transfer of my laptop, made with materials which I had at home, I hope you are motivated to make at home.
Resultado/ Result
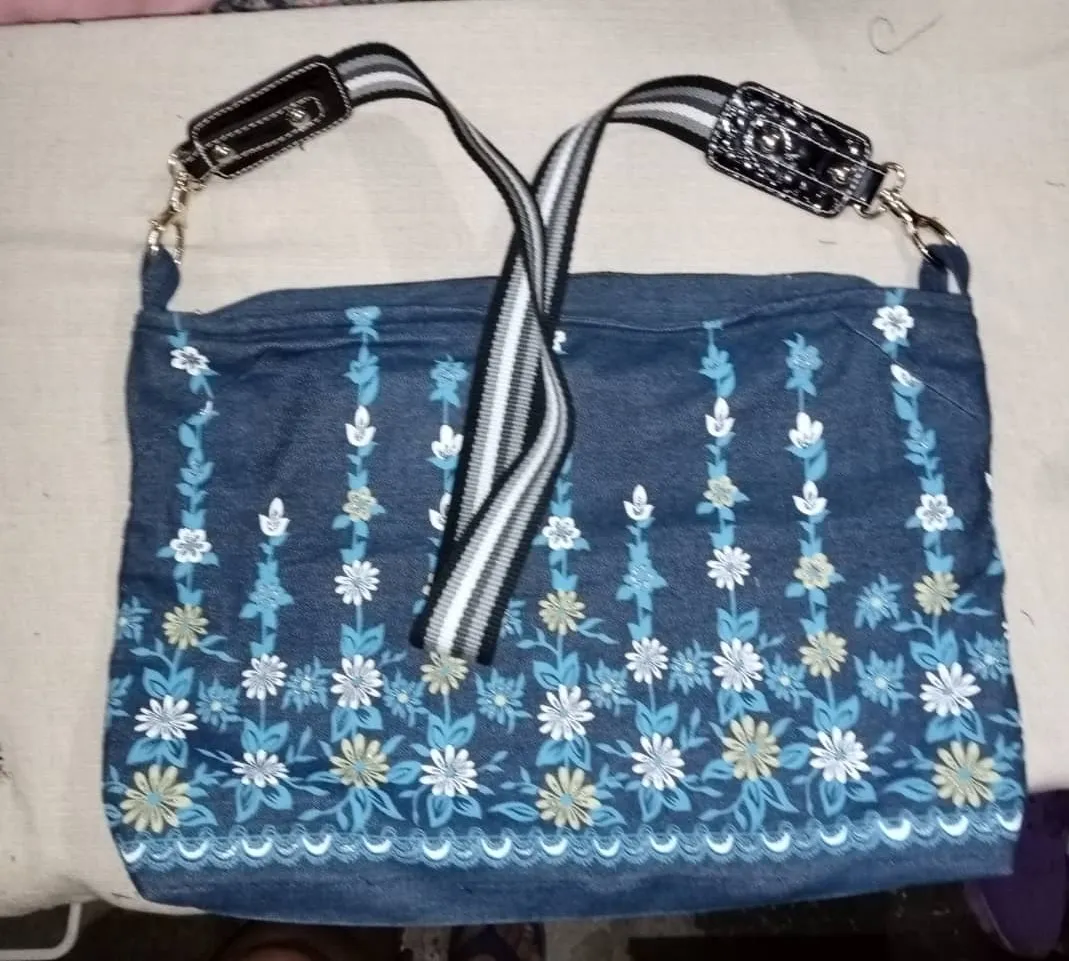
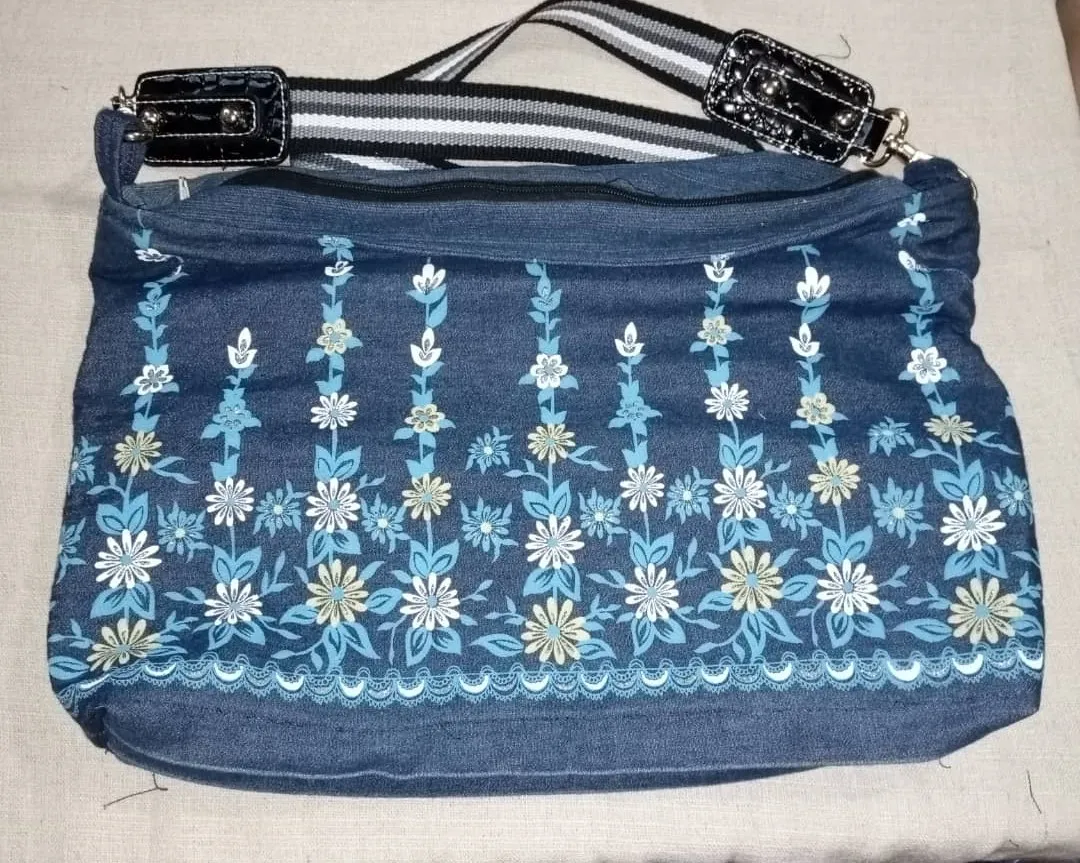
Este es un trabajo manual realizado para esta ocasión y espero sea de su agrado.
This is a manual work done for this occasion and I hope you like it.
Las fotos son de mi propiedad tomadas exclusivamente en este proyecto.
The photos are my property taken exclusively for this project.
Los collages del procedimiento los hice con la herramienta de mi Blue C6 y el principal en Picsart .
I made the collages of the procedure with my Blue C6 tool and the main one in Picsart .
Traductor usado
Translator used
DeepL Traductor
Gracias por leer y apoyar mi blog
Thank you for reading and supporting my blog