Saludos para todos los Hivers creativos de esta gran comunidad, siempre un gran gusto saludarlos y desearles muchas bendiciones en este día, que este lleno de creatividad, productividad y mucha salud, y es precisamente un tema de cuidado y prevención, cuando inicio la pandemia del COVID y que decidieron a conocer las medidas a tomar para evitar el contagio, todos llevábamos con rigurosidad la mascarilla y el lavado de las manos o uso de desinfectante a cada minuto, después de un tiempo y tantas variantes nos hemos relajado un poco y de hecho apartado algunas de esas recomendaciones. El hecho es que recientemente hemos sido víctimas nuevamente del COVID y es necesario retomarlos, por eso quiero mostrarles como hice un porta gel antibacterial para colgar del bolso, y tenerlo siempre a la mano cuando estamos fuera de casa haciendo nuestras diligencias, los invito a leer a continuación.
Greetings to all the creative Hivers of this great community, always a great pleasure to greet you and wish you many blessings on this day, may it be full of creativity, productivity and good health, and it is precisely a matter of care and prevention, when the COVID pandemic started and we decided to know the measures to take to avoid contagion, we all carried rigorously the mask and hand washing or use of disinfectant every minute, after a while and so many variants we have relaxed a bit and in fact set aside some of those recommendations. The fact is that recently we have been victims again of COVID and it is necessary to retake them, so I want to show you how I made an antibacterial gel holder to hang from the bag, and always have it at hand when we are out of home doing our errands, I invite you to read below.
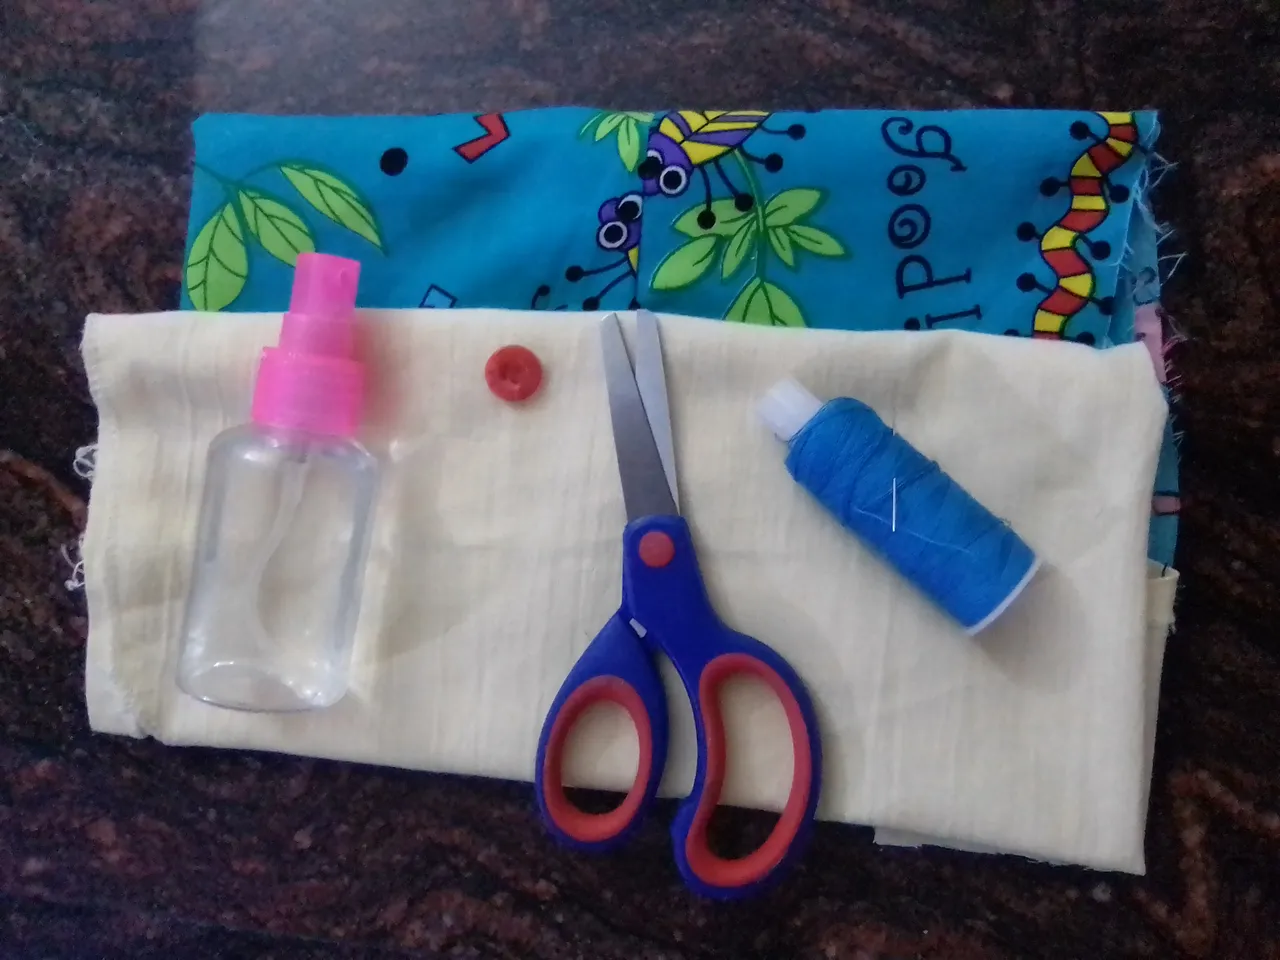
Materiales / Materials
- Retazos de tela, unicolor y estampados
- 2 botones.
- Hilo y aguja
- Tijera
- Plancha de ropa.
*Fabric scraps, unicolor and printed.
- 2 buttons.
- Thread and needle
- Scissors
- Iron.
Paso a paso / Step by Step
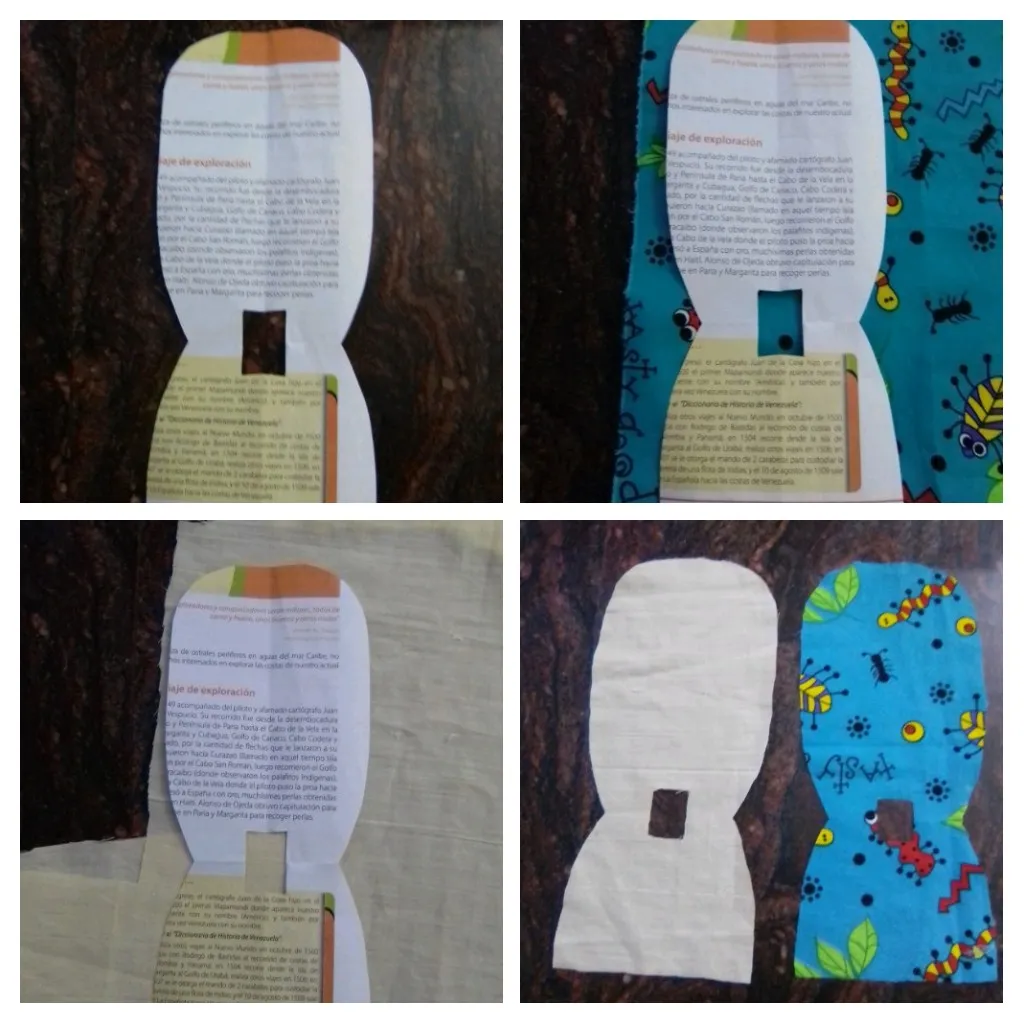
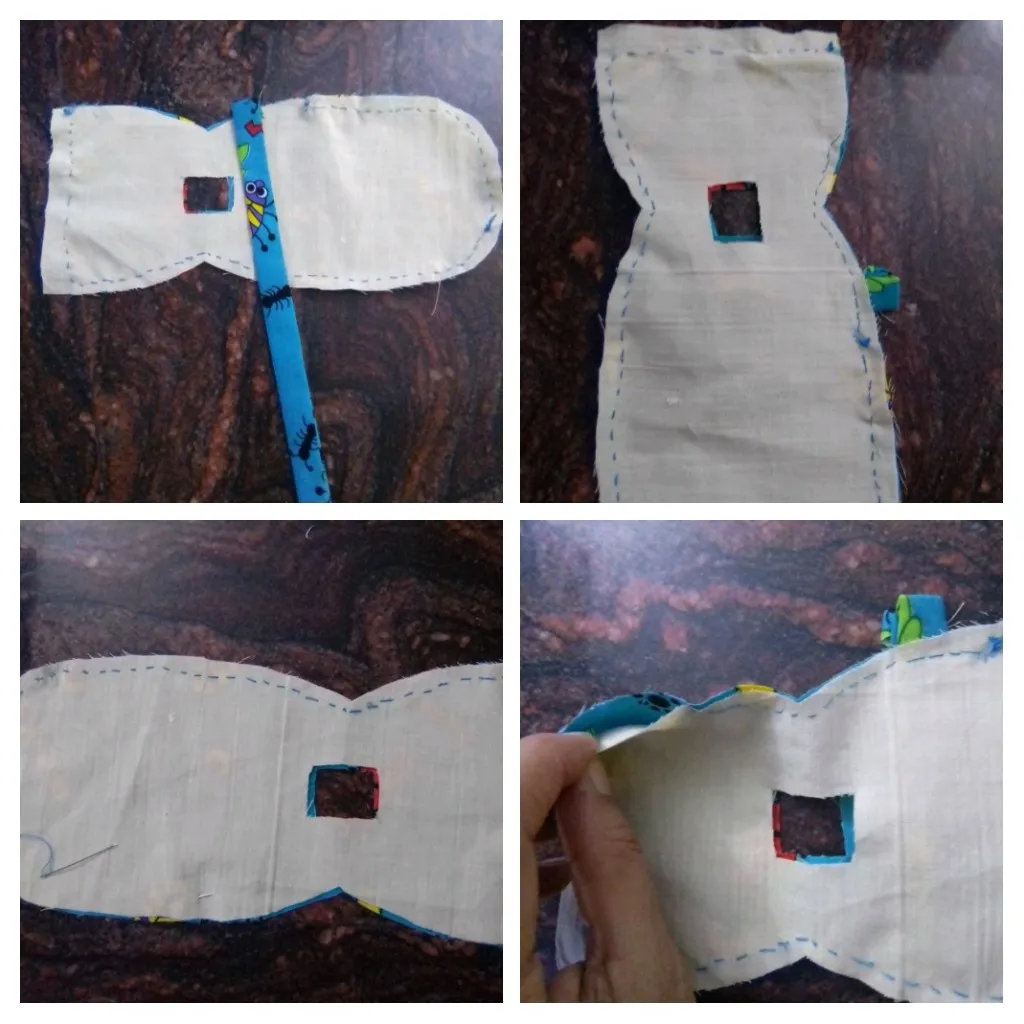
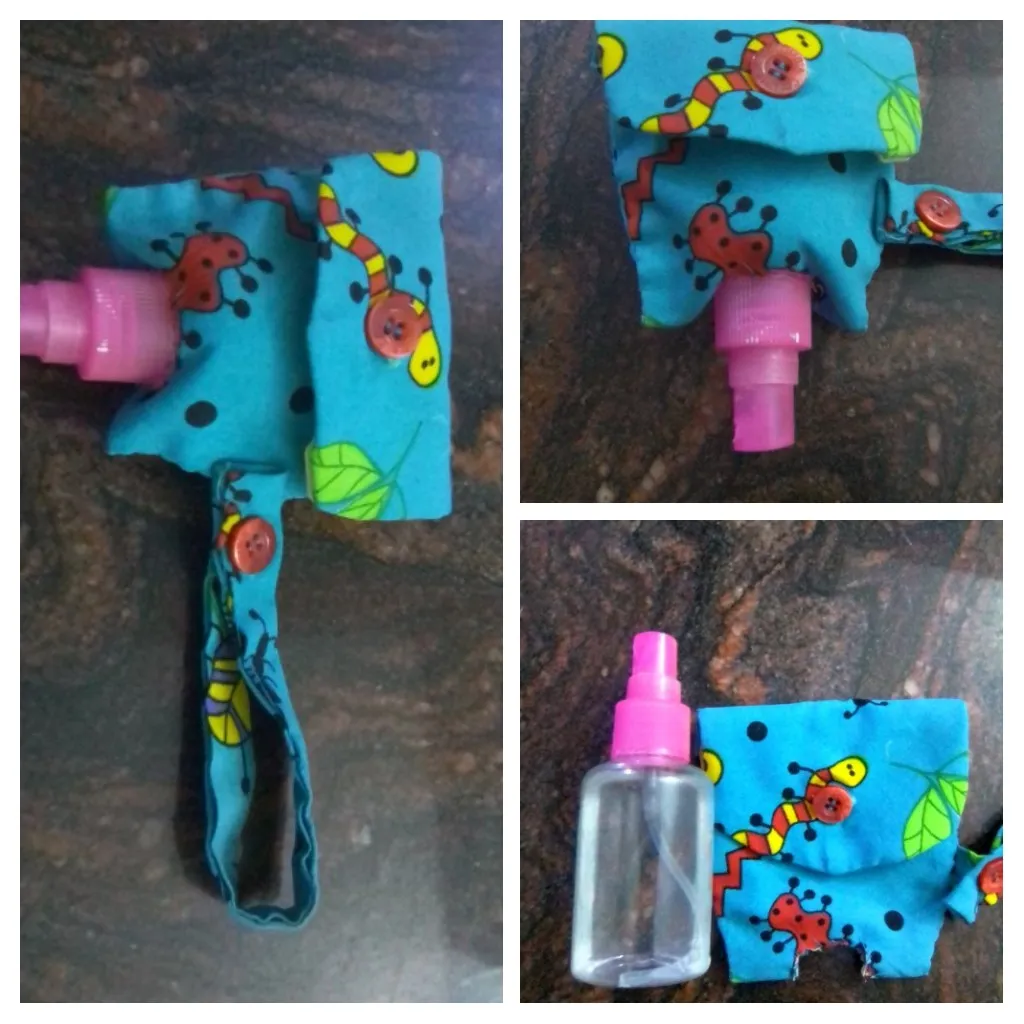
Este porta gel antibacterial, es muy sencillo de hacer y podemos reciclar algunos retazos de telas y botones que siempre tenemos por allí guardados. Lo primero es realizar el diseño de lo que queremos hacer, para ello utilice papel reciclado y medi 15 x 6,5 centímetros, luego un recorte un poco hacia una de los extremos para dar una forma más reducida y el otro extremo redondeo las puntas. Con la referencia de mi envase de gel, ubico el lugar donde haré una abertura en forma de cuadrado. Teniendo mi plantilla lista los transfiero a los retazos de tela. El estampado será la parte exterior del porta gel y el amarillo el forro y así continuamos.
This antibacterial gel holder is very easy to make and we can recycle some scraps of fabric and buttons that we always have lying around. The first thing is to make the design of what we want to do, for this I use recycled paper and measure 15 x 6.5 centimeters, then I cut a little towards one of the ends to give a smaller shape and the other end I round the ends. With the reference of my gel container, I locate the place where I will make an opening in the shape of a square. Having my template ready I transfer them to the fabric scraps. The pattern will be the outside of the gel holder and the yellow will be the lining and so we continue.
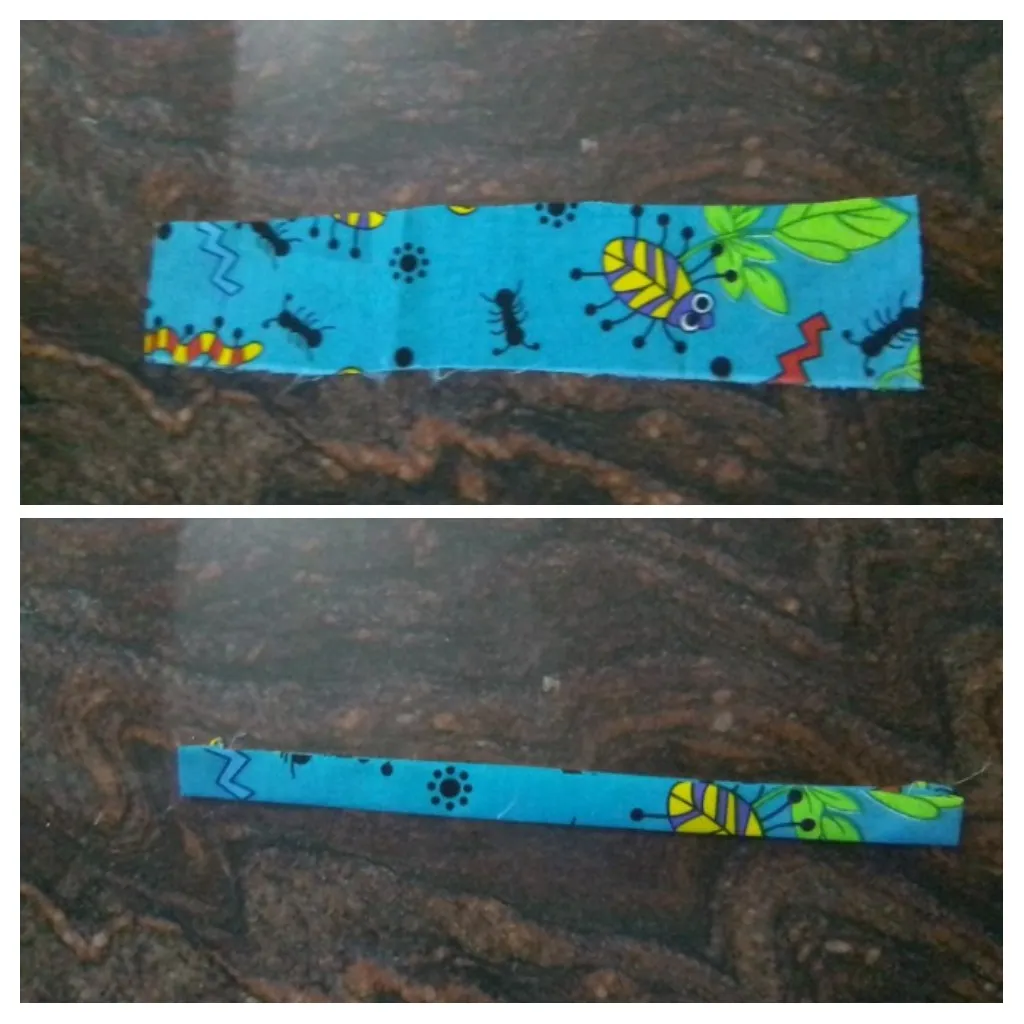
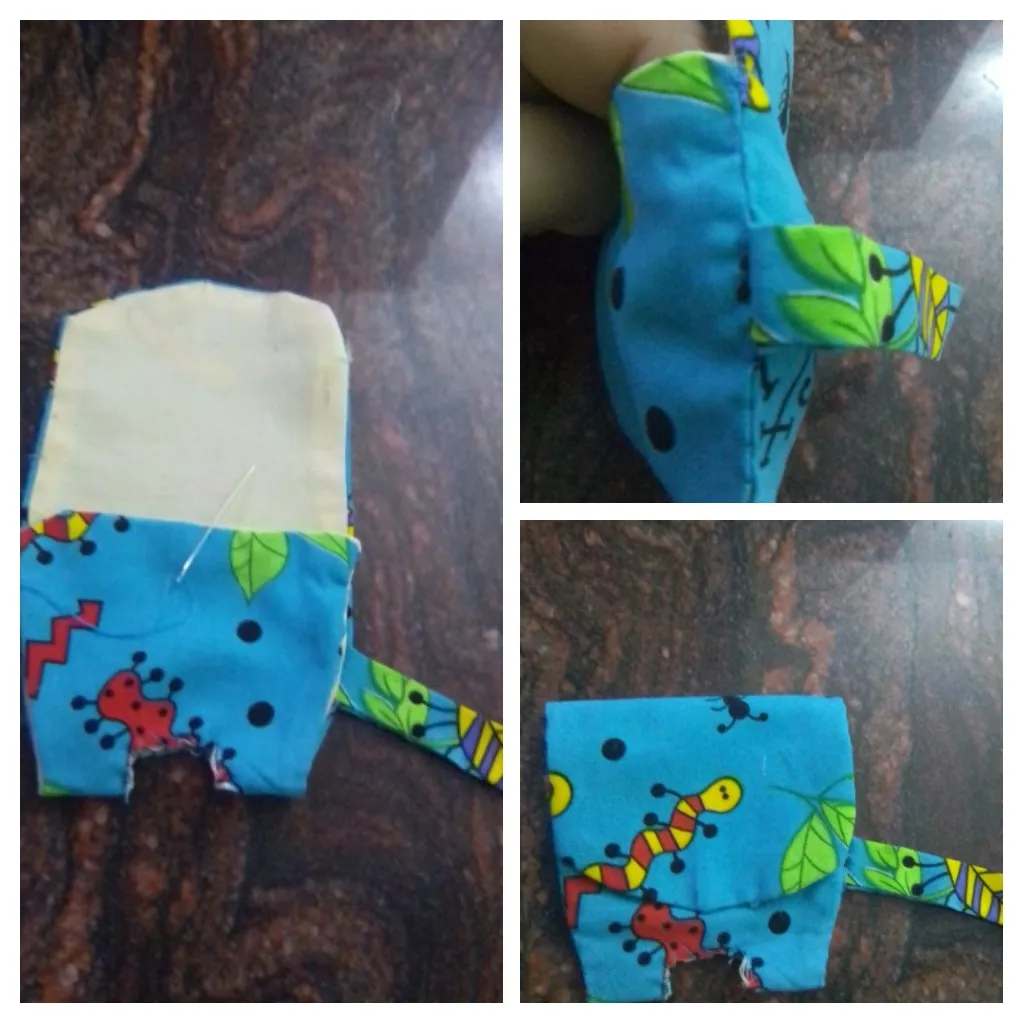
Seguidamente me dispongo a realizar el asa para colgar el porta gel, y corte un trozo de tela estampada de 21 x 6 centímetros, doble sus lados hacia adentro y fijé con la plancha, doble nuevamente y planche para después coser a mano.
Next, I cut a 21 x 6 centimeter piece of printed fabric, folded its sides inwards and fixed it with an iron, folded it again and ironed it and then sewed it by hand.
Ya con mis piezas de tela preparadas, las coloco que coincida sus lados derecho y sujeto con los alfileres, ubico el asa hacia la parte interna, para así comenzar a coser a mano todo el borde, bueno no todo porque es necesario dejar un espacio para dar vuelta a las telas.
Once my fabric pieces are ready, I place them so that their right sides match and fasten with the pins, only the handle towards the inner side, so that I can start sewing by hand the whole edge, well not everything because it is necessary to leave a space to turn the fabrics.
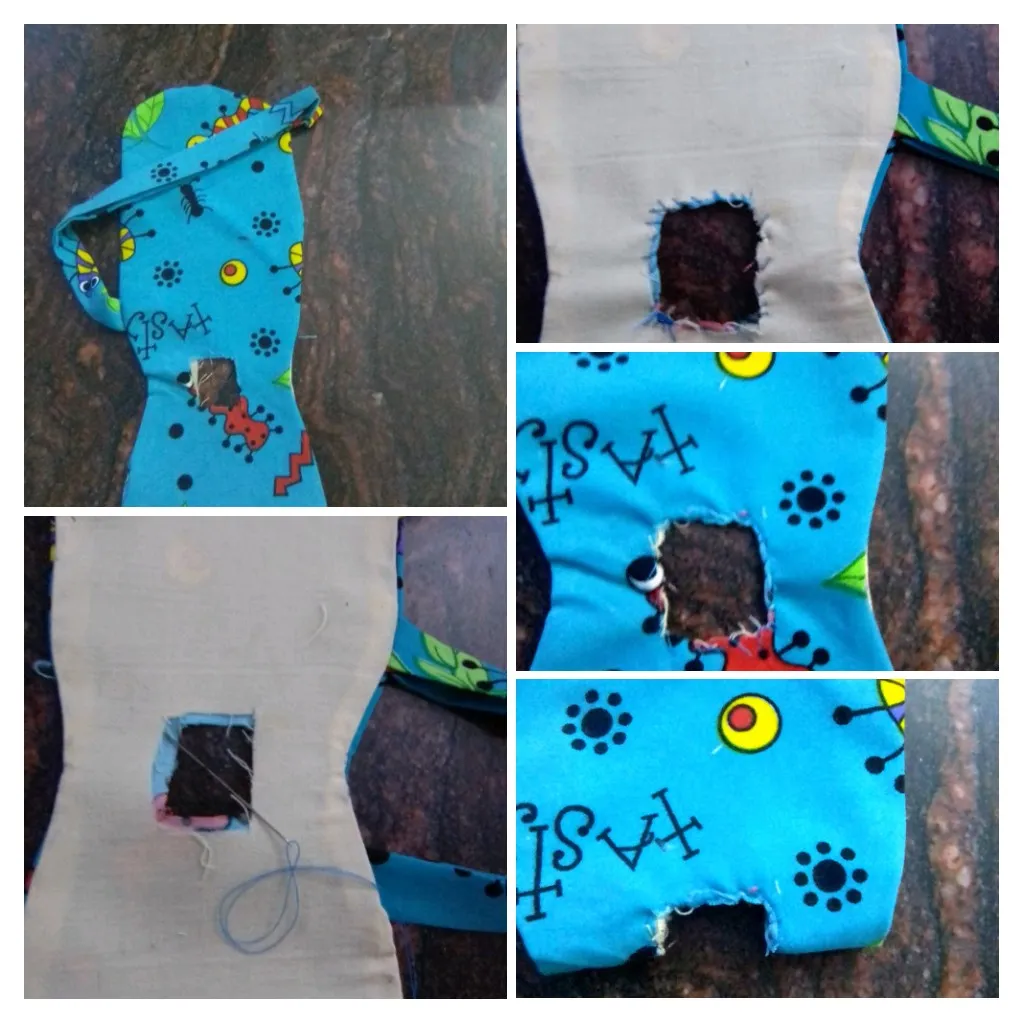
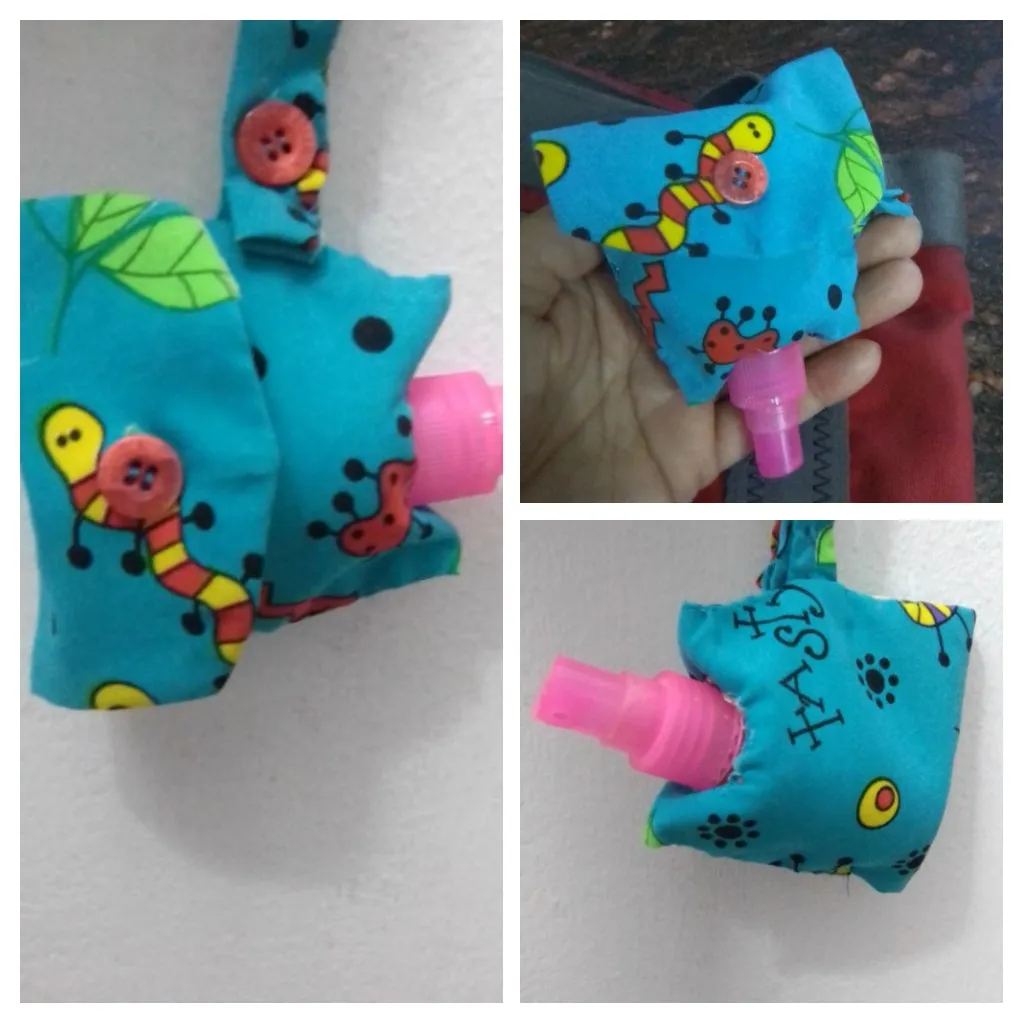
Con las piezas ya al derecho, planche para alisar las costuras y es el momento de coser al rededor de la abertura que deje para la salida del gel, listo este paso, voy a doblar y hacer que coincidan los bordes de la abertura, fijo con alfileres los lados y coso a mano con costura invisible para lograr un acabado muy bonito.
With the pieces already right side up, I ironed to smooth the seams and it's time to sew around the opening I left for the gel to come out, ready this step, I will fold and match the edges of the opening, pin the sides and sew by hand with invisible stitching to achieve a very nice finish.
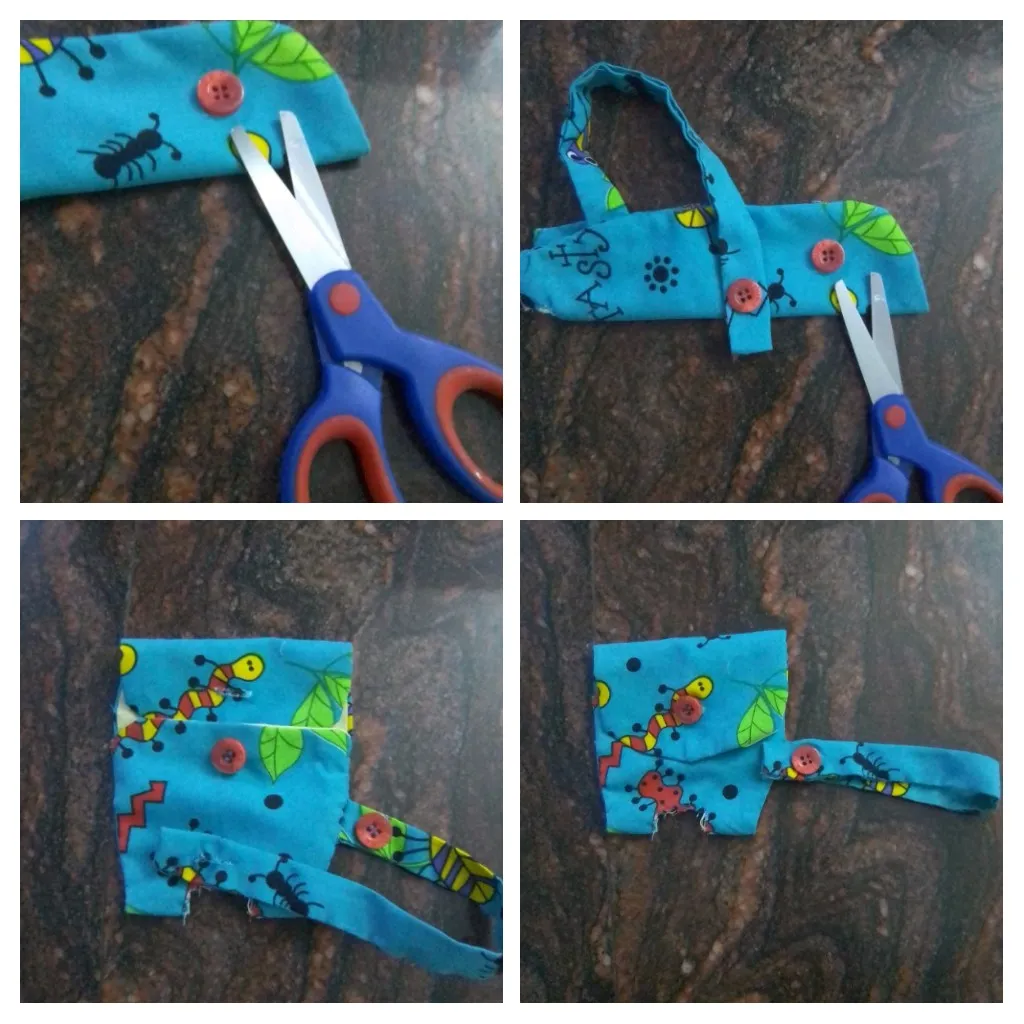
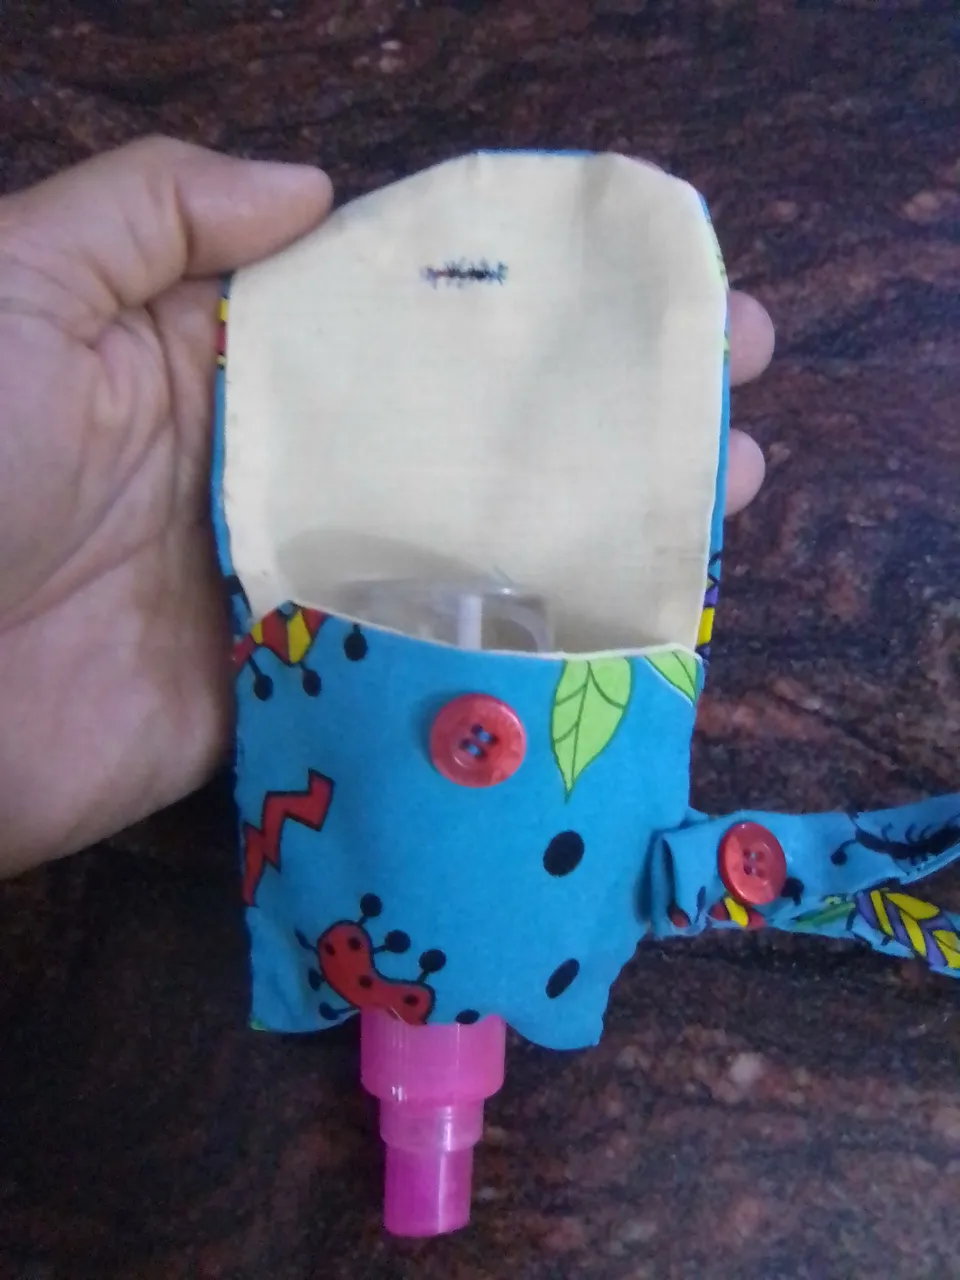
Para finalizar hago los ojales tanto en el asa y el centro del porta gel y coloco los botones. Se dieron cuenta de lo sencillo que es y si tienen máquina de coser es más sencillo aún, sino tienen no hay excusas lo hacen cosido a mano, lo importante es tener nuestro porta gel antibacterial y prevenir enfermedades.
Finally I make the eyelets in the handle and the center of the gel holder and place the buttons. They realized how simple it is and if they have sewing machine is even simpler, if they do not have no excuses do it sewn by hand, the important thing is to have our antibacterial gel holder and prevent diseases.
Espero esté proyecto les guste y les pueda ser de utilidad, muchas gracias por tomarse el tiempo de leer mi blog.
I hope you like this project and I hope you find it useful, thank you very much for taking the time to read my blog.
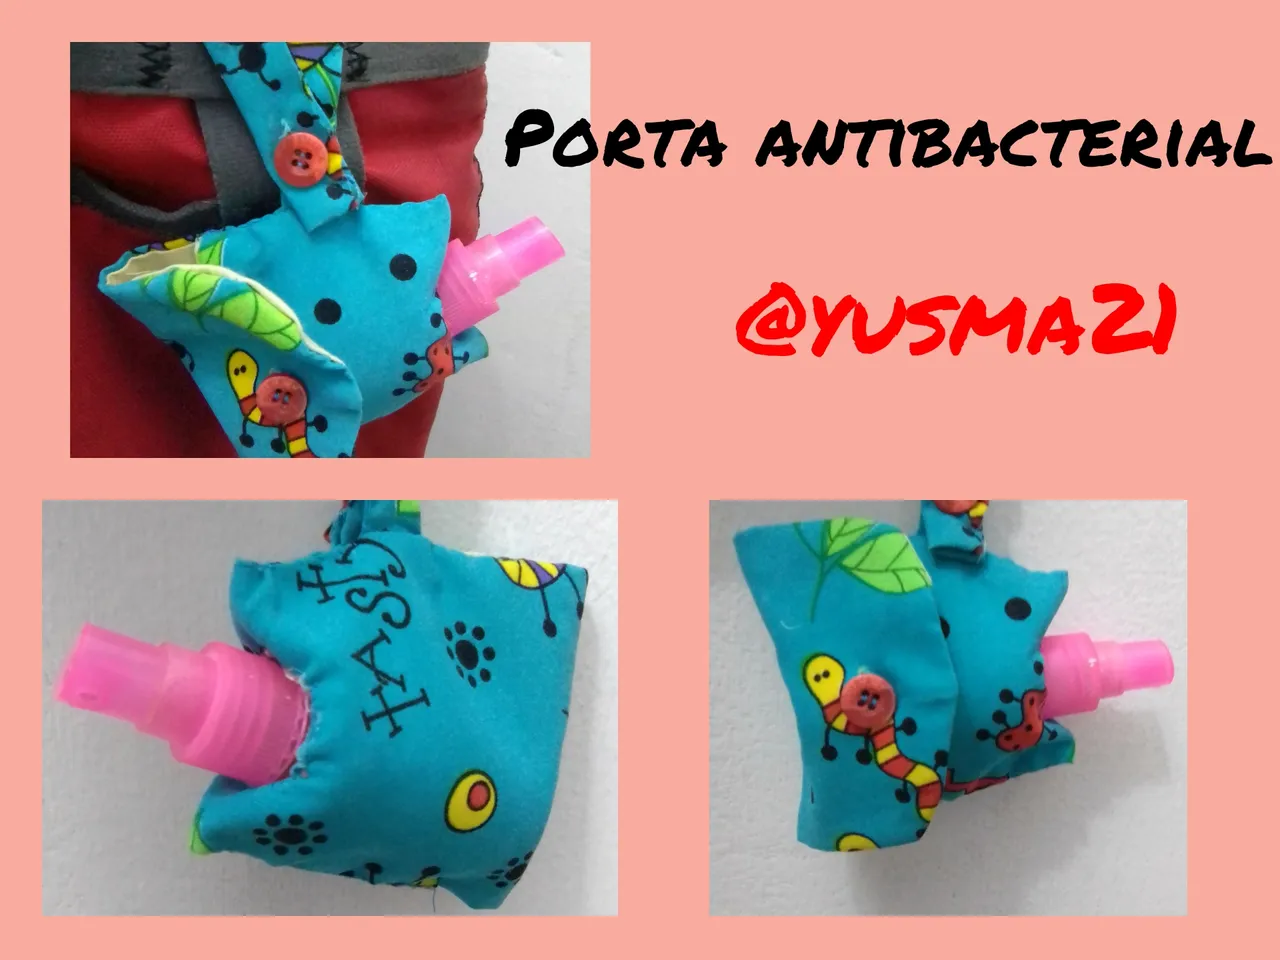
Resultado / Result
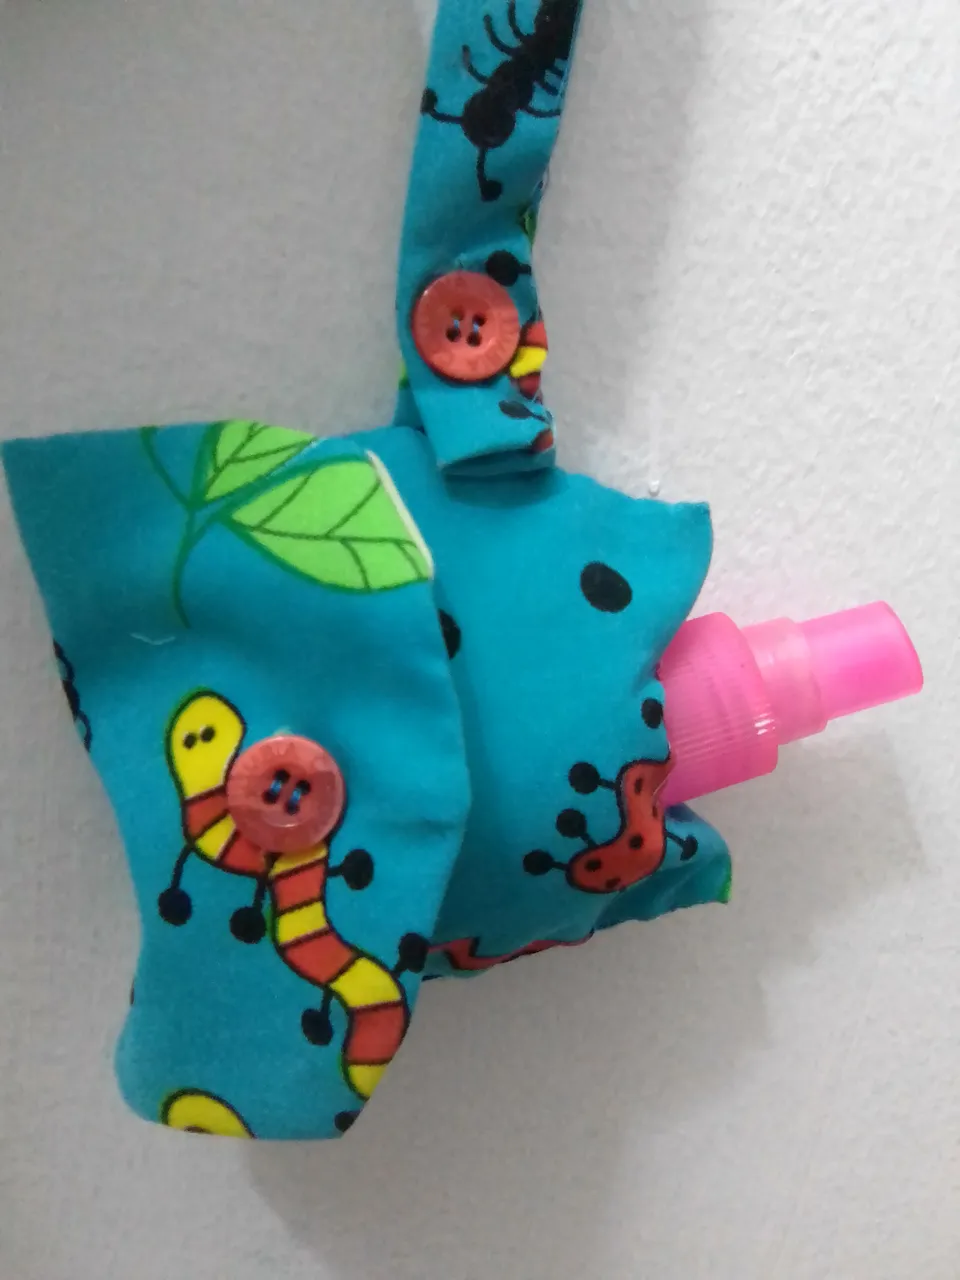
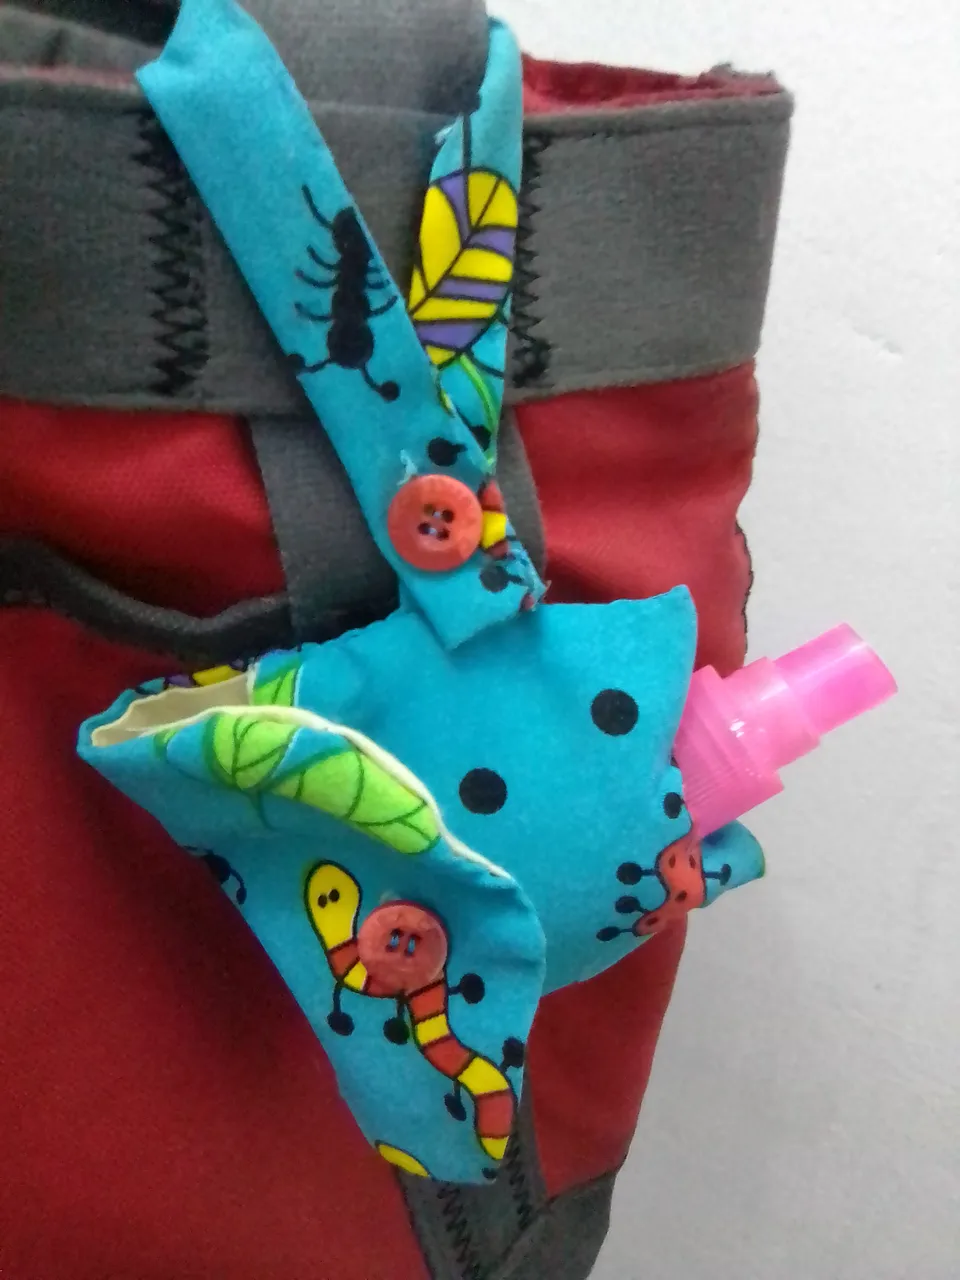
Este es un trabajo manual realizado para esta ocasión y espero sea de su agrado.
This is a manual work done for this occasion and I hope you like it.
Las fotos son de mi propiedad tomadas exclusivamente en este proyecto.
The photos are my property taken exclusively for this project.
Los collages del procedimiento los hice con la herramienta de mi Blue C6 y el principal en Picsart .
I made the collages of the procedure with my Blue C6 tool and the main one in Picsart .
Traductor usado
Translator used
DeepL Traductor
Gracias por leer y apoyar mi blog
Thank you for reading and supporting my blog