Saludos para todos los Hivers creativos de esta gran comunidad, hoy decidí mostrarles como hacer un mini botiquín para nuestro bolso, pues en muchas ocasiones me ocurrido y estoy segura que ha muchos de ustedes, que necesito, o uno de mis hijos, o sencillamente alguien en la calle, o terrible si vamos de viaje, necesitar una pastilla para el dolor de cabeza, o aquellos que marean como mis sobrinos, y solo nos queda decir yo tengo en la casa o se me olvidó y la iba a agarrar, jaja , y como estoy preparando un viaje a la casa de mis padres quiero tener todo a la mano, y me pareció de lo más práctico hacer este sencillo estuche para los medicamentos, pero que prefiero llamarlo mini botiquín para el bolso. Su elaboración es muy sencilla y lo cosi a mano, ya verán lo fácil que es, y se animarán hacer el propio. A continuación les dejo los materiales necesarios.
Greetings to all the creative Hivers of this great community, today I decided to show you how to make a mini first aid kit for our bag, because on many occasions it happened to me and I'm sure many of you, that I need, or one of my children, or simply someone on the street, or terrible if we go traveling, need a pill for a headache, or those who get dizzy like my nephews, and we can only say I have in the house or I forgot it and I was going to grab it, haha, and as I am preparing a trip to my parents' house I want to have everything at hand, and I found it very practical to make this simple case for medicines, but I prefer to call it mini medicine cabinet for the bag. Its elaboration is very simple and I sewed it by hand, you will see how easy it is, and you will be encouraged to make your own. Here are the materials needed.
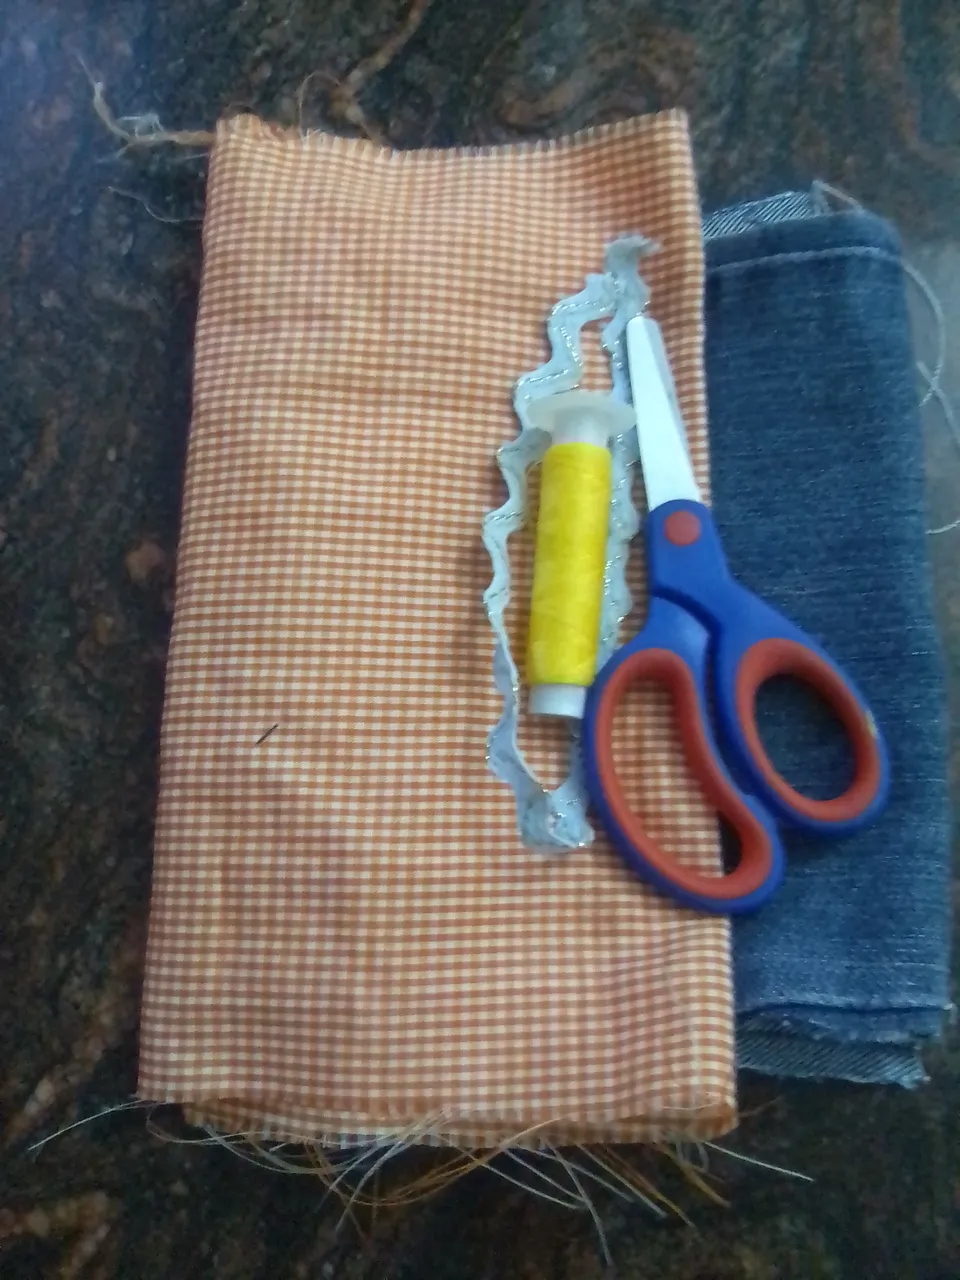
Materiales / Materials
- Pieza de tela de jeans.
- Pieza de tela estampada.
- Cinta decorativa
- Hilo y aguja
- Pistola y barra de silicona
- Boton
- Plancha de ropa
- Piece of jeans fabric.
- Piece of printed fabric.
- Decorative ribbon
- Thread and needle
- Silicone gun and silicone stick
- Button
- Clothes iron
Paso a paso / Step by Step
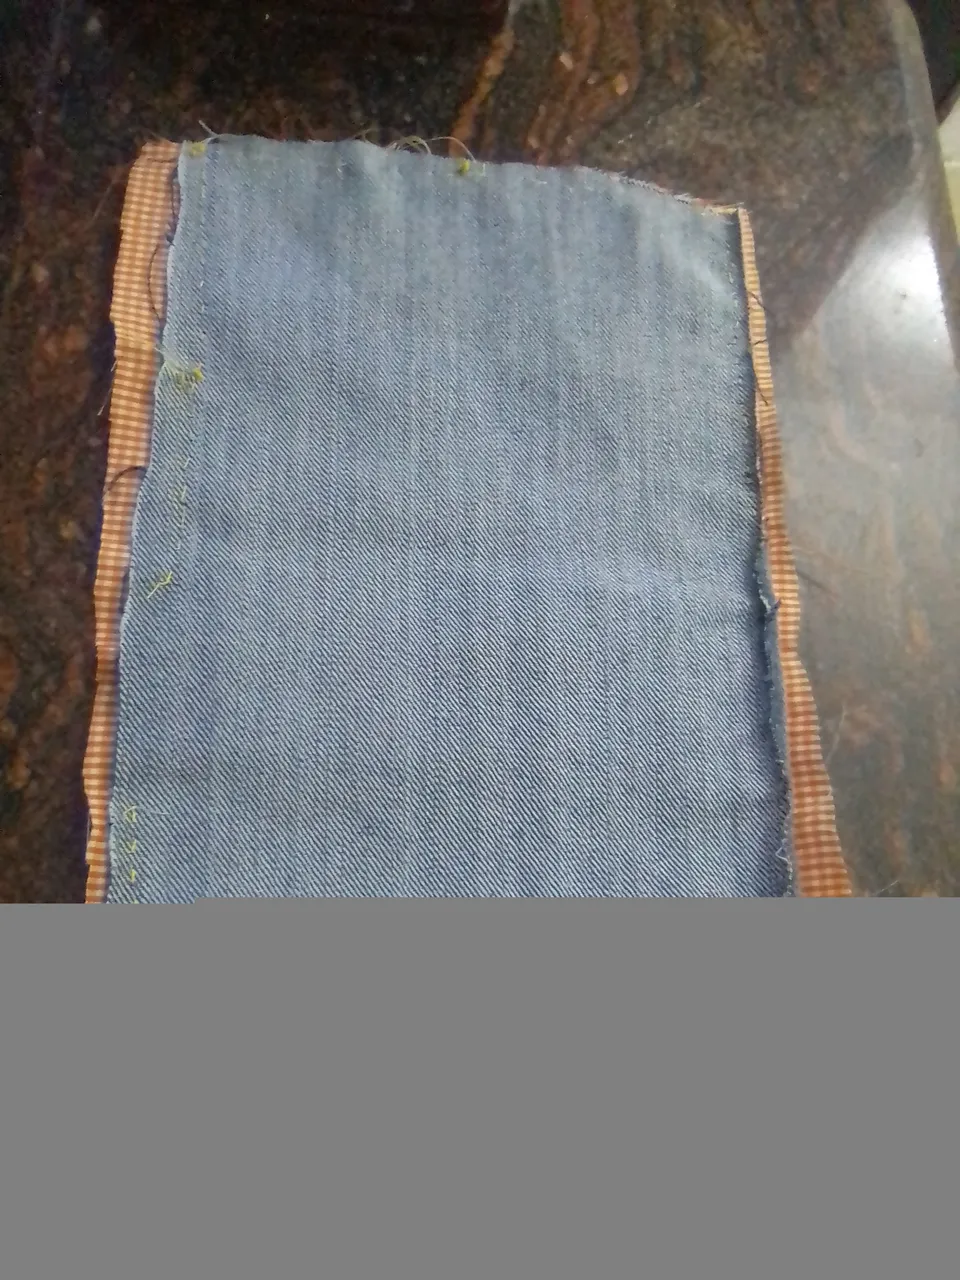
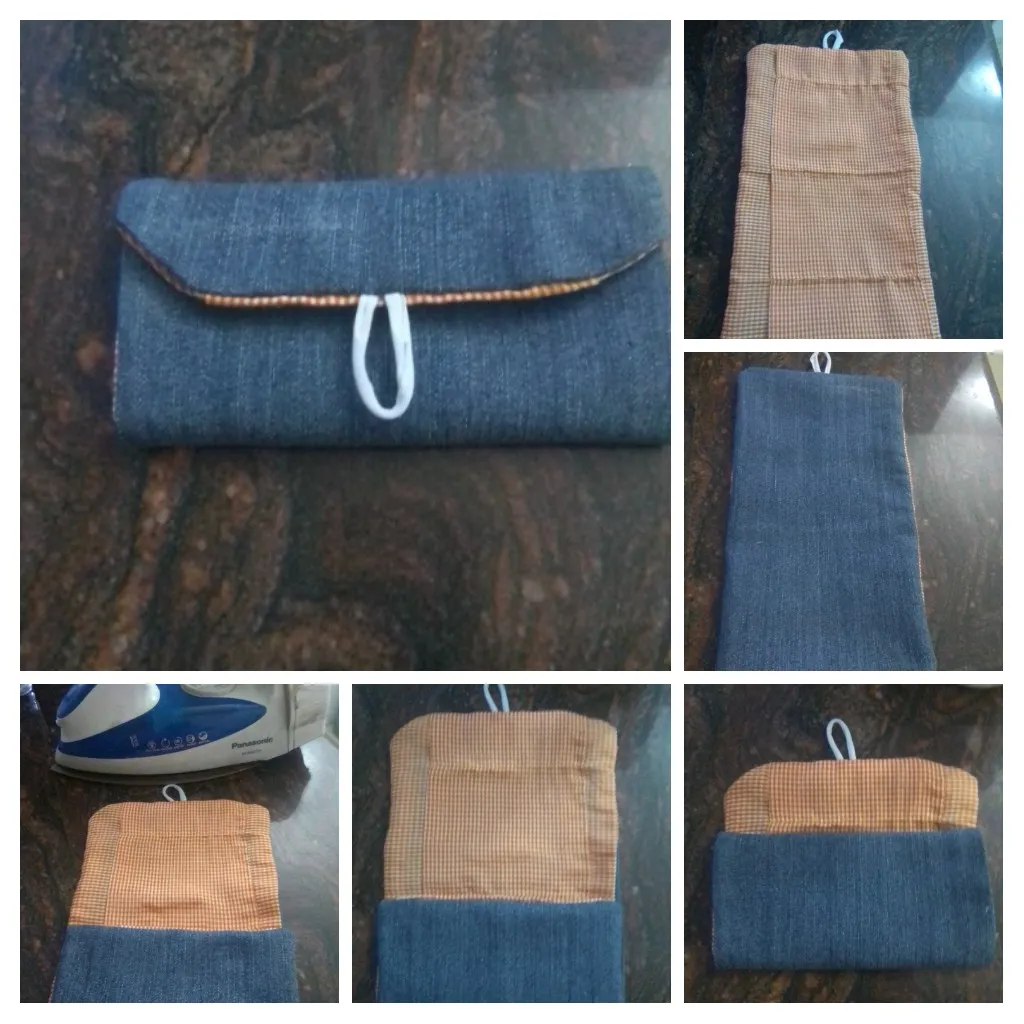
Para este estuche mini botiquín, utilice un trozo de tela de jeans, que recicle de un viejo pantalón y uno trozo de tela estampada, cuyas medidas es de 27x15 centímetros cada una. Adicionalmente se requiere una pieza de tela estampada, de 27x12 centímetros para elaborar los compartimientos. Con los materiales ya listos lo primero es realizar un doblez de aproximadamente 0,5 centímetros a la tela para los compartimientos y rectificar con la plancha de ropa, luego está pieza la fijé con alfileres en el extremo inferior y luego proceso a coser a mano, después a estas piezas ya juntas les realice tres dobleces y acentúe con la plancha ya que esa será mi guía para coser y realizar cada una de las divisiones del estuche.
For this mini first aid kit, use a piece of jeans fabric, which I recycled from an old pair of pants, and a piece of printed fabric, each measuring 27x15 centimeters. Additionally, a piece of printed fabric, measuring 27x12 centimeters, is required to make the compartments. With the materials already ready the first thing to do is to make a fold of approximately 0.5 centimeters to the fabric for the compartments and rectify with the clothes iron, then this piece I fixed it with pins at the lower end and then process to sew by hand, then to these pieces already together I made three folds and accentuate them with the iron since that will be my guide to sew and make each of the divisions of the case.
El siguiente paso fue colocar en contraposición las dos piezas, y colocar en el centro de extremos cortos un trozo de cordón pero hacía adentro, sujete todos los extremos con alfileres incluyendo el cordón y luego cosi a mano dejando una abertura que servirá para dar vuelta a la pieza cosida, y así tengo ya mi estuche con el cordón para sujetar fijado de una vez.
The next step was to place in opposition the two pieces, and place in the center of short ends a piece of cord but inward, fasten all the ends with pins including the cord and then sew by hand leaving an opening that will serve to turn the sewn piece, and so I have my case with the cord to hold fixed at once.
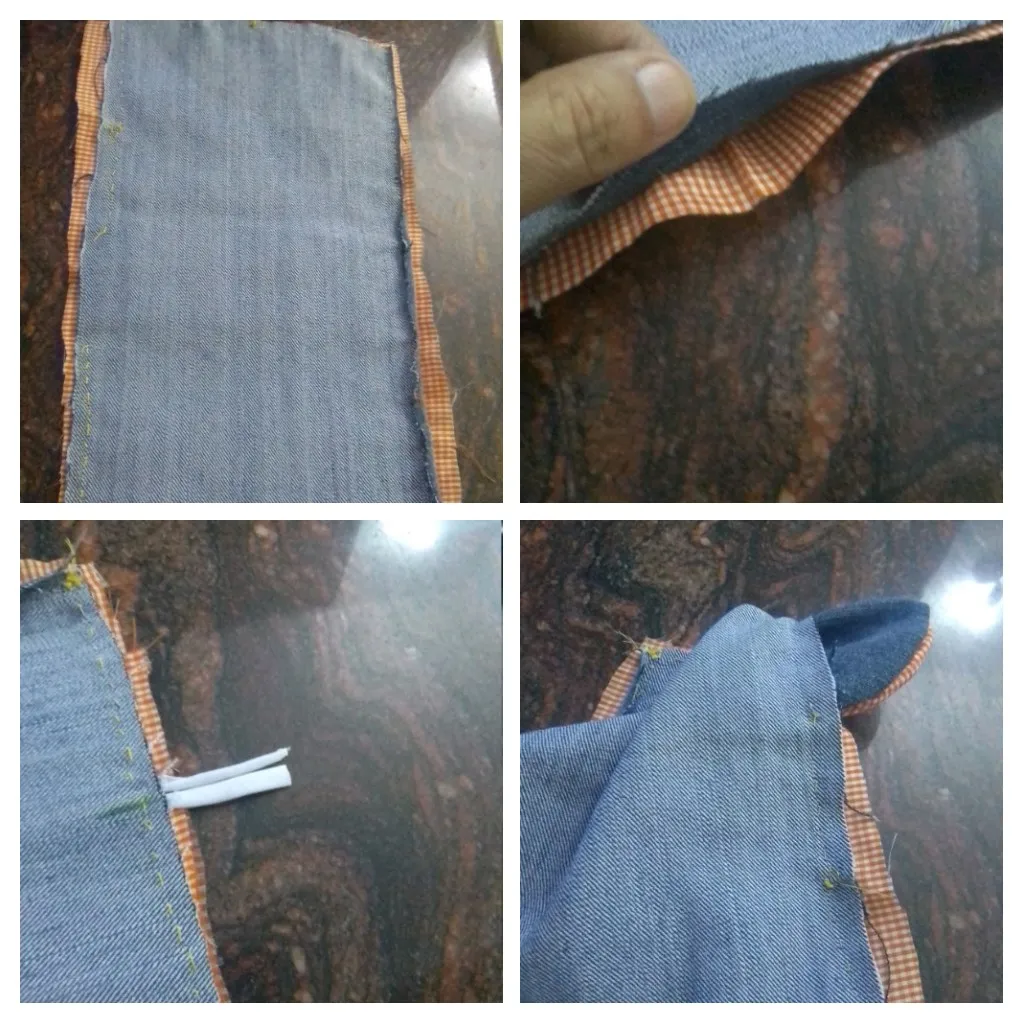
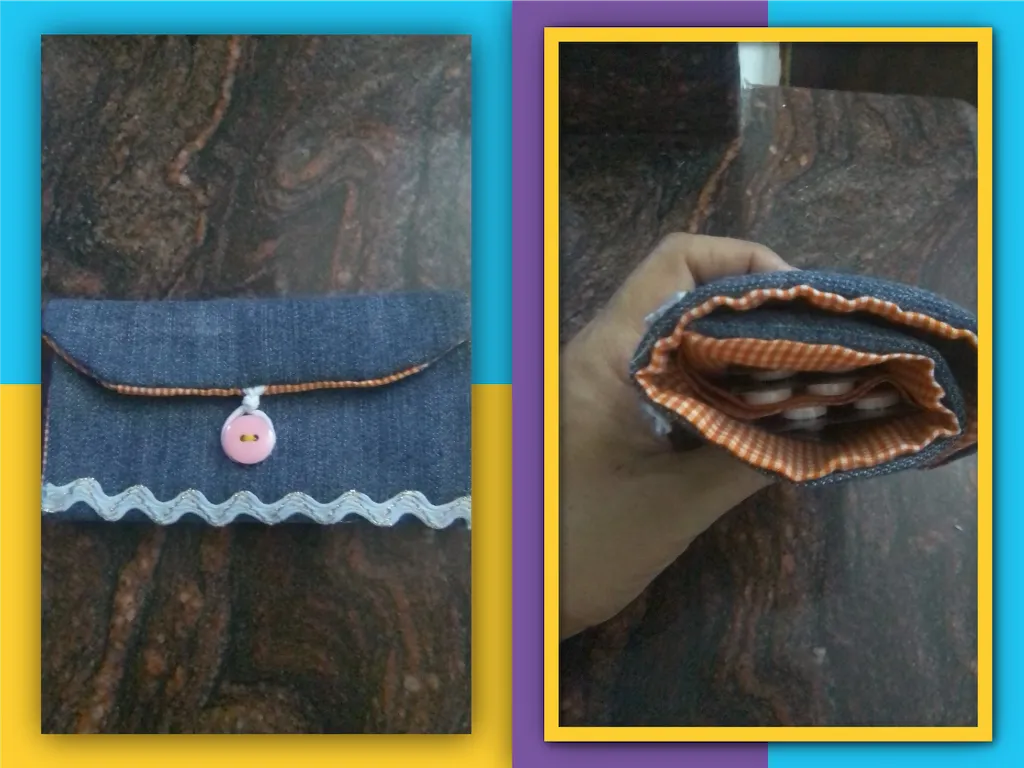
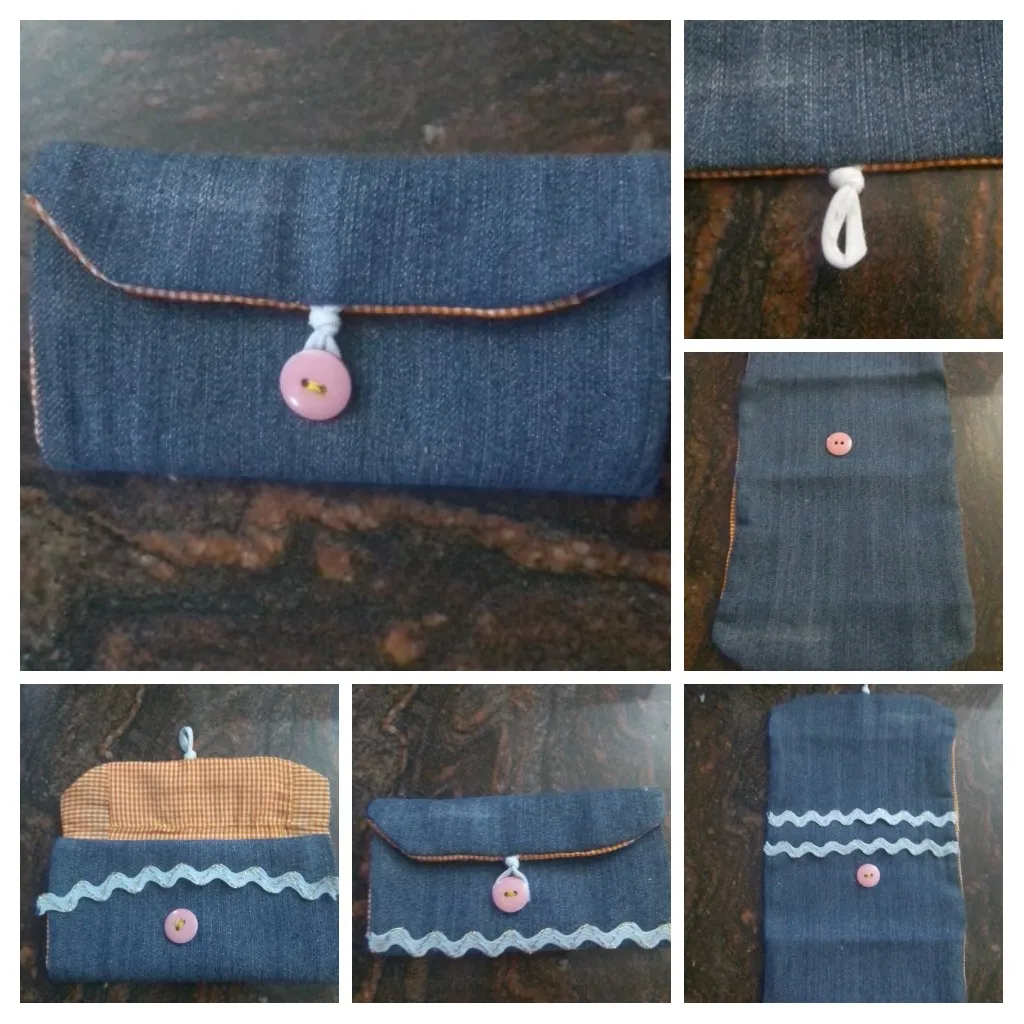
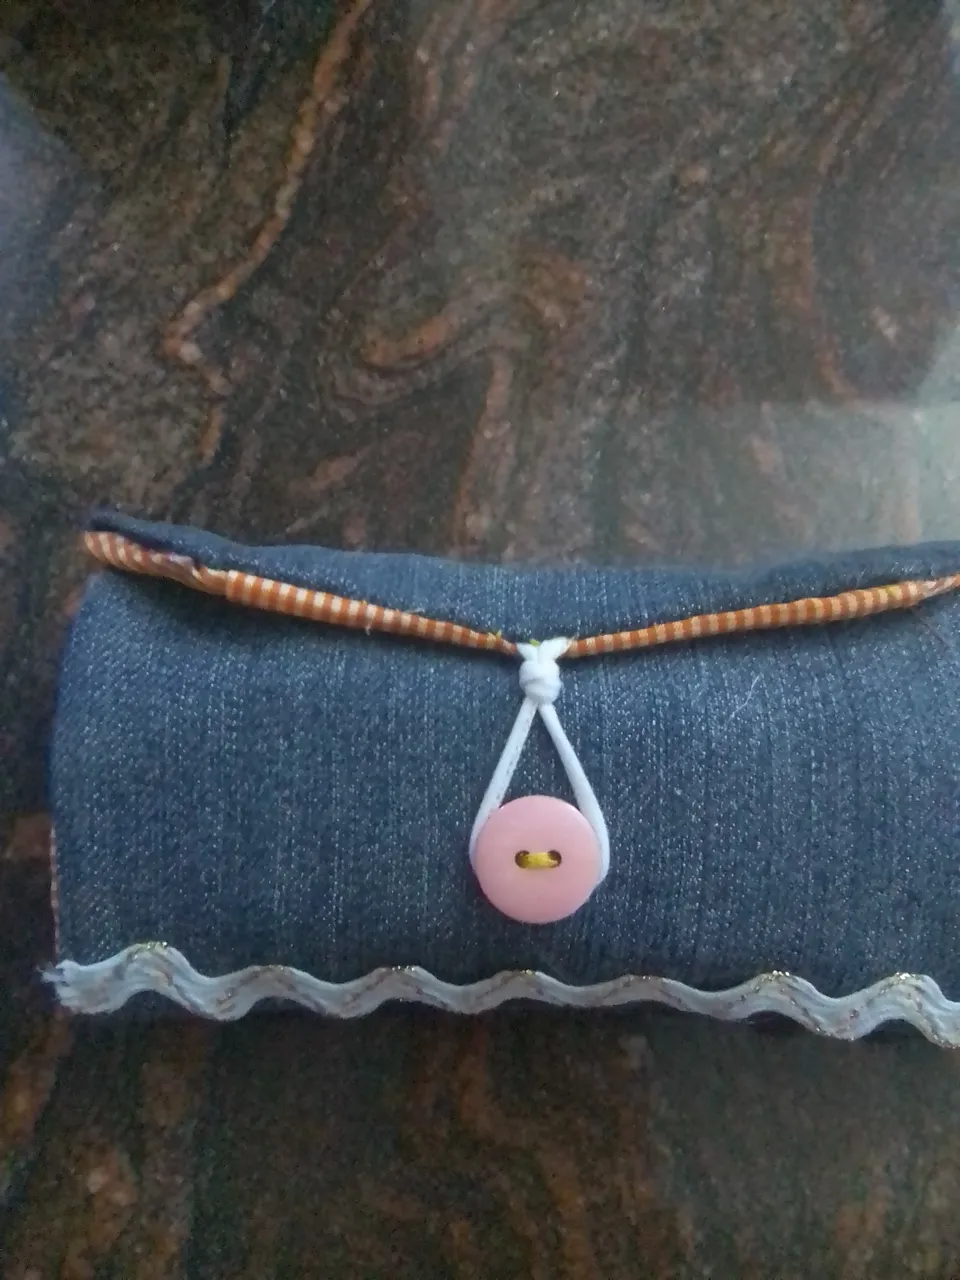
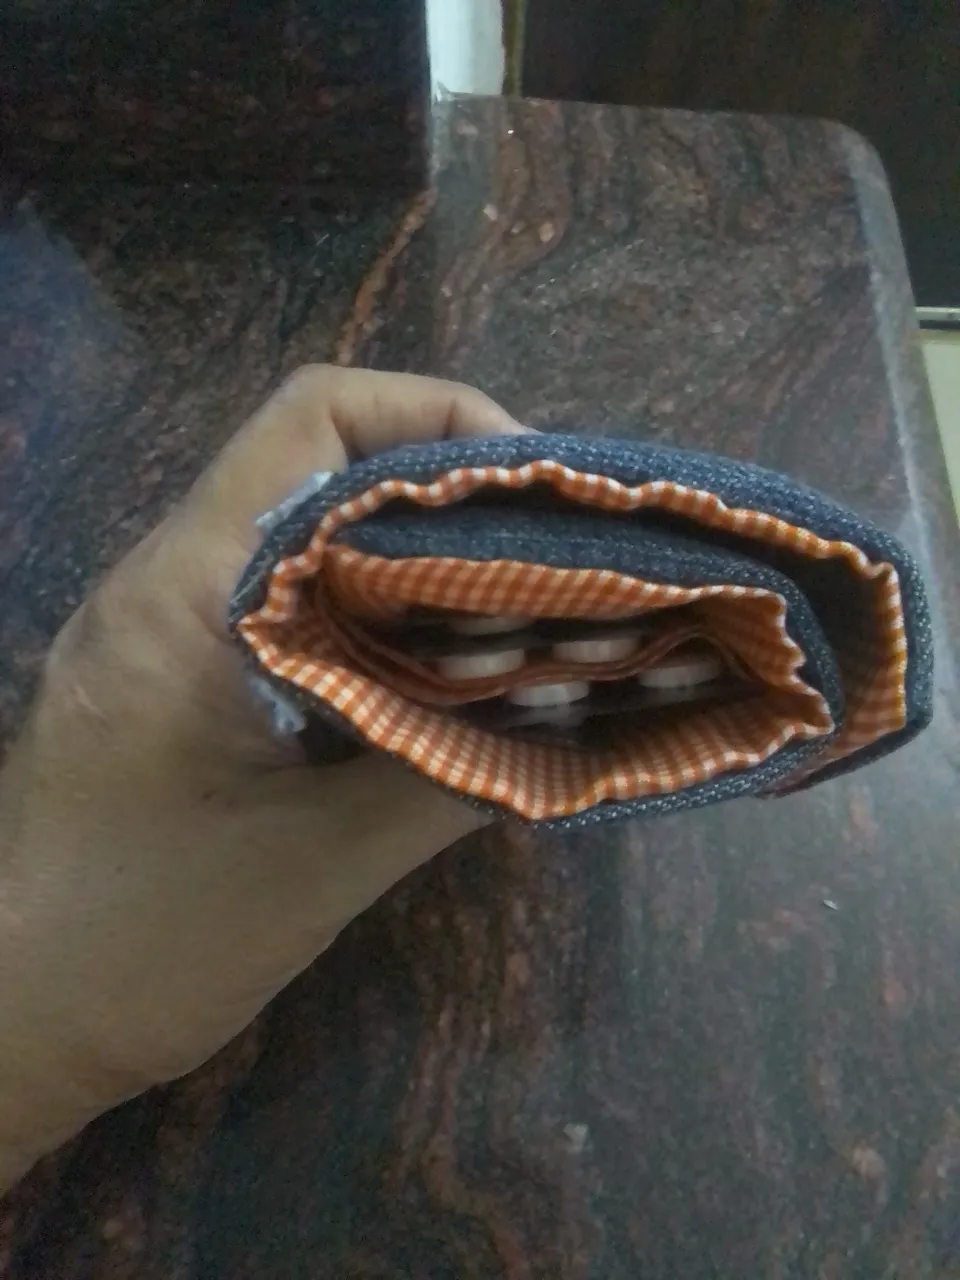
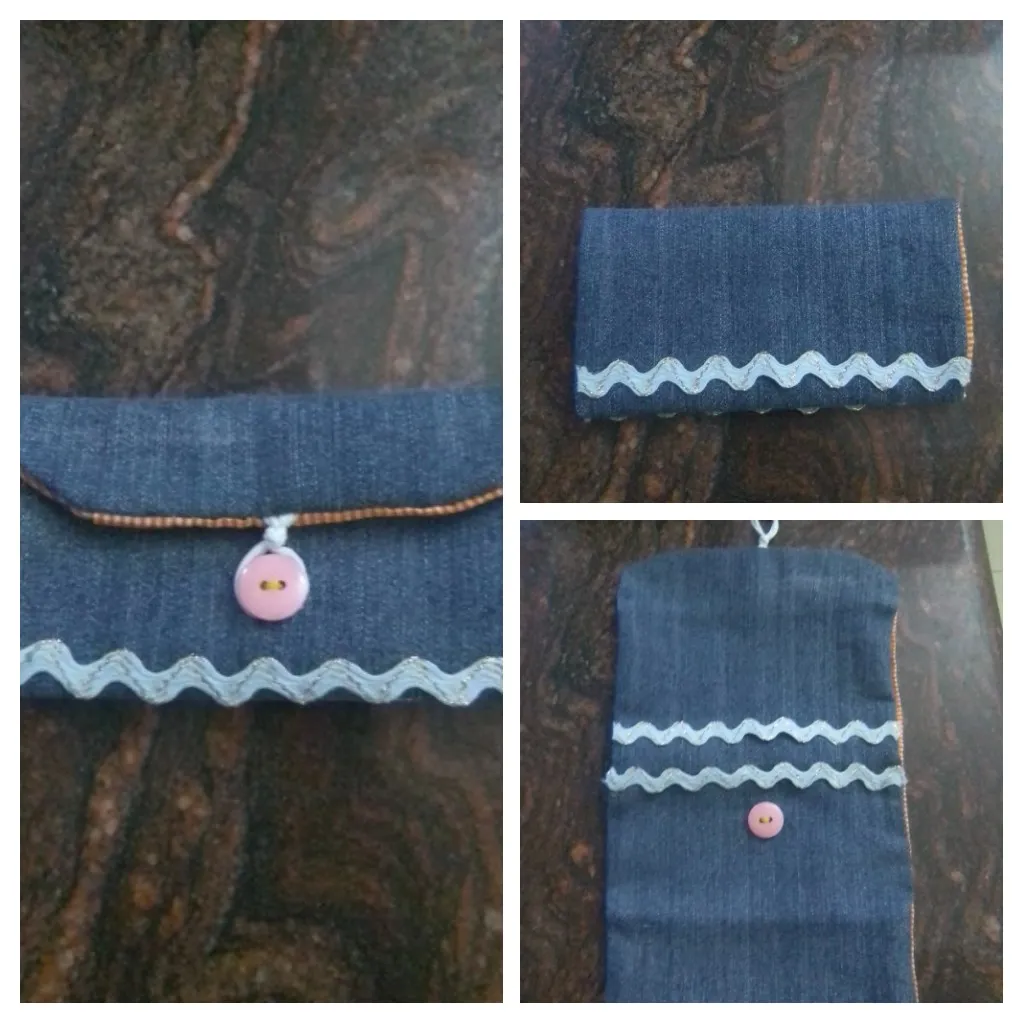
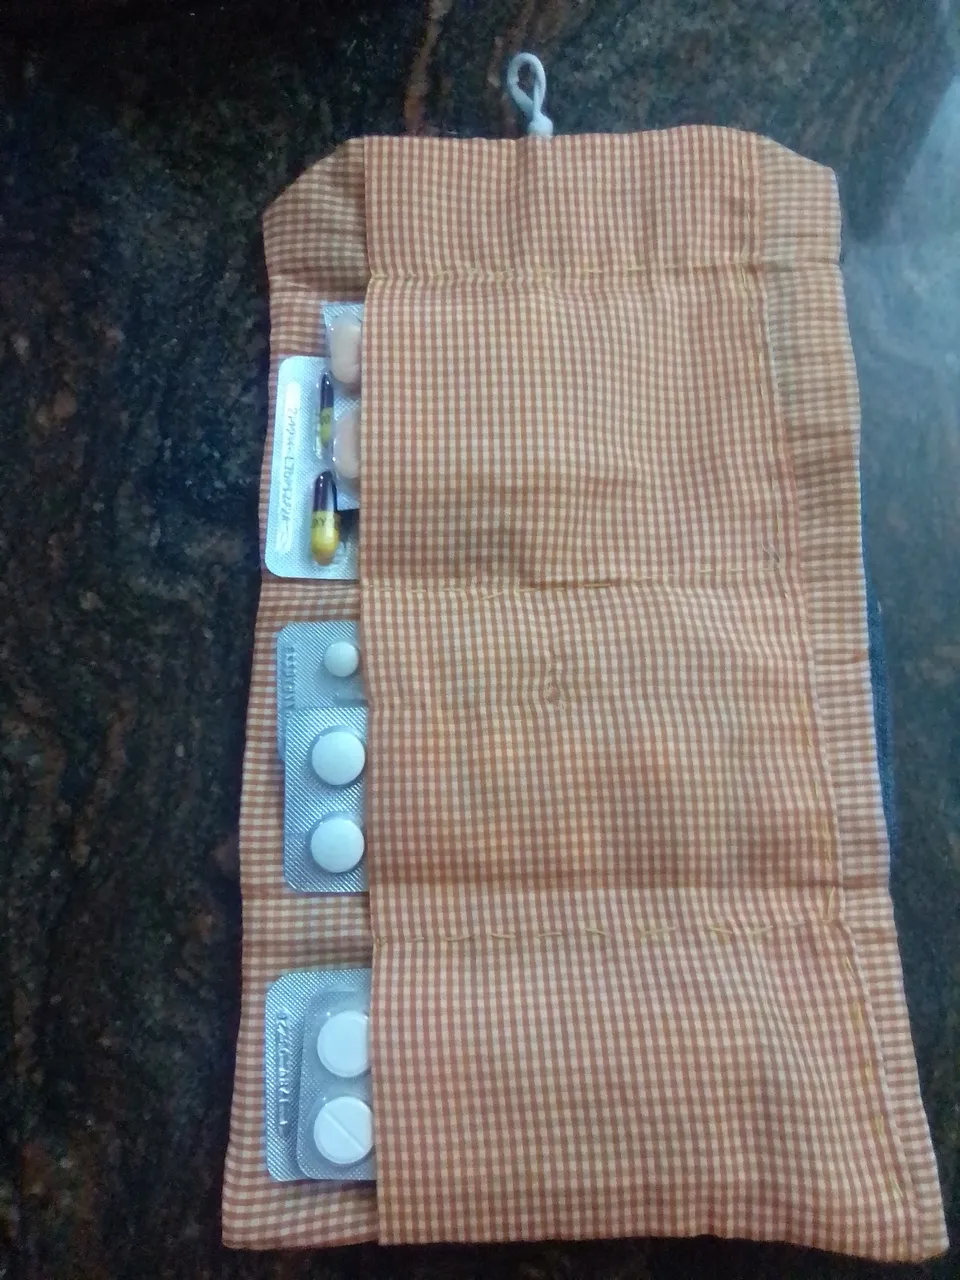
Ya con mi pieza lista, procedo a planchar para eliminar las imperfecciones de la costura y realizar un pequeño dobladillo en las esquinas del extremo del cordón, para dar una forma bonita. Luego con la plancha acentúe los tres dobleces que había hecho anteriormente y ubique el botón y luego decidí colocar una cinta decorativa para hacer el mini botiquín más coqueto. Las cintas las fijé con silicon caliente y ya está terminado este útil y práctico organizador para nuestros medicamentos, de manera que podamos tenerlo a la mano de manera segura, todos juntos y organizados, un verdadero mini botiquín para las cosas indispensables. Espero se motive a realizar en casa.
Once my piece was ready, I proceeded to iron to eliminate the imperfections of the seam and make a small hem on the corners of the end of the cord, to give it a nice shape. Then with the iron I accentuated the three folds I had previously made and placed the button and then I decided to place a decorative ribbon to make the mini kit more flirtatious. I fixed the ribbons with hot silicon and this useful and practical organizer for our medicines is finished, so that we can have it safely at hand, all together and organized, a real mini first aid kit for the indispensable things. I hope you will be motivated to make it at home.
Resultado/ Result
Este es un trabajo manual realizado para esta ocasión y espero sea de su agrado.
This is a manual work done for this occasion and I hope you like it.
Las fotos son de mi propiedad tomadas exclusivamente en este proyecto.
The photos are my property taken exclusively for this project.
Los collages del procedimiento los hice con la herramienta de mi Blue C6 y el principal en Picsart .
I made the collages of the procedure with my Blue C6 tool and the main one in Picsart .
Traductor usado
Translator used
DeepL Traductor
Gracias por leer y apoyar mi blog
Thank you for reading and supporting my blog