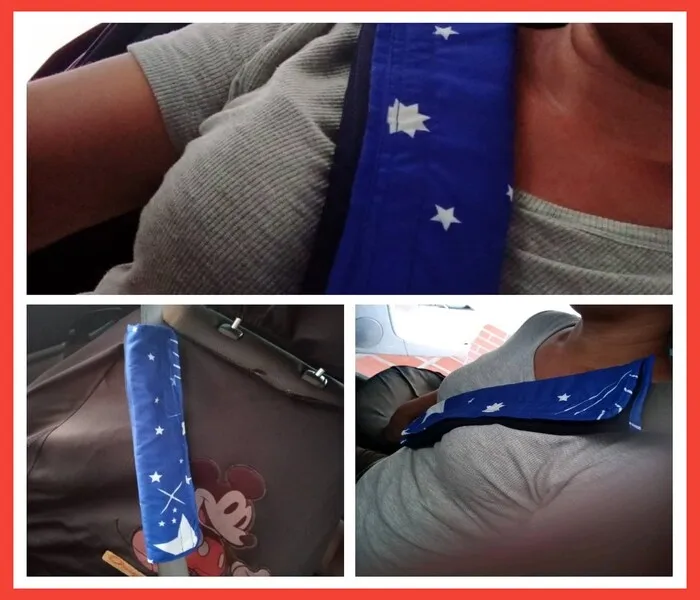

Greetings to all the creative Hivers of this great community, pleased to be with you again, today I bring you a very useful craft, it is about some pads for the seat belt of the vehicle, because it is very common that this hurts me with the rubbing right in the collarbone, this depending on the type of clothing I wear, and it is painful especially when my blouse has cleavage. That's why I decided to make two pads for the seat belts of my vehicle, one for the driver (that is me) and the co-driver.
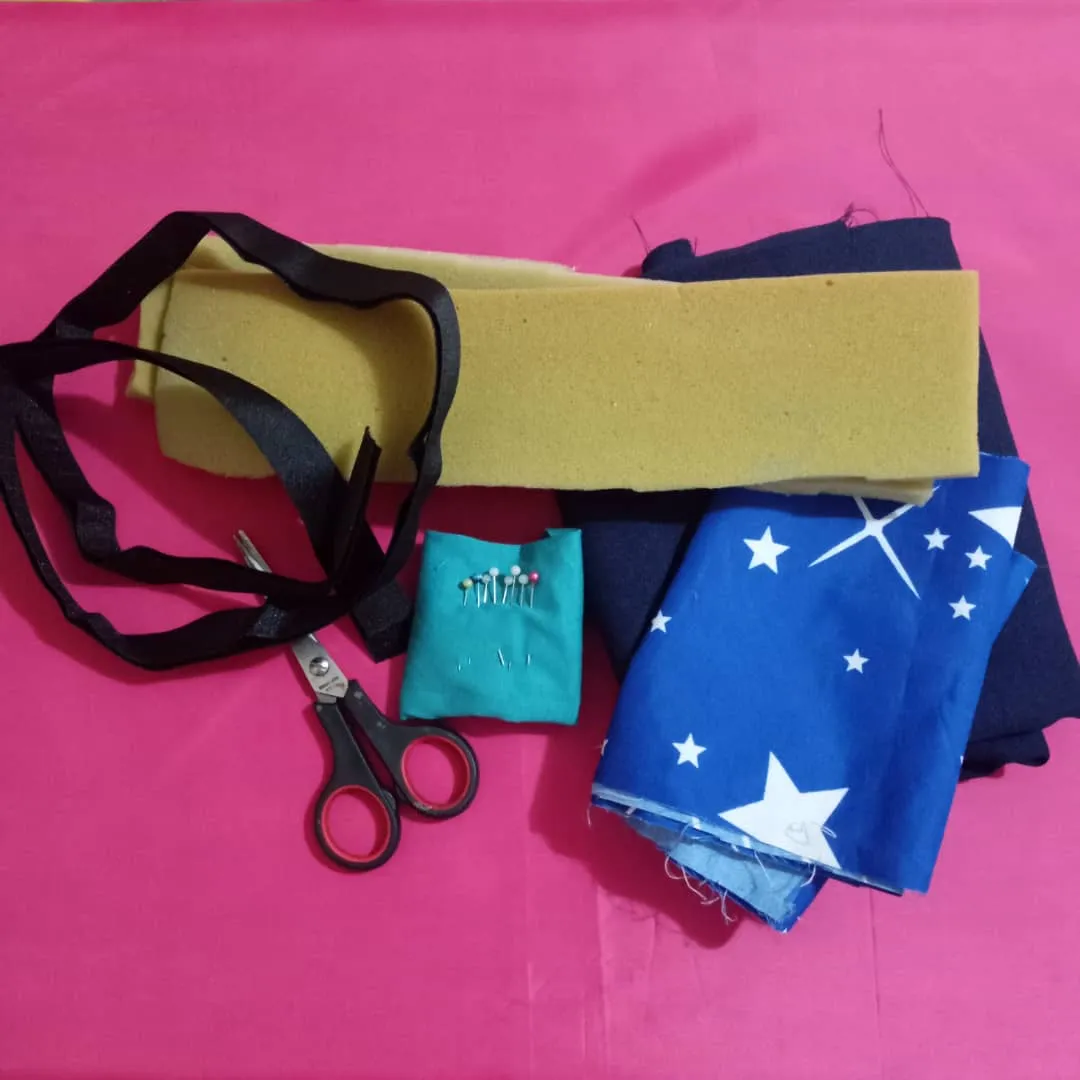
Materials
✓ Printed fabric
✓ One-color fabric
✓ Scissors
✓ Sewing machine.
✓ Pins.
✓ Velcro
✓ Foam rubber or padding.
Step by step
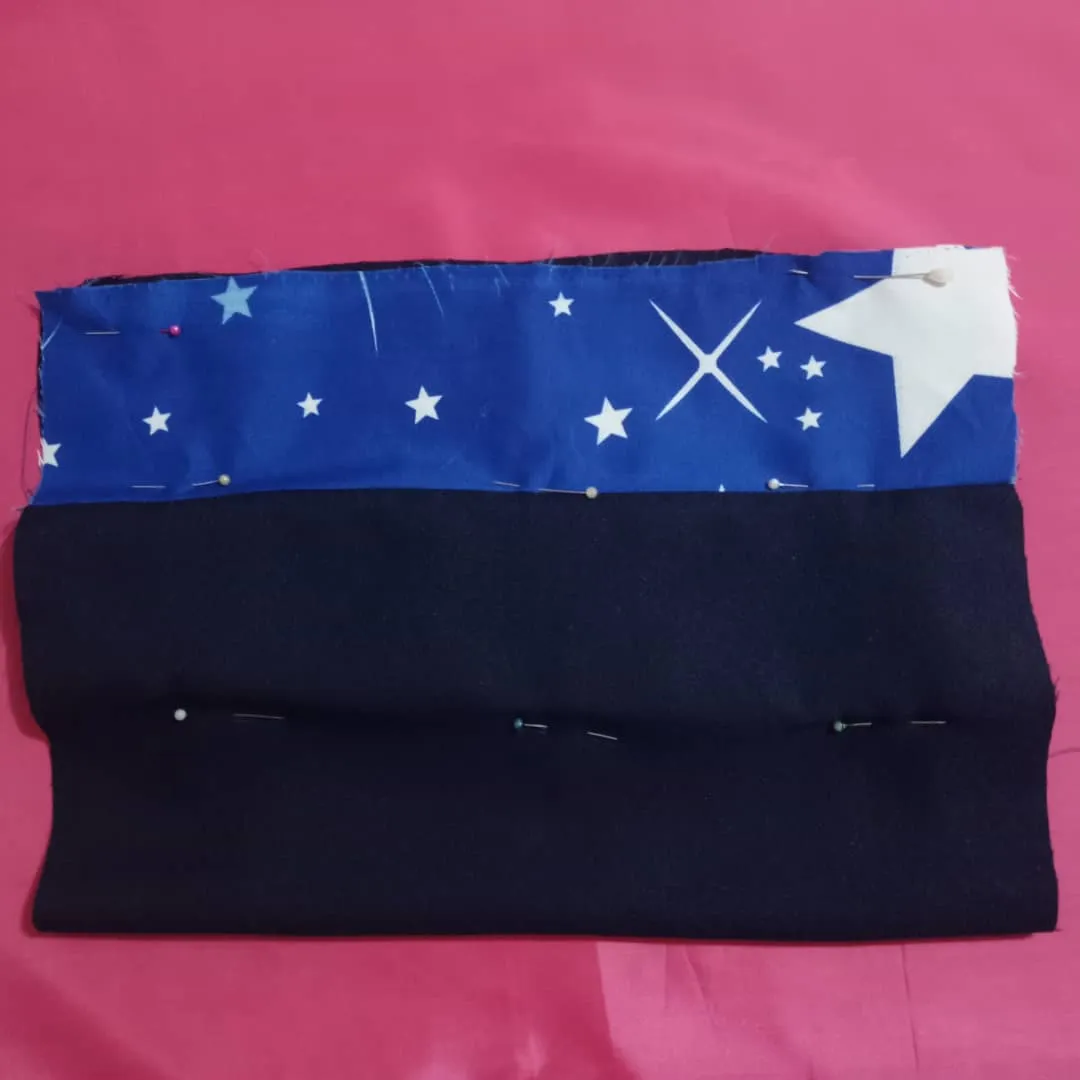
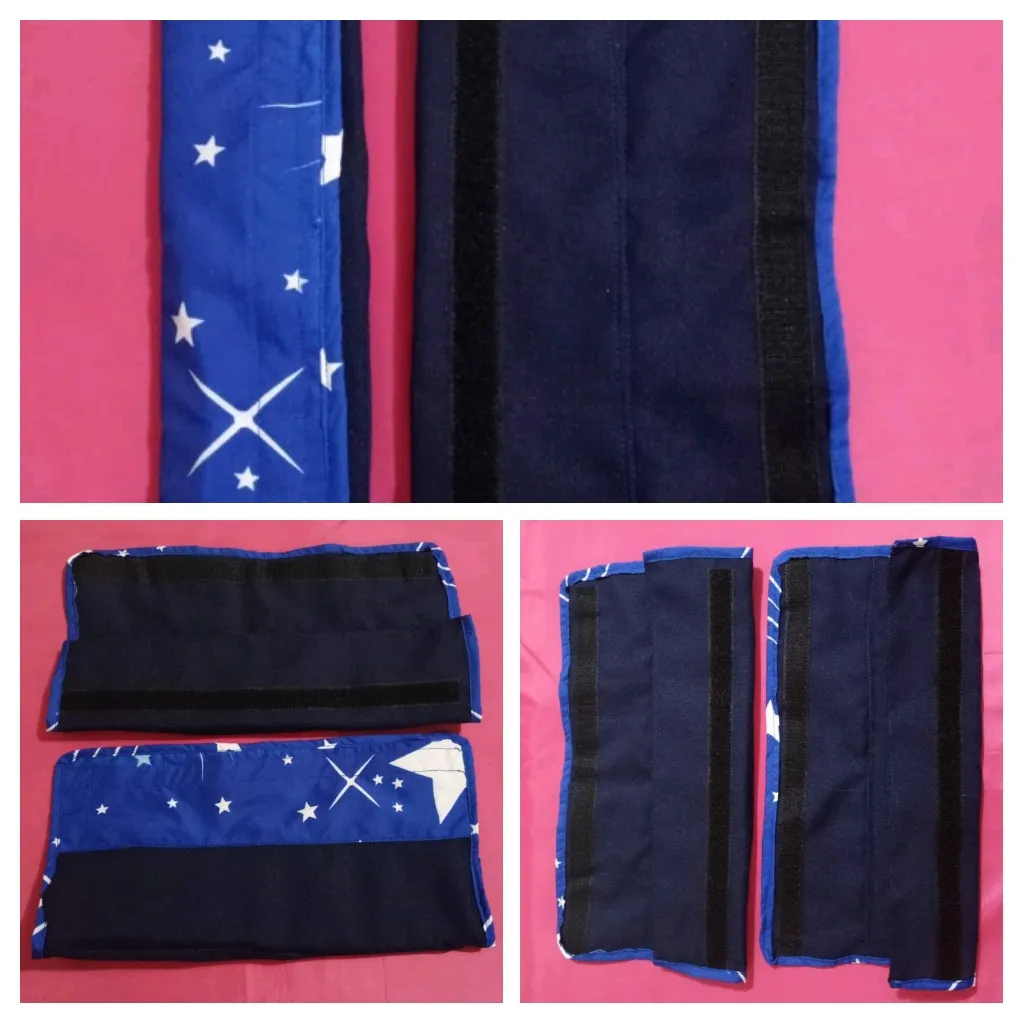
I made two pillows, as I mentioned at the beginning, in the photos you can see them, although in the description I refer to the measurements of one. The first thing I did was to measure and cut a piece of foam rubber 40 x 7 centimeters. I also measured a piece of dark blue fabric measuring 21 x 40 centimeters and another of the same color measuring 14 x 40 centimeters and to complete this last piece of fabric I will use a printed fabric measuring 7 x 40 centimeters.
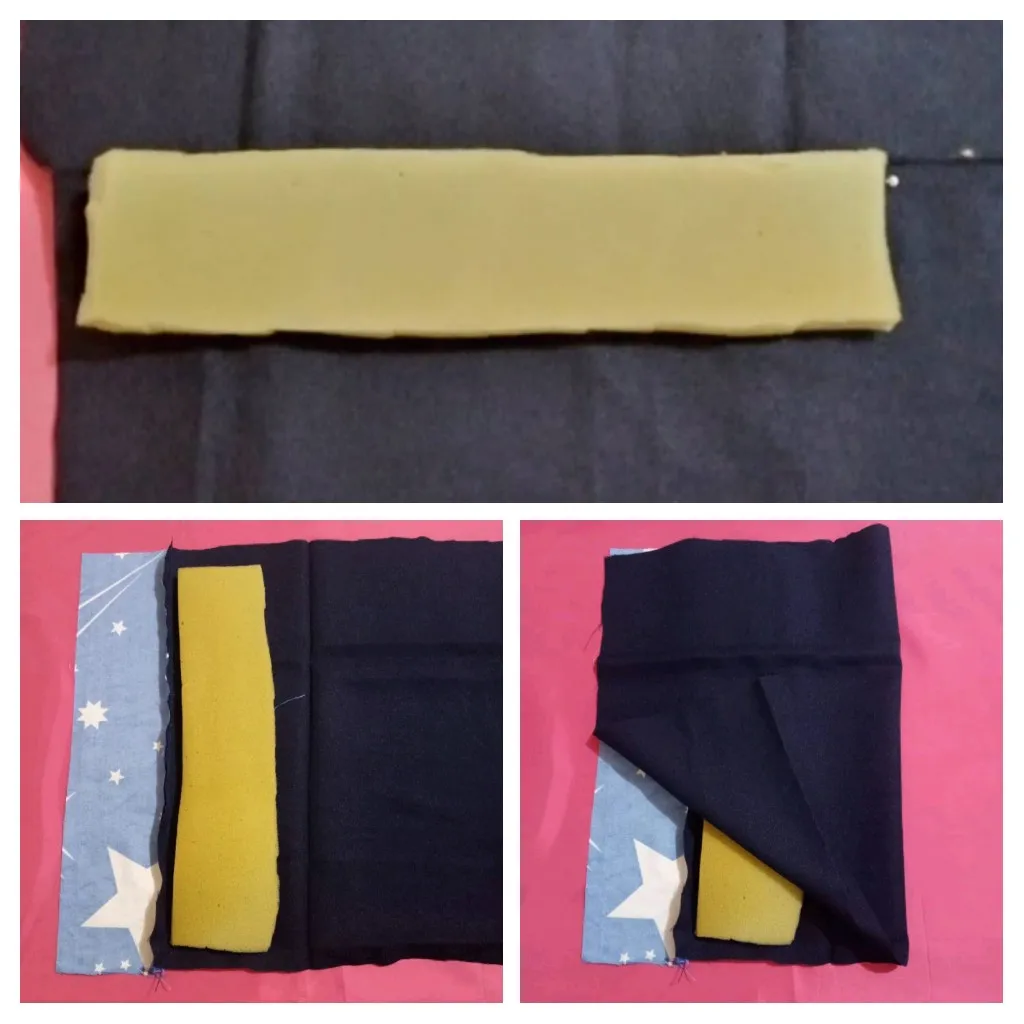
Next, I begin to sew to assemble the cushion, joining the patterned piece to the 14-centimeter unicolor fabric, in order to then fix the foam rubber on the piece of fabric that we have just formed, right on the sewing machine. center of this piece.
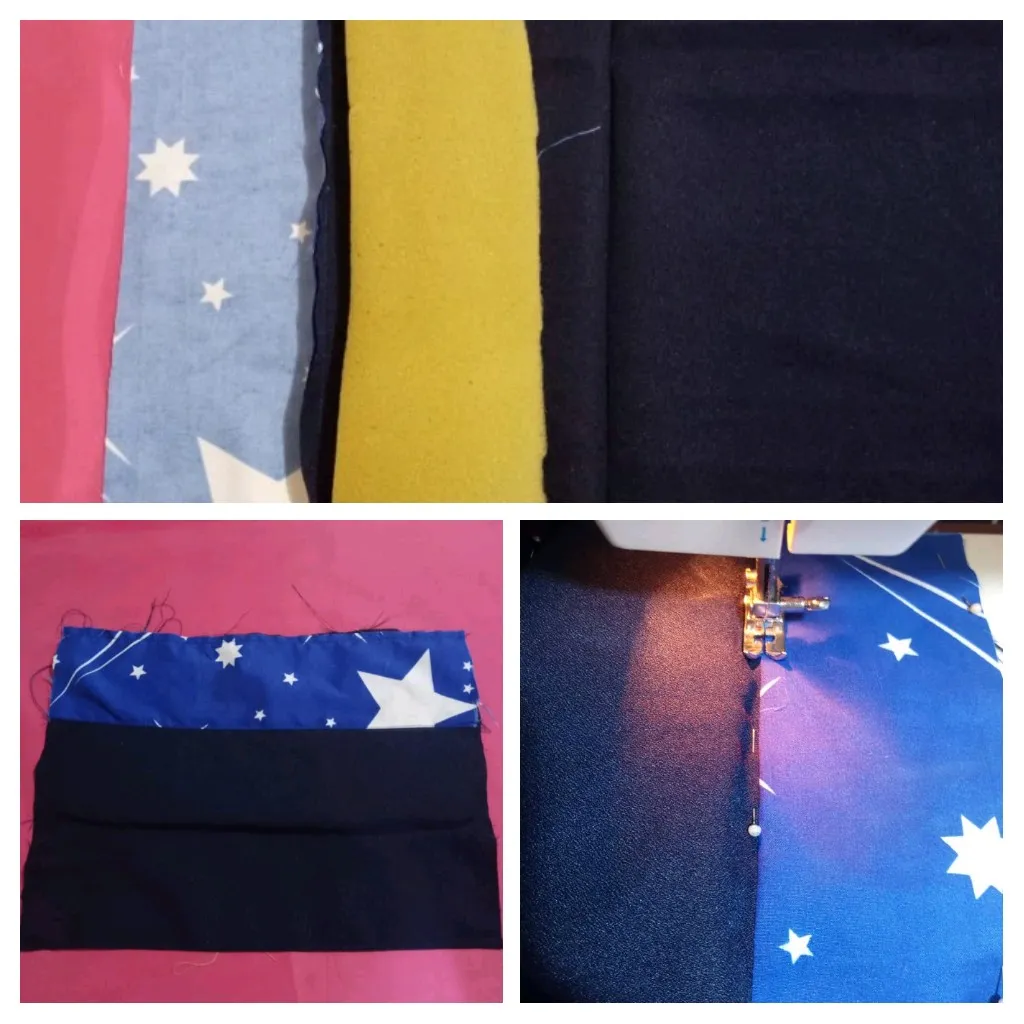
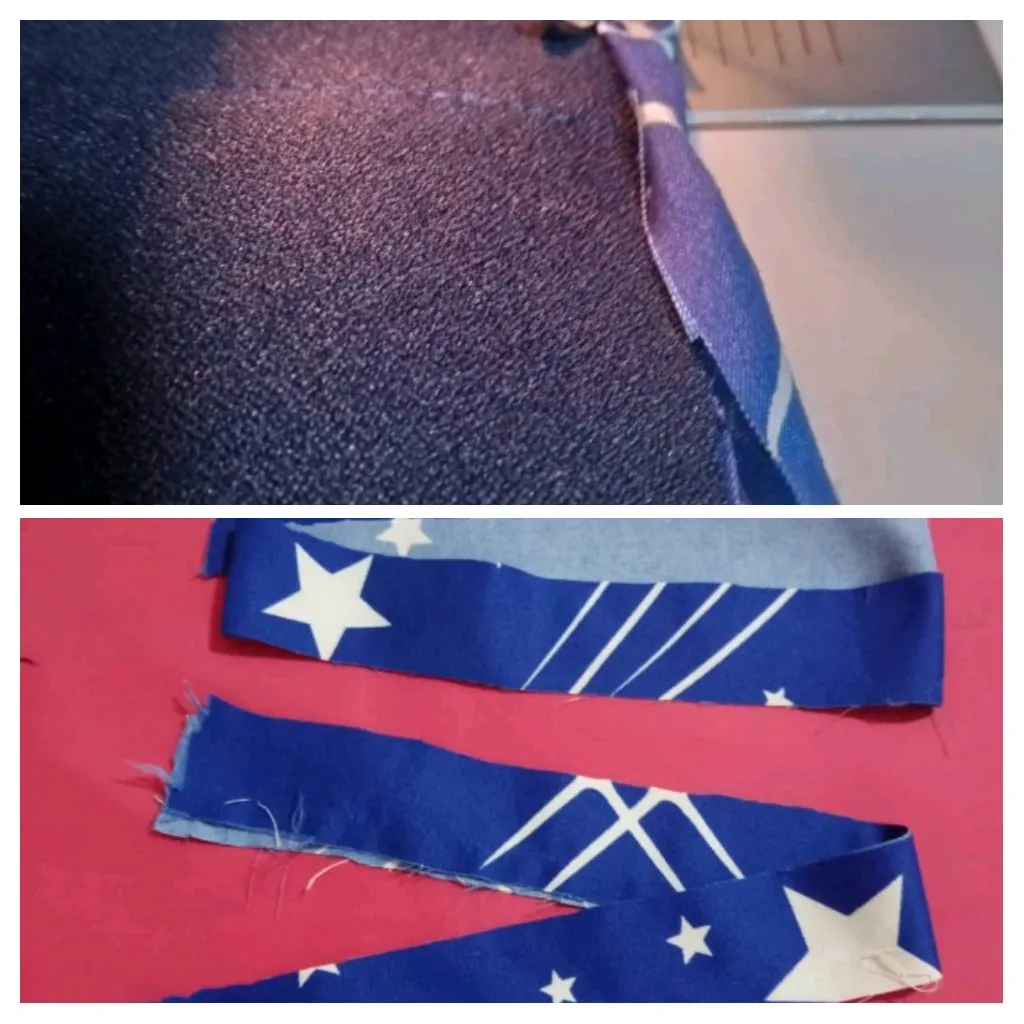
Then I proceed to place and pin the 21-centimeter piece of fabric, on which I have the foam rubber and machine sew on all four sides and then I pass a seam on each side of the foam rubber.
Next, cut a 3-centimeter ribbon of patterned fabric to use as a bias, to cover the seam, around the entire cushion and at the same time decorate it.
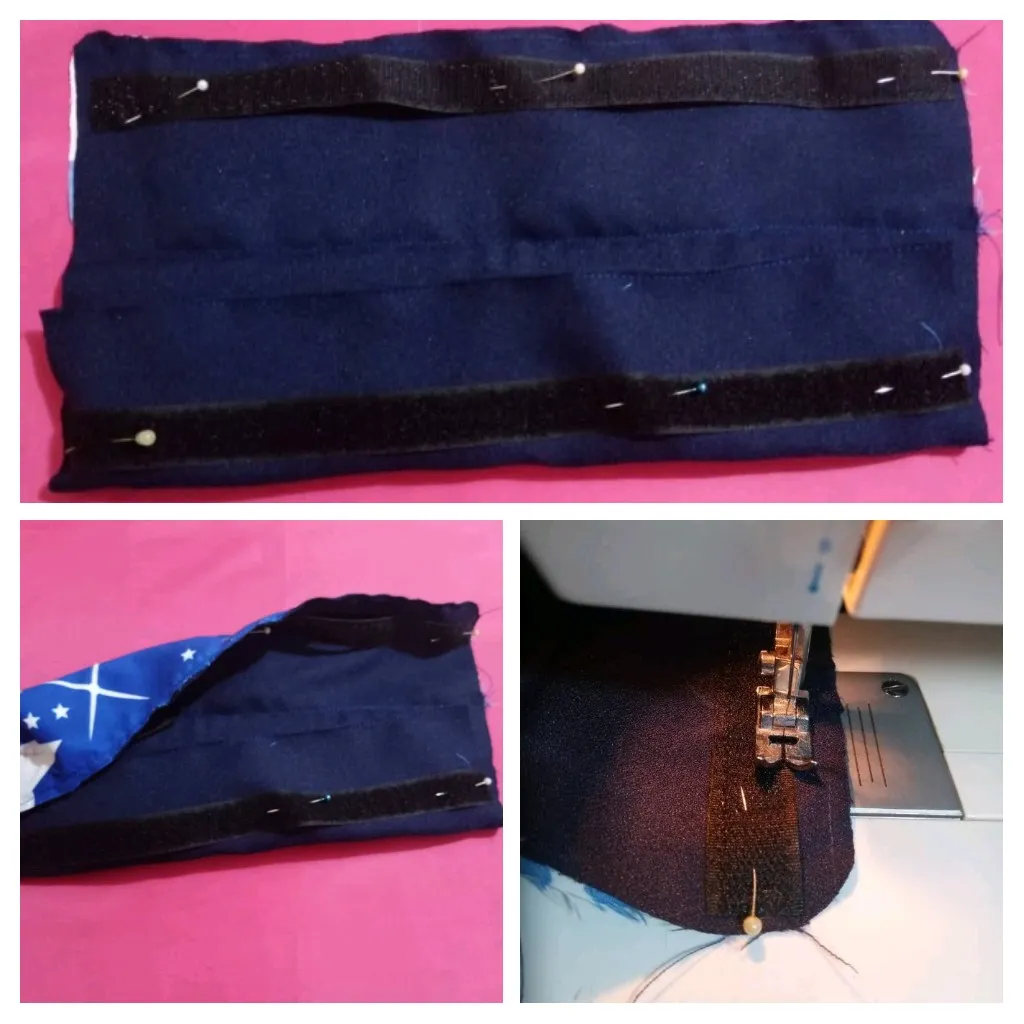
I finish by cutting 16 inches of black Velcro and sewing to each end of the inside of the pad. And so I have my useful pads ready, which will give me comfort when driving my vehicle.
Result
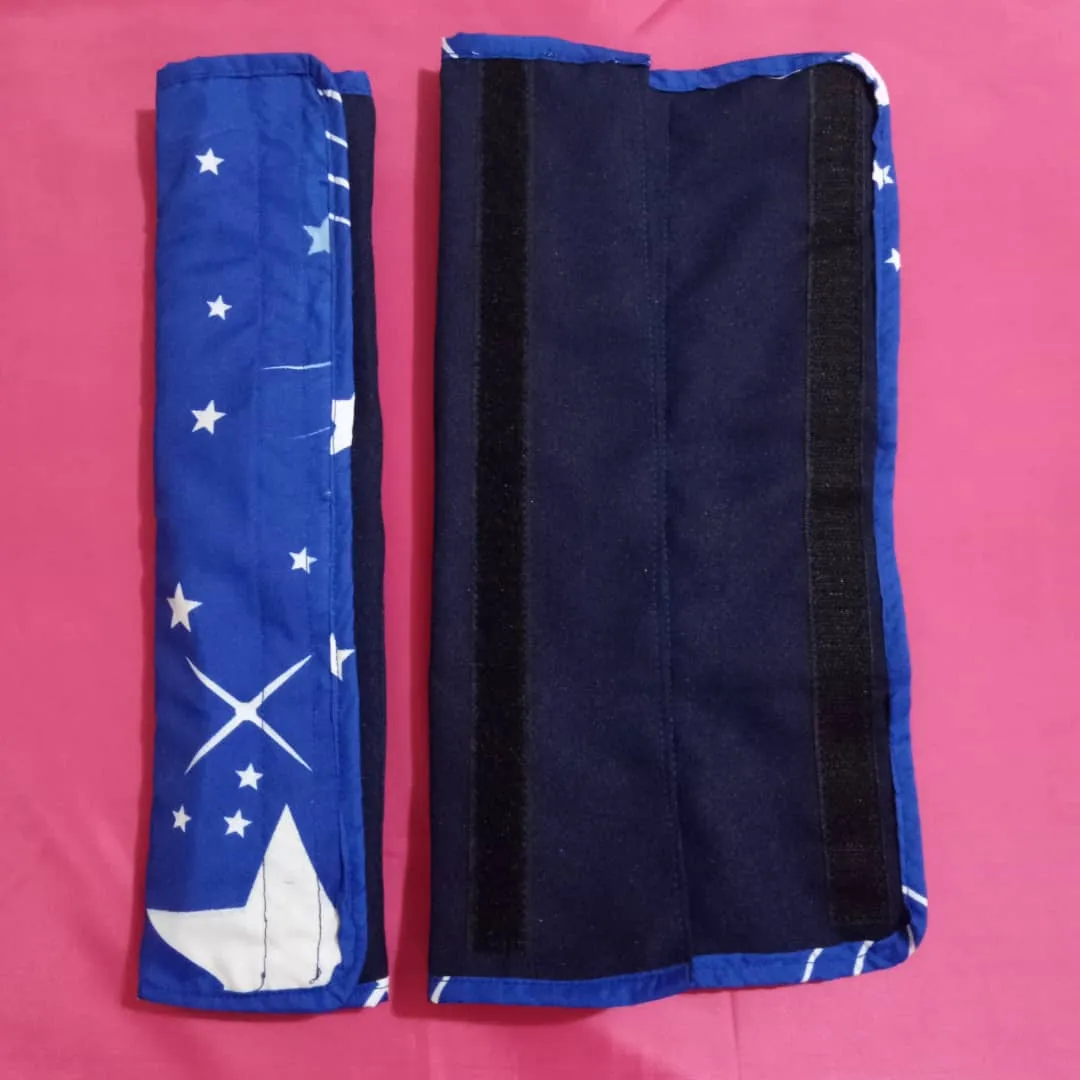
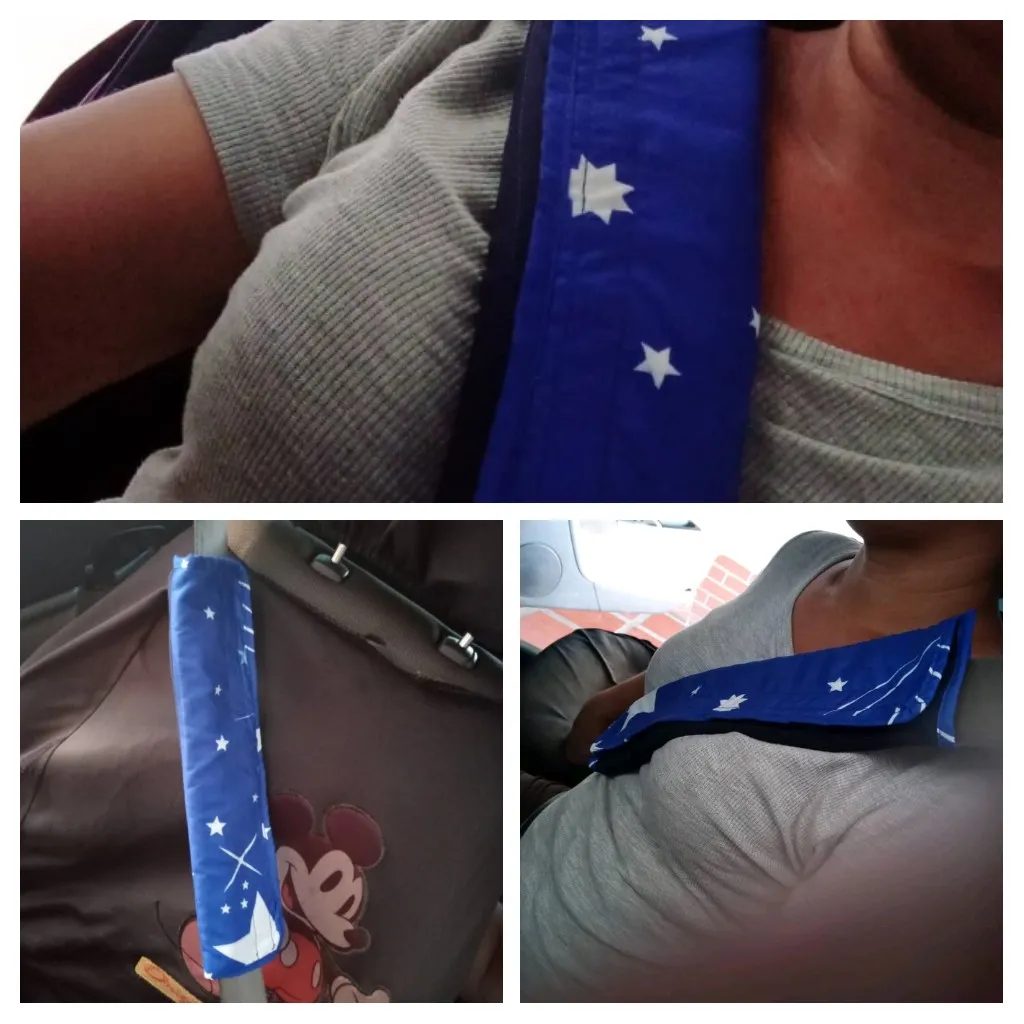

This is a manual work done for this occasion and I hope you like it.
The photos are my property taken
exclusively in this project.
I made the procedural collages with my Blue C6 tool and the main one in Canva
The dividers and the banners were edited by me in Canva
The translation was done with
DeepL Translator


Saludos para todos los Hivers creativos de esta gran comunidad, complacida de estar nuevamente con ustedes, hoy les traigo una manualidad muy útil, se trata de unas almohadillas para el cinturón de seguridad del vehículo, pues es muy habitual que este me lastime con el roce justo en la clavícula, esto según el tipo de ropa que lleve, y es doloroso sobre todo cuando mi blusa tiene escote. Por eso decidí realizar dos almohadillas para el los cinturones de seguridad de mi vehículo, uno para el chófer ( o sea yo ) y el copiloto.
Materiales
✓ Tela estampada
✓ Tela unicolor
✓ Tijera
✓ Máquina de coser.
✓ Alfileres.
✓ Velcro
✓ Goma espuma o relleno.
Paso a paso
Yo realice dos almohadillas, como les comenté al inicio, en las fotos pueden apreciarlas , aunque en la descripción me refiera a las medidas de una. Lo primero que hice fue medir y recortar un trozo de goma espuma de 40 x 7 centímetros. Así mismo, mido una pieza de tela color azul oscuro de 21 x 40 centímetros y otra de ese mismo color de 14 x 40 centímetros y para completar esta última pieza de tela usaré una tela estampada de 7 x 40 centímetros.
A continuación, comienzo a coser para ensamblar la almohadilla, uniendo la pieza estampada, a la tela unicolor de 14 centímetros, para así luego fijar con la máquina de coser, la goma espuma sobre la pieza de tela que acabamos de conformar, justo en el centro de esta pieza.
Procedo entonces a colocar y fijar con alfileres el trozo de tela de 21 centímetros, sobre el que tiene la goma espuma y coso a máquina por los cuatro lados y luego paso una costura a cada lado de la goma espuma.
Seguidamente corte una cinta de 3 centímetros de tela estampada, para usarla como sesgo, para cubrir la costura, alrededor de toda la almohadilla y al mismo tiempo decorarla.
Finalizo recortando 40 centímetros de Velcro negro y cosiendo a cada extremo de la parte interna de la almohadilla. Y así ya tengo listas mis útiles almohadillas, que me brindarán confort al momento de conducir mi vehículo.
Resultado
Este es un trabajo manual realizado para esta ocasión y espero sea de su agrado.
Las fotos son de mi propiedad tomadas exclusivamente en este proyecto.
Los collages del procedimiento los hice con la herramienta de mi Blue C6 y el principal en Canva
Lo separadores y el banners fueron editados por mi en Canva
La traducción fue realizada con
DeepL Traductor