¡Saludos 👋 Queridos 💞 Amigos de #Hive Diy😘! // Greetings 👋 Dear 💞 Friends of #Hive Diy😘!
Cartuchera Escolar de Conejito 🐰#hechoamano //Bunny School Pencil Case 🐰#hechoamano
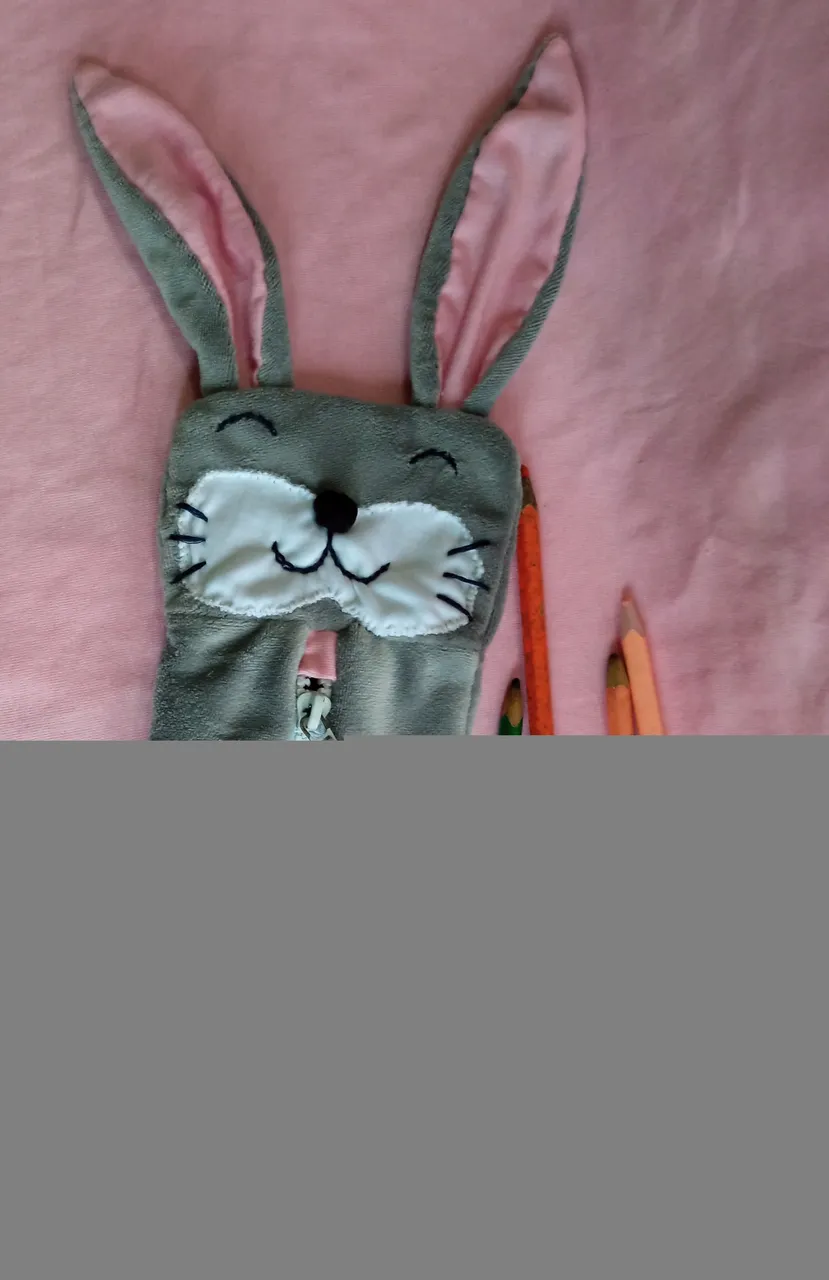
Cómo siempre me encuentro por esta maravillosa comunidad para compartir con ustedes un tutorial 😃 de cómo elaborar un Cartuchera Escolar de Conejito 🐰 cocida a mano, es una cartuchera comoda y además hermosa 😍 a los niños les va encantar.
As always I find myself in this wonderful community to share with you a tutorial 😃 on how to make a Bunny School Pencil Case 🐰 handmade, it is a food pencil case and also beautiful 😍 the kids will love it.

Está hermosa 😍 cartuchera escolar se la elabore a mi sobrina ya que su cartuchera tenía en cierre dañado y estaba muy deteriorada, hoy al entregársela se emocionó muchísimo además que le gustó.
It is beautiful 😍 school pencil case I made it for my niece because her pencil case had a damaged zipper and was very deteriorated, today when I gave it to her she was very excited and she liked it.
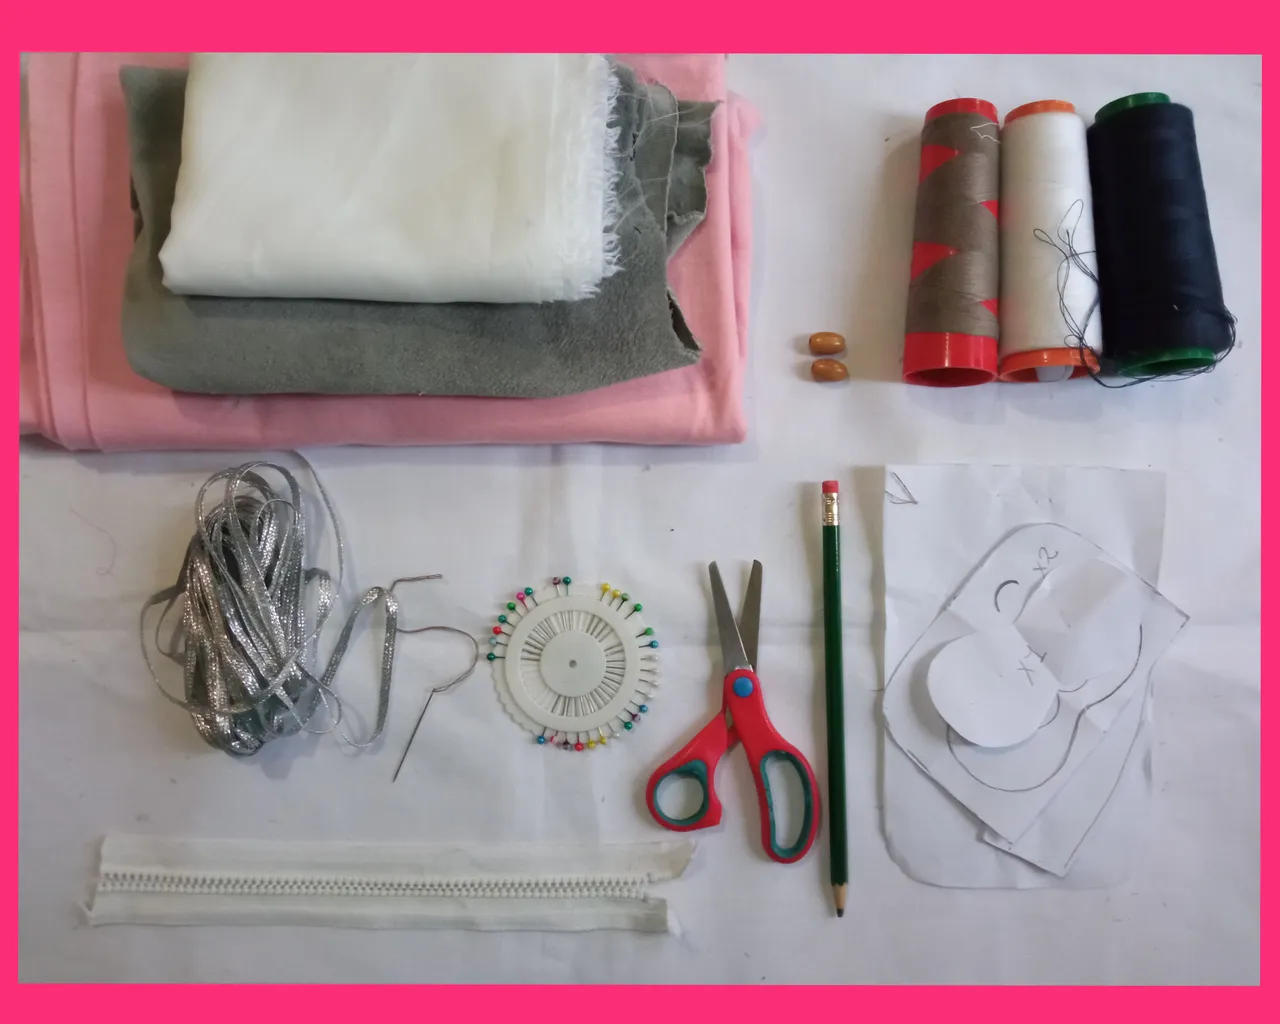
Para comenzar les voy a detallar los materiales que utilice.
To begin with, I will detail the materials I used.
🐰 Materiales:🐰
- Tela de color gris.
- Tela de color rosada.
- Tela de color blanca.
- Un trozo de tela negra.
- Un cierre blanco de 30cm.
- Hilos de color negro, blanco y gris.
- Agujas.
- Una hoja blanca. (Para dibujar los patrones).
- Lápiz.
- Tijera.
- Cinta de 5cm plateada.
- Pepitas del color deseado.
- Relleno.
🐰 Materials:🐰
- Gray fabric.
- Pink color fabric.
- White fabric.
- A piece of black fabric.
- A 30cm white zipper.
- Black, white and gray threads.
- Needles.
- A white sheet. (To draw the patterns).
- Pencil.
- Scissors.
- 5cm silver ribbon.
- Nuggets of the desired color.
- Filling.
🐰Elaboración:🐰 // 🐰 Elaboration:🐰
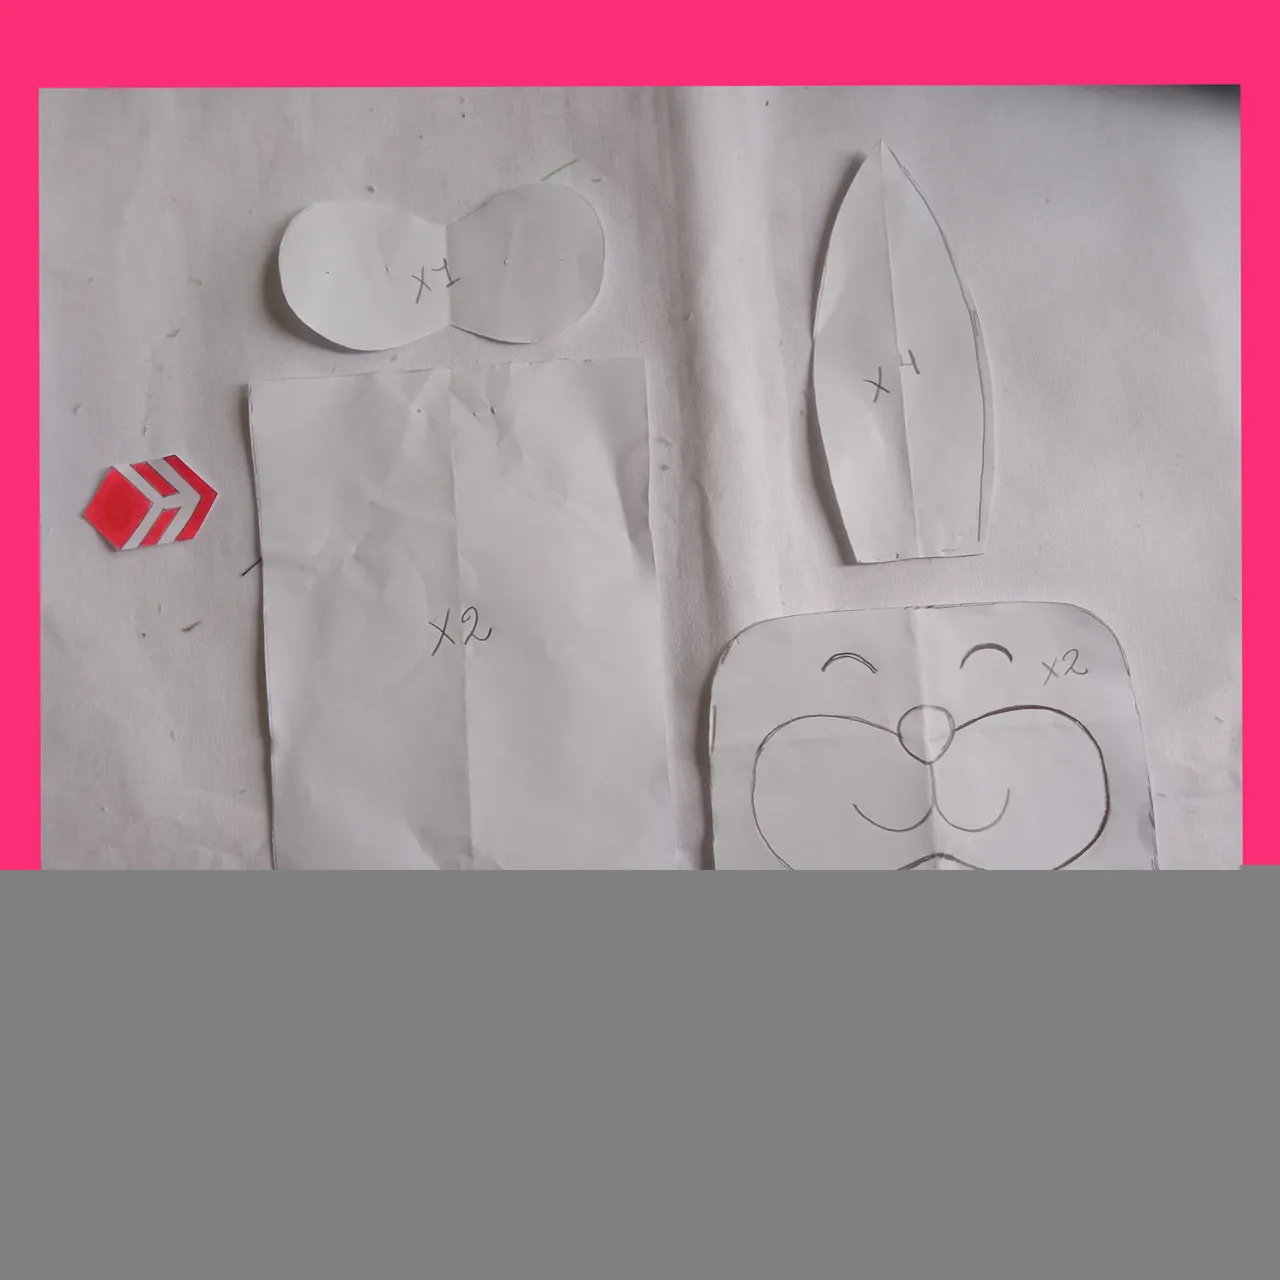
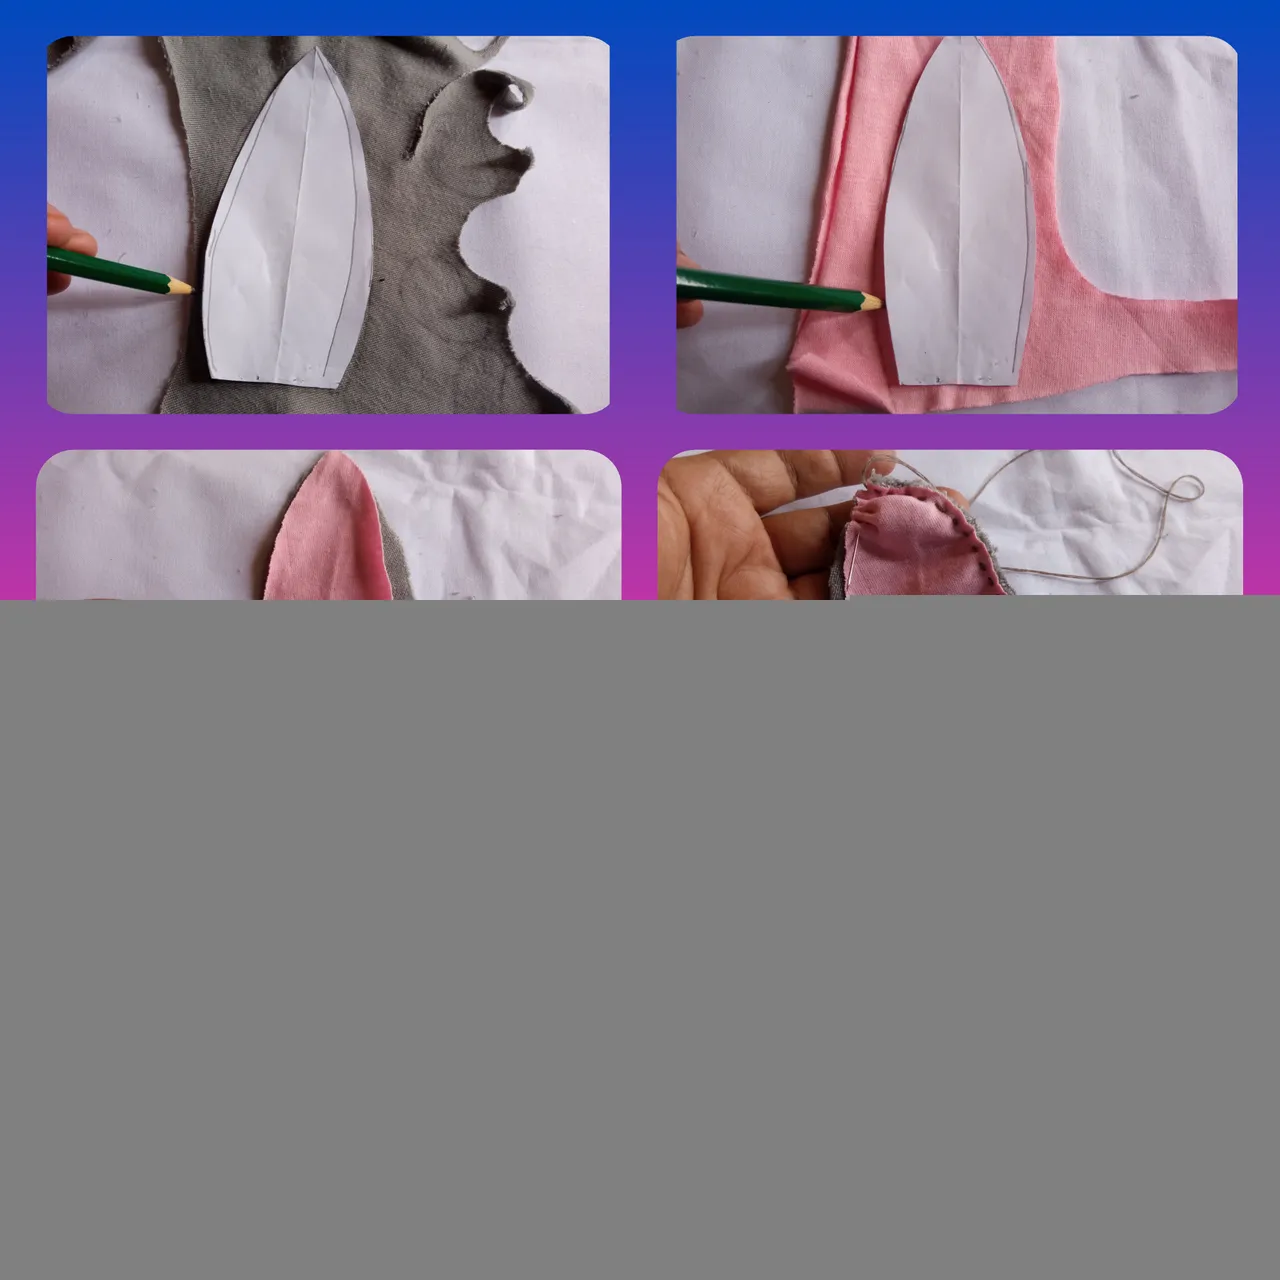
Paso 1:
Para comenzar dibujamos el Conejito 🐰 luego sacamos los patrones y recortamos.
Step 1:
To start we draw the Bunny 🐰 then we draw the patterns and cut out.
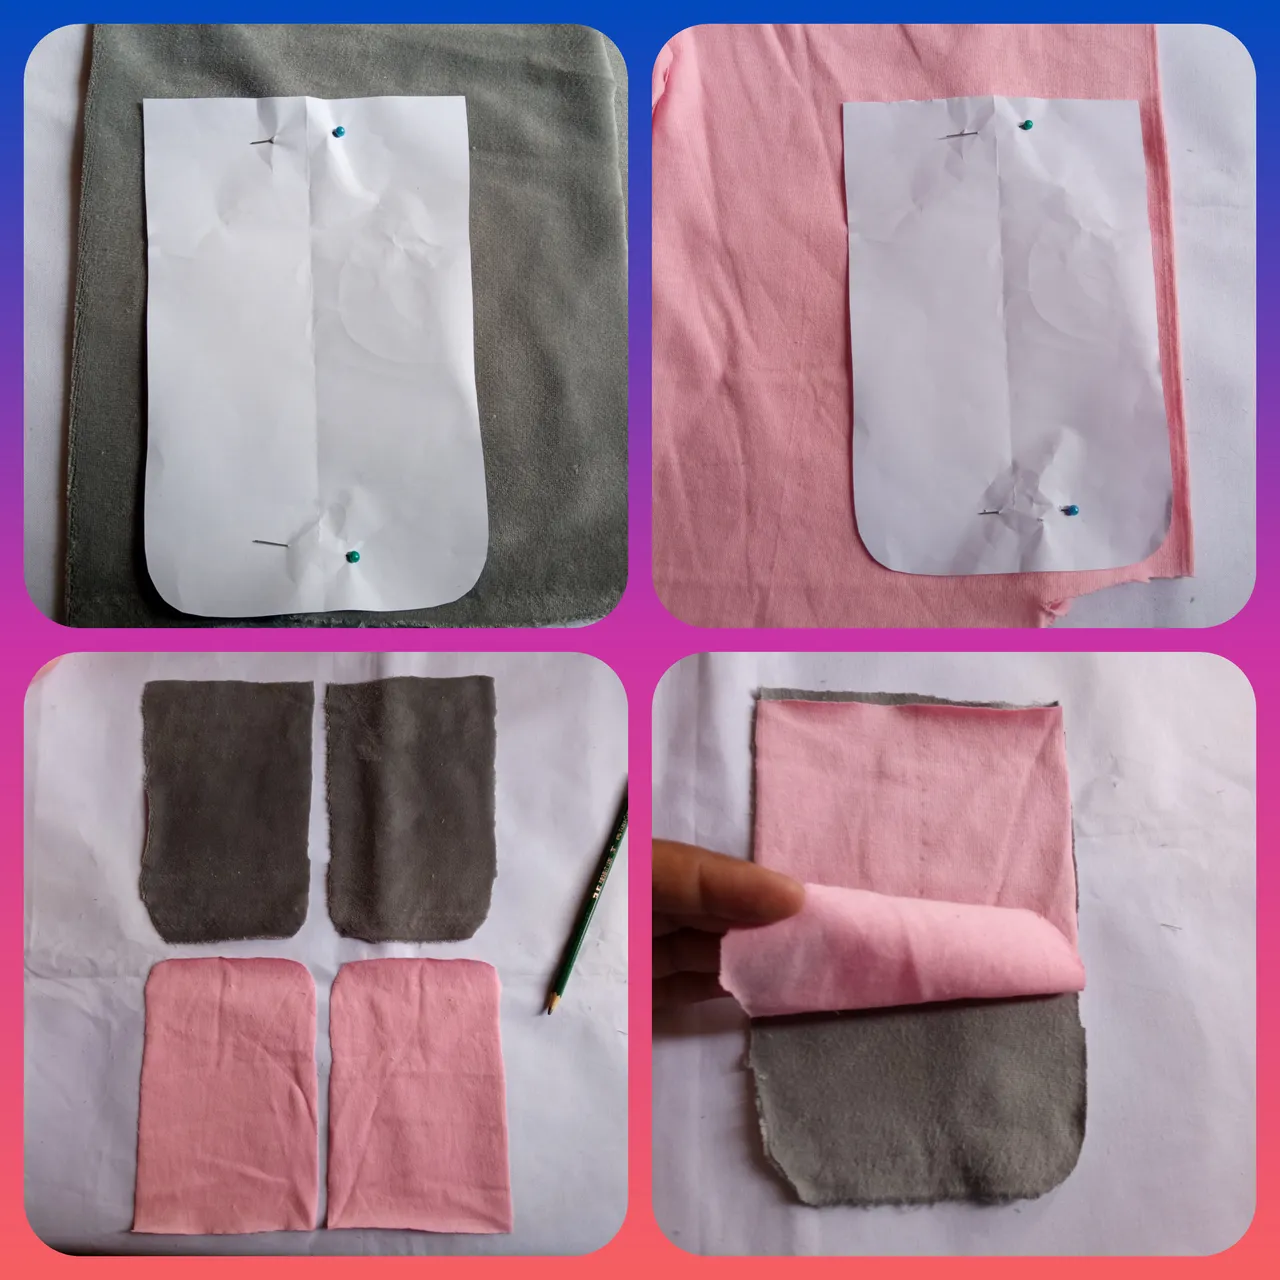
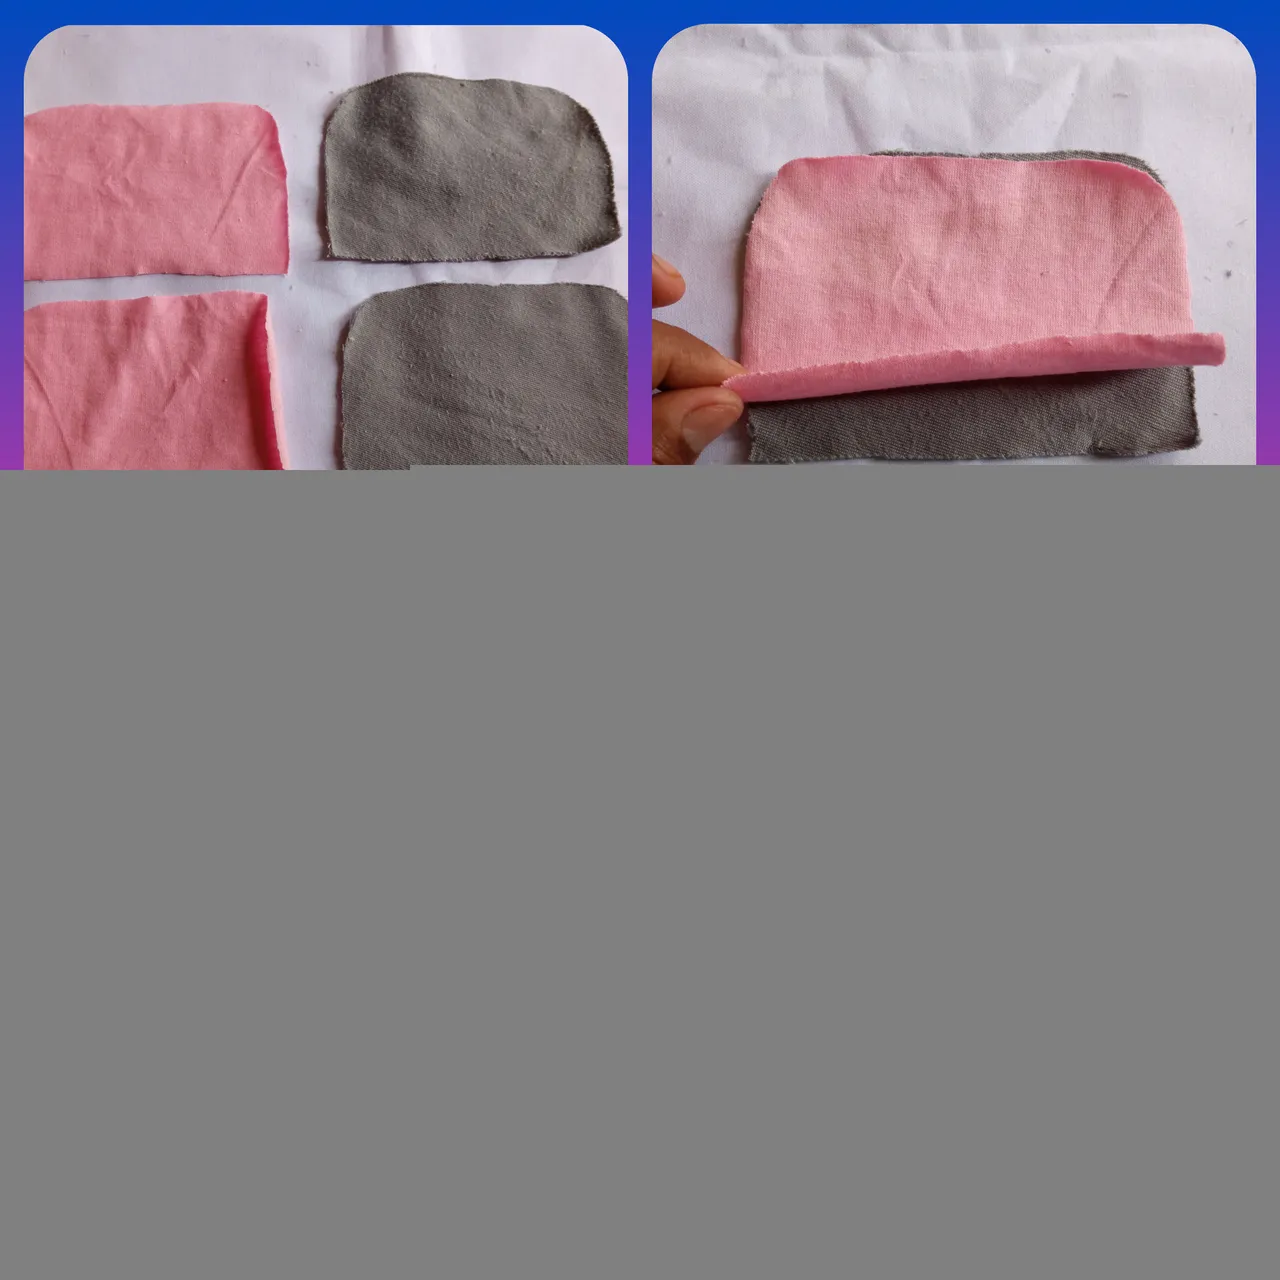
Paso 2:
Con la ayuda del patrón tomamos lo que va hacer el cuerpo del Conejito 🐰 y cortamos dos piezas en tela gris y dos pieza en tela rosada, luego montamos unas de las piezas gris montamos una pieza rosada.
Step 2:
With the help of the pattern we take what is going to make the body of the Bunny 🐰 and cut two pieces in gray fabric and two pieces in pink fabric, then we assemble one of the gray pieces and assemble a pink piece.
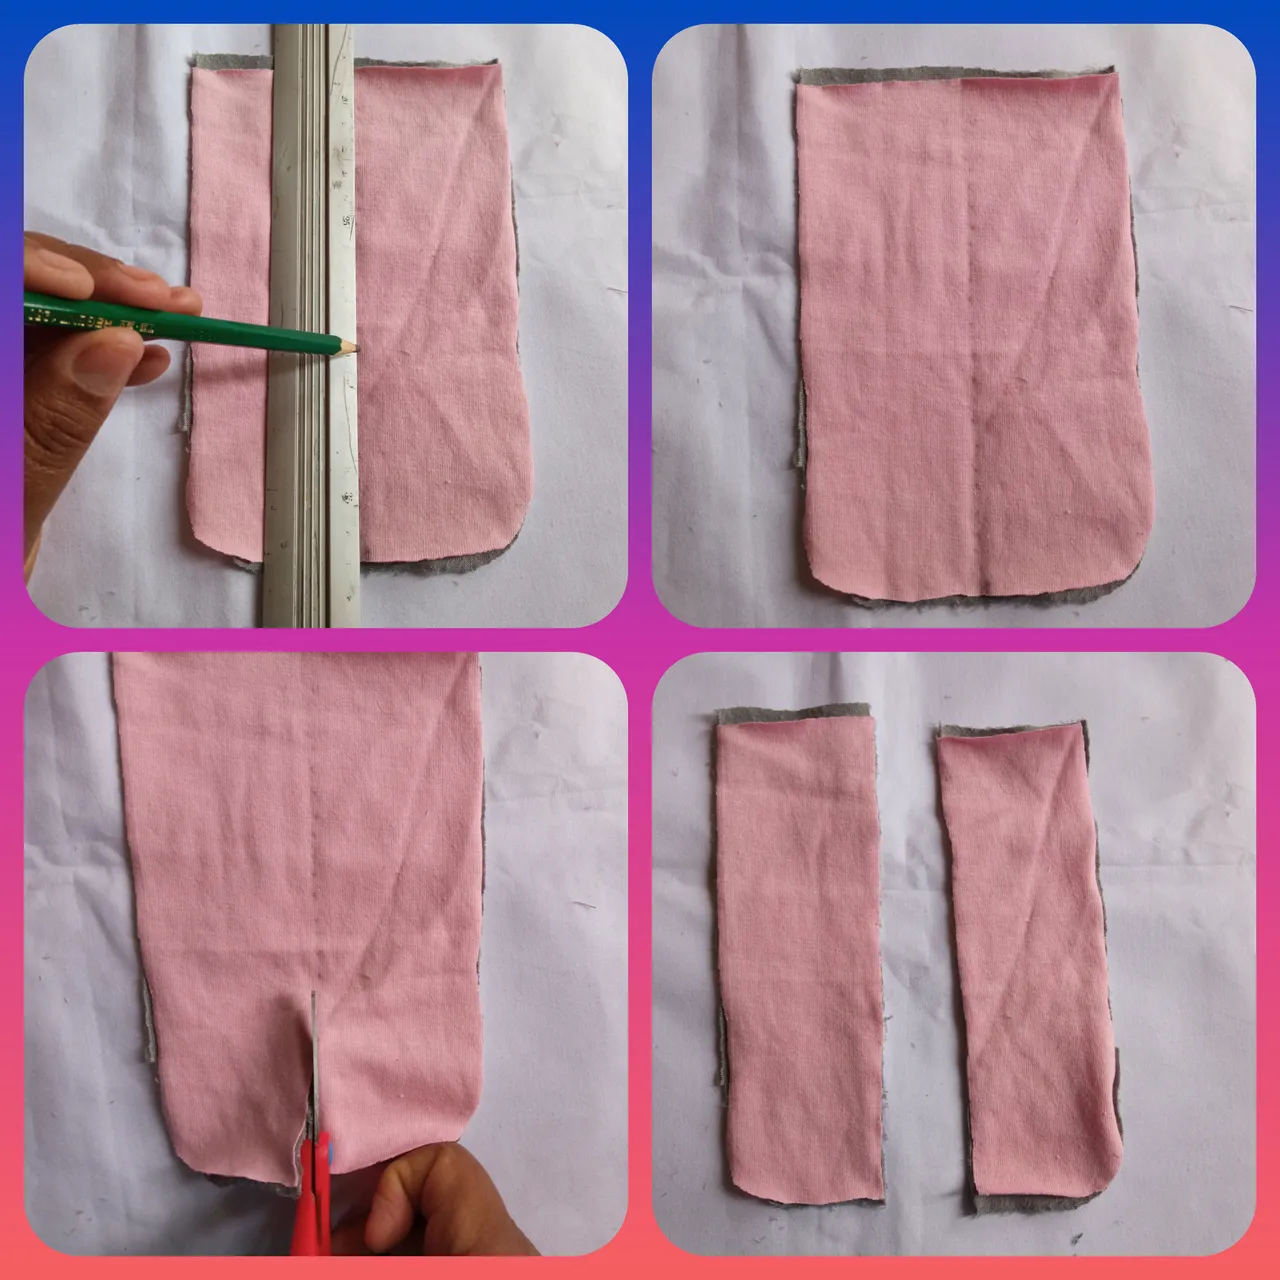
Paso 3:
Con ayuda de una regla marcamos la mitad en la tela y cortamos así como muestro en la imagen.
Step 3:
With the help of a ruler we mark the middle of the fabric and cut as shown in the image.
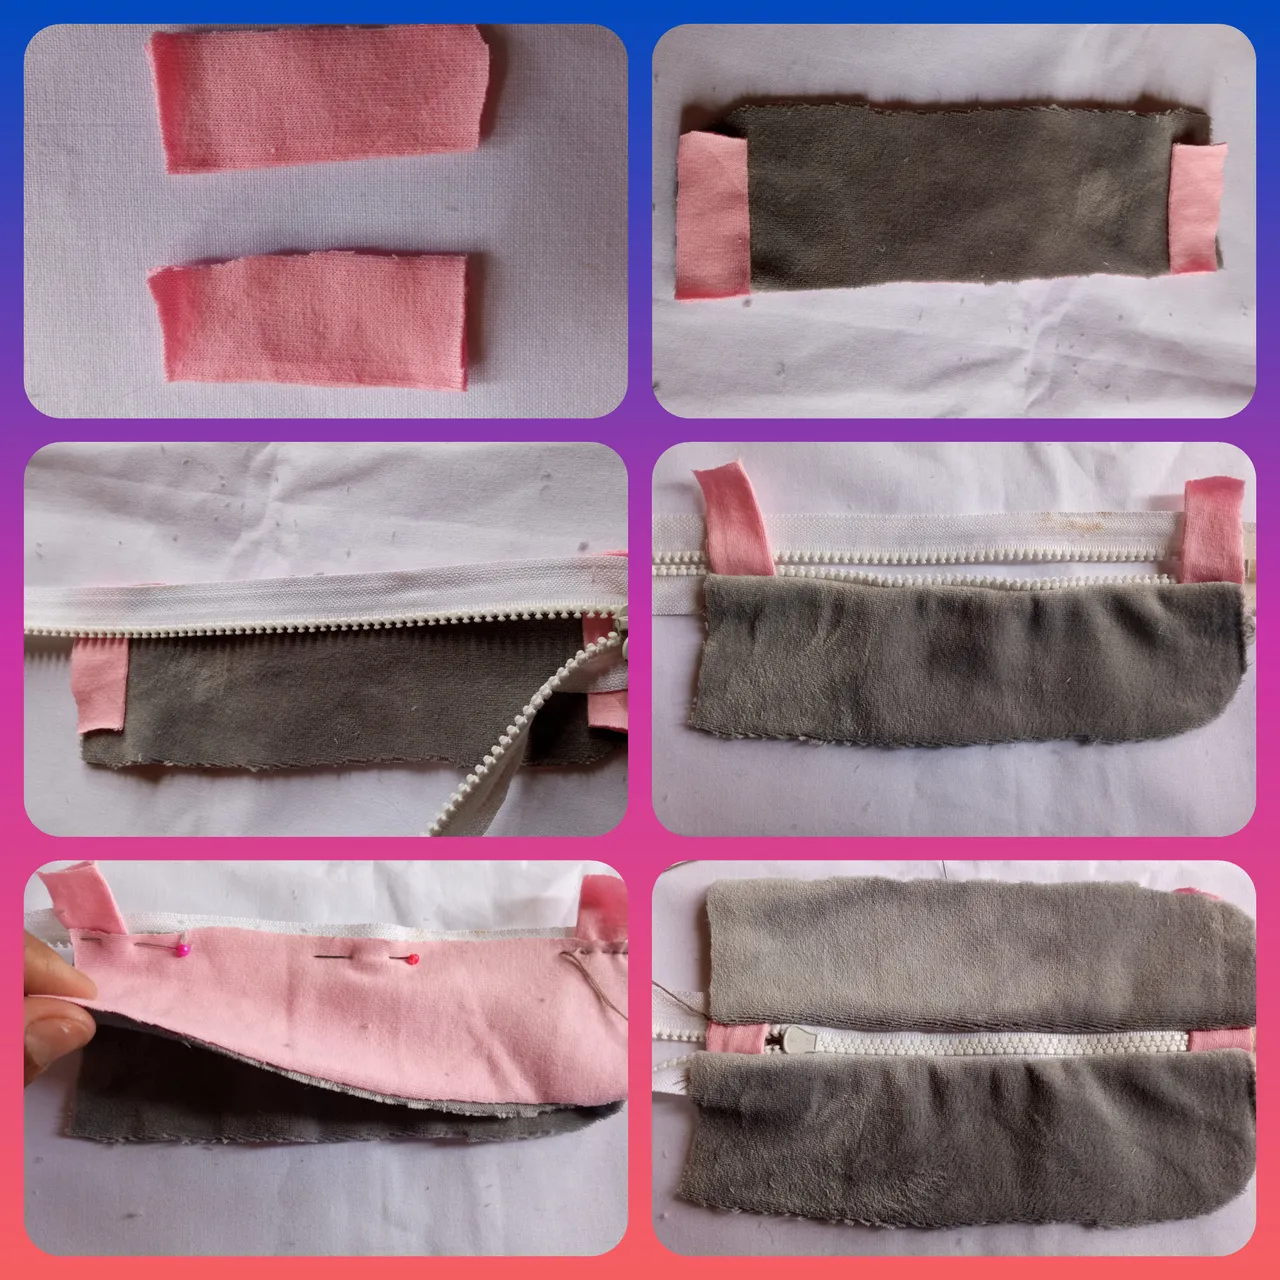
Paso 4:
Ahora procedemos a cortar dos tira de 2cm de ancho y la colocamos arriba y abajo de una de la mitad de las piezas y colocamos el cierre cosemos, luego montamos la otra pieza y metemos las dos tiras y montamos la otra parte del cierre y cosemos, volteamos y se verá como en la foto.
Step 4:
Now we proceed to cut two 2cm wide strips and place them on the top and bottom of one of the half of the pieces and place the zipper and sew, then we mount the other piece and put the two strips and mount the other part of the zipper and sew, turn it over and it will look like in the picture.
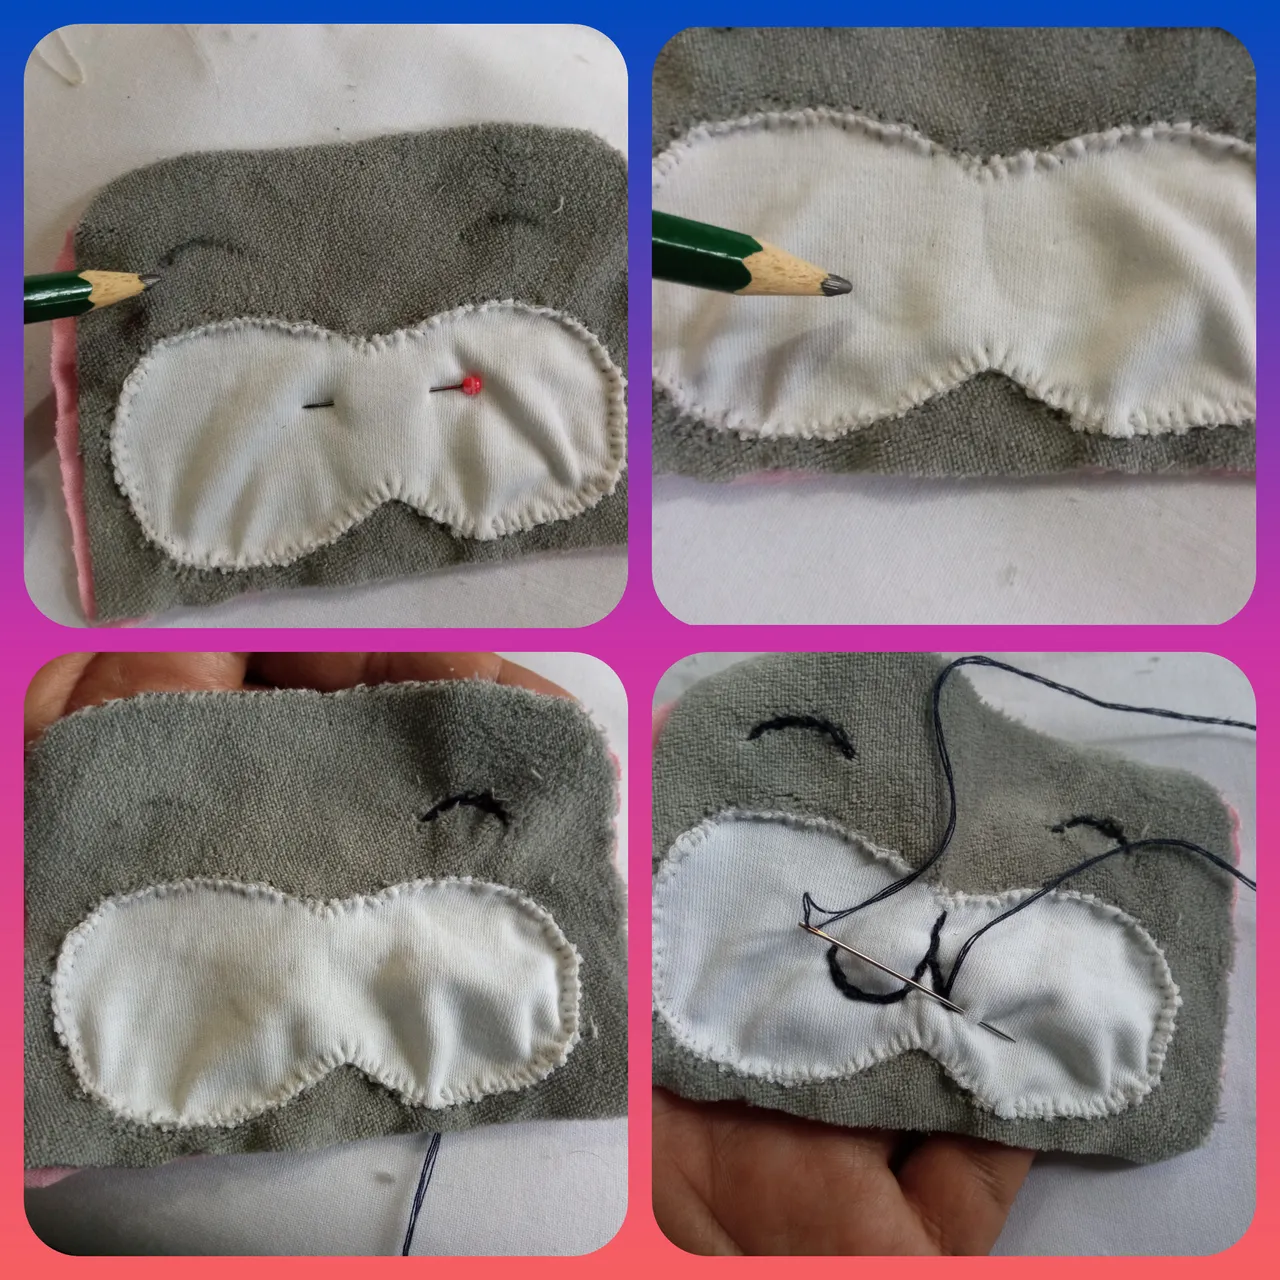
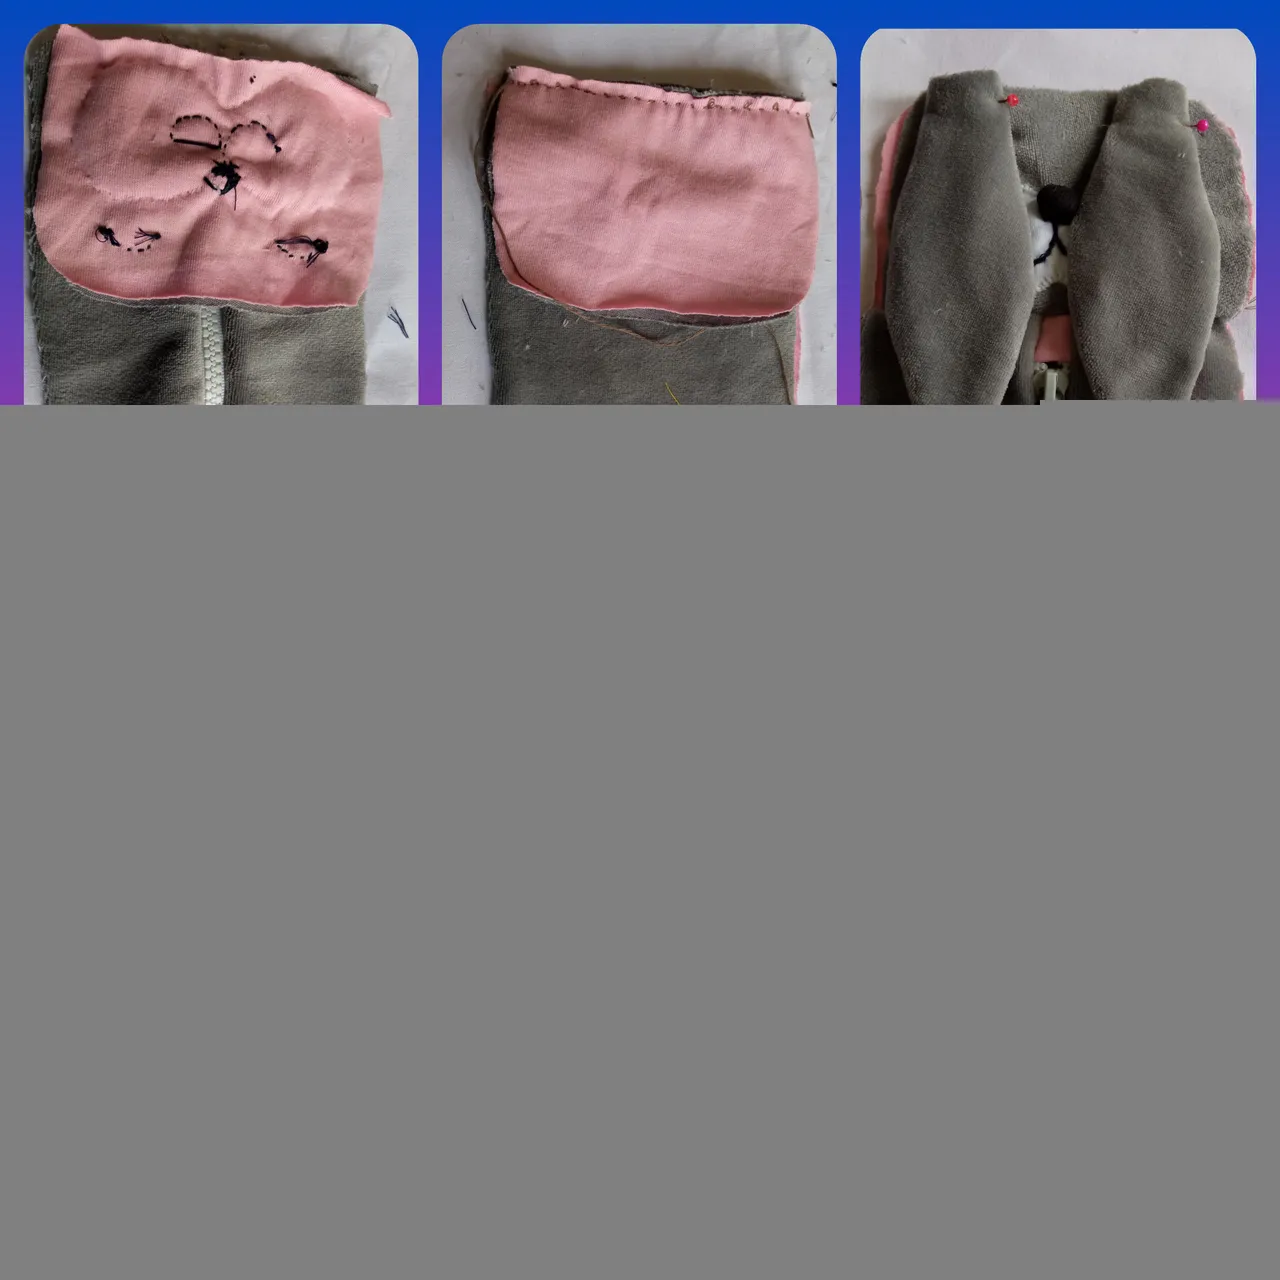
Paso 5:
Tomamos el patrón de la cabeza del conejito y cortamos dos piezas rosada y dos piezas gris, luego tomamos una pieza gris y una rosada y la unimos, cortamos la trompa en tela blanca, luego la cosemos a la cara del conejito con punto ojal en hilo blanco.
Step 5:
We take the pattern of the bunny's head and cut two pink and two gray pieces, then we take one gray and one pink piece and join them together, we cut the trunk in white fabric, then we sew it to the bunny's face with buttonhole stitch in white thread.
Paso 6:
Ahora con un lápiz marcamos los ojos y la boca del conejito y con hilo negro bordamos.
Step 6:
Now with a pencil we mark the eyes and mouth of the bunny and with black thread we embroider.
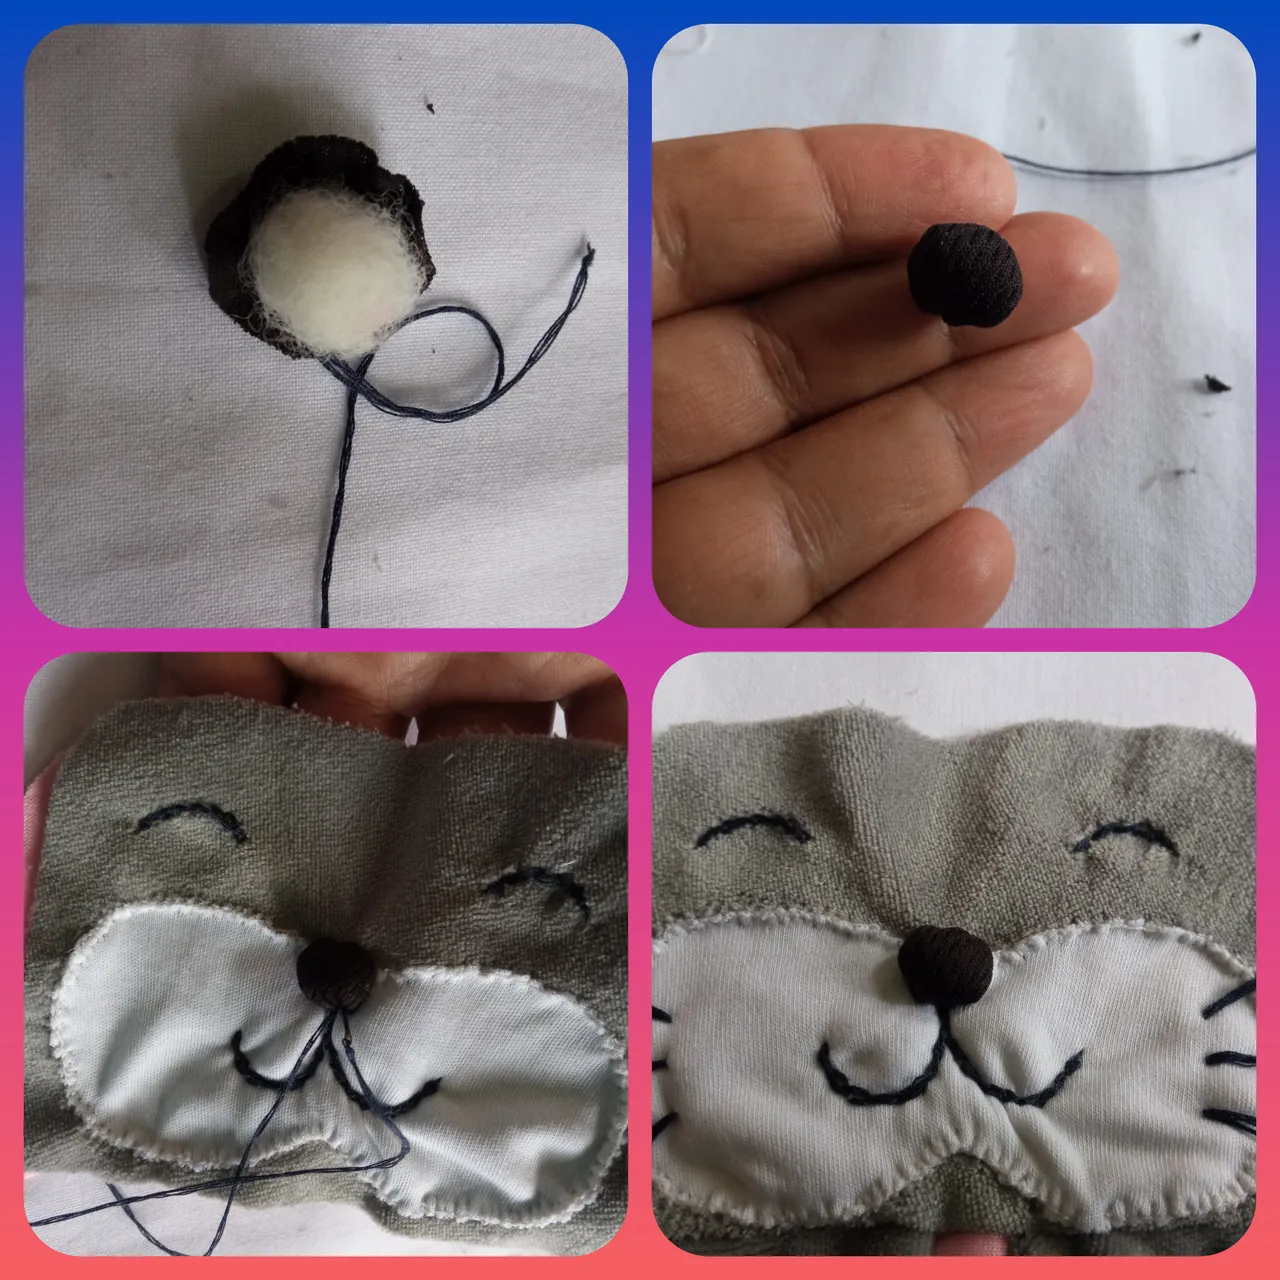
Paso 7:
Cortamos un círculo pequeño en tela negra cosemos por el alrededor y rellenamos luego hablamos el hilo que quede como una bolita luego la cosemos arriba de la trompa del conejito.
Step 7:
We cut a small circle in black fabric, sew around it and fill it with thread so that it looks like a little ball, then we sew it on top of the bunny's trunk.
Paso 8:
Cortamos dos piezas de las orejas en tela rosada y dos piezas en tela gris con ayuda del patrón, luego unimos una pieza gris y una rosada con el derecho de frente hacia dentro cosemos y luego volteamos repetimos el proceso con la otra oreja.
Step 8:
We cut two pieces of the ears in pink fabric and two pieces in gray fabric with the help of the pattern, then we join one gray piece and one pink piece with the right side facing inwards we sew and then we turn over and repeat the process with the other ear.
Paso 9:
Cosemos las cabezas al cuerpo, así como muestro en la foto, luego con ayuda de alfileres tomamos la pieza del frente y fijamos las orejas, luego unimos las piezas y cosemos por todo el alrededor cerrando.
Step 9:
We sew the heads to the body, as shown in the picture, then with the help of pins we take the front piece and fix the ears, then we join the pieces and sew all around closing.
Paso 10:
Volteamos el conejito por la parte del cierre, luego cortamos un trozo de cinta y la metemos por el agujero del cierre y comenzamos a meter las pepitas al terminar amarramos para que no se salga y listo!.
Step 10:
We flip the bunny by the closing part, then we cut a piece of ribbon and we put it through the hole of the closing and we begin to put the nuggets when we finish we tie it so that it does not come out and that's it!
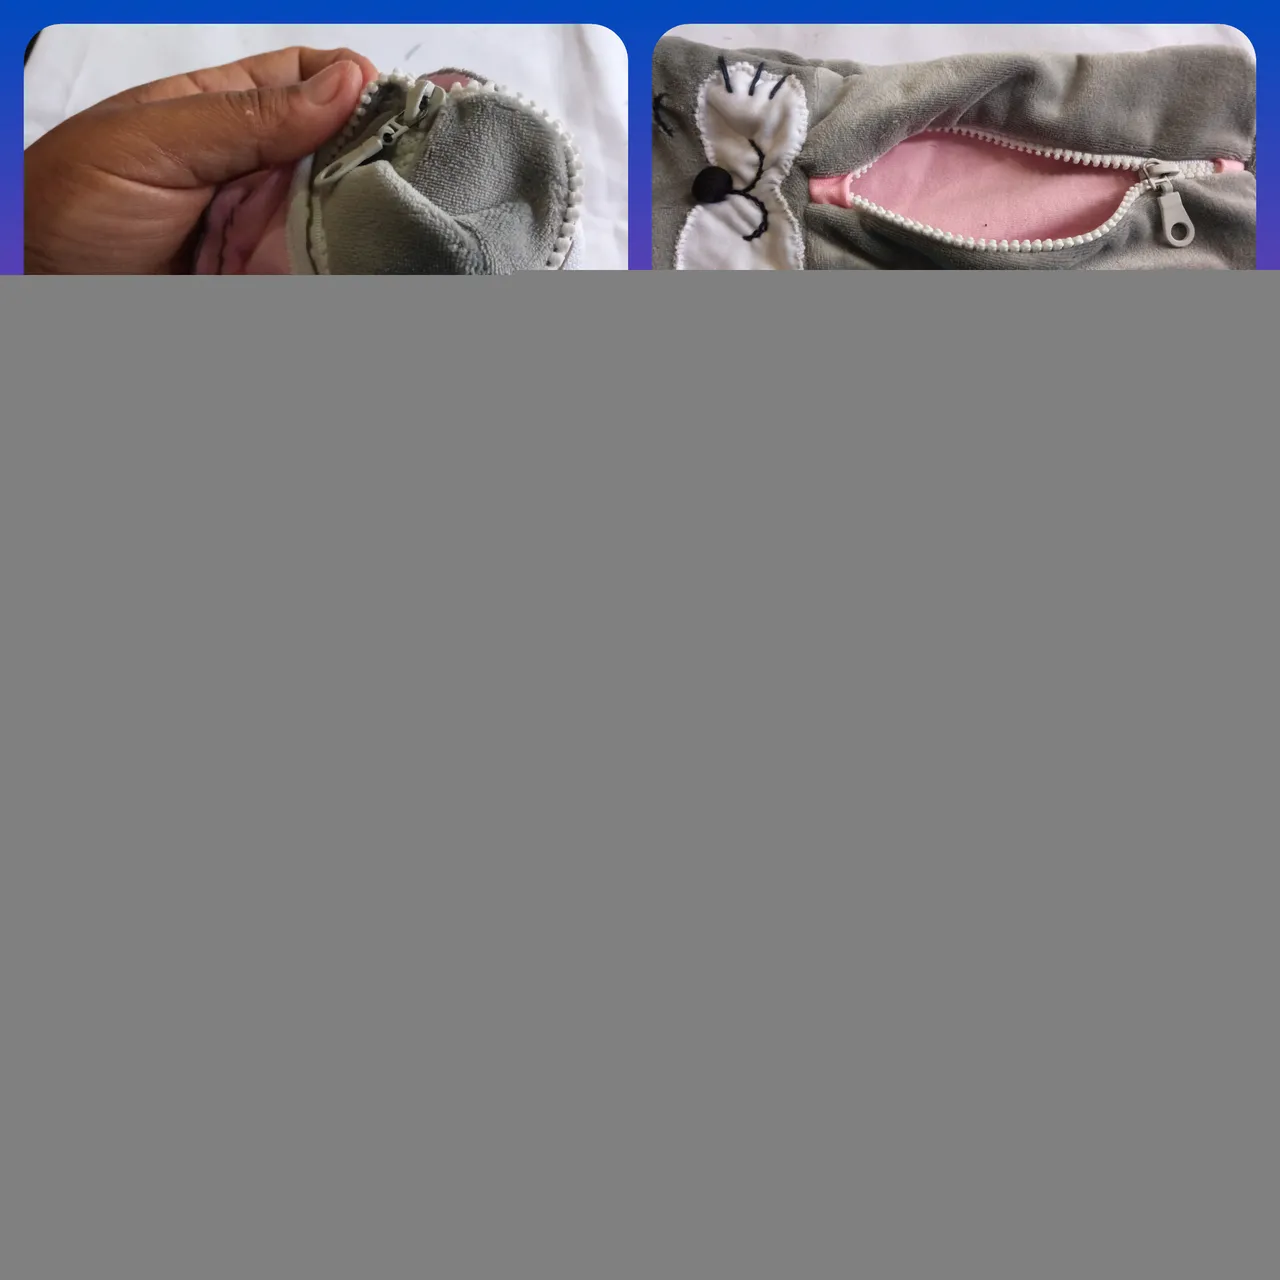
Paso 11:
Abrimos el cierre y podemos ver qué mi conejito está también forrado por dentro se ve súper genial.
Step 11:
We open the zipper and we can see that my bunny is also lined inside it looks super cool.
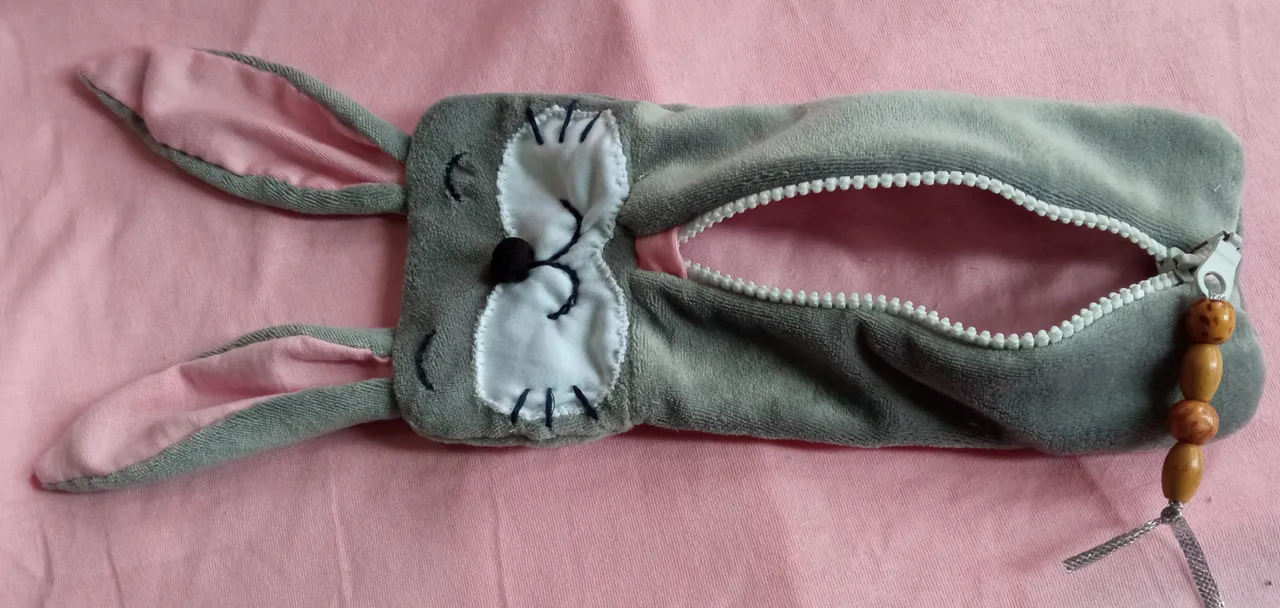
¡Ya mi Hermoso 😍 Cartuchera Escolar de Conejito 🐰 está Terminada! // Already my beautiful 😍 Bunny School Pencil Case 🐰 is finished!

Hasta aquí llego este maravilloso 💓 tutorial, espero les haya gustado como quedé y se animen en elaborarles está hermosa 🥰 Cartuchera a sus niños, se que les va a super encantar.
So much for this wonderful 💓 tutorial, I hope you liked it and I encourage you to make this beautiful 🥰 pencil case for your children, I know you will love it.
Como siempre estoy agradecida con esta maravillosa comunidad y con la familia #hive por brindarme su apoyo en cada tutorial que he preparado para ustedes.
As always I am grateful to this wonderful community and to the #hive family for supporting me in every tutorial I have prepared for you.