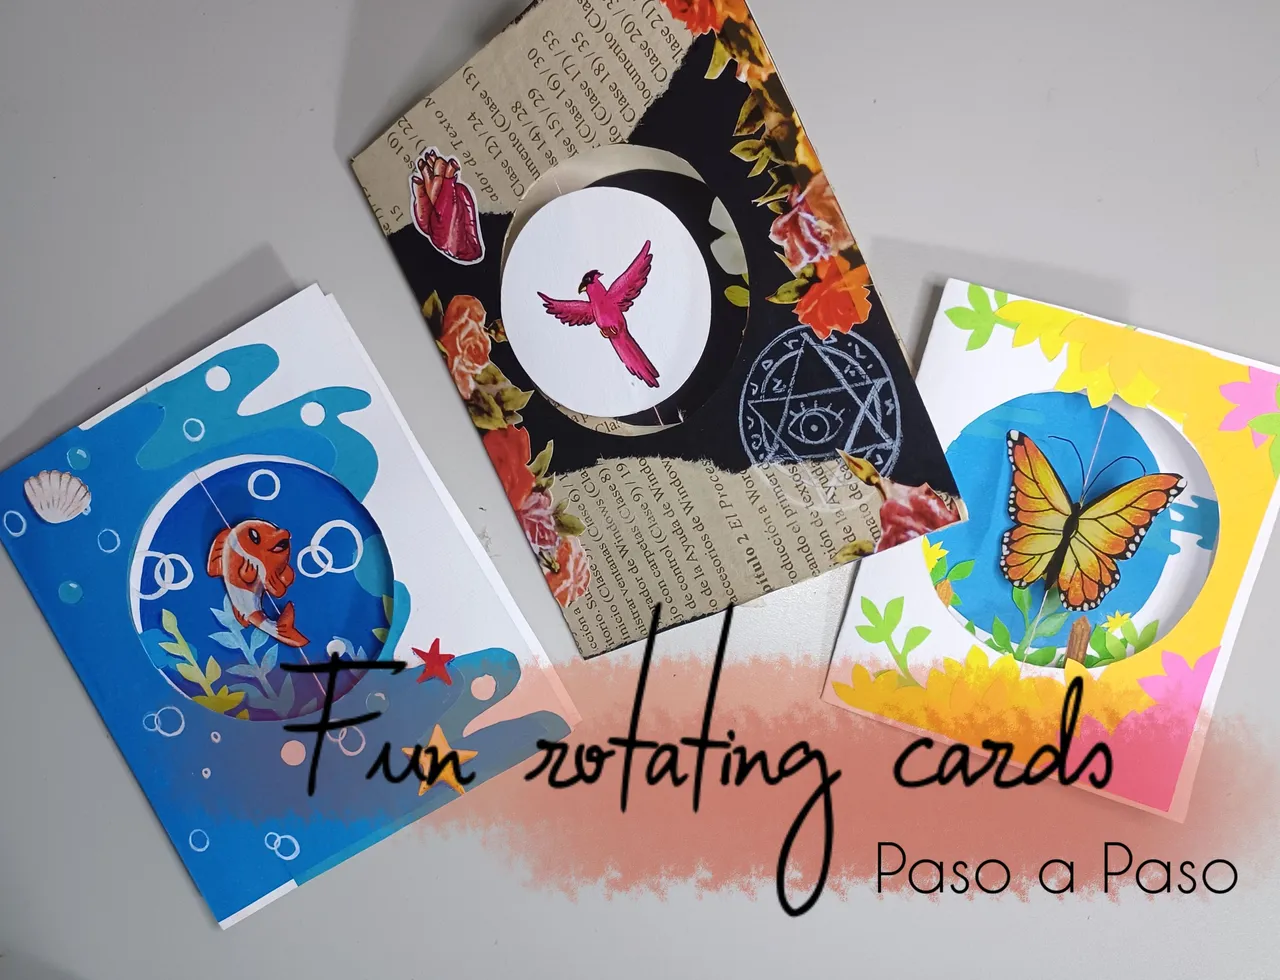
Saludos amigos! Me ha vuelto a dar la fiebre de doblar, recortar y pegar papel, esta vez traigo unas divertidas tarjetas con elemento giratorio en el centro, este tutorial tiene tiempo rondando mu cabeza y mi feed de Pinterest, hasta que me he animado a hacerlo, la verdad estoy fascinada tengo muchos motivos en mente para realizar, les mostraré los primeros tres que he hecho hasta hoy, espero que les gusten.
Greetings friends! It has given me again the fever of folding, cutting and gluing paper, this time I bring some fun cards with rotating element in the center, this tutorial has long hovering mu head and my Pinterest feed, until I have encouraged me to do it, the truth I am fascinated I have many reasons in mind to perform, I will show you the first three that I have done until today, I hope you like them.
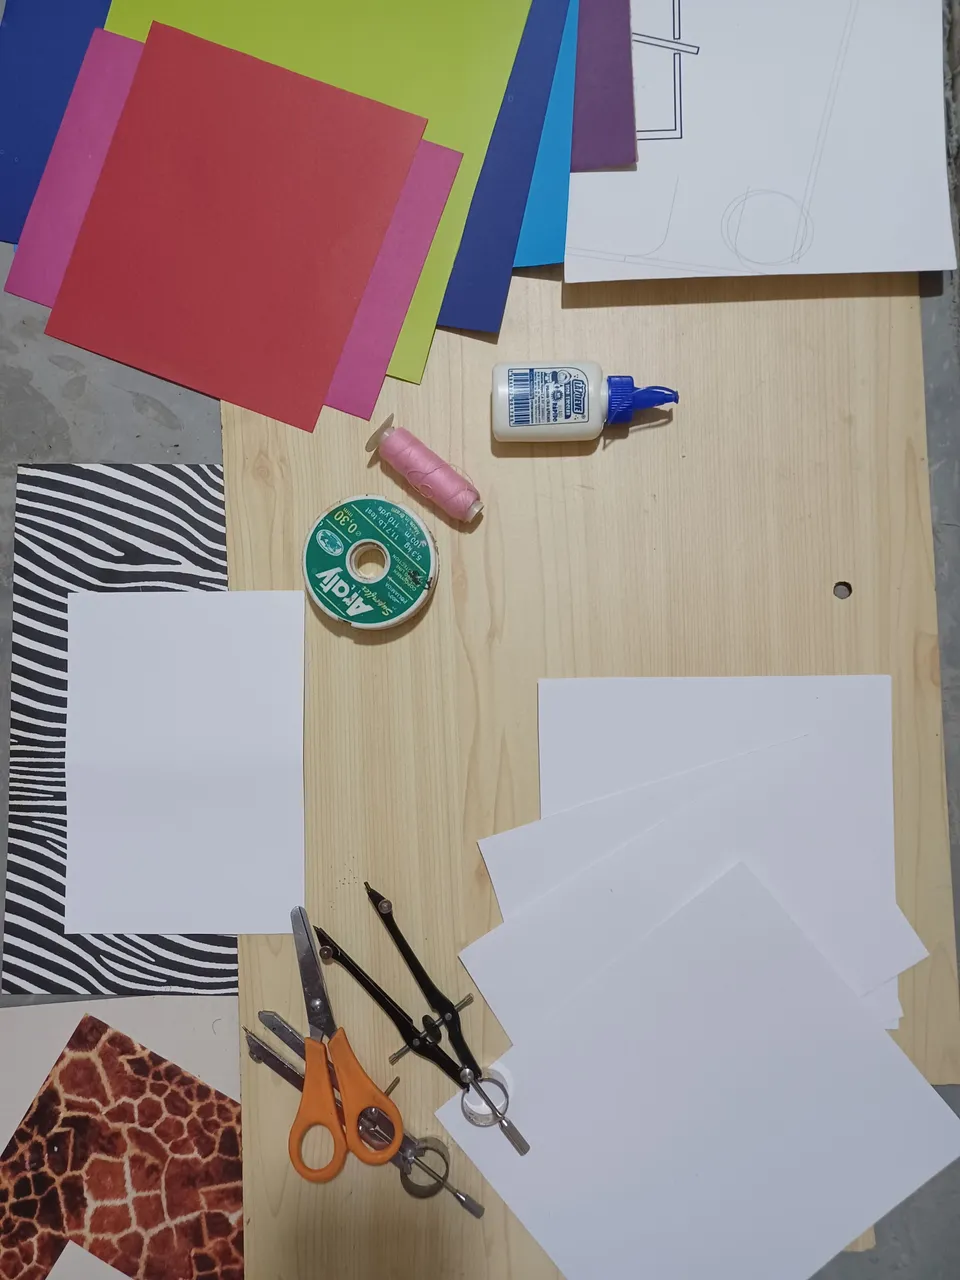
MATERIALS:
- White cardboard
- Color cardboard
- Compasses
- Scissors
- White glue
- Thread
- Scalpel
MATERIALES:
- Cartulina blanca
- Cartulina de colores
- Compás
- Tijeras
- Pega blanca
- Hilo
- Bisturí
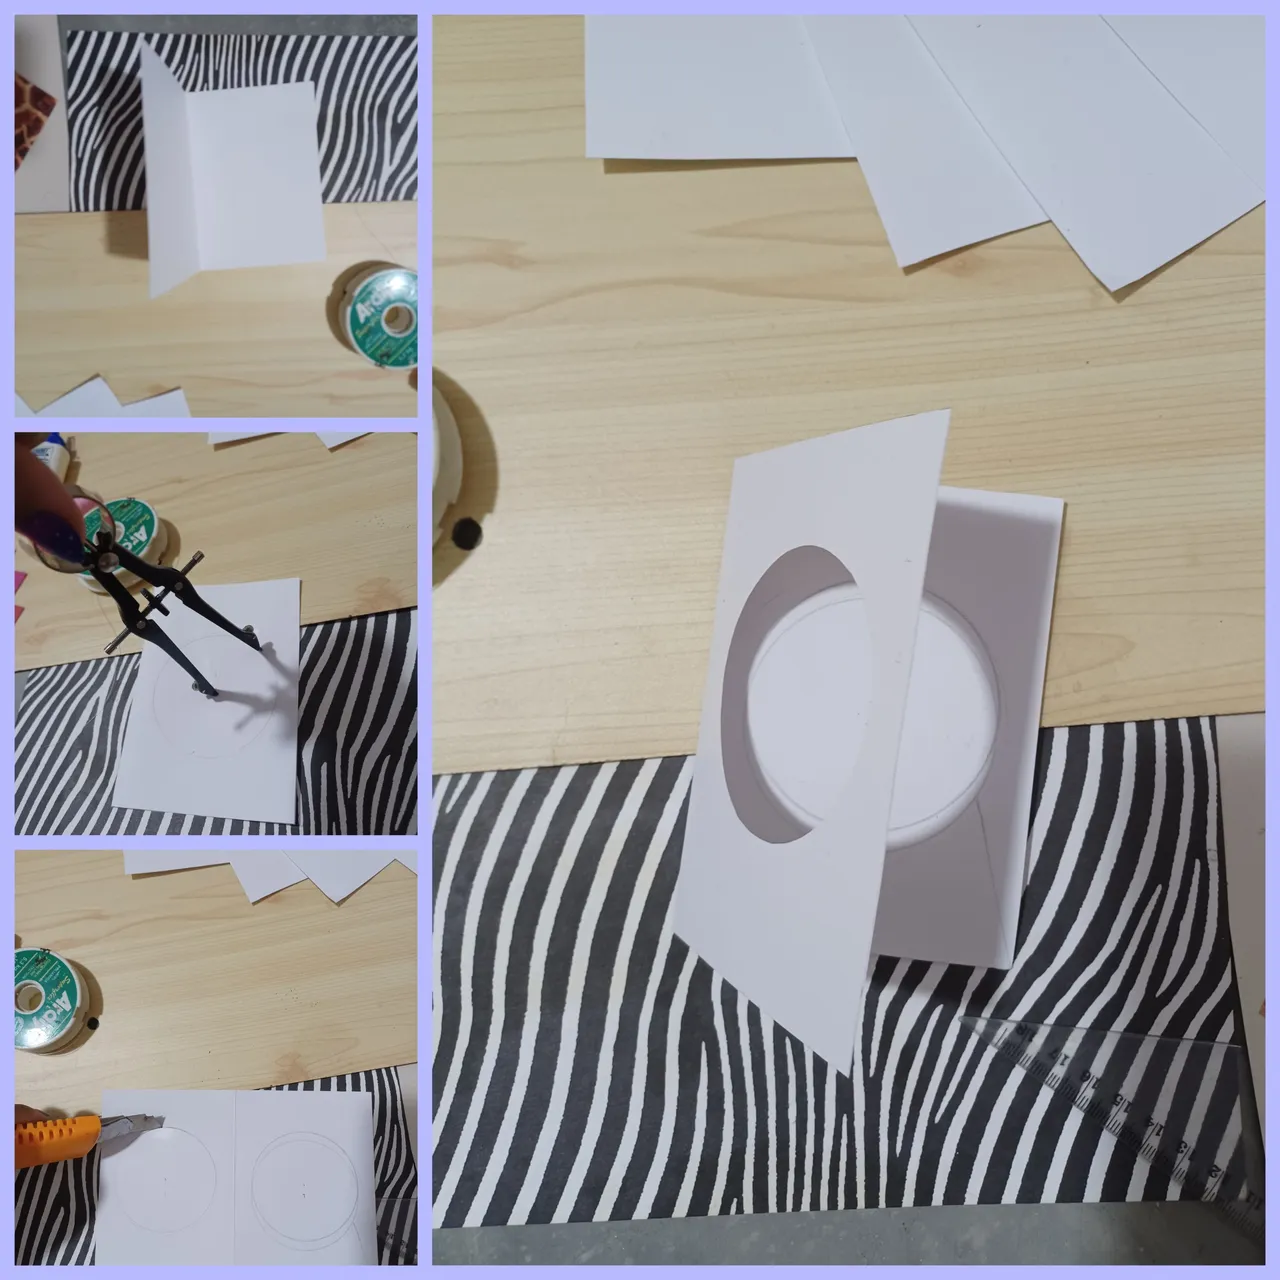
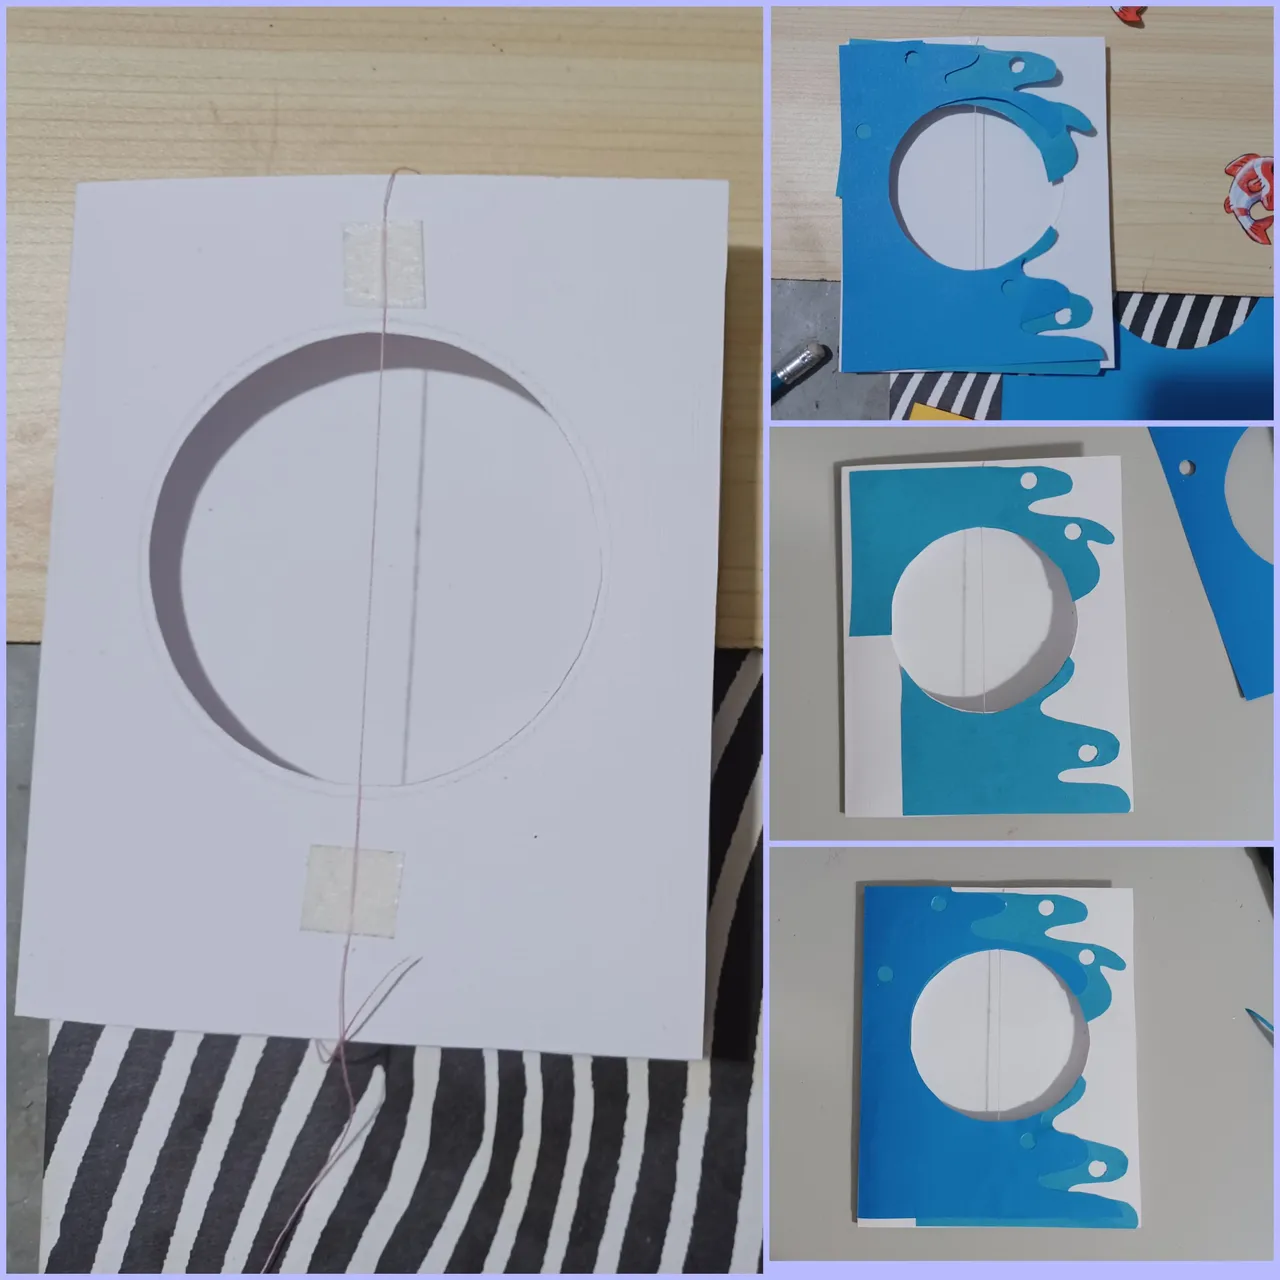
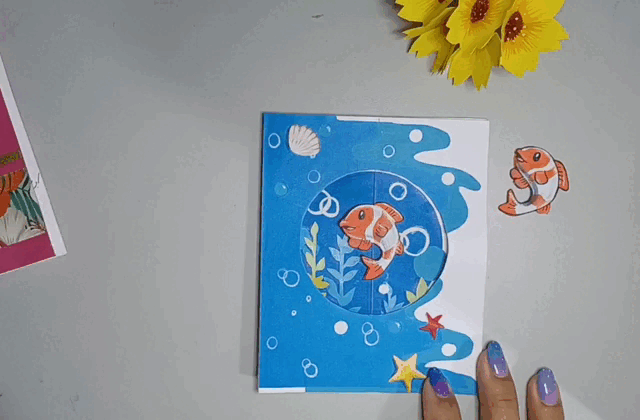
Primero dispuse de una cartulina blanca blanca de 20x12cm para la primera tarjeta, luego doble a la mitad por el lado más largo, luego medí el centro en una de las caras y tome el compás y marque una circunferencia de 6,5cm de diámetro, el cual igualmente marque en la cara interna de la tarjeta. Seguidamente y con la ayuda de un exacto corte la circunferencia de una de las caras de la tarjeta.
First I had a 20x12cm white cardboard for the first card, then I folded it in half on the longest side, then I measured the center on one of the sides and took the compass and marked a circumference of 6.5cm in diameter, which I also marked on the inner side of the card. Then with the help of an exacto cut the circumference of one side of the card.
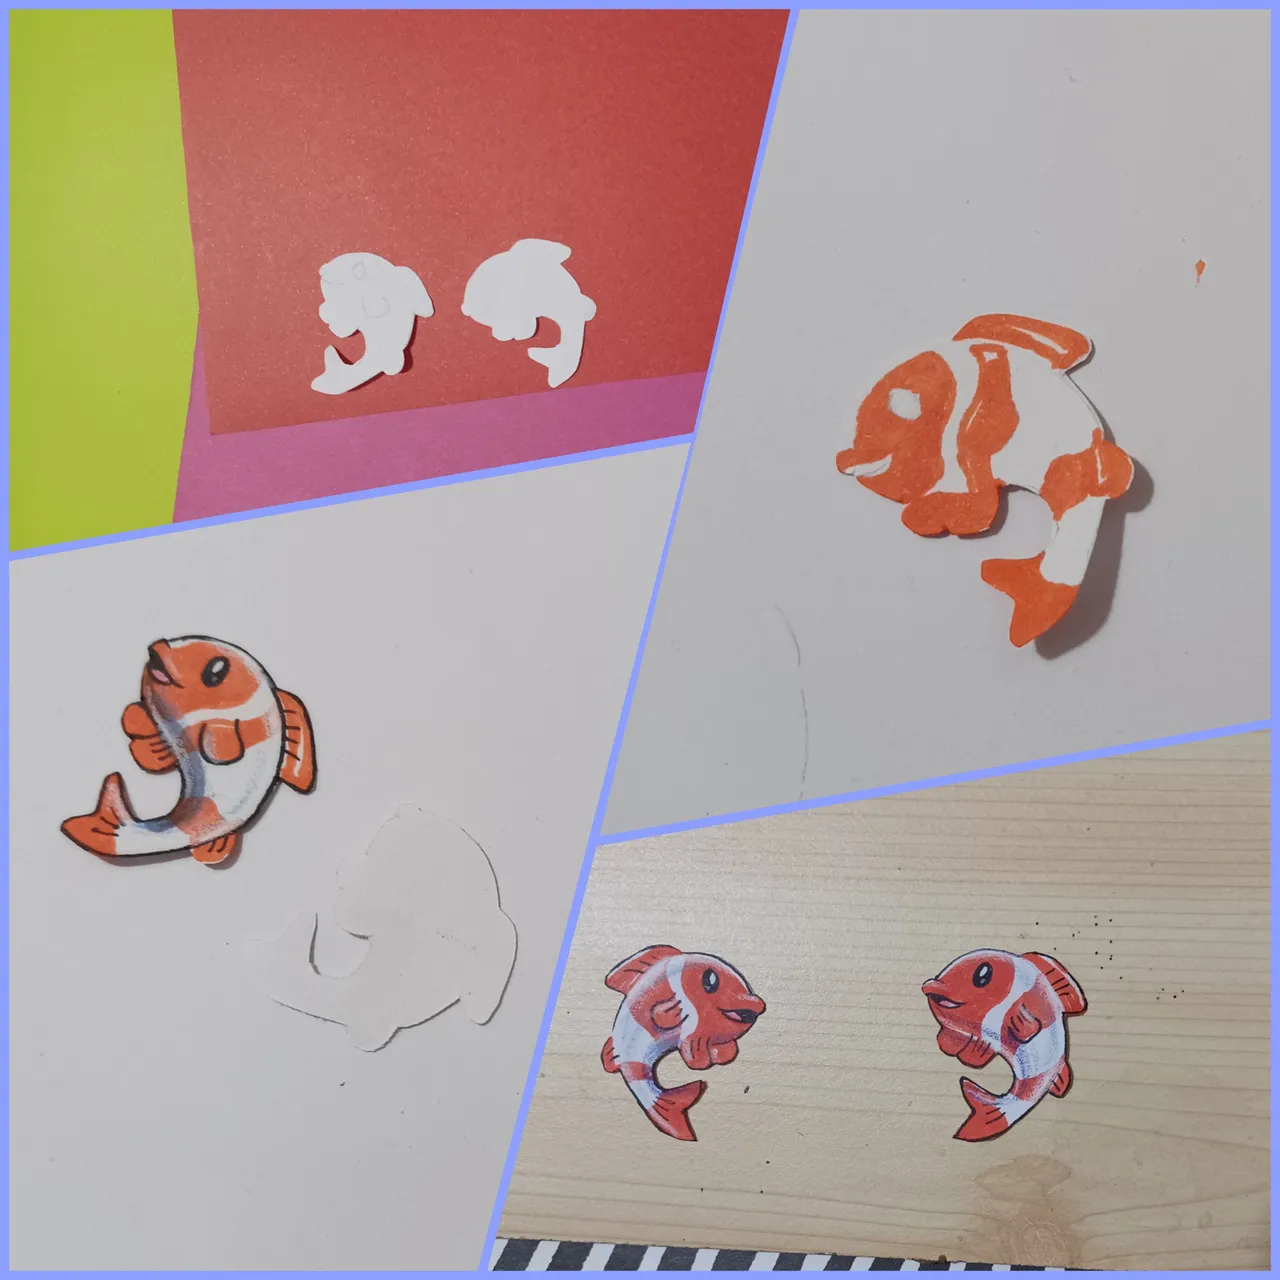
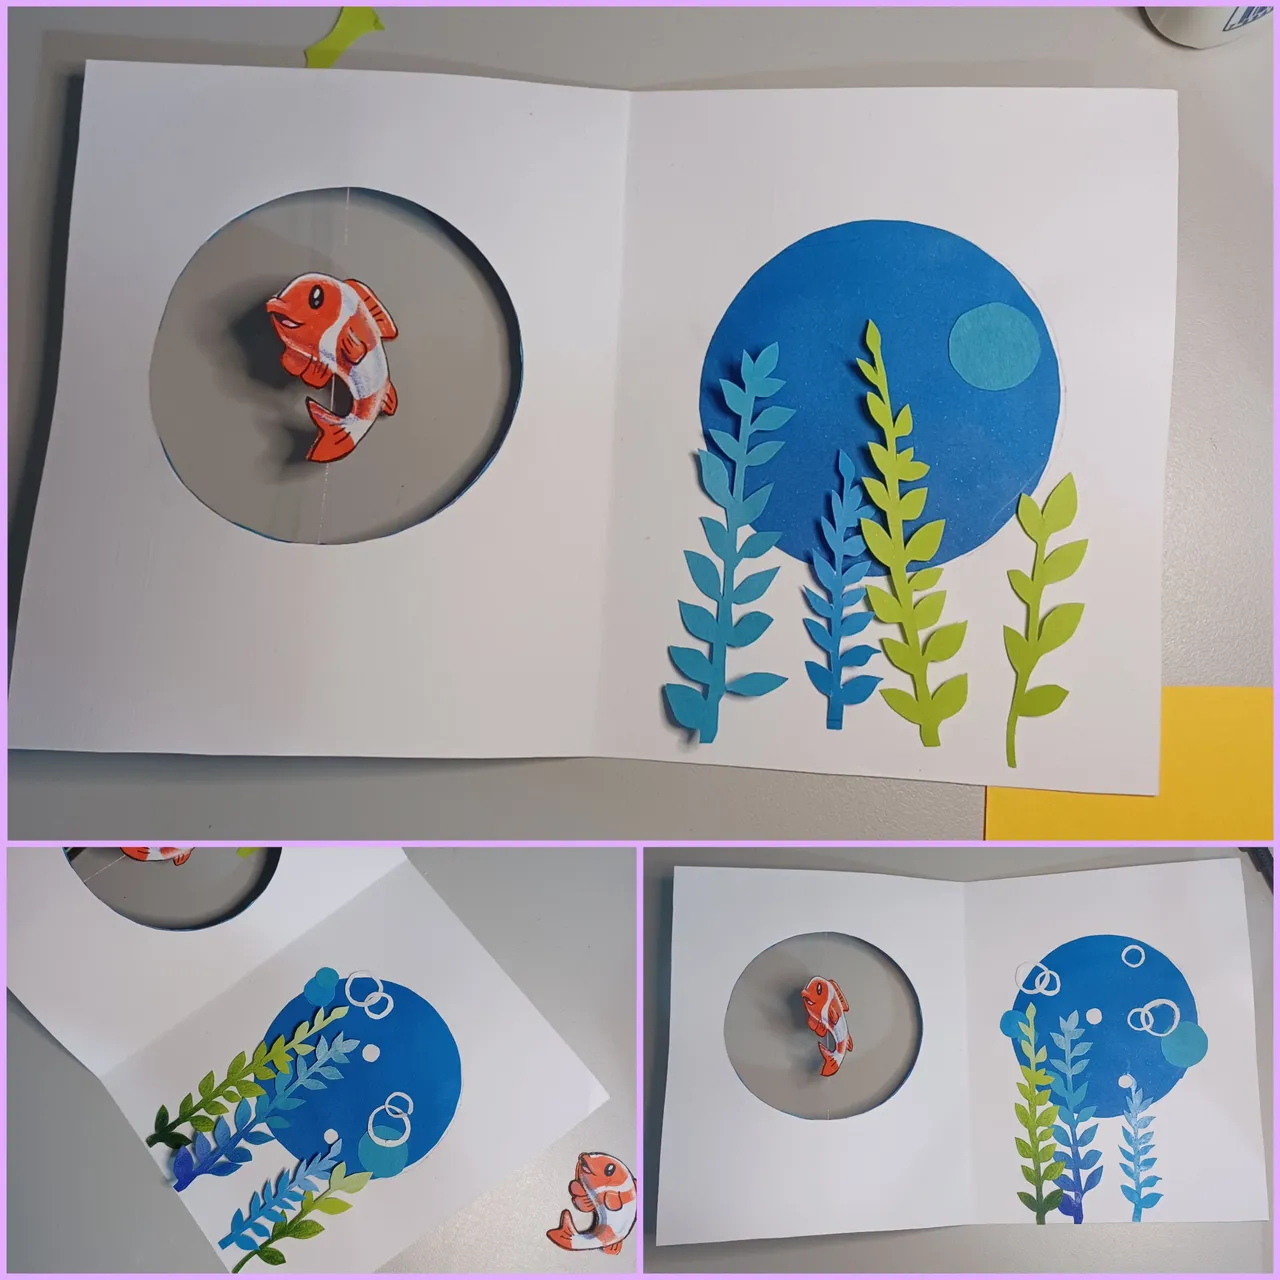
Lo siguiente fue decidir el motivo de esta tarjeta, como quería que fuera en su mayoría azul, quise que fuese un escenario marino, así que para el elemento giratorio del centro dibuje un pequeño pez dorado, para ello dibuje en una cartulina blanca la figura la cual corte doble para que obtener dos exactente iguales, luego los coloree con marcadores y colores de naranja y agregue los detalles con negro y algo de gris y azul para las sombras.
The next thing was to decide the motif of this card, as I wanted it to be mostly blue, I wanted it to be a marine scenery, so for the rotating element in the center I drew a small gold fish, for this I drew on a white cardboard the figure which I cut double to get two exactly the same, then I colored them with markers and orange colors and added the details with black and some gray and blue for the shadows.
Seguidamente sobre la cartulina azul marque alguna formar asemejanndo las olas del mar para colocar en la parte superior de la tarjeta y ocultar el hilo que sostendría en la mitad, en la cual posteriormente pegaría el pecesito, es importante tensar muy bien el hilo.
Then on the blue cardboard mark some form resembling the waves of the sea to place on top of the card and hide the thread that would hold in the middle, which would later paste the fish, it is important to tighten the thread very well.
Una vez pegue ambas caras del pecesito a la tarjeta, cencerro a decorar el interior, el cual sería un escenario submarino, justo en el área marcada con la circunferencia anteriormente pegue un círculo de cartulina azul, luego recorte algunas algas de cartulina azul y verde, también algunas burbujas y lo pegue todo alrededor del círculo.
Once you have glued both sides of the fish to the card, start decorating the inside, which would be an underwater scenery, just in the area marked with the circumference above glue a circle of blue cardboard, then cut out some seaweed from blue and green cardboard, also some bubbles and glue it all around the circle.
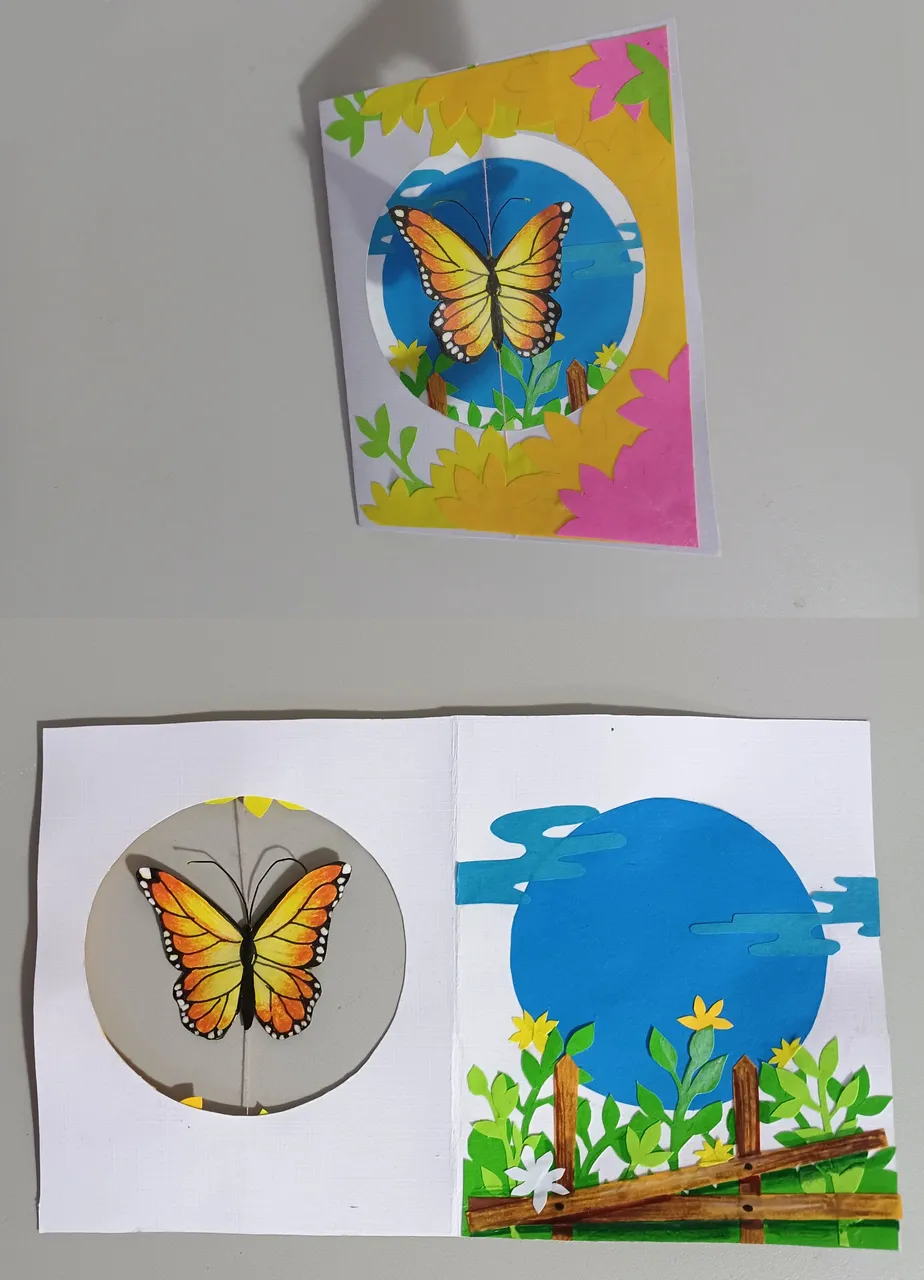
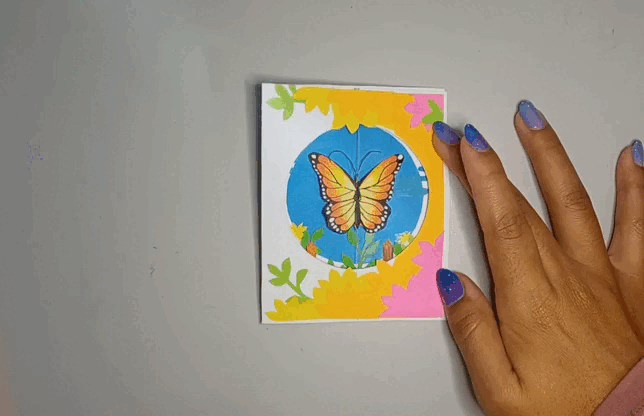
Para las siguientes tarjetas el procedimiento es el mismo, solo que modificando el motivo, la segunda idea fue esta mariposa, rodeada de florecitas, me gustó bastante además que la simetría en comparación con el primer motivo hace que el movimiento sea más prolongado y armónico.
For the following cards the procedure is the same, only modifying the motif, the second idea was this butterfly, surrounded by little flowers, I liked the symmetry in comparison with the first motif makes the movement more prolonged and harmonious.
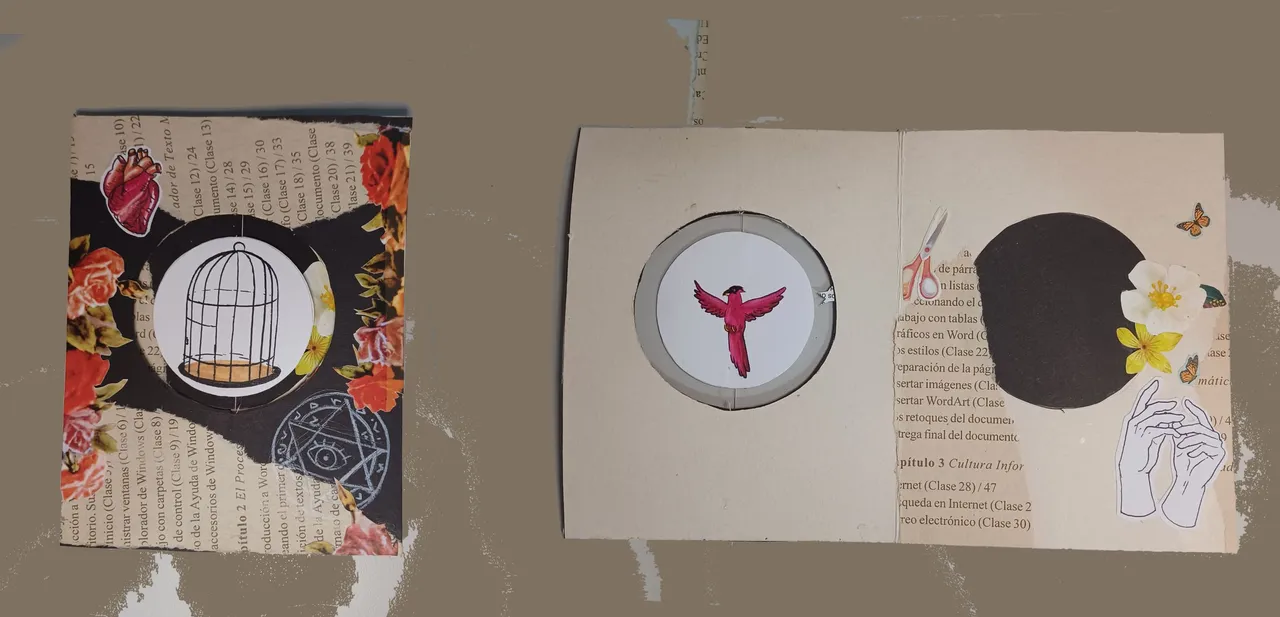
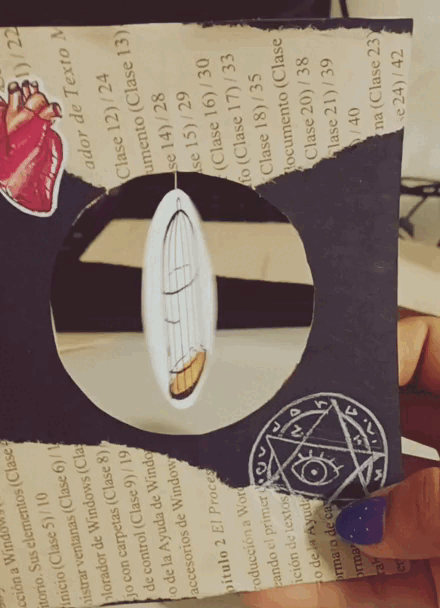
El tercer motivo esta inspirado en el collage y en el juguete mostrado en la película el Jinete sin cabeza (1999) el cual consiste en una jaula de un lado de un círculo y el otro un ave y al hacerlo girar se ve el ave entro de la jaula, siempre quise recrearlo y me pareció prefecto para esta tarjeta.... el resto de detalles del collage procure imitar la estética de la película.
The third motif is inspired by the collage and the toy shown in the movie The Headless Horseman (1999) which consists of a cage on one side of a circle and the other a bird and when you rotate it you see the bird inside the cage, I always wanted to recreate it and it seemed perfect for this card.... the rest of the details of the collage try to imitate the aesthetics of the film.
A continuación muestro el movimiento generado en cada una de las tarjetas, a todos lo que han leído hasta aquí les agradezco de corazón, espero que les haya gustado y que al igual que yo experimenten creando estas divertidas tarjetas, me imagino un sinfín de motivos! 😍🥰
Below I show the movement generated in each of the cards, to all who have read this far I thank you from the bottom of my heart, I hope you liked it and that like me you experiment creating these fun cards, I imagine endless motifs! 😍
¡Espero que les haya gustado esta publicación!
¡Muchas gracias por leer, hasta la próxima!
Hoping you liked this post!
Thank you very much for reading, see you next time!