I have had for a long time a piece of fabric printed with very striking red flowers. On another occasion I used it as a lining for a purse, and it turned out great because it is very attractive to open the purse and see a fabric like that, it shows that it was made with love. .
Well, today I want to make some bows for a girl, since the fabric is floral and fits very well with the colors of a girl, I have visualized it like this.
This is my first post from InLeo and I want to present the DIY of these Bows for girls, made with two strips...welcome.
Tengo desde hace mucho tiempo, un retazo de tela estampada de flores rojas muy llamativa, en otra ocasión la usé como forro para una cartera, y resultó genial porque es muy atractivo abrir la cartera y ver una tela así, denota que fue hecha con amor.
Bueno, hoy quiero realizar unos lazos para niña, ya que la tela es de flores y se ajusta muy bien a los colores de una niña, lo he visualizado así.
Esta es mi primera publica desde InLeo y quiero presentarle el Diy de estos Lazos para niñas, realizados con dos tiras...bienvenidos.
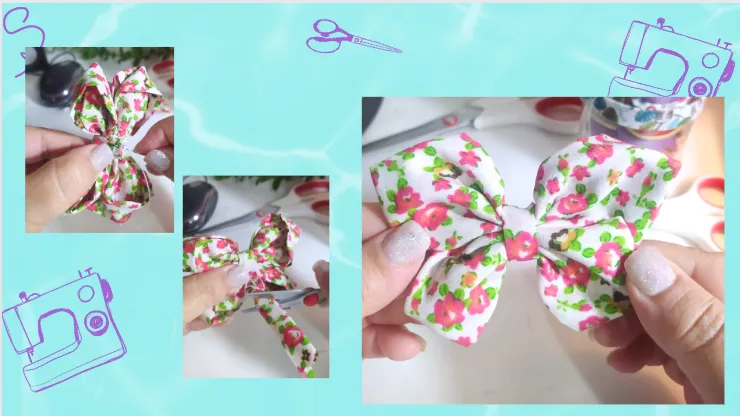
There are many techniques to make bows, the one I present to you today is two strips, with only two strips we will make a beautiful bow for girls that will end up with points. I am sure that once you see the technique, you will realize that each bow is different.
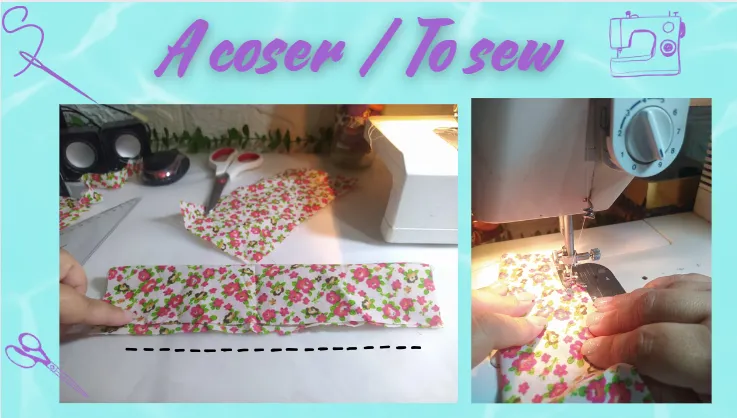
Let's start with the materials and follow the step by step with a very detailed infographic, and a gif to better explain the movement of the fabric.
Existen muchas técnicas para elaborar lazos, la que les presento hoy es de dos tiras, con solo dos tiras realizaremos un hermoso lazo para niñas que va a quedar con puntas. Se aseguro que una vez que veas la técnica, te darás cuenta que cada lazo es diferente.
Comencemos con los materiales y seguido el paso a paso con una infografía muy detalla, y un gif para explicar mejor el movimiento de la tela.

- Retazo de tela
- Máquina de coser
- Alfileres
- Regla
- Tijera y bolígrafo
- Pistola de silicón caliente
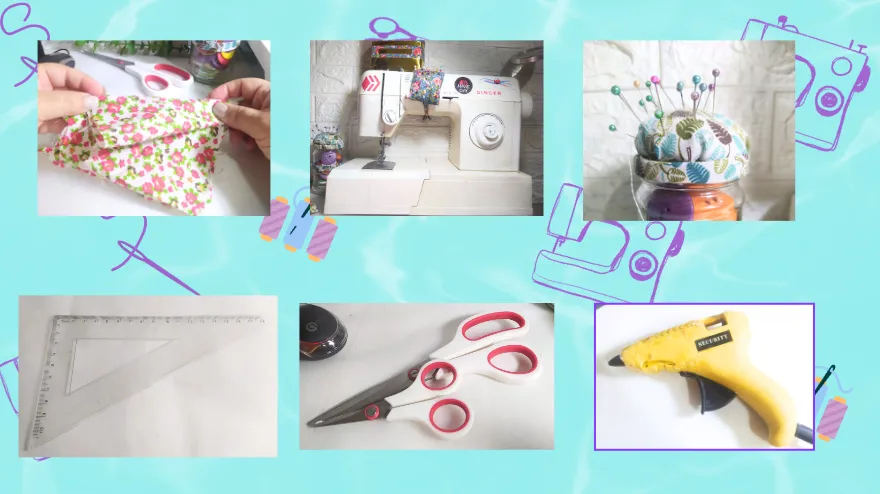
- Piece of cloth
- Sewing machine
- Pins
- Ruler
- Scissors and pen
- Hot glue gun

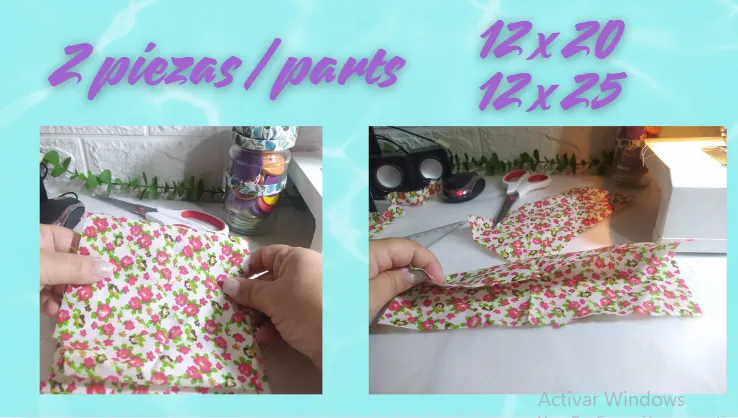
We will begin working on the piece of fabric, cutting the two pieces with the measurements indicated below.
Comenzaremos trabajando el retazo de tela, cortando las dos piezas con las medidas señaladas a continuación:
We sew along the pieces of fabric, with a straight seam on a sewing machine. However, you can do this project by hand, with very neat sewing the result will still be achieved.
I really like using my sewing machine, I don't know why I don't spend more time on it, I really spend very pleasant moments with it and when I finish a project it is very satisfying. Lately I have been using it only to repair things in my house, but I want to dedicate more time to it, that is why you will see that I will create more content related to sewing on my blog.
Cosemos a lo largo de las piezas de tela, con costura recta a máquina de coser. Sin embargo, este proyecto lo puedes realizar a mano, con una costura muy prolija alcanzará igualmente el resultado. Esto lo repito en la otra pieza.
Me gusta mucho usar mi máquina de coser, no se por qué no le dedico más tiempo, en ella realmente paso momentos muy agradables y cuando termino un proyecto es muy satisfactorio. Últimamente la estoy usando solo para repara cosas en mi casa, pero quiero dedicarle más tiempo, es por eso que verán que crearé mas contenido referente a la costura en mi blog.
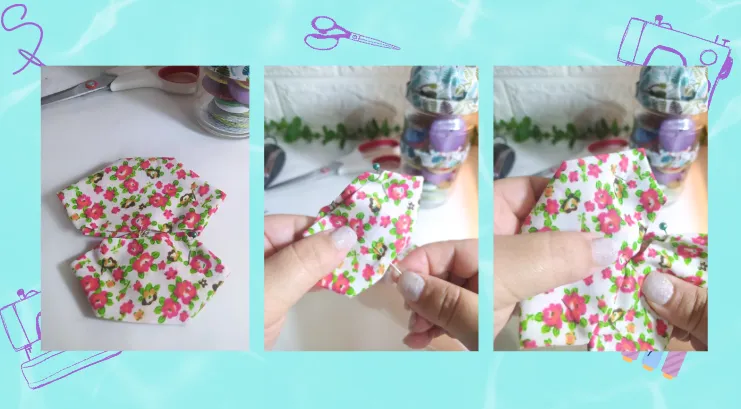
Once we have the two pieces sewn lengthwise, we proceed to turn it over.
Ya al tener las dos piezas cosidas a lo largo, procedemos a voltearla.
This is how the turned pieces look. We are going to flatten them or iron them with our hands, preferably leaving the seam in the center of each piece, so that it does not hinder the design of the bow.
Así lucen las piezas volteadas, las vamos a aplanar o planchar con las manos puede ser, dejando preferiblemente la costura en el centro de cada pieza, esto con la finalidad de que no entorpezca el diseño del lazo.

Now, I overlap the ends of each piece and sew them by hand. It is a simple seam and we leave the pieces equally with the seam in the center.
Ahora, sobrepongo las puntas de cada pieza y las coso a mano. Se trata de una costura simple y dejamos las piezas igualmente con la costura en el centro.
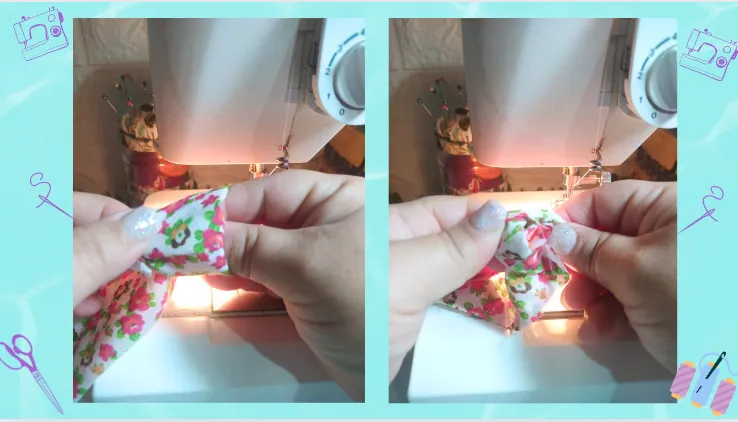
This step is perhaps the most careful and I present it to you in gifs so you can appreciate it. I turn the center piece over and place it in the same place, making sure to accommodate the ends and the pointed figure that is formed.
It's really easy.
Este paso es tal vez el de mayor cuidado y se los presento en gifs para que lo aprecien. La pieza central le doy la vuelta y la coloco en el mismo lugar, asegurándome de acomodar bien los extremos y la figura en punta que se forma.
Es muy fácil realmente.
I secure the tips that form at the ends of each piece with pins as seen in the following photo.
Las puntas que se forman en lo extremos de cada pieza, las aseguro con alfileres tal como se ve en la siguiente foto.
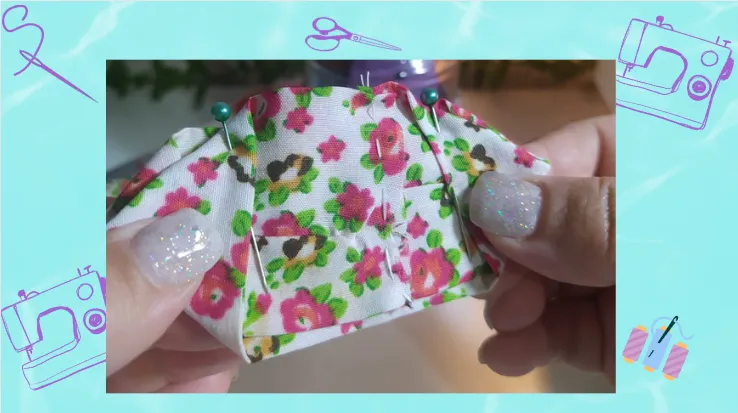
We can see that both pieces have a slight difference due to the measurements, they are already formed with the tips, and now with hand sewing I am going to go through the entire half of each one, joining them.
Ambas piezas las podemos apreciar que tienen ligeramente su diferencia por las medidas, ya están formadas con las puntas, y ahora con costura a mano voy a pasar por toda la mitad de cada una, juntándolas.

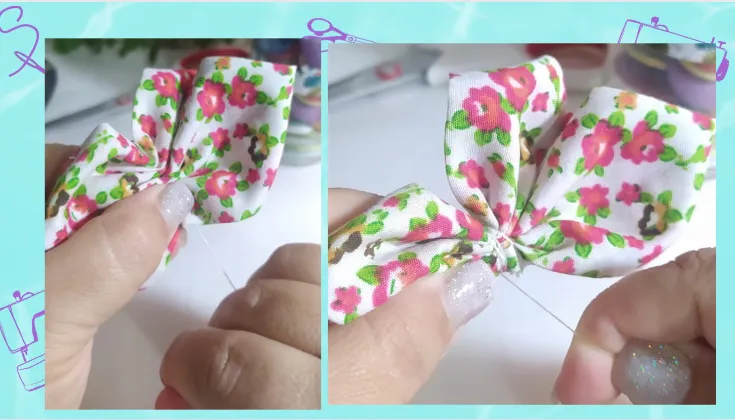
Here you can see how after putting them together well, I make sure they are tight, I turn the loop with the thread several times, and I make a safety stitch to finish this process well.
Aquí se ve como después de juntarlas bien, me aseguro que estén bien apretadas, le doy varias vueltas al lazo con el hilo, y realizo una puntada de seguridad para terminar bien este proceso.
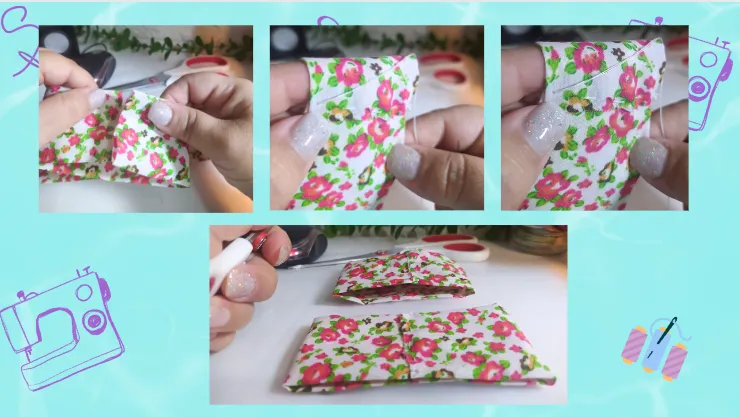
Now, with a piece of fabric, even if it has been left over from the cuts, I take a strip of approximately 6 cm by 3 cm, I fold it and turn it around starting from the back and ending right there with safety stitches.
Ahora, con un trozo de tela, incluso ha sido sobrante de los cortes, tomo una tira de 6 cms por 3 cms aproximadamente, la doblo y doy vueltas empezando por detrás y terminando ahí mismo con puntadas de seguridad.
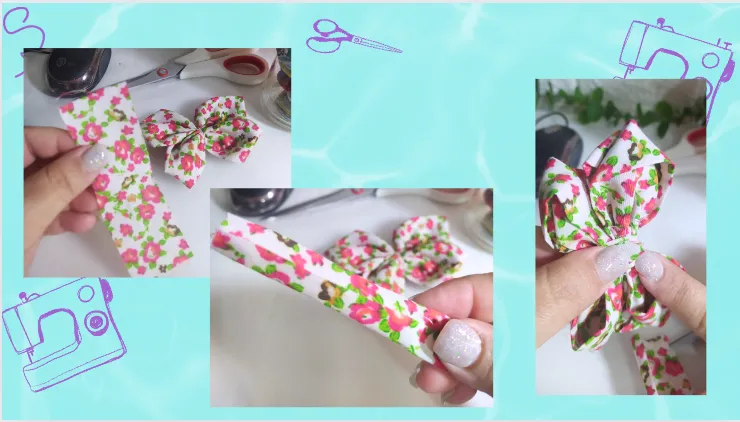
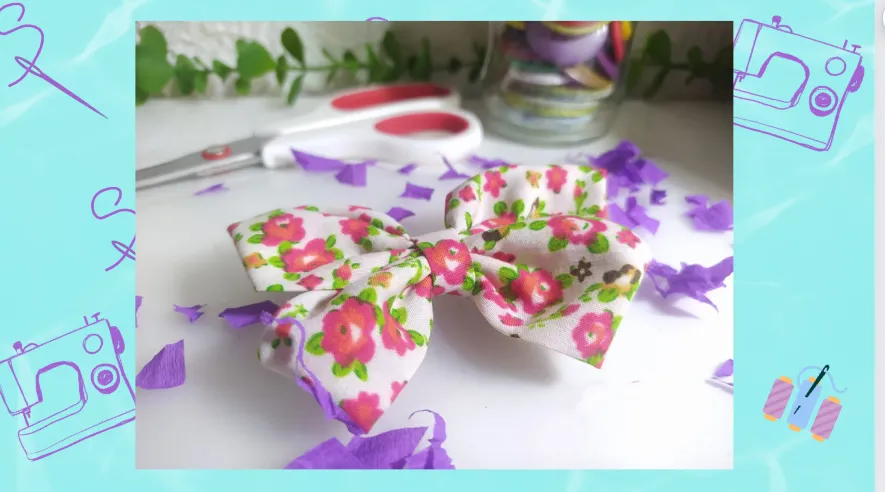
The bow is ready, it looks really beautiful and you can see the four-point design.
At this point I hadn't decided which clamp I was going to attach the bow to, but I already thought about it.
Ya está listo el lazo, se ve realmente hermoso y se puede apreciar el diseño que es de cuatro puntas.
En este punto no había decidido sobre que pinza iba a colocar el lazo, pero ya lo pensé bien.

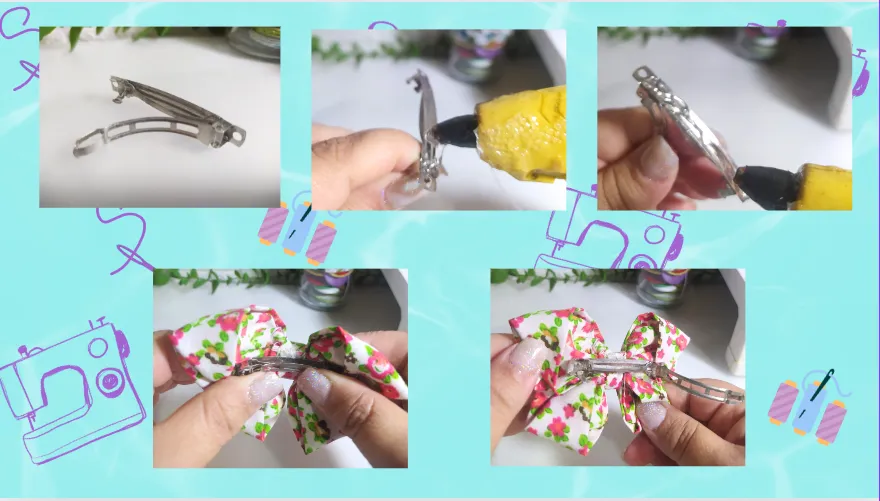
Well, since this bow is for girls I decided to use a snap clip as it will more ensure it stays in the hairstyle.
I take the clamp and place hot silicone on the smooth side and glue it to the back of the bow, ensuring that it sticks well by applying pressure with my fingers.
This fabric-silicone-clip combination is really very strong, I don't need to have put the fabric inside the clip like in other pieces or models. In fact, I tried to take it off to check how it behaves and the adhesion was quite strong.
Bueno, dado que este lazo es para niñas decidí usar una pinza de presión, ya que garantizará más que permanezca en el peinado.
Tomo la pinza y por el lado liso le coloco silicón caliente y lo pego por la parte de atrás del lazo, asegurando que mediante la presión con mis dedos, quede bien pegado.
Realmente esta combinación de tela-silicón-pinza queda muy fuerte, no necesito haber metido la tela por dentro de la pinza como en otras piezas o modelos. De hecho, traté de despegarla para revisar como se comporta y fue bastante fuerte la adherencia.
We can repeat the bow and design to make a pair, and it is ready to give as a gift or sell. It depends on the fabric and if you have followed the tutorial well, you can guarantee the quality of this product.
Podemos repetir el lazo y diseño para realizar un par, y ya queda listo para obsequiar o vender. Depende de la tela y de haber seguido bien el tutorial, puedes garantizar la calidad de este producto.
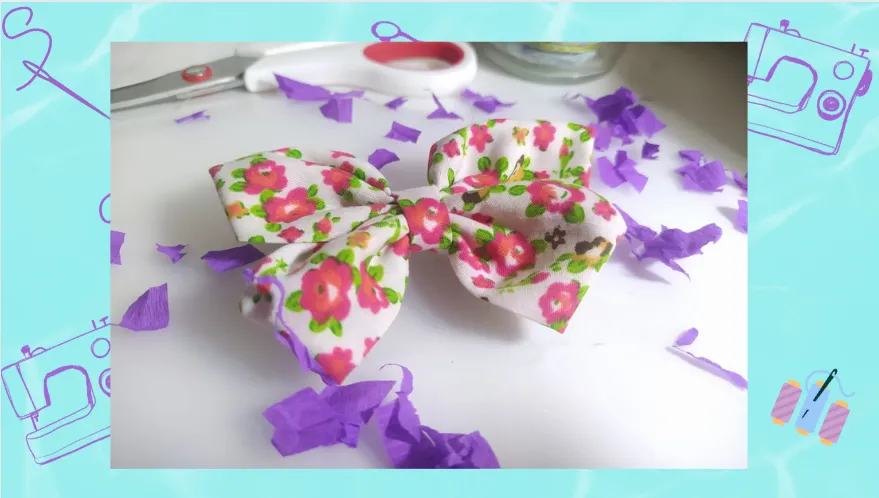
I hope you liked this Tutorial, I guarantee that it will have a very firm structure and a very beautiful and commercial four-point design.
See you in a future publication.
Deseo que te haya gustado este Tutorial, te garantizo que queda con una estructura muy firme y con un diseño de cuatro puntas muy hermoso y comercial.
Nos leemos en una próxima publicación.

Las fotos las tomé con mi teléfono Redmi Note 8
Apps que utilicé:
Canva Pro para la Portada, gifs, collage y banner
Utilicé el Traductor Deepl
Mi redes sociales:
Discord: YennysYaneth#0189
Twitter: @yennysferm
Instagram: @yennysyaneth
I took the photos with my phone Redmi Note 8
Apps I used:
Canva Pro for Cover, gifs, collage and banner
I used Deepl Translator
My social networks:
Discord: YennysYaneth#0189
Twitter: @yennysferm
Instagram: @yennysyaneth