
Yesterday I needed a Pendrive to save some movies that my brother was going to give me, I asked my daughter because I know that she recently bought one, and you can't imagine the turns she did to look for it, because it is a very nice Pendrive and with good capacity as she wanted it when she bought it, but that is a very small thing that she did not remember if she kept it in her wallet, in her pencil case, in a drawer, she checked external and internal pockets of her wallets, until she got it. Here I show you the pendrive:
Ayer necesitaba un Pendrive para guardar unas películas que mi hermano me iba a pasar, le pedí a mi hija porque se que ella recientemente se compró uno, y no se imaginan las vueltas que dio para buscarlo, porque es un Pendrive muy lindo y con buena capacidad como ella lo quería cuando lo compró, pero eso es una cosa muy pequeña que ella no recordaba si lo guardó en su billetera, en su cartuchera, en una gaveta, es que revisó bolsillos externos e internos de sus carteras, hasta que lo consiguió. Aquí les muestro el pendrive:
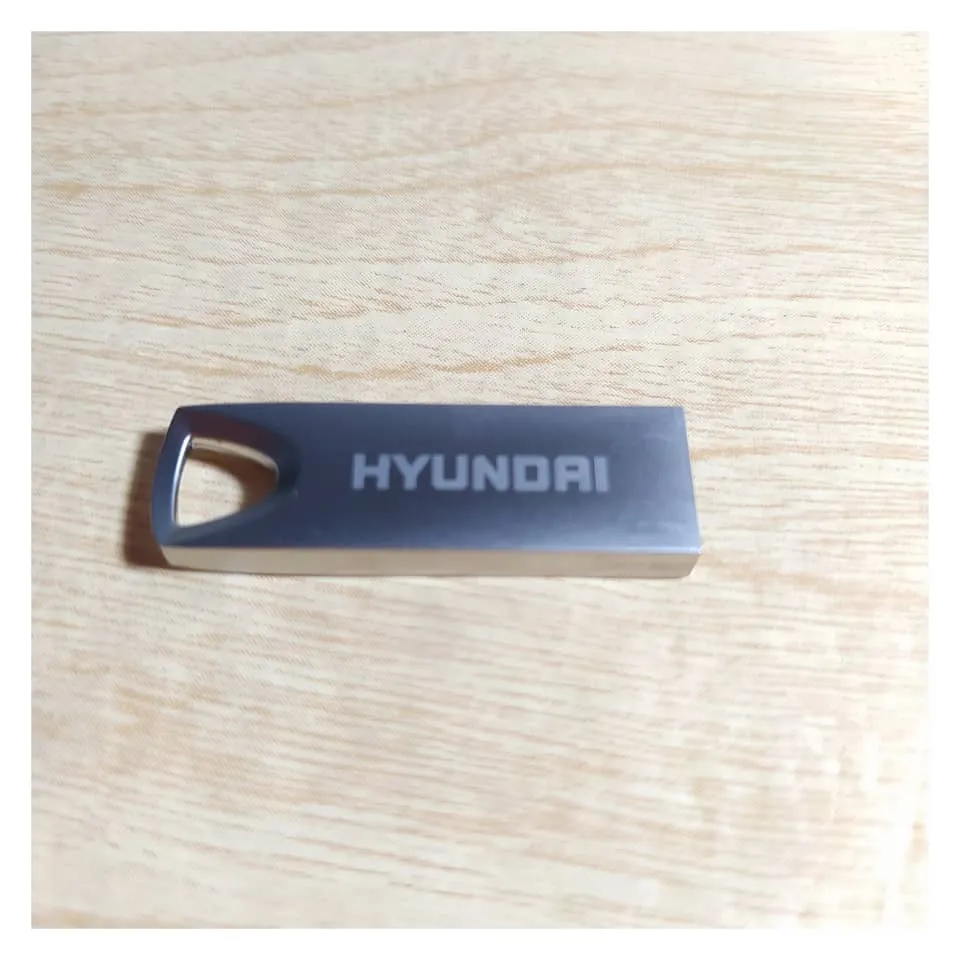
As you can see it really is very small and compact. Then, it occurred to me to make a small bag that is intended only to carry the pendrive, and additionally something like a pendant to make it even more visible, so today I show you this new Utility I made. You may think that I must have a thousand bags for everything, but really my bags always find an owner who falls in love with them and I always end up giving them away.
Well, I invite you to watch this Tutorial that has a lot of infographics, but it is really something that is done very, very fast. So, let's get started:
Como pueden ver realmente es muy pequeño y compacto. Entonces, se me ocurrió hacer un pequeño bolso que esté destinado únicamente a llevar el pendrive, y adicionalmente algo así como un colgante para que sea más visible aún, así que hoy les muestro este nuevo Utilitario que hice. Uds pensaran que debo tener mil bolsitos para todo, pero realmente mis bolsitos siempre consiguen un dueño que se enamora y siempre termino regalándolos.
Bueno, les invito a ver este Tutorial que tiene mucha infografía, pero que realmente es algo que se hace muy, muy rápido. Así que, empezamos:


- Sewing machine, thread, pins and scissors.
- Ruler and pen
- Piece of fabric
- Bias tape
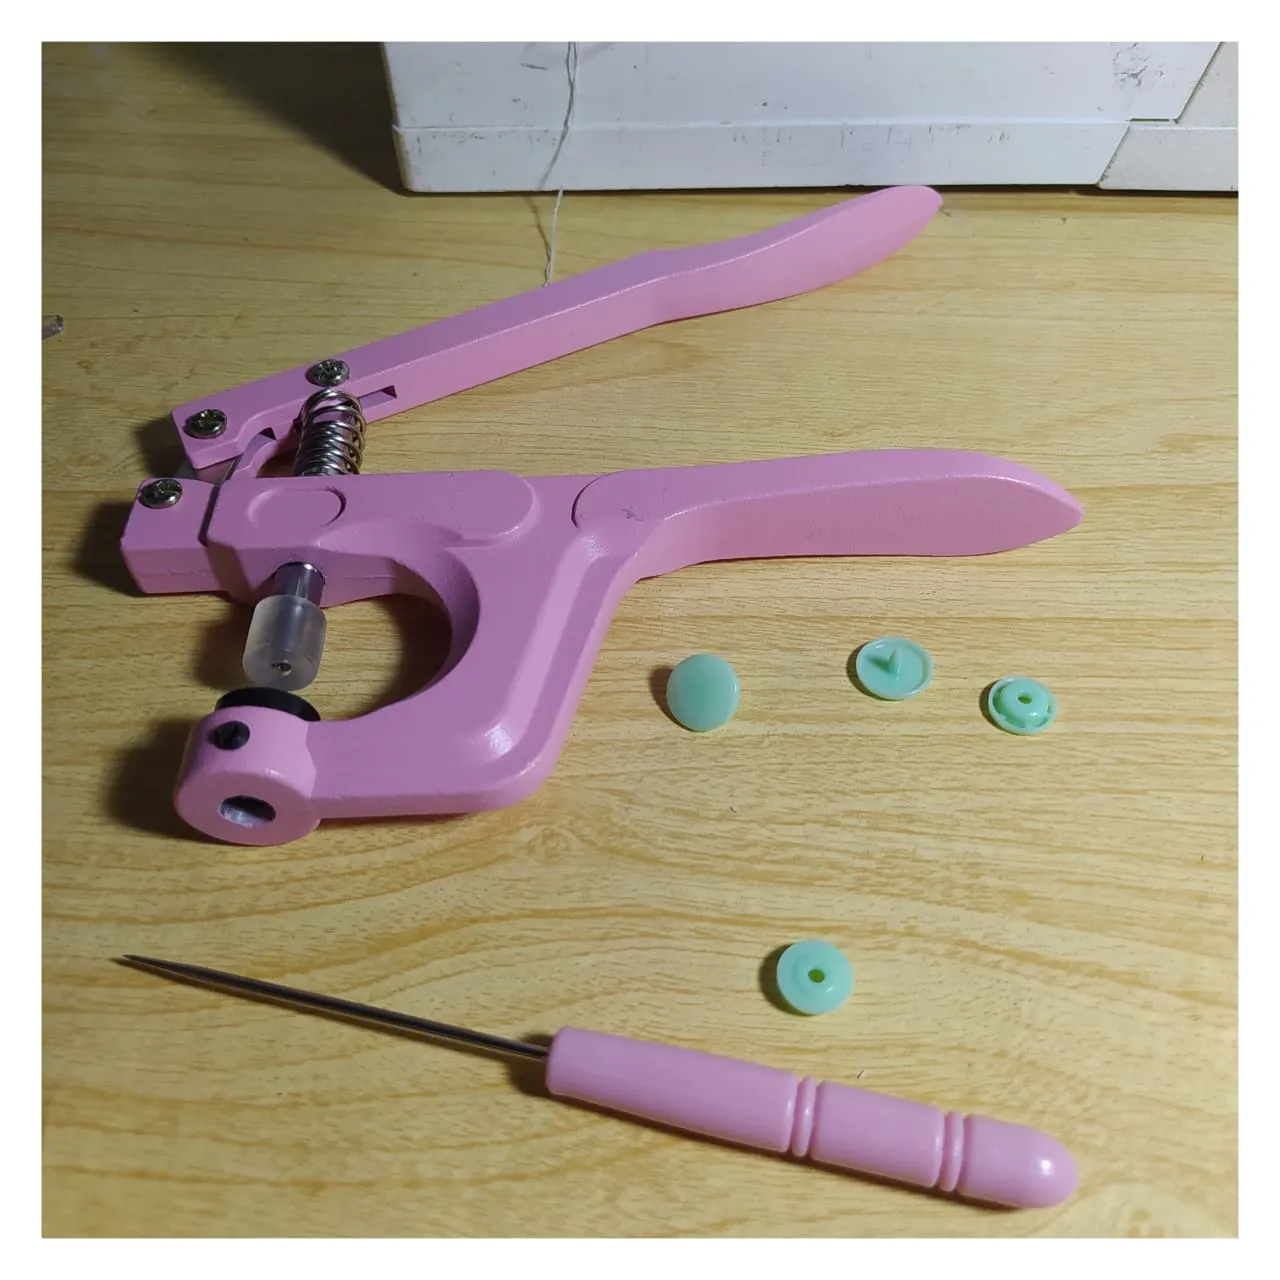
- Plastic pins, awl and pliers.
- Keychain hook, stones and mouse tail ribbon * Decorative accessories
- Decorative accessories
- Máquina de coser, hilo, alfileres y tijera.
- Regla y bolígrafo
- Tela un trozo
- Cinta al bies
- Broches de plástico, punzón y alicate
- Gancho para llavero, piedras y cinta rabo de ratón
- Accesorios decorativos

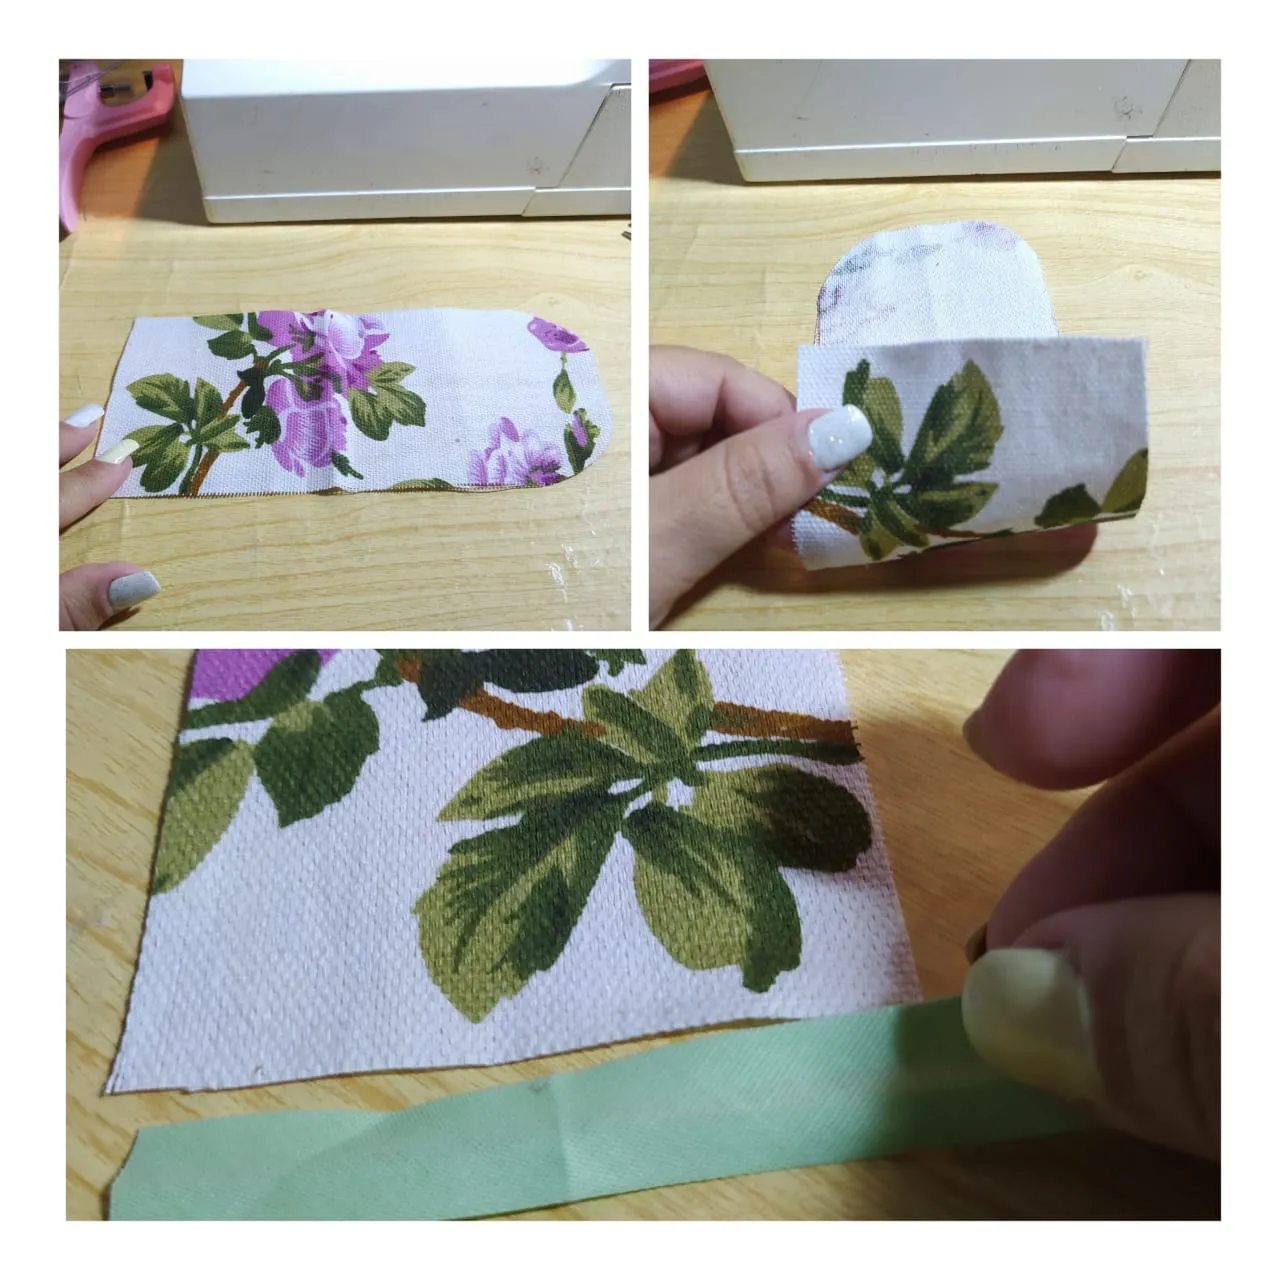
With the piece of fabric I chose, which is actually very small, it's from scraps of other projects or crafts that I keep. I marked it with a square and pen to make sure it wasn't a little off center.
For this design the fabric rectangle measured 20cms by 8cms. I pinned and trimmed.
Con el trozo de tela que escogí y que realmente es muy pequeña, es de retazos de otros proyectos o manualidades que guardo. Marqué con una escuadra y bolígrafo para garantizar que no quede algo descuadrado.
Para este diseño el rectángulo de tela midió 20cms por 8cms. Fijé con alfileres y recorté.

With a round element, I used a cone of thread, I formed the curved corner at one end of the fabric. I folded the fabric to mark the other corner on the same side and trimmed them to match. I did this on only one end of the fabric.
Con algún elemento redondo, yo utilicé un cono de hilo, formé la esquina en curva en uno de los extremos de la tela. Doblé la tela para marcar la otra esquina de ese mismo lado y los recorté así para que quedaran iguales. Esto lo hice solo en un extremo de la tela.

This is the shape I got. On the straight end, I apply the bias tape.
Esta es la forma que conseguí. En el extremo que quedó recto, aplico la cinta al bies.
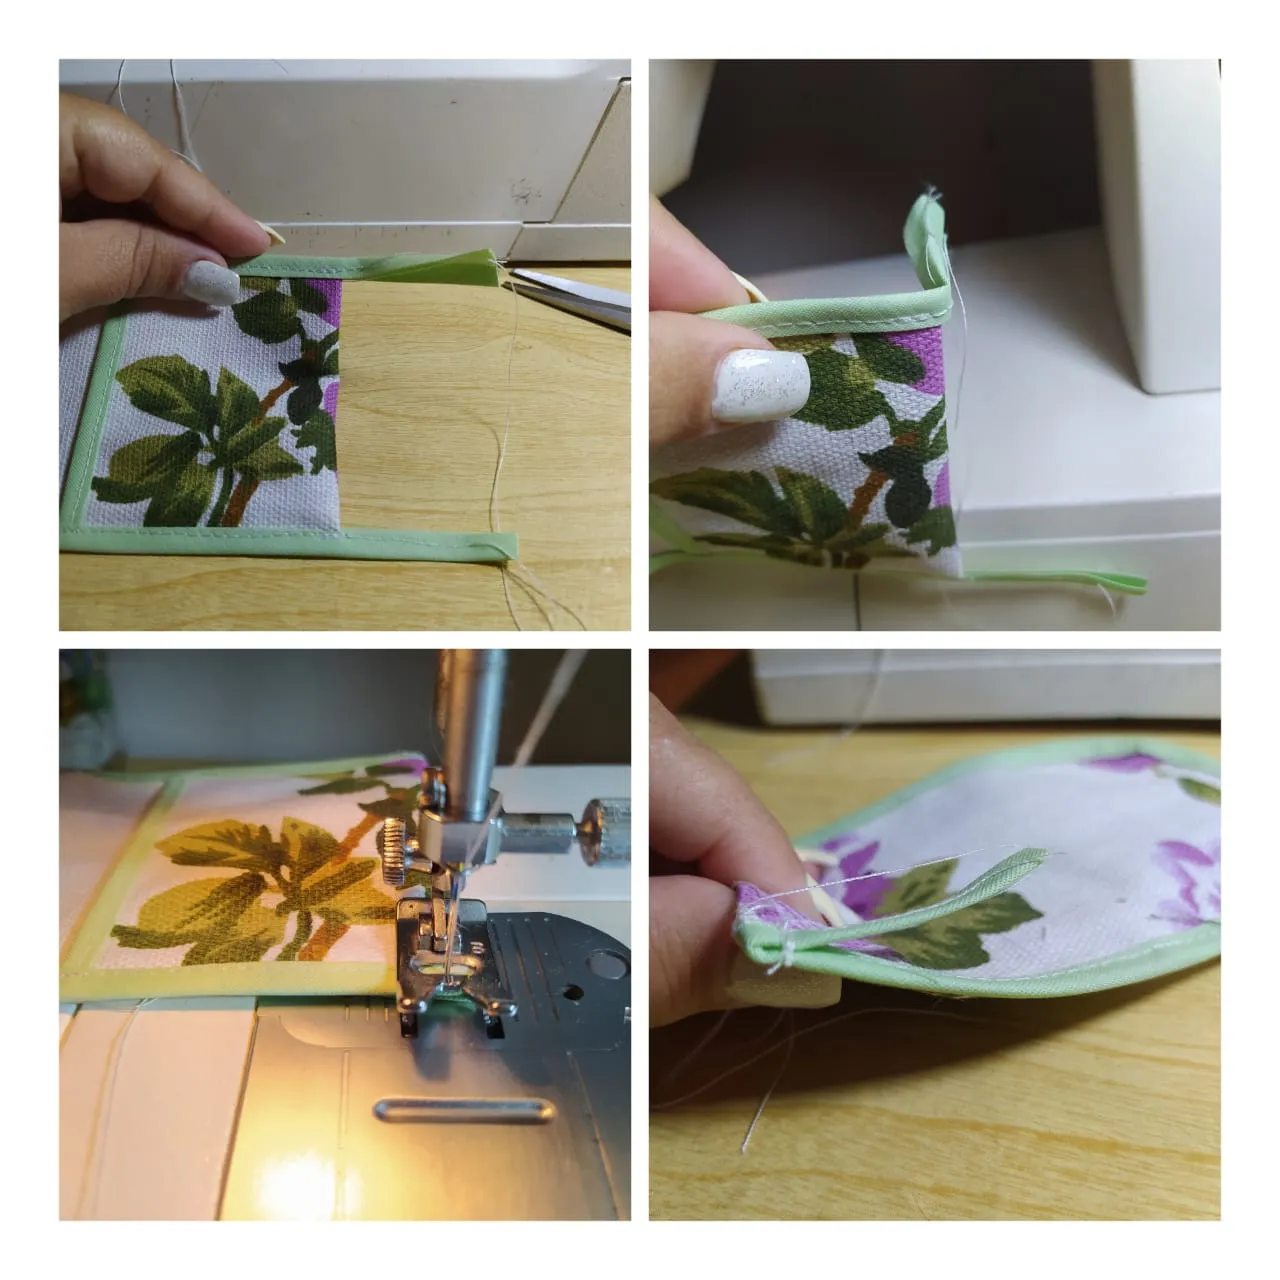
Since this project is so small, I didn't open the bias tape, I sewed it by folding it over, let the sewing machine run a little with it, and then simply inserted the straight edge of the fabric piece, sewed with straight stitching and when finished I cut off the excess.
Dado que este proyecto es tan pequeño, no abrí la cinta al bies, la cosí doblándola, dejo que corra un poco la máquina de coser con ella, y luego simplemente introduje el borde recto de la pieza de tela, cosí con costura recta y al terminar corté lo excedentes.
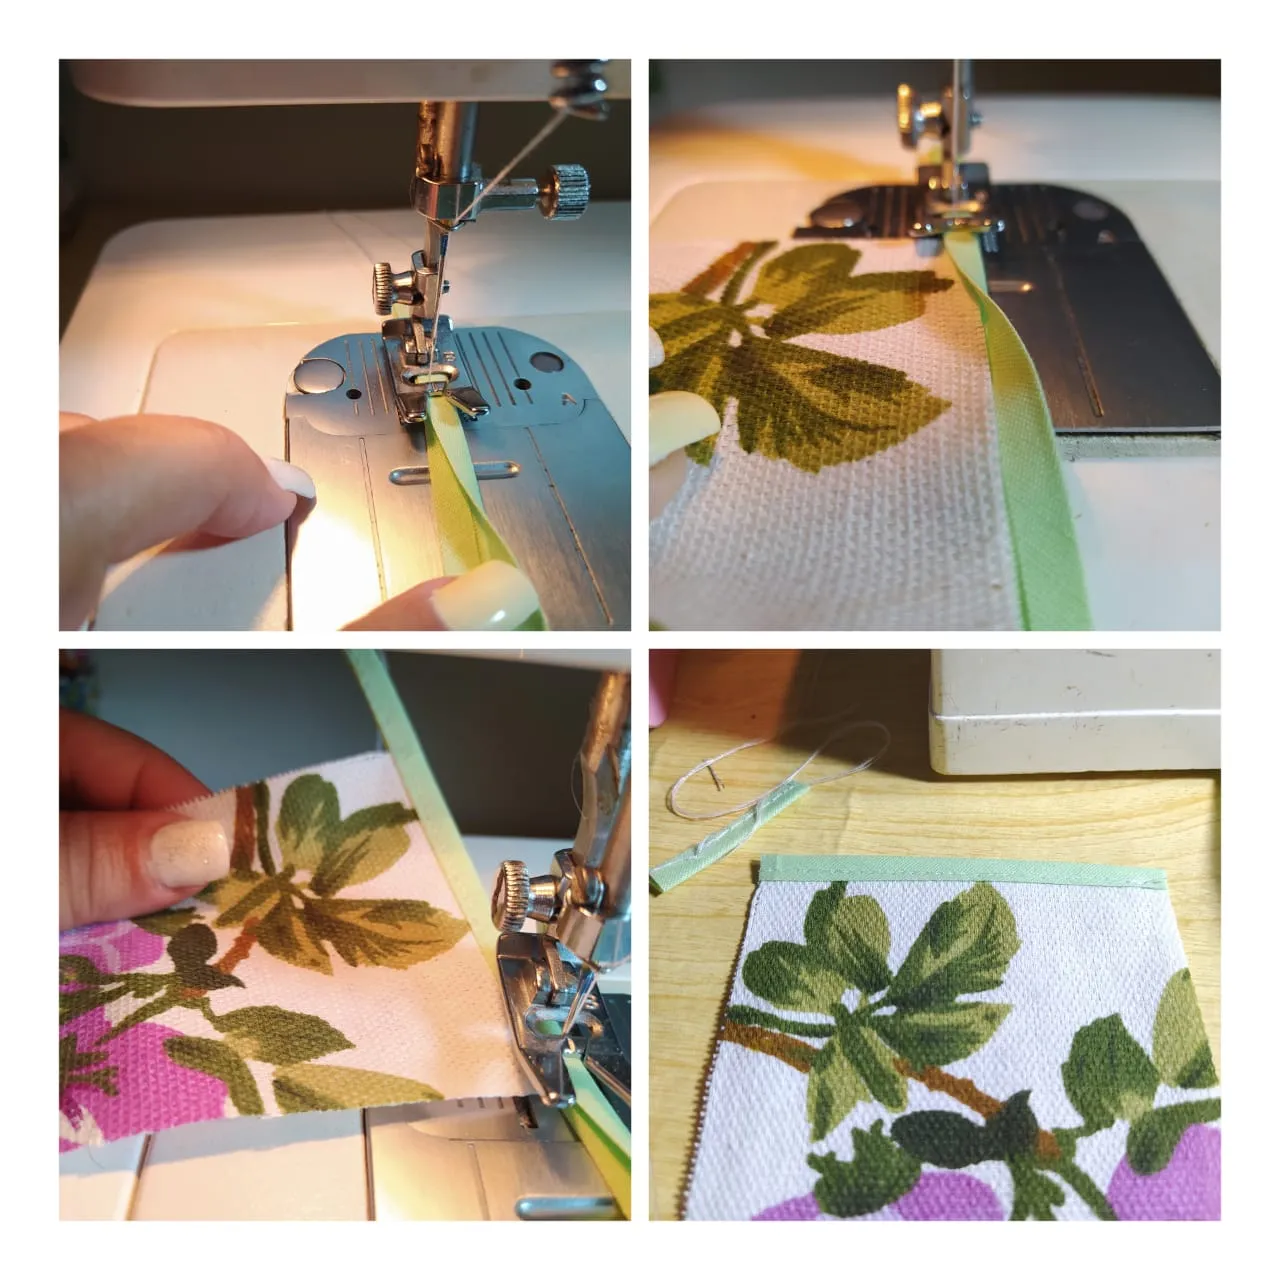
Here I show you the shape that this little bag is going to have. I folded the fabric at the straight end, and I'm going to apply bias tape again from the bottom end of one side to the other side. Very easy and quick.
Aquí les muestro la forma que va a tener este pequeño bolsito. Doblé la tela en el extremo recto, y voy a aplicar nuevamente cinta al bies desde la punta inferior de un lado, hasta el otro lado. Muy fácil y rápido.

So I quickly sew the bias binding, taking care in the curve so that it grips the fabric well, and continue to finish.
Así que coso rápido el bies teniendo cuidado en la curva para que agarre bien la tela, y sigo hasta terminar.
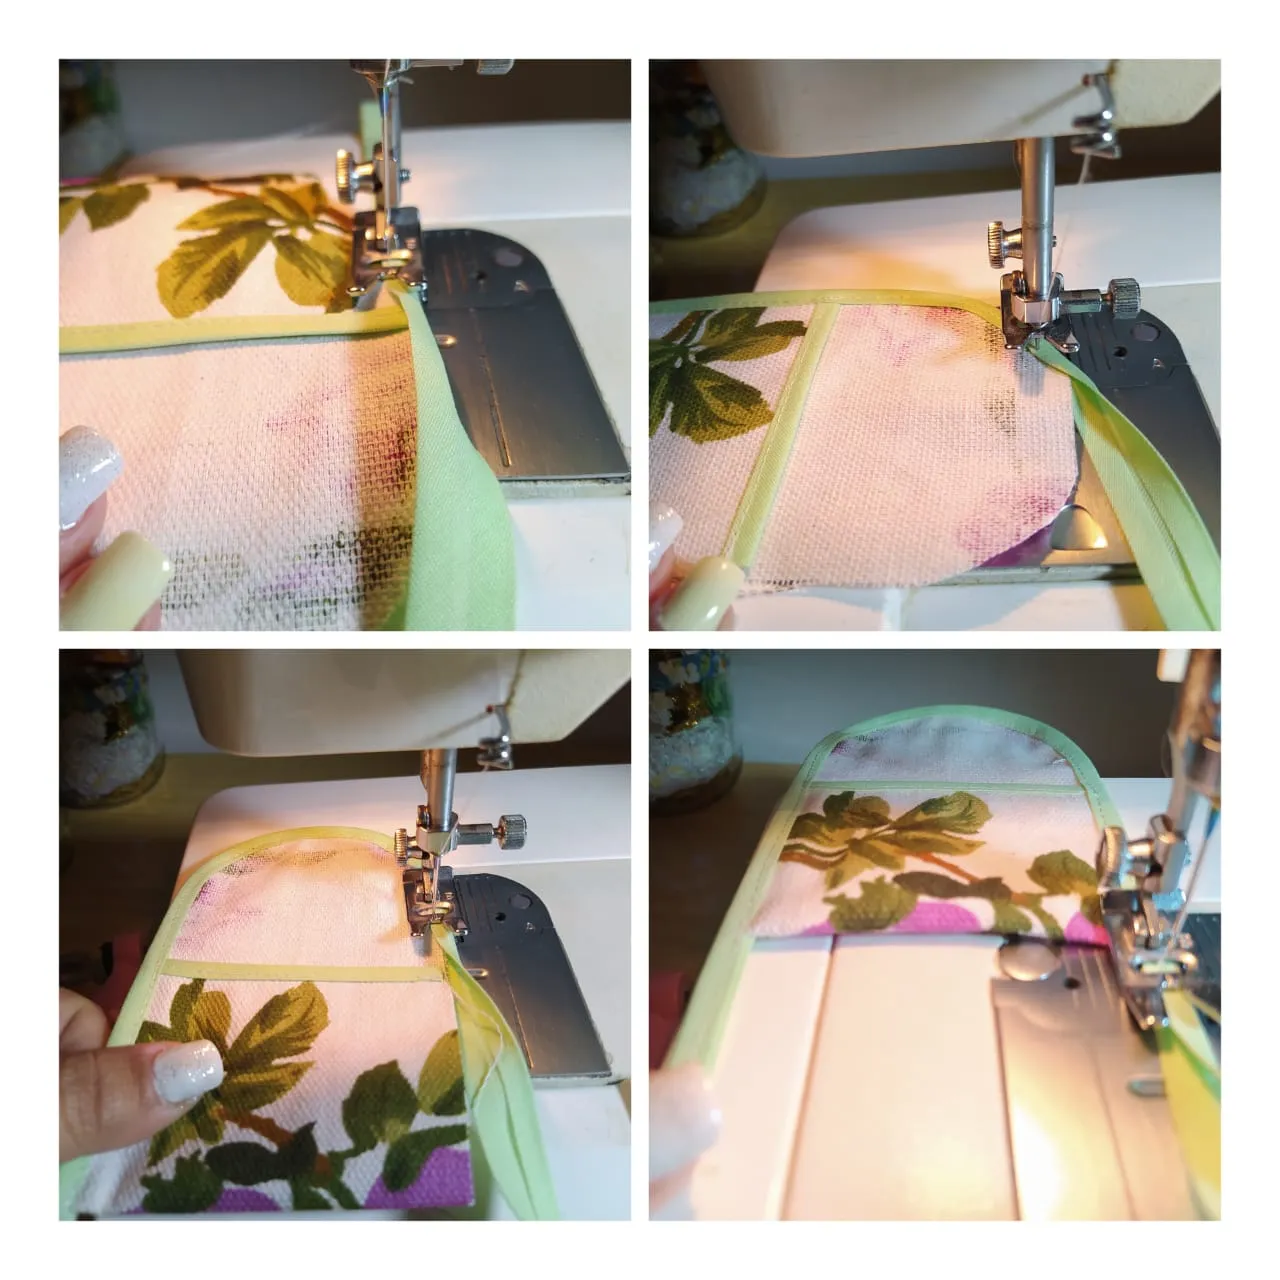
The beginning end of the bias binding I fold it to the back of the piece and sew it with a straight stitch as well, to give it a better finish than if I just cut it.
El inicio fin del bies lo doblo hacia atrás de la pieza y lo coso con puntada recta también, para darle una mejor terminación que si simplemente lo cortara.
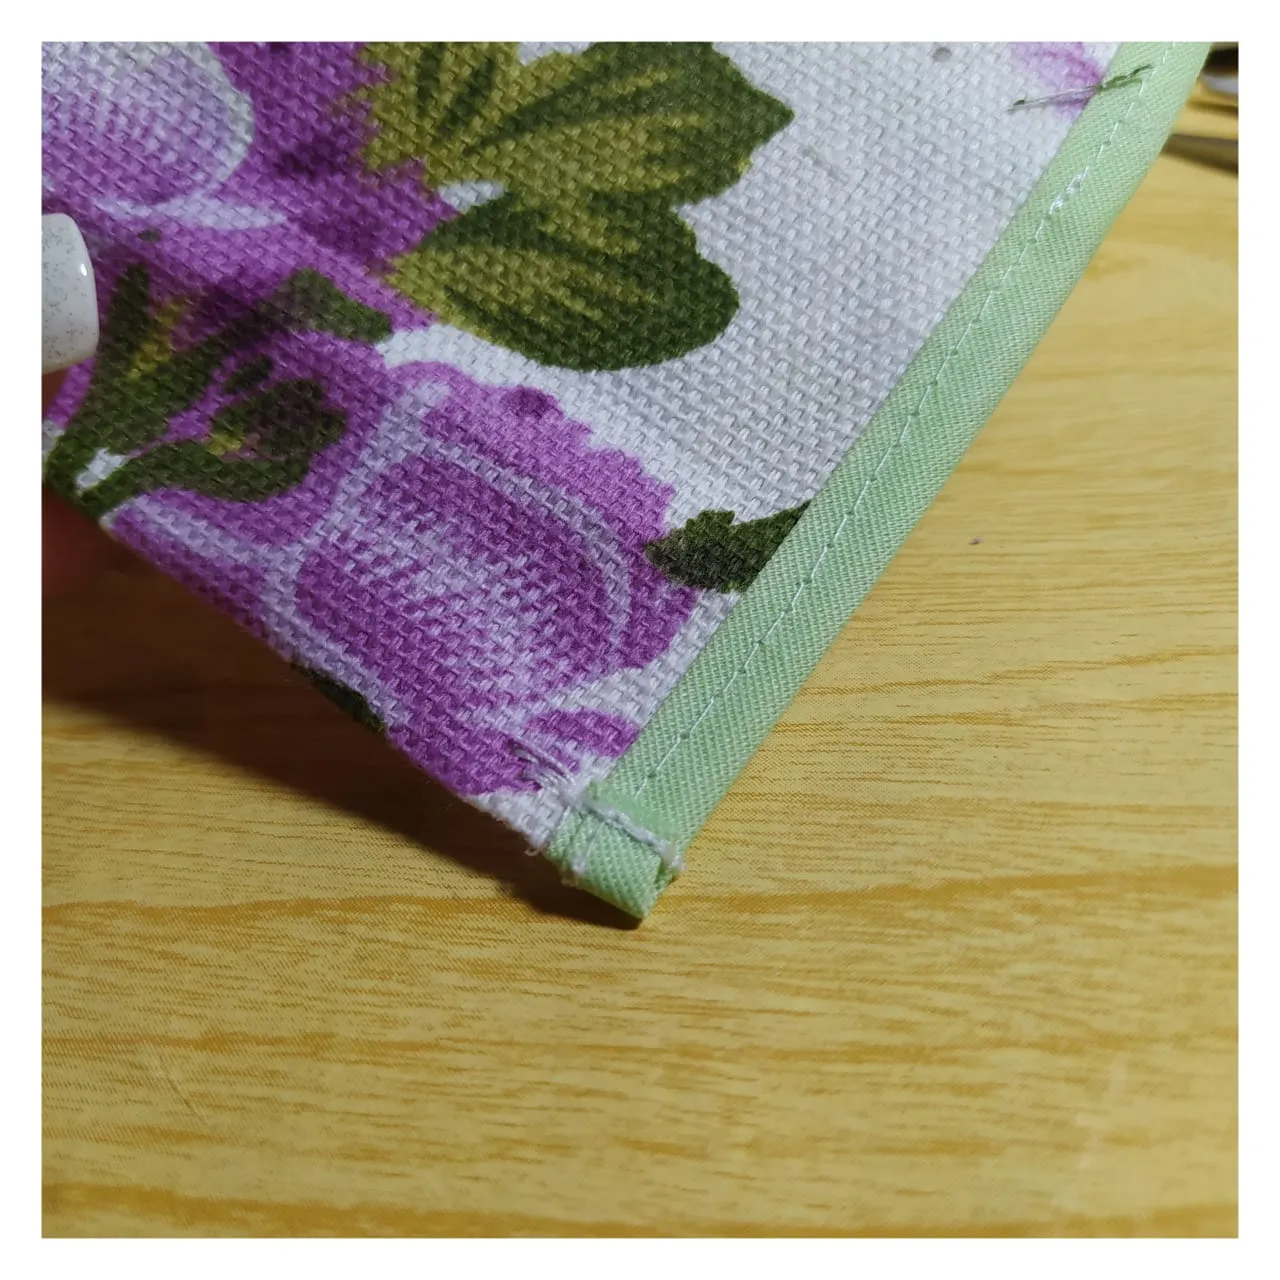
After stitching, I cut off the excess and this way it is well finished.
Luego de la costura, corto el excedente y así queda bien acabado
Now I'm going to place some plastic clips, if you don't have them you can replace them with a small piece of Velcro tape.
Ahora voy a colocar unos broches de plástico, si no tienes puedes sustituirlo por un trocito de cinta velcro.
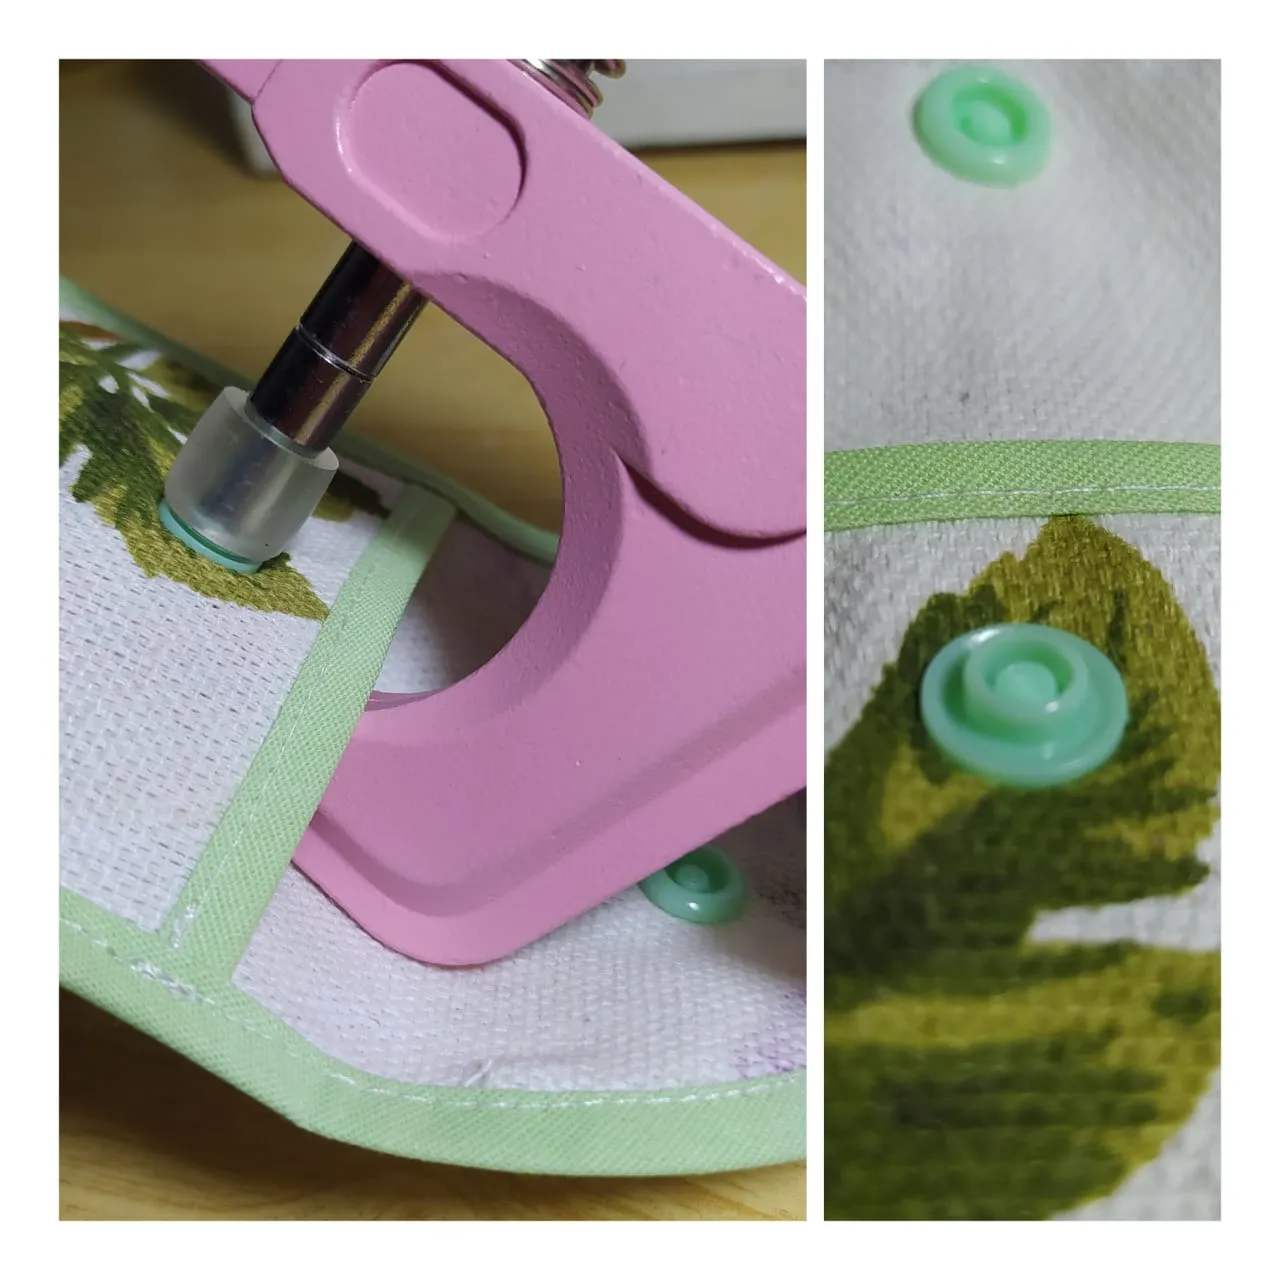
I determine the center of the flap, place the clasp with the tip on the outside, and on the inside I place the other piece, then press with the pliers.
Determino el centro de la solapa, coloco el broche que tiene la punta por la parte externa, y por el lado interno coloco la otra pieza, luego presiono con el alicate.

It looks like this, it no longer has the tip.
Queda de esta forma, ya no tiene la punta.

I observe well where I must place the other brooch so that it closes, I pierce with the punch, I place the one with the tip from the inside so that the tip comes out and I place the other piece of the brooch.
Observo bien donde debo colocar el otro broche para que cierre, perforo con el punzón, coloco el de la punta desde el lado de adentro para que la punta salga hacia afuera y coloco la otra pieza del broche.

Again I press with the pliers and the clasps and the little bag are ready.
Nuevamente presiono con el alicate y ya están listos los broches y también el pequeño bolsito.
This is what it looks like, it really was very quick and easy.
Así luce, realmente fue muy rápido y fácil.
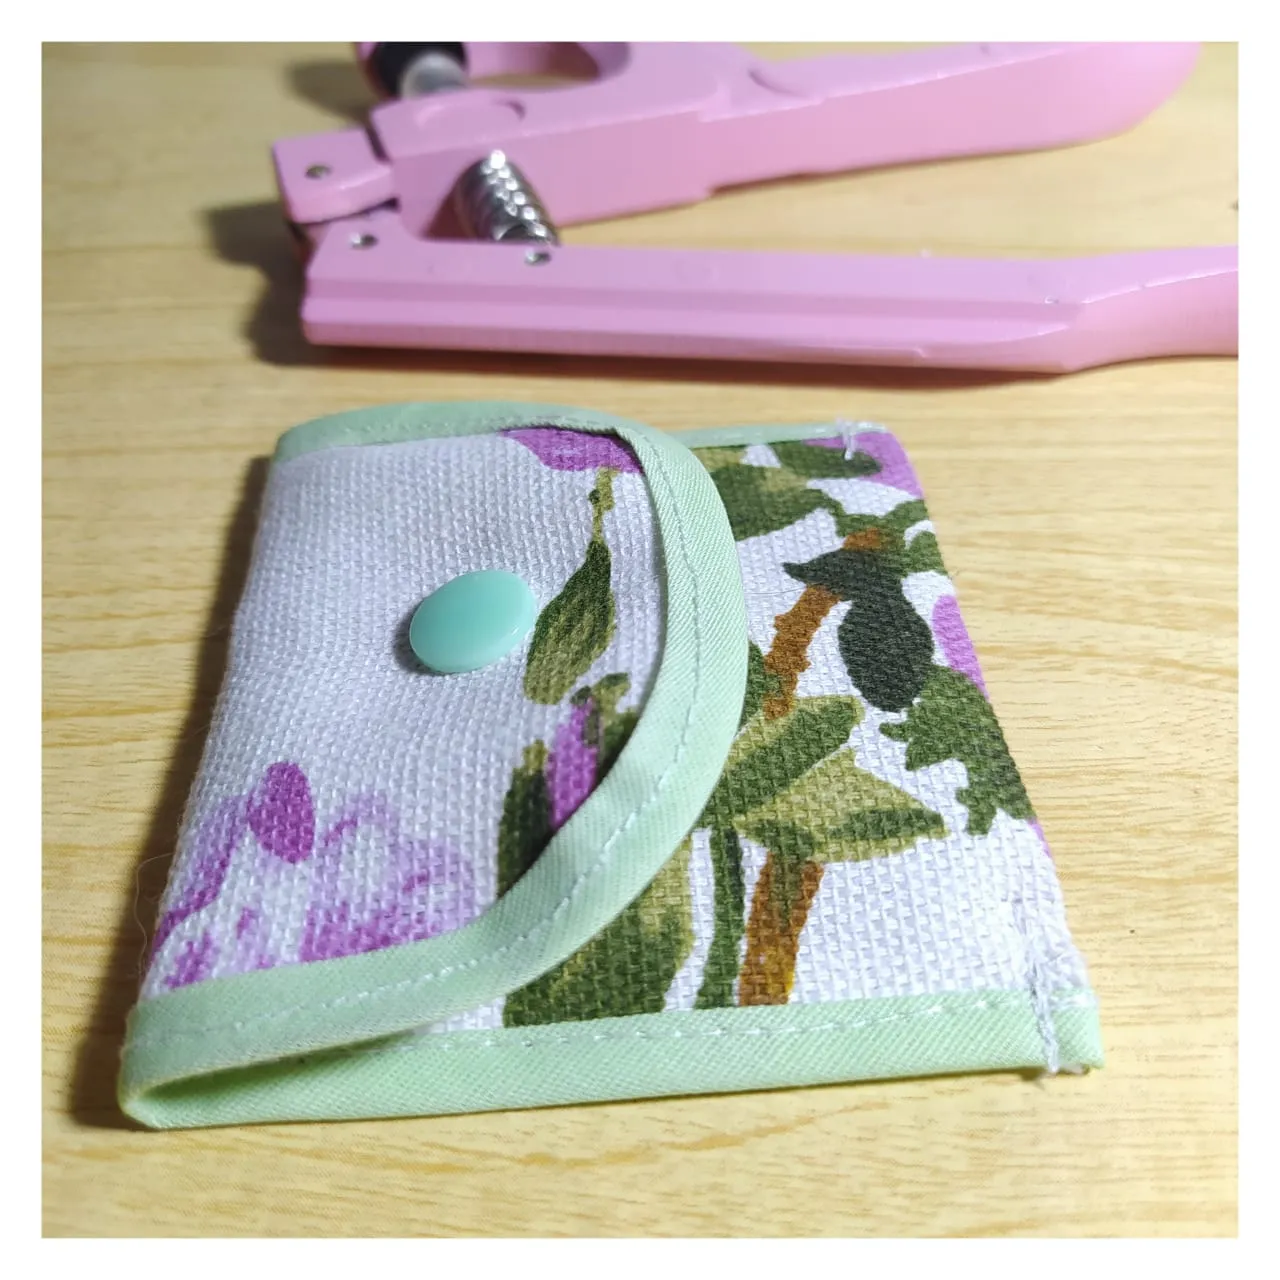
Now I want to make a pendant for the little pendrive so that it is well visible and not so easy to get lost.
I will work with these materials that I mentioned before:
Ahora quiero hacerle un colgante al pequeño pendrive para que sea bien visible y no sea tan fácil de perderse.
Trabajaré con estos materiales que ya había mencionado anteriormente:
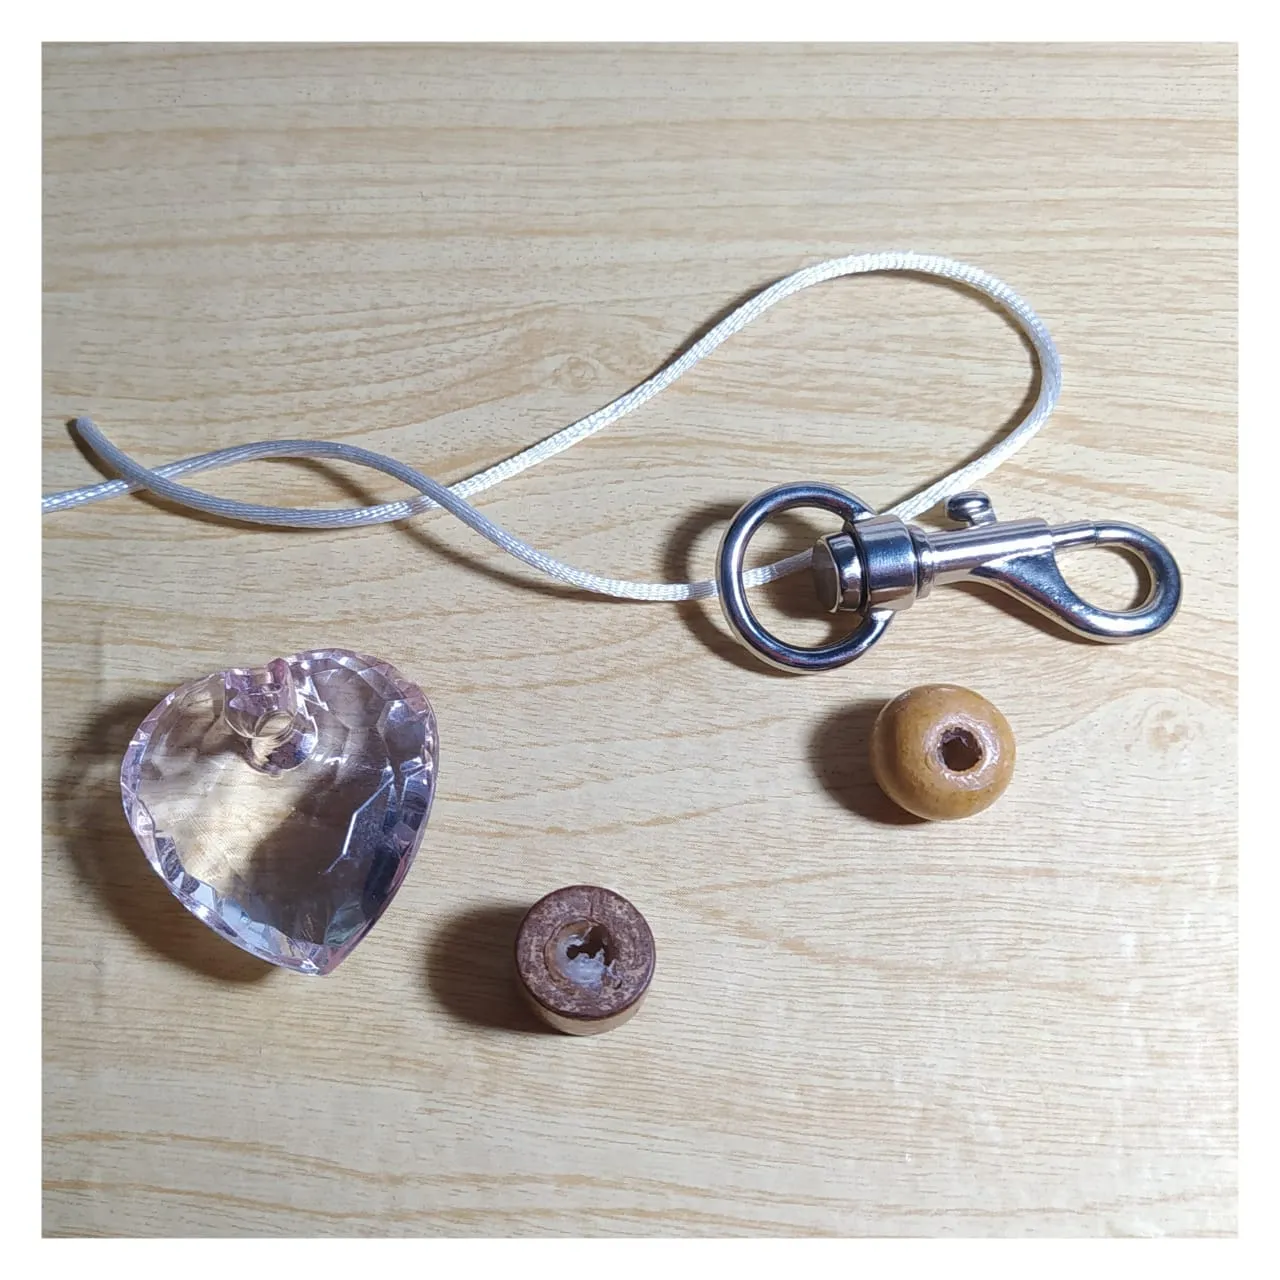
On the keychain hook, I place a piece of ribbon called mouse tail measuring approximately 25cms, so that it is fixed. On the ends of the ribbon or cord I place the details or appliqués that I have to decorate.
En el gancho para llavero, coloco un trozo de cinta llamada rabo de ratón que mide aproximadamente 25cms, de manera que quede fijo. En las puntas de la cinta o cordón coloco los detalles o apliques que tengo para decorar.
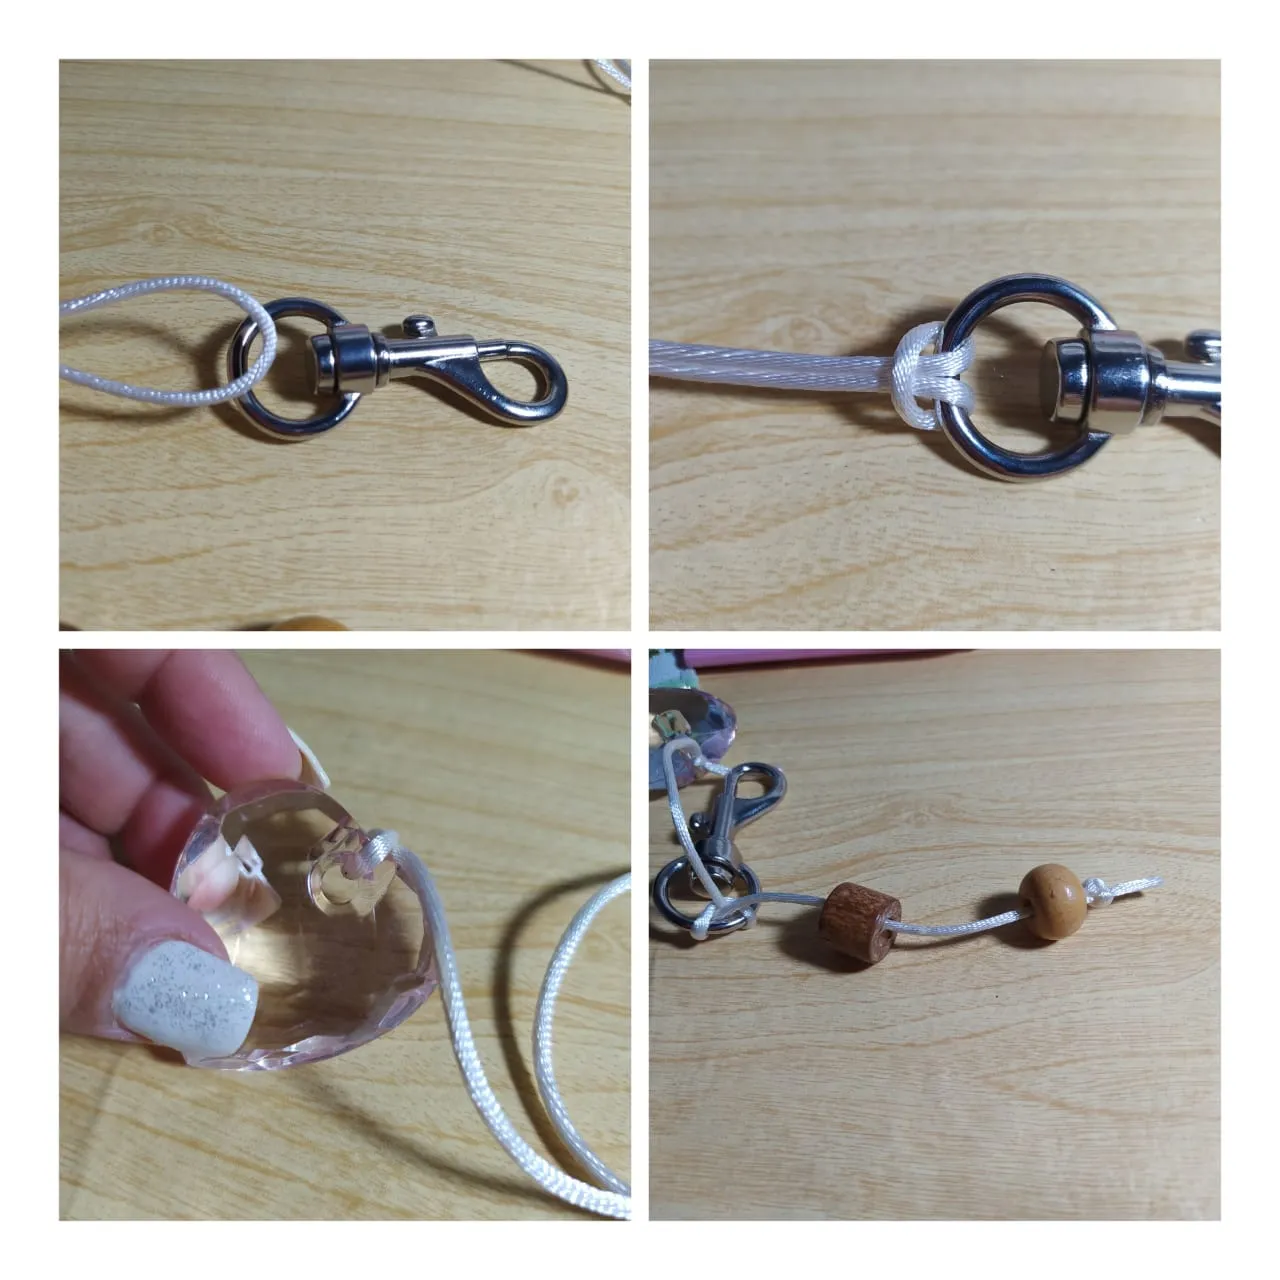
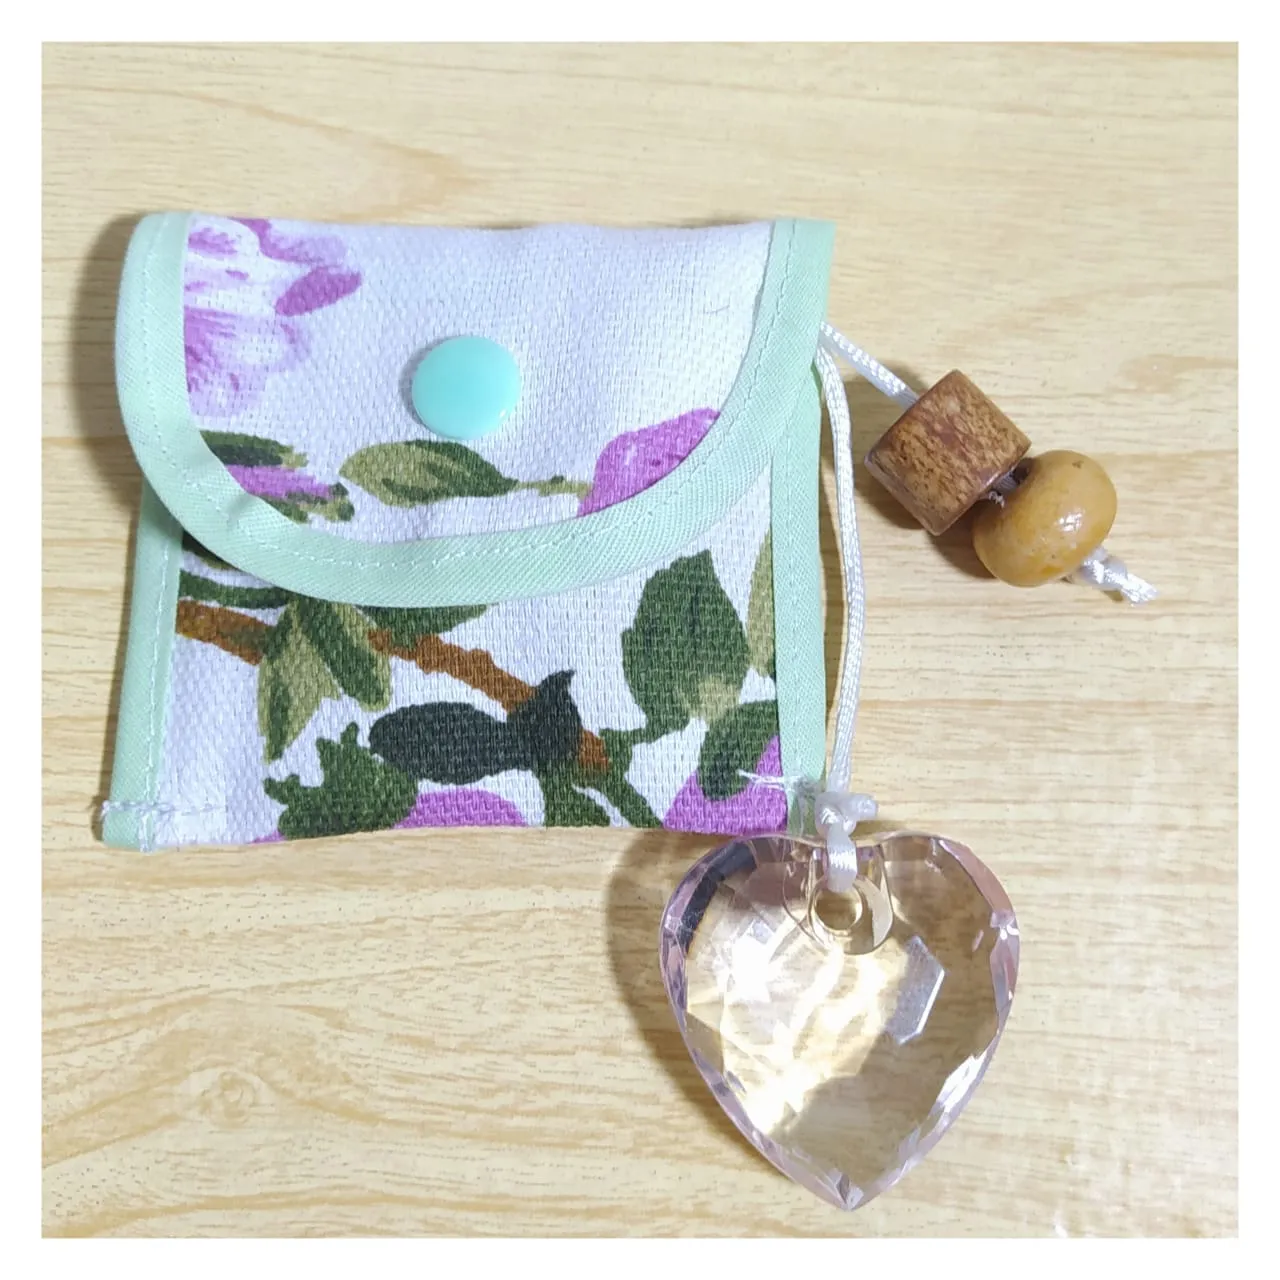
This is how the pendant is ready, the hook opens perfectly and I can place the small pendrive very easily. The colors look spectacular.
Así quedó listo el colgante, el gancho se abre perfecto y puedo colocar el pequeño pendrive muy fácilmente. Los colores se ven espectaculares.
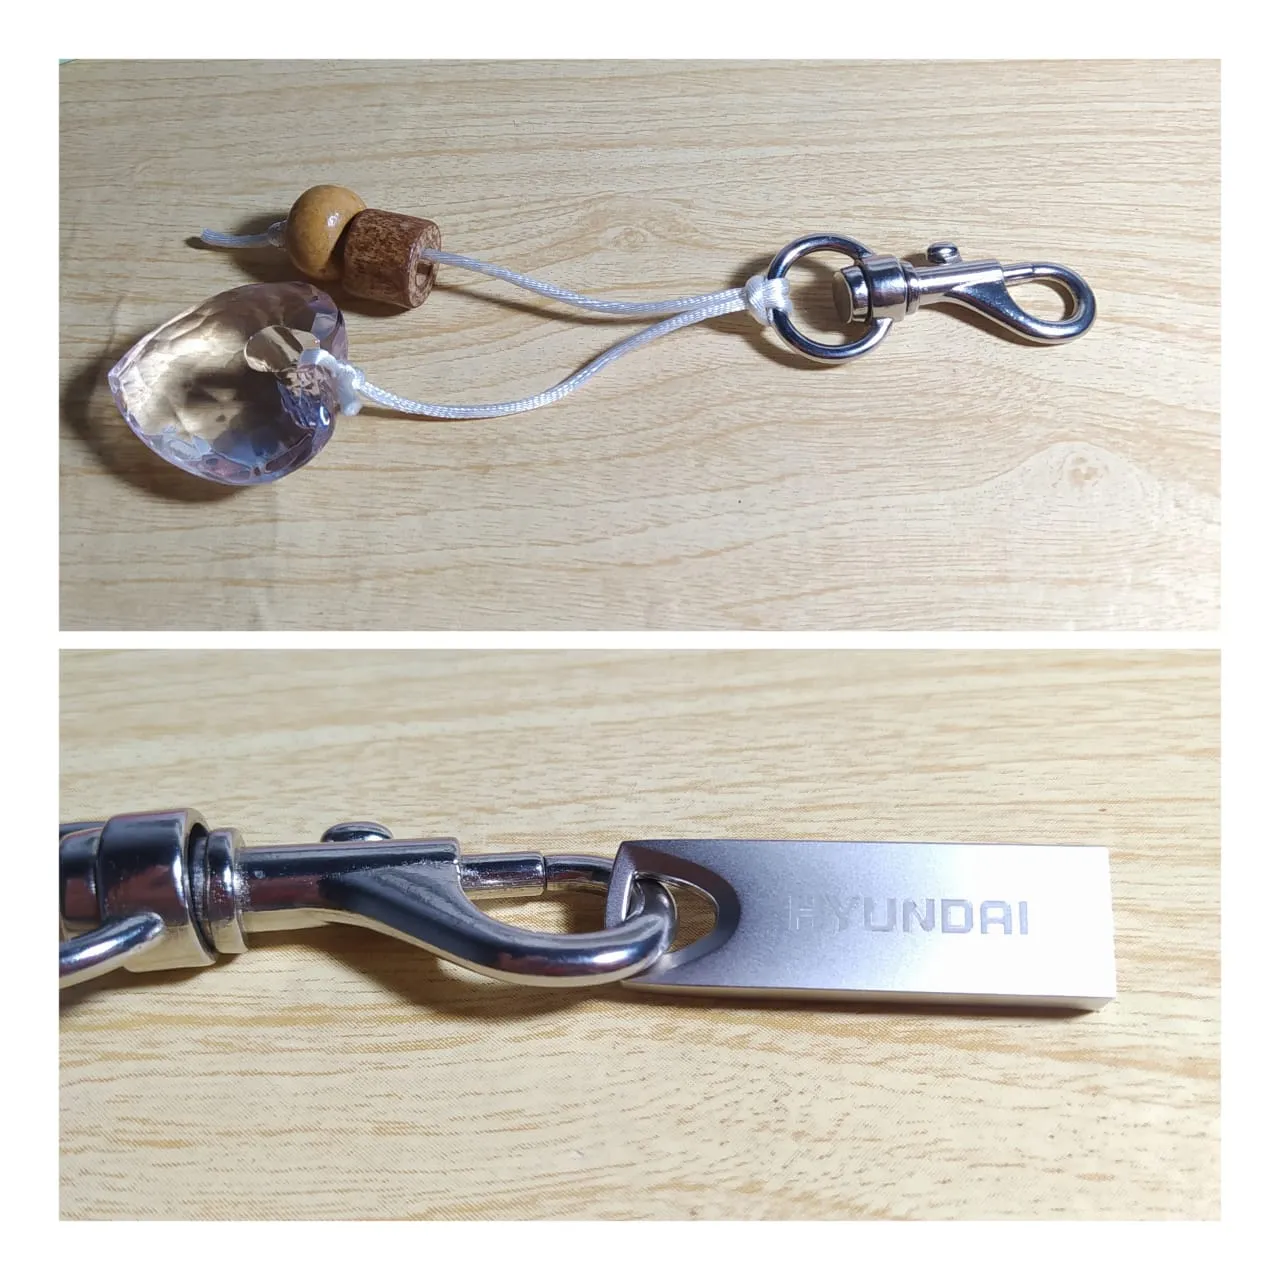
And so everything is ready, the bag and the pendant for the pendrive, all very functional.
Y así queda todo listo, el bolsito y el colgante para el pendrive, todo muy funcional.

I open the bag, put the flash drive in with the hook and leave the decorative accessories outside, it looks very nice and it is impossible for it to pass unnoticed.
Abro el bolsito meto el pendrive con el gancho y dejo los accesorios decorativos por fuera, luce muy bien y es imposible que pase desprevenido.

I think this flash drive will have a long life, I don't think it will be easy to lose it or forget it. It will always be visible.
Pienso que este pendrive tendrá larga vida, no creo que sea fácil ni perderlo ni olvidarlo. Siempre estará visible.
The combination of the green of the good with the colors of the fabric and the brooches, look spectacular .
La combinación del verde del bien con los colores de la tela y los broches, se ven espectaculares .

Really this pendrive can not be forgotten, it looks great and is very functional, i.e. it fulfills its function completely.
Realmente este pendrive no puede ser olvidado, luce muy bien y es muy funcional, e decir cumple con su función totalmente.

I hope you liked this project.
I cordially invite you to see my next publication.
Best regards...
Deseo que les haya gustado este proyecto.
Los invito cordialmente a ver mi próxima Publicación.
Un abrazo...
I took the photos with my Redmi Note 8 phone
Apps I used:
Canva for the Cover
Inshot for the Collage
I used Deepl Translate
My social networks:
Discord: YennysYaneth#0189
Twitter: @yennysferm
Instagram: @yennysyaneth
---------- ❤️❤️❤️❤️ ----------
Las fotos las tomé con mi teléfono Redmi Note 8
Apps que utilicé:
Canva para la Portada
Inshot para los Collage
Utilicé el Traductor Deepl
Mi redes sociales:
Discord: YennysYaneth#0189
Twitter: @yennysferm
Instagram: @yennysyaneth