¡Bienvenidos amigos creativos!👩🎨
🙋♀️ ¡Hola gente bonita y creativa! Espero que se encuentren súper bien y hayan tenido días llenos de gratos momentos. Por este lado de la pantalla todo bien gracias a Dios feliz de estar una vez más aquí, en esta oportunidad mostrándoles el paso a paso de cómo fue posible con materiales muy económicos de hacer una tarjeta en forma de laptop para sorprender a un cumpleañero amante de la tecnología, en esta oportunidad mi hermana️ mayor✨.
Welcome creative friends!👩🎨
🙋♀️ Hello beautiful and creative people! I hope you are super well and have had days full of pleasant moments. On this side of the screen all good thank God happy to be here once again, this time showing you the step by step of how it was possible with very cheap materials to make a card in the shape of a laptop to surprise a technology lover birthday boy, this time my older sister️.
¡Llegó la hora de crear! / It's time to create!
|
|---|
¿Cuál es el proceso?/ What is the process?⬇️
👩💻 Paso 1 / Step1
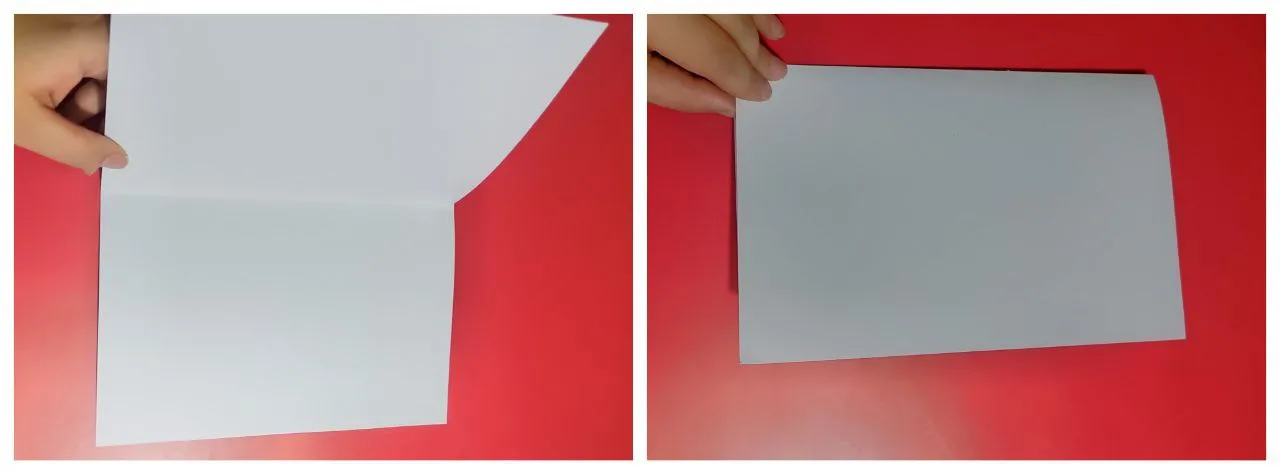
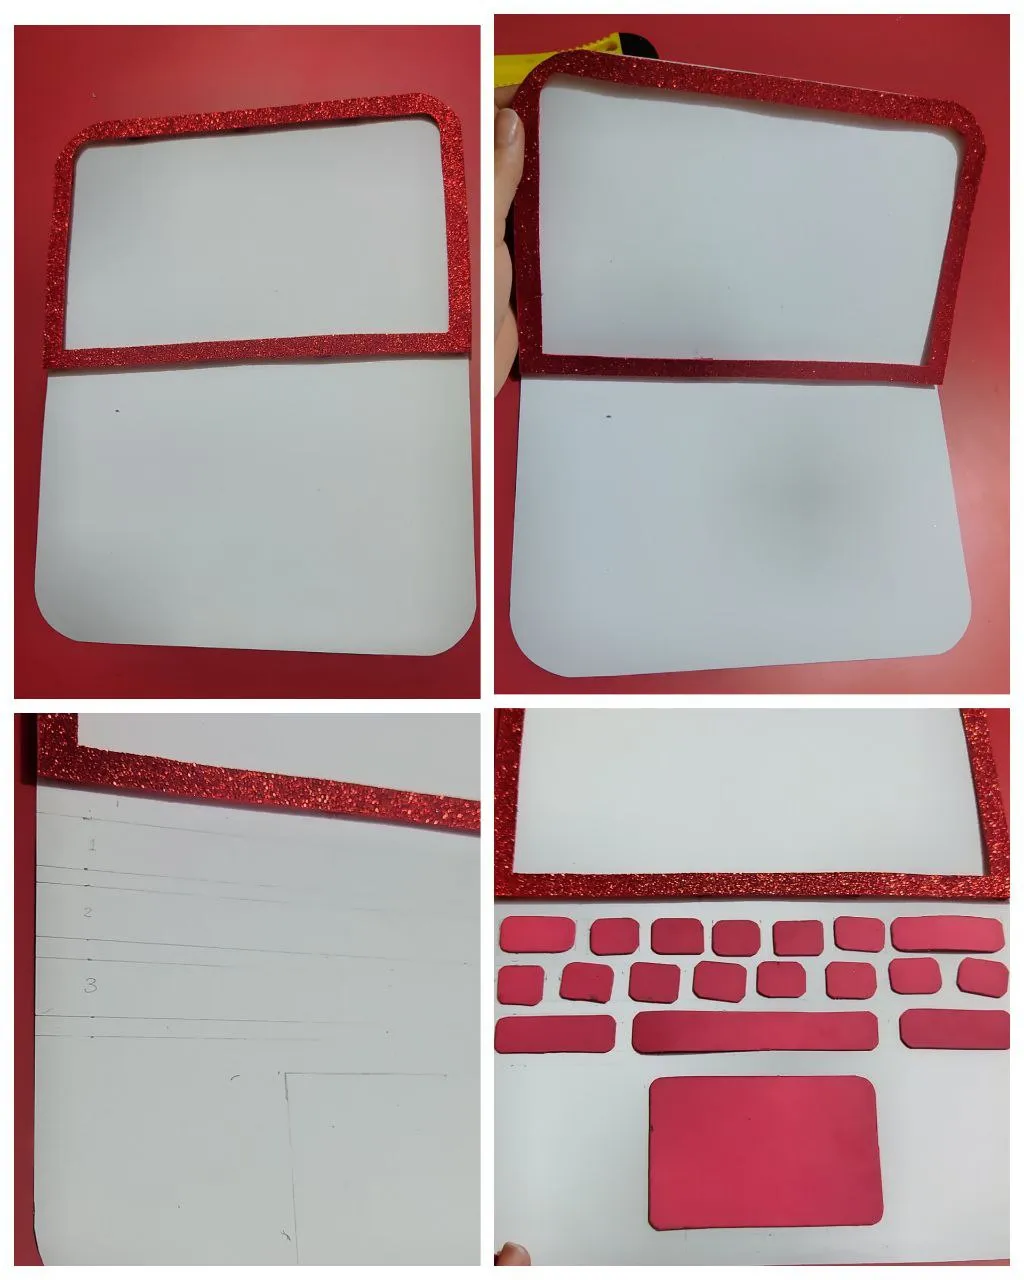
Para está tarjeta yo utilice una cartulina blanca tamaño carta (este tamaño varía según el tamaño de preferencia). Doble la cartulina a la mitad.
For this card I used a white card stock (this size varies according to size preference). Fold the card in half.
👩💻 Paso 2 / Step 2
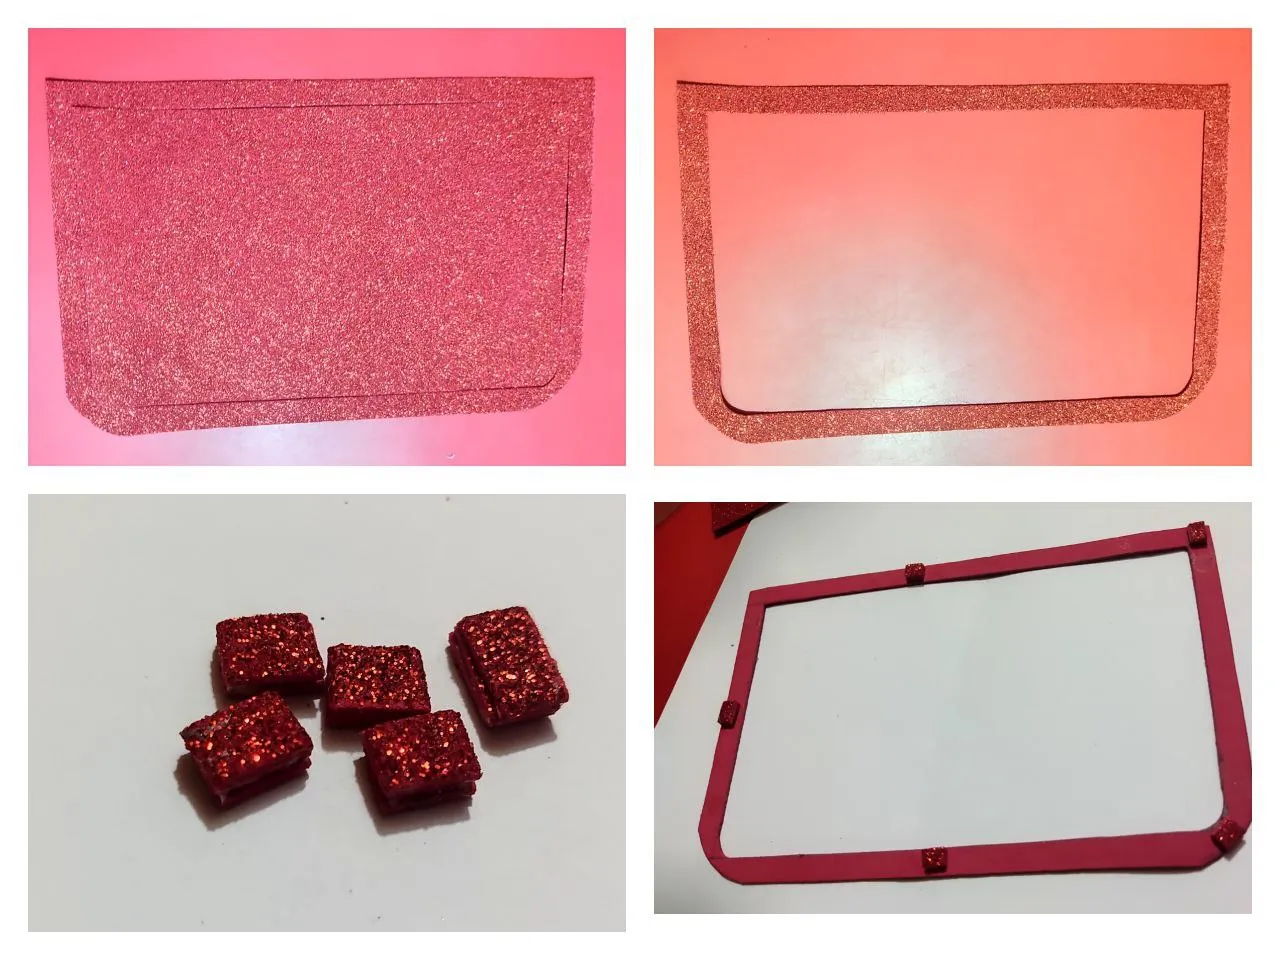
En foami rojo escarchado recorte la misma medida de una de las tapas que resultaron del dobles hecho en la cartulina anteriormente. Luego realice medidas dejando un ancho de 1cm alrededor del borde y con ayuda de un corta exacto recorte todo ese espacio.
In frosted red foami cut out the same size of one of the lids that resulted from the doubles made on the cardboard previously. Then make measurements leaving a width of 1cm around the edge and with the help of an exacto cutter cut out all that space.

👩💻 Paso 3 / Step 3
Recorte pequeños cuadros de foami haciendo altura con tres cuadros del mismo foami y así crear altura pegando estos en el borde cortado en el paso anterior.
Cut out small squares of foami making height with three squares of the same foami and thus create height by gluing these to the edge cut in the previous step.
👩💻 Paso 4 / Step 4
Por la parte interior de la tarjeta pegue el borde antes recortado y en la otra con lápiz y marcando muy claro saqué las tres lineas para ayudarme con el espacio y tamaño.
On the inside of the card I glued the previously cut border and on the other side with a pencil and marking very clearly I drew the three lines to help me with the spacing and size.
👩💻 Paso 5 / Step 5
Luego en foami rojo saqué varios cuadritos haciendo simular las letras de la laptop.
Then in red foami I made several squares to simulate the letters of the laptop.
👩💻 Paso 6 / Step 6
De igual forma con un lápiz marque la otra parte de laptop haciendo lo más parecido que pueda a la navegación de Google.
In the same way with a pencil mark the other part of the laptop making it as similar as possible to the Google navigation.
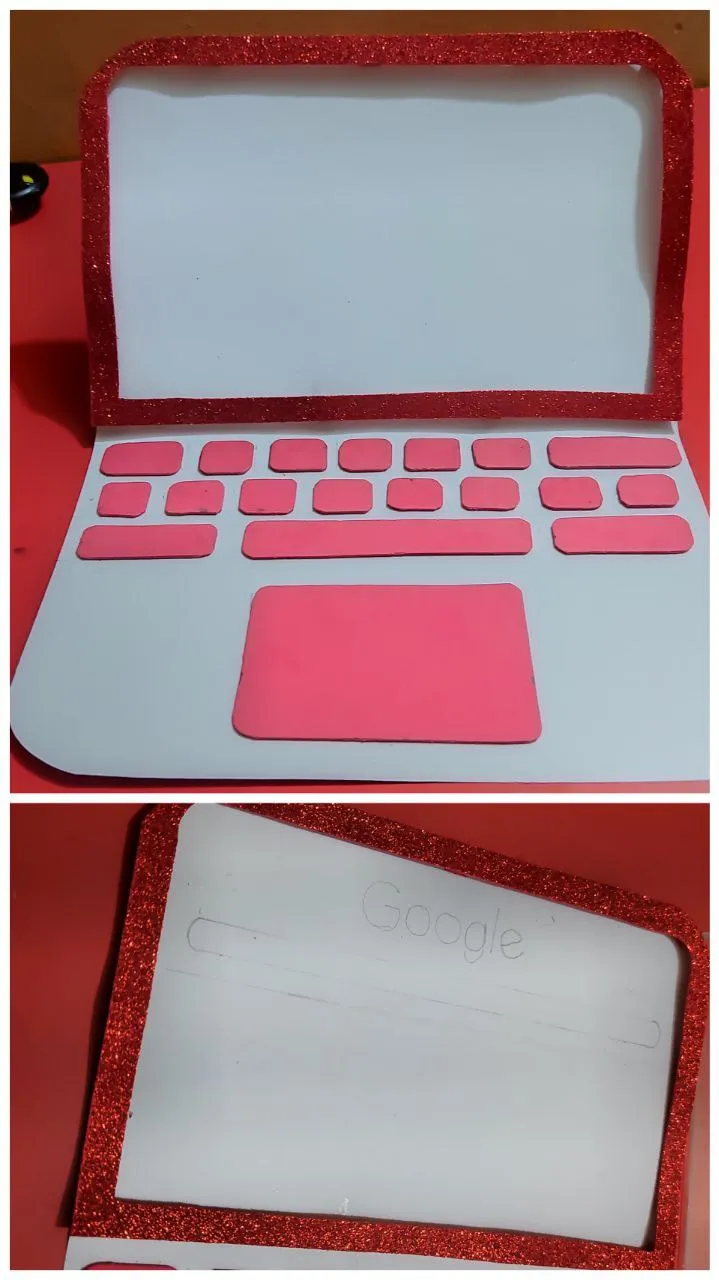
👩💻 Paso 7 / Step 7
Con marcadores empecé a darle color a eso que ya había plasmado en lápiz usando los colores de la página de Google, y para la parte en negro me ayude con un lapicero. Que en español escribí “la mejor hermana y amiga del mundo”️
With markers I started to give color to what I had already written in pencil using the colors of the Google page, and for the black part I helped myself with a pen. In Spanish I wrote “the best sister and friend in the world"️
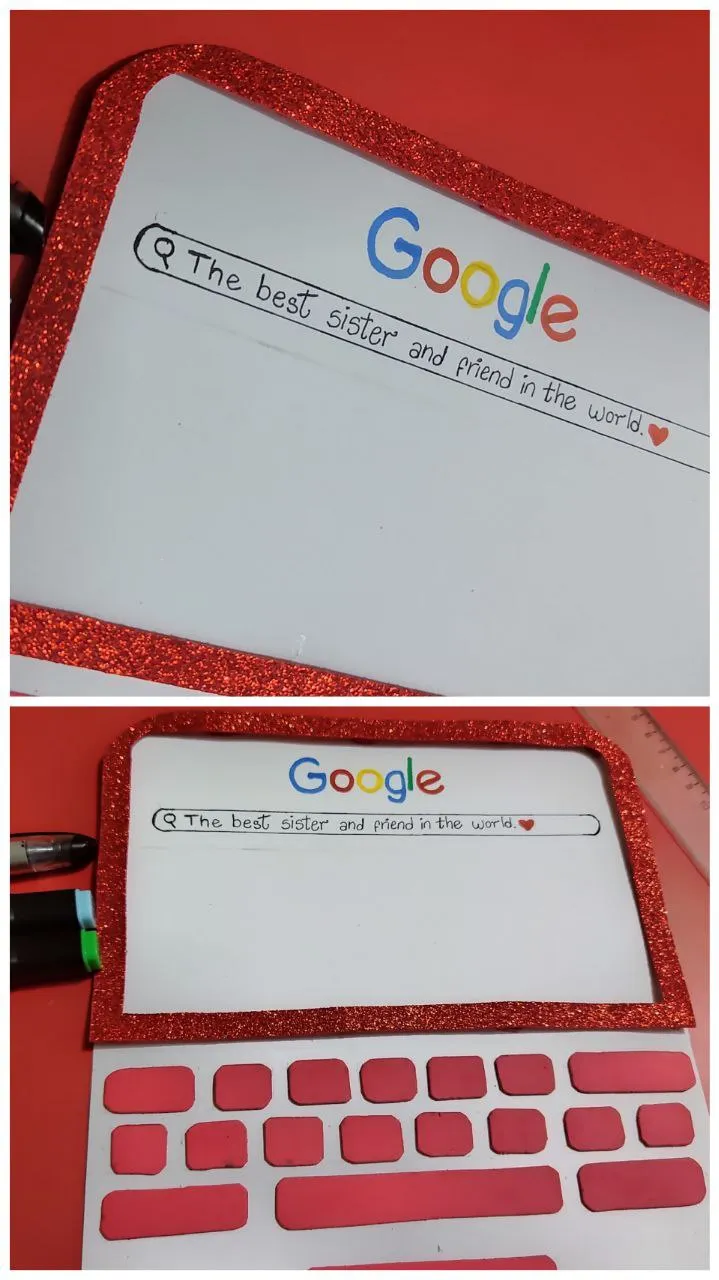
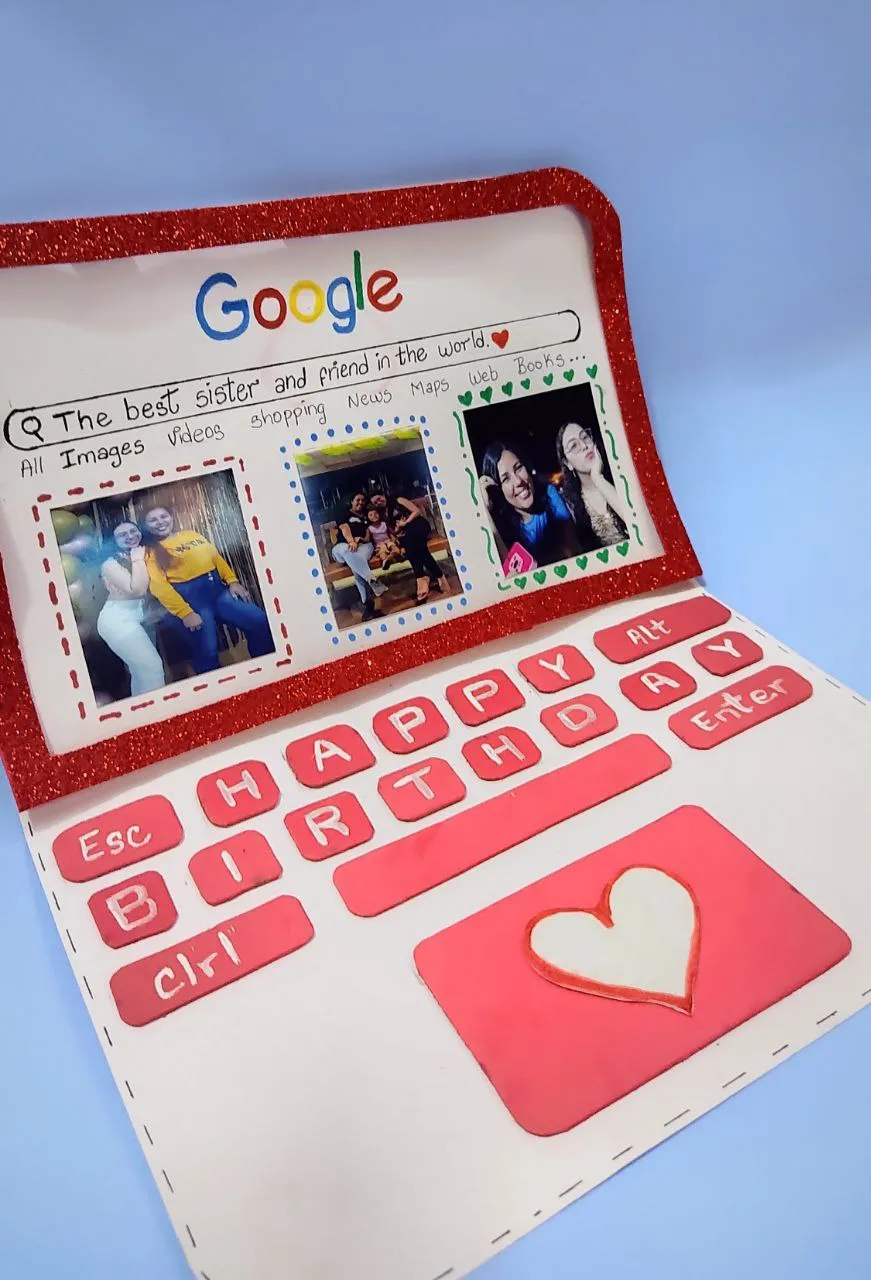
👩💻 Paso 8 / Step 8
En papel fotográfico mandé a imprimir las fotos que recientemente me han gustado con mi hermana y las pegue debajo del escrito en el buscador de Google. En las teclas escribí la palabra Feliz cumpleaños en inglés, y algunas letras que hacen parte de un teclado, esto con ayuda de pintura al frío blanca. En el mouse táctil de la laptop decore con un corazón blanco. Y alrededor de las fotos hice un pequeño borde con marcadores.
On photographic paper I printed the photos that I recently liked with my sister and pasted them under the writing on the Google search engine. On the keys I wrote the word Happy Birthday in English, and some letters that make part of a keyboard, this with the help of white cold paint. On the touch mouse of the laptop I decorated with a white heart. And around the photos I made a small border with markers.
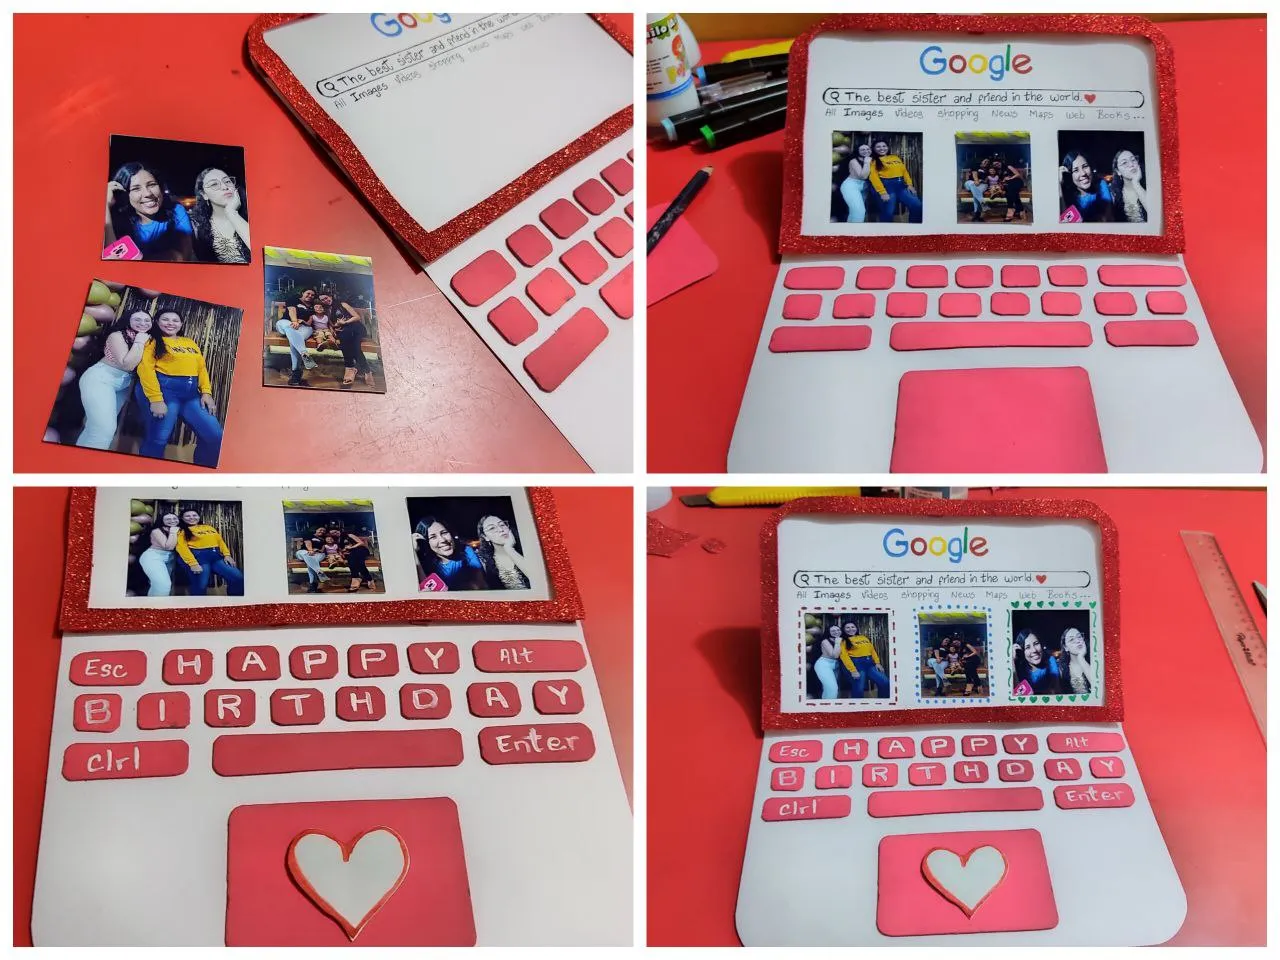
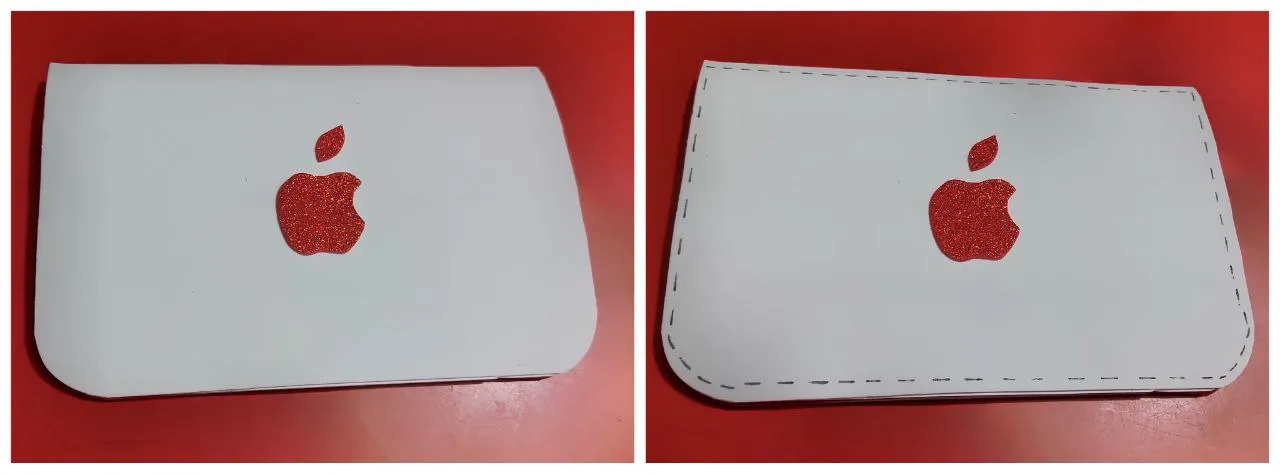
👩💻 Paso 9 / Step 9
Por último el foami escarchado realice el logo de la Apple, y pegue en el centro de la tarjeta
Finally the frosted foami make the Apple logo, and glue it in the center of the card.
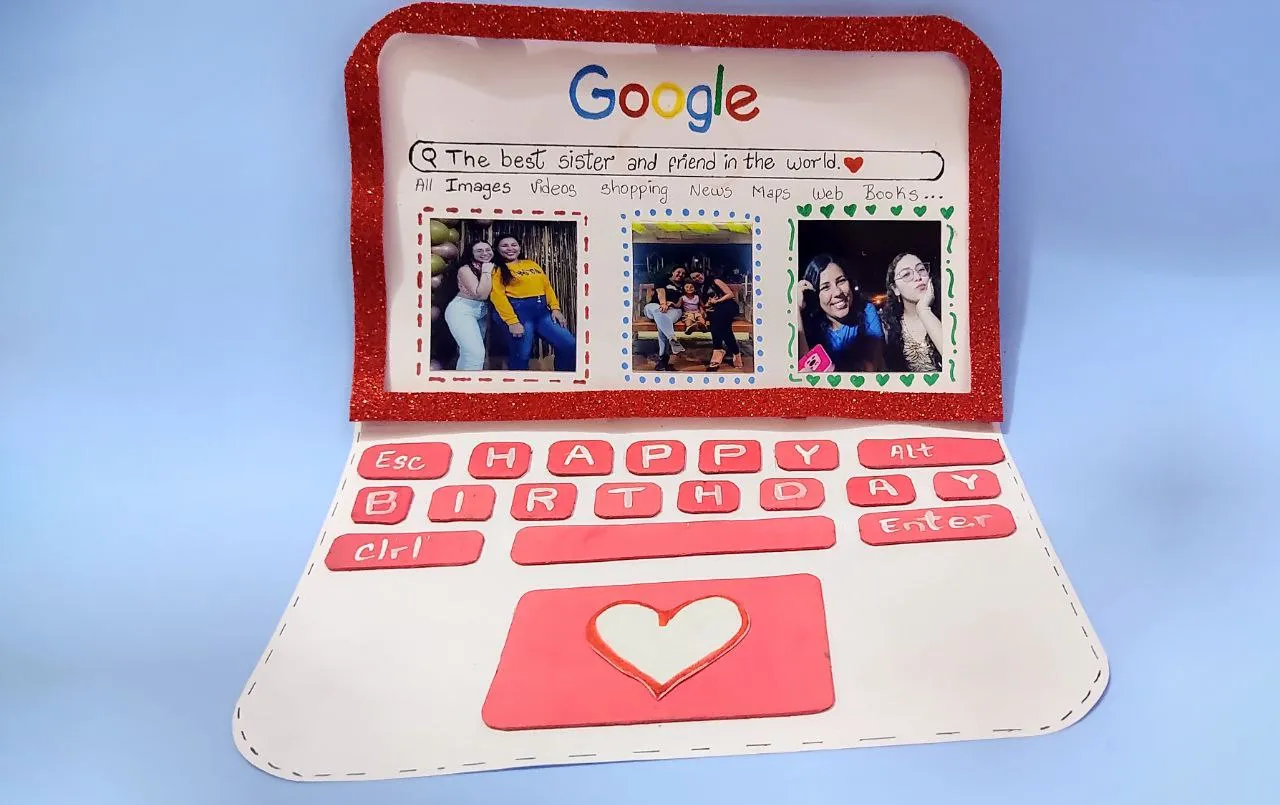
Creación finalizada / Creation completed⬇️
¡Y de esta forma pude sorprender a mi hermana con una laptop tarjeta!👩💻🥳
Queda una forma muy linda, a parte con recuerdos muy hermosos que se viven a través de las fotos, se puede agregar el mensaje que desees y del tamaño que prefieras adaptándolo a cualquier color. Mi hermana quedó encantada ama todas mis manualidades y no dudo de qué está haya sido su preferida. Había visto una idea parecida en el feed de Instagram y supe que era perfecta así que la adapte para ella. Espero les haya gustado tanto como a mí️.
And this way I was able to surprise my sister with a laptop card!👩💻🥳
It is a very nice shape, with beautiful memories that are lived through the photos, you can add the message you want and the size you prefer adapting it to any color. My sister loved all my crafts and I have no doubt that this one was her favorite. I had seen a similar idea on her Instagram feed and knew it was perfect so I adapted it for her. I hope you liked it as much as I did️.
See you in a new creation👩🎨


Mil gracias por leerme una vez
Nos vemos en una próxima publicación.
Muchas bendiciones y abrazos digitales🤗
Thank you very much for reading me once
See you in an upcoming post.
Many blessings and digital hugs🤗
👩🏼💻 Edición: Inshot y Canva / Edition: Inshot and Canva
✨ Traducción: DeepL.com / Translation: DeepL.com