Bienvenidos, amigos creativos🎨💜
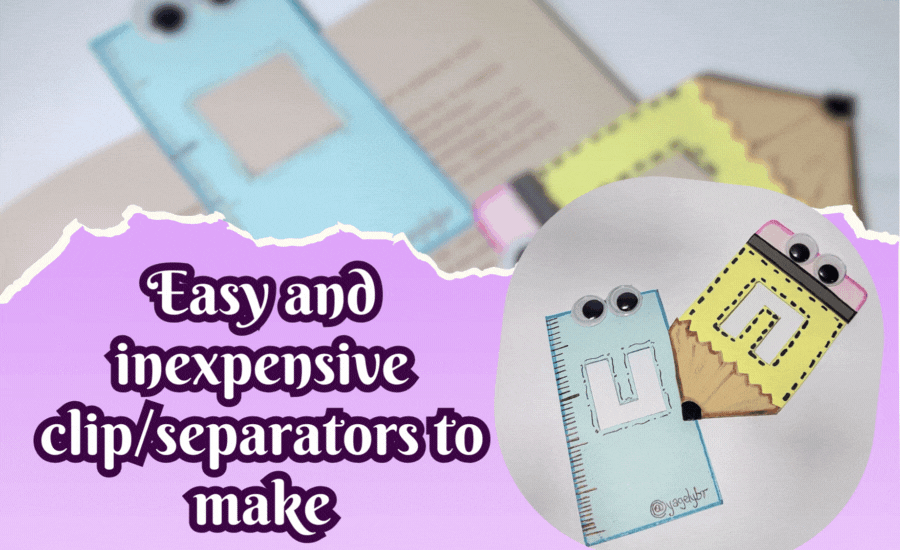
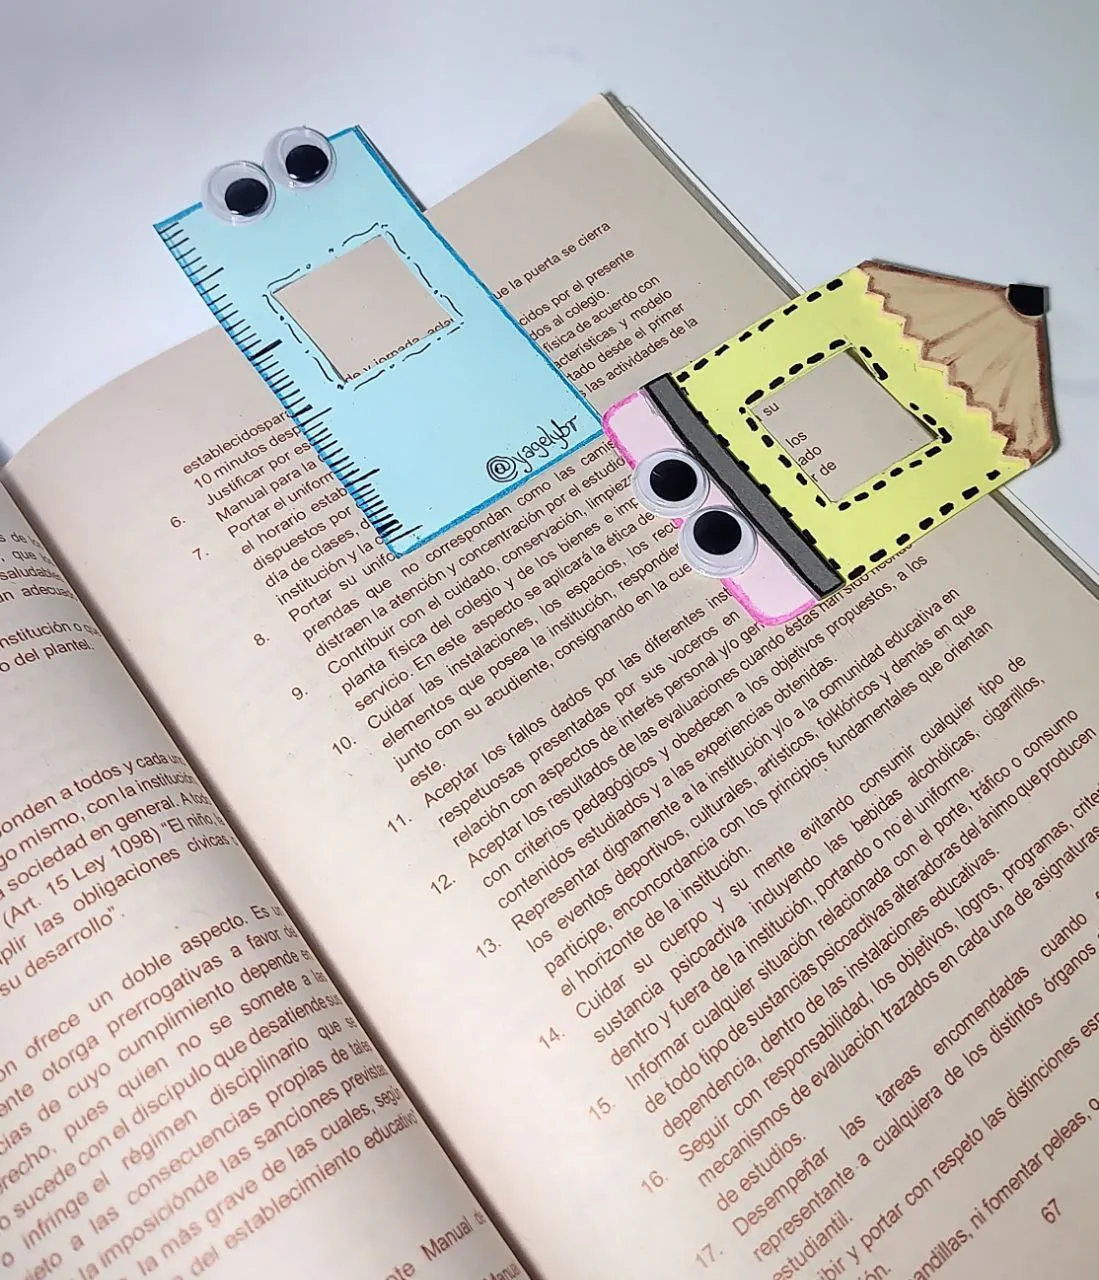
En esta oportunidad traigo el paso a paso de cómo hacer un clip/separador muy fácil y con pocos materiales, lo mejor es que es muy económico y a parte de ello una linda forma de mantener nuestros libros o algún dato importante que no queramos perder. De allí el nombre porque de cierta forma sirve para ambas cosas. Los materiales para que esto fuese posible son:
Welcome, creative friends🎨💜
Hello everyone, I hope you are all in the best of shape, on this side of the screen all is well thank God.
In this opportunity I bring the step by step of how to make a very easy clip / separator and with few materials, the best thing is that it is very economical and besides that a nice way to keep our books or some important data that we do not want to lose. Hence the name because in a way it serves for both things. The materials to make this possible are:
 |
|---|

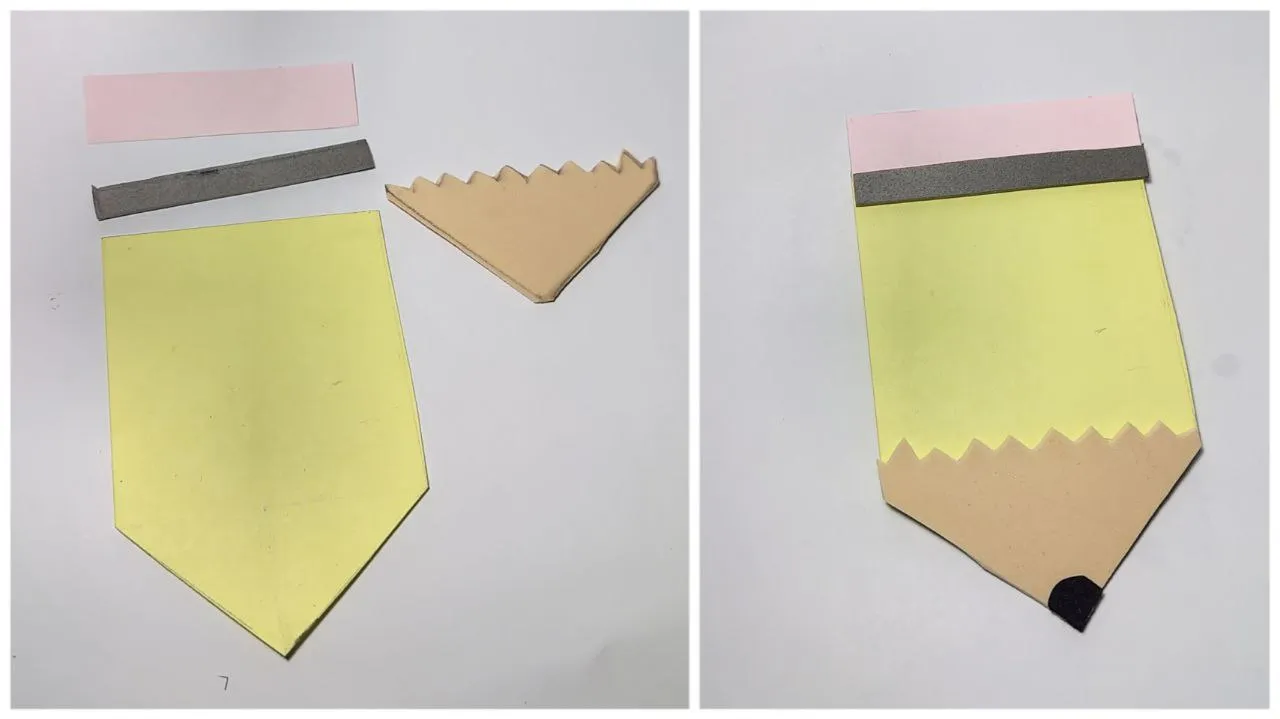
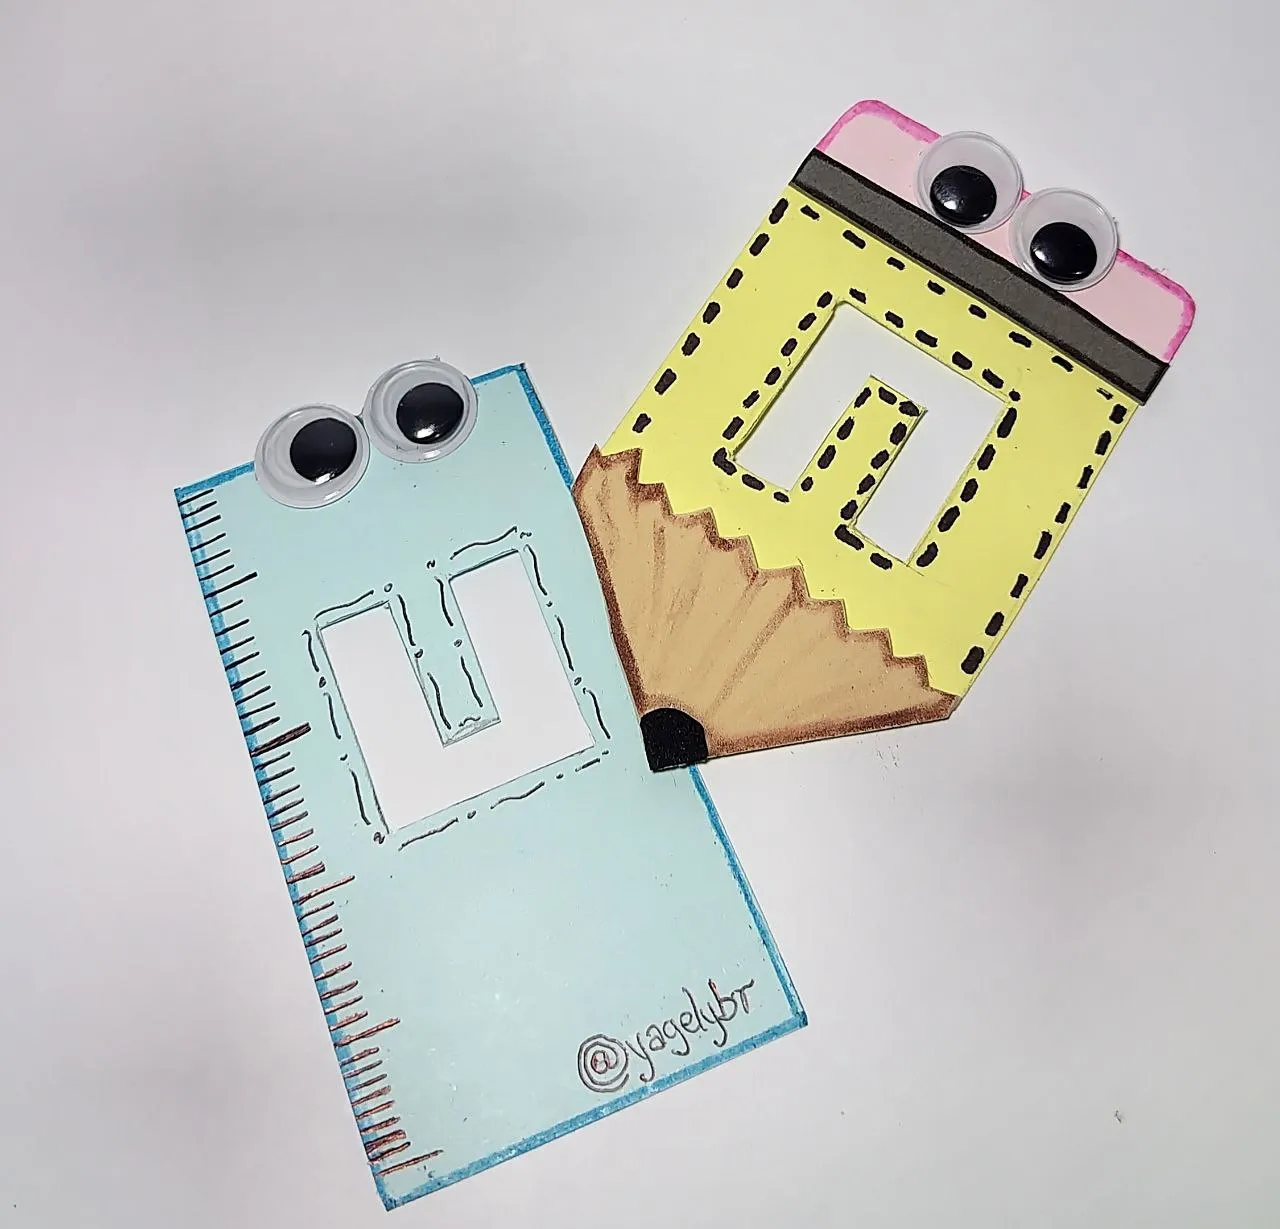
✏️ Paso 1: En una cartulina amarilla realice un rectángulo de 6x6cm, seguido realice un triángulo de 3cm y así sacar la forma del lápiz, luego recorte.
✏️ Step 1: On a yellow cardboard make a rectangle of 6x6cm, then make a triangle of 3cm and thus get the shape of the pencil, then cut out.

✏️ Paso 2: Para completar con las partes de lápiz en cartulina rosa realice un pequeño rectángulo de 6cm de largo x 2cm de ancho, en foami gris de igual forma de 6cm de largo x 1cm de ancho y en foami beige saque la punta del lápiz, seguidamente pegue hasta completar la forma que deseaba.
✏️ Step 2: To complete with the pencil parts on pink cardboard make a small rectangle of 6cm long x 2cm wide, on gray foami of the same shape of 6cm long x 1cm wide and on beige foami remove the tip of the pencil, then glue until completing the shape you wanted.
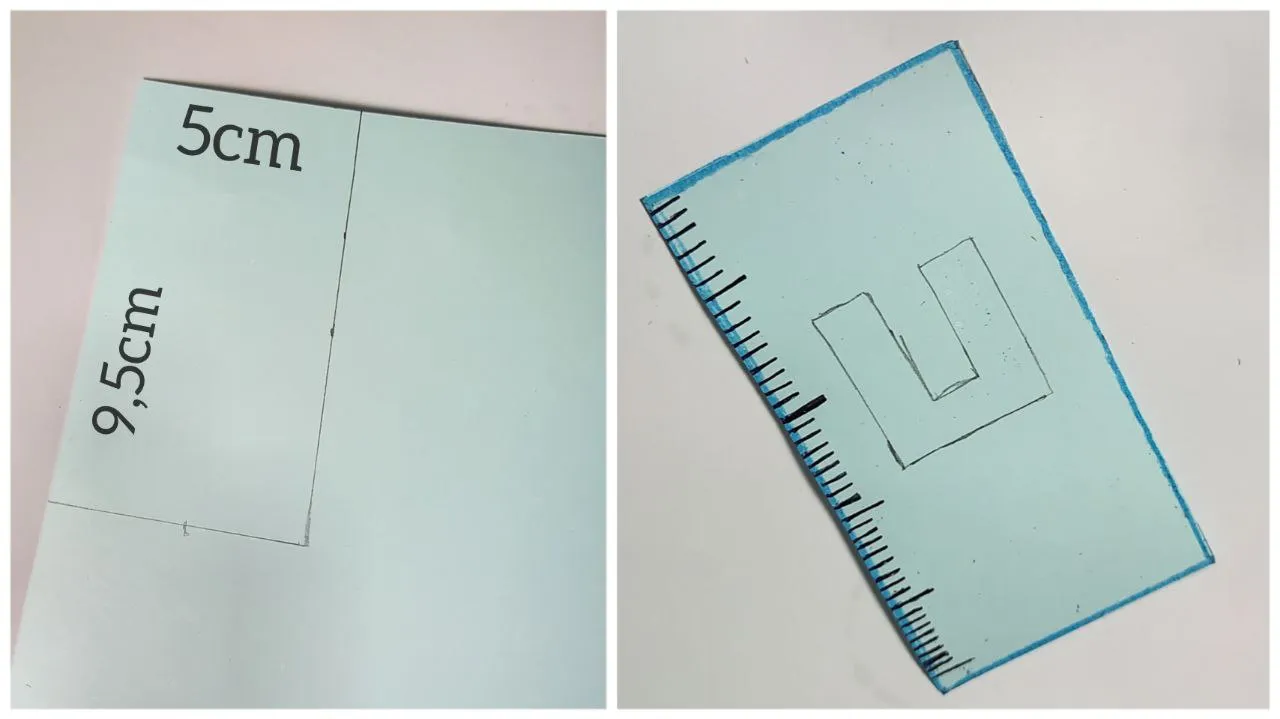
✏️ Paso 3: En el centro del lápiz realice la forma de doble de una letra U, luego con ayuda de un corta exacto recorte solo esa parte quedando así el espacio en forma de U, es allí donde se insertarán las hojas.
✏️ Step 3:In the center of the pencil make the shape of a double letter U, then with the help of an exacto cutter cut out only that part, leaving the space in the shape of a U. This is where the leaves will be inserted.
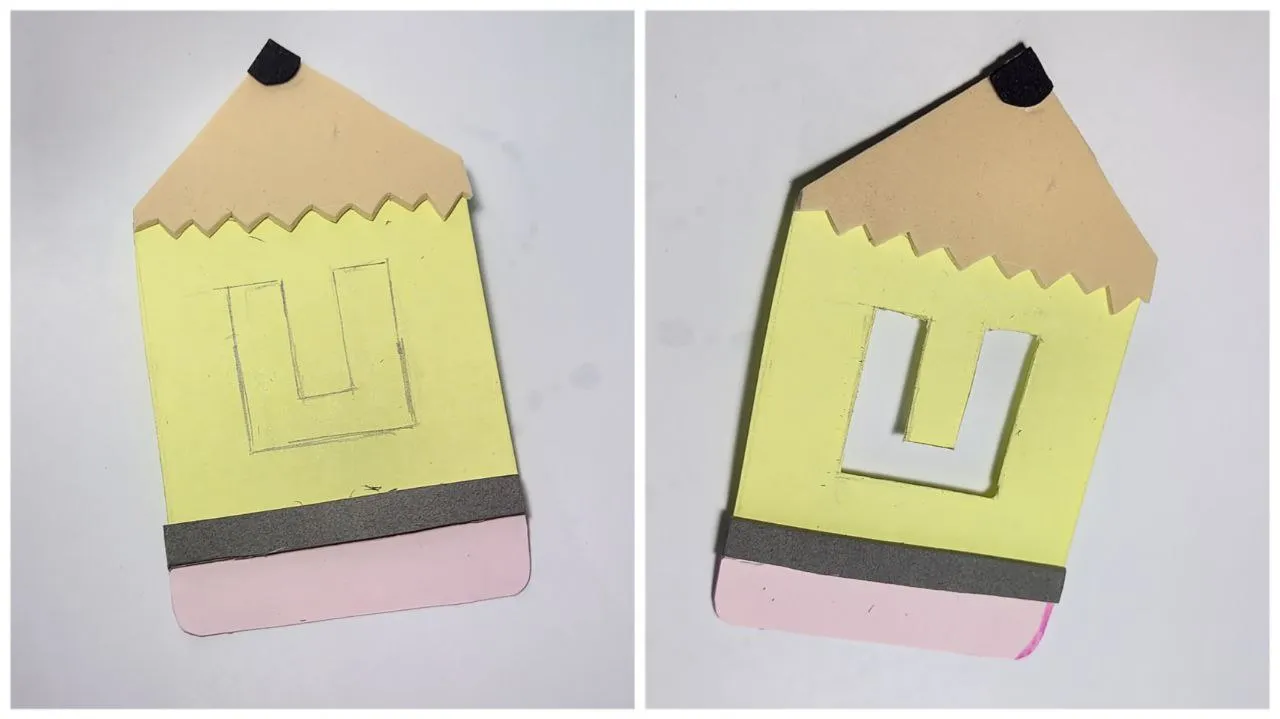
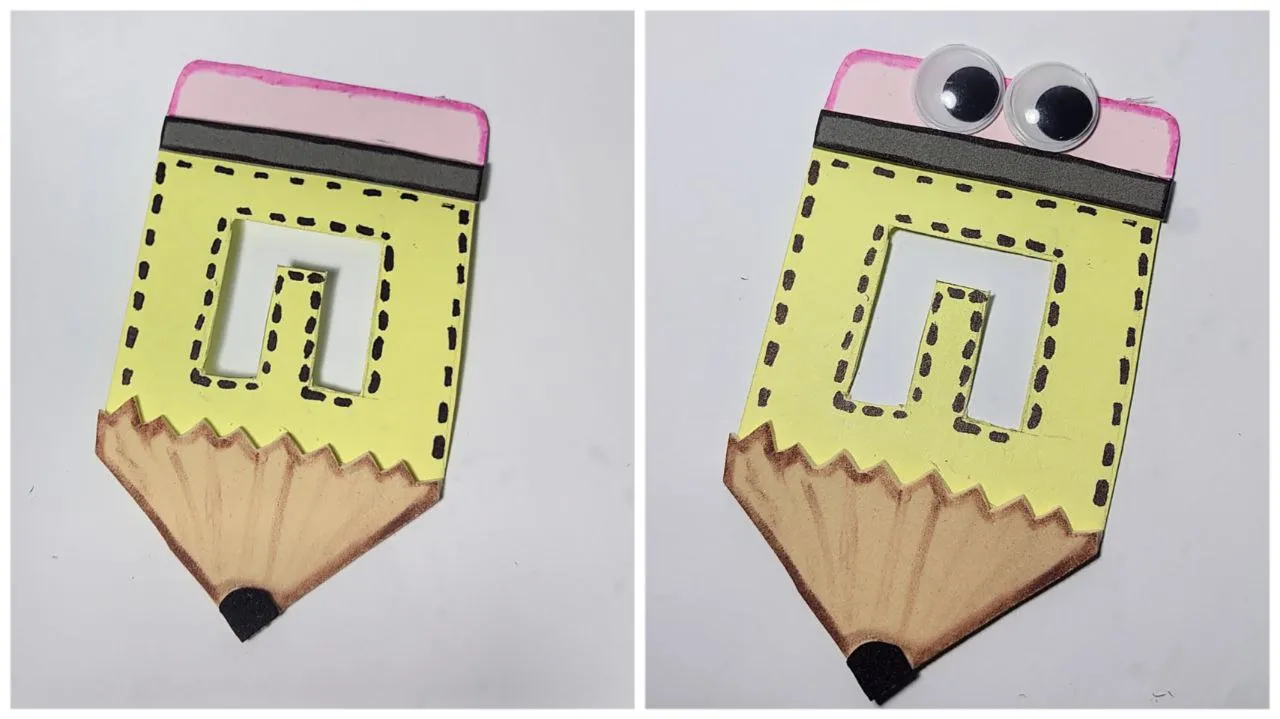
✏️ Paso 4: Ya cuando tuve la forma completa, procedí a decorar, para la cual realice unos delineados y algunas líneas con marcador. También pegue unos ojos locos dando el estilo de un lápiz animado.
✏️ Step 4: Once I had the complete shape, I proceeded to decorate, for which I made some outlines and some lines with marker. I also glued some crazy eyes giving the style of an animated pencil.
📌Diseño 2: Forma de regla / Design 2: Ruler shape
📏 Paso 5: Para el diseño de regla realice un rectángulo de 5cm de ancho x 9,5cm de largo, luego recorte y procedí a realizar un delineado con color azul y de negro algunas rayas parecidas a una regla como tal. De igual forma en el centro de la misma realice la letra U.
📏 Step 5: For the ruler design I made a rectangle of 5cm wide x 9.5cm long, then I cut it out and proceeded to make a blue and black outline with some stripes similar to a ruler as such. In the same way in the center of the same I made the letter U.
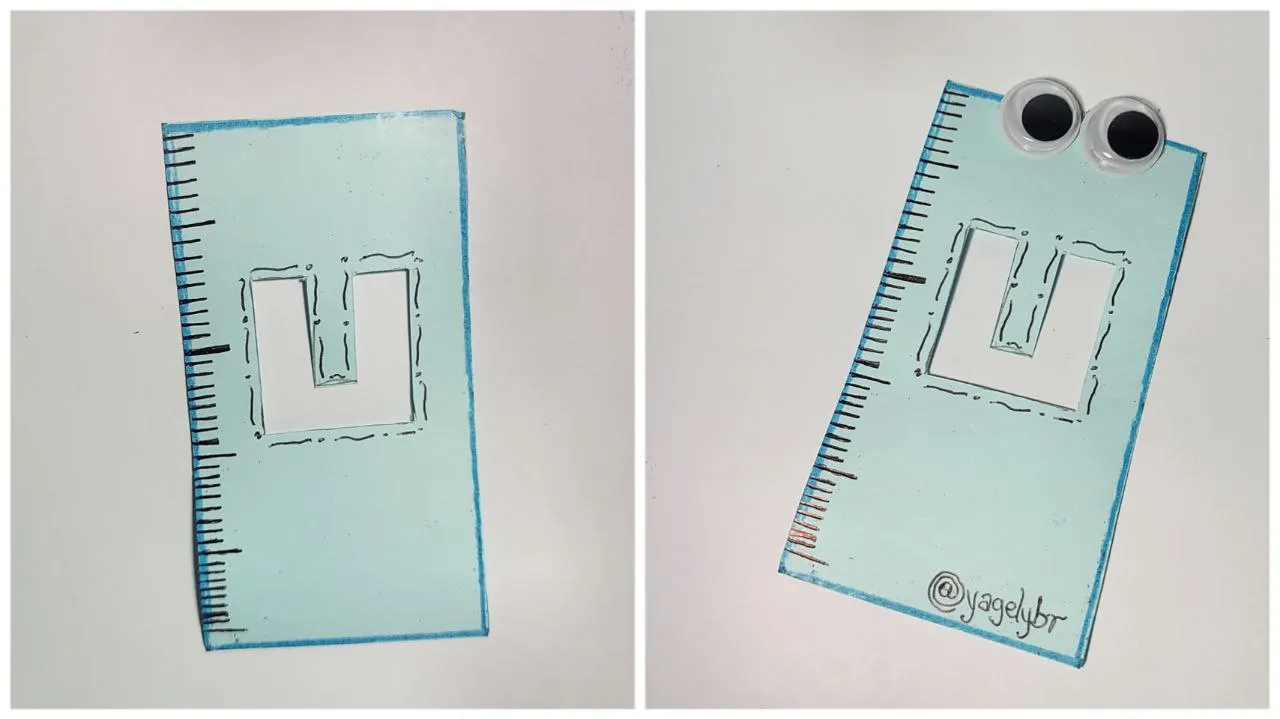
📏 Paso 6: Después de tener la U dibujada, con ayuda del corta exacto recorte para así quedar el espacio, realice algunos delineados curvados alrededor de la U. Al igual que el lápiz le agrega ojos locos y así darle ese toque animado.
📏 Step 6: After having the U drawn, with the help of the exact cutter cut out the space, make some curved outlines around the U. Just like the pencil add crazy eyes and give it that animated touch.

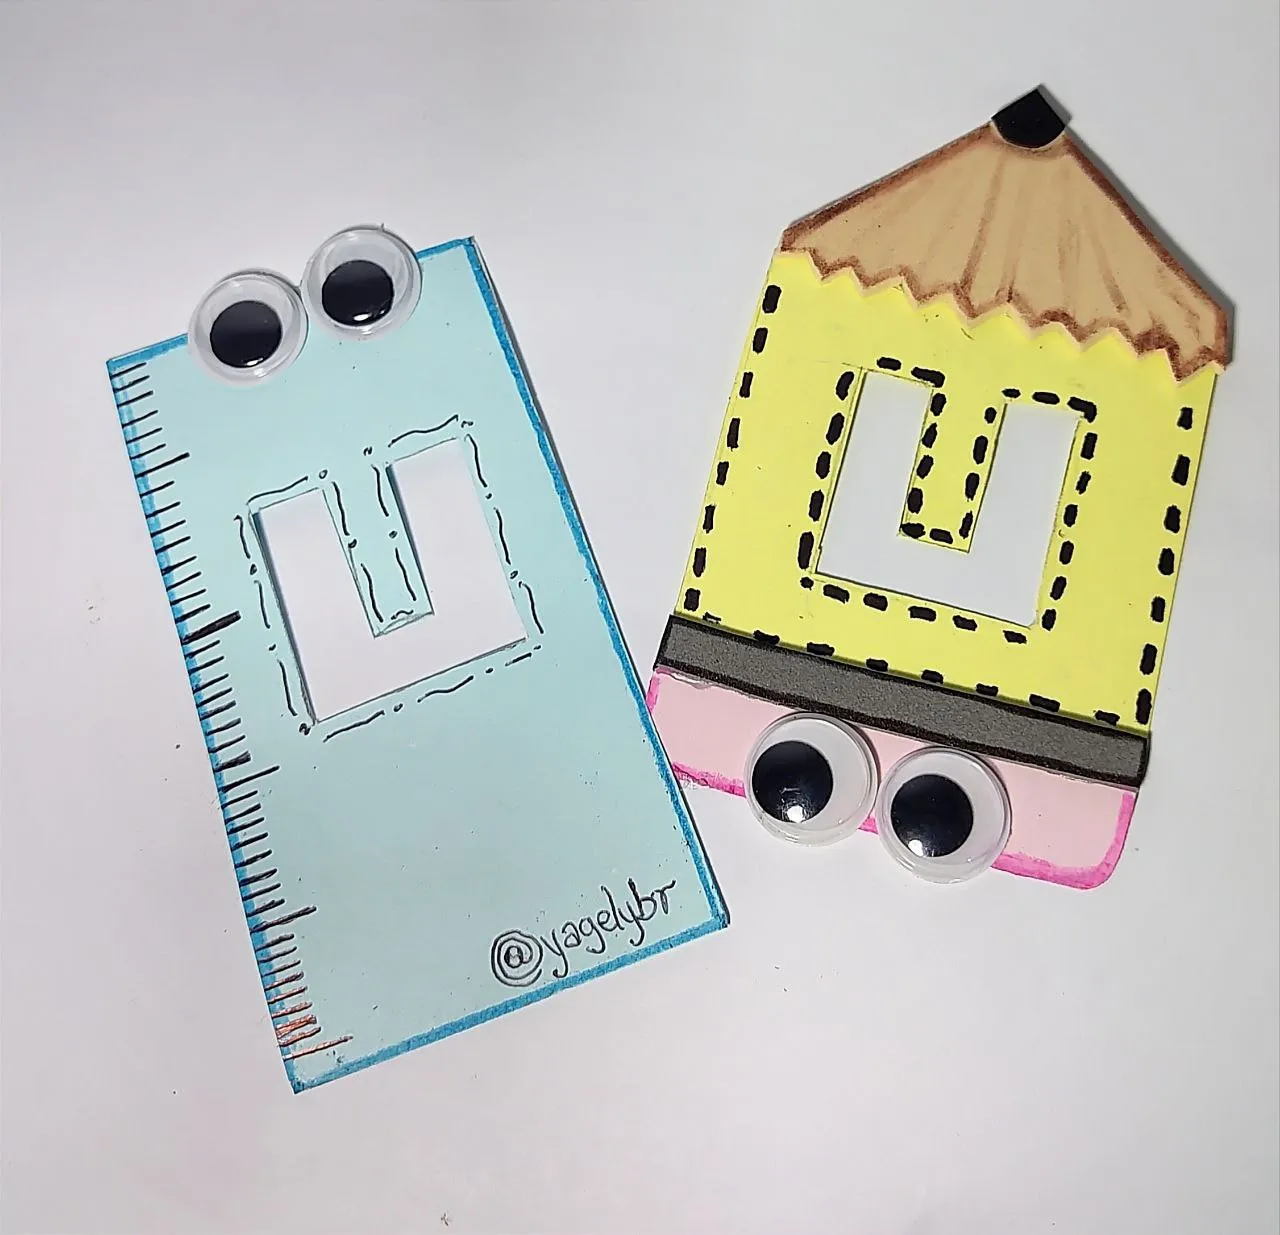
¡Y de esta forma obtuve dos clip/separadores! Personalmente el resultado me encantó, es muy fácil y con materiales muy sencillos, el hecho de agregarle los ojos locos lo hace ver tan cuchi😍, aunque si deseas recrear y no tienes este material lo puedes hacer en foami o dibujar de igual forma quedarían lindos, también puedes hacer el diseño escolar que desees, solo deja volar tu imaginación ✨
Nos vemos en una nueva creación👩🎨
And this way I got two clip/separators! Personally I loved the result, it is very easy and with very simple materials, the fact of adding the crazy eyes makes it look so cuchi😍, although if you want to recreate and do not have this material you can do it in foami or draw in the same way they would look cute, you can also make the school design you want, just let your imagination fly✨
See you in a new creation👩🎨
Mil gracias por leerme una vez
Nos vemos en una próxima publicación.
Muchas bendiciones y abrazos digitales🤗
Thank you very much for reading me once
See you in an upcoming post.
Many blessings and digital hugs🤗

Mil gracias por leerme una vez
Nos vemos en una próxima publicación.
Muchas bendiciones y abrazos digitales🤗
Thank you very much for reading me once
See you in an upcoming post.
Many blessings and digital hugs🤗