Hello everyone, It's a beautiful Sunday evening, and I'm delighted to be here once again. I hope this meets you well and that the month of August will be a blessed one for all of us. Last week, my colleagues at work reached out to me to help him make simple footwear, that's normally called palm sandals down here in Nigeria; it's just typical footwear that looks like slippers but is made with leather, so today I'll be taking you through the fabric I made use of and the process of making the palm slippers for him.

This my colleague has seen several pieces of footwear I made for myself and the client, both while I was putting them on or in my phone gallery, and so he has made up his mind to make one from me. When he approached me, I said he wanted something simple, and that's literally weight, so he can easily wear it and move around with ease. He also told me his preferred color, and after taking note of all his descriptions, I set out to work, and below are the procedures.

List of materials and equipment used
- Brown leather
- Black leather lining
- Maco insole
- Nora outsole
- Gum
- Logo design
- Cutter
- Hammer
- Scissors
The making processes
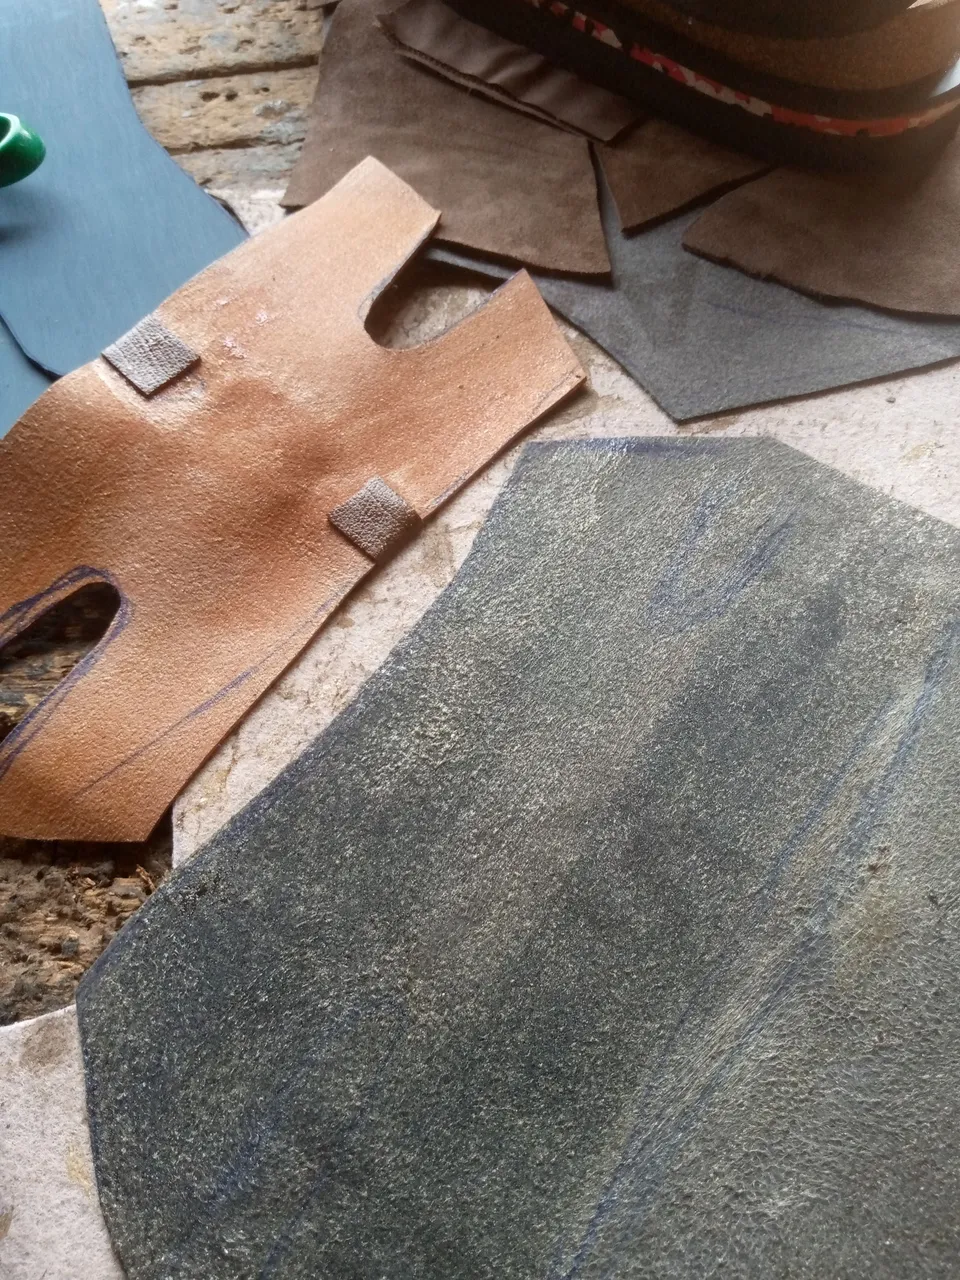
Just like every other time I'm making a footwear, once I've a picture of what I want to do in my mind, or via the description of the client, I usually began by cutting the upper design to suit the describe design and so help I drew the shape on my brown leather, then I use my leather scissors to cut our the shape.


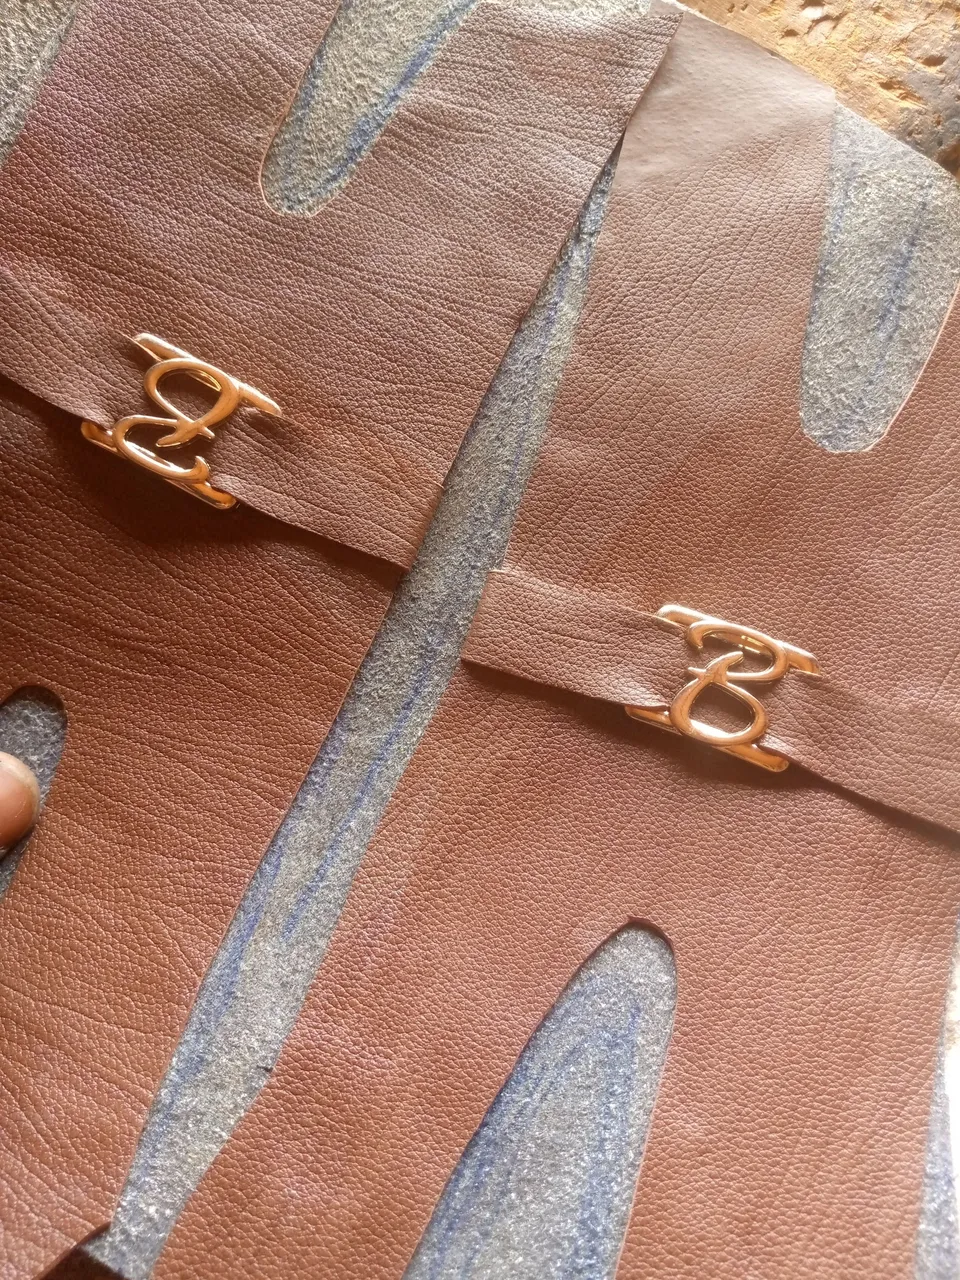
After this I cut a tin straight line of the brown leather, I attach the logo design to it, and then joined it to the entire upper I cut in the first stage, then I cut a black leather lining in the same shape as the brown leather for the upper design.
Once that was achieved, I pick my brush and OCI gum and applied it on the inner part of the brown leather and the black leather lining, then I leave it to dry for a minute.
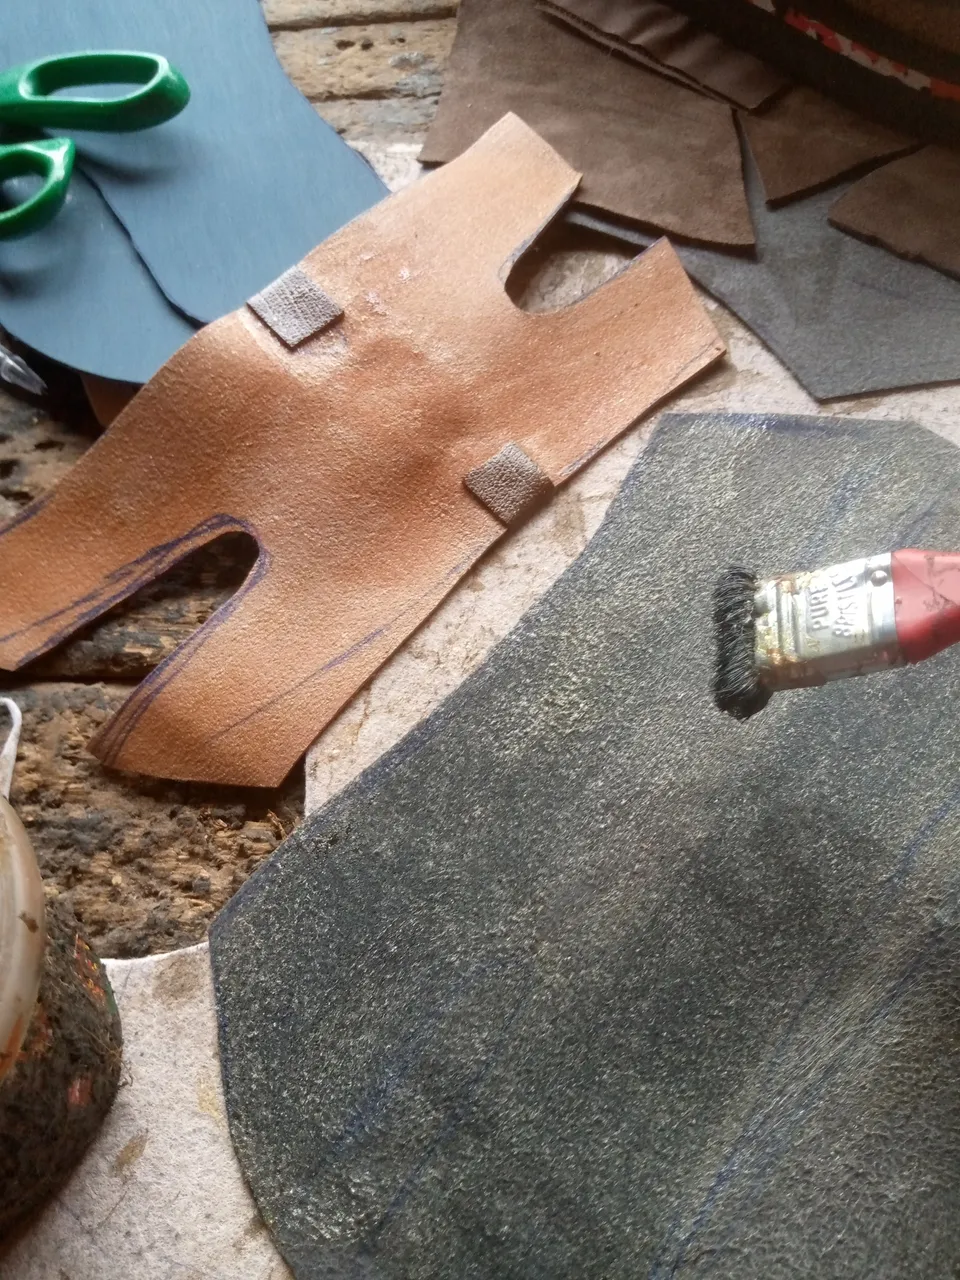
Once it was dry, not completely, I placed the brown leather on the black leather for lining, this will make the footwear more firm and long lasting, so once it was firmly attach, all I've to do was cut the perfect shape out of the extra black leather lining.
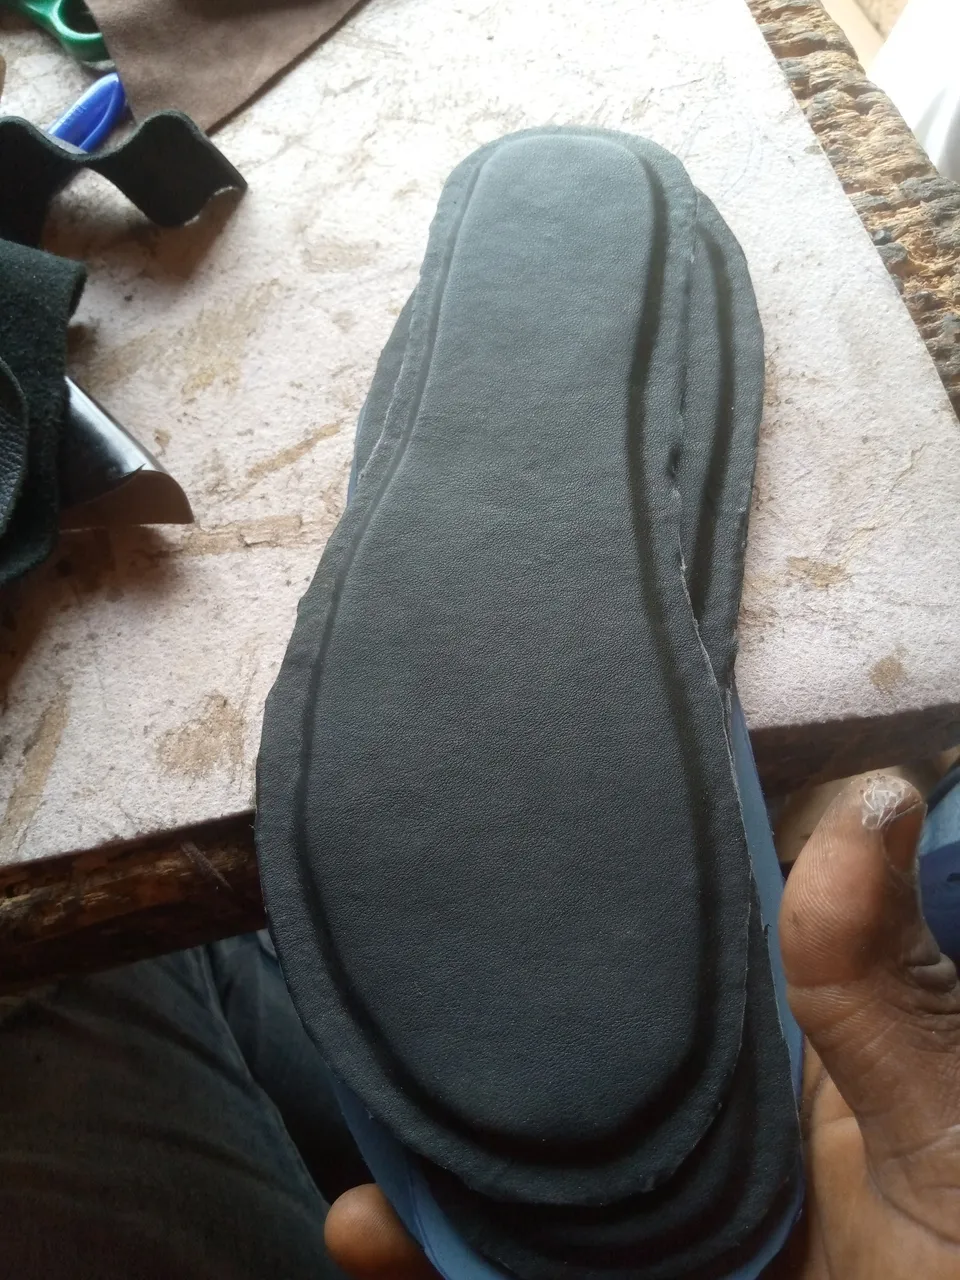
Moving to the lower part of the footwear, that's insole and outsole, since the colleagues asked for a custom made sole, so I had to build it myself, do I built the insole and outsole together, but cutting the Nora for outsole into his foot size, then the maco, I use the remaining black leather lining to wrap it firmly with a gum and that's how we've the sole looking like the image below.
I went on to use my cutter, a tool like a knife to creat an opening on the sizes of the outsole, so I can put the wings of the upper design through it, and once that was done I put apply some gun around the opening, put the strap through and let it joined together firmly.

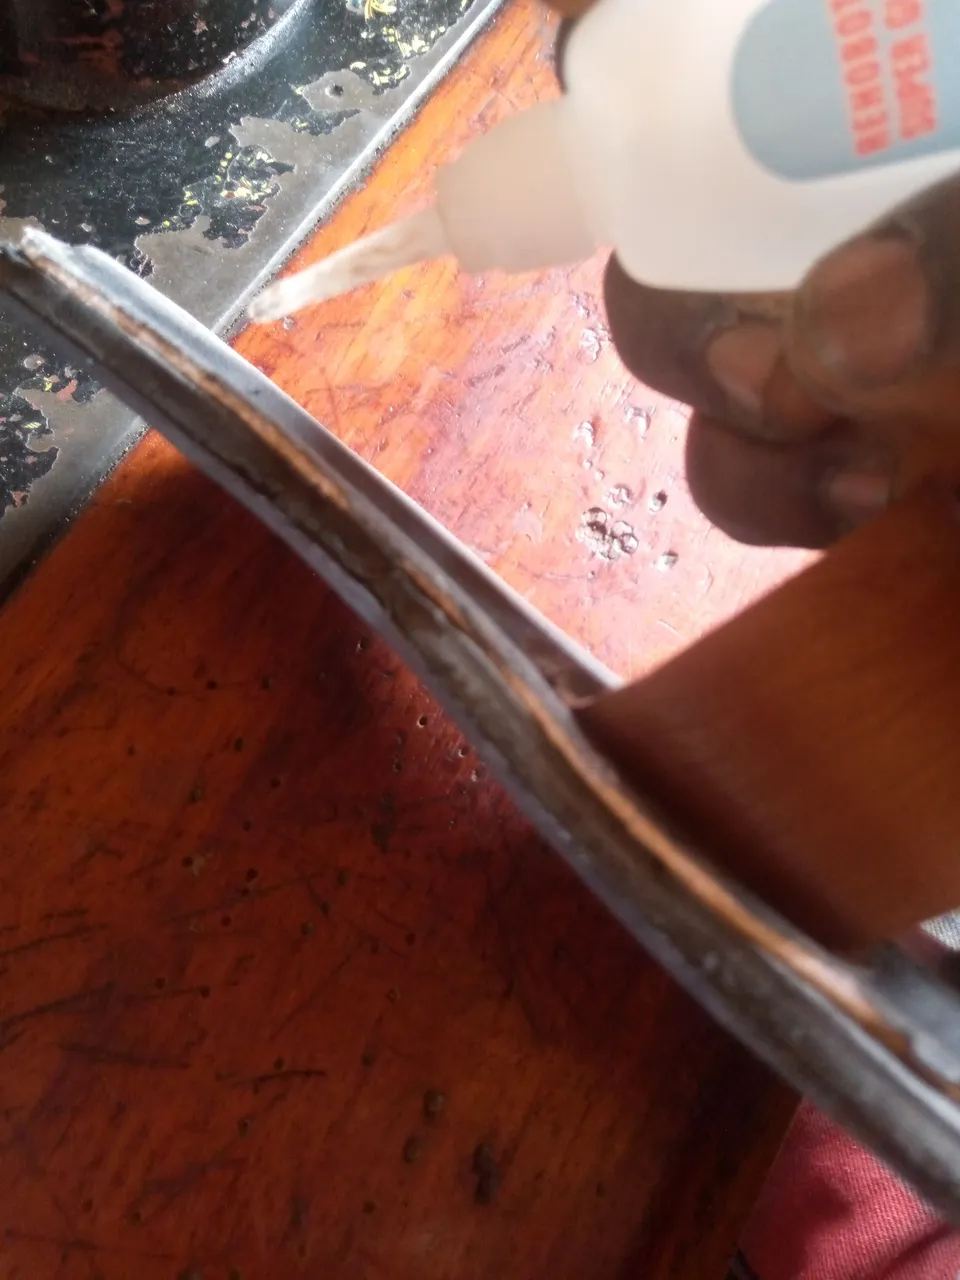
Lastly I did apply super glue all around the edge of the footwear some, press it together and also use the hammer to gently hit it for firmness.
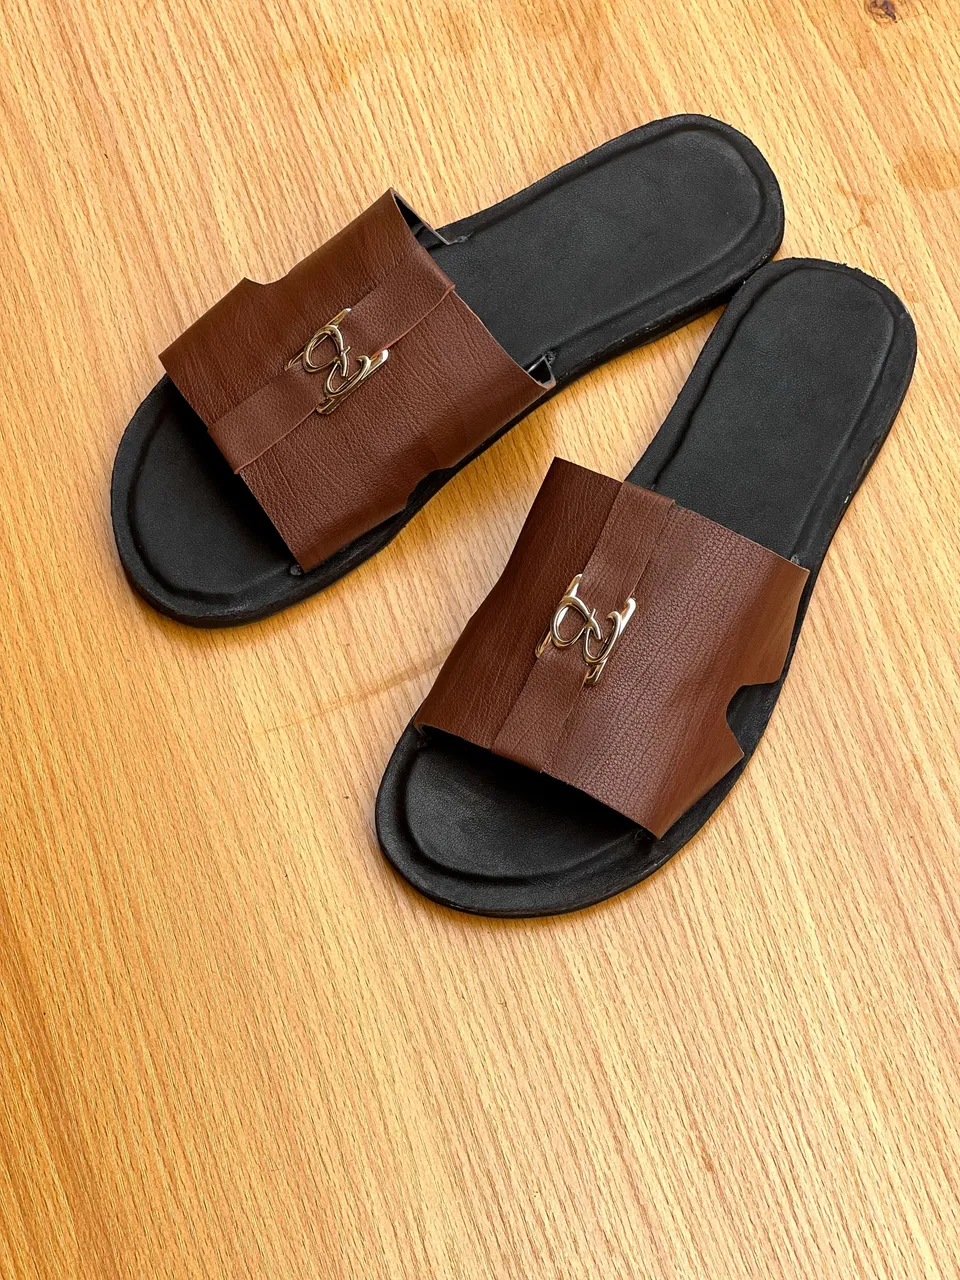
Finally after attaching every single part together, this is what we have and presenting it to my colleague, he loves it and said it was exactly what he pictured in mind when describing it to me, I'm glad he love it and excited I could meet his expectations.

Thanks so much for your time, I hope you enjoyed the read and procedure for making this footwear, do have a wonderful day and stay bless.
All photos are mine.