¡Hola, hivers creadores! Espero que se encuentren muy bien y en constante creación ✨
Hoy por fin terminé todos los detalles que tenía en mente para regalar a mamá por su cumpleaños. Tuve todo este mes para inventar y pensar en cosas que deseaba poder darle... ¡Y pude lograrlo! Muchas de esas cosas gracias a Hive, regalos para la cumpleañera, para mis primitos, un regalito para una nueva ahijada que además es mi prima 🤭, algo para mi papá y hasta para el gato de mi mamá. (En el camino también me compré un par de chucherías para mí 😐)
Spoiler: Es la primer tarjeta de cumpleaños que hago para mi mamá. Vivimos en estados diferentes y suelo ser yo quien viaja a pasar su cumpleaños juntas. Cada año le hago su torta porque ella es muy pero muy tortera. Hmm parece que siempre se me ha pasado por alto llevar tarjeta. Hasta este momento.
Así que esta es la tercera y última parte de la serie de manualidades, enfocadas en el trébol de la suerte🍀
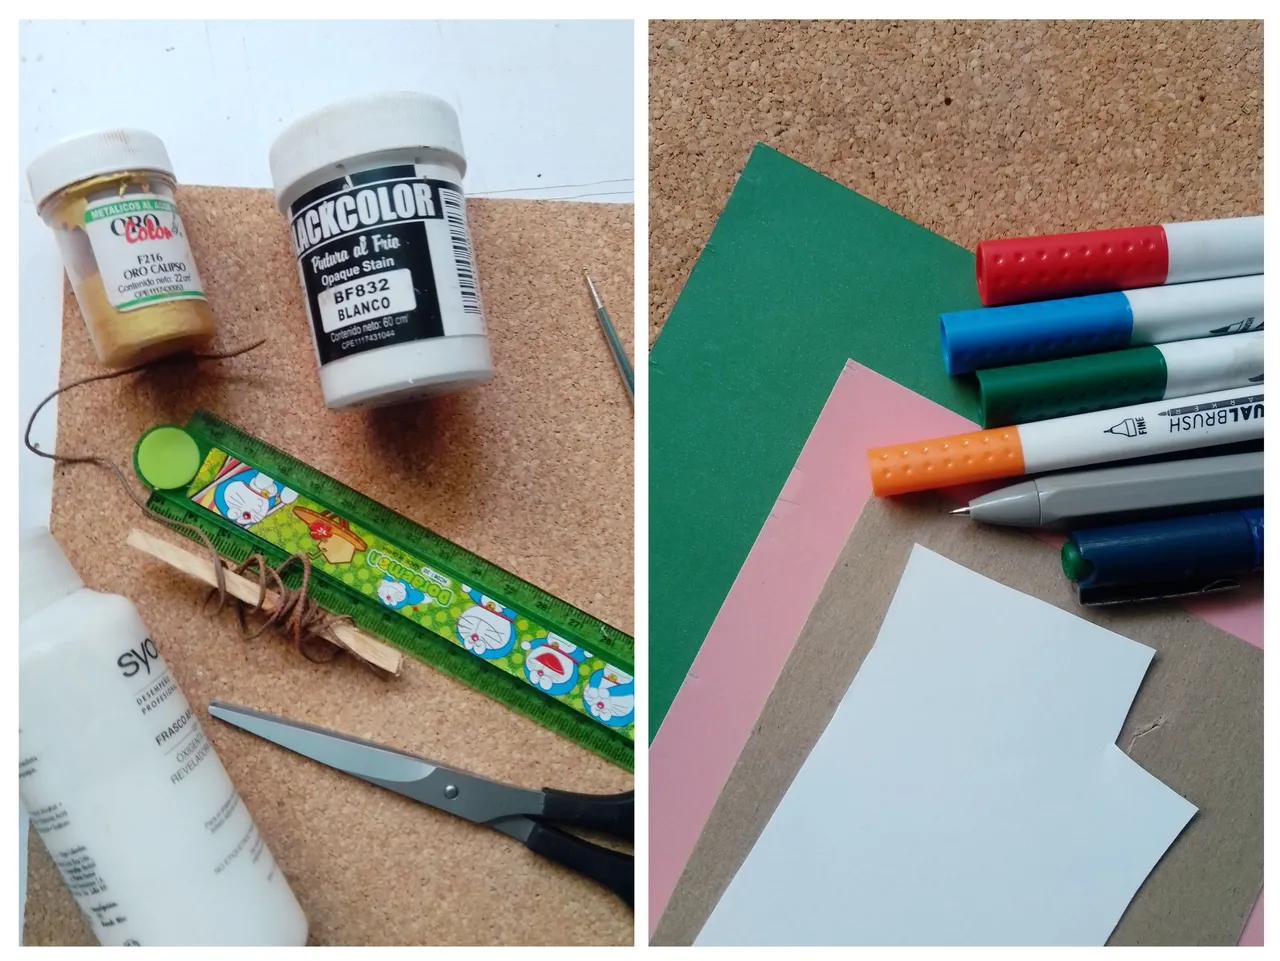
Y vamos a necesitar para la tarjeta:
- Cartón delgado.
- Marcadores.
- Regla.
- Cartulina de color blanco, verde, rosa.
- Tijera.
- Pega.
- Pintura al frío de color dorado y de color blanco.
- Palito de altura o puntero.
- Cuerda fina.

Paso 1
Necesitaremos un cartón que tenga un largo de 26 cm o más, ya que ese es el tamaño que ocuparemos. Este cartón lo saqué de un block y estaba manchado de pintura, pero ya verán como la solución.
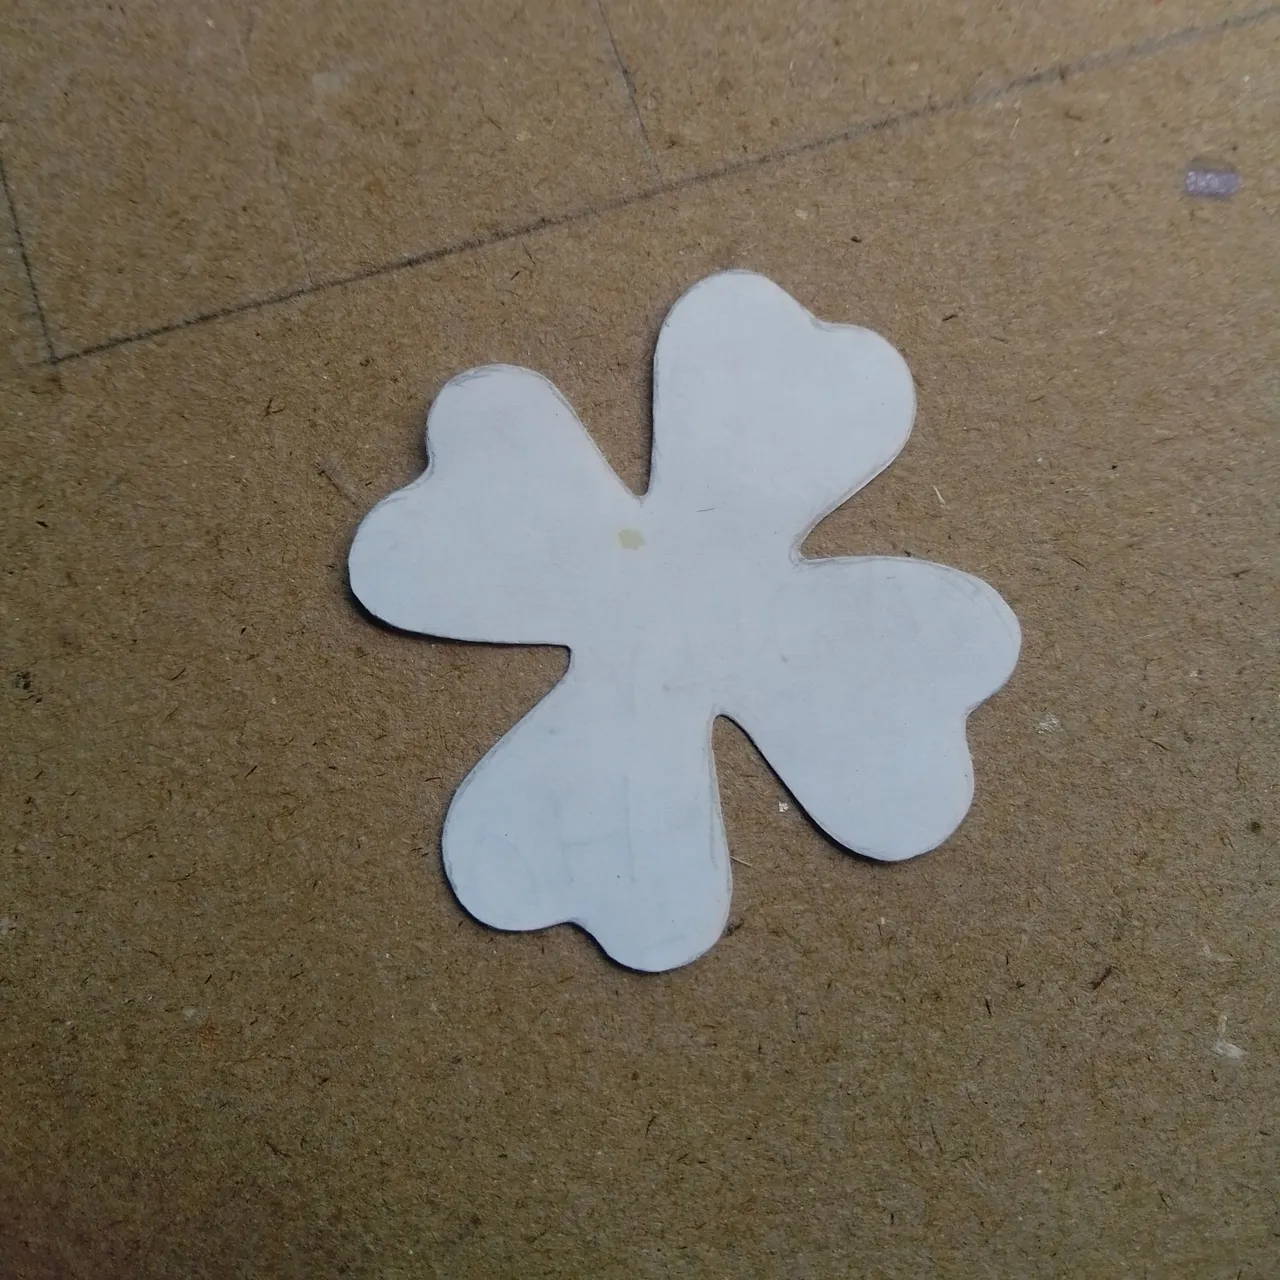
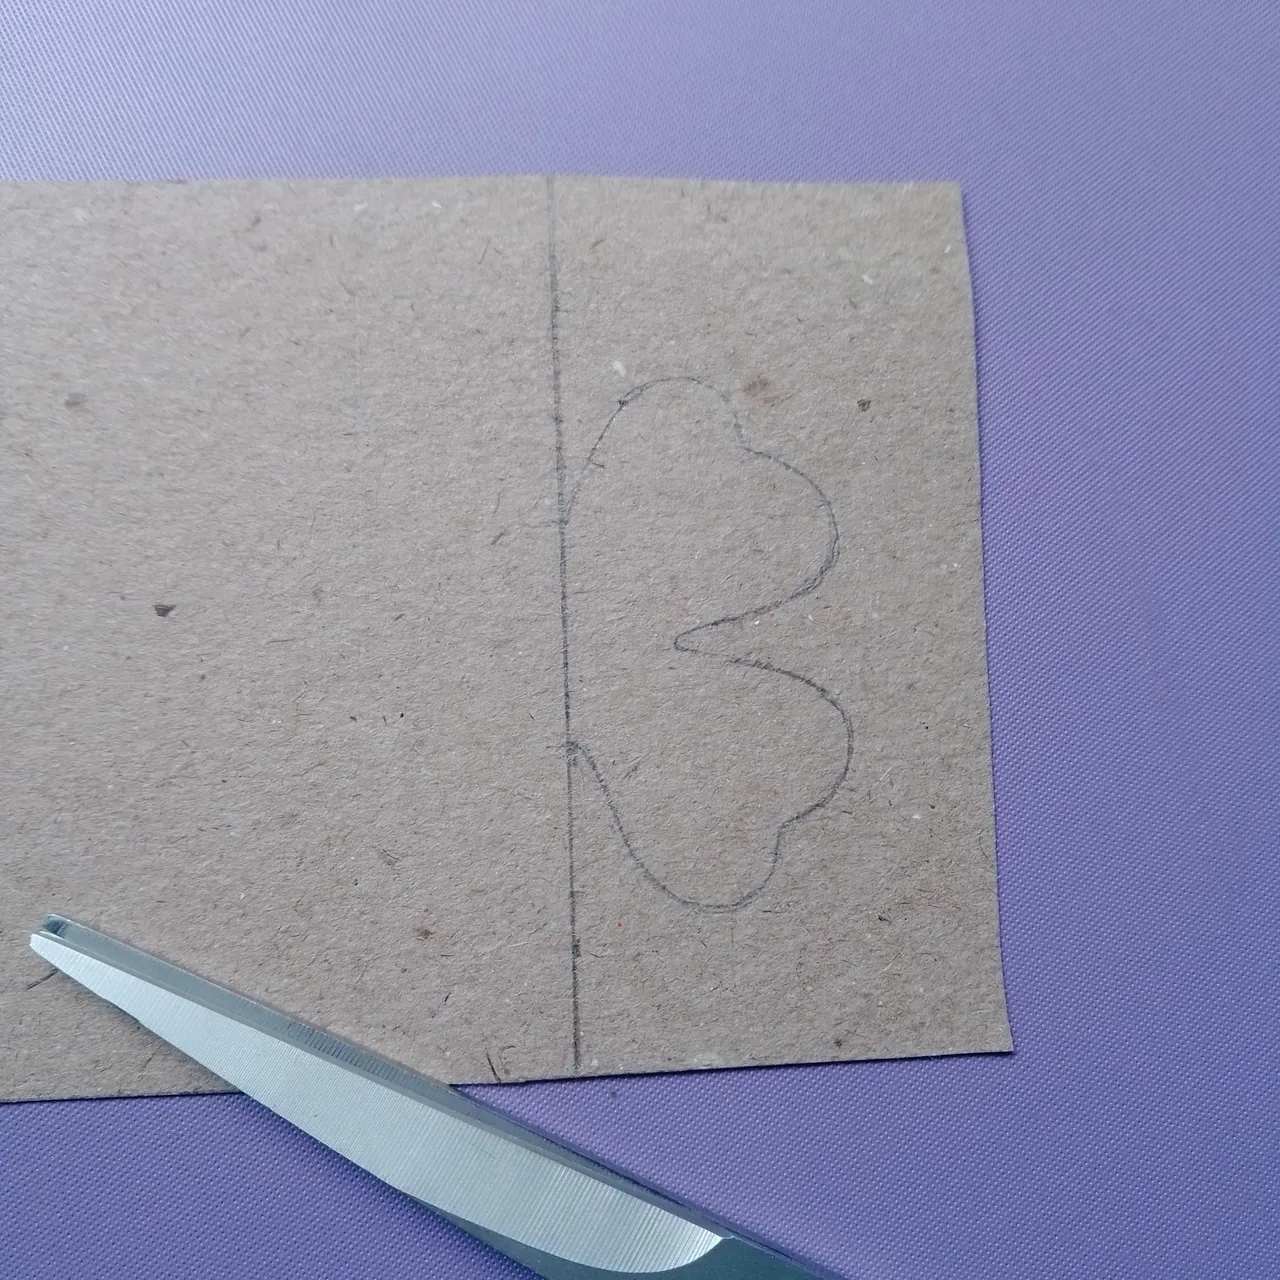
Lo primero es dibujar un trébol, que luego debemos cortar a la mitad.
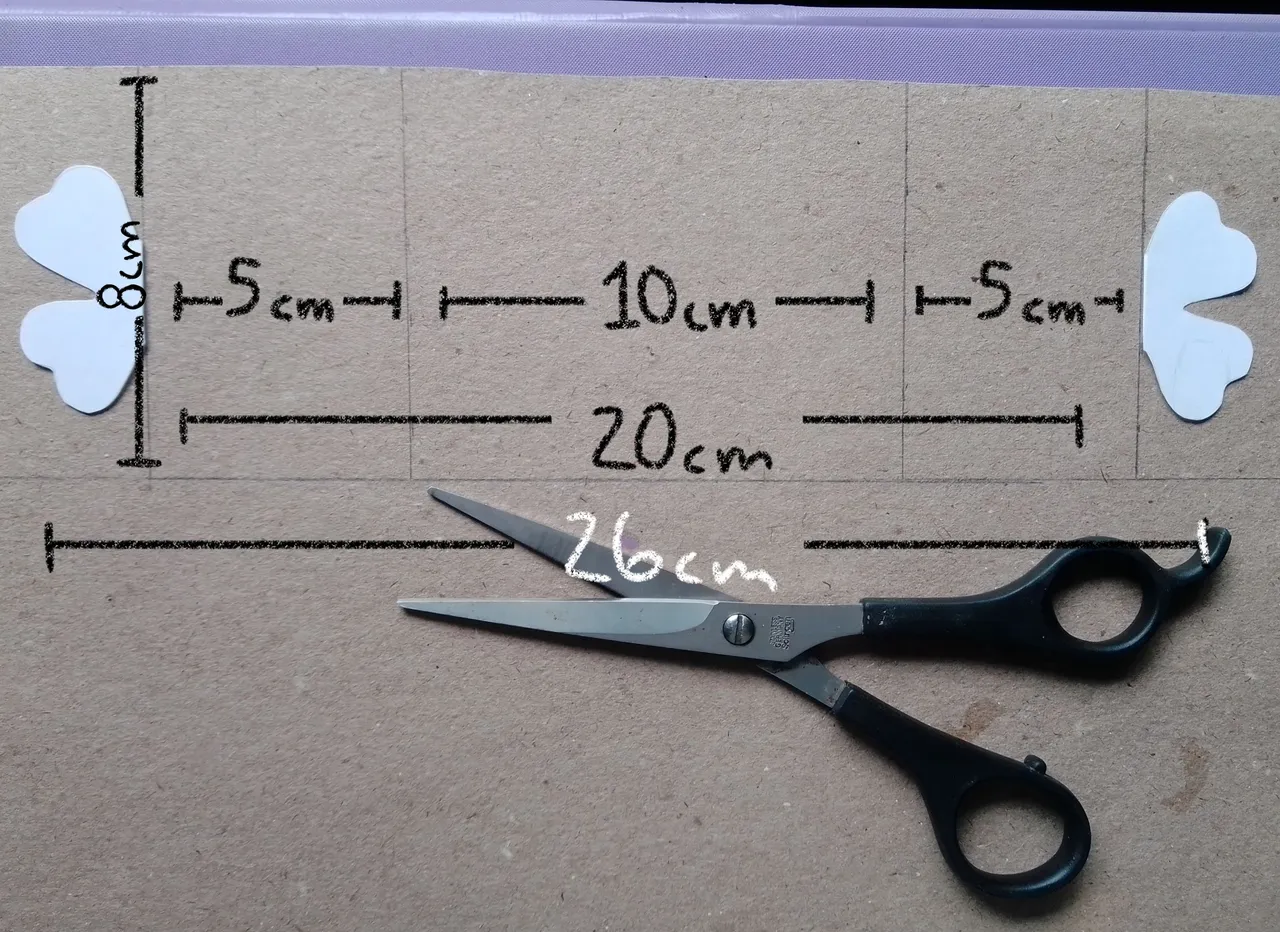
Marcamos un rectángulo de 26 cm de largo por 8 de alto. Dentro de este marcamos 3 cm de cada lado como se muestra en la imagen y dibujaremos ambas partes del diseño.
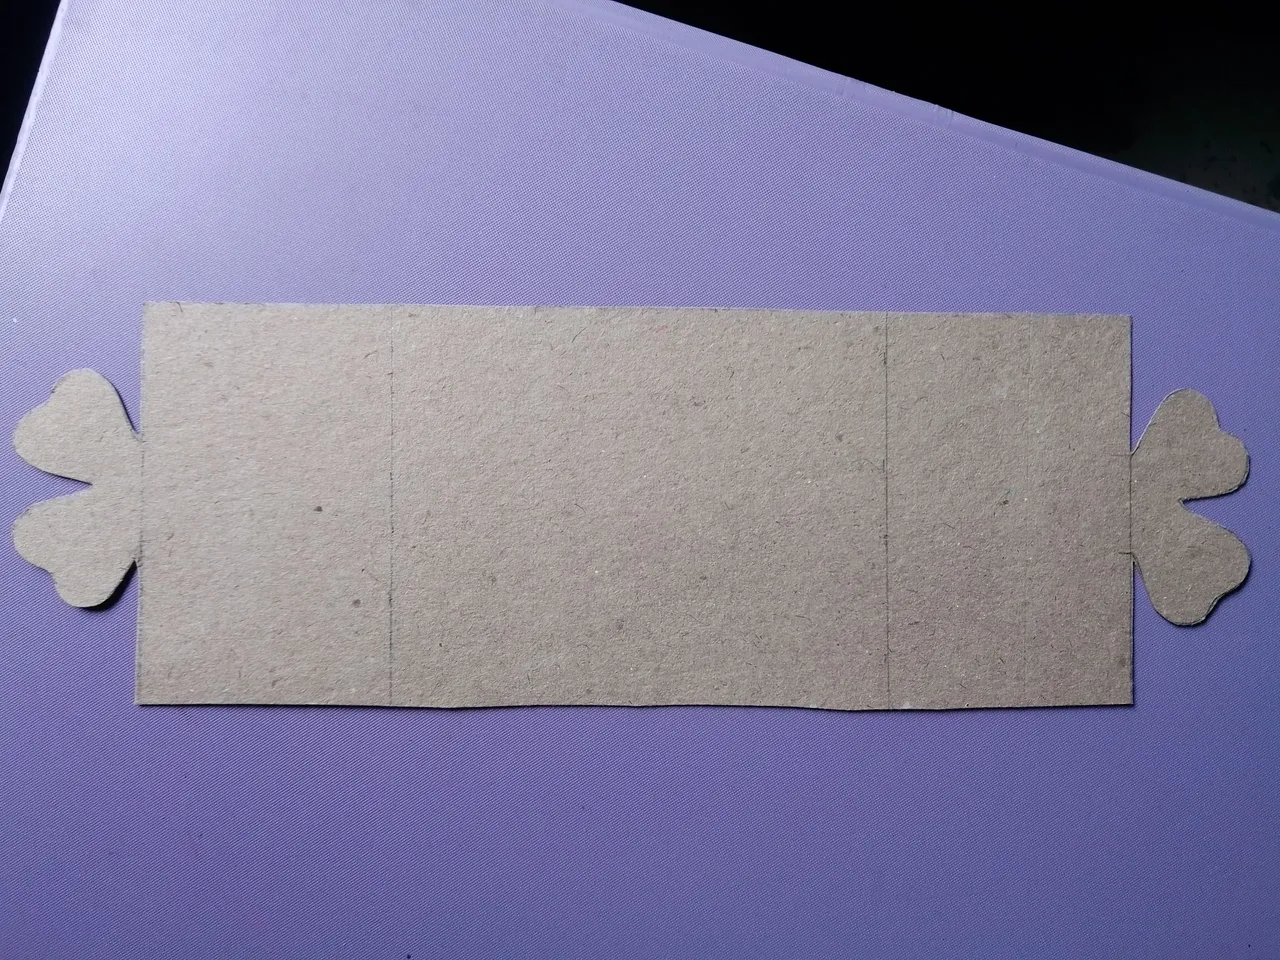
El rectángulo de 20 cm tendrá 3 divisiones en el siguiente orden: 5 cm, 10 cm, 5 cm.
Dibujamos la mitad de cada trébol en ambos lados y recortamos.
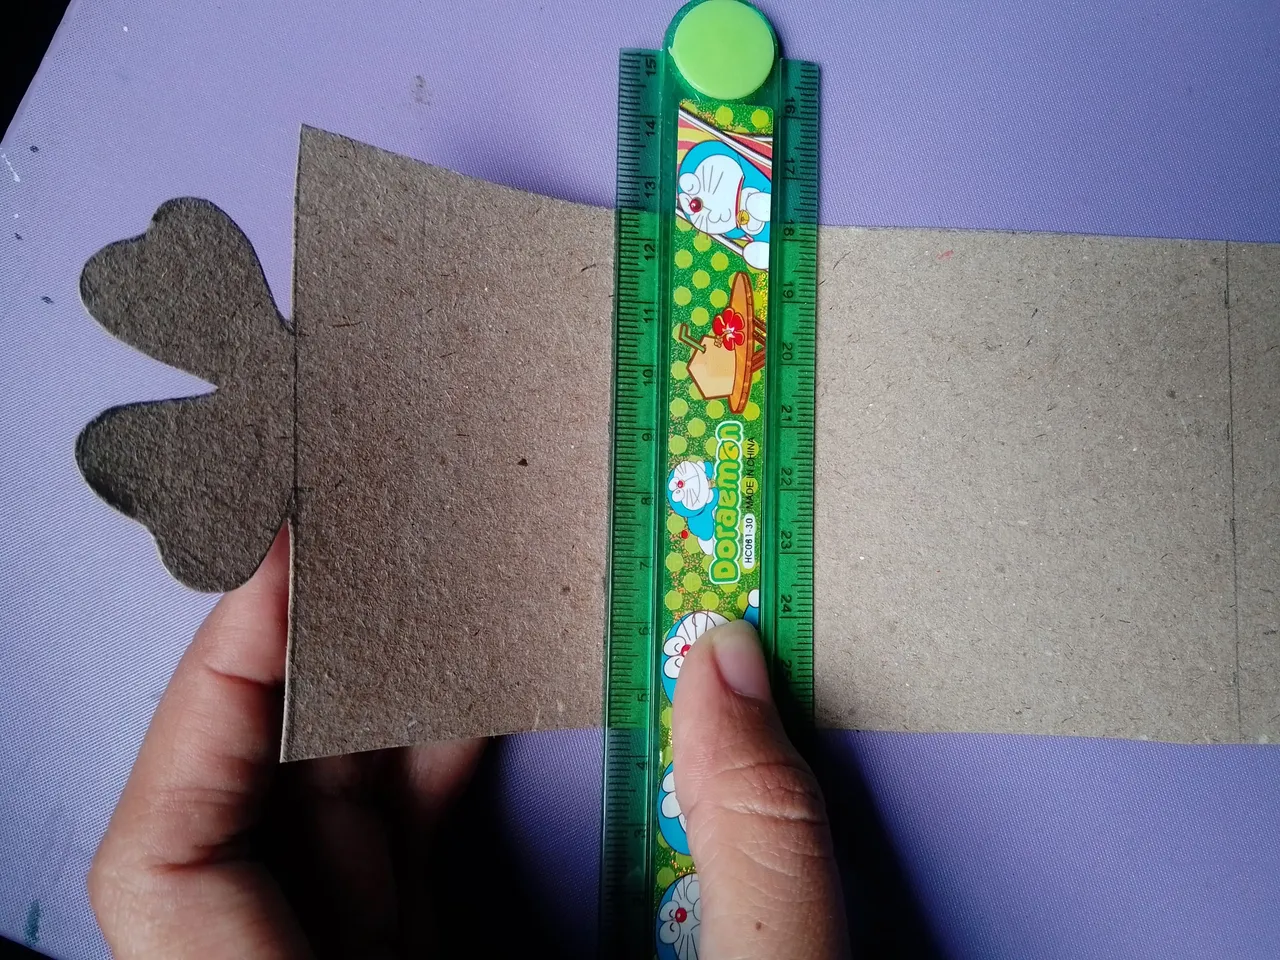
Doblamos con ayuda de la regla en la marca de los 5 cm y también en los tréboles
Paso 2
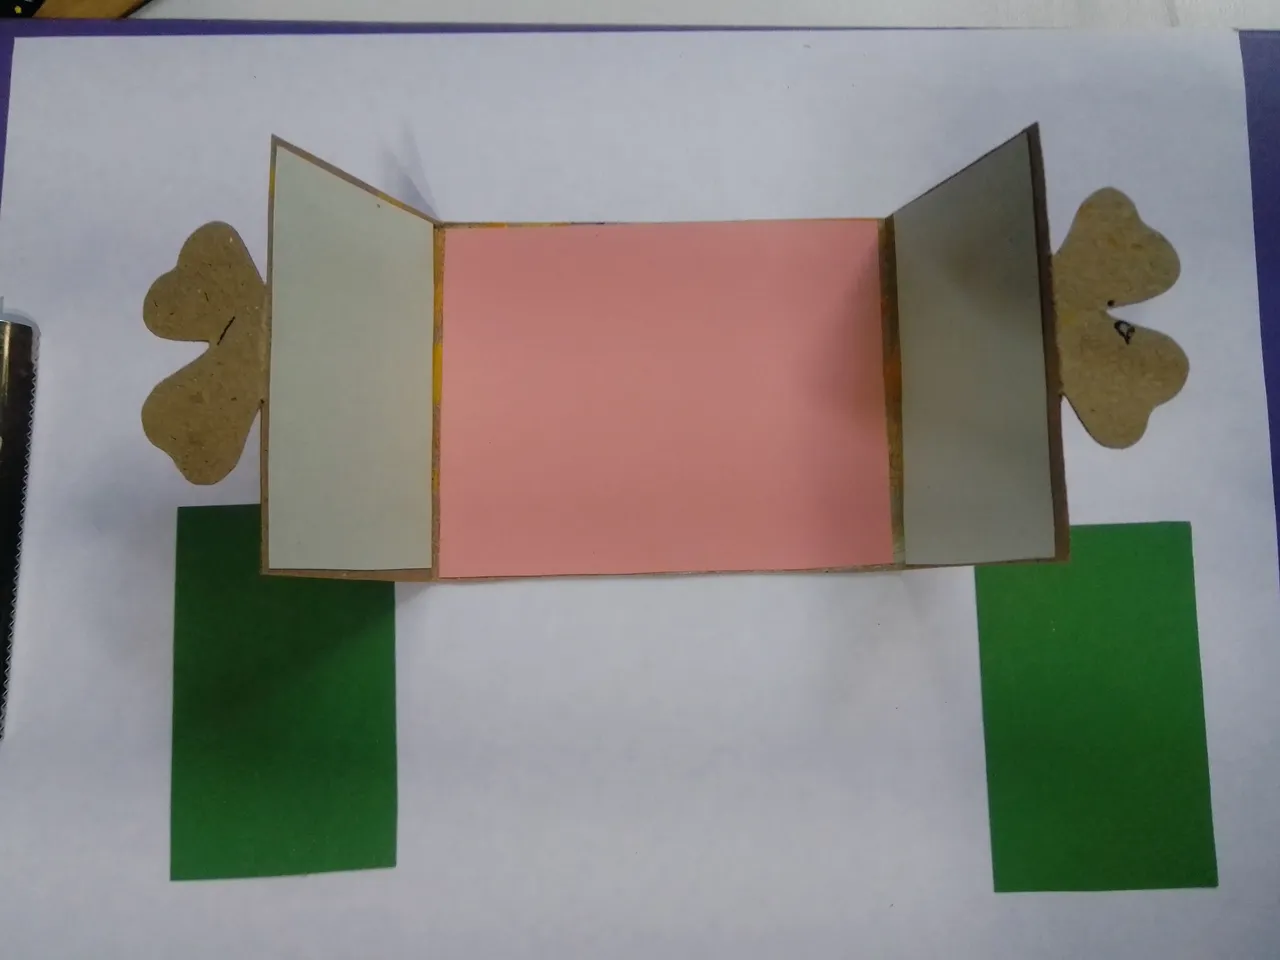
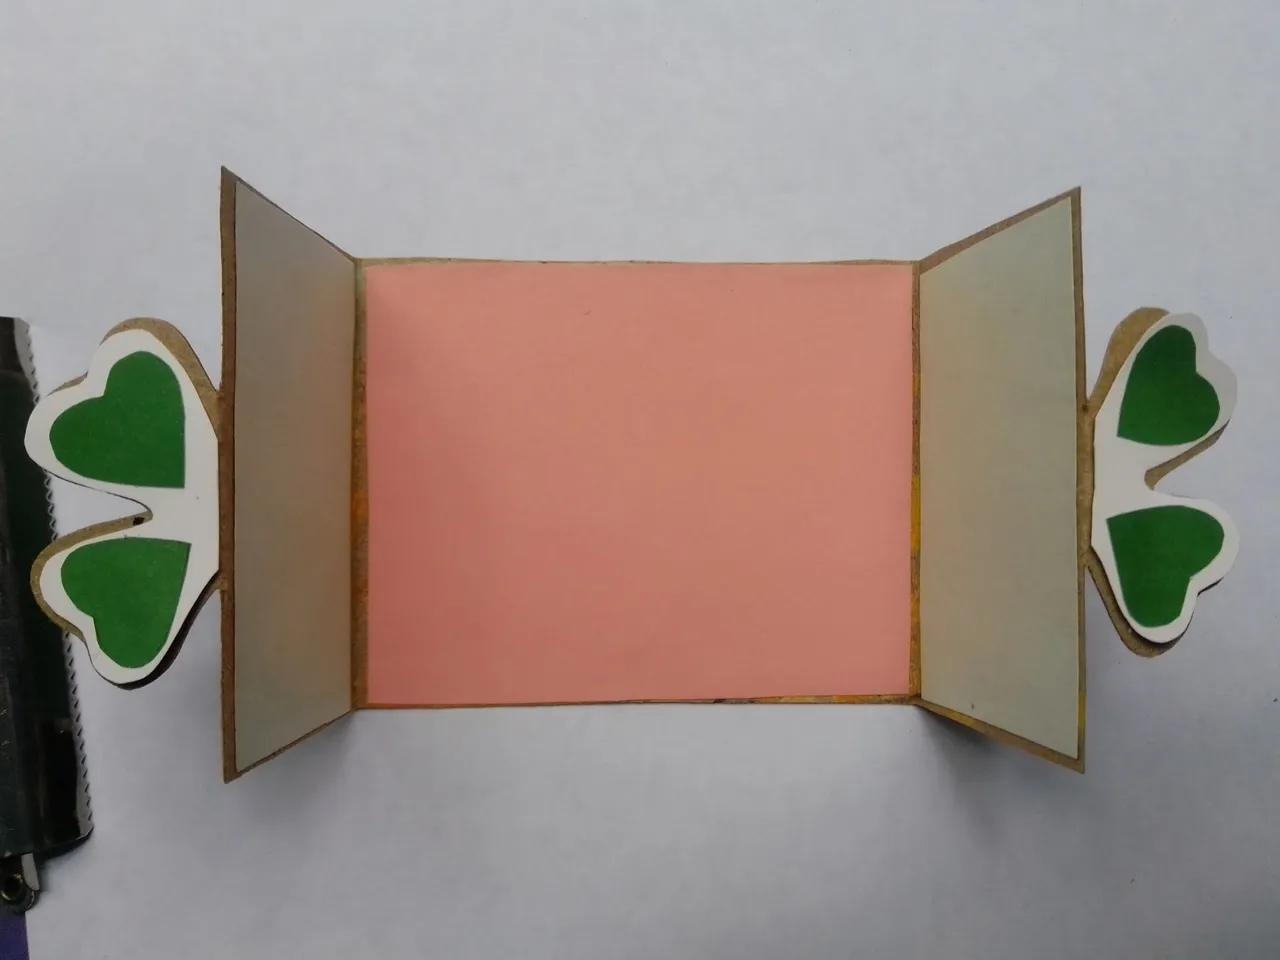
El interior está manchado con pintura y para solucionarlo, solo usamos las cartulinas de colores para cubrirlo.
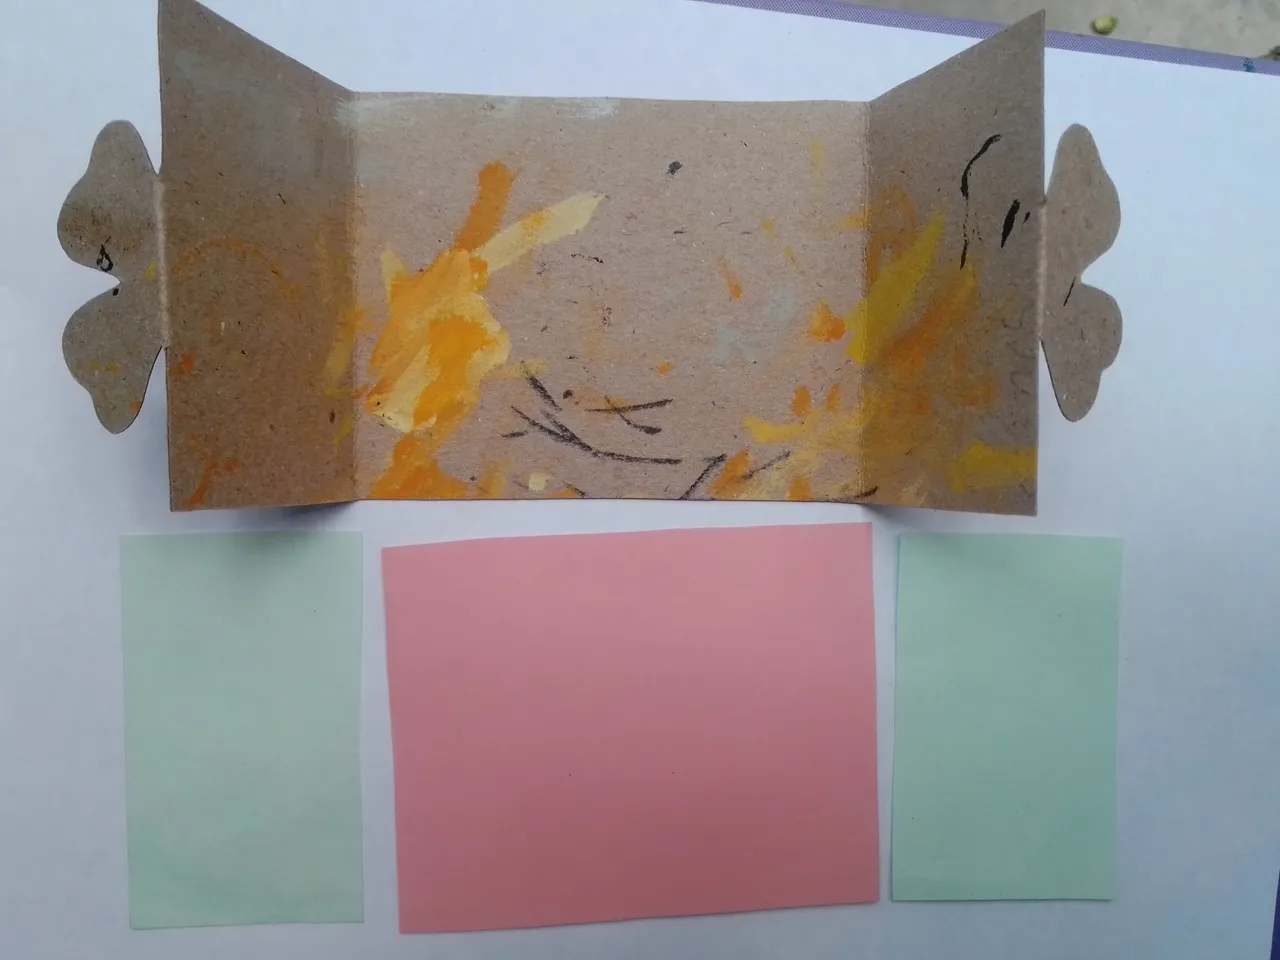
Para la parte exterior, cubrimos con cartulina verde.
Paso 3
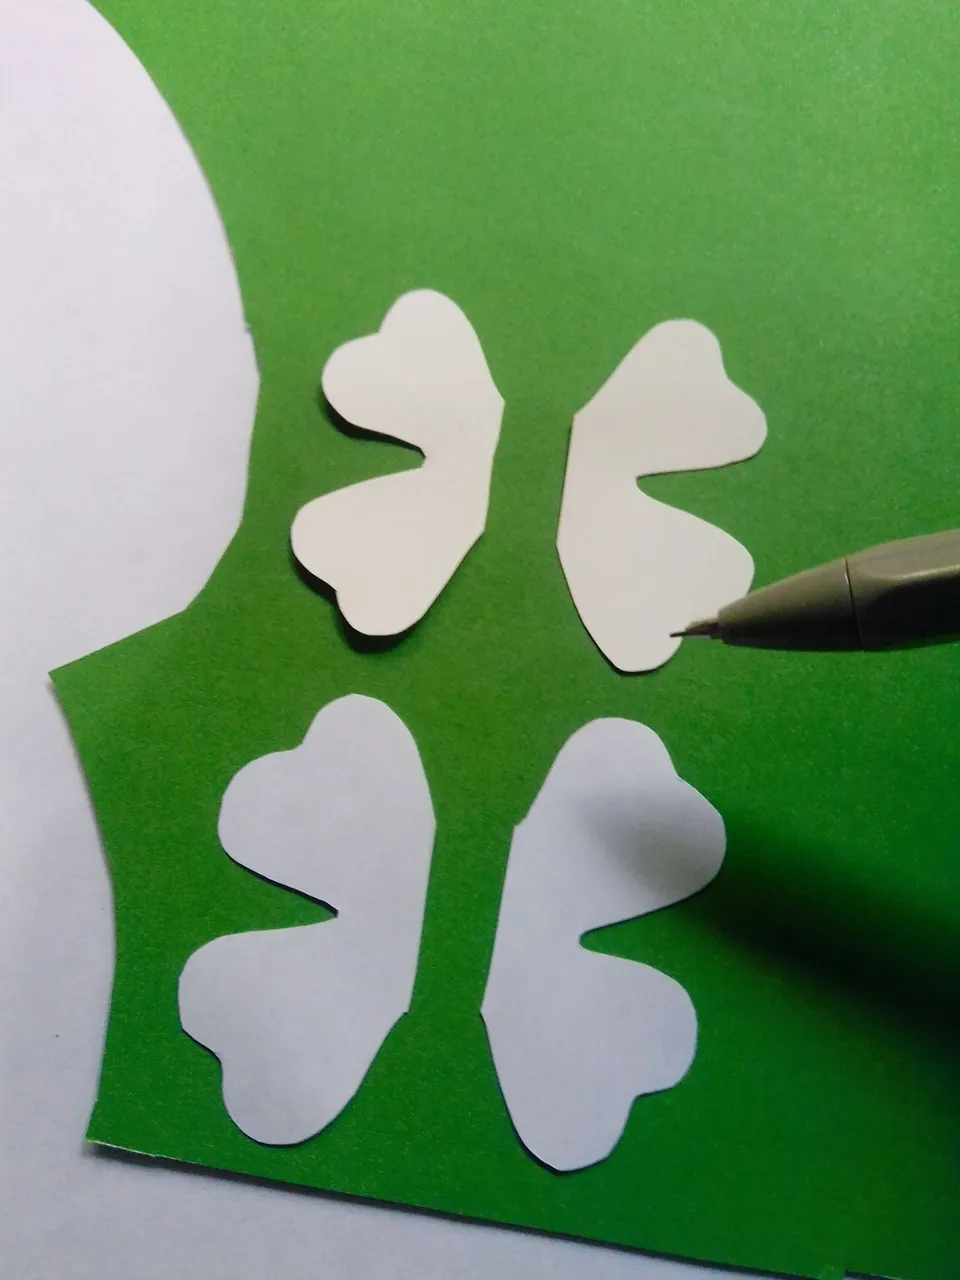
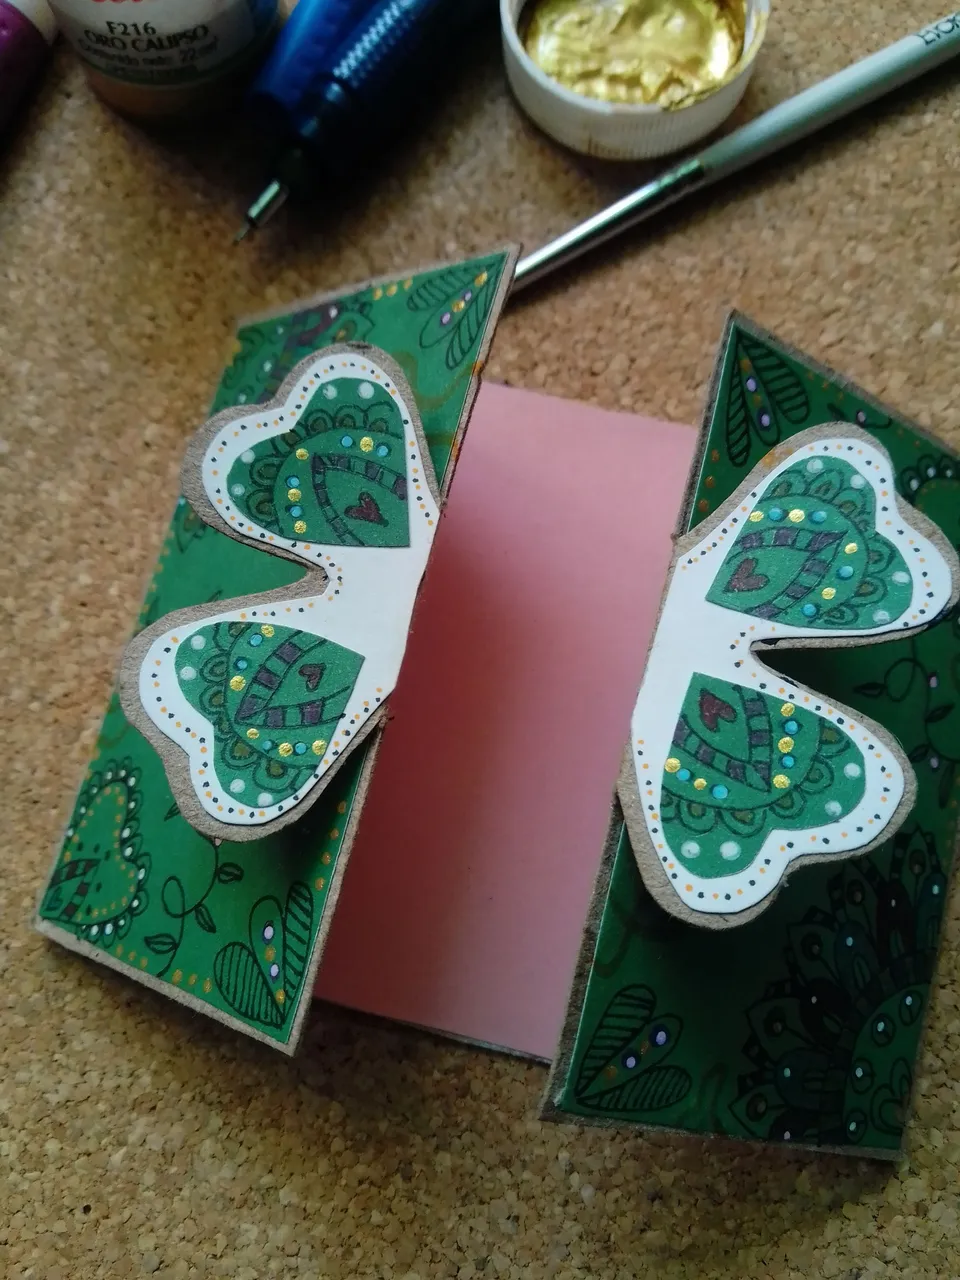
Usamos el molde del trébol para sacar las piezas en cartulina blanca o cartulina verde, la del color que prefieras.
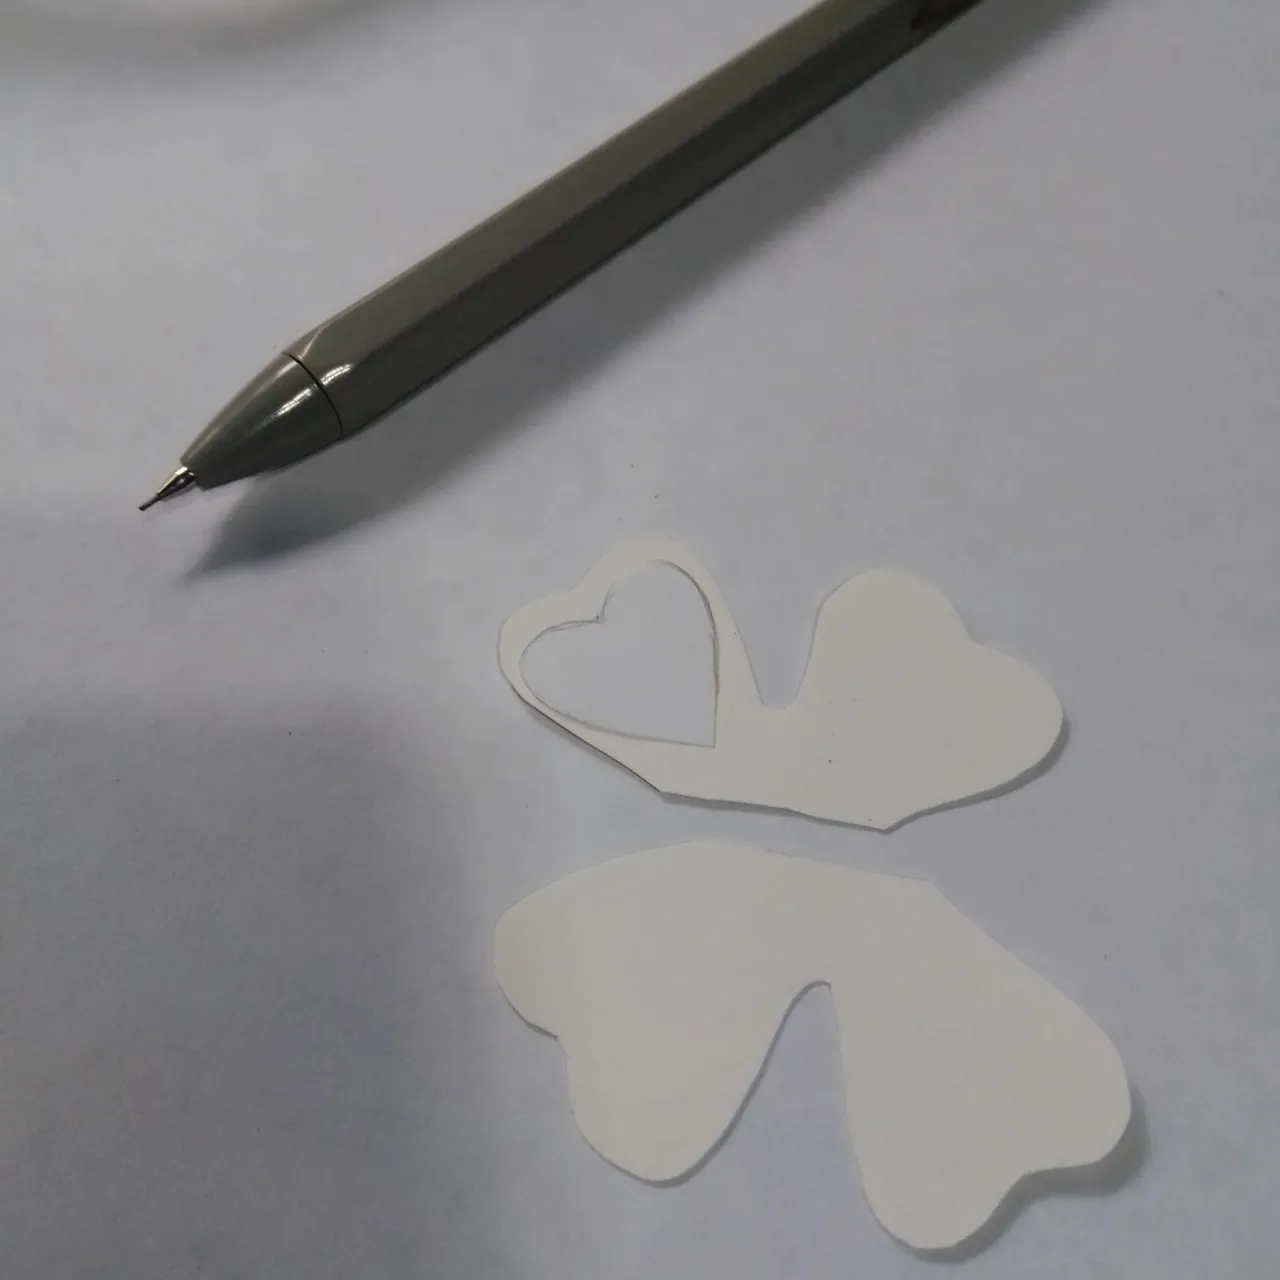
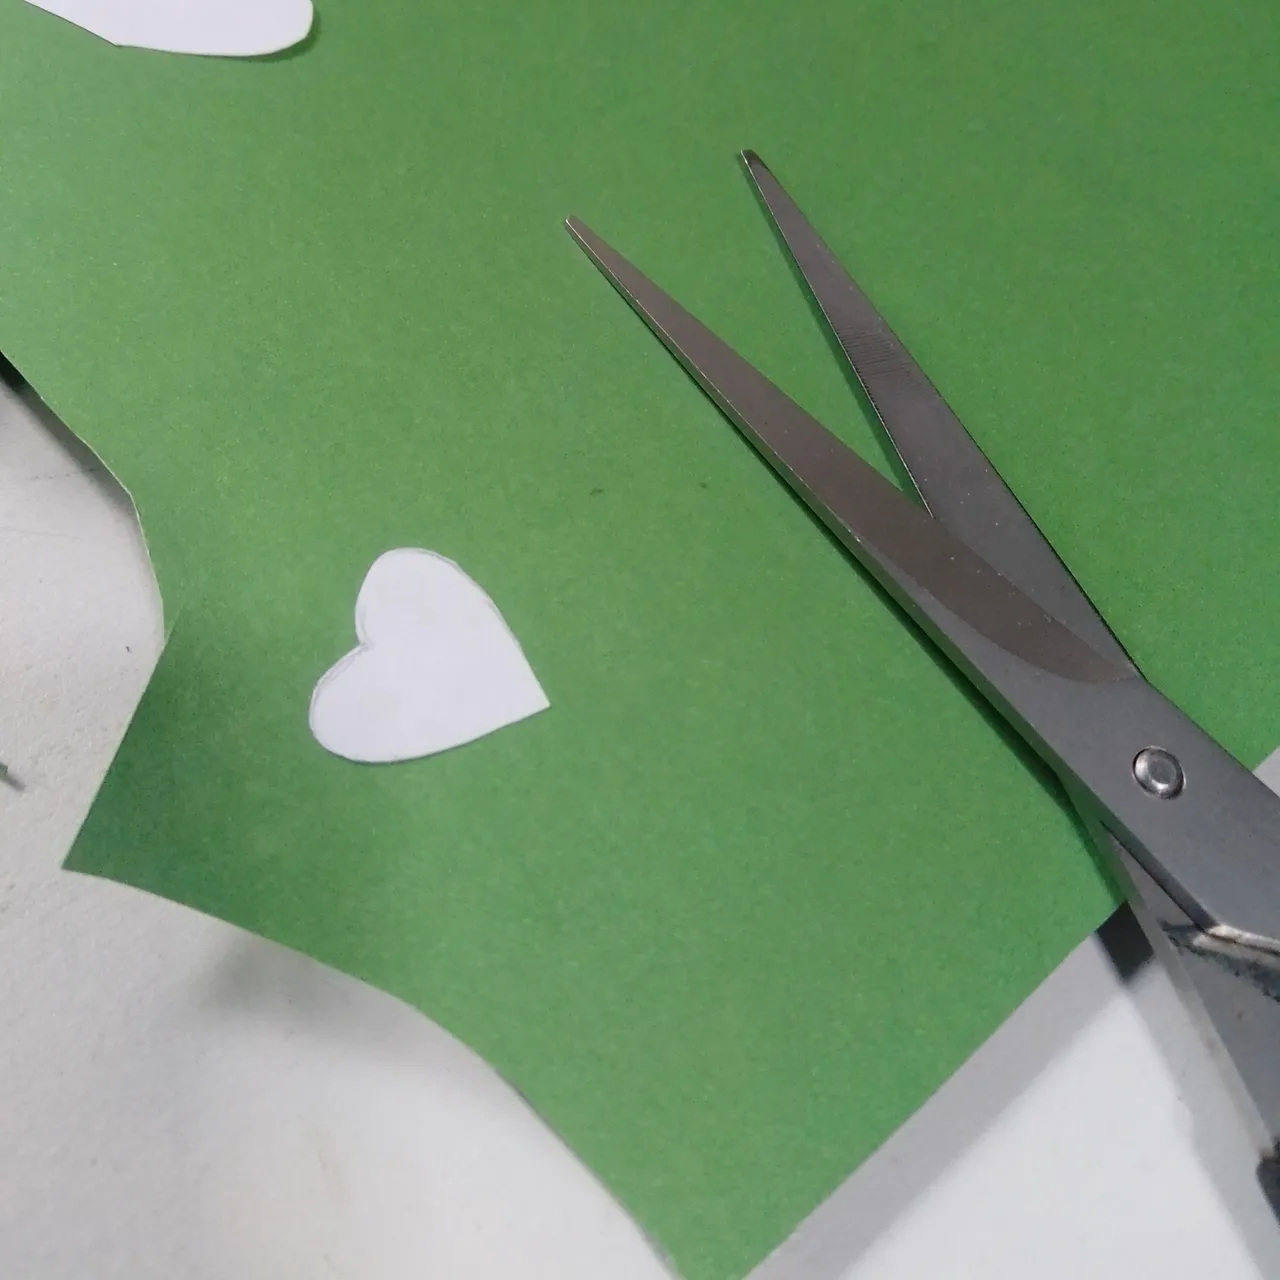
Y también hacemos cuatro corazones que irán en el centro del trébol.

Paso 4
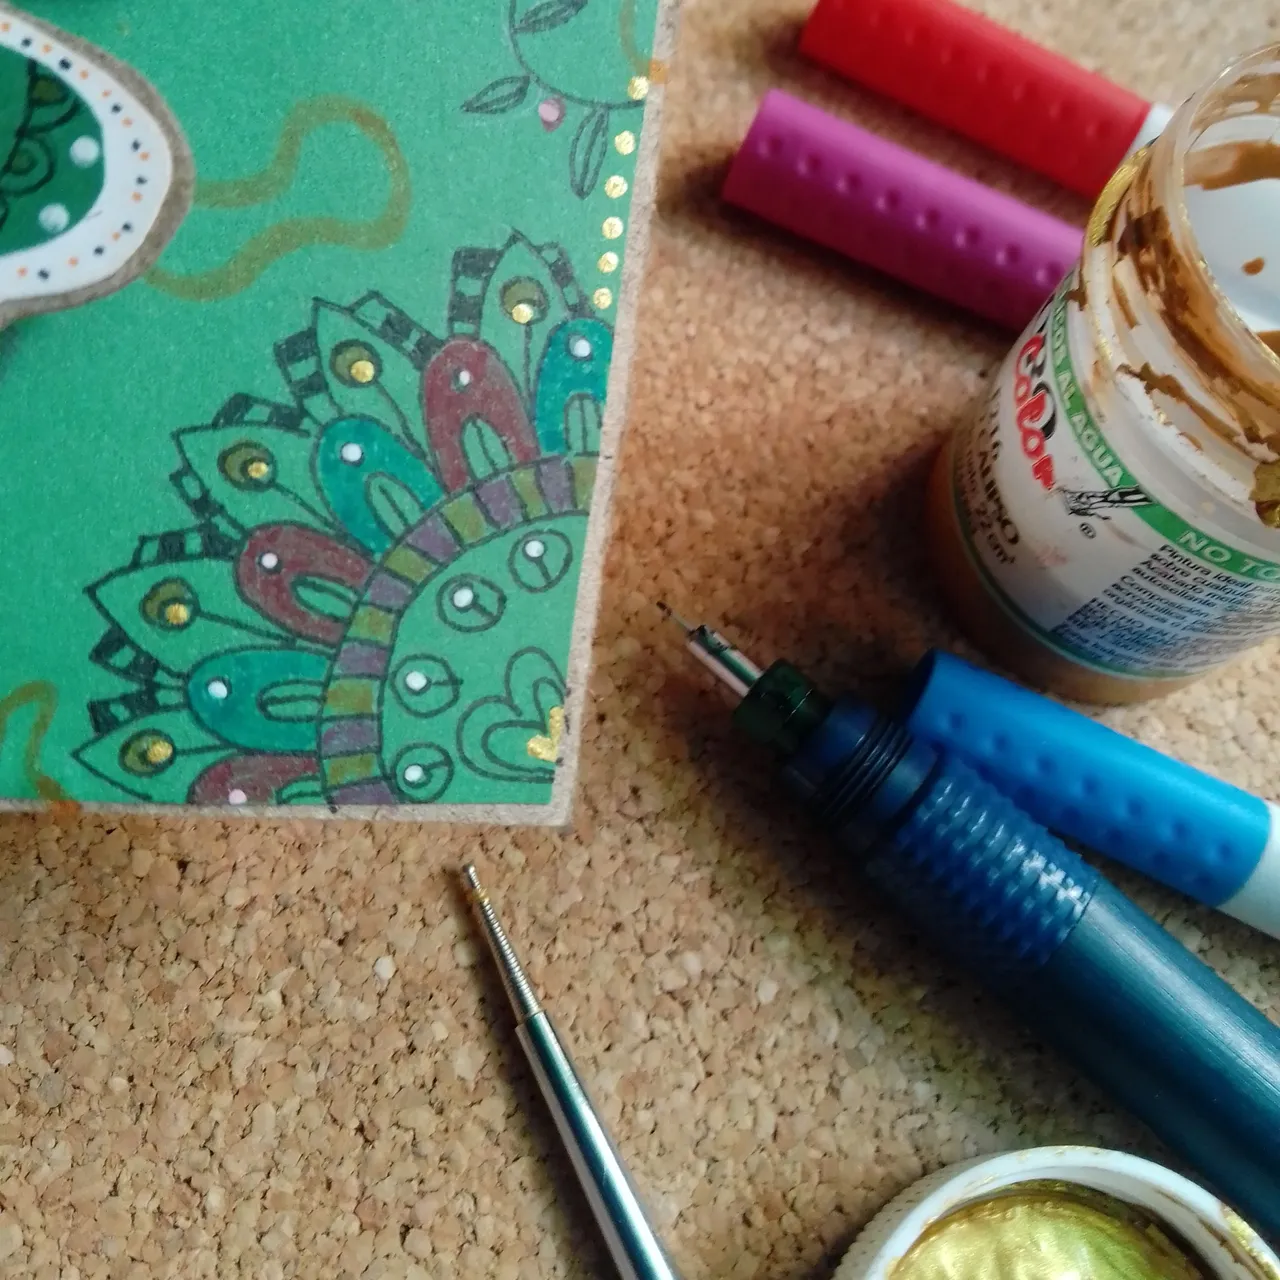
En la parte exterior puedes escribir "Feliz cumpleaños", "Te quiero", "Queremos torta", lo que se te ocurra 😅 o también puedes intentar estas decoraciones, son mis intentos de mandala, no son perfectas, pero le dan otro toque a la tarjeta. También unos puntitos con la pintura blanca y otros con la pintura dorada.

¡Y pampararam! 🥁
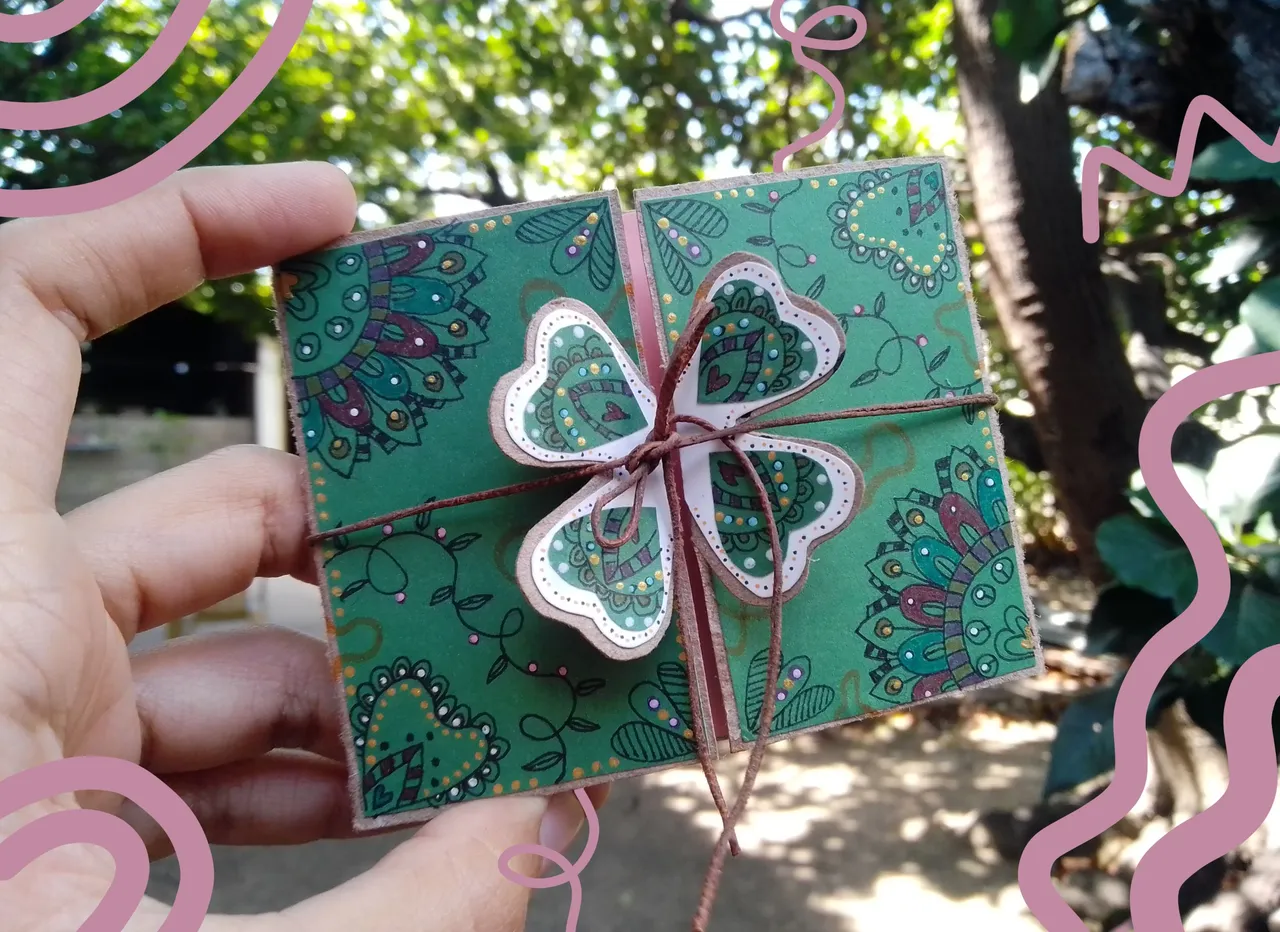
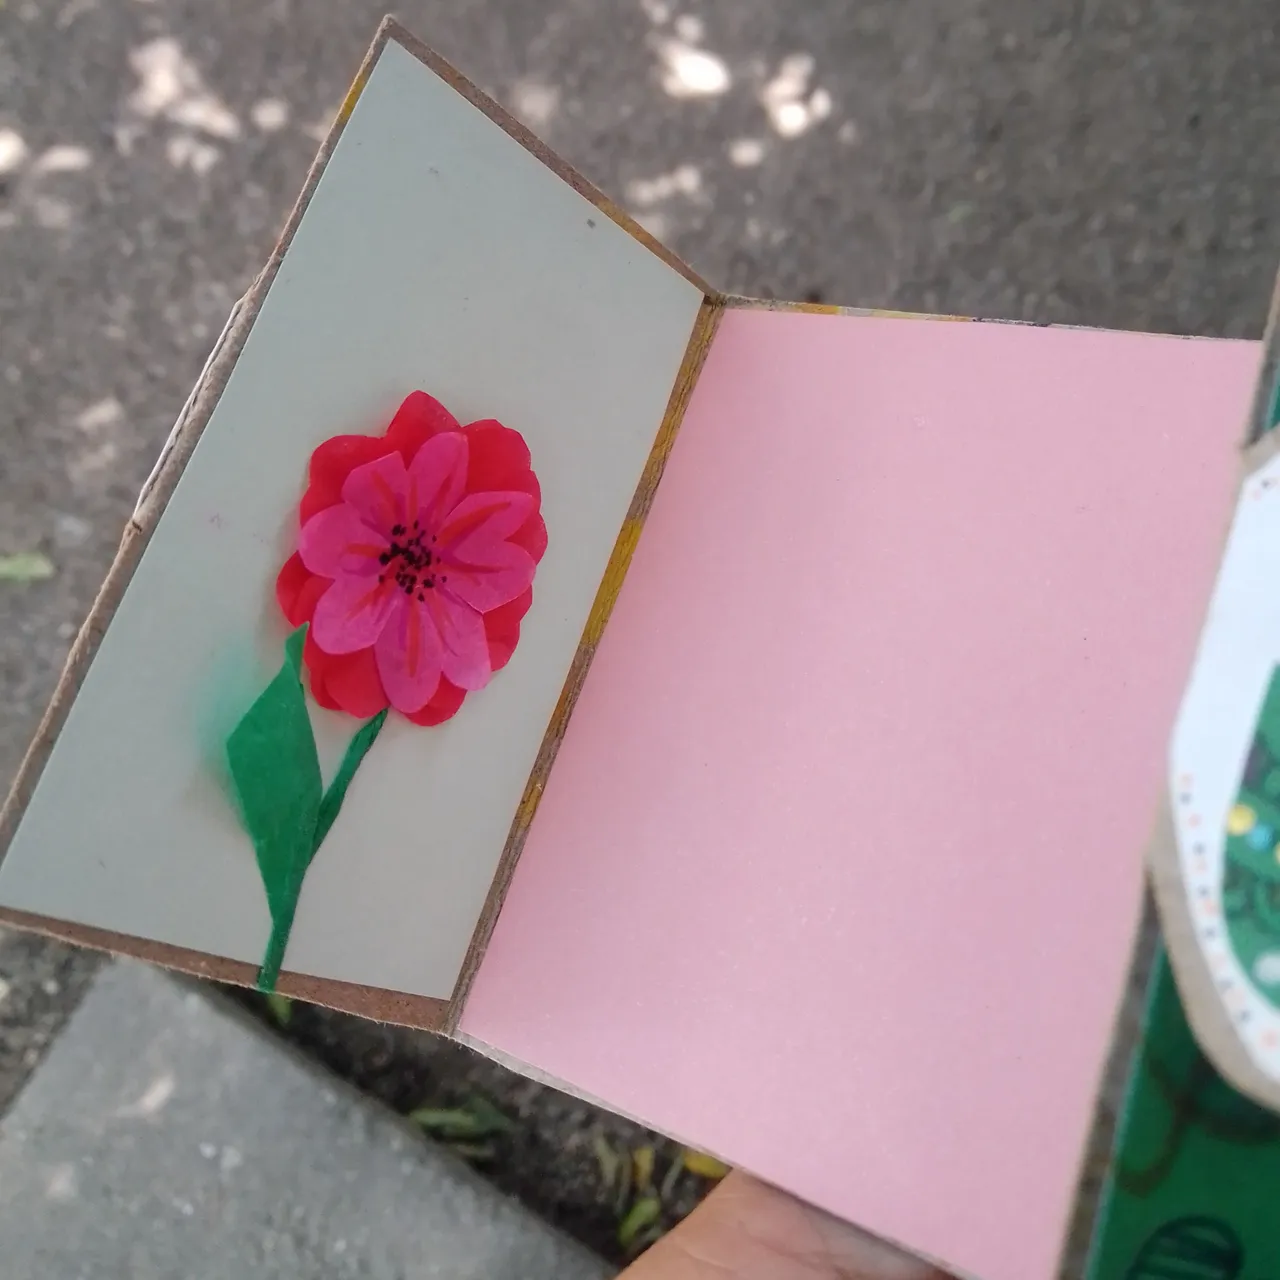
Así es como ha quedado, adentro le pegué una flor que tenía hecha hace tiempo y esa es la manera en que se debe entregar, atado para que el mensaje secreto permanezca secreto hasta el momento exacto 😁

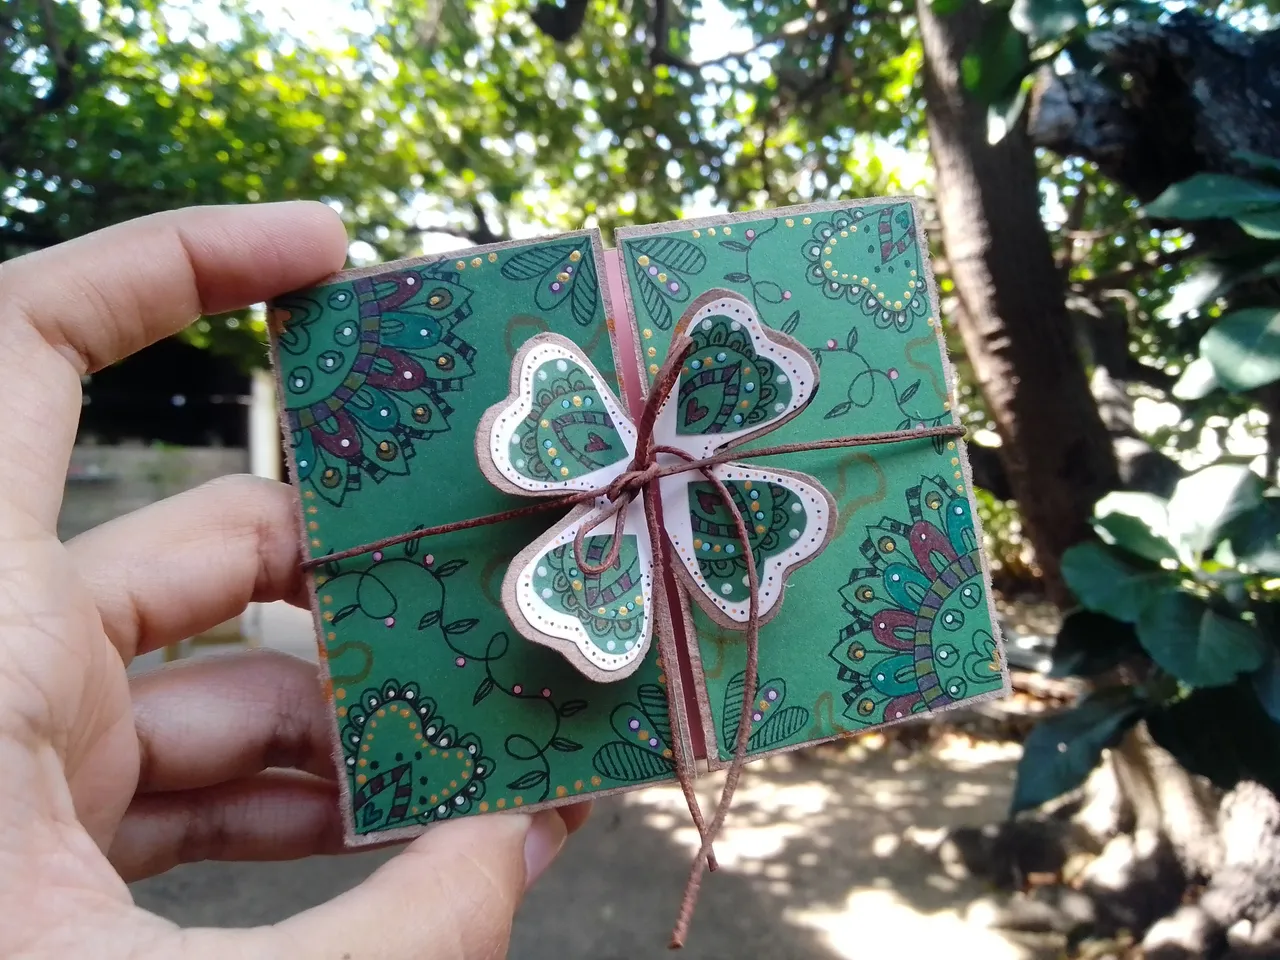
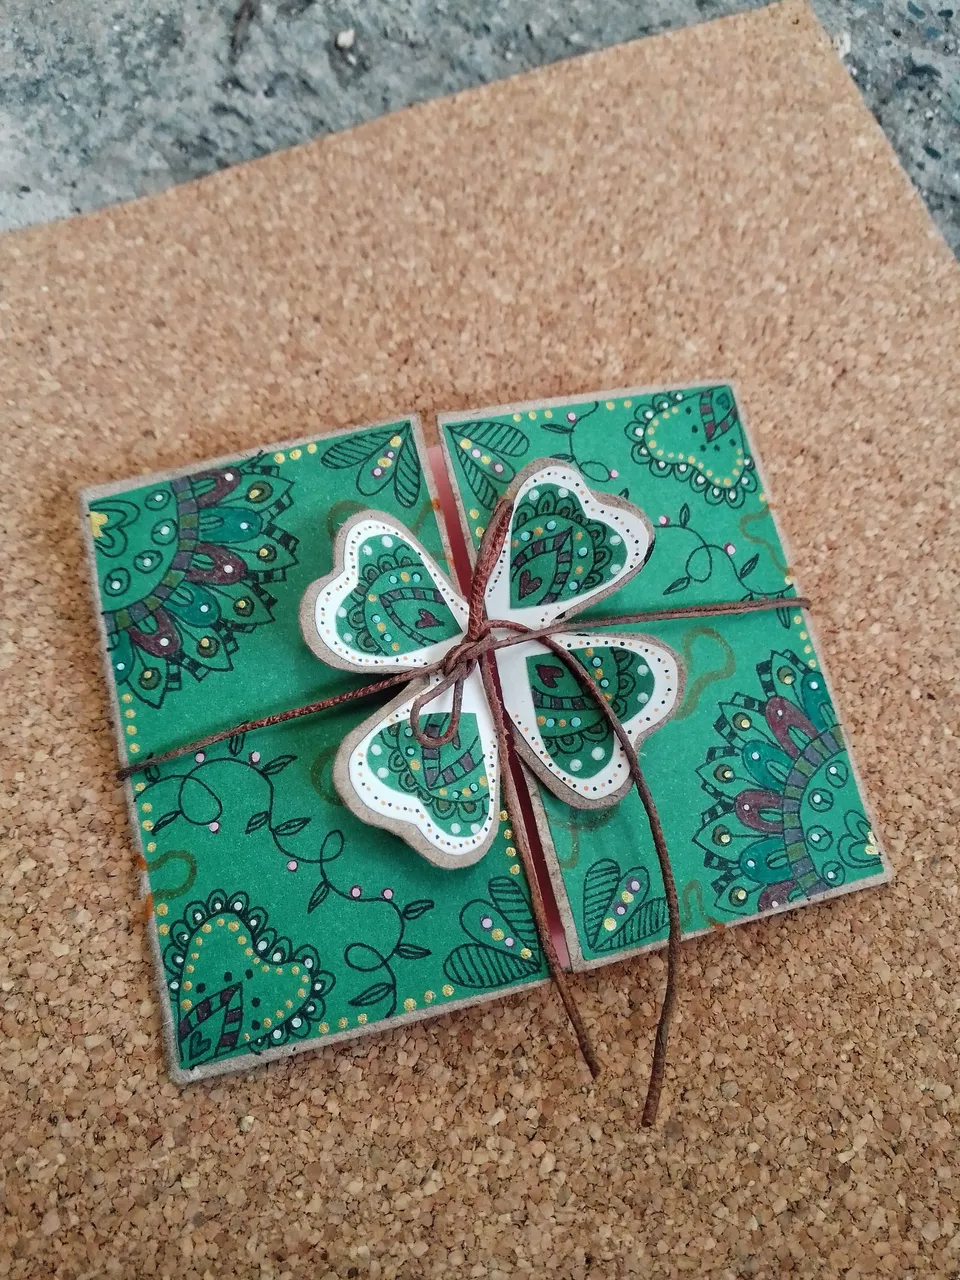
Una tarjeta de la suerte atrae la prosperidad para el que la recibe y para el que las obsequia.¡Feliz noche!✌🏼🍀
Creditos
- Fotos editadas en IbisPaint X.
English version
Hello, hivers creators! I hope you are feeling great and in constant creation 🖌️🍀
Today I finally finished all the details I had in mind to give mum for her birthday. I had all this month to invent and think of things I wished I could give her.... And I was able to do it! Many of those things thanks to Hive, gifts for the birthday girl, for my little cousins, a little present for a new goddaughter who is also my cousin 🤭, something for my dad and even for my mum's cat. (On the way I also bought a couple of trinkets for myself 😐)
Spoiler: This is the first birthday card I've made for my mum. We live in different states and I'm usually the one who travels to spend her birthday together. Every year I make her cake because she is very very cakey. Hmm it seems like I have always overlooked bringing a card. Until this moment.
So this is the third and final part of this craft series, focusing on the lucky shamrock🍀.
And we're going to need for this card:
- Thin cardboard.
- Markers.
- Ruler.
- White, green, pink cardboard.
- Scissors.
- Glue.
- Gold and white cold paint.
- Height stick or pointer.
- Thin string.
Step 1
We will need a cardboard with a length of 26 cm or more, as this is the size we will use. I took this cardboard out of a block and it was stained with paint, but you will see the solution.
The first thing to do is to draw a shamrock, which we then cut in half.
We mark a rectangle 26 cm long by 8 cm high. Inside this we mark 3 cm on each side as shown in the image and draw both parts of the design.
The 20 cm rectangle will have 3 divisions in the following order: 5 cm, 10 cm, 5 cm.
Draw half of each clover on both sides and cut out.
Fold with the help of the ruler at the 5 cm mark and also on the shamrocks.
Step 2
The inside is stained with paint and to fix it, we just use the coloured cardboard to cover it.
For the outside, we cover it with green cardboard.
Step 3
Use the shamrock mould to cut out the pieces on white cardboard or green cardboard, whichever you prefer.
And we also make four hearts that will go in the centre of the clover.
Step 4
On the outside you can write "Happy birthday", "I love you", "We want cake", whatever you can think of 😅 or you can also try these decorations, they are my mandala attempts, they are not perfect, but they give another touch to the card. Also some little dots with the white paint and some with the gold paint.
And pampararam! 🥁
This is how it has turned out, inside I stuck a flower I had made some time ago and that's the way it should be delivered, tied so that the secret message remains secret until the exact moment 😁
A lucky card attracts prosperity for the recipient and the giver. Happy night!🍀✌🏼
Credits
- Translate in DeepL.
- Photos edited in IbisPaint X.