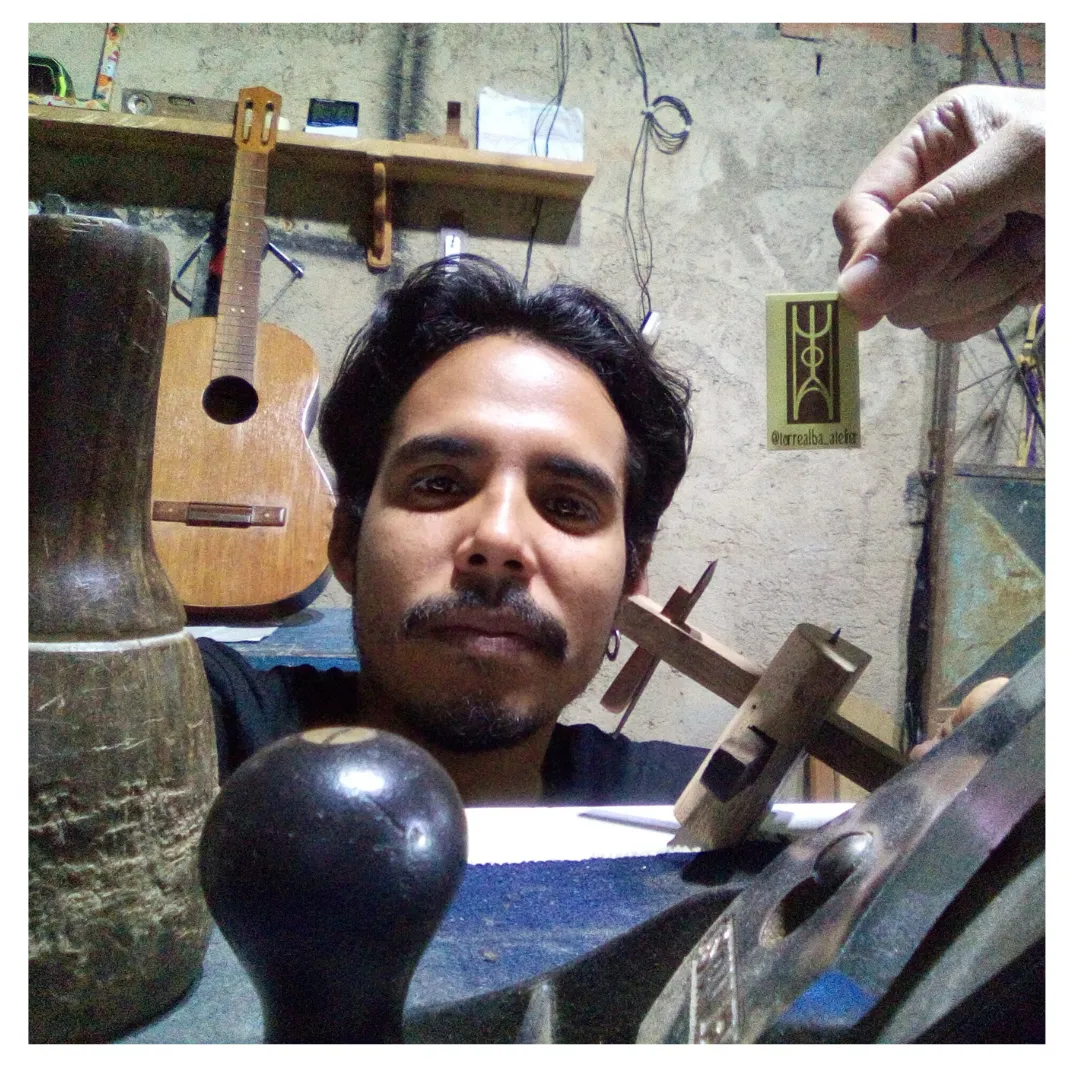
Les saludo desde mi atelier, compañeros artesanos e ingeniosos de la comunidad hive diy, en esta ocasión les compartiré un poco del oficio de la luthería, esta vez estaré modificando un cuatro venezolano por lo que es posible que se extienda en dos tutoriales, ya que es una labor de varias fases
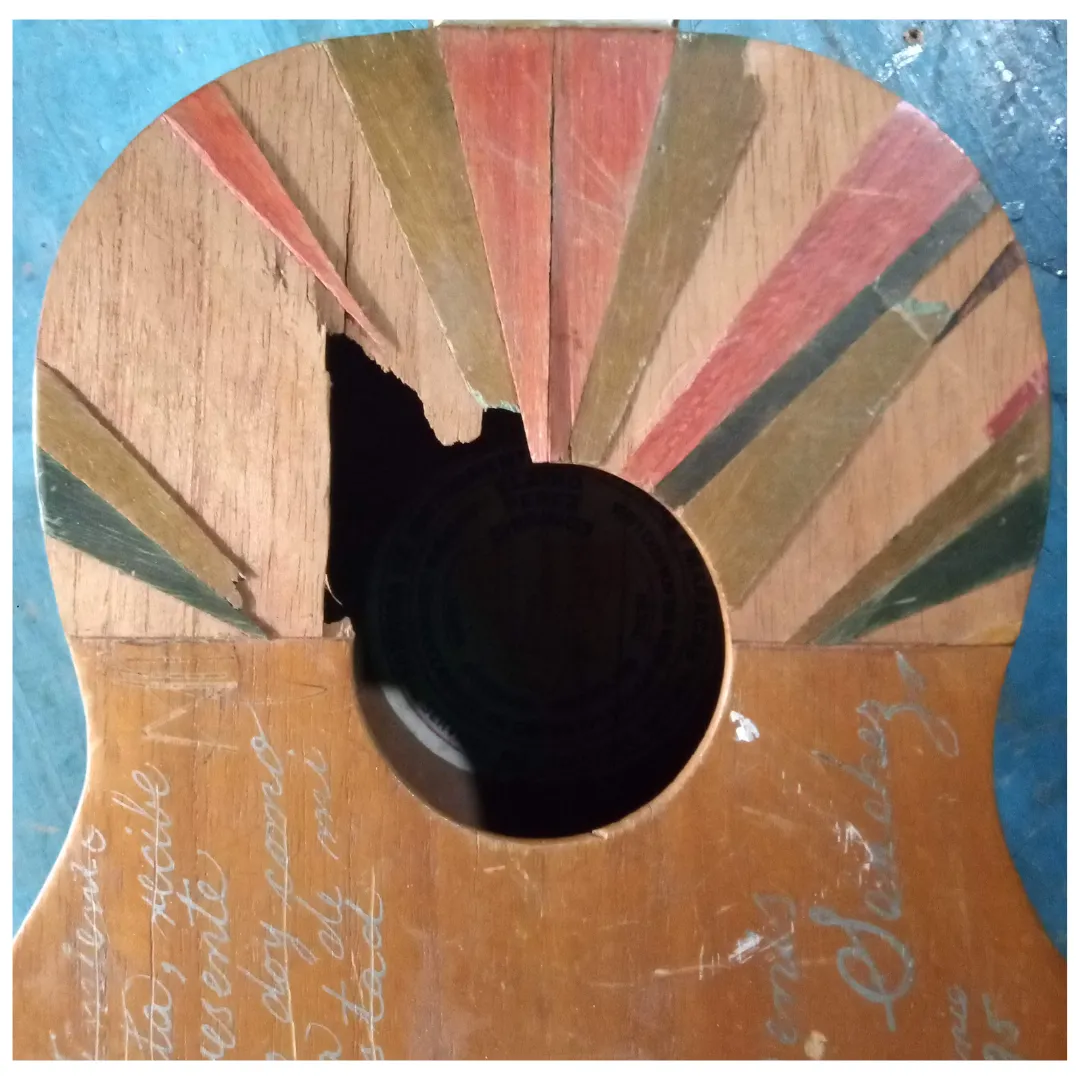
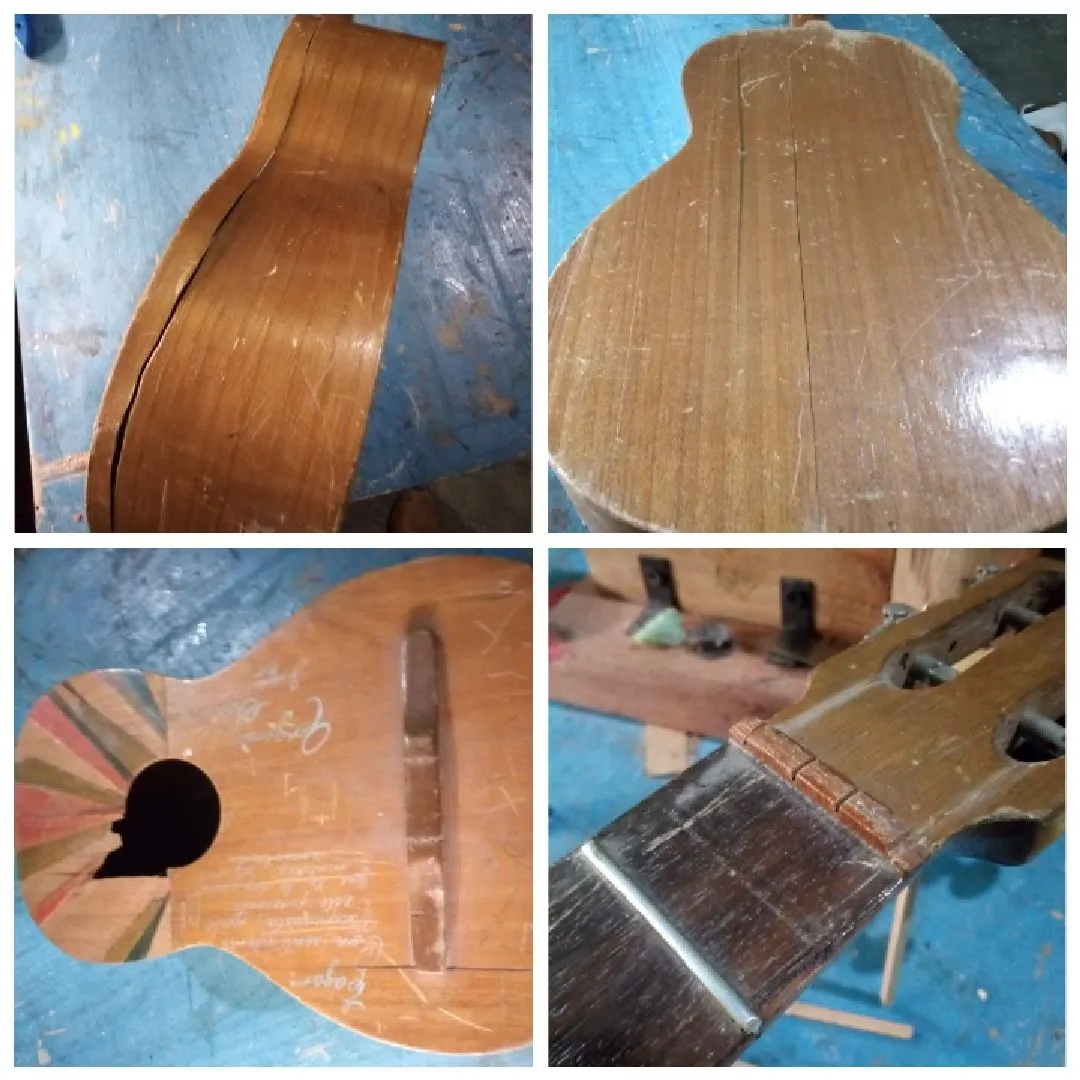
La luthería en este caso de Cordófonos de cuerda pulsada y latinoamericana, aparte de crear un instrumento musical desde cero, también se repara, restaura y se modifica, siempre con una finalidad de que mejoren ciertos aspectos, en esta ocasión le compartiré el proceso de modificación de un cuatro venezolano, que tiene una edad de 29 años y su función más que musical era de ornamento, este instrumento tenía varias fracturas tanto en el fondo como en los aros y tapa armónica, un puente muy tradicional y sin diapasón macizo, es decir los trastes estaban incrustados en el propio mango o mástil así que para que fuese útil y funcional para un aprendiz debemos de encarar varios aspectos, pues es un cuatro quizás de souvenir, de esos que venden en la carretera de Lara para llevarlo de recuerdo que sin duda alguna es un símbolo icónico de nuestra capital musical de Venezuela y que fueron creados por los artesanos guaros que con poco hacen mucho.

- cola de carpintero
- sargentos o prensas
- lijas de 80,120,180,220,
- Madera dura o semidura de 4 mm de espesor (saman)
- serrucho
- Espátula
- Raspar y quitar barniz antiguo
- Lijar superficie
- Encolar una barra de refuerzo cerca de la boca y justo debajo del golpeador
- Hacer un nuevo diapasón
- Colocarle un golpeador
- Colocarle una tapa en la cabeza del clavijero
- Quitar y hacer un nuevo puente con cejilla.
- Refuerzo de puente
Paso 1
Lo primero que debemos de hacer en un instrumento es observarlo, para así hacer un buen diagnóstico sobre qué debemos hacer posteriormente, aquí lo primero que hice fue colocarle cola al fondo y prensar con una cabuya, pues estas fotos las perdí, ya que esta modificación la realice hace unos meses y luego encole las fractura de los aros.
Paso 2
Ahora comenzamos a raspar todo el instrumento, aquí te pongo un enlace de un tutorial donde converso este tema se encuentra en el Paso 3 posterior a esto lijamos toda la superficie al igual que el mango aros y tapa armónica, este es un paso intuitivo, comenzamos a lijar desde la lija 80 en sentido de la beta hasta terminar con la lija 220.
Paso 3
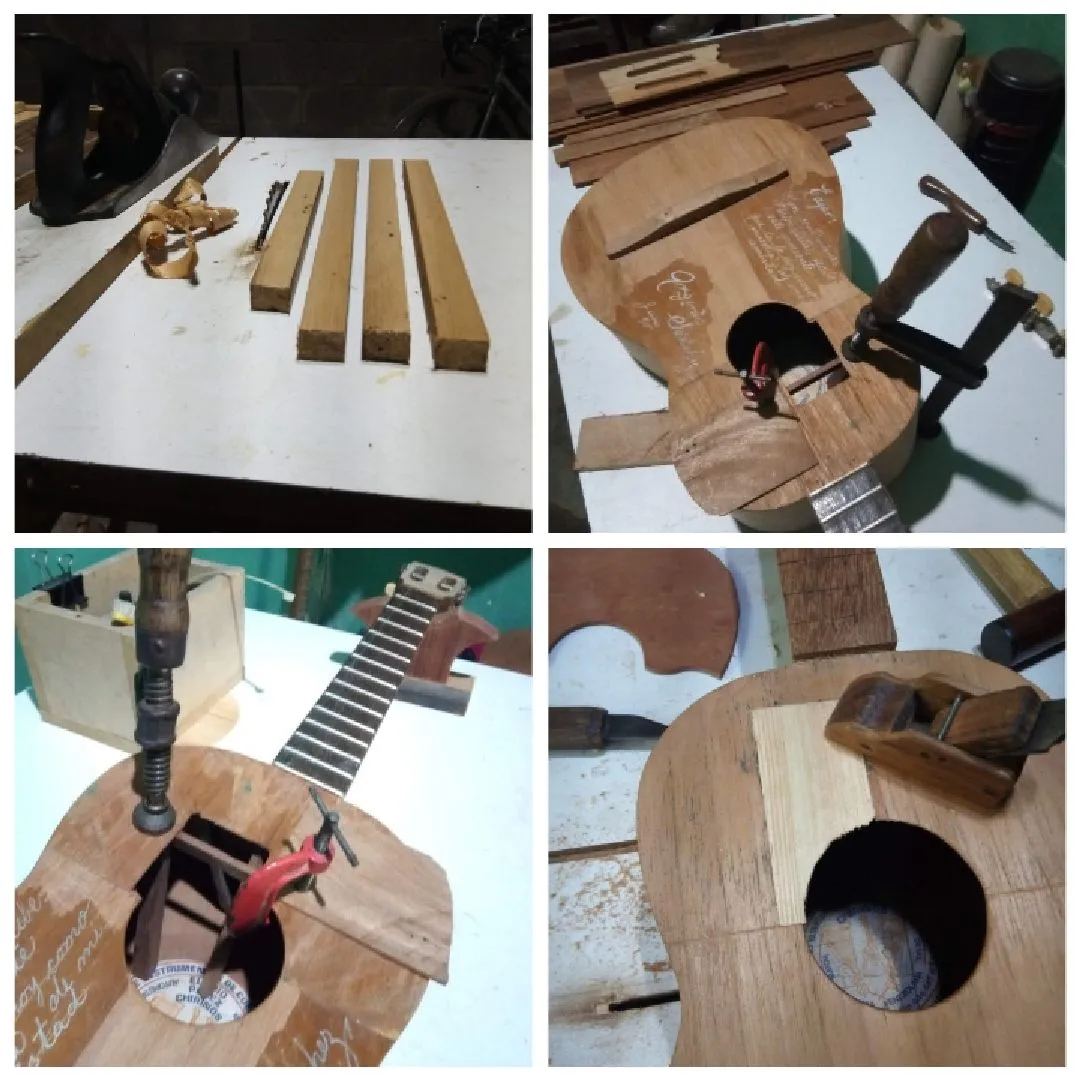
Una vez lijado centremos nuestra atención en la parte del golpeador del instrumento, aquí colocaré una barra de 8mmx10mm con la intención de reforzar esta parte que perdió una buena astilla, luego con la cuchilla cuadro sus puntas, para después de colocar la barra encolar un pedacito de madera para no dejar esta parte hueca, para que así más adelante el futuro golpeador tenga mejor apoyo.Lo primero que debemos de hacer en un instrumento es observarlo, para así hacer un buen diagnóstico sobre qué debemos hacer posteriormente, aquí lo primero que hice fue colocarle cola al fondo y prensar con una cabuya, pues estas fotos las perdí, ya que esta modificación la realice hace unos meses y luego encole las fractura de los aros.
Paso 4
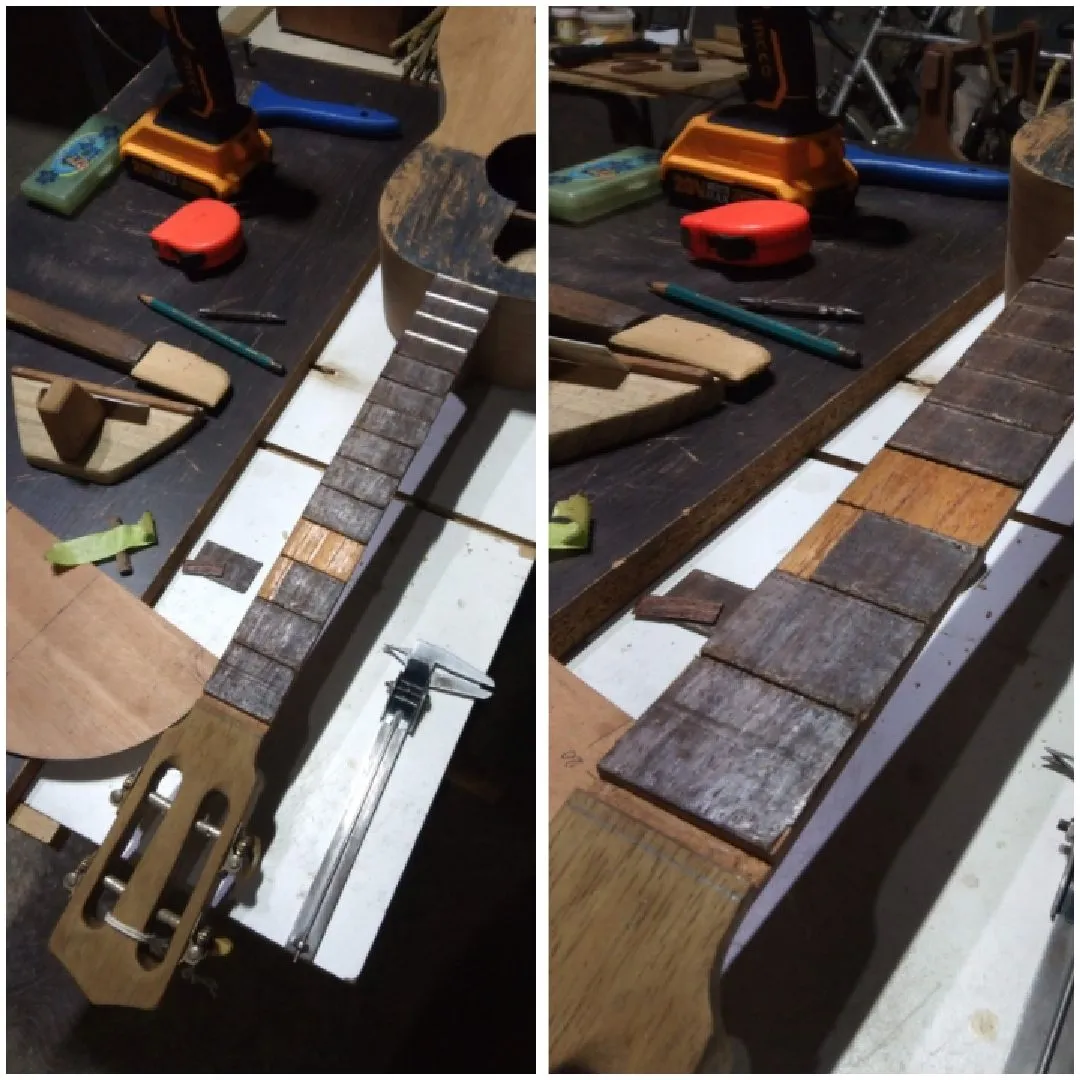
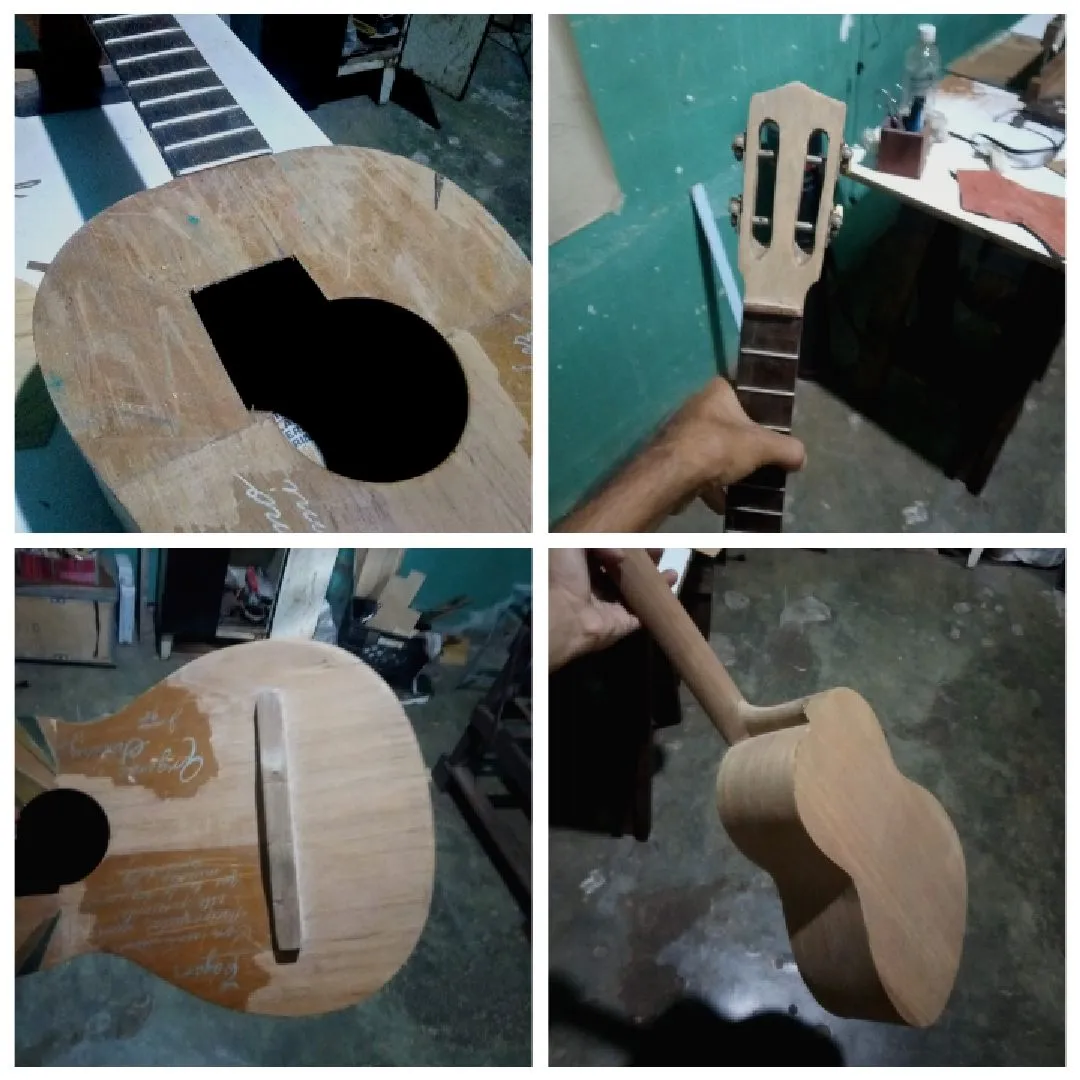
Ya al estar totalmente seca la barra del golpeador, no vamos a la parte del diapasón, como podemos notar las clavijas estaban incrustadas en el mismo mango del cuatro cubierta con una chapa de madera, así que mi idea era colocar un diapasón macizo para que a la hora de desgastarse en el tiempo sea reemplazado y no afecte el mango, usamos una espátula y vamos quitando las maderitas, lijamos con un taco la superficie y rallamos la madera.
Paso 5
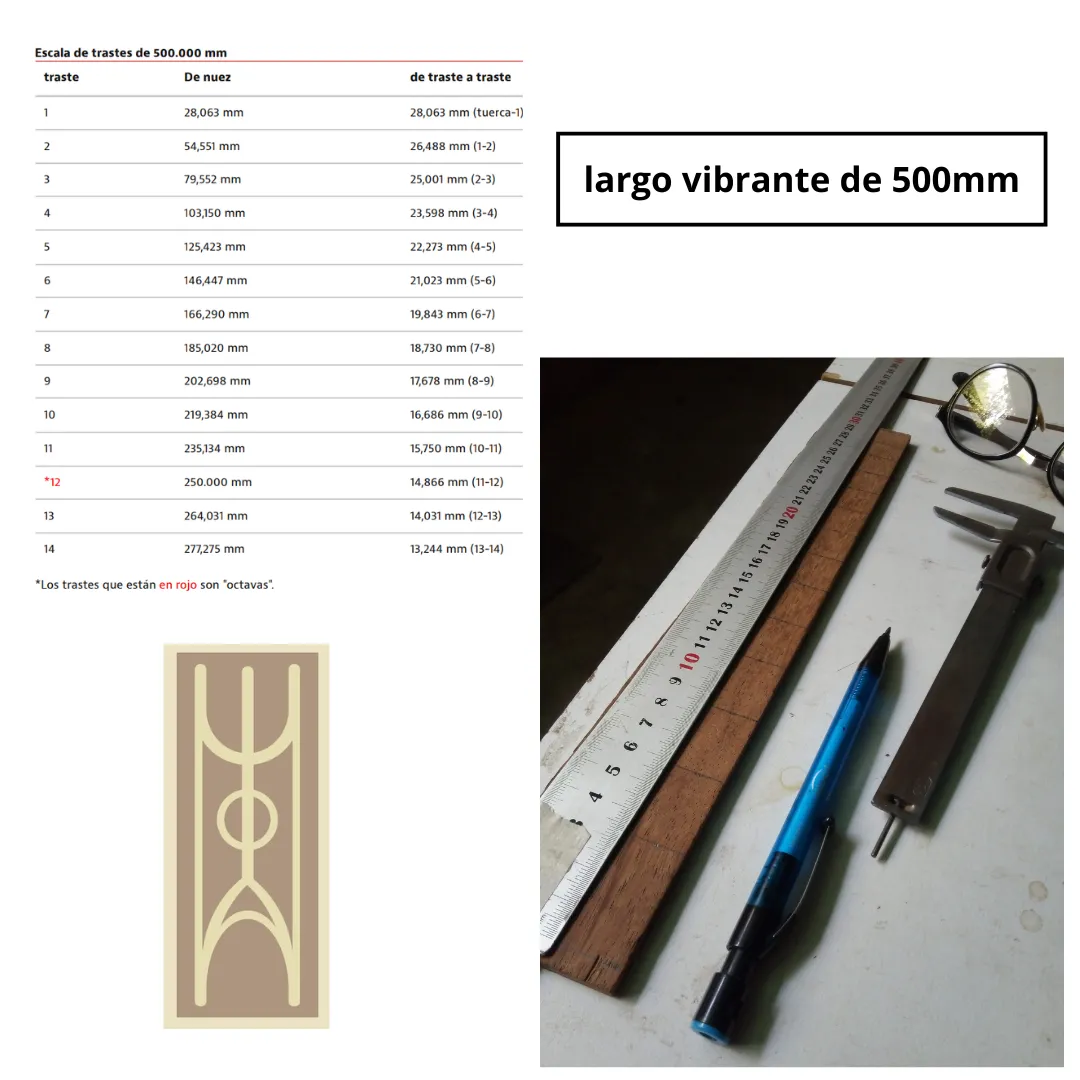
Hacemos el diapasón, una vez teniendo la madera con un espesor de 4 mm trazamos las distancias, aquí hay que tener mucha precisión, acá usamos la matemática, se puede hacer aplicando una fórmula con la calculadora científica o con un programa que ha avanzado en este aspecto y a muchos luthieres les ha dado buenos resultados, así que esto será para un próximo tutorial para conversar sobre diapasones, con un serrucho del espesor del traste vamos haciendo cada trazo sin pasar la profundidad justa del traste, con una décima más, es suficiente, con esta tarea note que el antiguo trazo no estaba muy exacto, pues con esto resolvemos uno de los objetivos, dar equilibrio en la escala tonal.
Paso 6

Encolamos el diapasón en el mango de la siguiente manera, encuadramos que quede el traste 14 al final, justo donde comienza en lóbulo menor del instrumento, prensamos y en la abertura del traste 1 con el taladro y una mecha fina abrimos un orifico de modo que coloquemos un clavo para que el diapasón no tenga juego debe ser un clavo de 1 mm de espesor y así en el traste 13, luego con una tira de tripa de bicicleta fui dando presión, pues como este material es elástico, ejerce mucha presión lo dejamos al menos 12 horas de secado, para seguir en la labor.
Hasta aquí les comparto parte del contenido, avanzando en los primeros 4 tópicos podemos notar que ha ido evolucionando el instrumento, mostrando una identidad totalmente distinta, de tras de todo esto hay un tiempo de labor una destreza, pero siempre usando el ingenio y la intuición muchas veces, pues cada instrumento nos va compartiendo sus necesidades es una experiencia que se vive en cada trabajo, por ello la restauración y reparación es una labor que me divierte bastante, aparte de crear y ver cómo vamos transformando y materializando una idea.
Me despido y espero que sea de provecho este contenido, muchas gracias por leer, si tienen alguna sugerencia o duda estoy atento a los comentarios y si desean hacer algún pedido o adquirir algún trabajo de los que hago pueden contactarme, hasta una próxima publicación.
Fotografías tomadas desde mi celular
texto traducido en deelp
Edición de imágenes desde mi celular
Separador hecho desde adobe illustrator
English version
Greetings from my atelier, fellow artisans and ingenious of the hive diy community, this time I will share with you a little of the craft of lutherie, this time I will be modifying a Venezuelan cuatro, so it is possible that it will be extended in two tutorials, since it is a work of several phases.
The lutherie in this case of plucked string and Latin American chordophones, apart from creating a musical instrument from scratch, it is also repaired, restored and modified, always with the purpose of improving certain aspects, this time I will share the modification process of a Venezuelan cuatro, which is 29 years old and its function was more than musical ornamentation, this instrument had several fractures in the bottom as well as in the sides and soundboard, A very traditional bridge and without a solid fingerboard, that is to say the frets were embedded in the handle or neck itself, so for it to be useful and functional for an apprentice we must address several aspects, because it is perhaps a souvenir cuatro, one of those that are sold on the road to Lara to take it as a souvenir that is undoubtedly an iconic symbol of our musical capital of Venezuela and that were created by artisans guaros that do a lot with little.
Tools and materials
- carpenter's glue
- clamps or presses
- sandpaper of 80,120,180,220,
- Hard or semi-hard wood of 4 mm thickness (saman)
- handsaw
- spatula
Objectives
- Scrape and remove old varnish
- Sand surface
- Glue a reinforcing bar near the soundhole and just below the pickguard
- Make a new fingerboard
- Fit a pickguard
Put a cap on the headstock + Remove and make a new bridge - Remove and make a new bridge with capo.
- Bridge reinforcement
Step 1
The first thing to do with an instrument is to observe it, in order to make a good diagnosis on what to do next, here the first thing I did was to put glue to the bottom and press with a cabuya, as I lost these photos, since I made this modification a few months ago and then I glued the fractures of the hoops.
Step 2
Now we begin to scrape the whole instrument, here I put a link of how I do it and then we sand the whole surface as well as the handle, sides and top, this is an intuitive step, we begin to sand from the sandpaper 80 in sense of the beta until finishing with the sandpaper
a 220.
Step 3
Once sanded let's focus our attention on the pickguard part of the instrument, here I will place a 8mmx10mm bar with the intention of reinforcing this part that lost a good splinter, then with the blade I will square its tips, after placing the bar glue a piece of wood to not leave this hollow part, so that later the future pickguard will have better support.
Step 4
Once the pickguard bar is completely dry, we do not go to the fingerboard, as we can see the pegs were embedded in the same handle of the cuatro covered with a wooden sheet, so my idea was to place a solid fingerboard so that when it wears out over time is replaced and does not affect the handle, we use a spatula and we remove the wood, sand the surface with a block and grate the wood.
Step 5
We make the fingerboard, once we have the wood with a thickness of 4 mm we trace the distances, here we have to be very precise, here we use mathematics, it can be done by applying a formula with the scientific calculator or with a program that has advanced in this aspect and has given good results to many luthiers, so this will be for a next tutorial to talk about fretboards, with a saw of the thickness of the fret we make each stroke without passing the right depth of the fret, with a tenth more is enough, with this task I noticed that the old stroke was not very accurate, because with this we solve one of the objectives, to give balance in the tonal scale.
Step 6
We glue the fingerboard to the handle in the following way, we frame the fret 14 at the end, just where it begins in the minor lobe of the instrument, we press and in the opening of the fret 1 with the drill and a thin bit we open a hole so that we place a nail so that the fingerboard has no play must be a nail of 1 mm thick and so on the fret 13, then with a strip of bicycle gut I was giving pressure, because as this material is elastic, it exerts a lot of pressure we leave it at least 12 hours of drying, to continue in the work.
So far I share with you part of the content, advancing in the first 4 topics we can notice that the instrument has been evolving, showing a totally different identity, behind all this there is a time of work a skill, but always using the ingenuity and intuition many times, because each instrument is sharing its needs is an experience that is lived in each job, so the restoration and repair is a work that I enjoy a lot, besides creating and seeing how we transform and materializing an idea.
I say goodbye and I hope this content is of benefit, thank you very much for reading, if you have any suggestions or questions I am attentive to the comments and if you wish to place an order or purchase any of the work I do you can contact me, until a future publication.