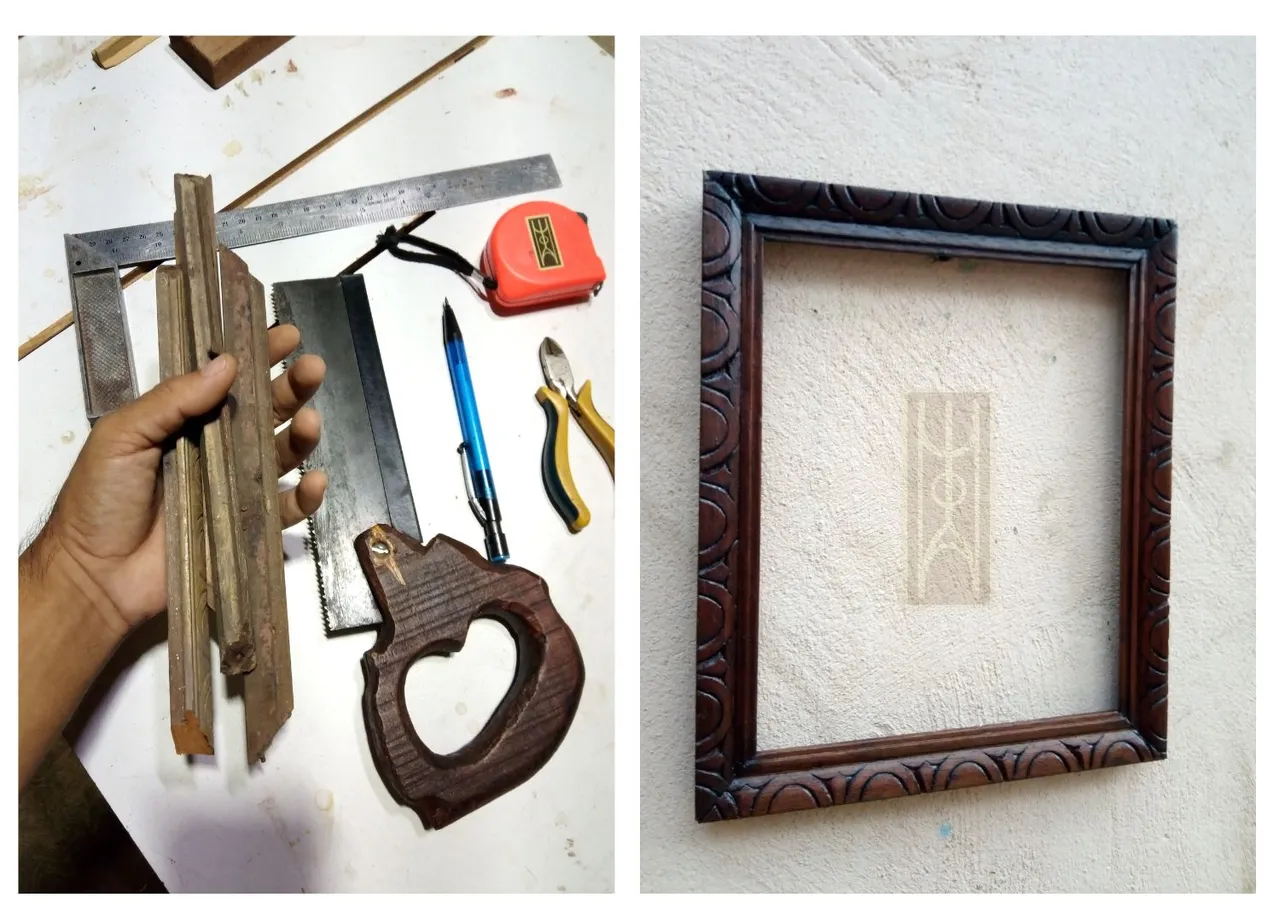
Les saludos desde mi atelier compañeros artesanos en esta ocasión les traigo un
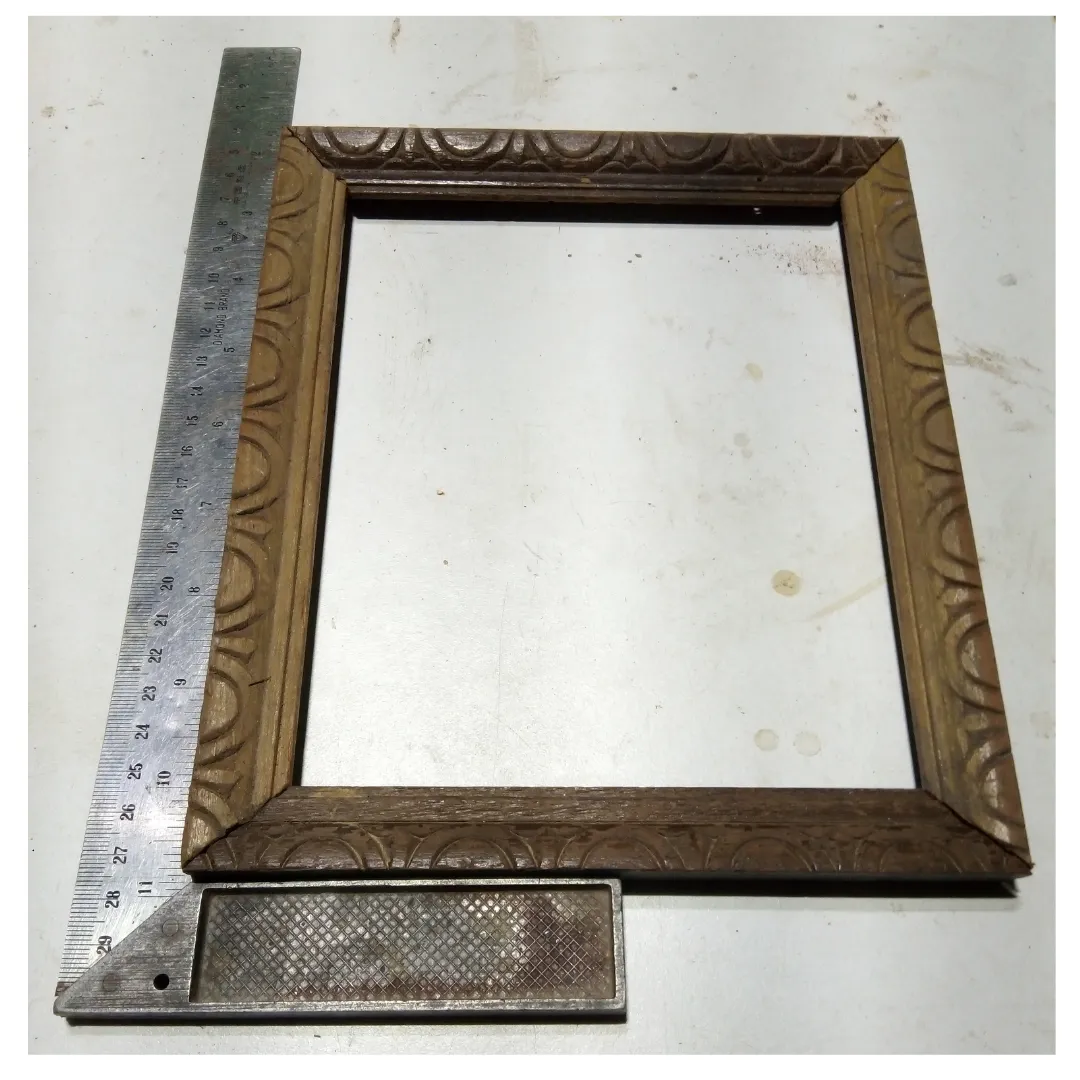
pequeño proyecto de marquetería, trata sobre reajustar las dimensiones de una montura o marco que tenía en mi atelier.
Cuando hablamos de hacer una montura o como en esta ocasión que vamos a reajustar, se nos presenta un inconveniente muy común cuando lo hacemos a mano, el corte a inglete (45°) que va a cada esquina, ya que siempre queda desnivelado, en este post le compartiré un dato para que nos quede con un buen acabado y así podamos hacer con simples herramientas, tanto bastidores como marcos para algún trabajo en específico.

- serrucho
- cola de carpintero
- escuadra
- cinta para enmascarar
- grapadora manual
- tinta
- sellador y Thiner
Paso 1
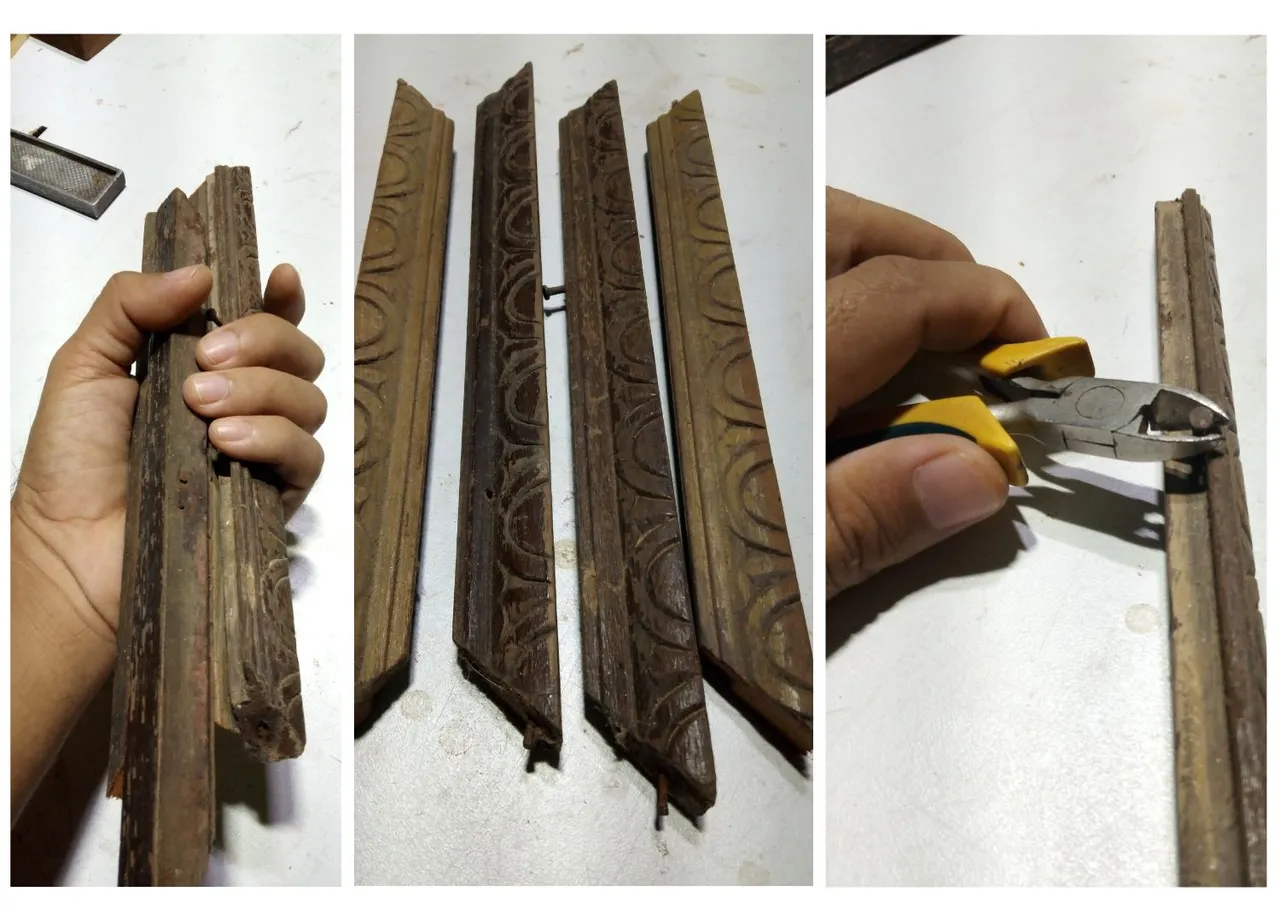
Una vez teniendo las partes encontradas del antiguo marcó, debemos limpiar y quitar algún posible obstáculo, ya sea un clavo, grapas o tornillos.
Paso 2
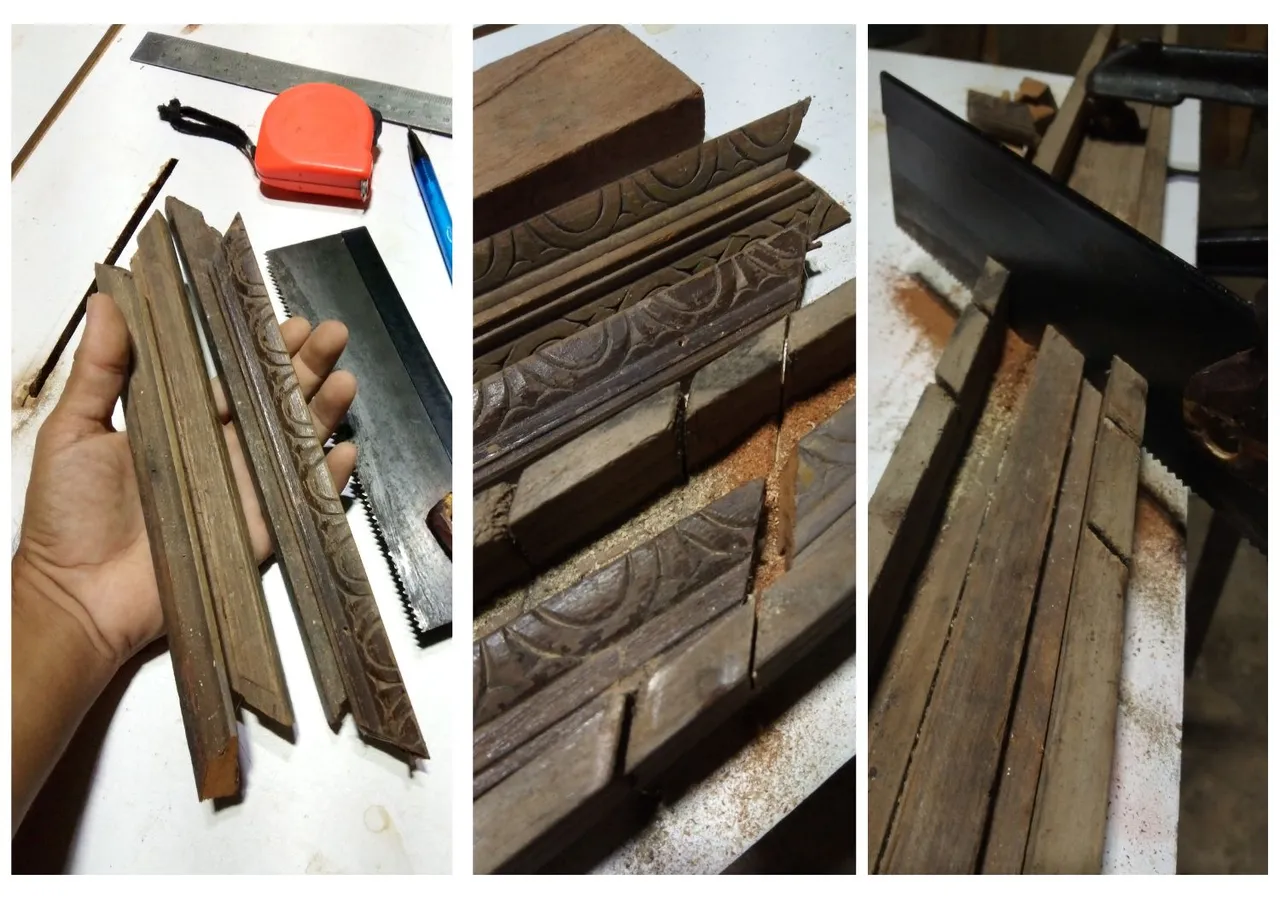
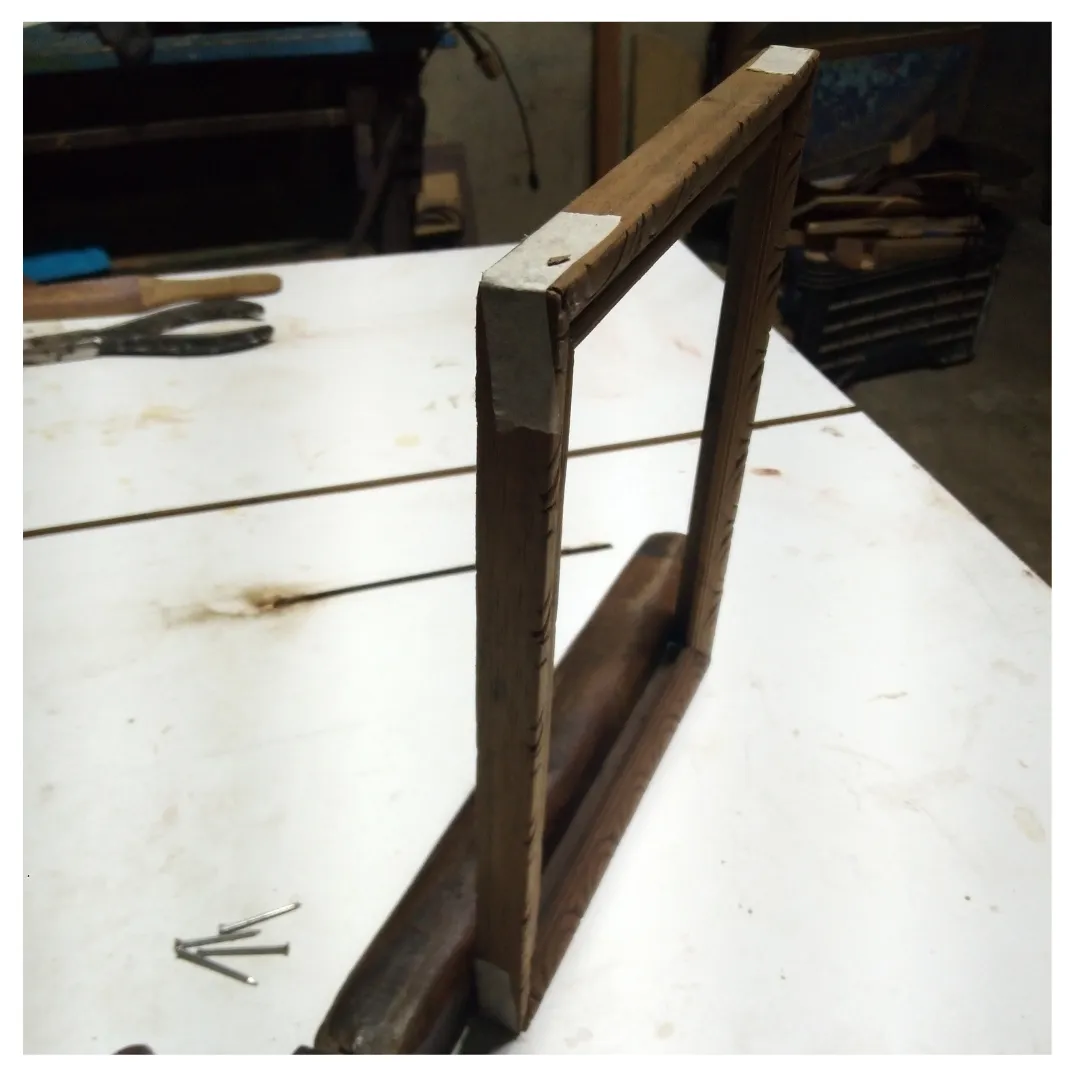
Tomamos cada pieza y procedemos a darle las dimensiones que queremos, en mi caso quería obtener una montura de 18.5 cm x 22 cm de largo, así que lleve cada una de mis piezas a la caja de ingletadora manual para hacer los cortes correspondido
| Nota: como podemos ver en la imagen, la guía a inglete nos proporciona mayor control del corte dejándonos un acabado más plano, con un pequeño margen de error, pero logramos el objetivo. |
Paso 3
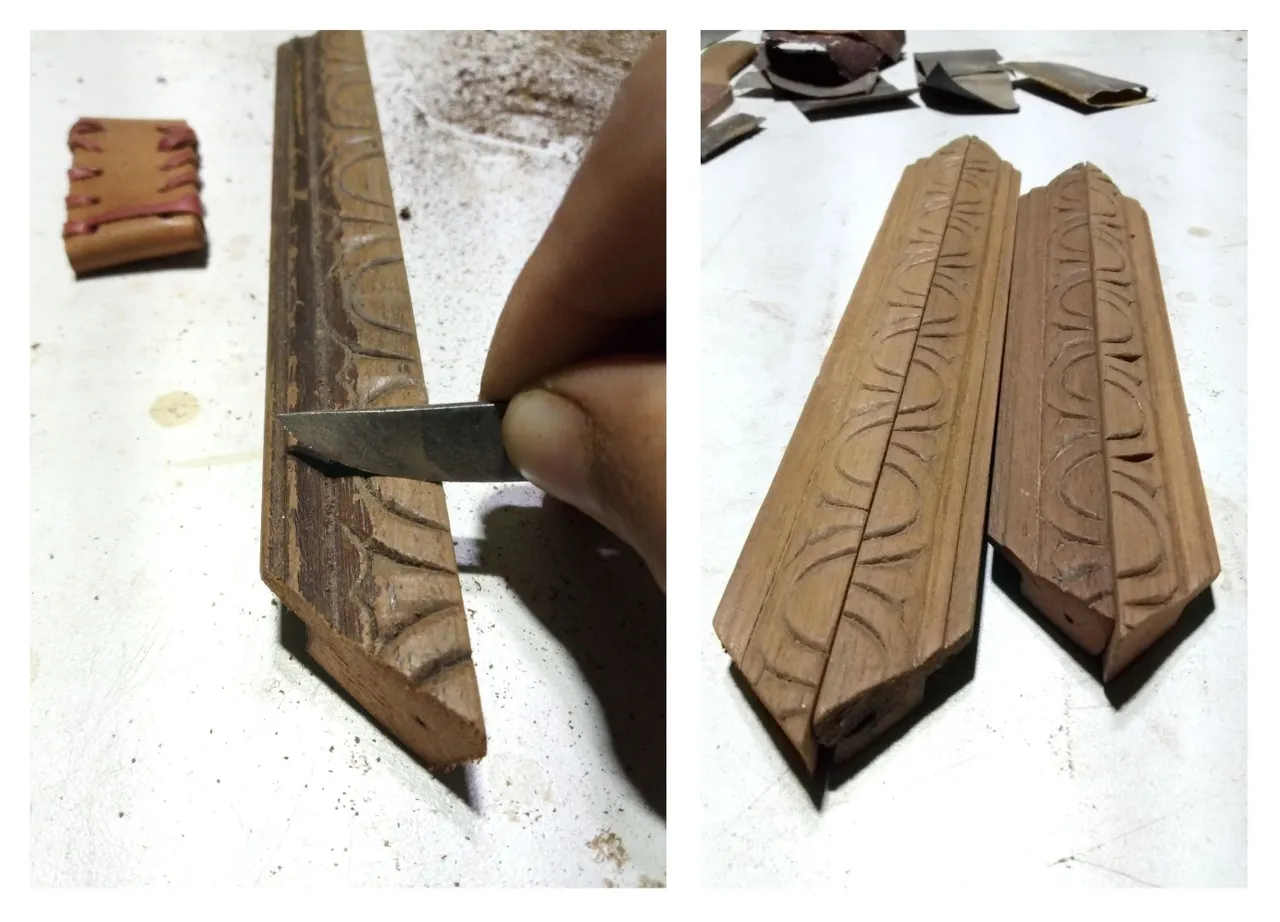
Ya al tener los cortes realizados, raspamos cada pieza para quitar la laca antigua, luego hacemos una bajada de lija desde la de grano 80, 100, 120 hasta una 220.
Paso 4
Rectificamos que todos los ángulos estén a 45° y presentamos cada uno y observamos con la escuadra, en dado caso que haya un poquito de desnivel, pasamos con mesura una lija gruesa, unas tres pasadas ejerciendo un poco de presión en la parte que amerita nivelar.
Paso 5
Una vez que vimos que todo queda escuadrado, colocamos cola de carpintero y cada esquina la aseguramos con cinta para enmascarar, esta es una de las formas que empleo para su encolado.
Paso 6
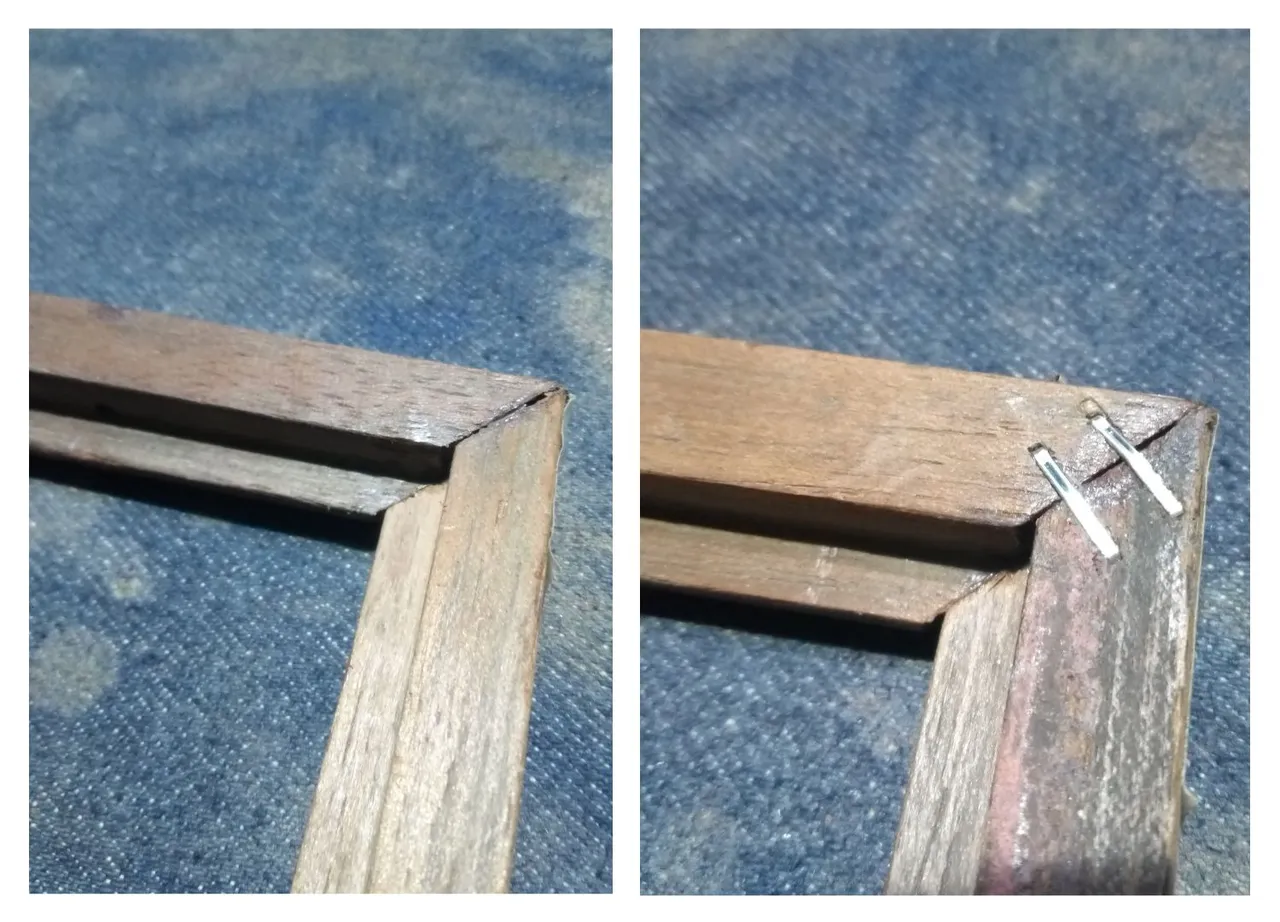
Tras dejar secar la montura por 4 horas aseguramos las esquinas con unas grapas para que quede más rígida, lo hacemos por la parte de atrás.
Paso 7
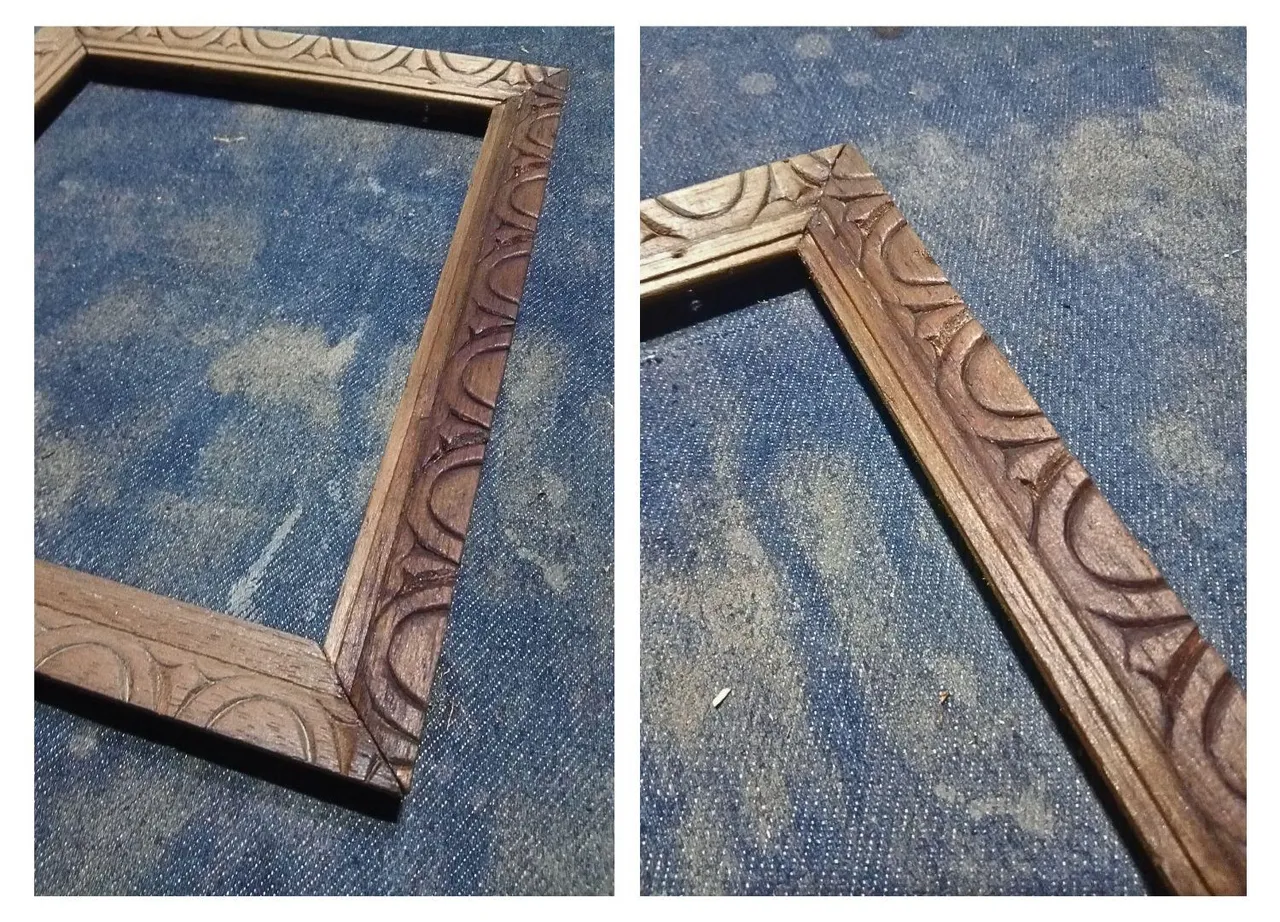
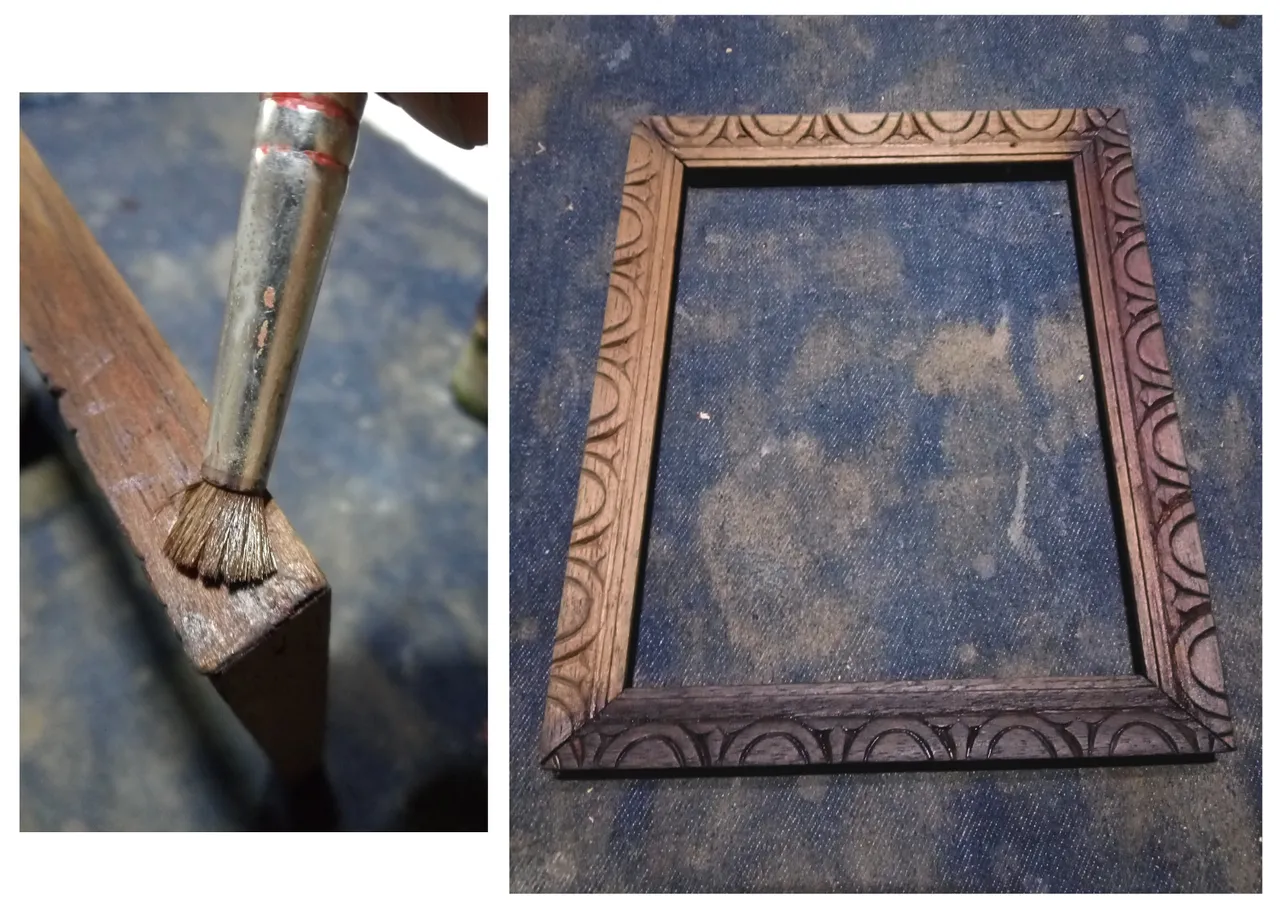
Ya casi culminamos este pequeño proyecto de marquetería, acá como ya tenemos nuestra madera lijada y preparada para entintar, pasamos unas manos de tinta para lograr un buen acabado y darle un acabado envejecido.
Paso 8
En esta etapa final, tras dejar secar un poco la superficie entintada, le aplicamos sellador nitro, en este caso le di cuatro manos, ya que estaba un poco más diluida y por último dos manos de laca nitro para así obtener un acabado satinado.
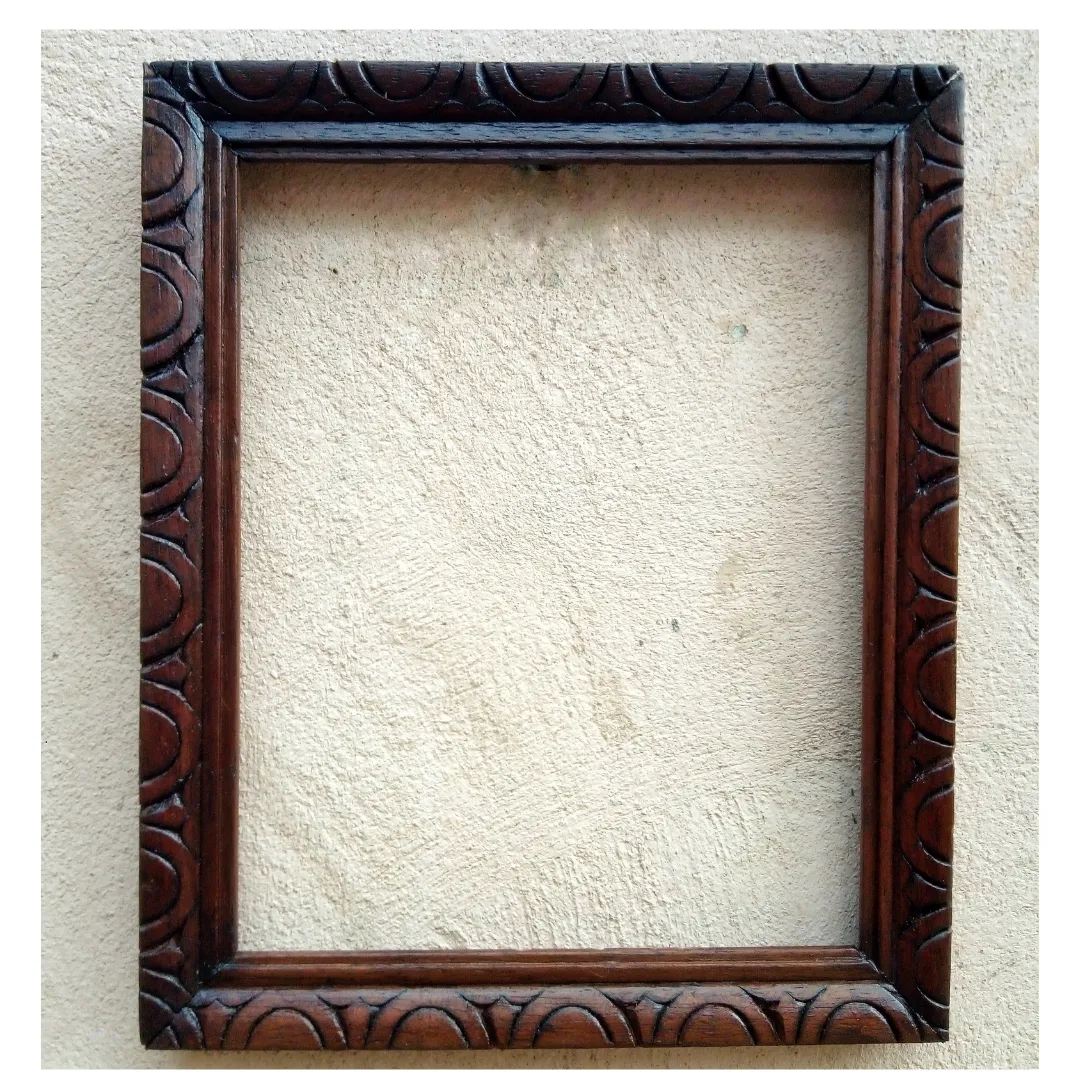
De esta manera culminamos esta montura para una futura pintura, fotografía o algún dibujo, reajustamos y logramos una pieza totalmente funcional. Con unas pocas herramientas y por supuesto las adecuadas podemos resolver muchas situaciones similares a la que tratamos en esta publicación.
Me despido y espero que sea de provecho este contenido, muchas gracias por leer, si tienen alguna sugerencia o duda estoy atento a los comentarios hasta una próxima publicación...
Fotografías tomadas desde mi celular.
Separador de texto diseñado en adobe illustrator.
Edición de imágenes en cava.
Traducción en deepl.
English
Carpentry and readjustment of a frame
Greetings from my atelier fellow artisans, this time I bring you a small project about a
small marquetry project, it is about readjusting the dimensions of a frame or marker that I had in my atelier.
When we talk about making a frame or as on this occasion that we are going to readjust, we have a very common problem when we do it by hand, the miter cut (45 °) that goes to each corner, as it is always unlevel, in this post I will share a tip for us to leave us with a good finish and so we can do with simple tools, both frames and frames for a specific job.
- handsaw
- carpenter's glue
- square
- masking tape
- manual stapler
- ink
- sealant and Thiner
Step 1
Once we have found the parts of the old marker, we must clean and remove any possible obstacles, whether they are nails, staples or screws.
Step 2
We take each piece and proceed to give it the dimensions we want, in my case I wanted to get a frame of 18.5 cm x 22 cm long, so I took each of my pieces to the manual miter saw box to make the corresponding cuts.
| Note: as we can see in the image, the miter guide gives us more control of the cut leaving us a flatter finish, with a small margin of error, but we achieve the goal. |
Step 3
Once the cuts are done, we scrape each piece to remove the old lacquer, then we make a sandpaper descent from 80, 100, 120 to 220 grain.
Step 4
We rectify that all the angles are at 45° and we present each one and observe with the square, in case there is a little unevenness, we pass with measure a coarse sandpaper, about three passes exerting a little pressure on the part that deserves leveling.
Step 5
Once we saw that everything is squared, we put carpenter's glue and secure each corner with masking tape, this is one of the ways I use for gluing.
Step 6
After letting the frame dry for 4 hours we secure the corners with staples to make it more rigid, we do it from the back.
Step 7
We are almost finished this little project of marquetry, here as we have our wood sanded and ready to ink, we pass a few coats of ink to achieve a good finish and give it an aged finish.
Step 8
In this final stage, after letting the inked surface dry a little, we apply nitro sealer, in this case I gave four coats, as it was a little more diluted and finally two coats of nitro lacquer to obtain a satin finish.
In this way we finish this mount for a future painting, photography or drawing, we readjust and achieve a fully functional piece. With a few tools and of course the right ones we can solve many situations similar to the one we deal with in this publication.
I say goodbye and I hope this content is of benefit, thank you very much for reading, if you have any suggestions or questions I am attentive to the comments until a next publication...
Photographs taken from my cell phone.
Text separator designed in adobe illustrator.
Image editing in cava.
Translation in deepl.