Les saludo desde mi atelier, amigos y amigas, artesanos e ingeniosos de la comunidad hive diy, en esta ocasión les traigo un tutorial de cómo hacer una caja tipo cofre con cartón reciclado, es decir el material se toma de las cajas de productos de víveres o demás productos que muchas veces la pueden vender en las bodegas o almacenes, como también no las pueden obsequiar

Esta es una de las primeras cajas de cartón que hago de este estilo, lo cual me pareció interesante, ya que estaremos unificando la técnica de encuadernación, he hecho cajas de maderas por supuesto, pero esta vez quería hacer una con materiales de fácil acceso un producto funcional, estético y didáctico, compañeros artesanos teniendo todos los materiales se hace una práctica entretenida además de que se puede destinar hasta para obsequiar un regalo o guardar distintas cosas que están por allí suelta.

- Cartón
- Cola blanca
- Cartulina escolar
- Afiches, revista, libros para recortar etc.
- Tijera, cutter o cuchilla.
- Imanes
- cinta para enmascarar
Paso 1
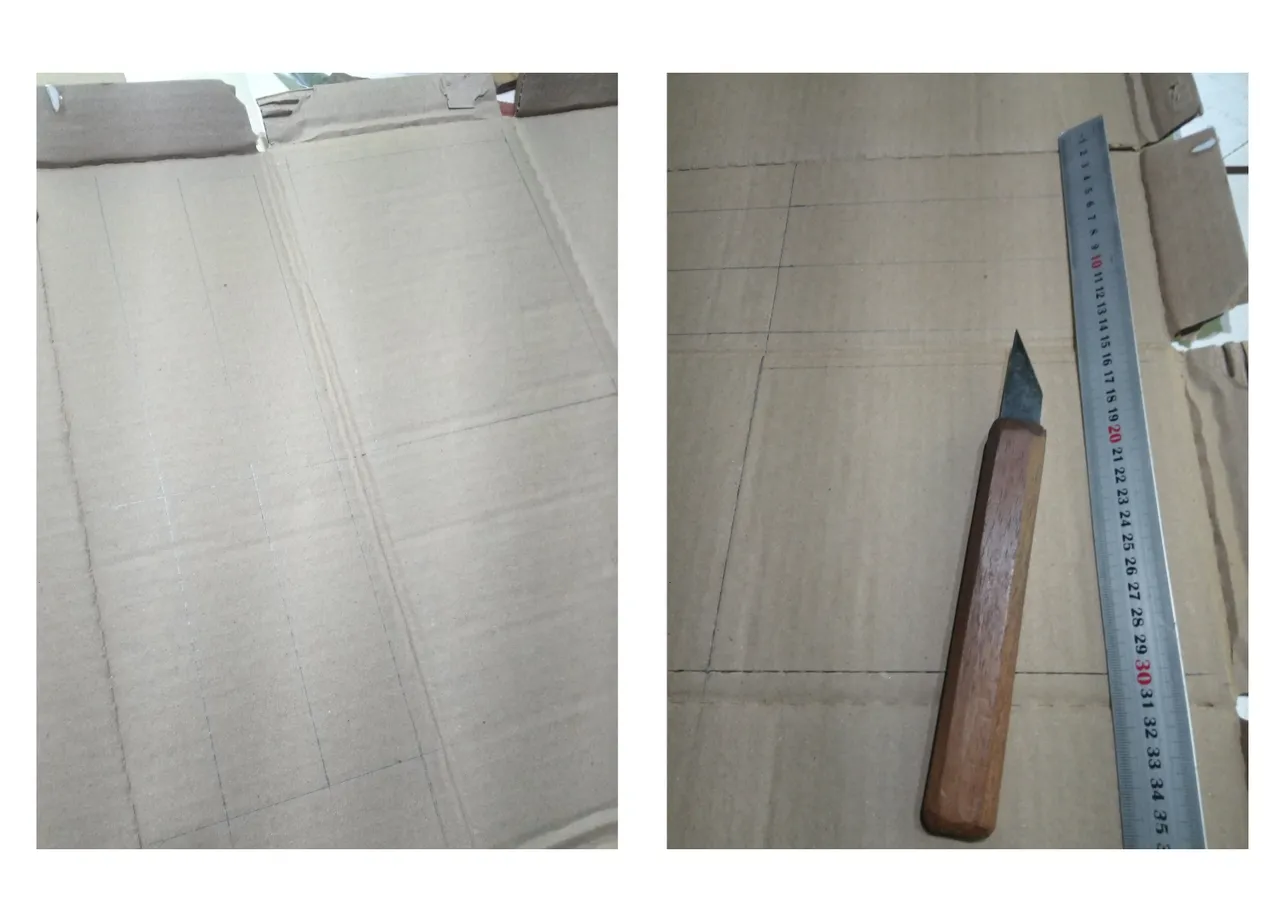
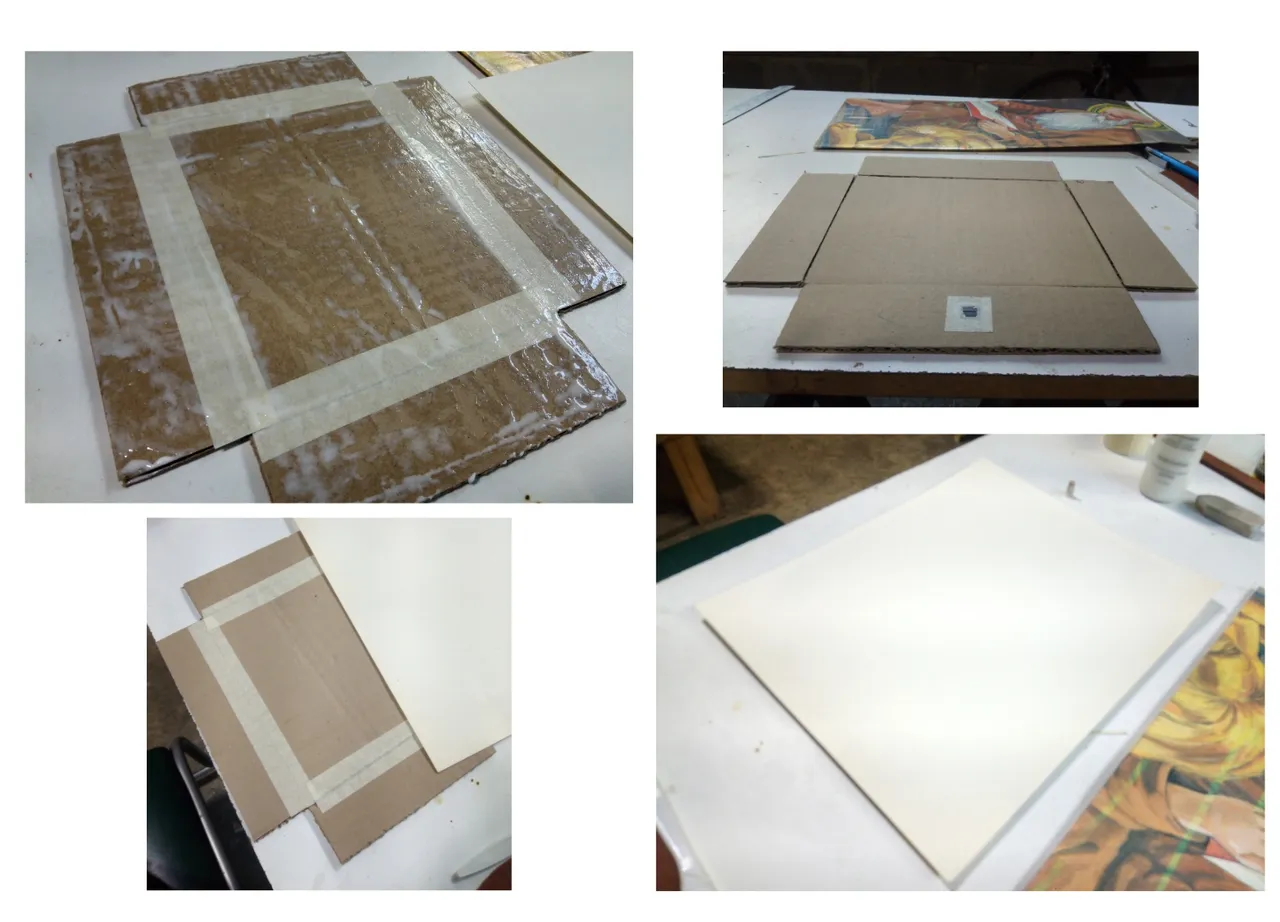
Una vez teniendo el cartón procedemos a seleccionar las mejores partes del mismo, ya que aveces hay partes golpeadas, trazamos y hacemos los cortes de la carcasa de este cofre lo cual será la base y la tapa.
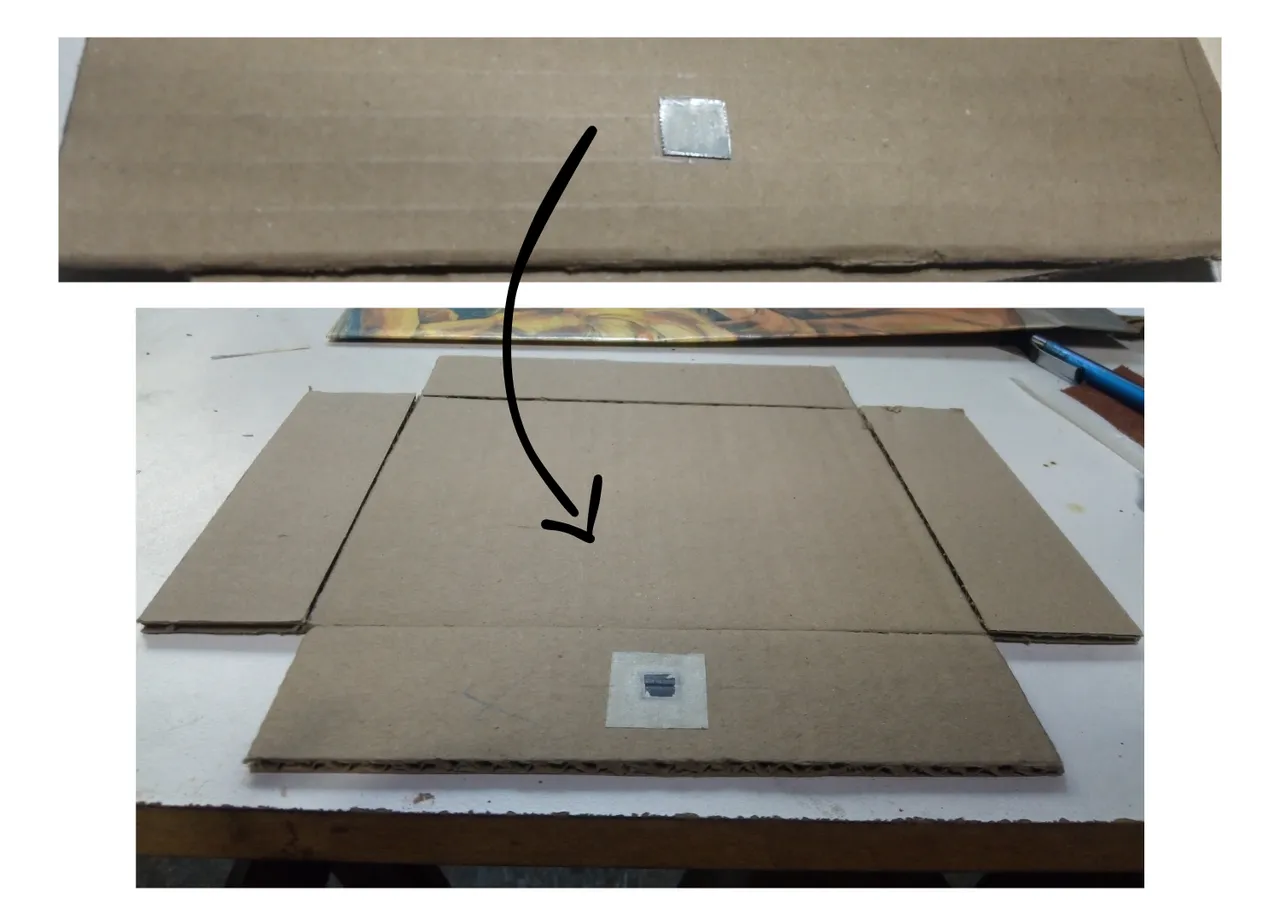
Paso 2
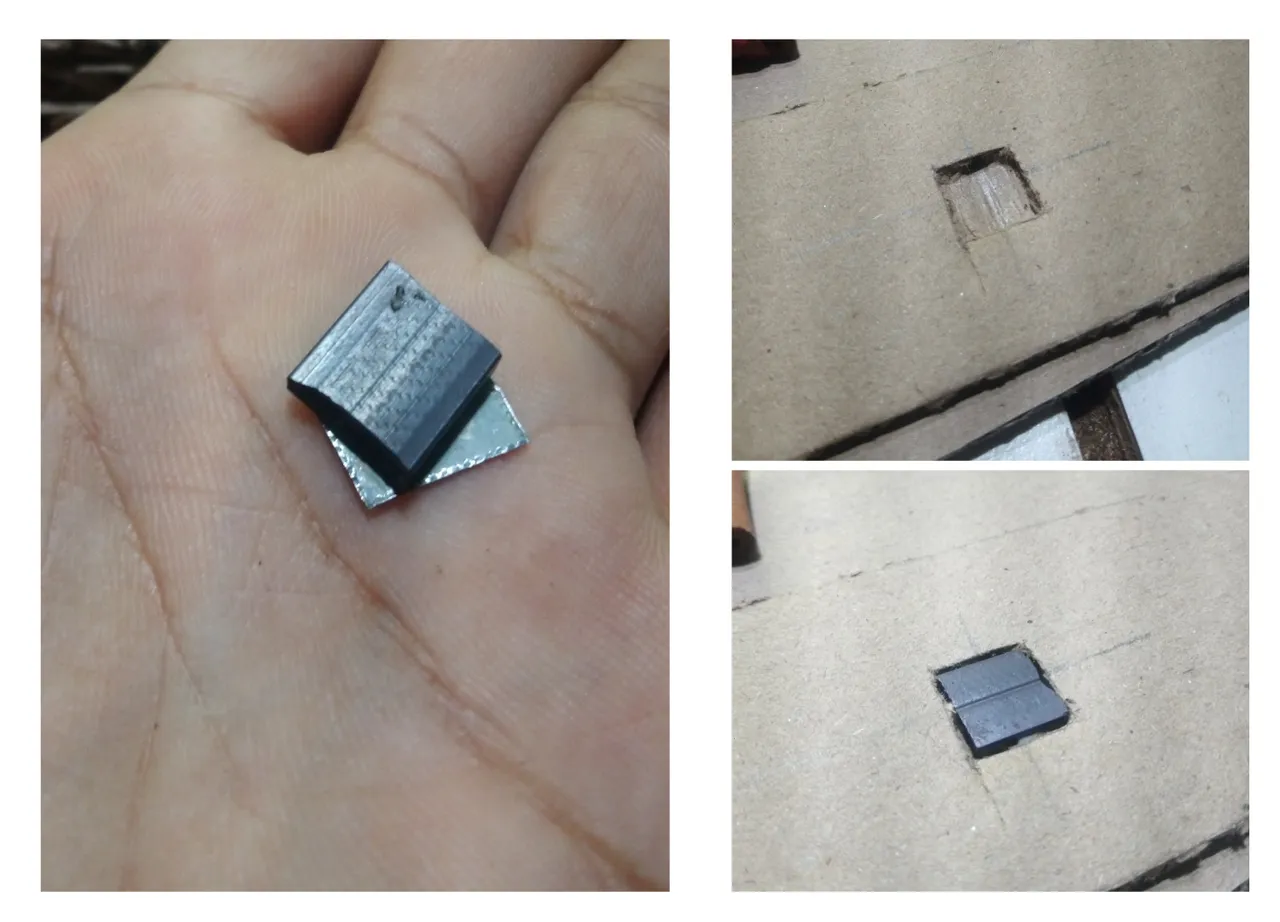
En una de las láminas procedemos a incrustar el imán para ser más específico en la que va en la parte superior acompañando la tapa, ya que esta va hacer contacto con la caja en si misma permitiendo que esta cierre.
Paso 3
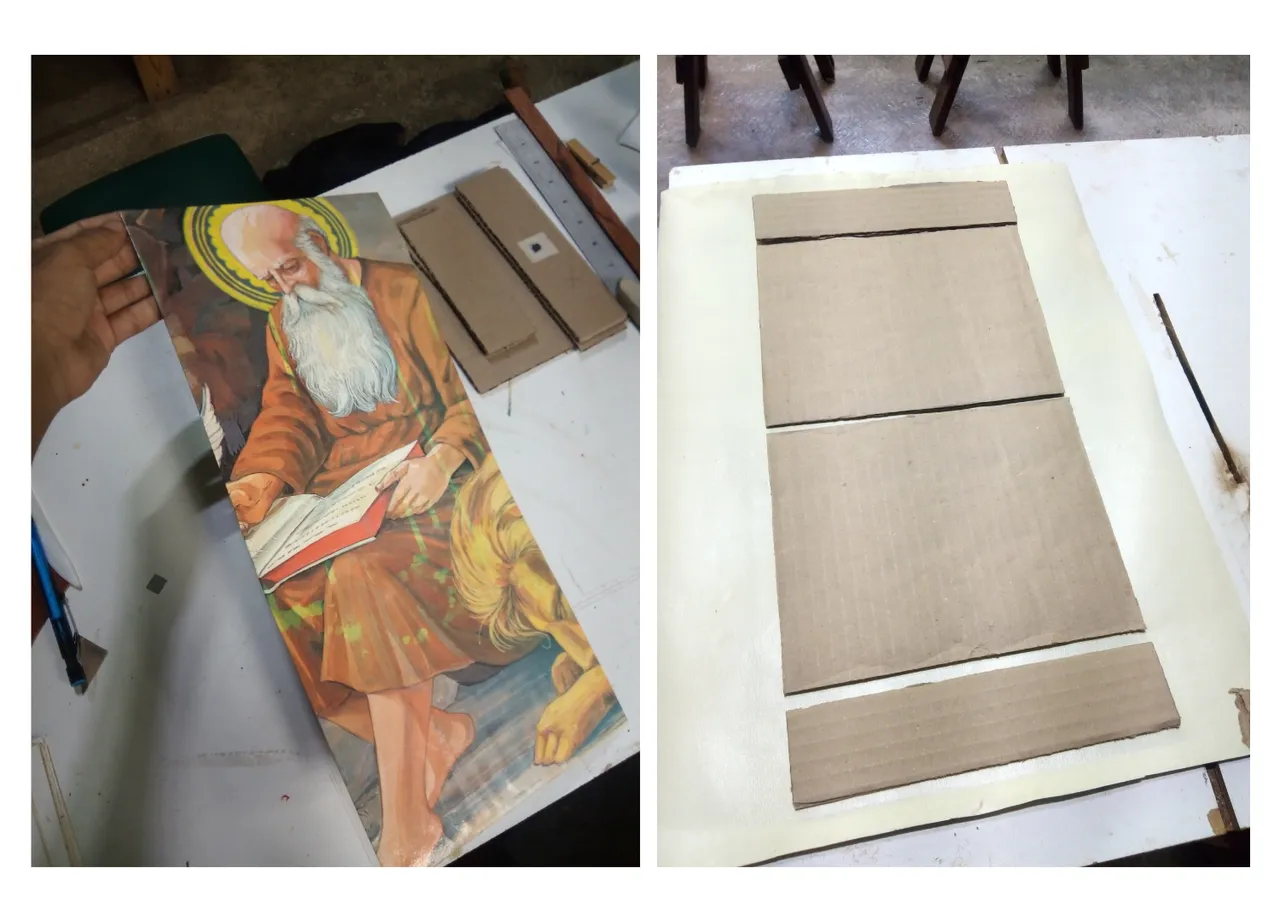
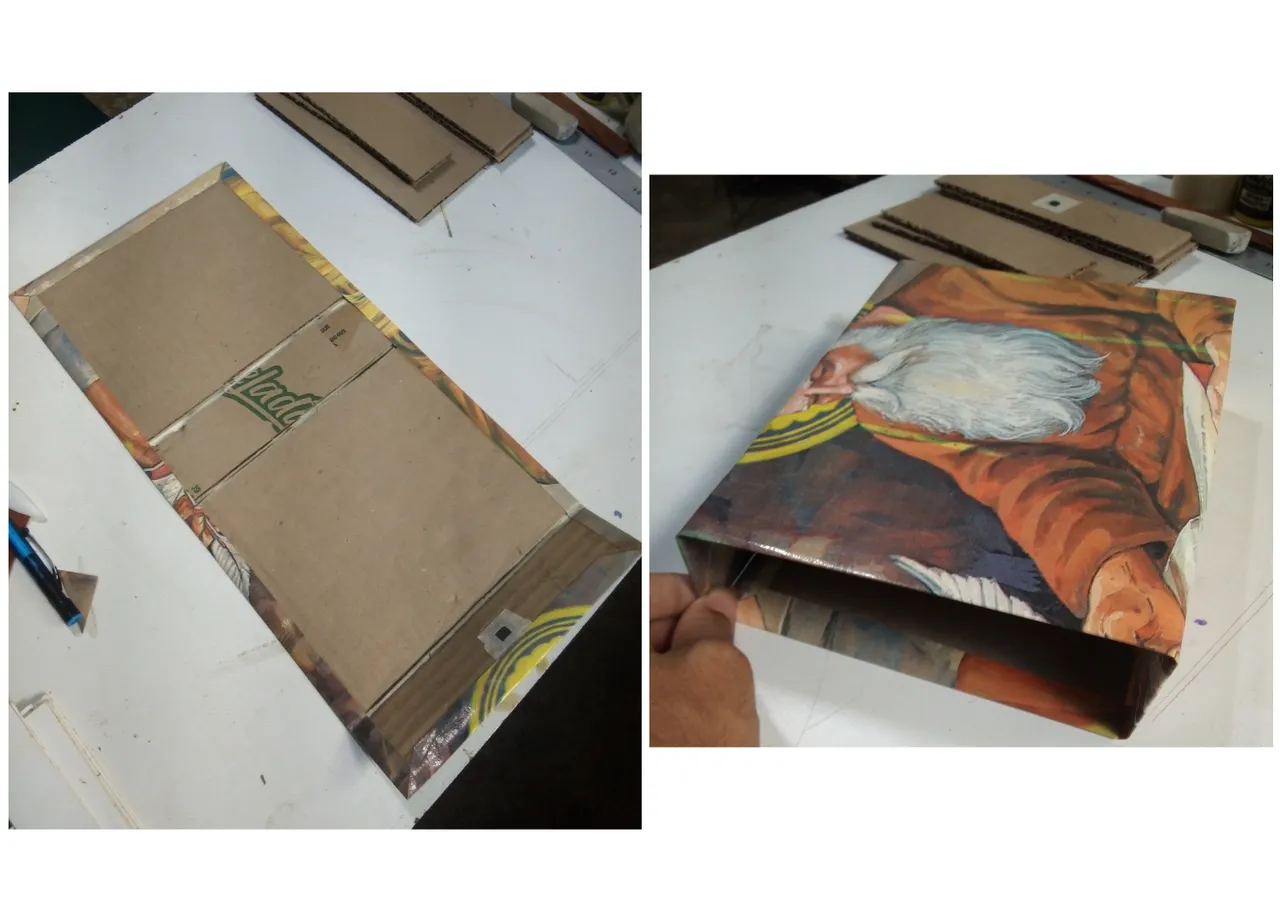
En este caso tenía un afiche o una impresión que una vez estuvo enmarcada, así que la tenía guardada para usarla en algún momento, es la imagen de san marcos de león el evangelista una iconografía muy interesante además de que es uno de los tetramorfos siendo el león la representación zoomorfa de Marcos, así que la usare para forrar la parte externa de la caja, (aludiendo que dentro de esta yacerá algo relacionado a la sabiduría) presentamos los recortes para delimitar y recortar, dejaremos un margen de 1.5cm por los cuatros lados.
Paso 4
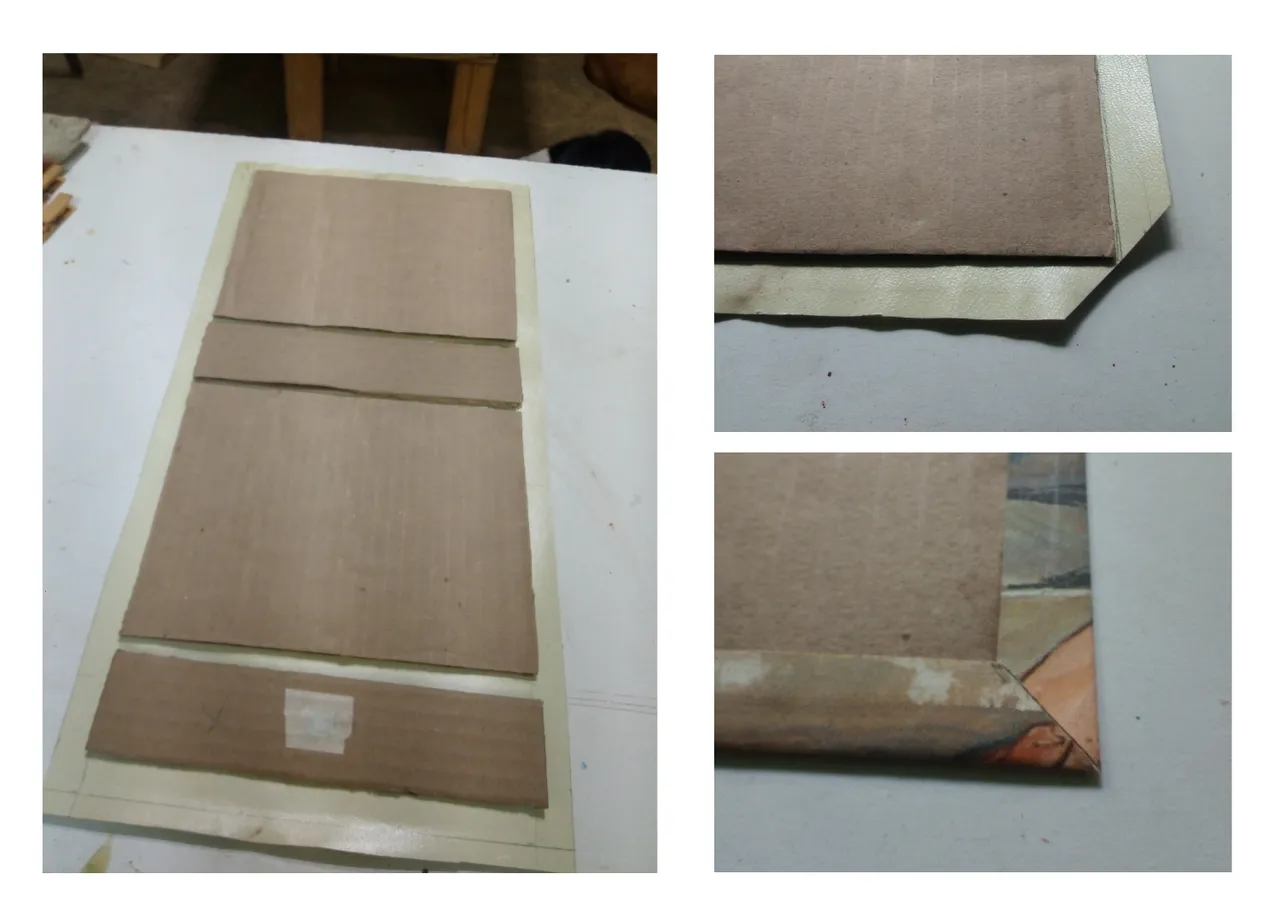
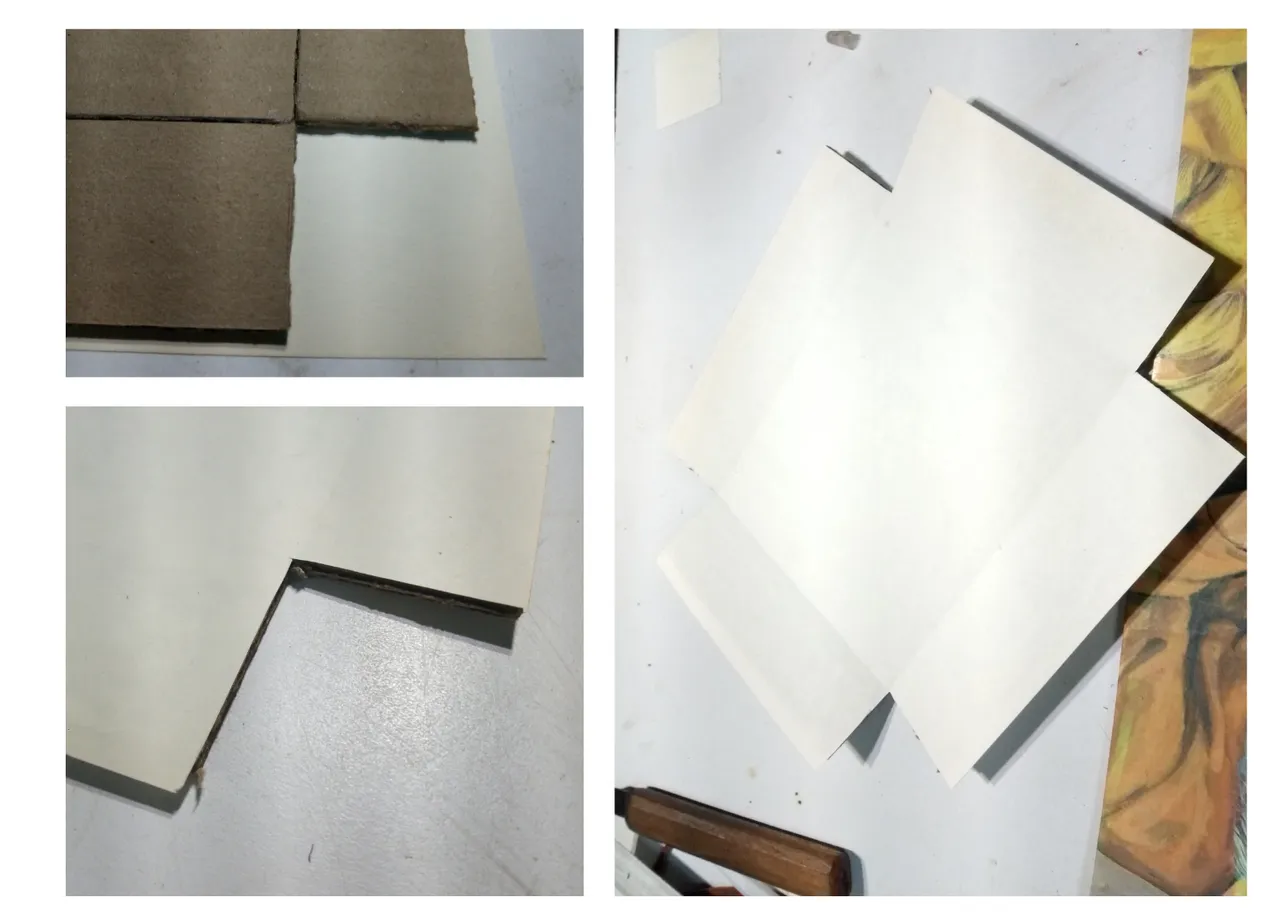
Vamos a pegar cada cartón, dejemos 5mm de separación para que estas puedan ser flexible, le damos presión y con un trapo hacemos fricción, como cuando pegamos un papel contax, luego hacemos unos cortes al borde de cada esquina para generar un ángulo de 45, le untamos cola y doblamos y repetimos el mismo proceso hasta que quede totalmente pegada.
Paso 5
Acá debemos flexionar la carcasa para determinar que todo esté muy bien y así podemos ir visualizando como va a ir quedando.
Paso 5.1
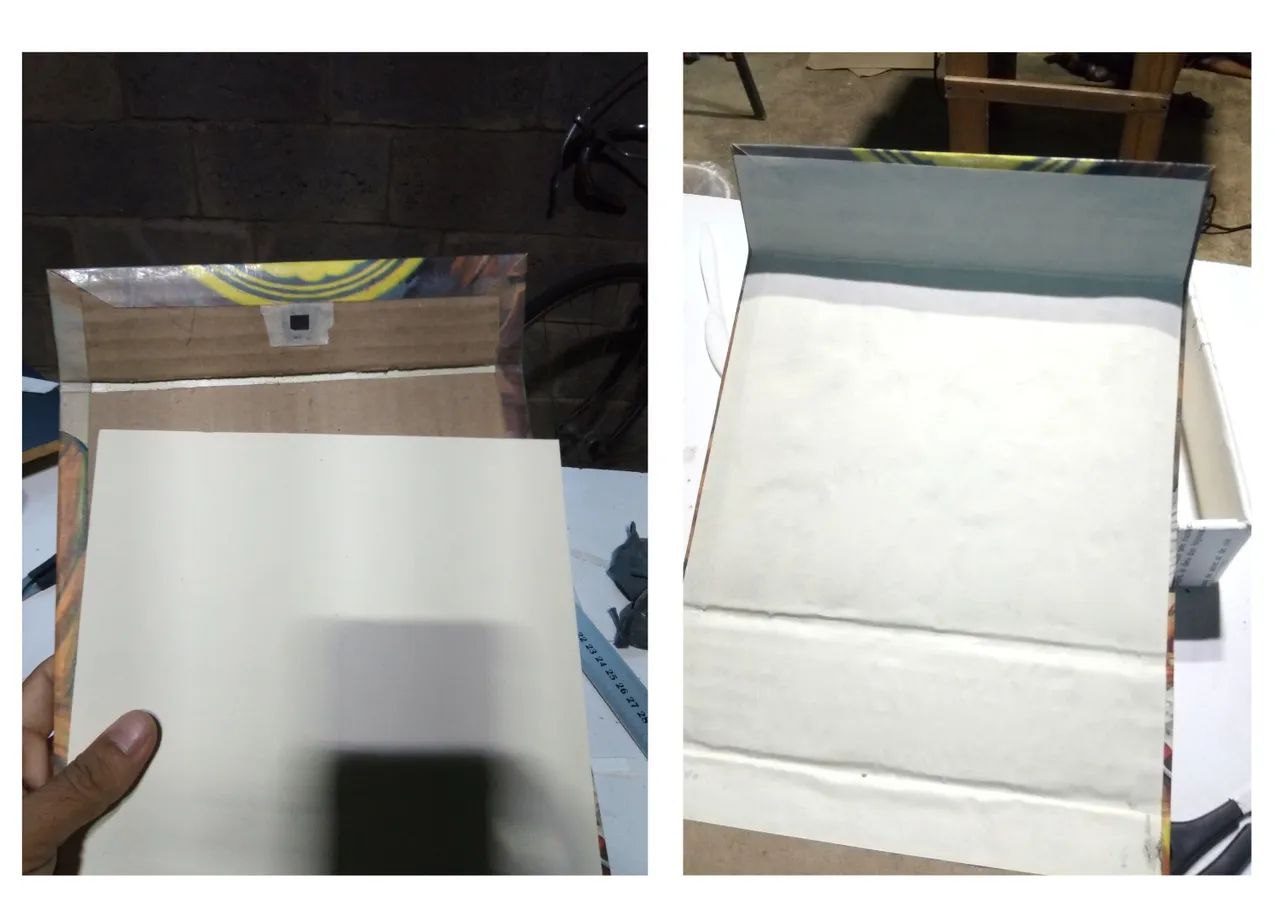
Forramos la parte interna de la misma, podemos usar una espátula platica para esparcir la cola y hacemos precio sobre la cartulina con un trapo limpio.
Paso 6
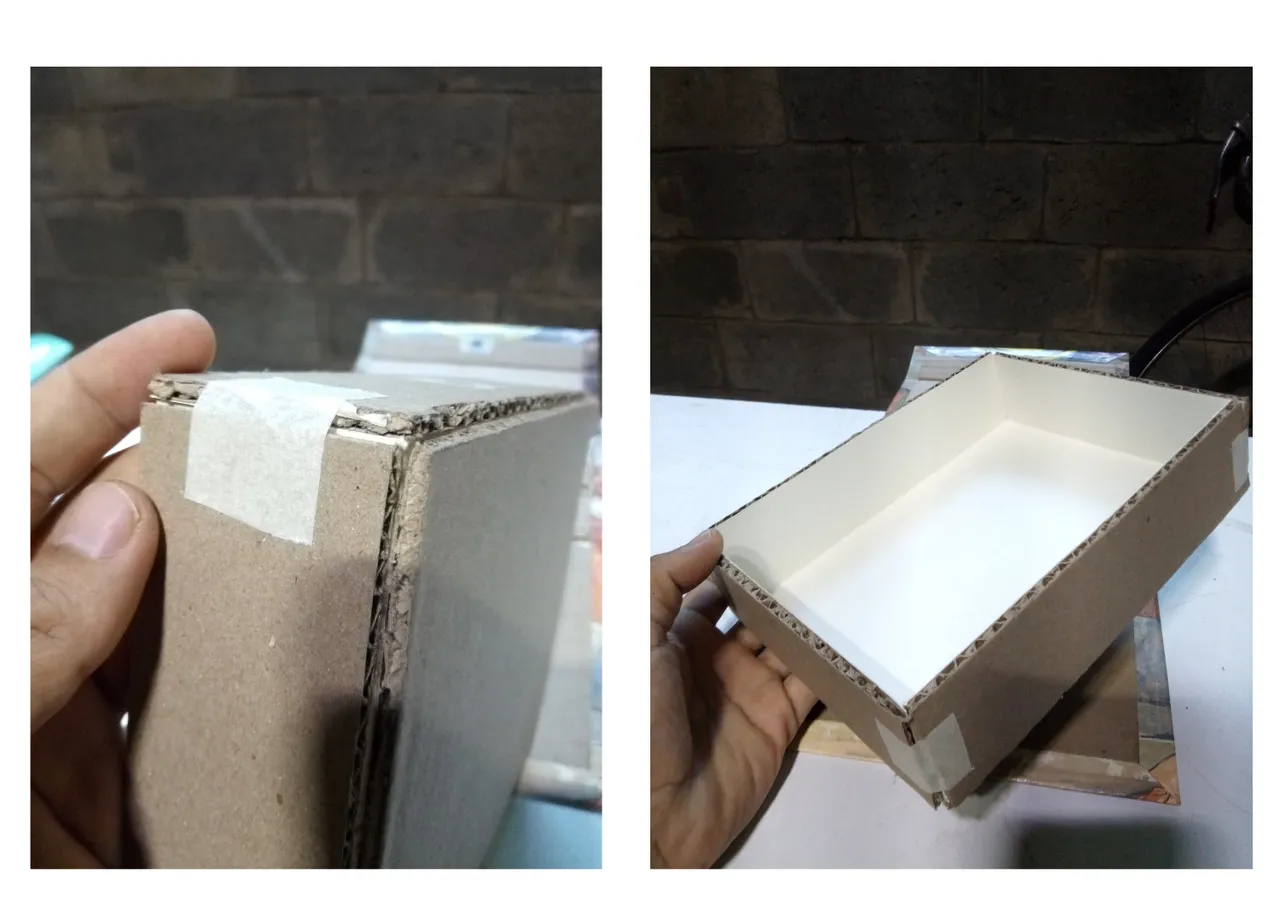
En este paso nos enfocaremos a realizar la caja interna y en una de las partes más angosta marcamos la mitad y colocamos el imán.
Paso 6.1
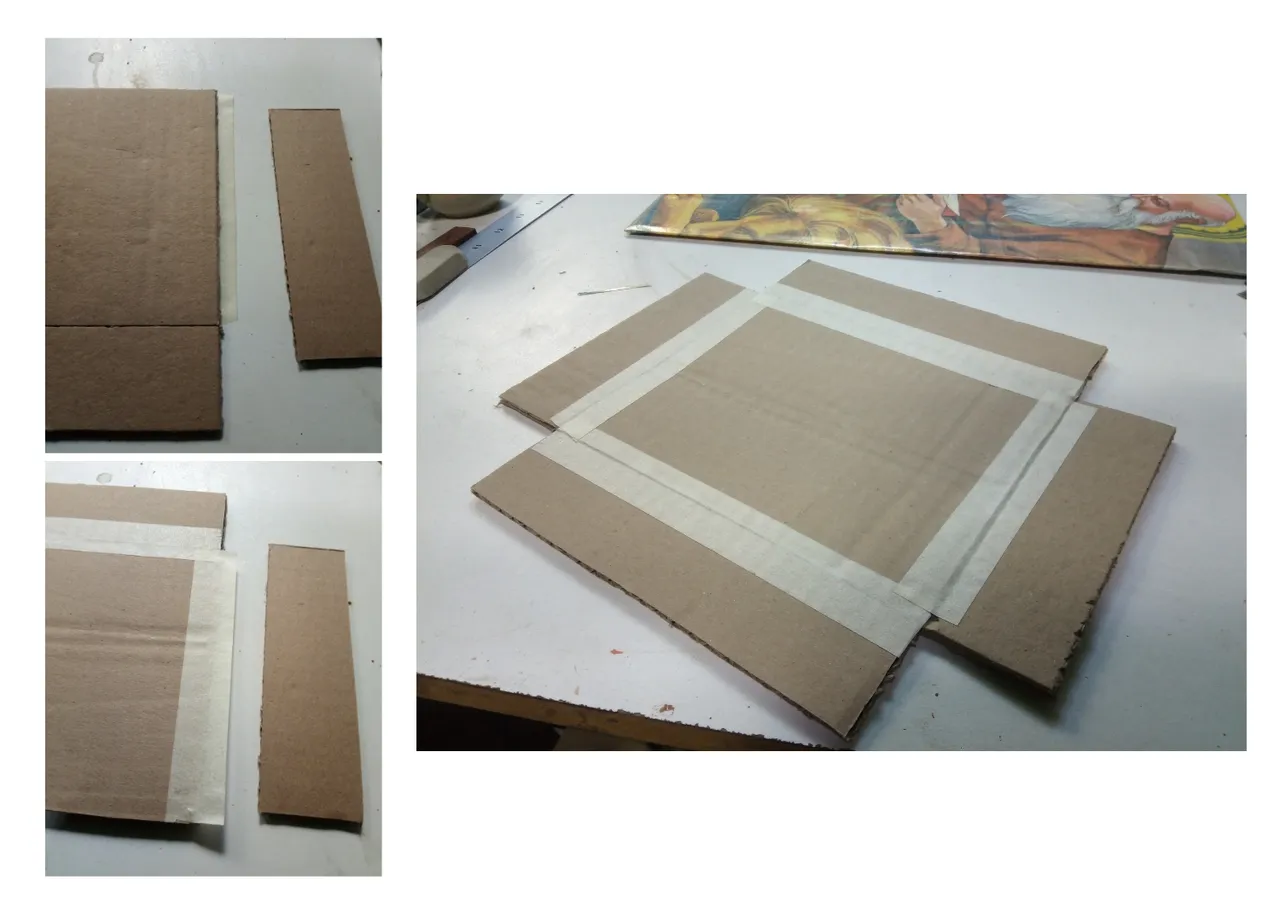
Presentamos todas los pedazos y colocamos cinta por las cuatro Partes, esto para mejor fijación al formar la caja.
Paso 7
Debemos de tomar en cuenta que la cinta quedara por la parte interna y la que tiene el imán por la parte externa, así que colocamos una cartulina por la parte de la cinta y encolamos, aquí podemos jugar con los colores y tono ya es a gusto de cada creador.
Paso 8
Una vez seca recortamos por el borde la cartulina, doblamos todos los lados y aseguramos con la cinta de enmascarar y notamos como queda tan genial este forro interno.
Paso 9
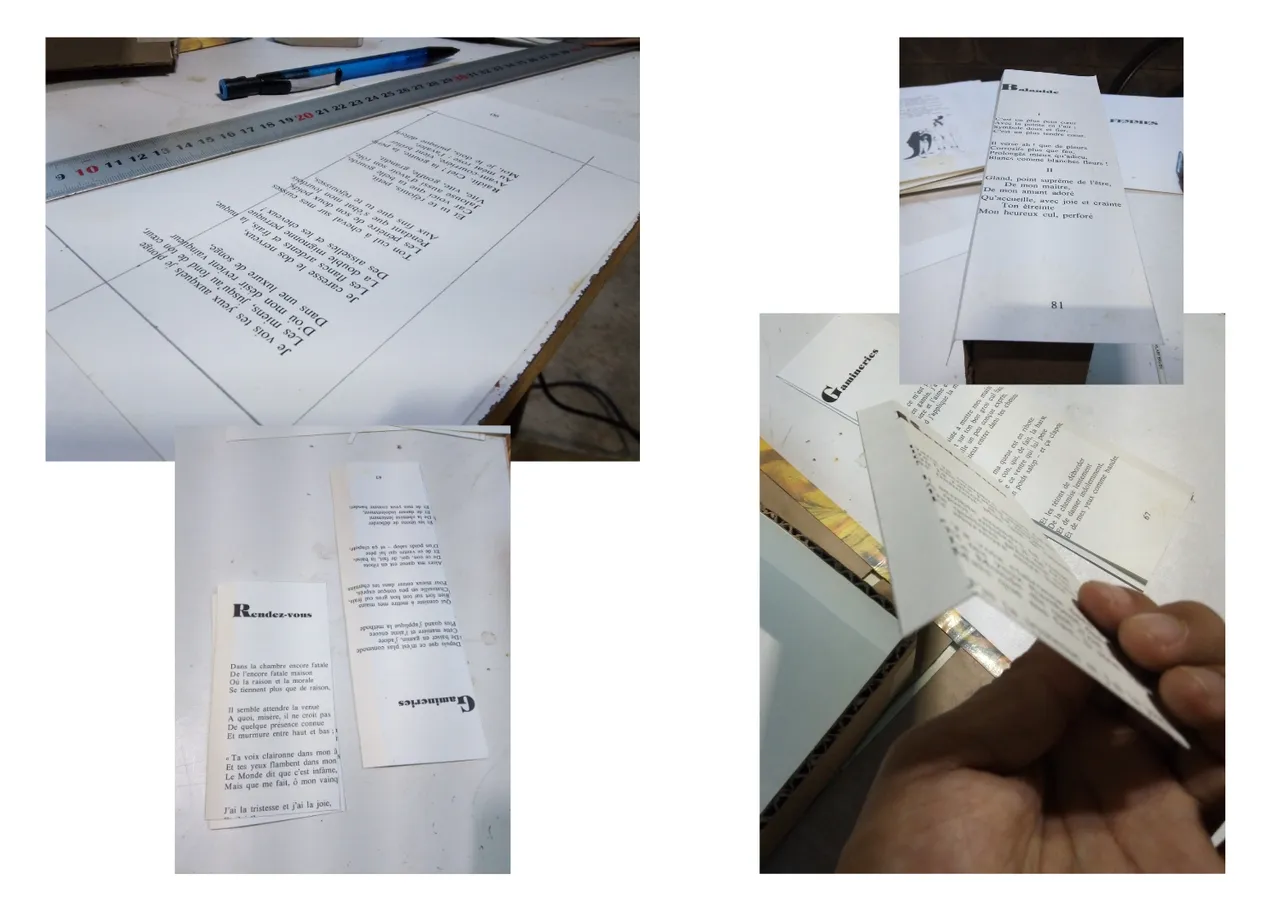
Ahora procedemos a forrar la parte externa, en este caso usare unas hojas suelta de un libro, era un poemario en francés del poeta Verlaine, lo traduje y lo leí, y como estaba incompleto lo aproveche para esta actividad, en realidad no daño libro solo aprovecho esas hojas sueltas, aca tomamos en cuenta la dimensiones de la caja y comenzamos con la parte más larga le dejamos 1.5cm de más por la inferior y por los lados y por la parte superior la cual entra a la parte interna de la caja unos 7mm, la de la parte angosta le restamos 1.5 cm de los lados es decir si la caja tiene 14.5cm al forro le damos 13vm y a la parte superior e inferior las misma que la anterior.
Paso 10
Doblamos la parte inferior de cada forro a 1.5cm encolamos y procedemos a pegar la parte más largas por ambos lados, hacemos unos corte en las puntas superiores de arriba y abajo, para doblar a los lados y doblamos hacia adentro, luego pegamos las más angostas, amigos de esta manera ya culminamos de forrar la caja interna, la cual da estructura y sentido a este cofre.
Paso 11
Ya para finalizar solo debemos de encolar en la base que dejamos sin colocar cartulina, por ello se deja así para que se pegue con más adherencia, en este caso use una herramienta de presión, un poco rustica para la ocasión así que damos presión por al menos unas dos horas y damos por finalizado el proyecto.

Ahora a buscar los objetos de curiosidad o regalos que estarán aquí adentro, podemos ver que quedo muy bien estructurado y el seguro con el imán sin duda resulto muy positivo, siempre es bueno ser lo más preciso que podamos ya que es reflejado en el trabajo final, espero que con estos pasos que les compartí puedan hacer uno o varios, amigos creadores despertemos esa chispa creativa y les aseguro que podemos hacerlo con distintas dimensiones y ornamentos, esta práctica me recordó cuando hacia mis bitácoras para diseños y dibujos así que fue muy grata la práctica además de que la obsequiare, siempre recuerdo esta especie de proverbio y se la comparto a la comunidad :
Me despido y espero que sea de provecho este contenido, muchas gracias por leer, si tienen alguna sugerencia o duda estoy atento a los comentarios y si desean hacer algún pedido o adquirir algún trabajo de los que hago pueden contactarme, hasta una próxima publicación.
- Fotografías tomadas desde mi celular
- texto traducido en deelp
- Edición de imágenes en canva
English version
Let's make a chest box with recycled cardboard
Greetings from my atelier, friends, artisans and ingenious of the hive diy community, this time I bring you a tutorial on how to make a box type chest with recycled cardboard, ie the material is taken from the boxes of grocery products or other products that often can be sold in warehouses or stores, as well as they can not give them away
This is one of the first cardboard boxes that I make in this style, which I found interesting, since we will be unifying the binding technique, I have made wooden boxes of course, but this time I wanted to make one with easily accessible materials, a functional, aesthetic and didactic product, fellow artisans having all the materials is an entertaining practice and it can even be used as a gift or to keep different things that are loose there.
- Cardboard
- White glue
- School cardboard
- Posters, magazines, cut-out books, etc.
- Scissors, cutter or blade.
- Magnets
- Masking tape
Step 1
Once we have the cardboard we proceed to select the best parts of it, as sometimes there are parts hit, we trace and make the cuts of the casing of this chest which will be the base and lid.
Step 2
In one of the sheets we proceed to embed the magnet to be more specific in the one that goes on top accompanying the lid, as this will make contact with the box itself allowing it to close.
Step 3
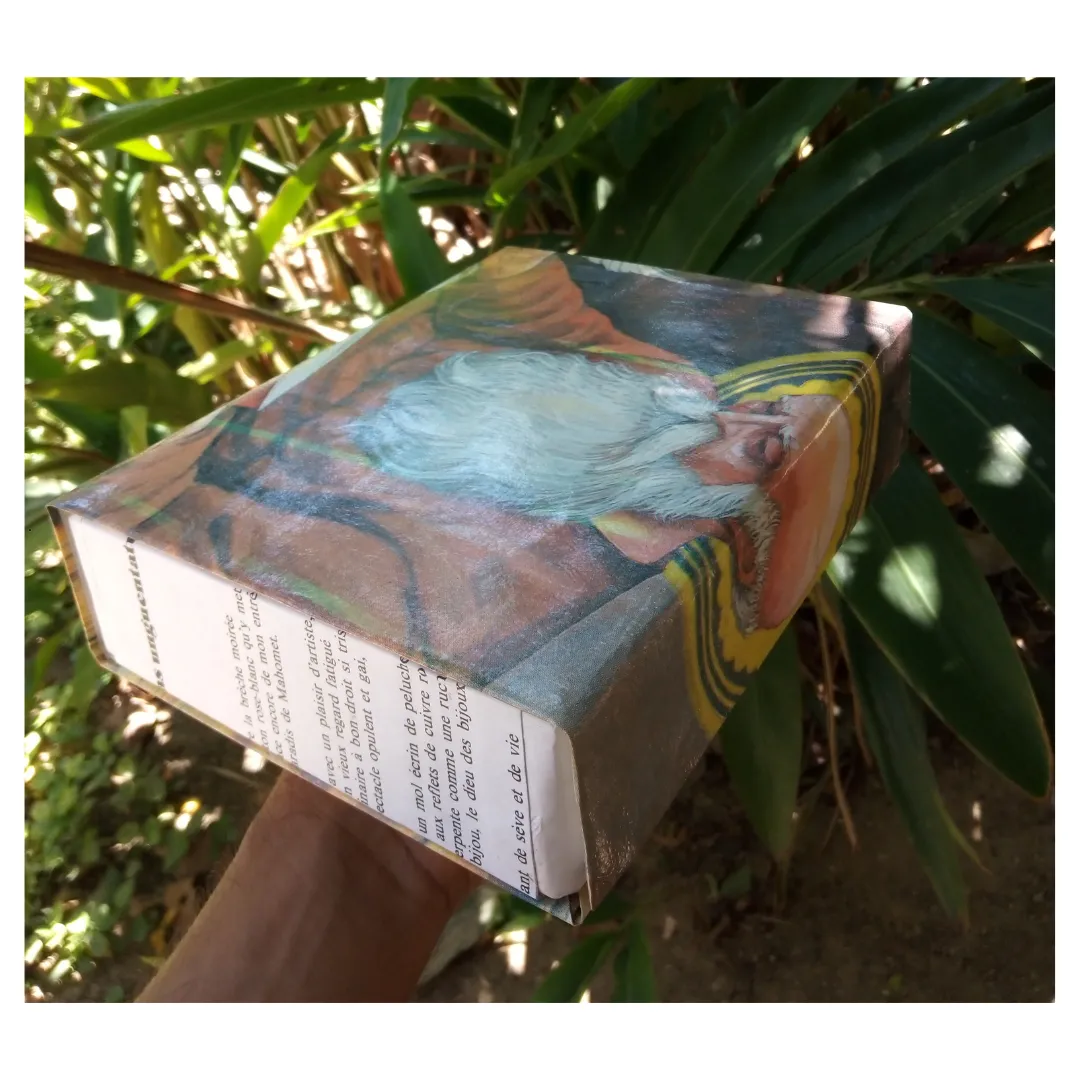
In this case I had a poster or a print that was once framed, so I had it saved to use it at some point, it is the image of St. Mark the Evangelist lion, a very interesting iconography besides being one of the tetramorphs being the lion the zoomorphic representation of Mark, so I will use it to line the outside of the box, (alluding that inside this will lie something related to wisdom) we present the cuts to delimit and trim, we will leave a margin of 1. 5cm on all four sides.
Step 4
We are going to glue each cardboard, leave 5mm of separation so that they can be flexible, we give pressure and with a cloth we make friction, as when we glue a contax paper, then we make some cuts at the edge of each corner to generate an angle of 45, we smear glue and fold and repeat the same process until it is completely glued.
Step 5
Here we must flex the casing to determine that everything is very well and so we can visualize how it will be and line the inside of it.
Step 6
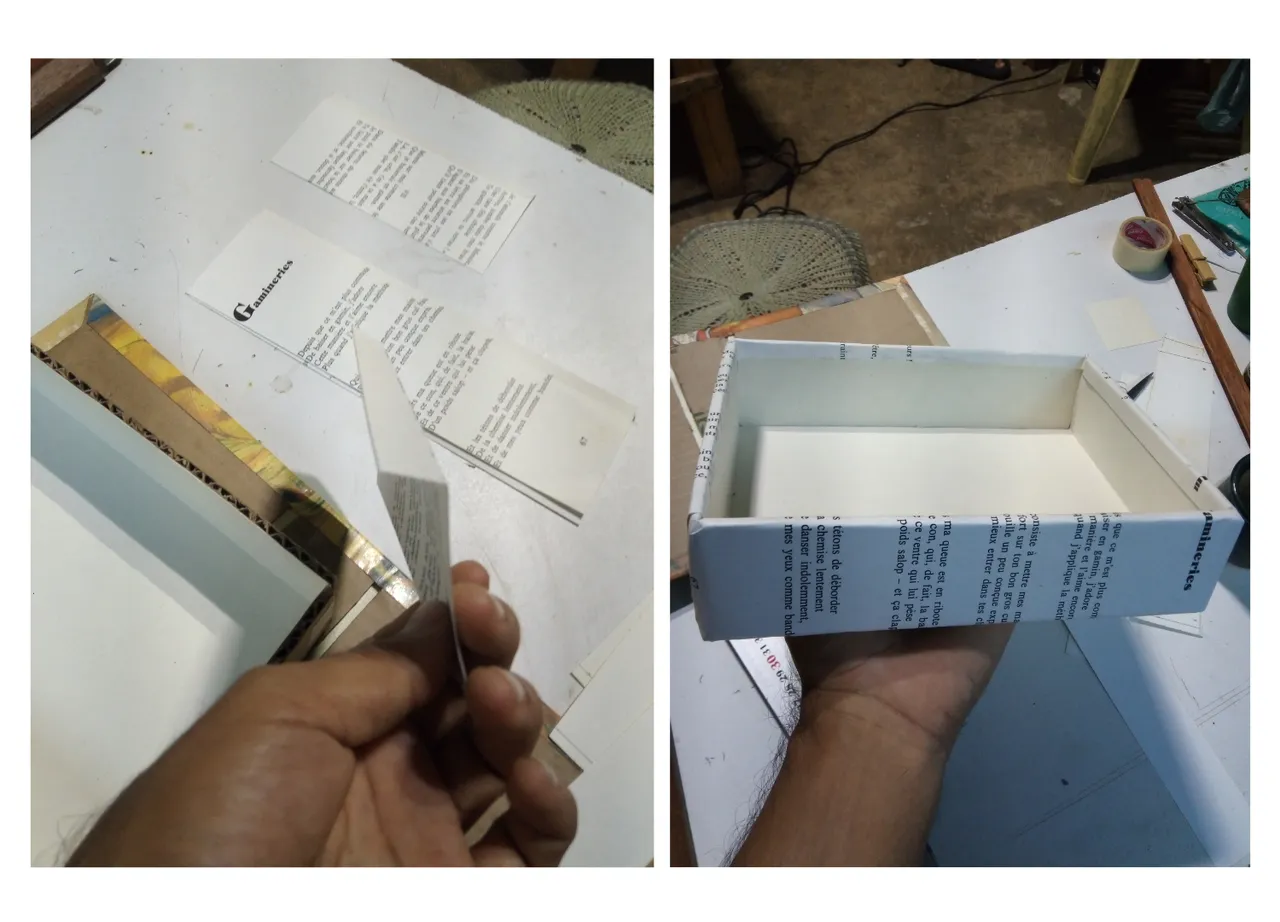
In this step we will focus on making the inner box and in one of the narrowest parts we mark the middle and place the magnet, we present all the pieces and place tape on the four parts.
Step 7
We must take into account that the tape will be on the inside and the one with the magnet on the outside, so we place a cardboard on the part of the tape and glue, here we can play with the colors and tone and it is to the taste of each creator.
Step 8
Once dry, cut the cardboard along the edge, fold all sides and secure with the masking tape and notice how great this inner lining looks.
Step 9
Now we proceed to line the outside, in this case I will use some loose leaves of a book, it was a collection of poems in French by the poet Verlaine, I translated it and read it, and as it was incomplete I took advantage of it for this activity, actually I don't damage the book I just take advantage of those loose leaves, here we take into account the dimensions of the box and we start with the longest part we leave 1. 5cm more for the bottom and sides and for the top which enters the inner part of the box about 7mm, the narrow part we subtract 1.5 cm from the sides that is if the box has 14.5cm to the lining we give 13vm and the top and bottom the same as above.
Step 10
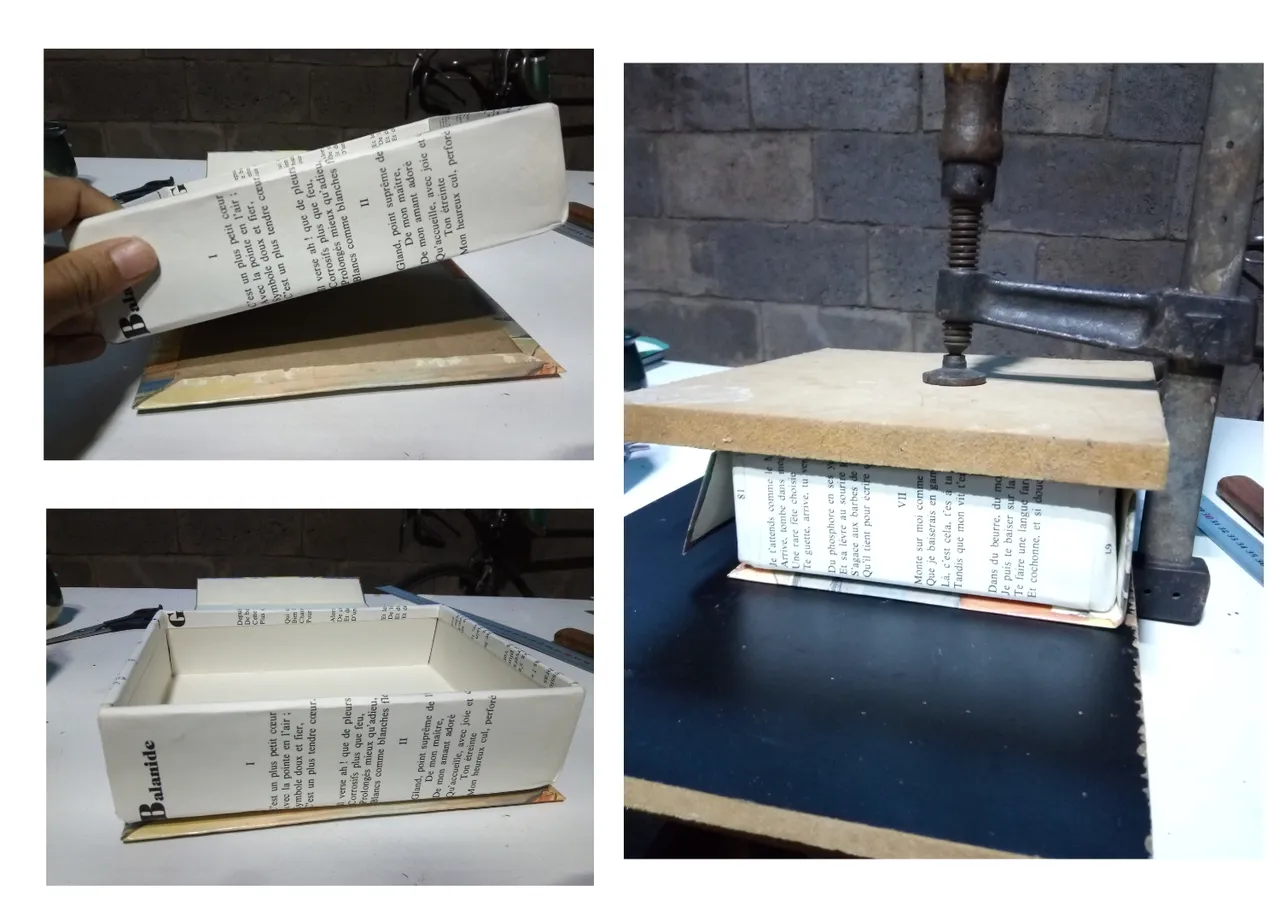
Fold the bottom of each lining to 1.5cm, glue and proceed to glue the longest part on both sides, make a cut at the top and bottom upper ends, to bend to the sides and fold inward, then glue the narrower ones, friends in this way we have finished lining the inner box, which gives structure and sense to this chest.
Step 11
Now to finish we just have to glue on the base that we left without placing cardboard, so it is left so that it is glued with more adhesion, in this case use a pressure tool, a little rustic for the occasion so we give pressure for at least two hours and we finish the project.
Now to look for objects of curiosity or gifts that will be here inside, we can see that it was very well structured and insurance with the magnet certainly proved very positive, it is always good to be as accurate as we can because it is reflected in the final work, I hope that with these steps that I shared with you can make one or more, friends creators awaken that creative spark and I assure you that we can do it with different dimensions and ornaments, this practice reminded me when I did my logs for designs and drawings so it was very nice practice in addition to the gift, I always remember this kind of proverb and I share it with the community:
I say goodbye and I hope this content is of benefit, thank you very much for reading, if you have any suggestions or questions I am attentive to the comments and if you want to place an order or purchase any of the work I do can contact me, until a future publication.
- Photographs taken from my cell phone
- Text translated in deelp
- Image editing in canva