Greetings to the Hive DIY community, I'm finally back after many interesting and rather complicated situations.
My regular computer was damaged in the midst of the continuous power failures that occur almost daily in the area, the surge protector, the multiple connection box, the computer's hard drives, among other things, were also damaged.
Image's Source
I had to build another computer, and get it working properly.
Now after catching up, let's get to the topic of the post, this time I share with you another technique to repair LED lamps.
The reason I dedicate myself to repairing these lamps and reflectors has to do with the ecological concept of reducing waste that is deposited in the environment, and extending the useful life of the things we use at home and in the workshop.
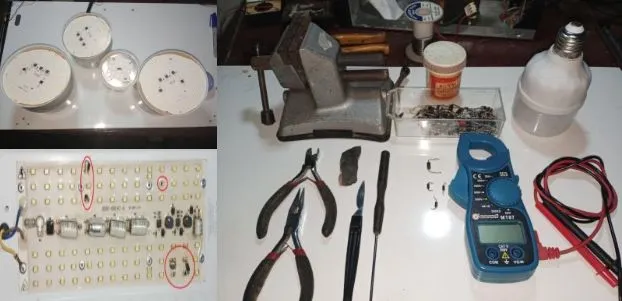
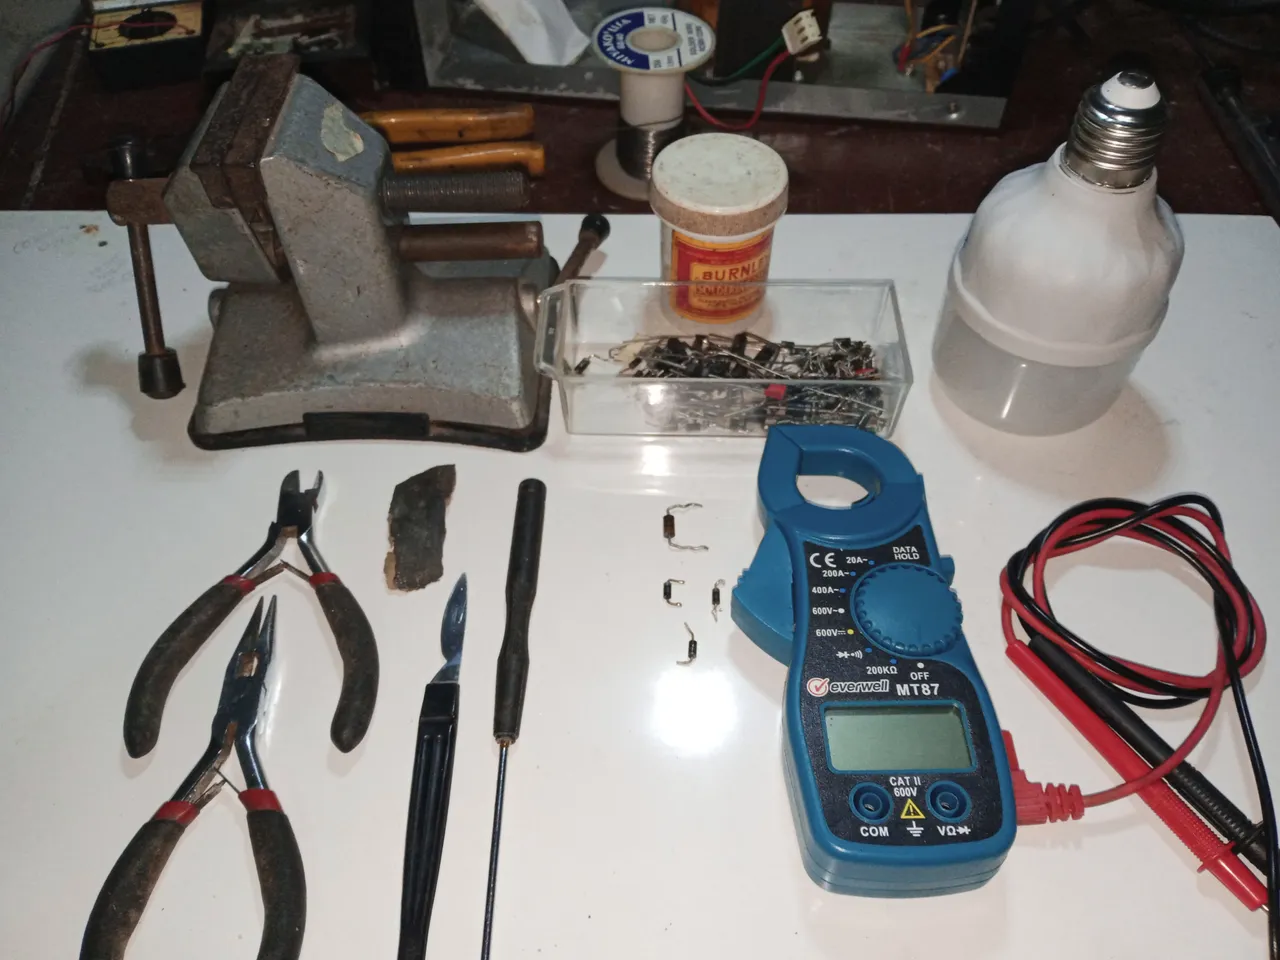
It is a very simple job that does not require much time and we need a few tools.
There are many ways to repair these LED lamps, among the ways we can do the repair are:
- placing solder between the terminals of the damaged LED joining the connections of the two terminals.
- replacing the LEDs with npn transistors and zenner diodes, as we do in LED type televisions, thus creating a multi-voltage substitute for the LED strips that illuminate the screen in LED TVs.
- placing a 100 ohm or 200 ohm resistor for 1 or 2 Watts, in place of the damaged LED.
- placing a conventional diode to replace the LED diode.
The most common and simple way to repair these bulbs is to place solders at the ends of the connection of the damaged LED to join the connection, after having removed the burned LED.

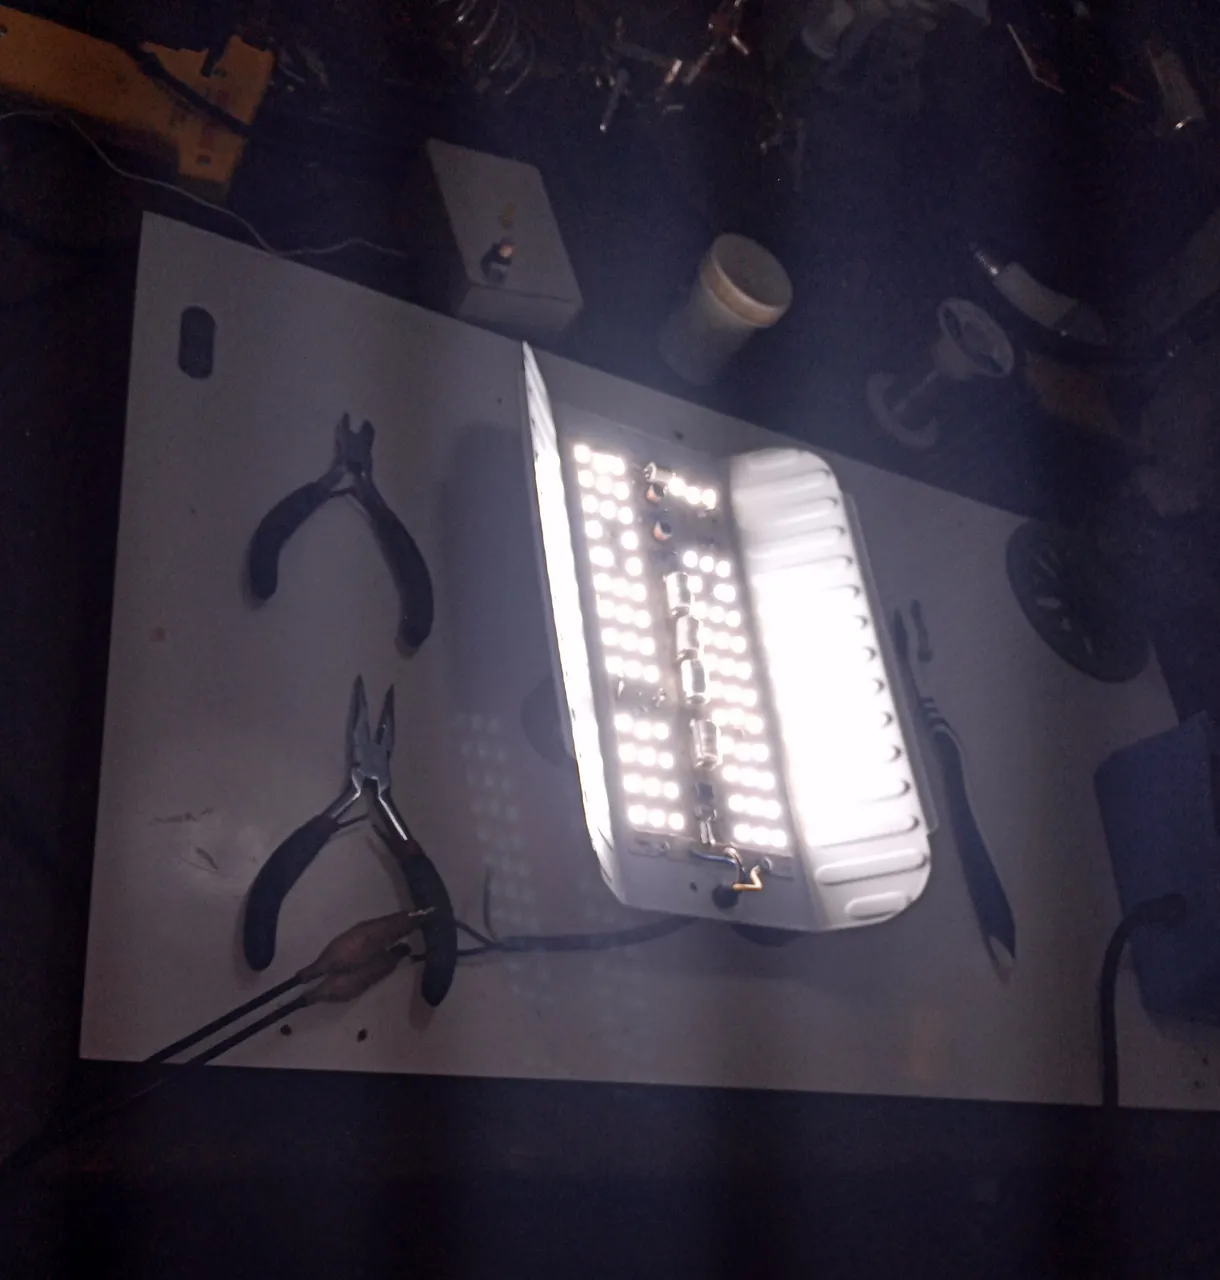
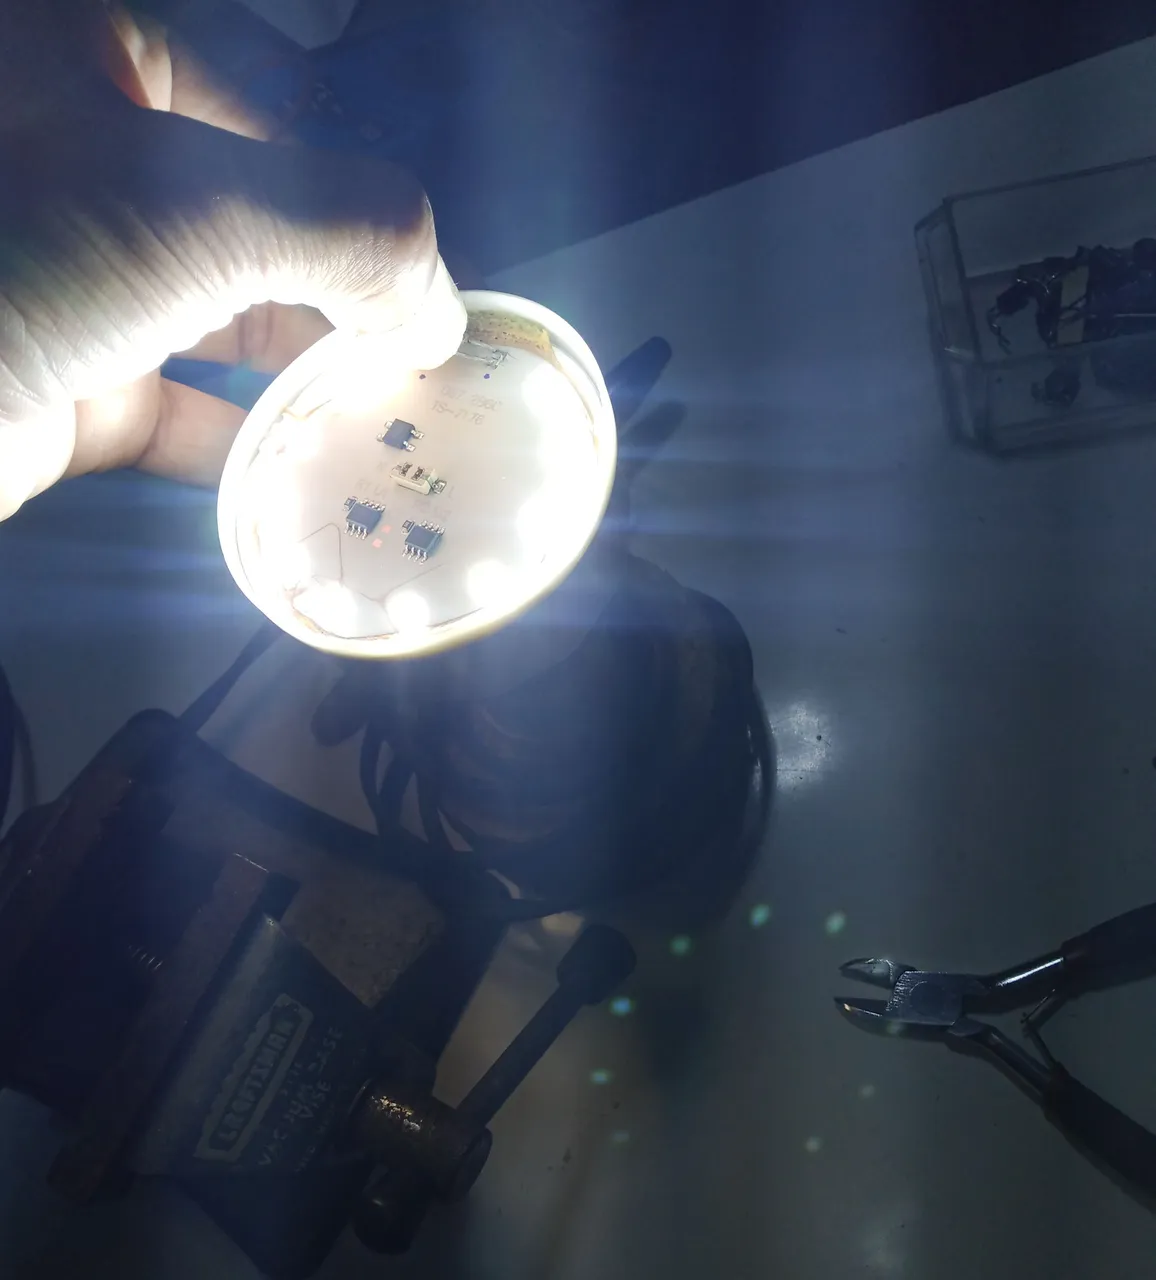
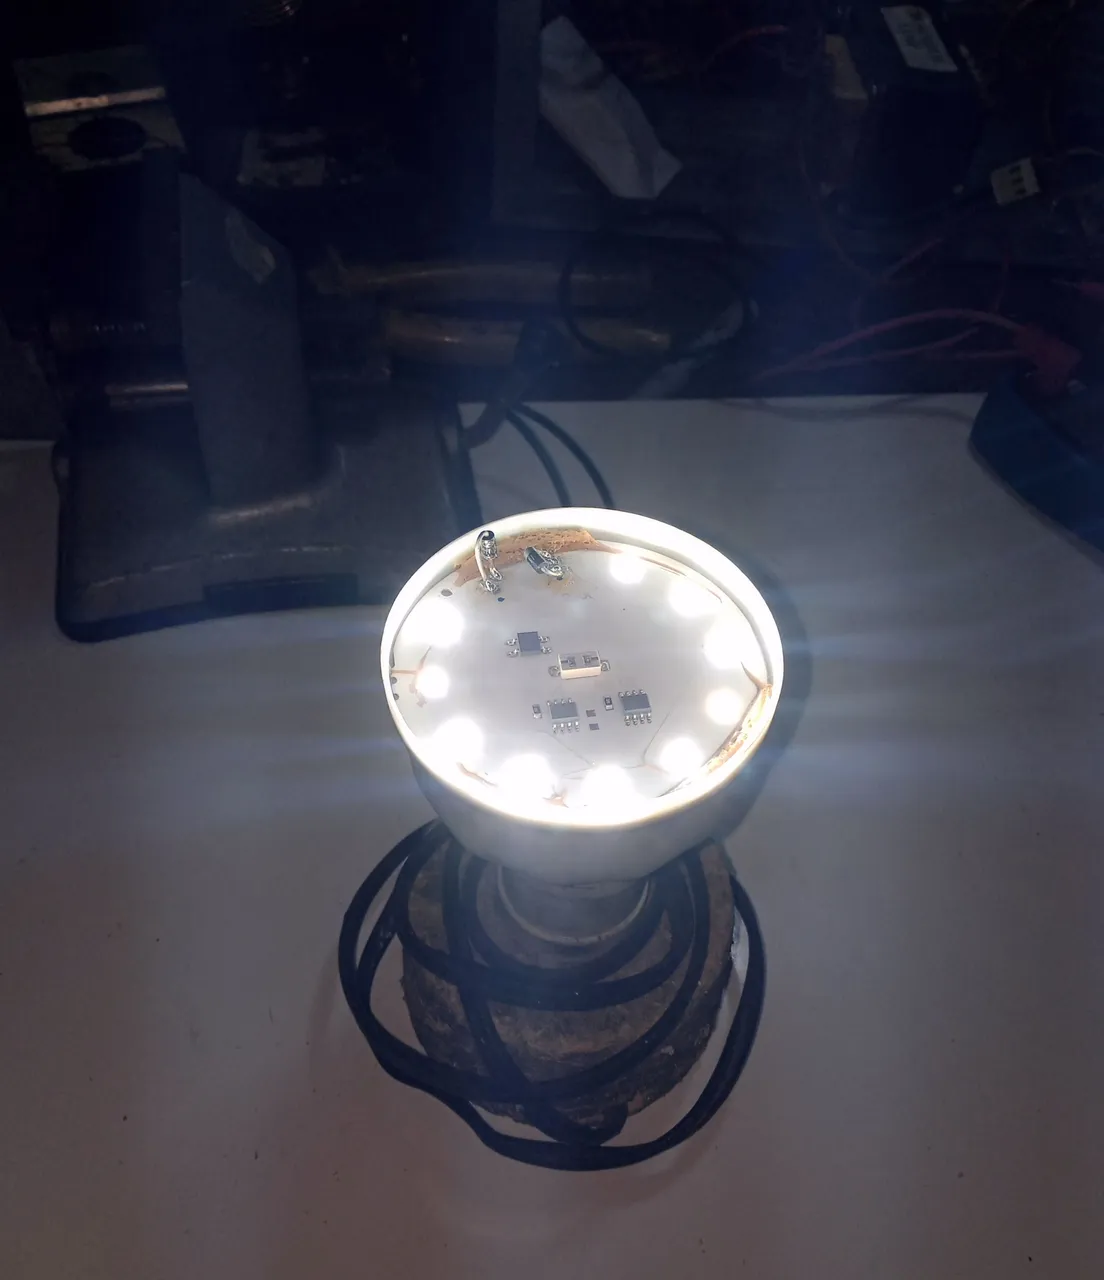
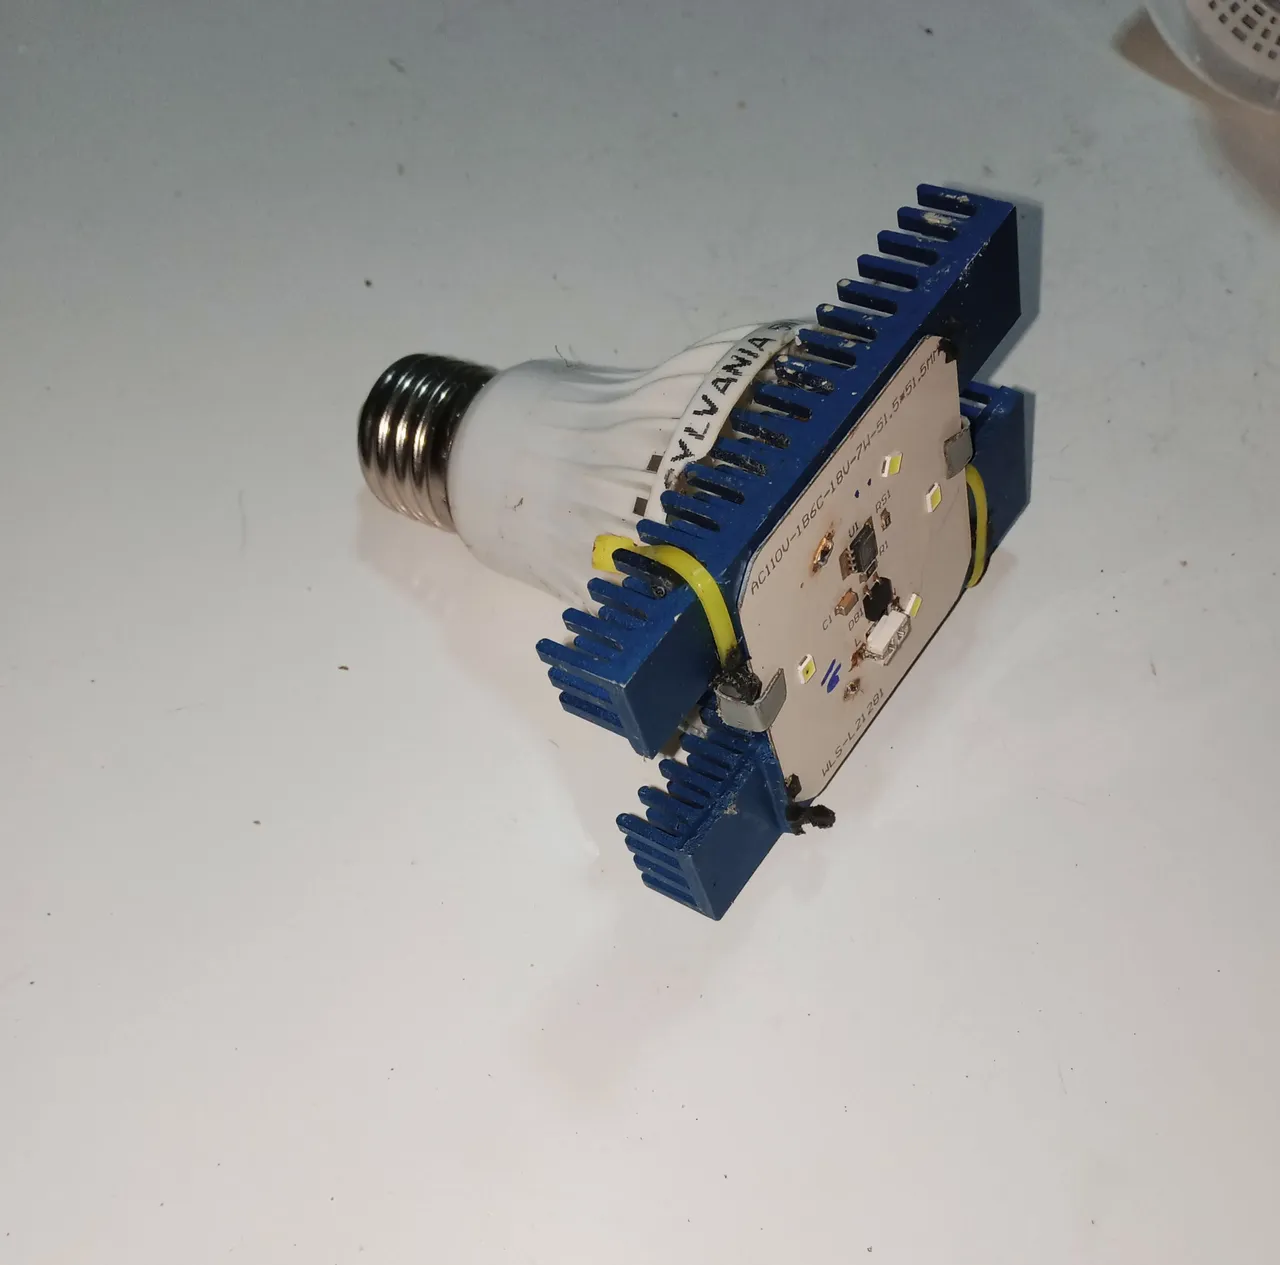
If the bulb is a switched source, the bulb will work fine, in theory the circuit will regulate itself automatically with the LEDs that still work in the bulb or reflector.
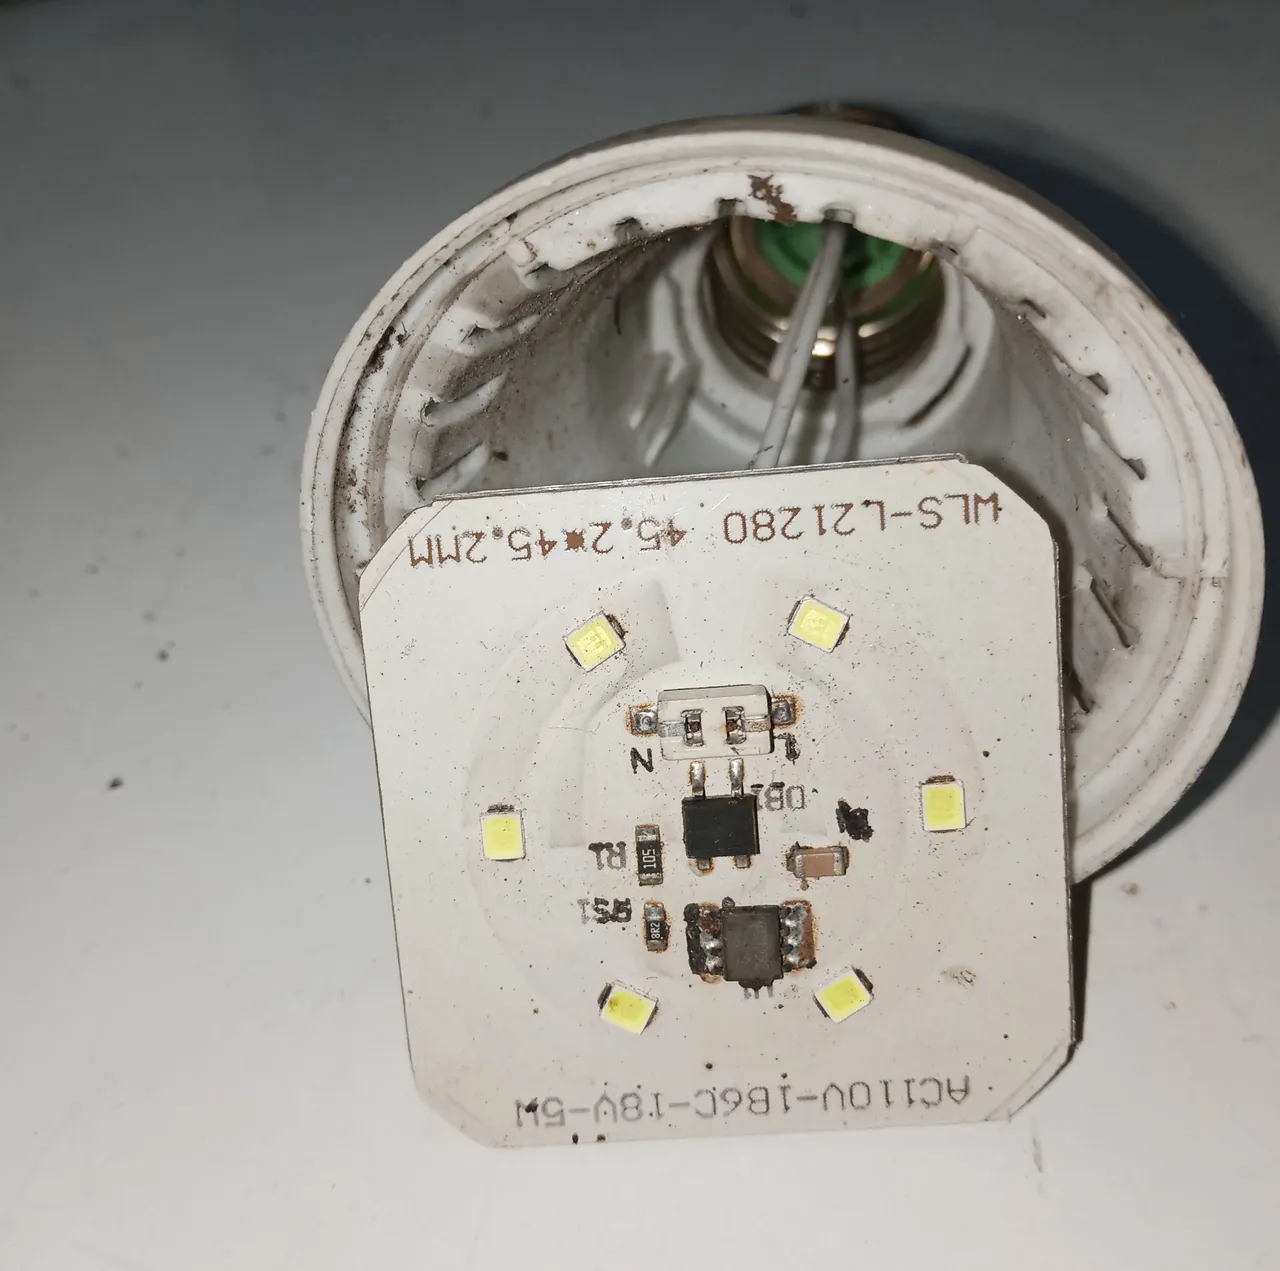
The image above shows a very common model of a switching power supply.
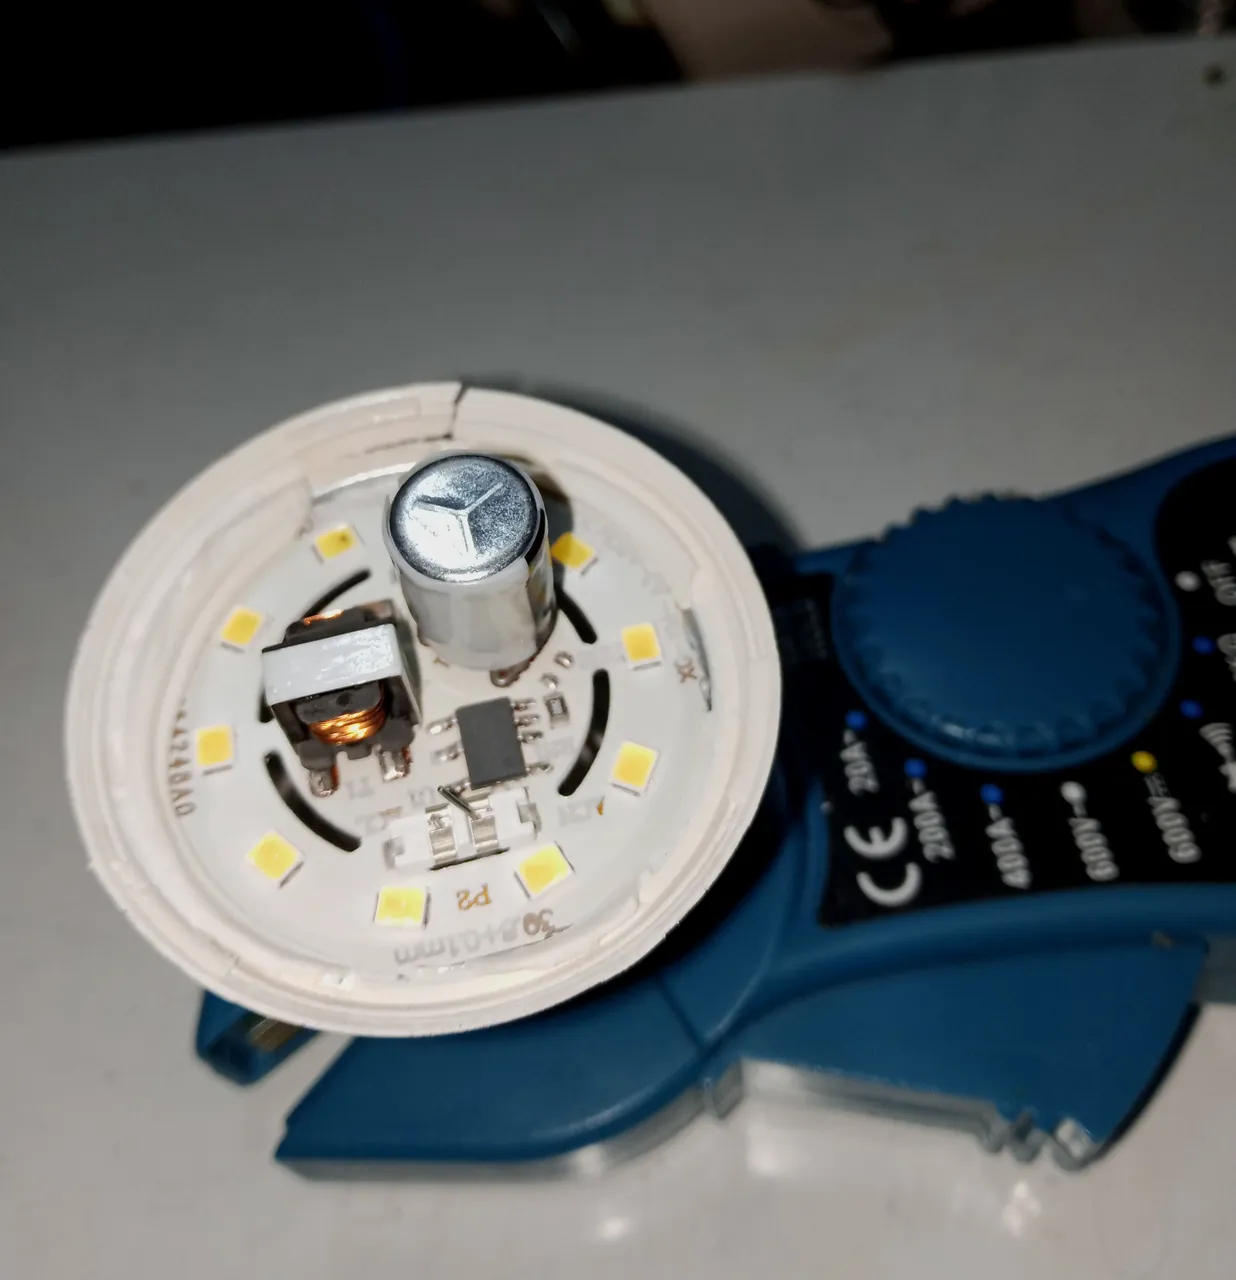
The image above shows a model of a switching power supply that I don't often find.
If the LED bulb you are repairing is a capacitive source and you make a bridge connecting the terminals of the damaged LED together, when you connect the LED bulb after the repair, all the LEDs will burn out at the same time.
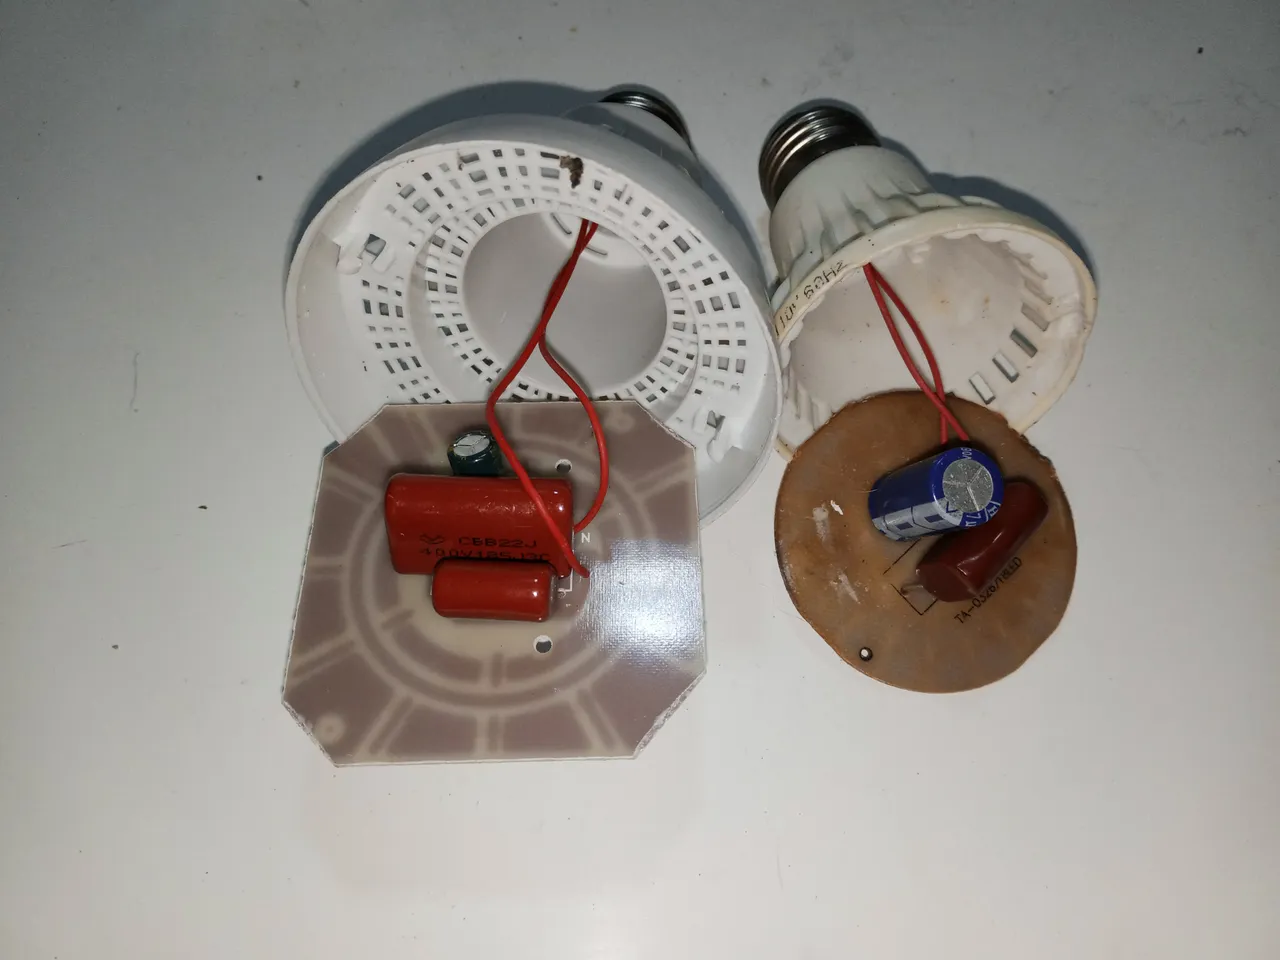
The image above these lines is of bulbs with power sources, based on capacitors.
The capacitive source bulbs are the cheapest and do not have any electronic control, so a resistor or some electronic element must be placed on them that can replace the electricity consumption of the damaged LED in the circuit.
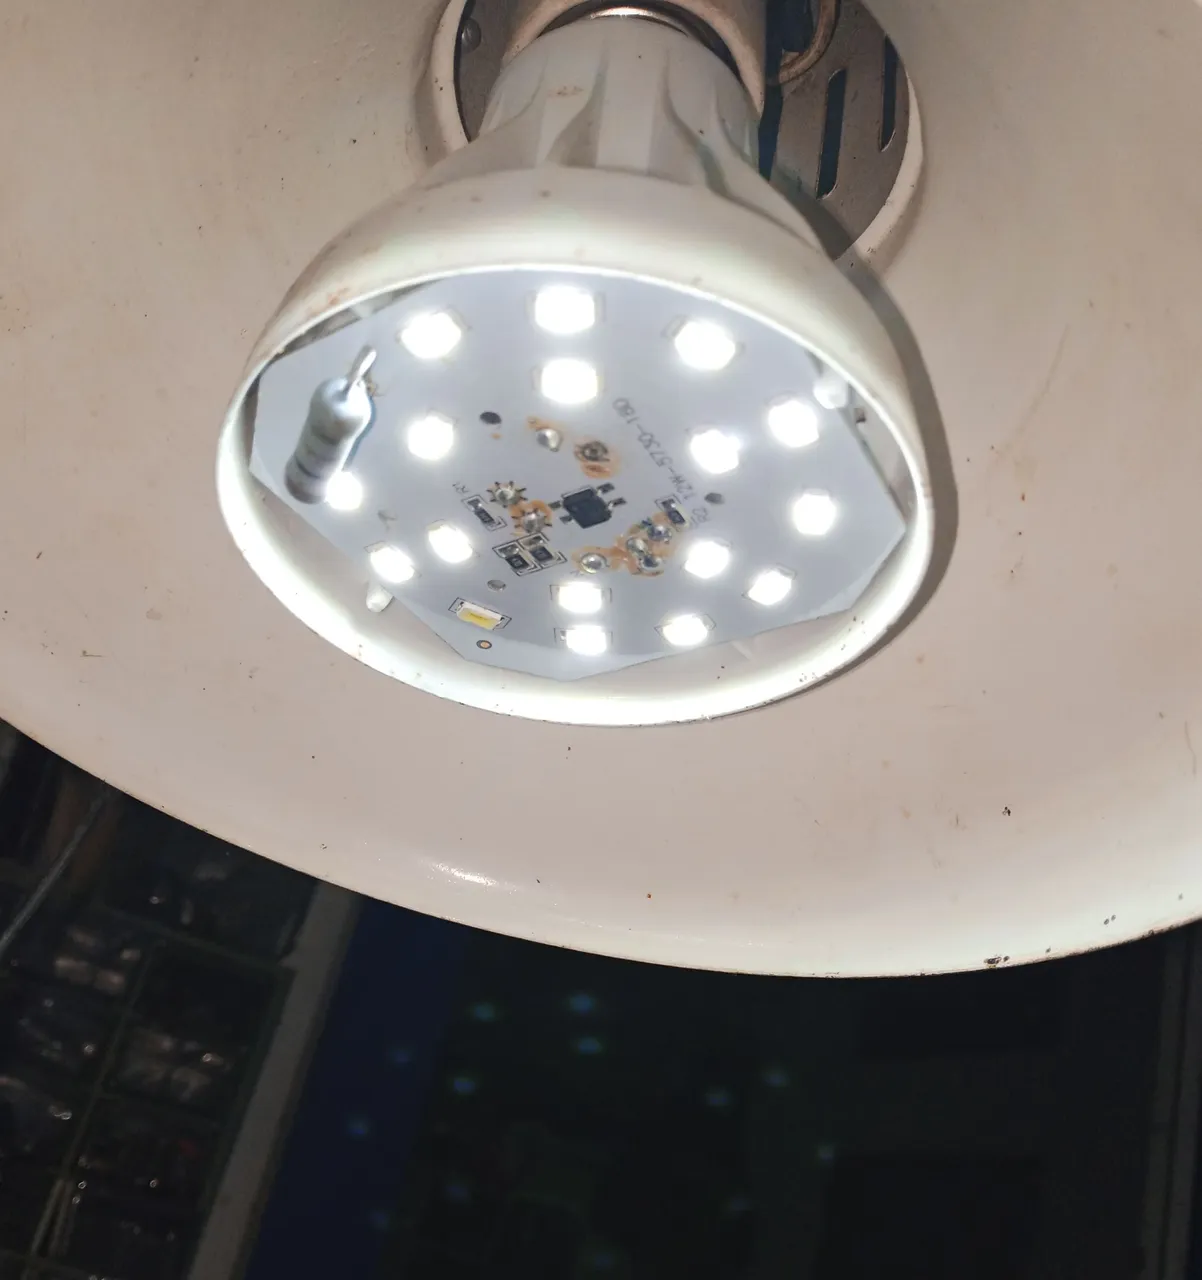
This image above is of a switched source bulb, but it is an example of a repair to a capacitor source bulb.
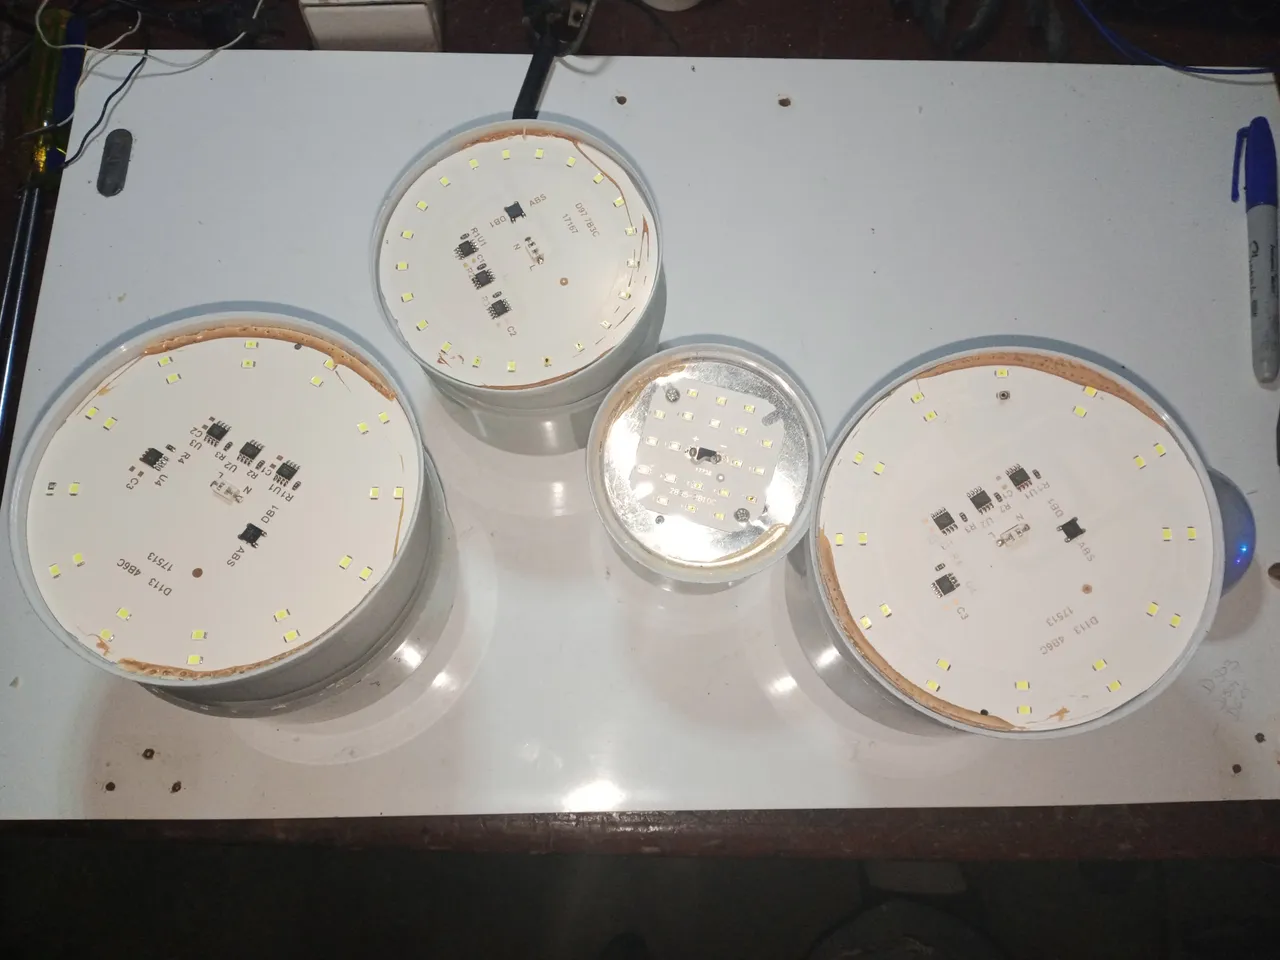
The lamps and reflectors that I am going to repair on this occasion are switched source bulbs, and I have tried all the methods I mentioned before and somehow, the lamps that have had a longer service time have been the ones I have repaired by placing diodes to replace the damaged LEDs.
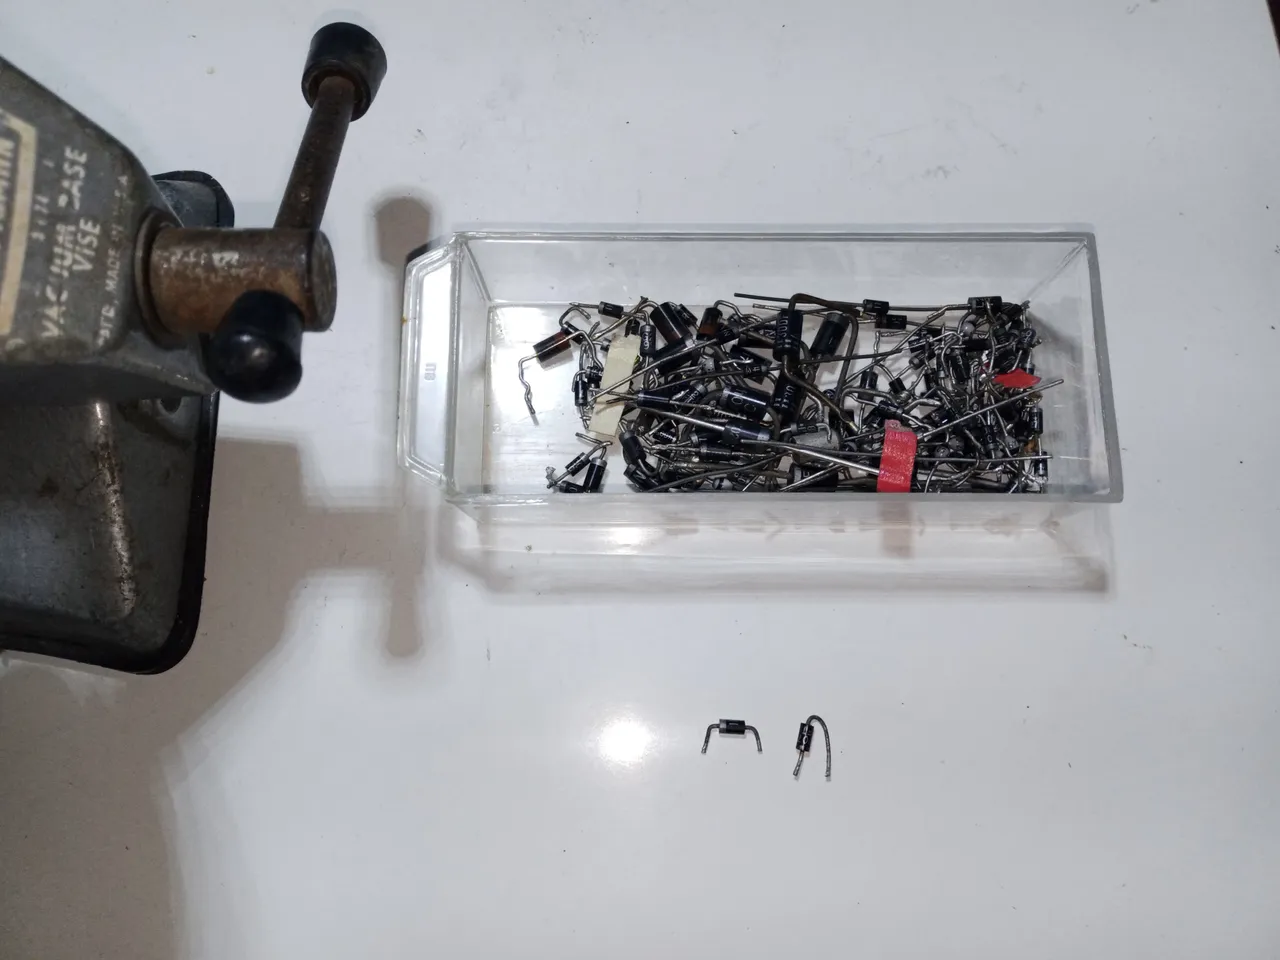
I will use in this repair, recycled diodes from electronic equipment that I have been recovering in my workshop, in particular, the most common ones called 1N4007.
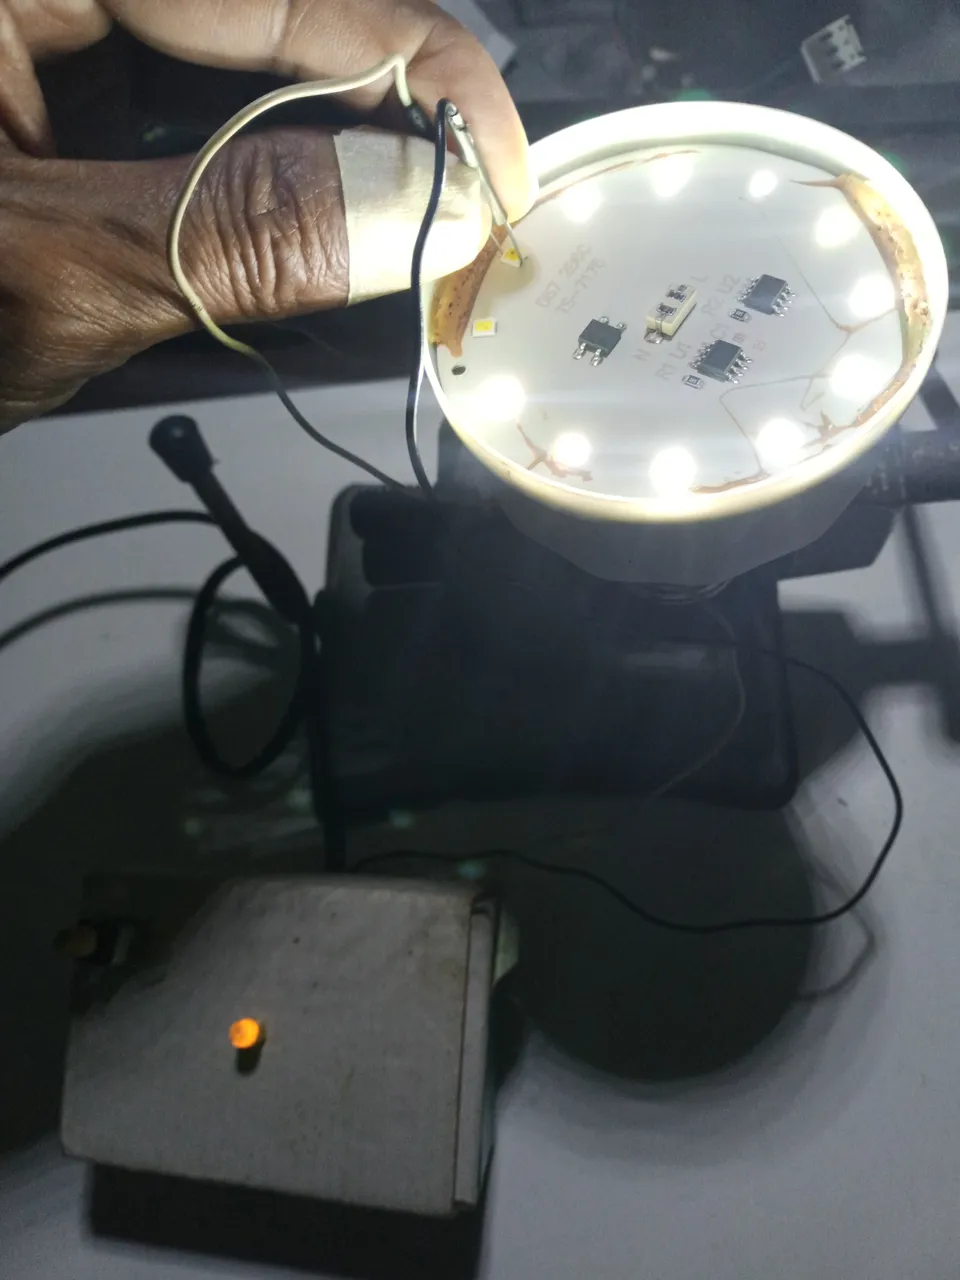
I test the bulbs and reflector using the homemade LED tester I posted before, so there's no need to connect it to the power supply.
I can also test the bulbs using a diode that I put on the ends of the LEDs, I put the bulb in a holder or lamp to connect it to the power supply. Then we have to take into account that the diode only conducts continuous electricity when it is correctly polarized on the LED, so if you are not very sure you just have to reverse the position in which we placed it when doing the tests.
The mark on the body of the diode indicates the negative pole, the terminal opposite the mark is the positive pole.
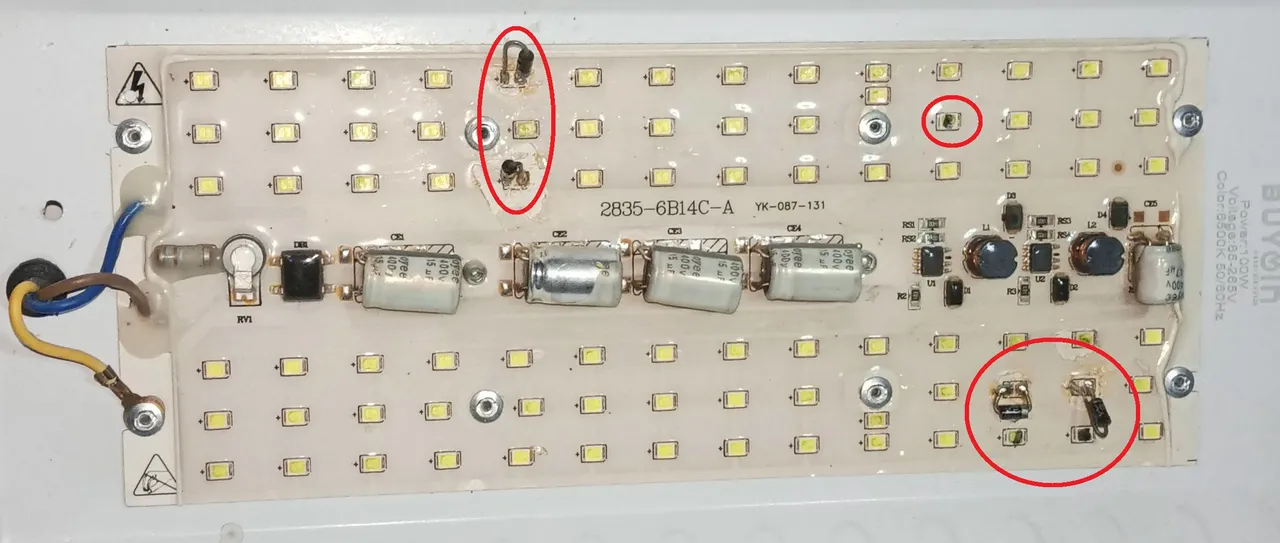
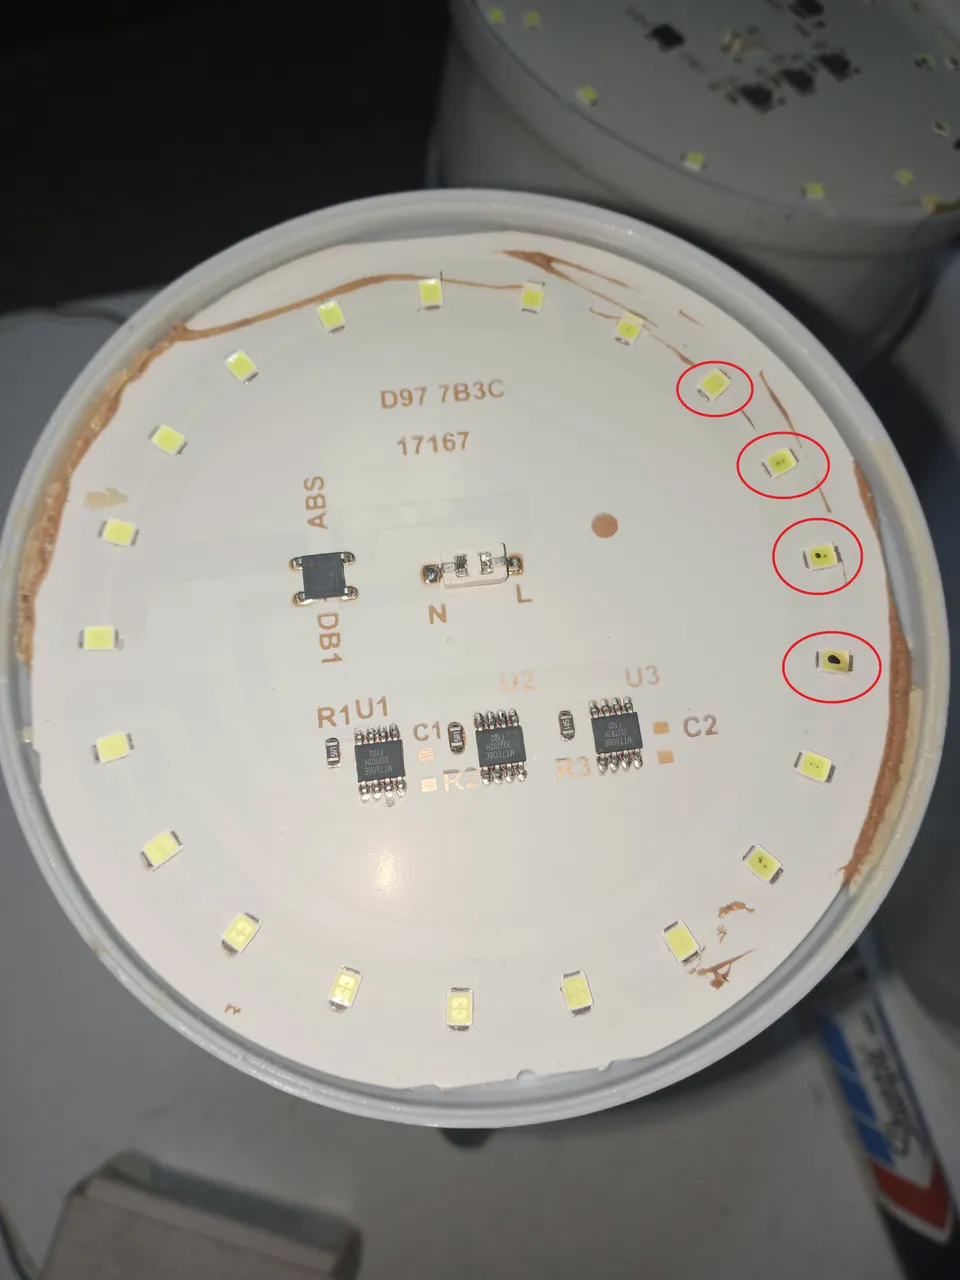
Damaged LEDs are usually noticeable by the naked eye by the black burn spot on the yellow surface, however some damaged LEDs do not have the burn mark.
We can reduce the intensity of the current that passes through the LEDs and thus increase the useful life of the bulbs, by altering the value of the resistors that control the integrated circuits, but I do not have the appropriate values of resistors to make the modification, so it will be on another occasion when I deal with this subject, in addition to the fact that with this modification that I mention, the intensity with which the LEDs shine is reduced.
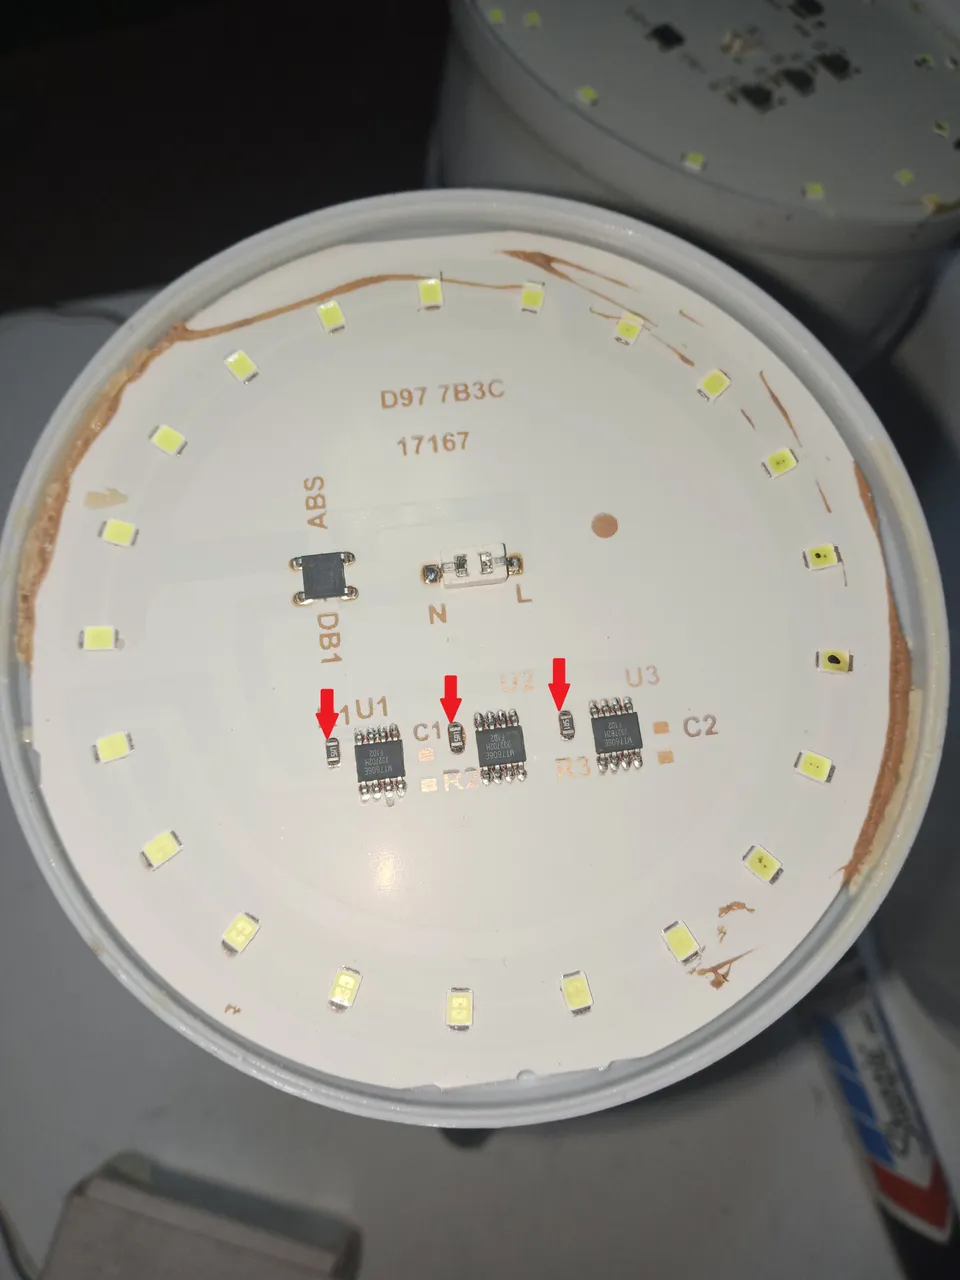
As a rule, I only repair lamps that do not have more than a third of damaged LEDs, if there are too many damaged LEDs, the bulb will be recycled and repaired other bulbs.
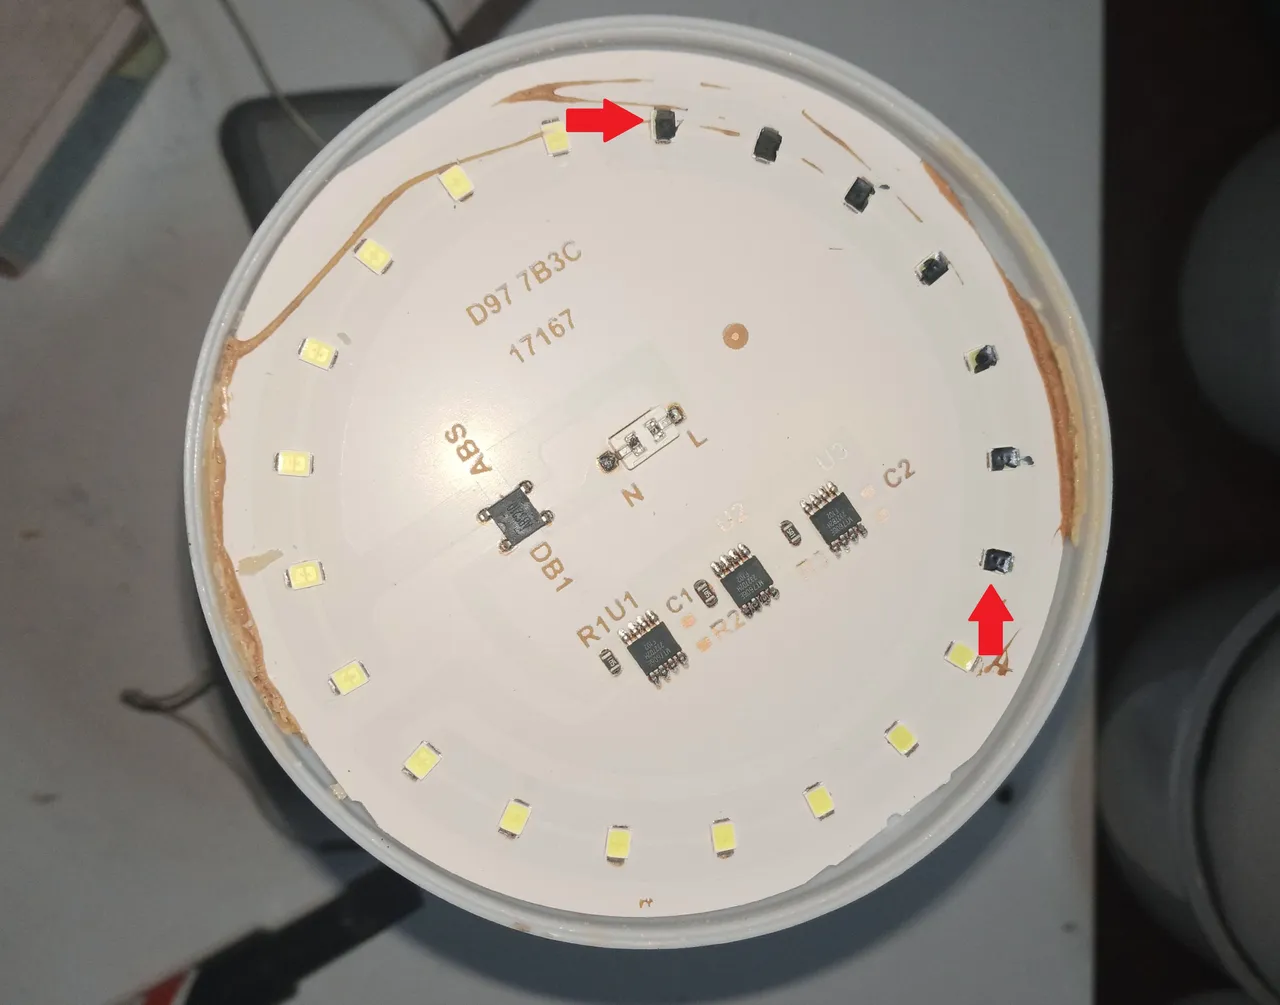
I indicated the damaged LEDs between the red arrows and highlighted them with a black marker, there are many, so this lamp remains as a replacement.
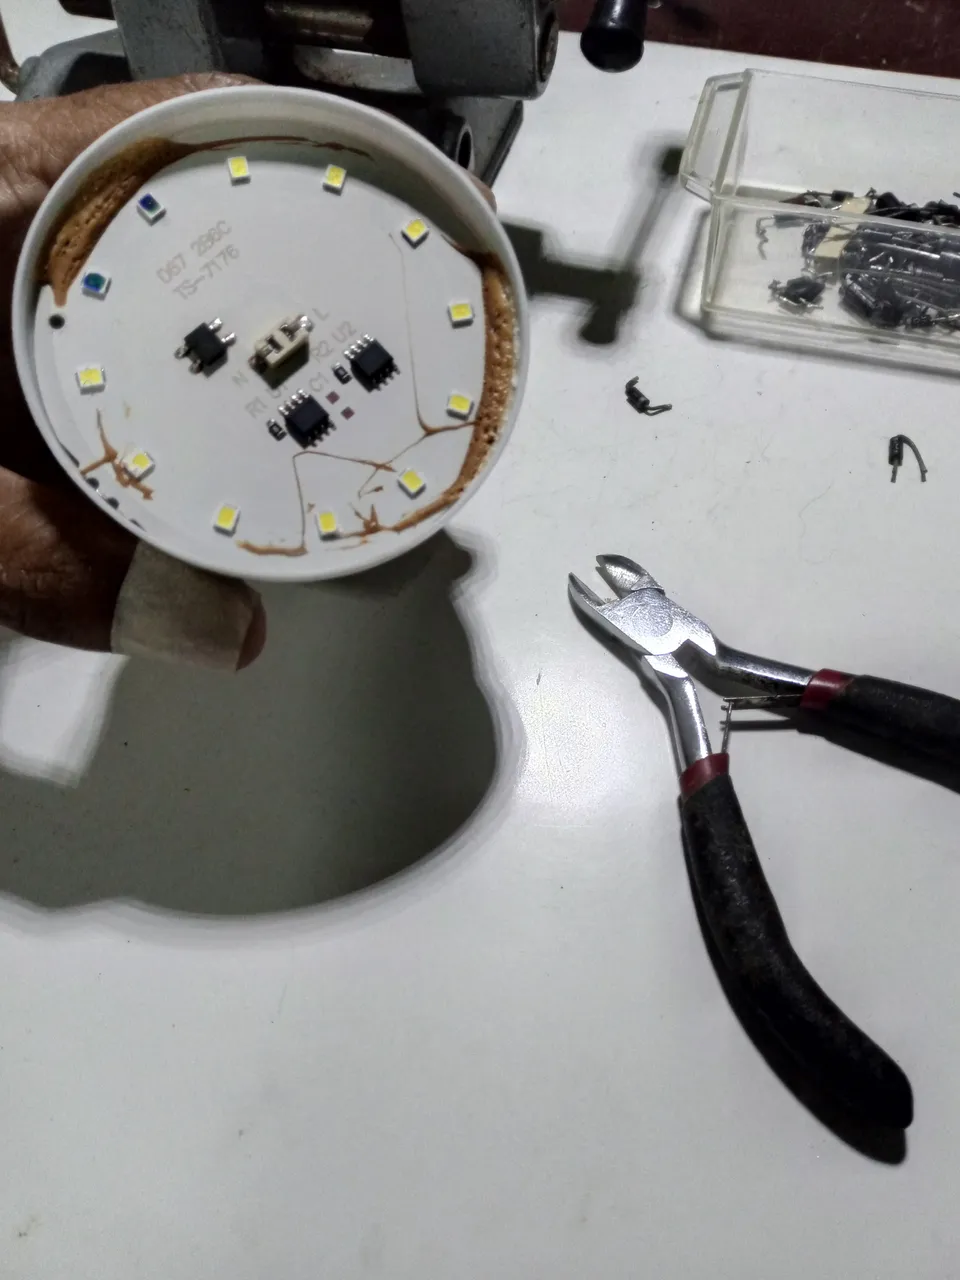
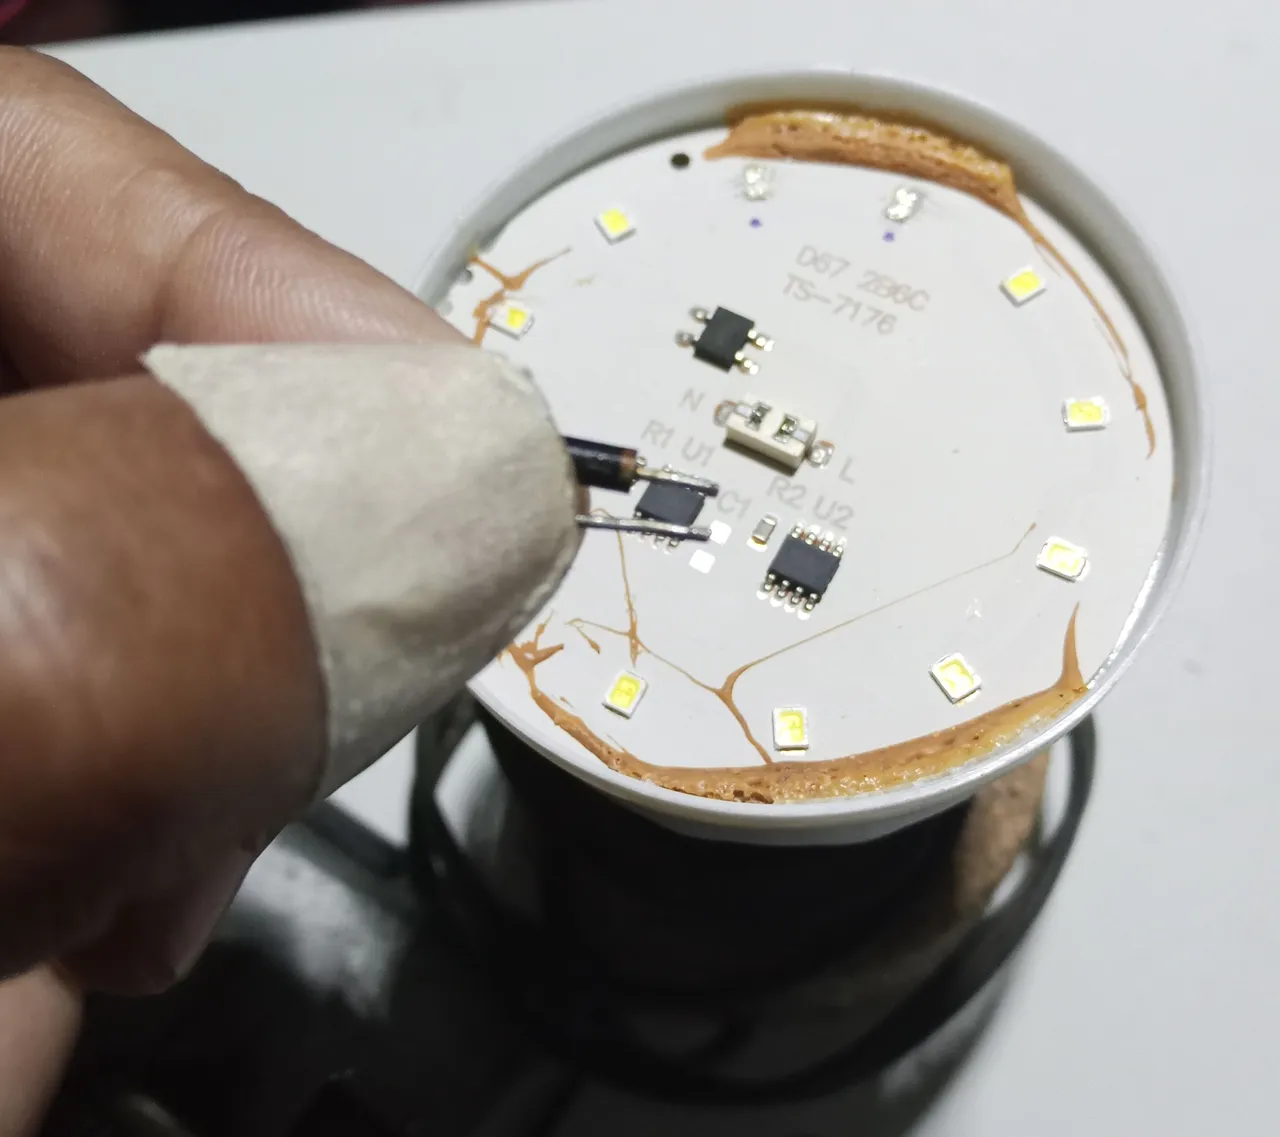
You can remove the damaged LEDs with a desoldering board, a 30 Watt soldering iron or simply with side-cutting tweezers.
The board where the components are mounted serves as a heatsink, so if you try to remove the components with heat you will need a good soldering iron.
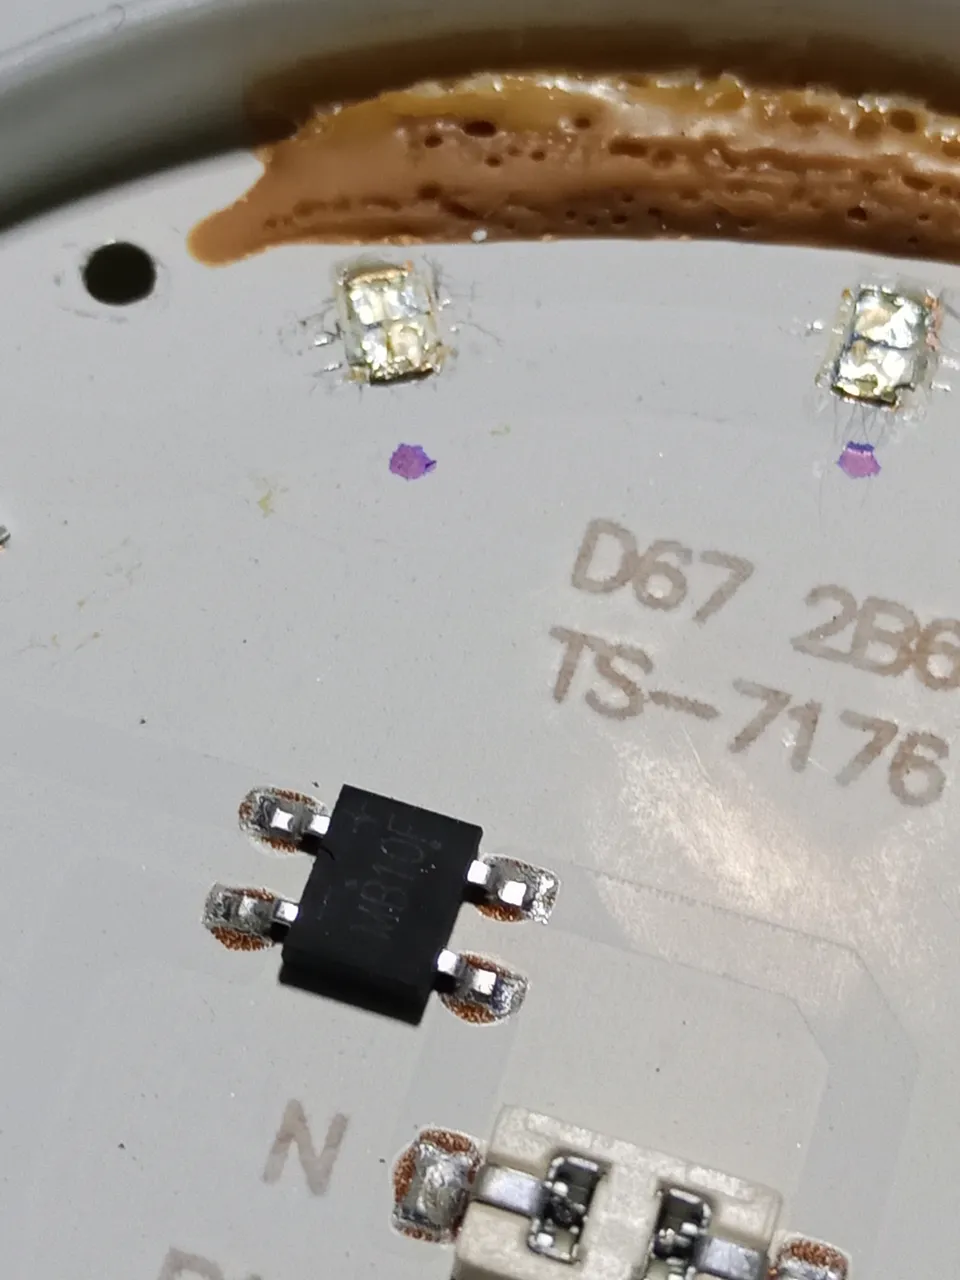
After removing the LED cover, you can either heat-remove the metal part of the terminals or solder them, being careful not to join the tracks, you have to scrape them a little and apply soldering paste.
If you are not sure about the polarity, just put the bulb in a test lamp and put the diode on top without soldering, to check.
It is a very low direct current voltage, but as always: do not work barefoot or wet, and do not work with electricity supported by metal surfaces.
One way to improve these LED lamps is to put a much larger heat sink on them, to reduce the temperature at which the LEDs work and to increase the life of the bulb.
Well, that's all for now.
Thank you very much for stopping by and reading me.
Have a great week.
Peace.
As always, if you are going to work with electronic or electrical equipment, it is always best to try to train yourself at least at a basic level.
Let's avoid accidents and avoid damaging the equipment.
- The images unless indicated are screenshots of my work in my workshop.
- The decorative header in Spanish is created with the help of TextStudio.
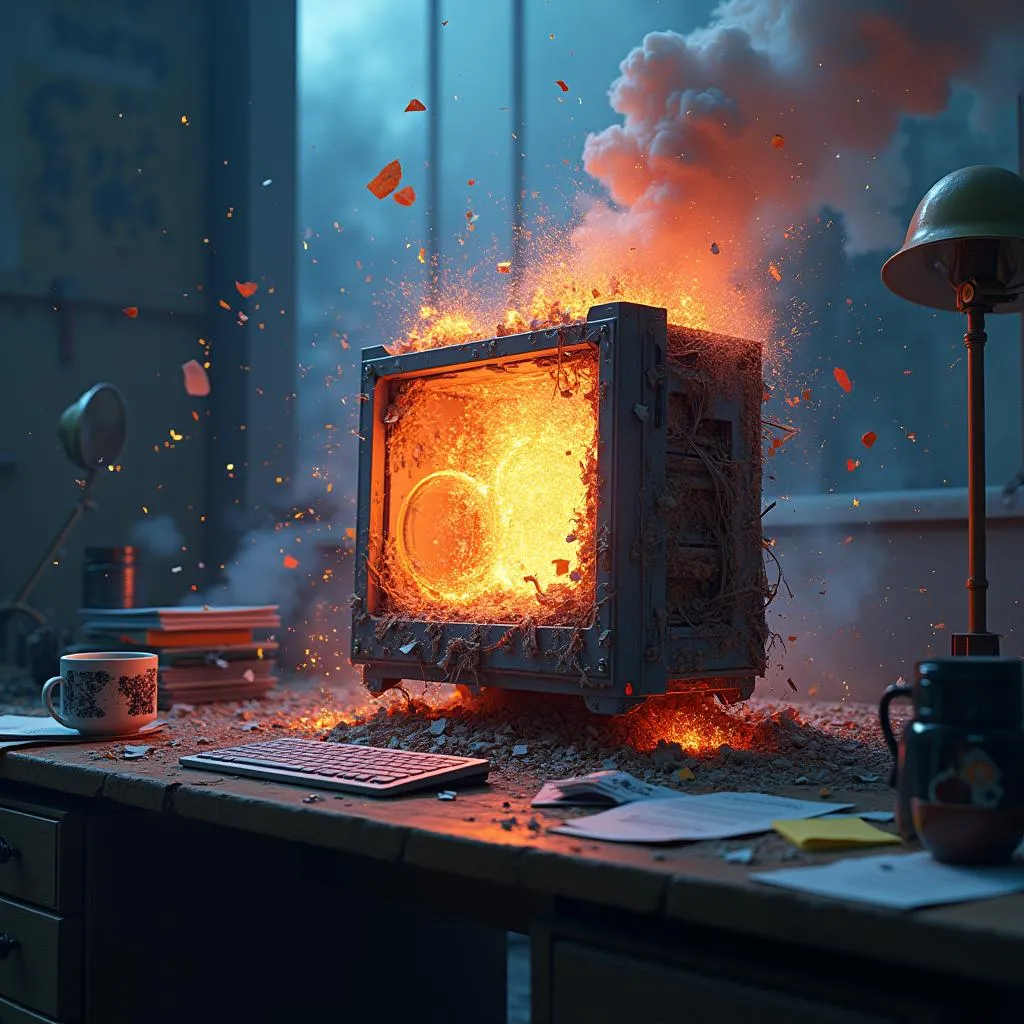
- I used the NightCafe application for the image of the computer on fire.
- I have used Google Translate for the English language.
- The workshop banner is created with the use of Paint.

Saludos a la comunidad de Hive DIY, estoy finalmente de regreso después de muchas situaciones interesantes y bastante complicadas.
Mi computador de uso corriente se dañó en medio de los continuos fallos de electricidad que se suceden casi a diario por la zona, también se dañaron el protector de voltaje, la caja de conexiones múltiples, los discos duros del computador, entre otras cosas.
Image's Source
He tenido que armar otro computador, y conseguir hacerlo andar correctamente.
Ahora después de ponernos al día, vamos al tema de la publicación, en esta ocasión les comparto otra técnica para hacer la reparación de las lámparas led.
El porqué me dedico a reparar estas lámparas y reflectores tiene que ver con el concepto ecológico de reducir los desechos que son depositados en el medio ambiente, y alargar la vida útil de las cosas que usamos en el hogar y el taller.
Es un trabajo muy sencillo que no requiere de mucho tiempo y necesitamos unas pocas herramientas.
Hay multitud de maneras de reparar estas lámparas de led, entre las formas en que podemos hacer la reparación están:
- colocando soldadura entre los terminales del led dañado uniendo las
conexiones de los dos terminales. - reemplazando los leds por transistores npn y diodos zenner, como hacemos en los televisores del tipo led, así se crea un sustituto multivoltaje para las tiras de led que iluminan la pantalla en los TV de leds.
- colocando una resistencia de 100 ohms o de 200 ohms por 1 o dos Watt, en el lugar del led dañado.
- colocando un diodo convencional que reemplace el diodo led.
Lo más común y sencillo al reparar estos bombillos, es colocar soldaduras en los extremos de la conexión del led dañado para unir la conexión, después de haber retirado el led quemado.
Si el bombillo es de fuente conmutada, el bombillo quedará funcionando bien, en teoría el circuito se regulará automáticamente con los leds que aún funcionen en el bombillo o reflector.
La imagen de arriba muestro un modelo muy común de fuente conmutada.
En la imagen de arriba muestro un modelo de fuente conmutada que no encuentro con frecuencia.
Si el bombillo led que están reparando, es de fuente capacitiva y usted hace un puente conectando los terminales del led dañado entre sí, al conectar el bombillo led después de la reparación, se quemarán de inmediato todos los leds al mismo tiempo.
La imagen sobre estas líneas es de bombillos con fuentes de poder, basada en capacitores.
Los bombillos de fuente capacitiva, son los más baratos y no tienen ningún control electrónico, así que se les tiene que colocar una resistencia o algún elemento electrónico que pueda reemplazar el consumo de electricidad del led dañado en el circuito.
Esta imagen de arriba es de un bombillo con fuente conmutada, pero es un ejemplo, de una reparación a un bombillo de fuente de capacitores.
Las lámparas y reflectores que voy a reparar en esta ocasión son con fuente conmutada, y yo he probado todos los métodos que mencione antes y de alguna manera, las lámparas que han tenido un tiempo de servicio más largo han sido las que he reparado colocándole diodos para reemplazar los leds dañados.
Usaré en esta reparación, diodos reciclados de equipos electrónicos que he ido recuperando en mi taller, en particular, los más corrientes denominados 1N4007.
Pruebo los bombillos y el reflector usando el probador de leds casero que ya publique antes, por lo que no hace falta conectarlo al suministro eléctrico.
También puedo probar los bombillos usando un diodo que coloco en los extremos de los leds, coloco el bombillo en un soporte o lámpara para conectarlo al suministro eléctrico. Luego tenemos en cuenta que el diodo solo conduce electricidad continua cuando esté polarizado de forma correcta sobre el led, así que si no está muy seguro solo tiene que invertir la posición en que lo colocamos al hacer las pruebas.
La marca en el cuerpo del diodo indica el polo negativo, el terminal contrario a la marca es el polo positivo.
Los leds dañados por lo general se notan a simple vista por el punto negro de quemadura en la superficie amarilla, no obstante algunos leds dañados no presentan la marca de quemadura.
Podemos reducir la intensidad de la corriente que pasa por los leds y así aumentar la vida útil de los bombillos, alterando el valor de las resistencias que controlan los circuitos integrados, pero no tengo los valores apropiados de resistencias, para hacer la modificación, por lo que será en otra ocasión en que trate ese tema, además que con esta modificación que comento, se reduce la intensidad con la que brillan los leds.
Por norma solo reparo lámparas que no tienen más de una tercera parte de leds dañados, si hay demasiados leds dañados, el bombillo quedará para reciclar y reparar otros bombillos.
Indique entre las flechas rojas los leds dañados y los resalte con un marcador negro, son muchos, así que esta lámpara queda como repuesto.
Puedes retirar los leds dañados con una placa para desoldar, con un cautín de 30 Watt o simplemente con unas pinzas de corte lateral.
La placa donde están montados los componentes sirve como disipador, por lo que si tratas de retirar los componentes con calor necesitarás un buen soldador.
Después de retirar la cubierta del led, puedes retirar con calor la parte metálica de los terminales o soldar sobre ellos, teniendo cuidado de no unir las pistas, hay que raspar un poco y aplicar pasta para soldar.
Si no se está seguro de la polaridad, solo basta con colocar el bombillo en una lámpara de pruebas y sobreponer el diodo sin soldar, para comprobar.
Es un voltaje de corriente directa muy bajo, pero como siempre: no trabajar descalzo ni mojado, tampoco trabajar la electricidad apoyado de superficies metálicas.
Una forma de mejorar estas lámparas de leds es colocarles un disipador de calor mucho más grande, para reducir la temperatura a la que los leds trabajan y poder aumentar la vida útil del bombillo.
Bueno, es todo por ahora.
Muchas gracias por pasar y leerme.
Que tengan una excelente semana.
Paz.
Como siempre, si van a trabajar con equipos electrónicos o eléctricos, es mejor siempre que procuren capacitarse por lo menos al nivel básico.
Evitemos accidentes y evitemos dañar los equipos.
- Las imágenes, a menos que se indiquen, son capturas de mi trabajo en mi taller.
- El encabezado decorativo en español es creado con la ayuda de TextStudio.
- He usado la aplicación de NightCafe para la imagen del computador en llamas.
- He usado el traductor de Google para el idioma inglés.
- El banner del taller es creado con el uso de Paint.