English
Greetings people, once again for the Hive DIY community, I take this opportunity to share with you some of the work of the workshop. I have been quite busy, but I cannot share several repairs that I have done, because some require care and safety procedures that should not be skipped. Like when you work with sulfuric acid and batteries.
So I try to publish only simple procedures that do not involve major risks.
I was working on a diorama alluding to the Destiny 2 game for this week's post.
But the microwave oven, headphones and mouse began to fail. They are objects that have priority in daily use. The painting will be left for later.
So I will dedicate the corresponding publications to them, repairs to leave them in good condition and then I continue with the diorama allusive to the game.
The repair of the oven, I confess that had me a little worried, the replacement parts for what seemed to be damaged are expensive, but this is one of those rare cases in which the problem and the solution are something absurd and simple, it is more like in the end a work anecdote.

Image's Source - Image Source
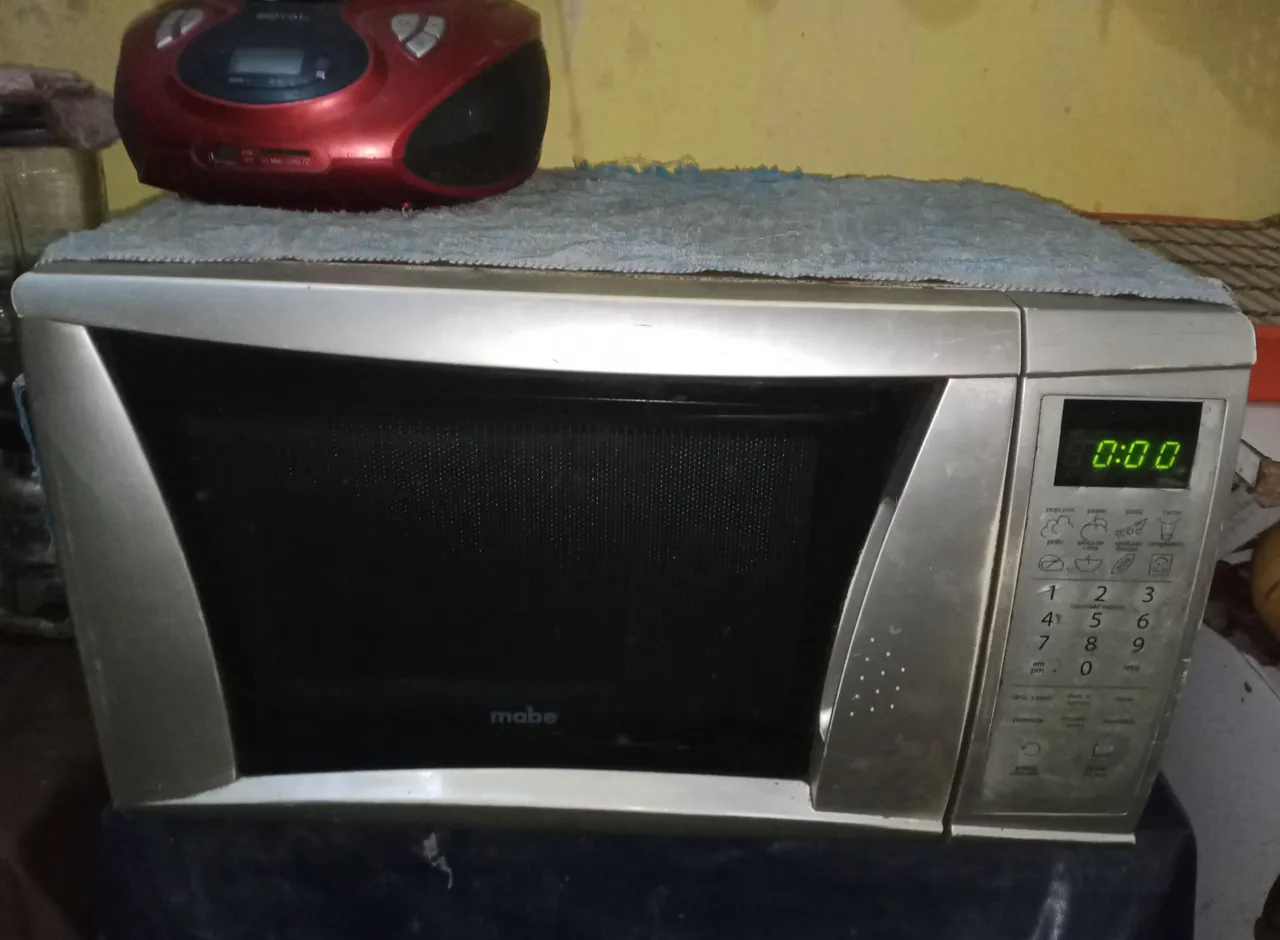
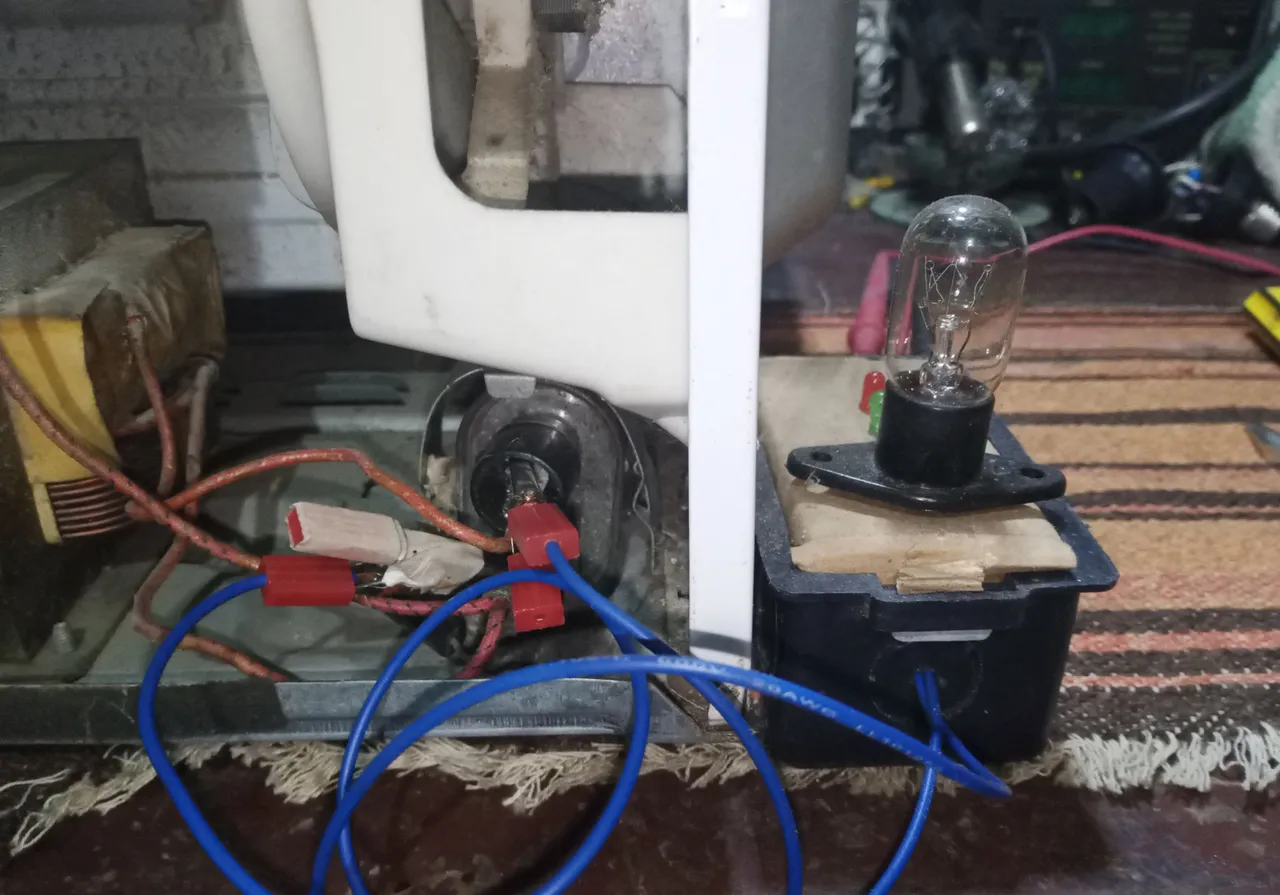
It is the microwave that has accompanied me for many years and the only one I have, I have repaired it a good number of times with parts that are from other equipment. So I worry when the oven makes strange noises, sparks, and smoke comes out when I open the door, which is what usually happens when the magnetron antenna goes bad.

The antenna usually ends up being damaged when the oven is started empty, without any object to heat.
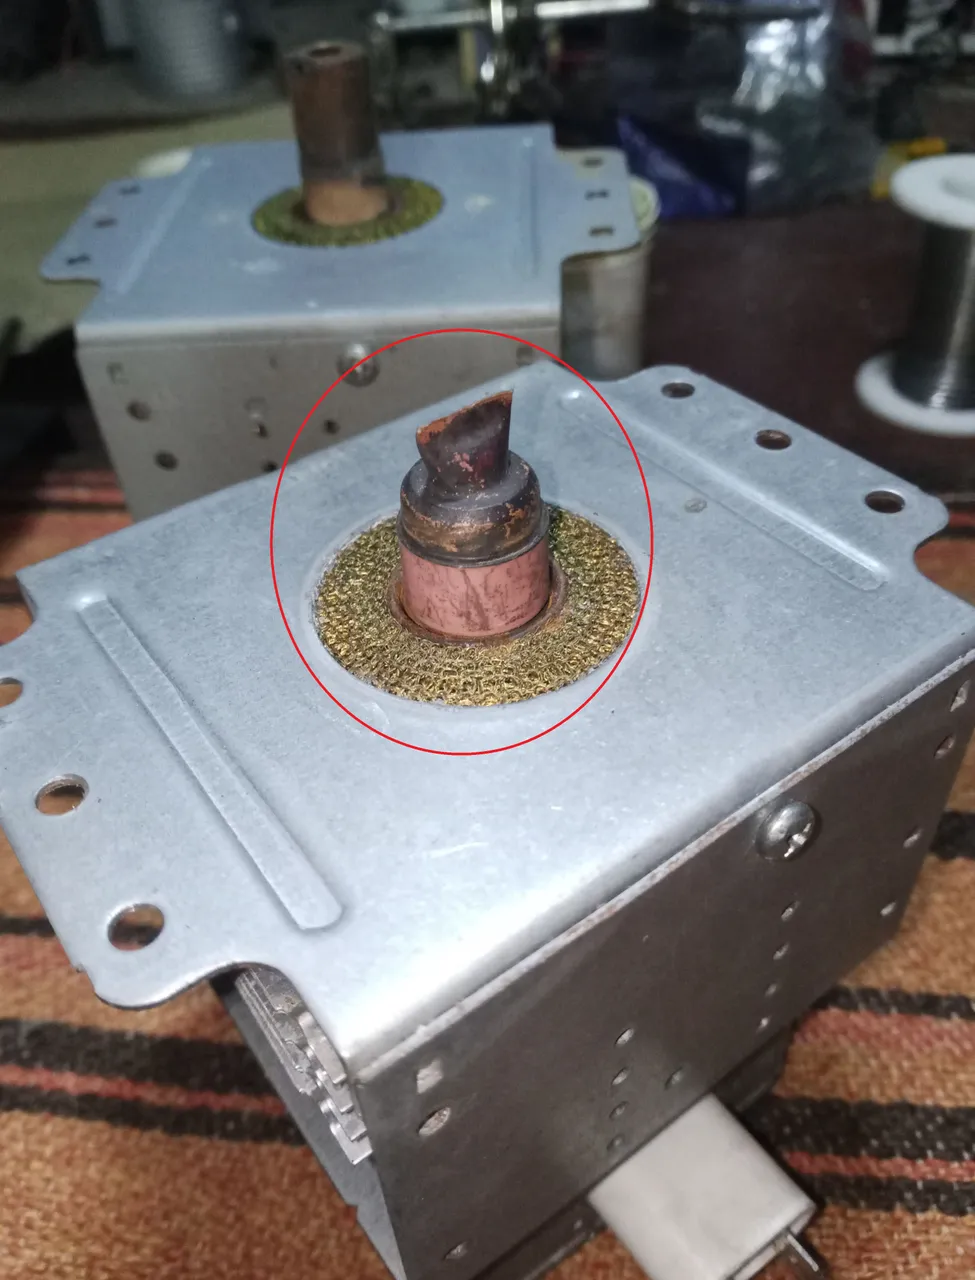
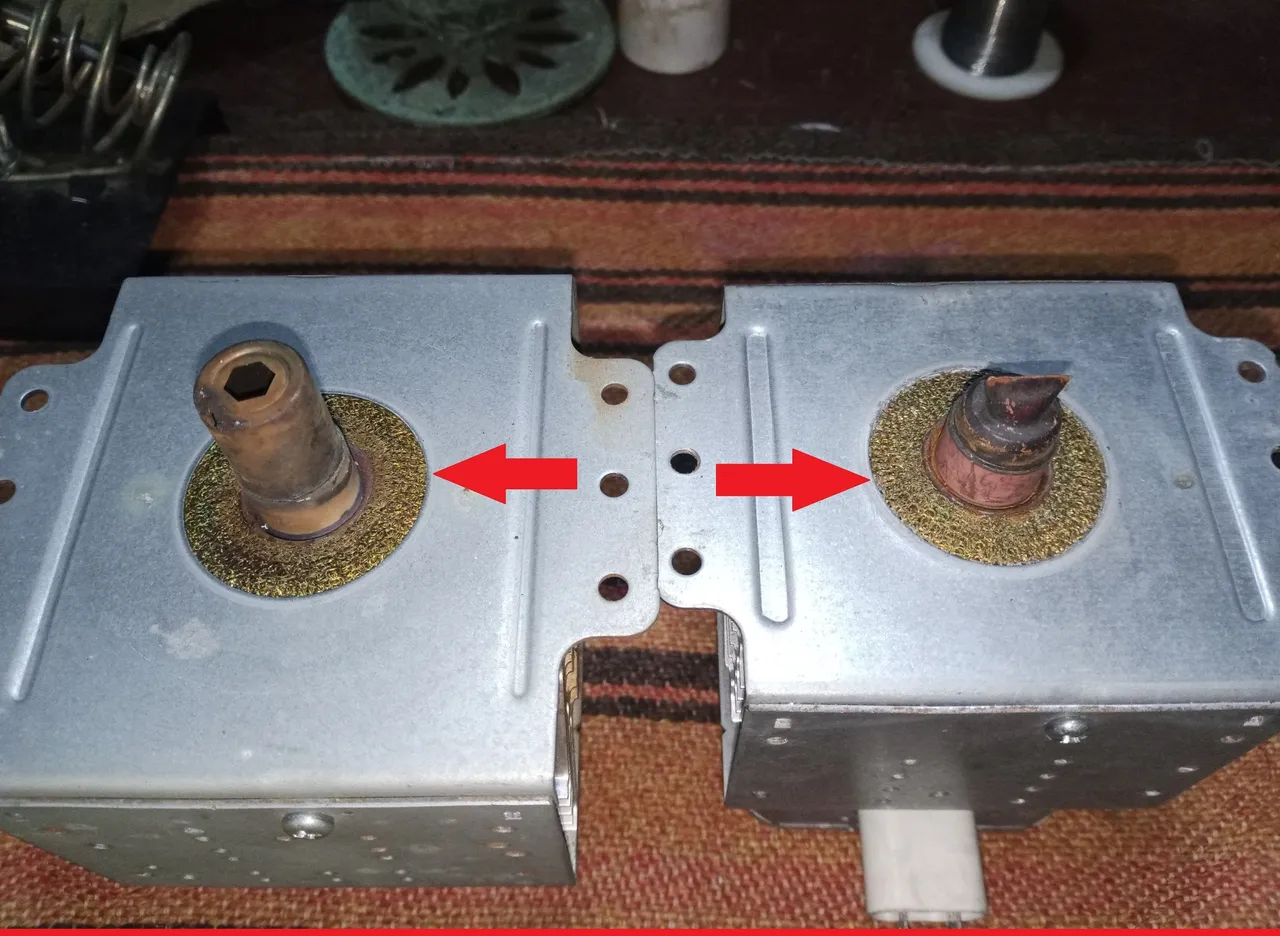
If you see a magnetron without the antenna cover, it will not work, so I do not advise you that if you are looking for a second-hand replacement, it is better that it be with its cover without damage.
The magnetron is one of the most expensive spare parts for the oven. If the magnetron is damaged, it is better to get another oven than to buy the spare part. Where I live, they sell the spare part for almost the same price as a working second-hand oven.
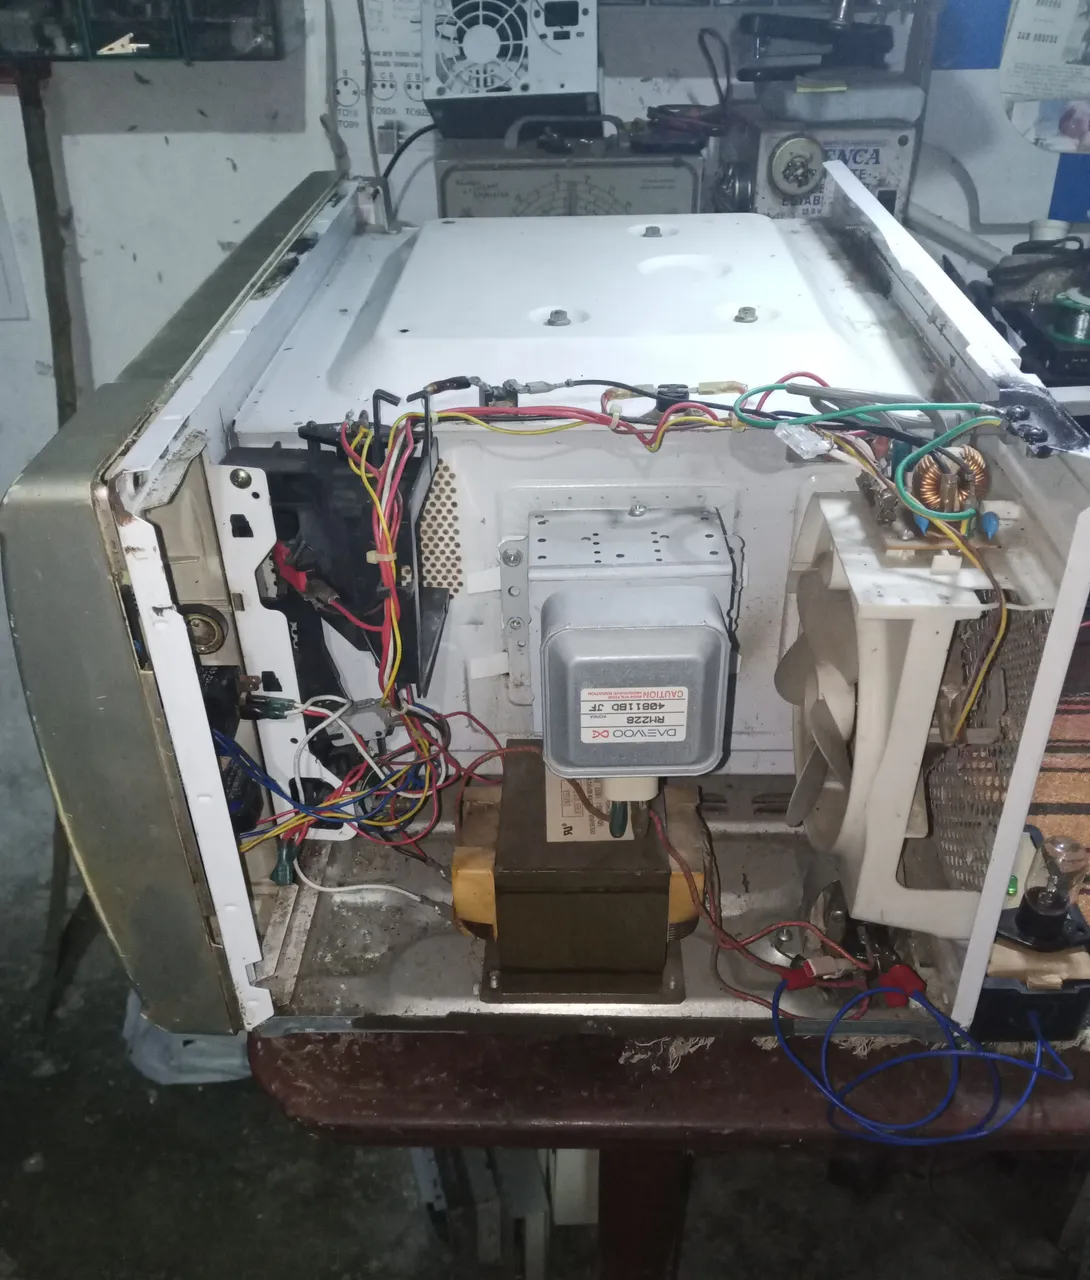
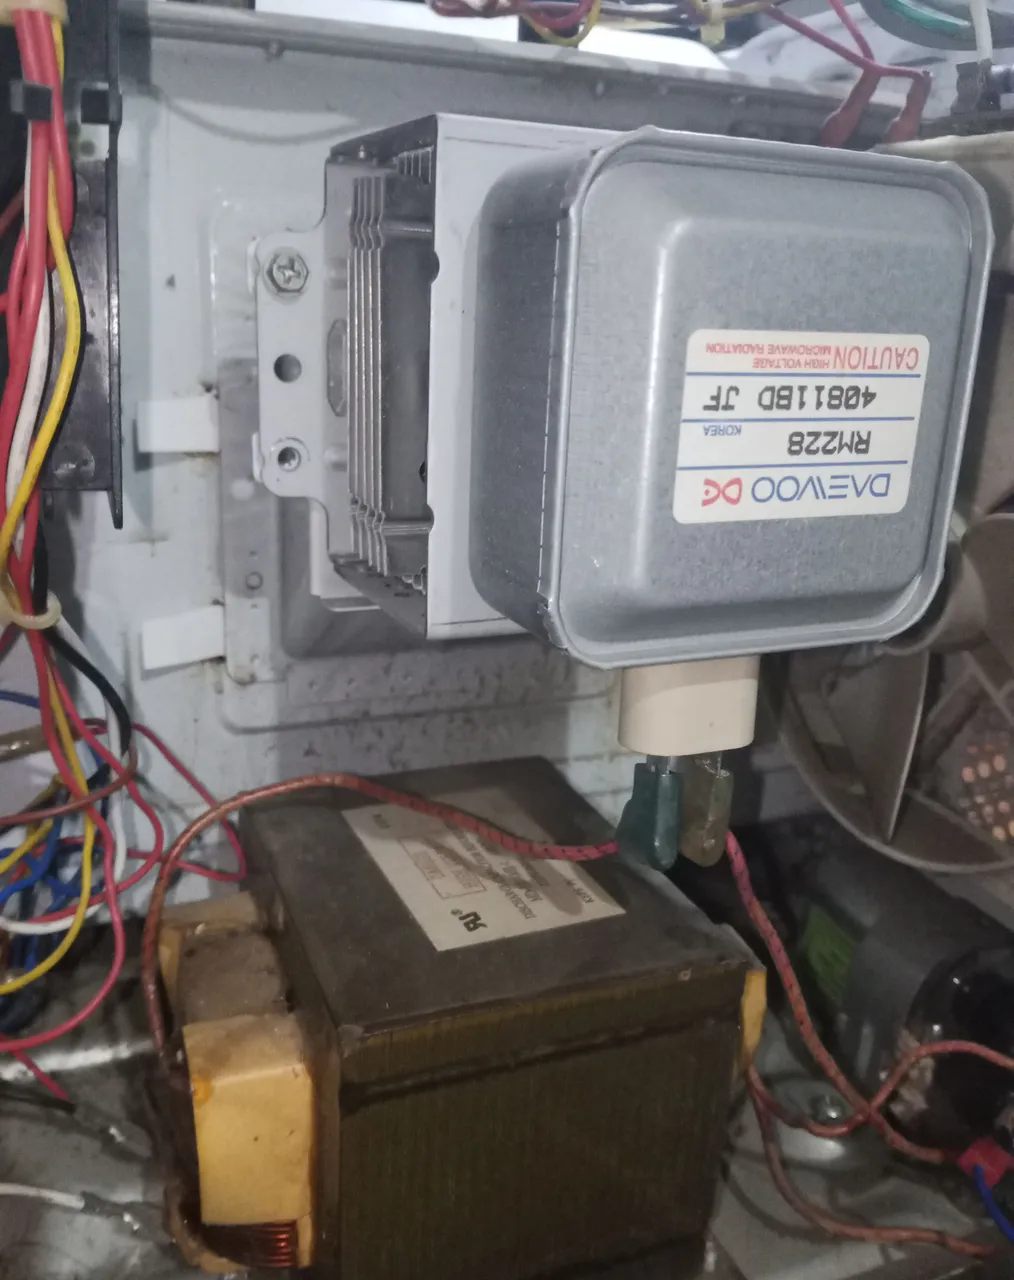
After disassembling it with the naked eye I see that it looks good, but we must not be careless: in these devices it is really very important to discharge the high voltage capacitor before touching anything.
We have already used the capacitor discharger that we made on a previous occasion.
I took the magnetron that my oven has from a Daewoo oven that I got second-hand years ago with the chassis completely damaged. I took advantage of the spare parts to repair my Mabe oven and it has worked for approximately ten years without problems.

Good fortune is on my side, because the magnetron doesn't look bad and when I check it, it has the correct value on the filament.
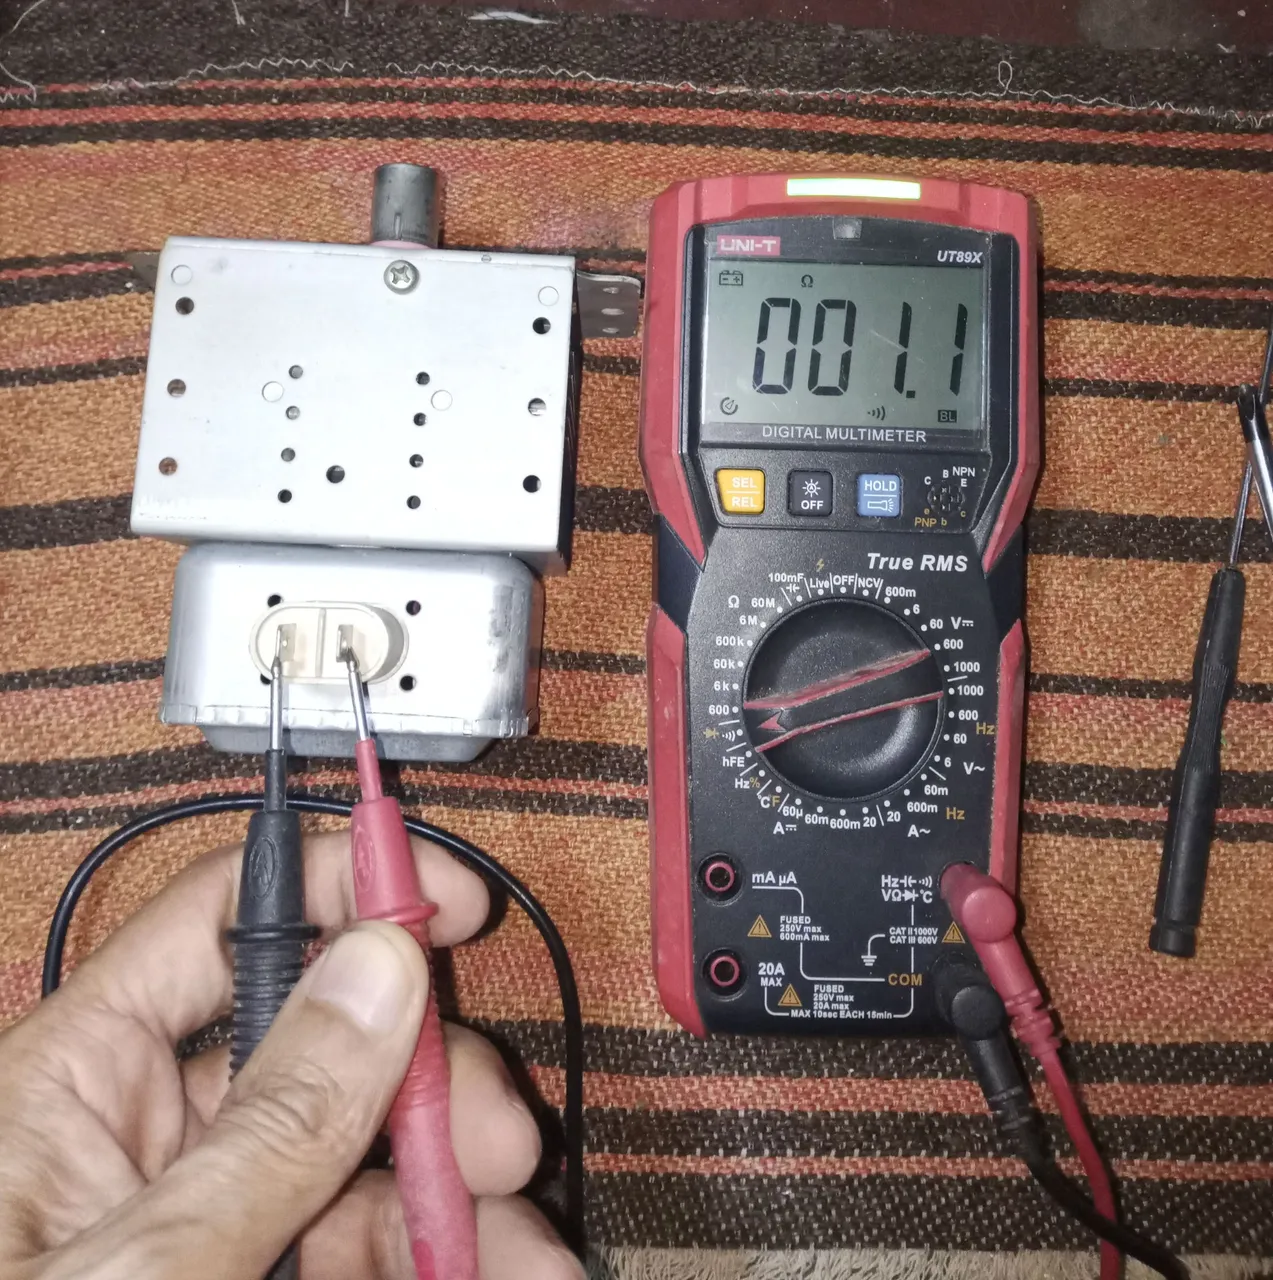
It is also not grounded with respect to the connections, there is no continuity to the chassis.

I found that the magnetron magnets had somehow gotten metal flakes attached to them, which came off the chassis, enough to make a sort of bridge between the chassis, the magnets, and the fins (I had to reattach a couple of them). pieces to take the photo).

Something that is very important is that if you ever have a magnetron in your hands: do not touch or remove the rings that are at the base of the magnetron antenna. Listen to me or you are going to have a very bad time, the damage to your health can be quite serious.
In the end, after removing the pieces of metal and straightening the fins, I reassembled the magnetron and started the oven, without any problem.
It's one of the simplest and strangest repairs I've ever done, it's the first time I've seen something like this, it had all the symptoms of a bigger problem. On the other hand, I am very glad that there was no damage to the antenna or the magnetron filaments.
Thank you very much for stopping by and reading for a moment.
Have an excellent week.
Peace.
I have used Google Translate for the English language
Images unless noted are screenshots of my work in the workshop.
Español
Saludos, gente, una vez más por la comunidad de Hive DIY, aprovecho la oportunidad para compartir con ustedes algo del trabajo del taller. He estado bastante atareado, pero no puedo compartir varias reparaciones que he llegado a hacer, porque algunas requieren cuidados y procedimientos de seguridad que no deben saltarse. Como cuando trabajas con ácido sulfúrico y baterías.
Así que procuro publicar solo procedimientos sencillos que no entrañen mayores riesgos.
Estaba trabajando en un diorama alusivo al juego Destiny 2 para la publicación de esta semana.
Pero el horno de microondas, los audífonos y el ratón empezaron a presentar fallas. Son objetos que tienen prioridad en el uso diario. El cuadro quedará para después.
Por lo que les dedicaré las correspondientes publicaciones, reparaciones para dejarlos en buen estado y luego sigo con el diorama alusivo al juego.
La reparación del horno, confieso que me tenía un poco preocupado, los repuestos de lo que parecía estar dañado son costosos, pero este es uno de esos raros casos en que el problema y la solución son algo absurdo y simple, es más al final como una anécdota de trabajo.
Image's Source - Fuente de la Imagen
Es el microondas que me ha acompañado por muchos años y el único que tengo, lo he reparado una buena cantidad de veces con partes que son de otros equipos. Así que me preocupo cuando el horno hace ruidos extraños, saltan chispas y sale humo al abrir la puerta, que es lo que suele suceder cuando la antena del magnetrón se daña.
La antena suele terminar por dañarse cuando se pone en marcha el horno en vacío, sin ningún objeto a calentar.
Si ven un magnetrón sin la cubierta de la antena no les va a funcionar, así que no les aconsejo que si buscan el repuesto de segunda mano, es mejor que esté con su cubierta sin daños.
El magnetrón es uno de los repuestos más caros del horno, si se daña el magnetrón es preferible conseguir otro horno antes que comprar el repuesto, donde vivo venden el repuesto casi al mismo precio que un horno de segunda funcionando.
Después de desarmar a simple vista compruebo que luce bien, pero no hay que descuidarse: en estos equipos es realmente muy importante descargar el condensador del alto voltaje antes de tocar cualquier cosa.
Ya ocupamos el descargador de capacitores que hicimos en una oportunidad anterior.
El magnetrón que tiene mi horno lo saque de un horno Daewoo que hace años que conseguí de segunda mano con el chasis totalmente dañado, aproveche los repuestos para reparar mi horno Mabe y ha trabajado ya unos diez años aproximadamente sin problemas.
La buena fortuna me es propicia, porque el magnetrón no tiene mal aspecto y cuando lo reviso tiene el valor correcto en el filamento.
Tampoco está a tierra respecto a las conexiones, no hay continuidad al chasis.
Encontré que a los imanes del magnetrón de alguna manera se le habían adherido escamas de metal, que se desprendieron del chasis, las suficientes para hacer una especie de puente entre el chasis, los imanes y las aletas (tuve que volver a colocar un par de trozos para sacar la foto).
Algo que es muy importante, es que si alguna vez tienen un magnetrón en sus manos: no toquen ni remuevan los anillos que están en la base de la antena del magnetrón. Háganme caso o lo vais a pasar muy mal, el daño a su salud puede ser bastante serio.
Al final, después de retirar los trozos de metal y enderezar las aletas, volví a montar el magnetrón y puse en marcha el horno, sin que diese ningún tipo de problema.
Es una de las reparaciones más sencillas y extrañas que he hecho, es la primera vez que veo algo así, tenía todos los síntomas de un problema mayor. Por otra parte, me alegra mucho que no haya sido algún daño de la antena o de los filamentos del magnetrón.
Muchas gracias por pasar y leerme un momento.
Que tengan una excelente semana.
Paz.
He usado el traductor de Google para el idioma inglés
Las imágenes a menos que se indique son capturas de mi trabajo en el taller.