Buenos días !...amig@s de hive, no había podido hacer mas proyectos se me han presentado una serie de inconvenientes de la vida, pero gracias a dios todo se ha ido resolviendo según su voluntad,.
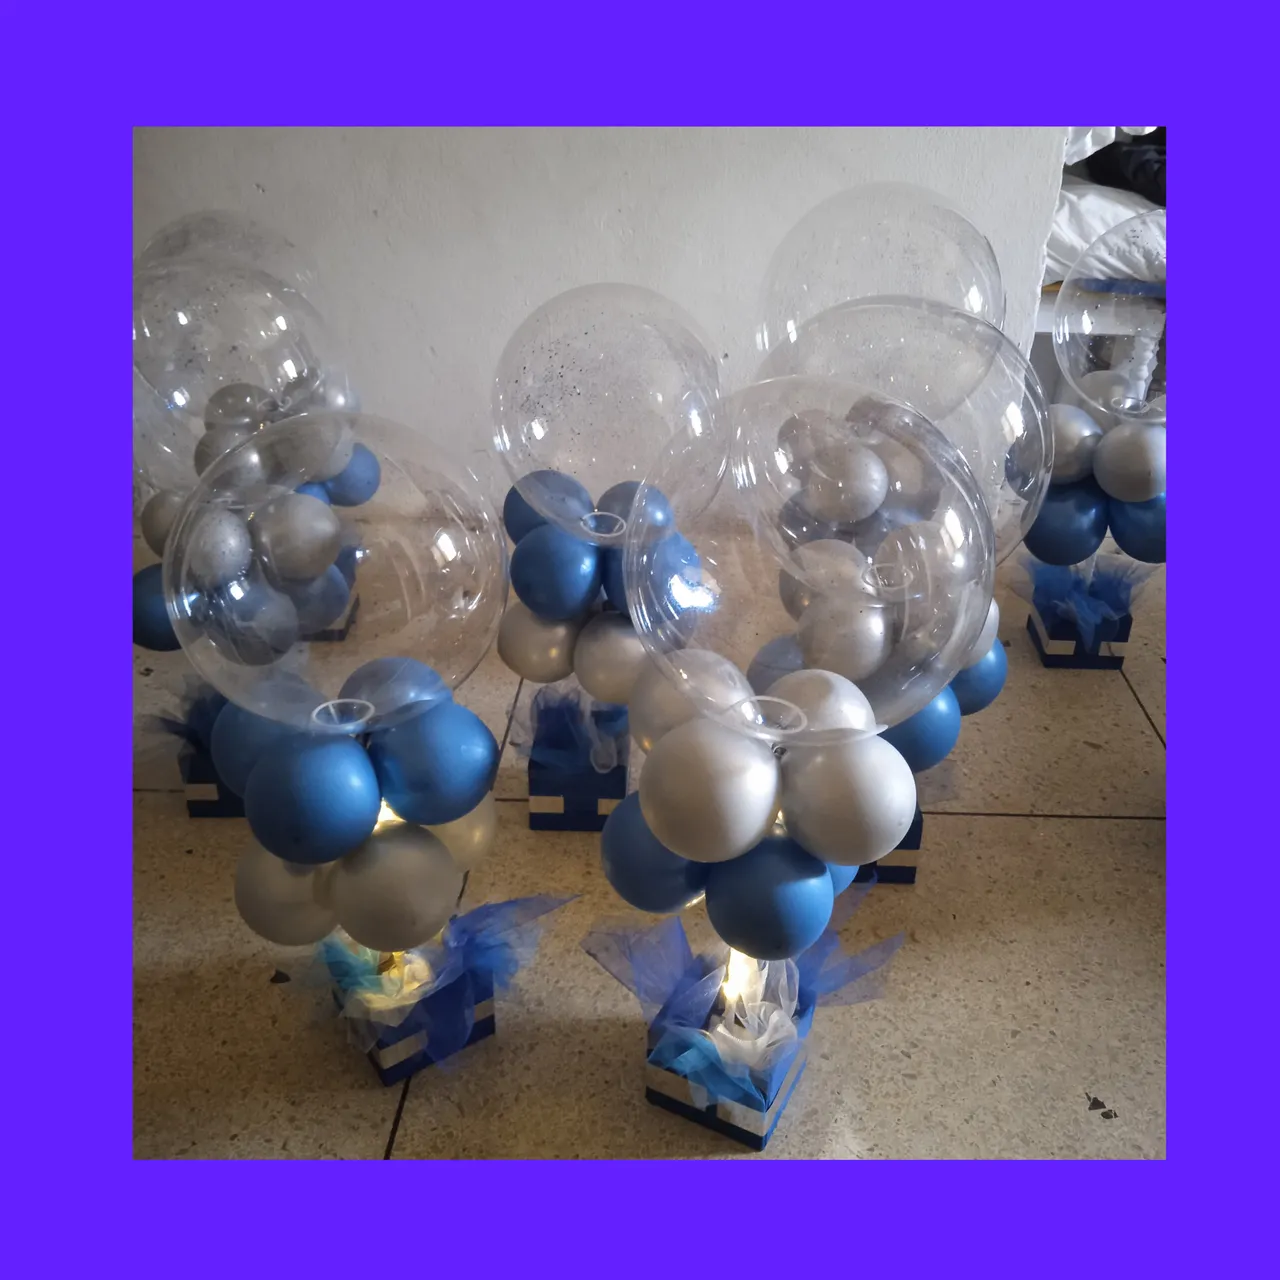
En estos días estuvo realizando este proyecto , se trata de un nuevo centro de mesa, con aplicación de globos llamados "burbujas" por su color transparente parecido a las bombas de jabón. Serian para centros de mesas, espero que les guste este proyecto y les de nuevas ideas.
Good morning!...friends from hive, I had not been able to do more projects, a series of life's inconveniences have presented themselves to me, but thank God everything has been resolved according to his will.
These days he was carrying out this project, it is a new centerpiece, with the application of balloons called "bubbles" for their transparent color similar to soap bombs. They would be for centerpieces, I hope you like this project and it gives you new ideas.

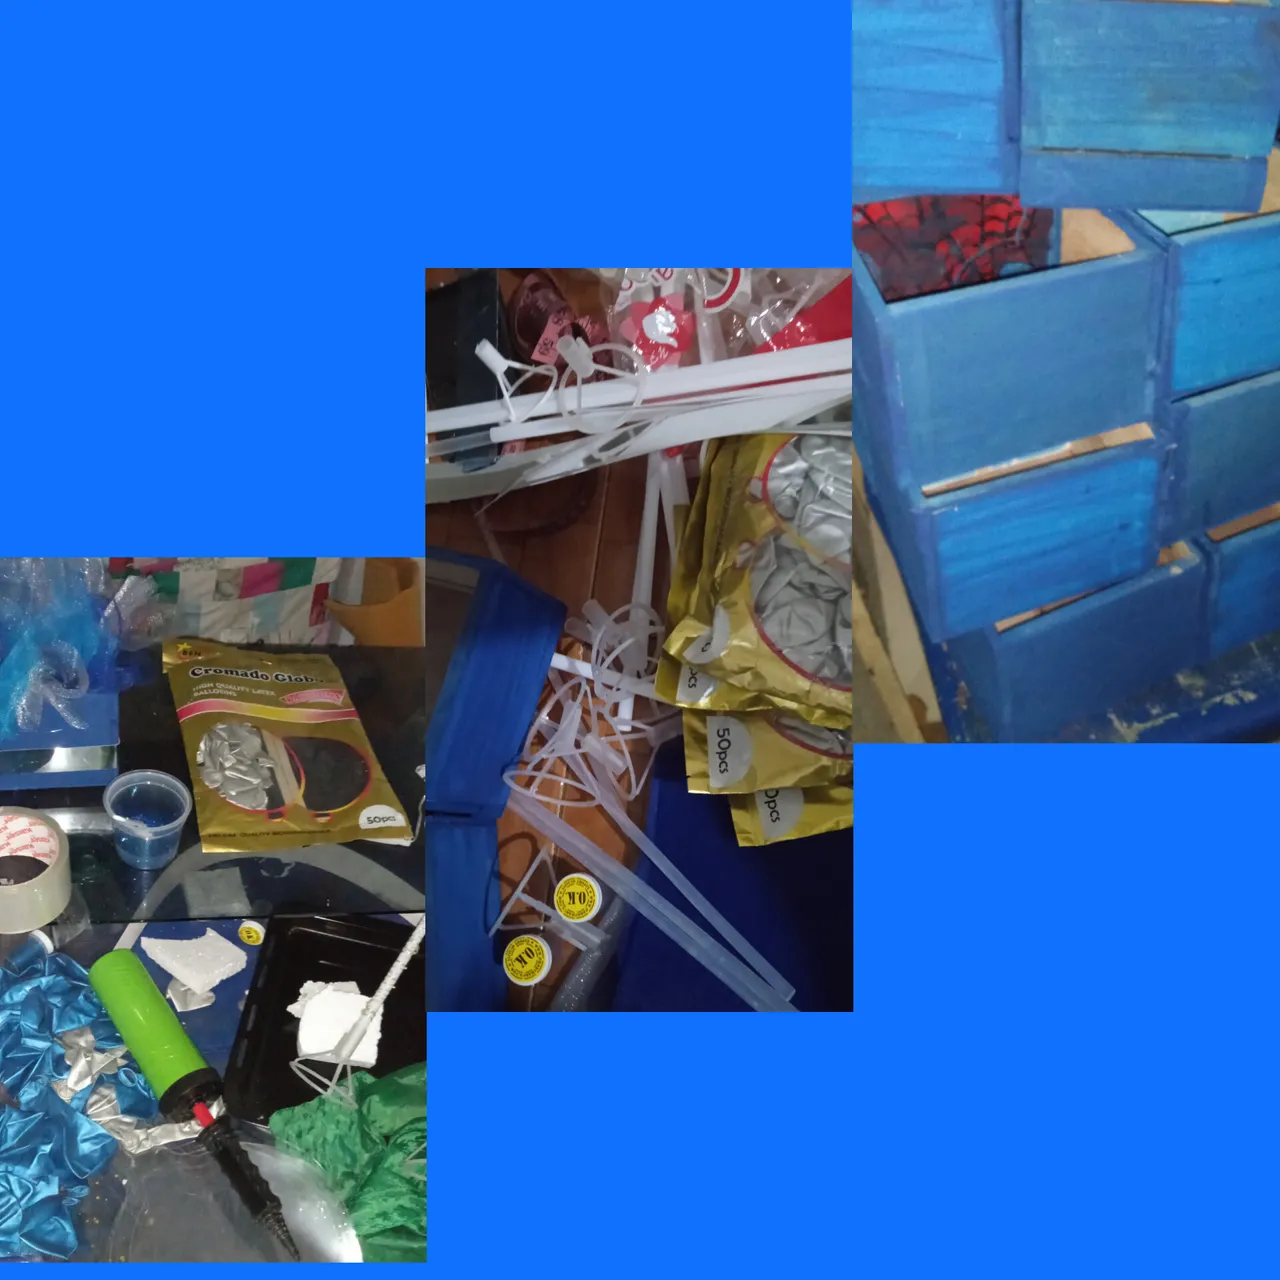
MATERIALES
Globos burbujas n8. con sus bases ,
4 globos color gris y 4 azul rey.
Cajitas de madera , para la base. Pintura azul rey para pintarlas.
Soplador manual.Escarcha o purpurina azul, .
Trocitos de anime, Telas de tul, azul rey, blanco, azul celeste, y cartulina metalizada plateada.
Tijeras, silicon, liquido, en barra, soplador,.
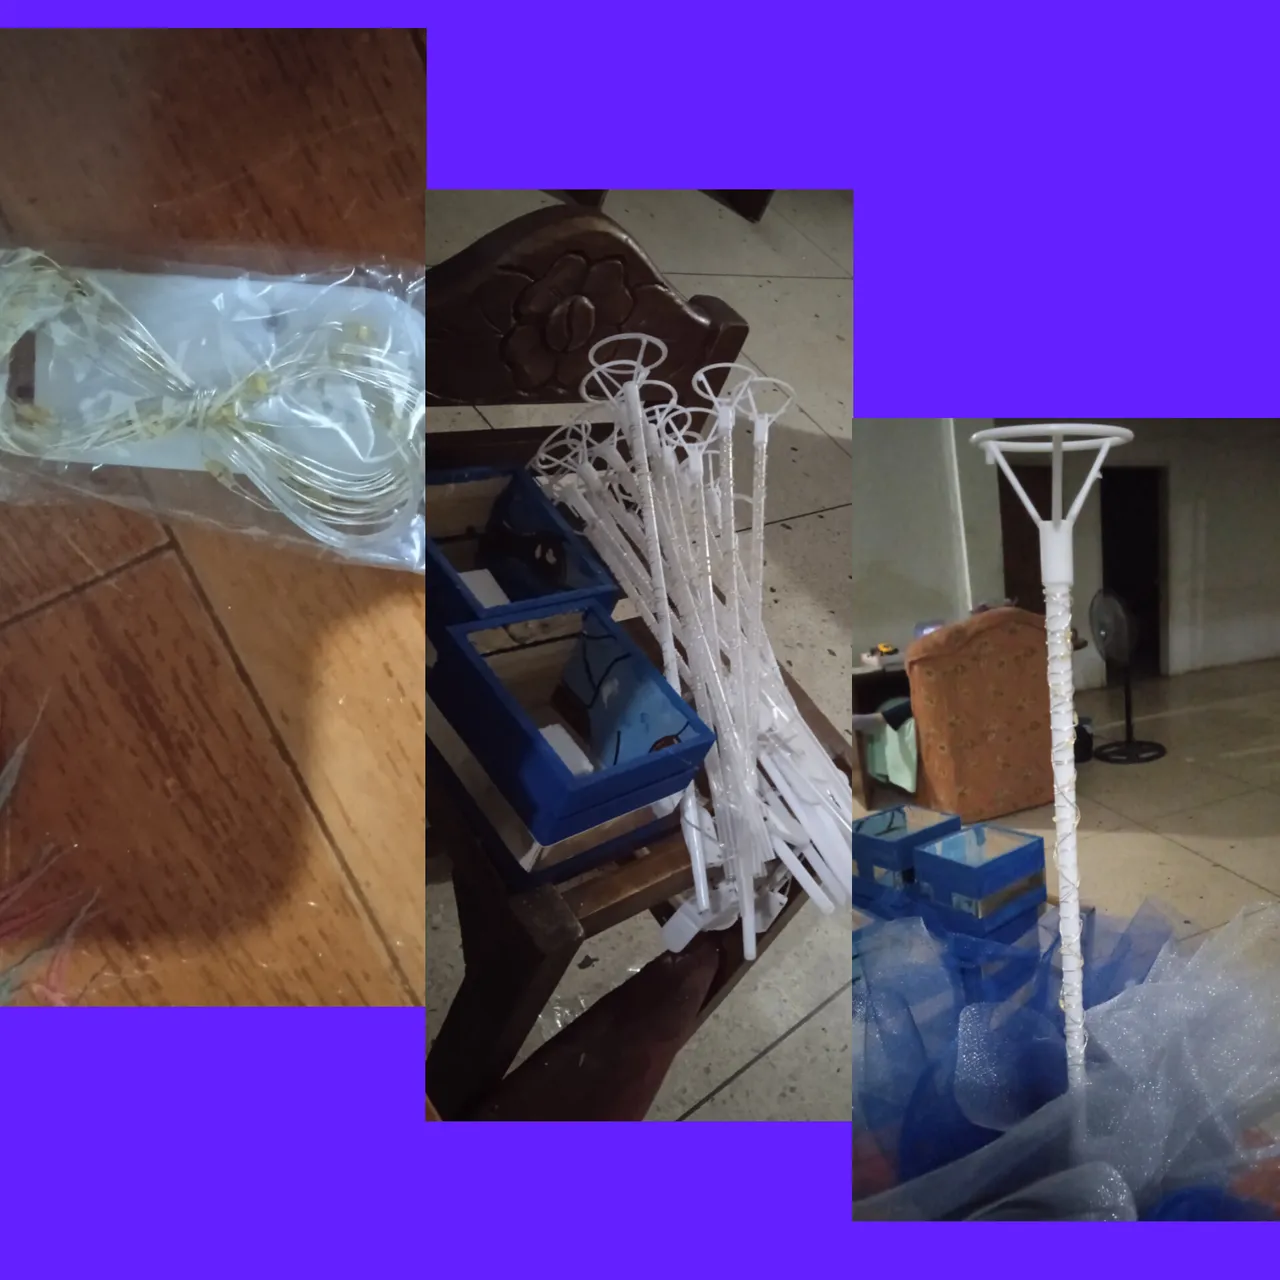
Luces lec individuales, amarillas.
MATERIALS
Bubble balloons n8. with its bases,
4 gray balloons and 4 royal blue.
Wooden boxes, for the base. Royal blue paint to paint them.
Manual blower. Frost or blue glitter, .
Anime pieces, tulle fabrics, royal blue, white, sky blue, and silver metallic cardboard.
Scissors, silicone, liquid, stick, blower,.
Individual LED lights, yellow.
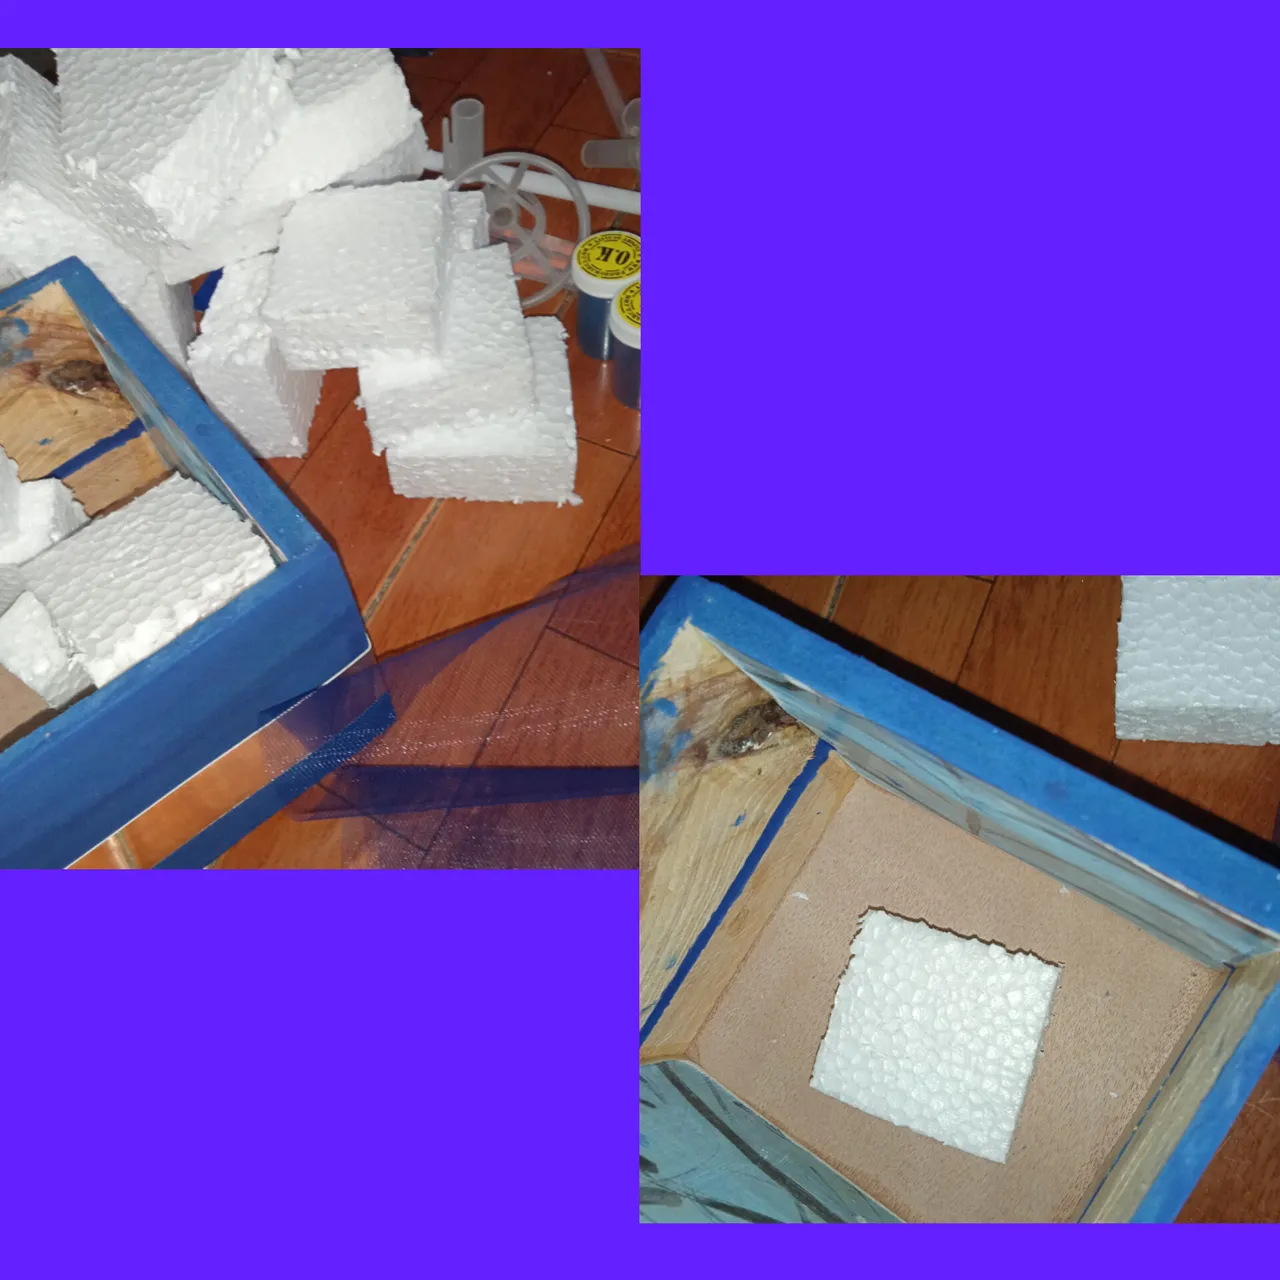
PASO 1.
Primero vamos a limpiar las cajitas , pintarlas y decorarlas con un listoncito de cartulina metalizada, un trabajo sencillo se hace rapido y facil.
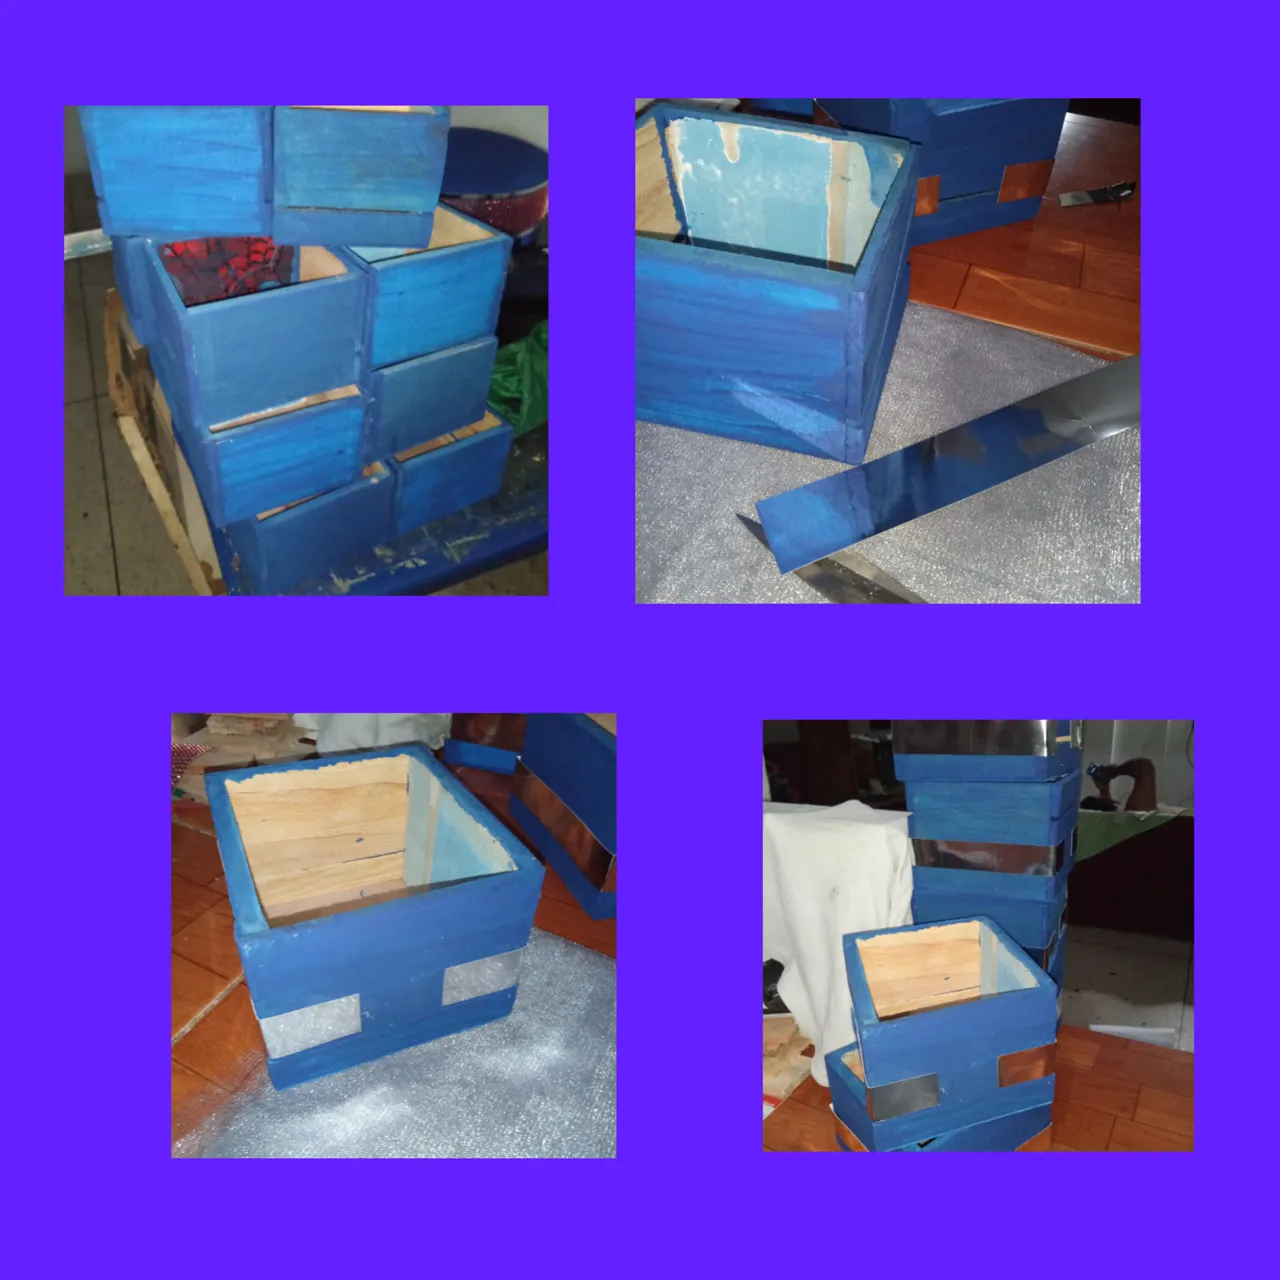
Luego en el centro se corta un trozo de anime o icopor y se le coloca en el centro a la cajita, luego les cuento para que sera.
STEP 1.
First we are going to clean the boxes, paint them and decorate them with a ribbon of metallic cardboard, a simple job is done quickly and easily.
Then in the center a piece of anime or Styrofoam is cut and placed in the center of the box, then I will tell you what it will be for.
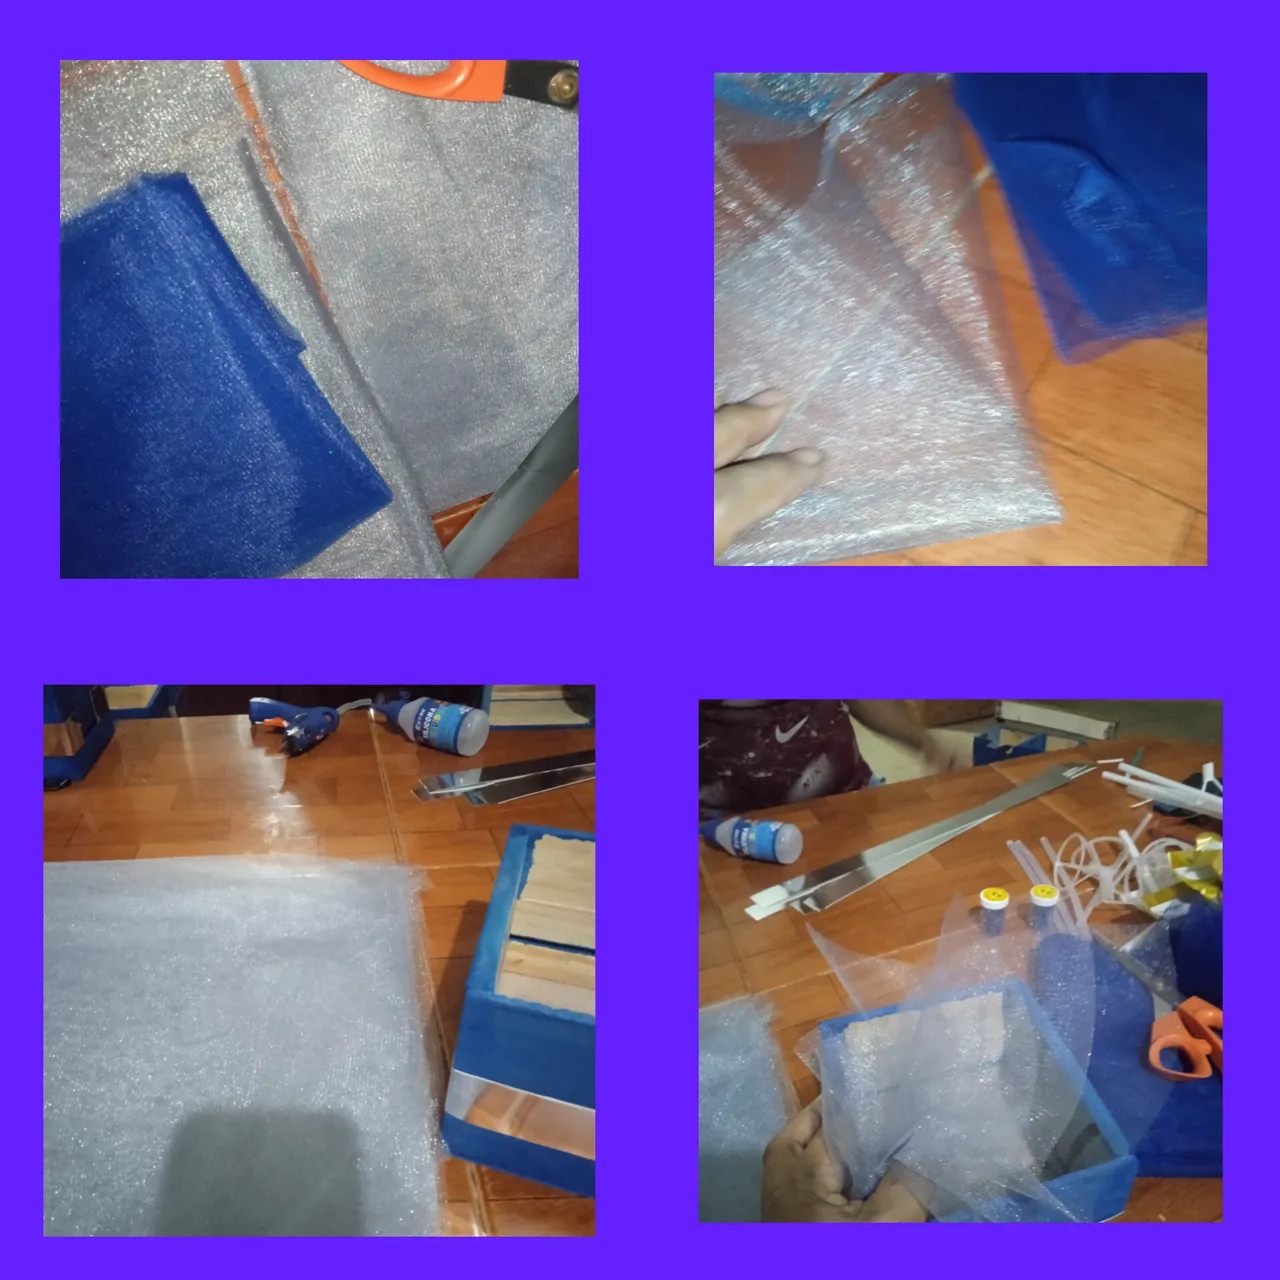
Ahora cortamos la tela de tull en cuadritos . y con silicon pegamos con silicon en barra en la orilla de las cajitas para luego darle volumen a la base
Now we cut the tull fabric into squares. and with silicone we glue a silicone bar on the edge of the boxes to then give volume to the base
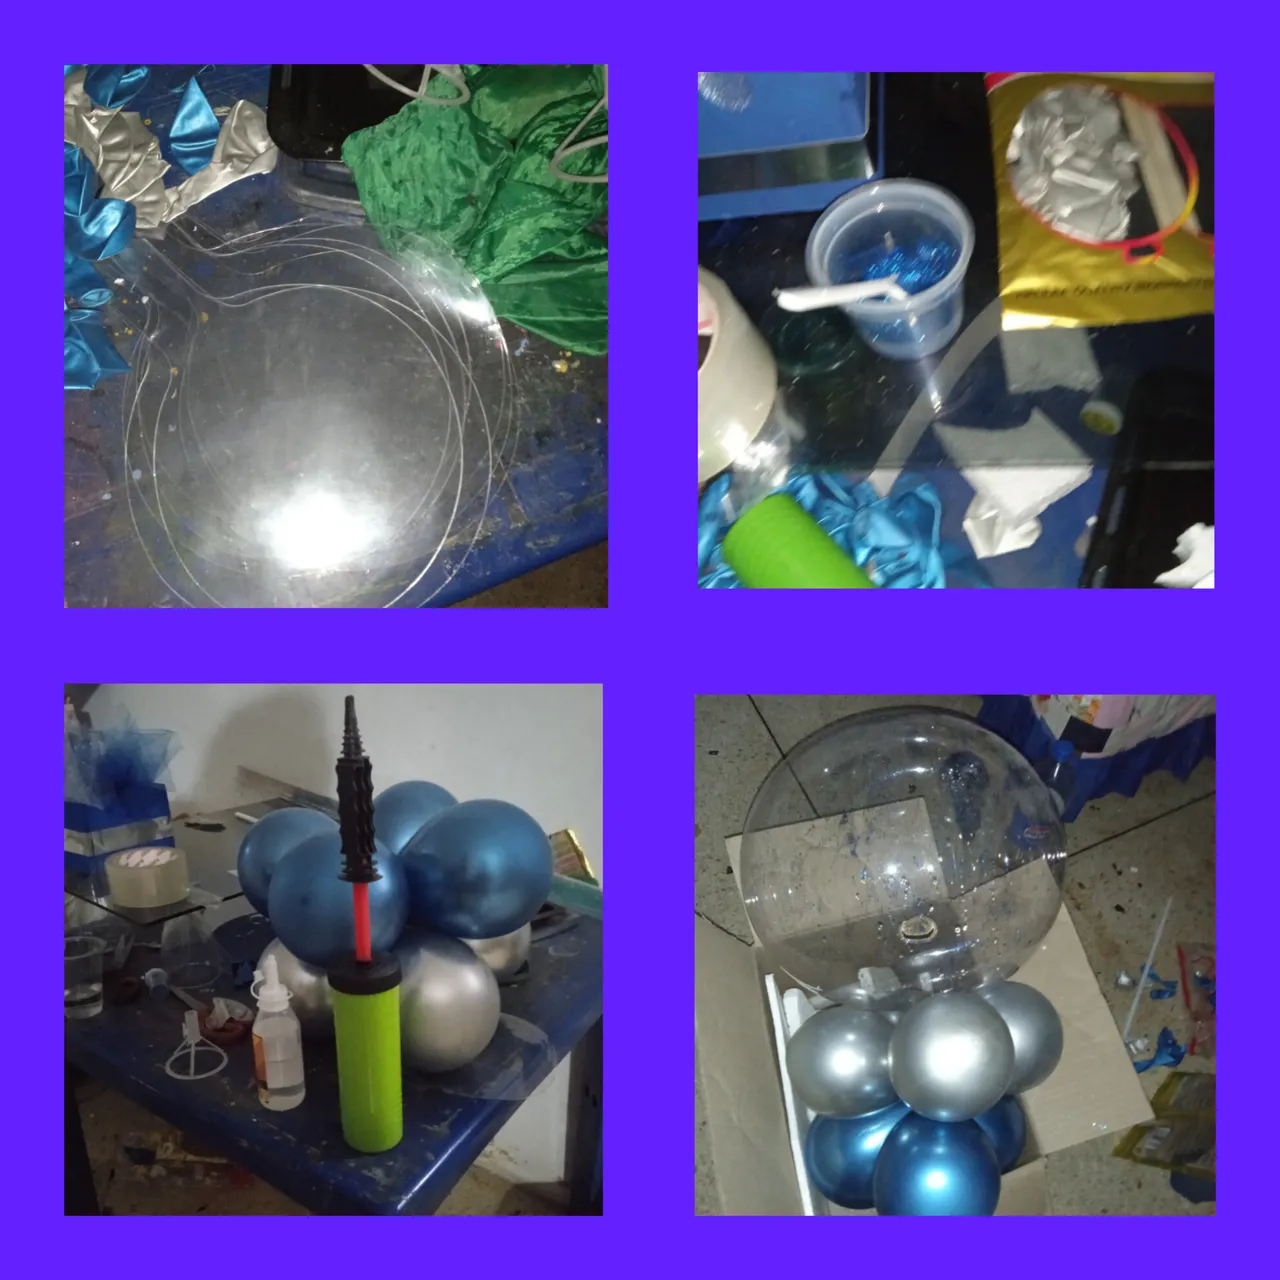
tomamos las bases que traen los globos y le colocamos las luce alrdedor de estas ...
We take the bases that the balloons come with and place the lights around them..
Ahora tomamos un globo burbuja y lo estiramos con las manos para darle flacidez, y abrimos la boca y con una cucharita le introducimos la escarcha o purpurina, y extendemos c dentro delglobo con unpañito para no dañarlo.
Now we take a bubble balloon and stretch it with our hands to make it flaccid, and we open our mouth and with a spoon we introduce the glitter or glitter, and we spread c inside the balloon with a cloth so as not to damage it.
Luego inflamos los otros cuatro globos azules y los cuatro globos plata y se arma un juego de cuatro, y vamos armando la base del globo ,ya cuadrado colocamos el globo burbuja y aseguramos .
Then we inflate the other four blue balloons and the four silver balloons and make a set of four, and we assemble the base of the balloon, once square we place the bubble balloon and secure it.
Ya tenemos el globo armado vamos a armar el centro de mesa con silicon caliente se pega en el fondo de la cajita el palito ya con las luces y los globos , mostramos y colocamos mas tull si es necesario
We already have the balloon assembled, we are going to assemble the centerpiece with hot silicone, stick the stick to the bottom of the box with the lights and the balloons, show and place more tull if necessary
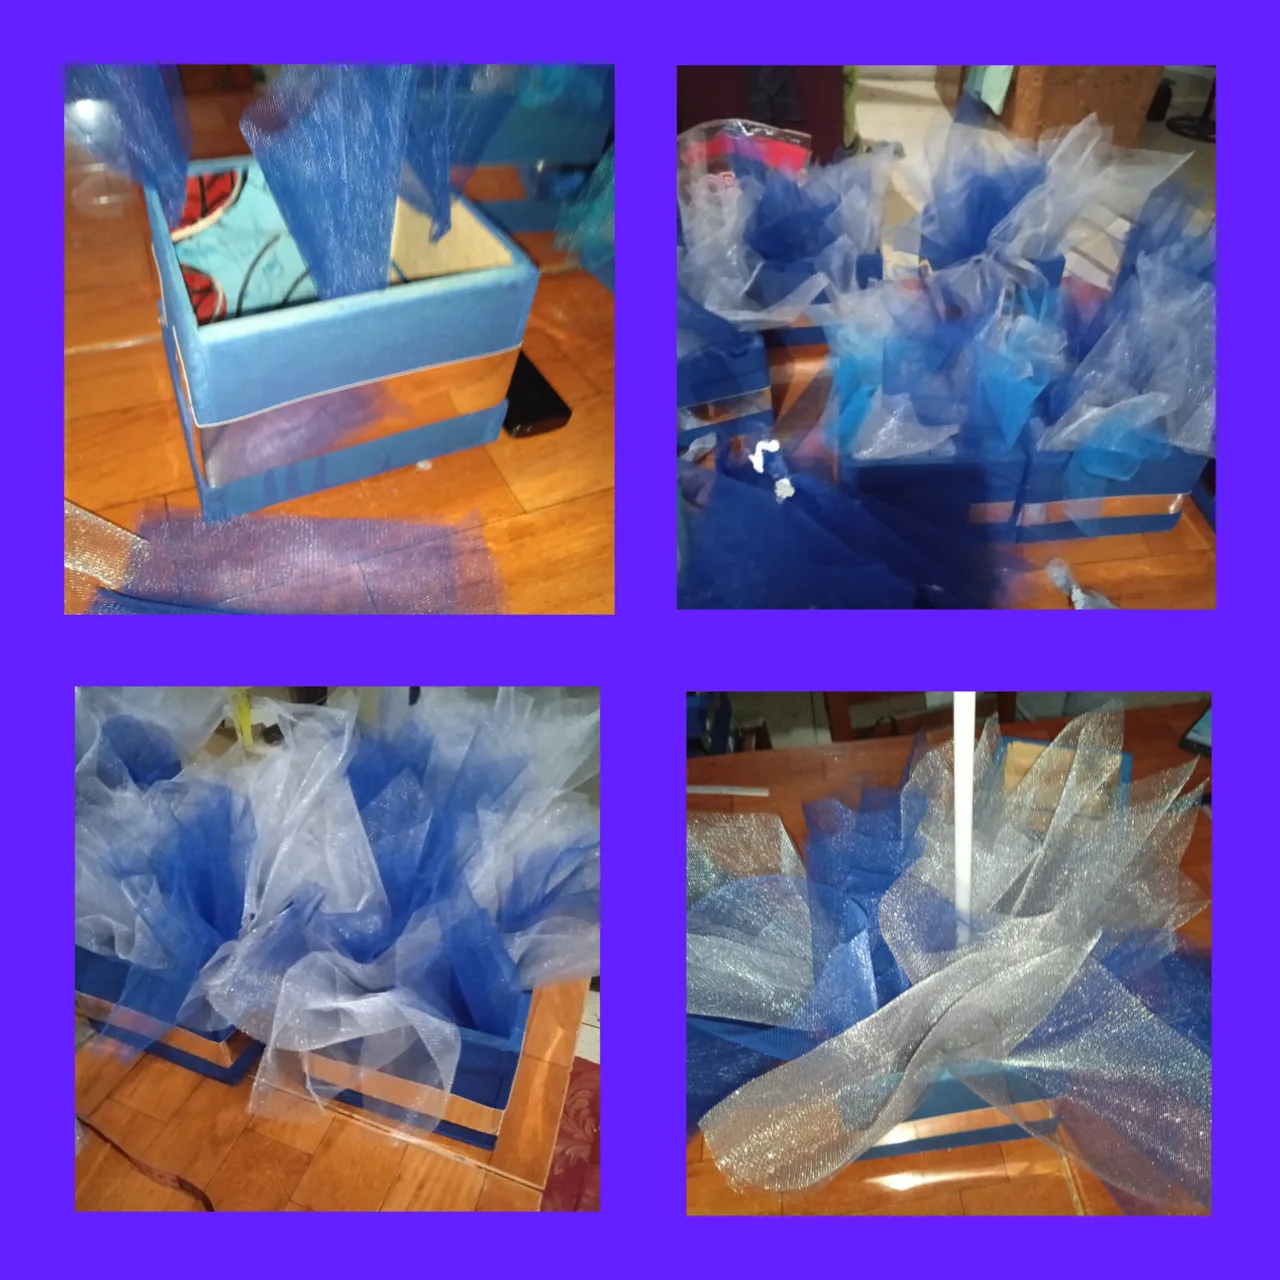
y asi quedaron hice unos 10 gustaron para decorar una reunion
and this is how they turned out, I made about 10 to decorate a meeting
espero les guste este pequeño pero gran proyecto, se pueden usar en cumpleaños o bodas, no se ustedes diran,... gracias a todos por leer y mirar mis trabajos se les quiere, hasta un proximo proyecto!.
I hope you like this small but great project, they can be used on birthdays or weddings, I don't know what you say... thank you all for reading and looking at my work, I love you, until the next project!