Muy buenos días! mis amig@s de hive... que el manto de Dios los cubra y proteja..
el esta ocasión les traigo una manera practica de hacer cajitas ,para cotillones y regalitos bonitos o para lo que se les ocurra... una cliente me pregunto que donde conseguía ese tipo de cajitas blancas, que su niña estaba de cumple y ella quería esas pero para cotillones y con la imagen de una artista (Karol G).
y le dije que todo es posible, con dedicación y esmero , bueno el caso fue que hice 19 cotillones, y les muestro todo el proceso
Very good morning! my hive friends... may the mantle of God cover and protect you..
This time I bring you a practical way to make boxes, for party favors and pretty gifts or for whatever comes to mind... a client asked me where she got those types of white boxes, because her daughter was having a birthday and she wanted those. but for party favors and with the image of an artist (Karol G).
and I told him that everything is possible, with dedication and care, well the fact was that I made 19 party favors, and I show you the whole process
MATERIALES
Cartulina doble fax blanca.
Silicon líquido.
Molde de cajita con medidas de 16cmx10cmx8cm.
Lápiz, tijeras, punzón, escuadra o regla.
Foami escarchado rosa y lila.
PARA DECORAR
Imágenes de impresión .
Cartulina metalizada dorada y holografíca.
Cartulina construcción rosada, rosa y fucsia.

MATERIALS
Double white fax cardboard.
Liquid silicon.
Box mold with measurements of 16cmx10cmx8cm.
Pencil, scissors, punch, square or ruler.
Pink and lilac frosty foam.
TO DECORATE
Print Images.
Gold and holographic metallic cardboard.
Pink, pink and fuchsia construction cardboard
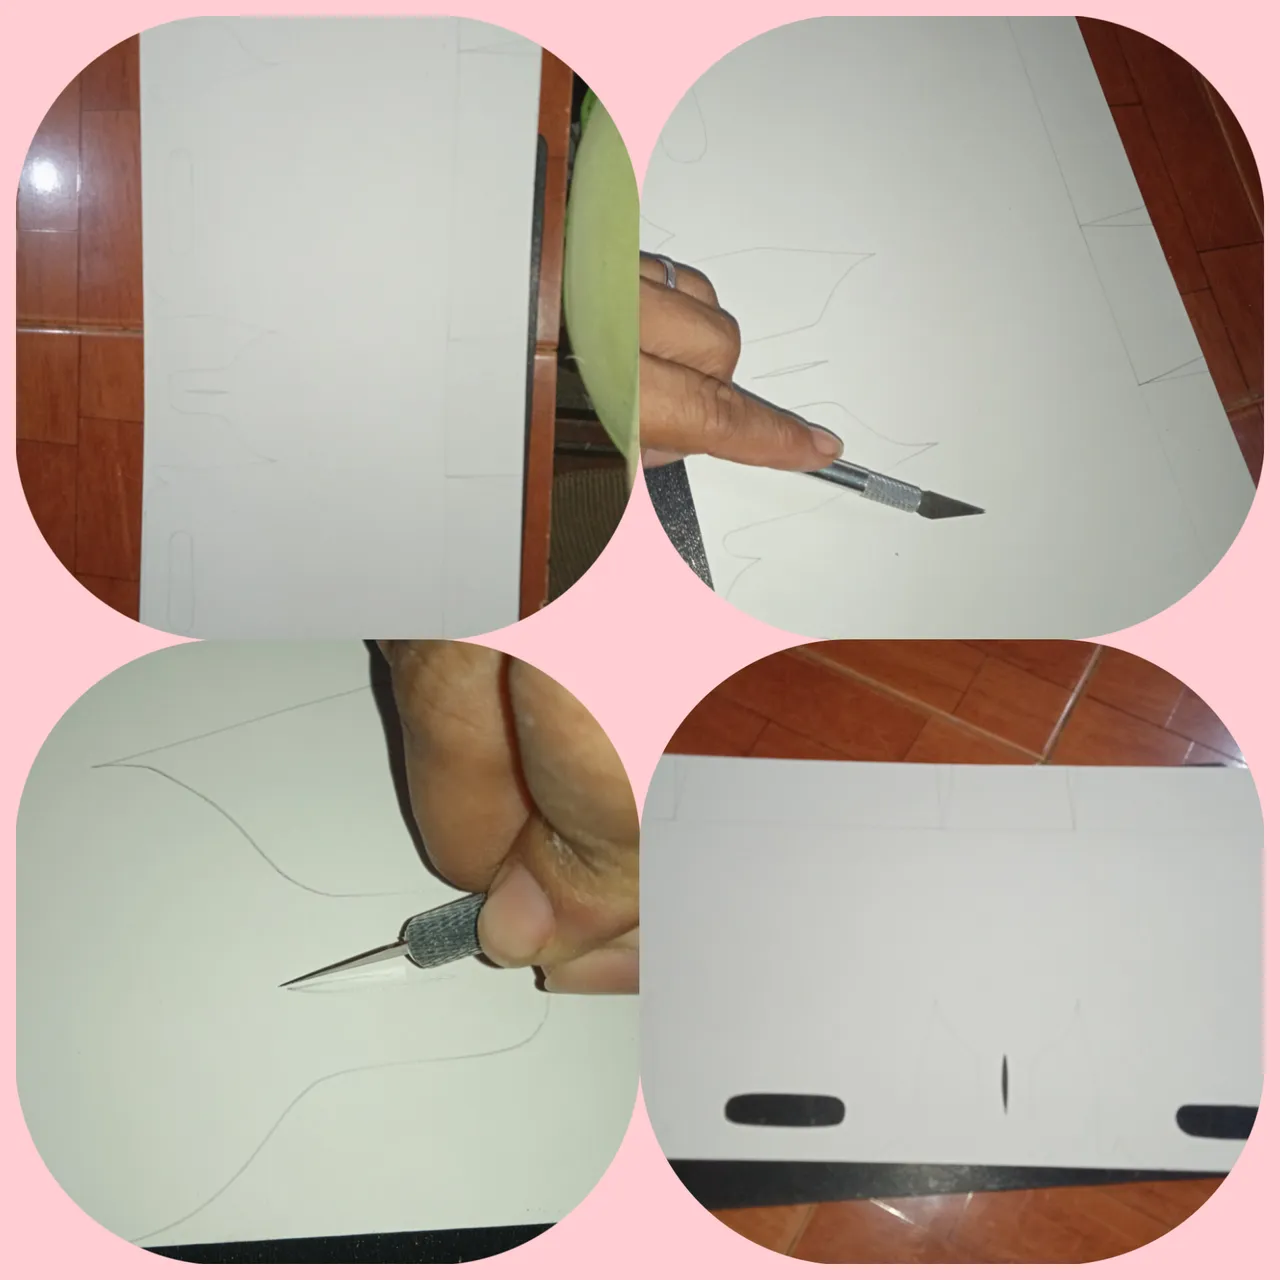
PASO 1,.
Comenzamos colocando la cartulina en un espacio abierto, este tipo de cartulina es grande, y colocamos el molde a manera de ahorrar la cartulina de una lamina salen de 4 a 5 cajitas dependiendo el tamaño, este modelo tiene las dimensiones que ya les anuncie en los materiales.
Ya marcadas dividimos la cartulina en listones para facilitar el corte.
Ahora marcamos con el lápiz y la regla o escuadra el molde o patrón, para que no quede deforme y a la hora de armar no sea tan engorroso.
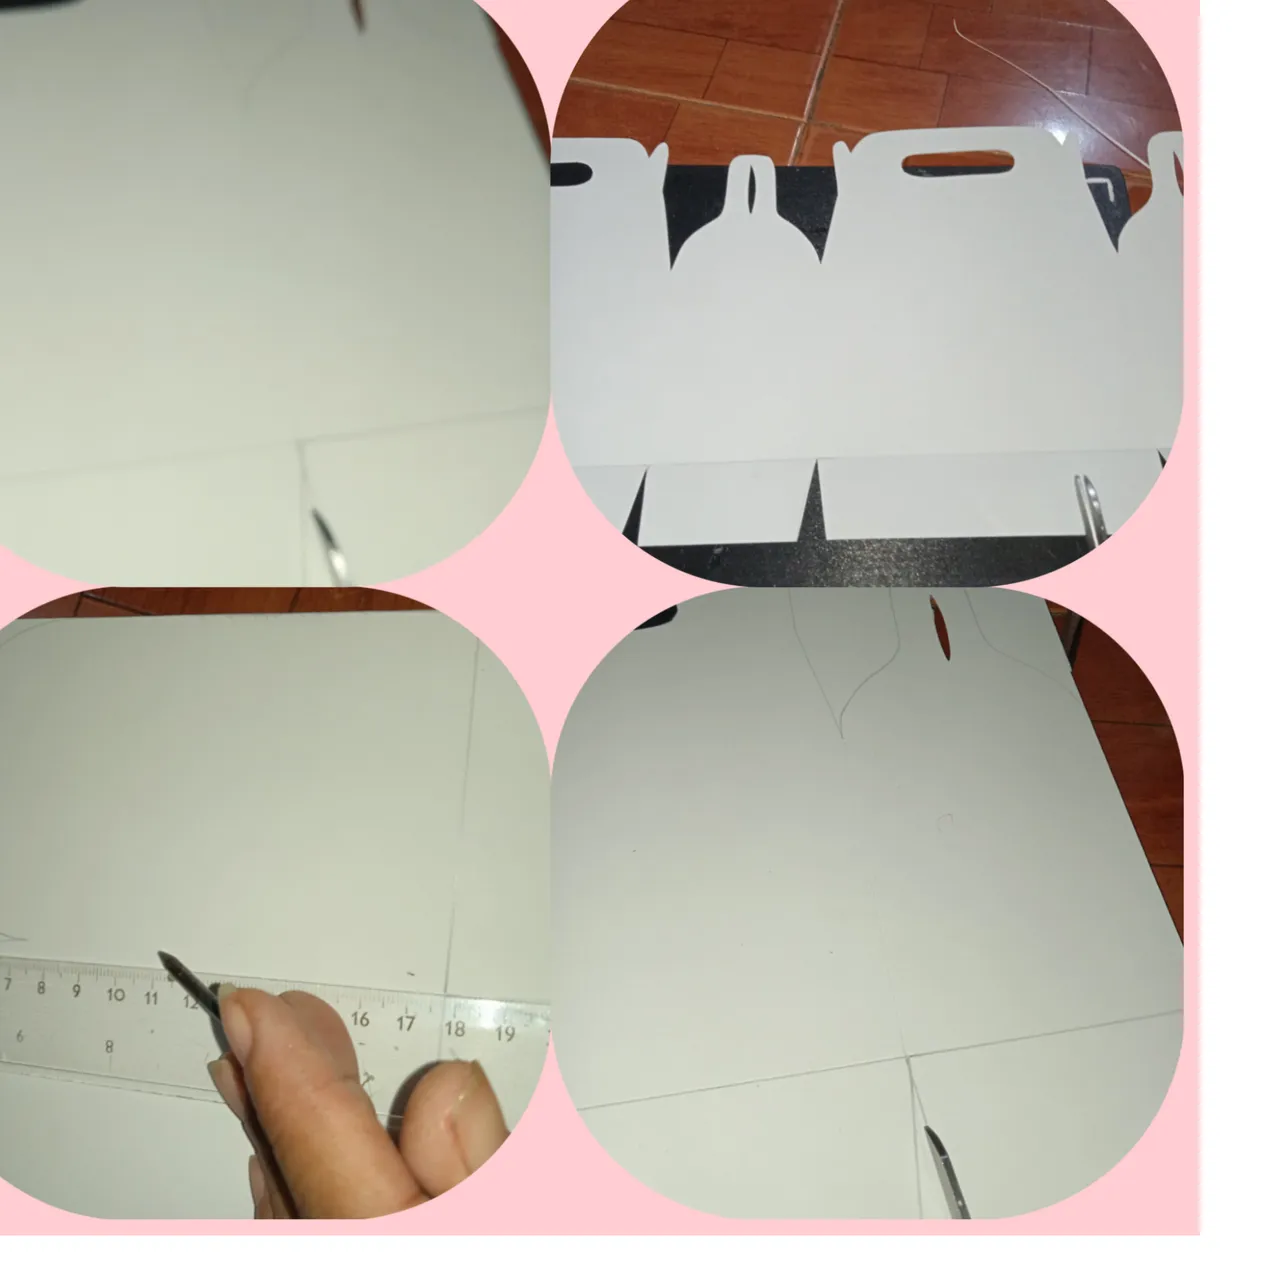
Hayy! se me olvido decirles que se necesita un exacto de presicion para abrir los ojales de los lados.
que es lo primero que hacemos abrir los ojales
STEP 1.
We begin by placing the cardboard in an open space, this type of cardboard is large, and we place the mold in order to save the cardboard from a sheet, 4 to 5 boxes come out depending on the size, this model has the dimensions that I already announced in the materials.
Once marked, we divide the cardboard into ribbons to facilitate cutting.
Now we mark the mold or pattern with the pencil and the ruler or square, so that it is not deformed and when it comes to assembly it is not so cumbersome.
Hayy! I forgot to tell you that it takes an exact amount of precision to open the eyelets on the sides.
What is the first thing we do is open the buttonholes
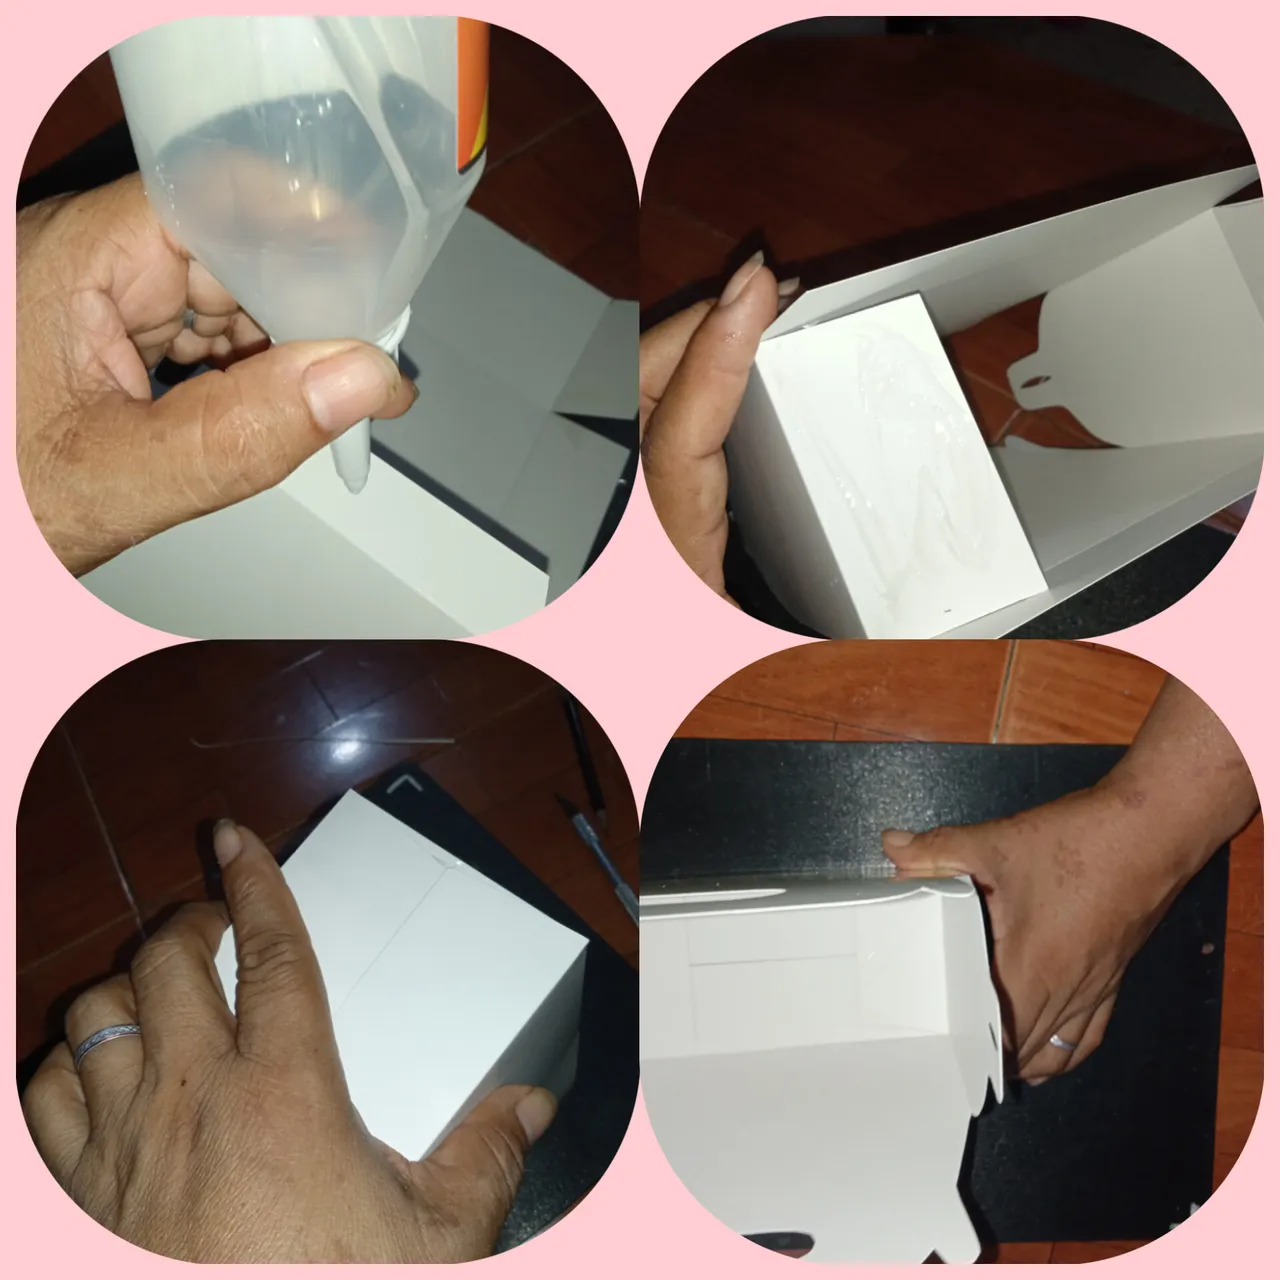
PASO 2.
Ya cortadas, con el punzón pasamos suavemente por todas las lineas trazadas con el lápiz , eso es para que al doblar no se deforme el doblez, .
luego de dobladas, pegamos con el silicon liquido , eso si se aplica y deja reposar un momento y luego pegamos.
STEP 2.
Once cut, with the punch we gently go over all the lines drawn with the pencil, this is so that when folding the fold is not deformed.
After folding, we glue with liquid silicone, that is if applied and let it rest for a moment and then we glue.
Ya pegada revisamos si esta recta y si por casualidad queda un fondo falso o un agujero cortamos de los sobrantes de cartulina un listón y lo colocamos al fondo.Once glued, we check if it is straight and if by chance there is a false bottom or a hole, we cut a ribbon from the leftover cardboard and place it at the bottom.
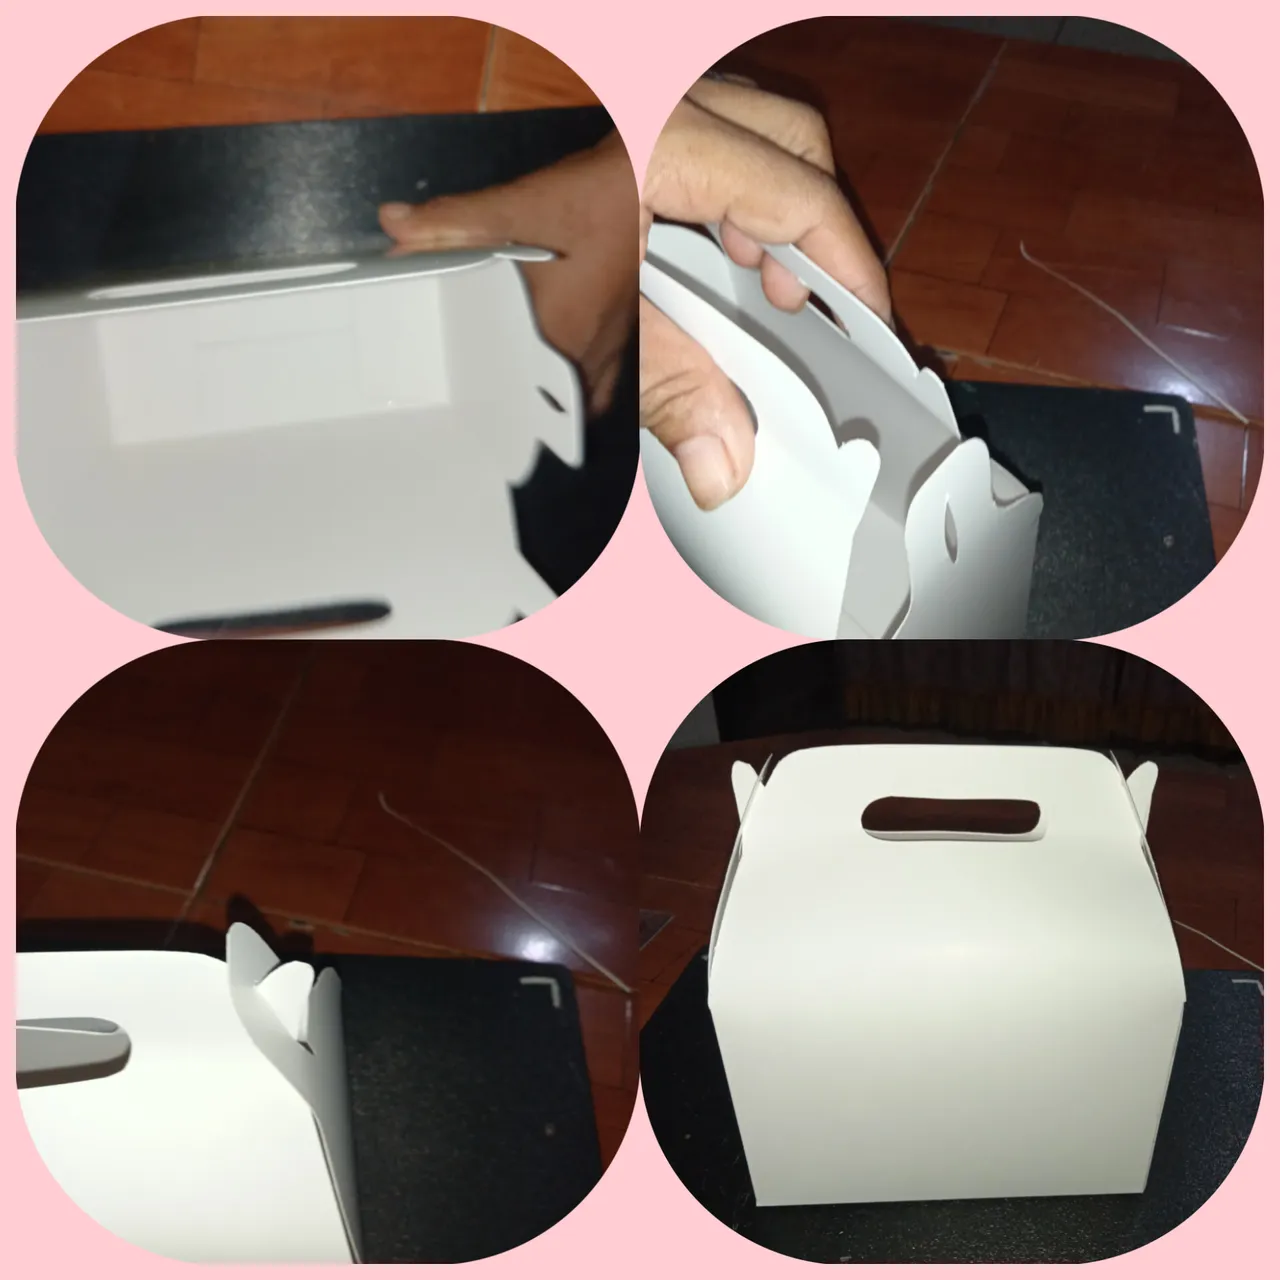
medimos las orejitas en el ojal para ver si entra sin esfuerzo, de ser así se le aumenta de arriba a abajo el corte del ojal
We measure the ears in the buttonhole to see if it fits without effort, if so, the cut of the eyelet is increased from top to bottom.
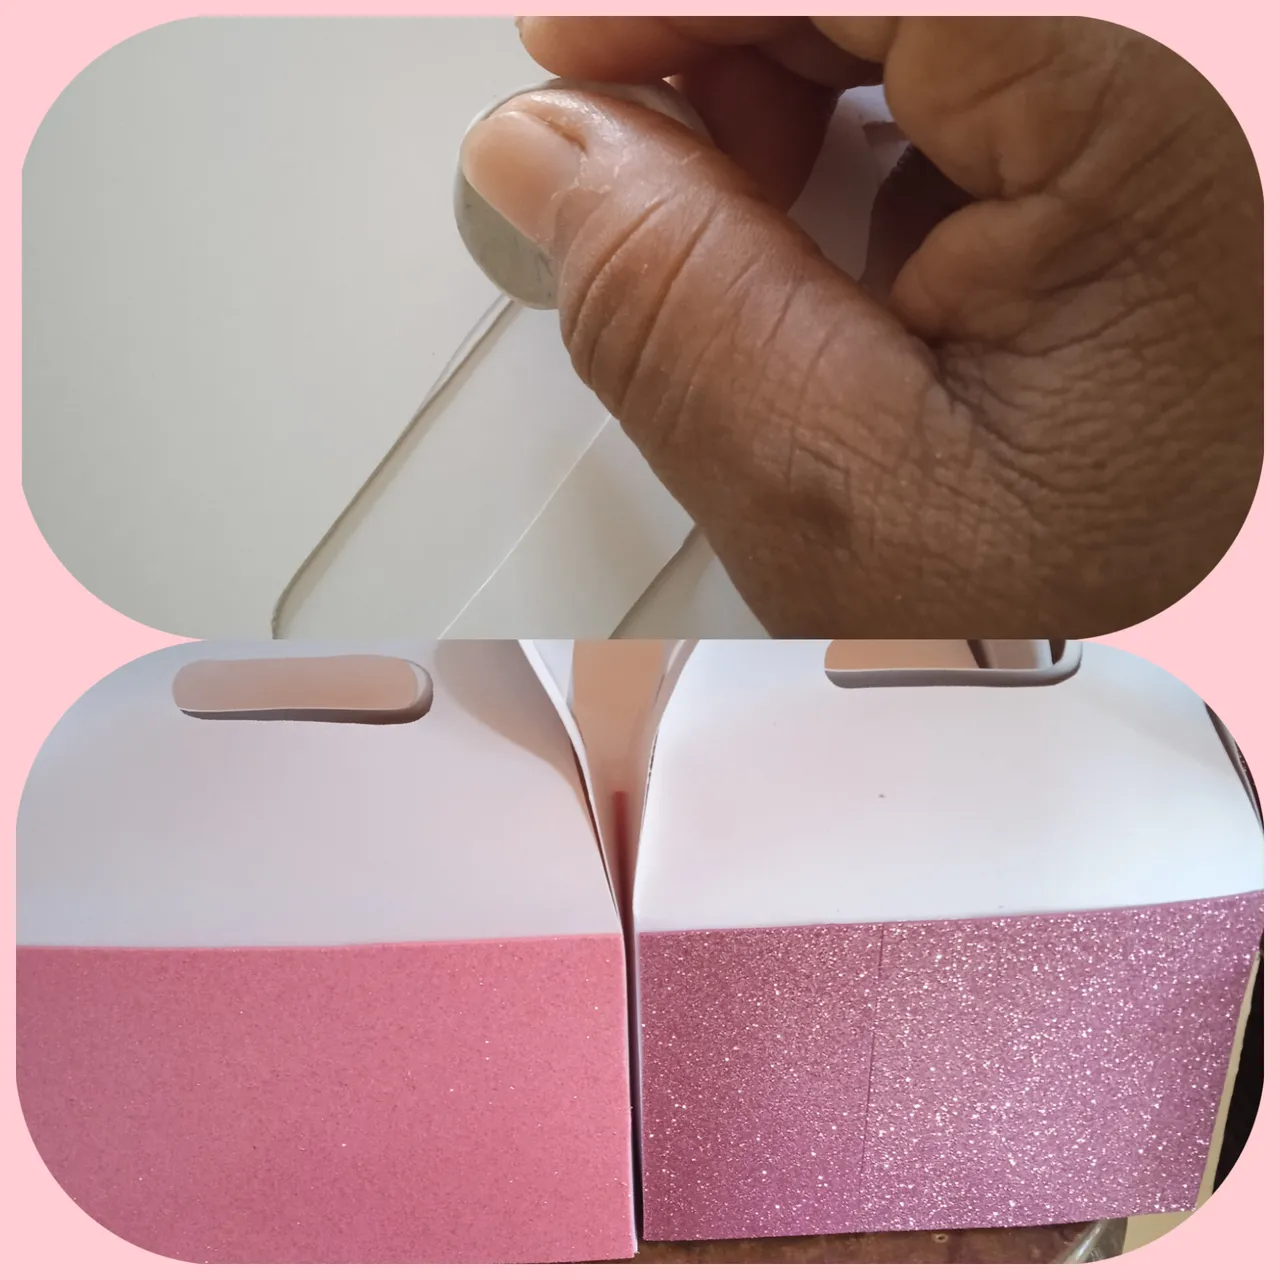
Como ya esta lista , revisamos si no quedan restos del lápiz y borramos con una borra blanca, debajo colocamos un trozo de foami escarchado en su diferencia cartulina escarchada , y ya están para decorar.
Since it is already ready, we check if there are any traces of the pencil and erase it with a white eraser, underneath we place a piece of frosted foam instead of frosted cardboard, and they are ready to decorate.
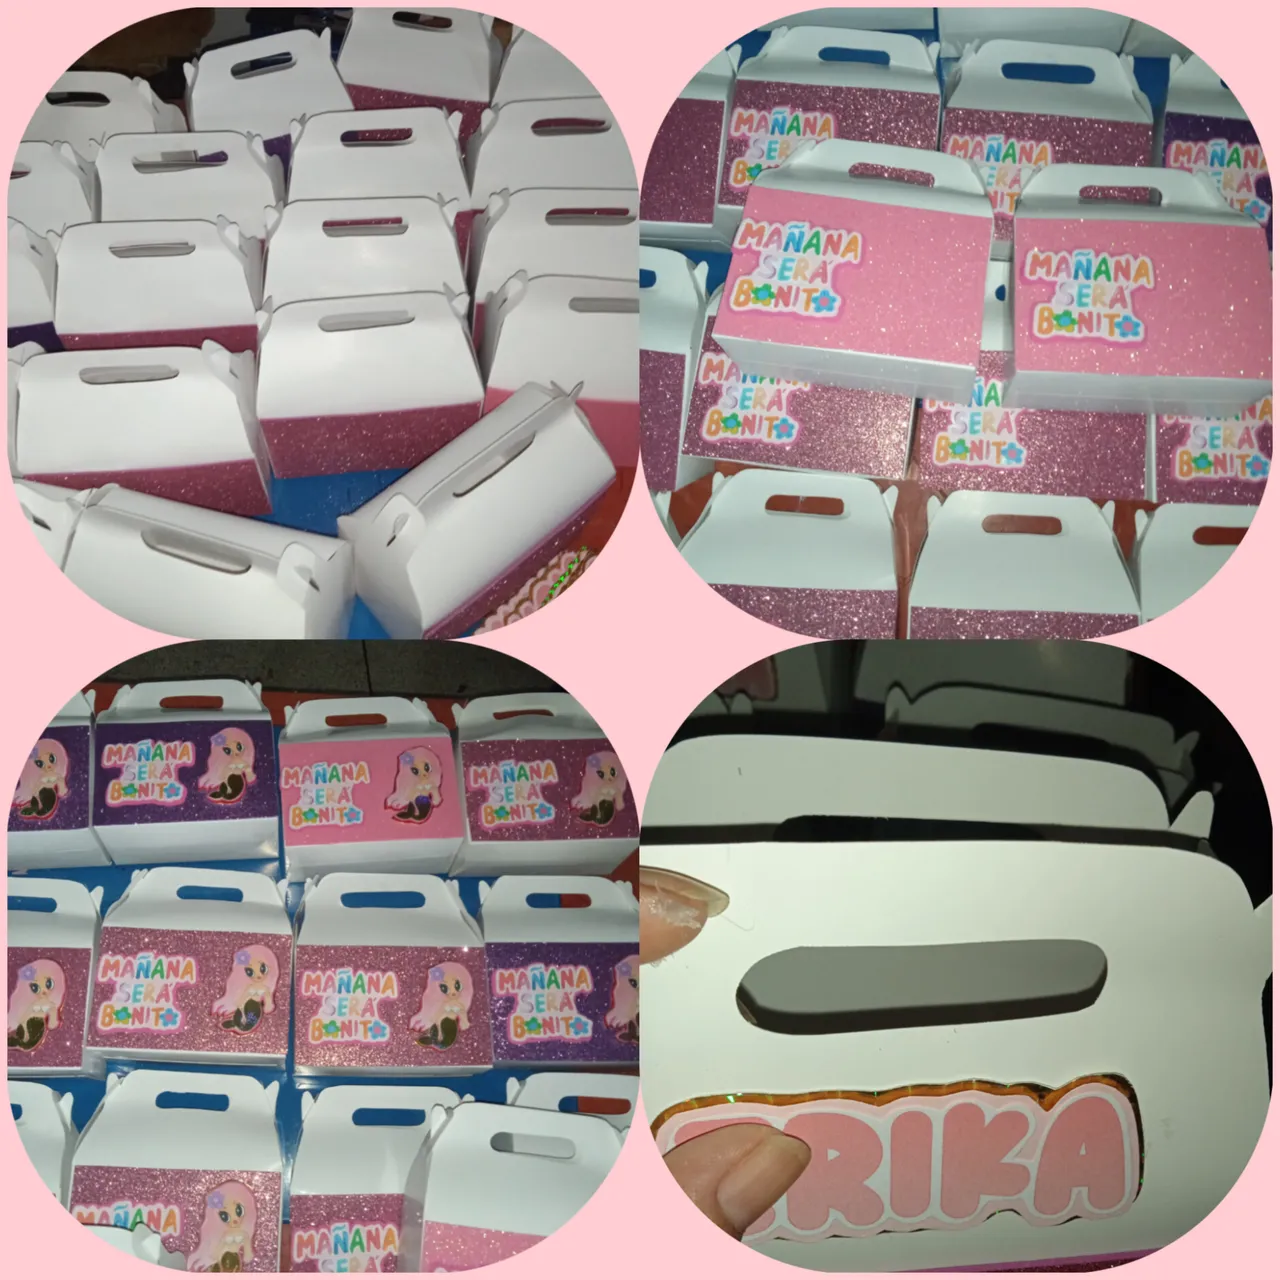
PASO 3.
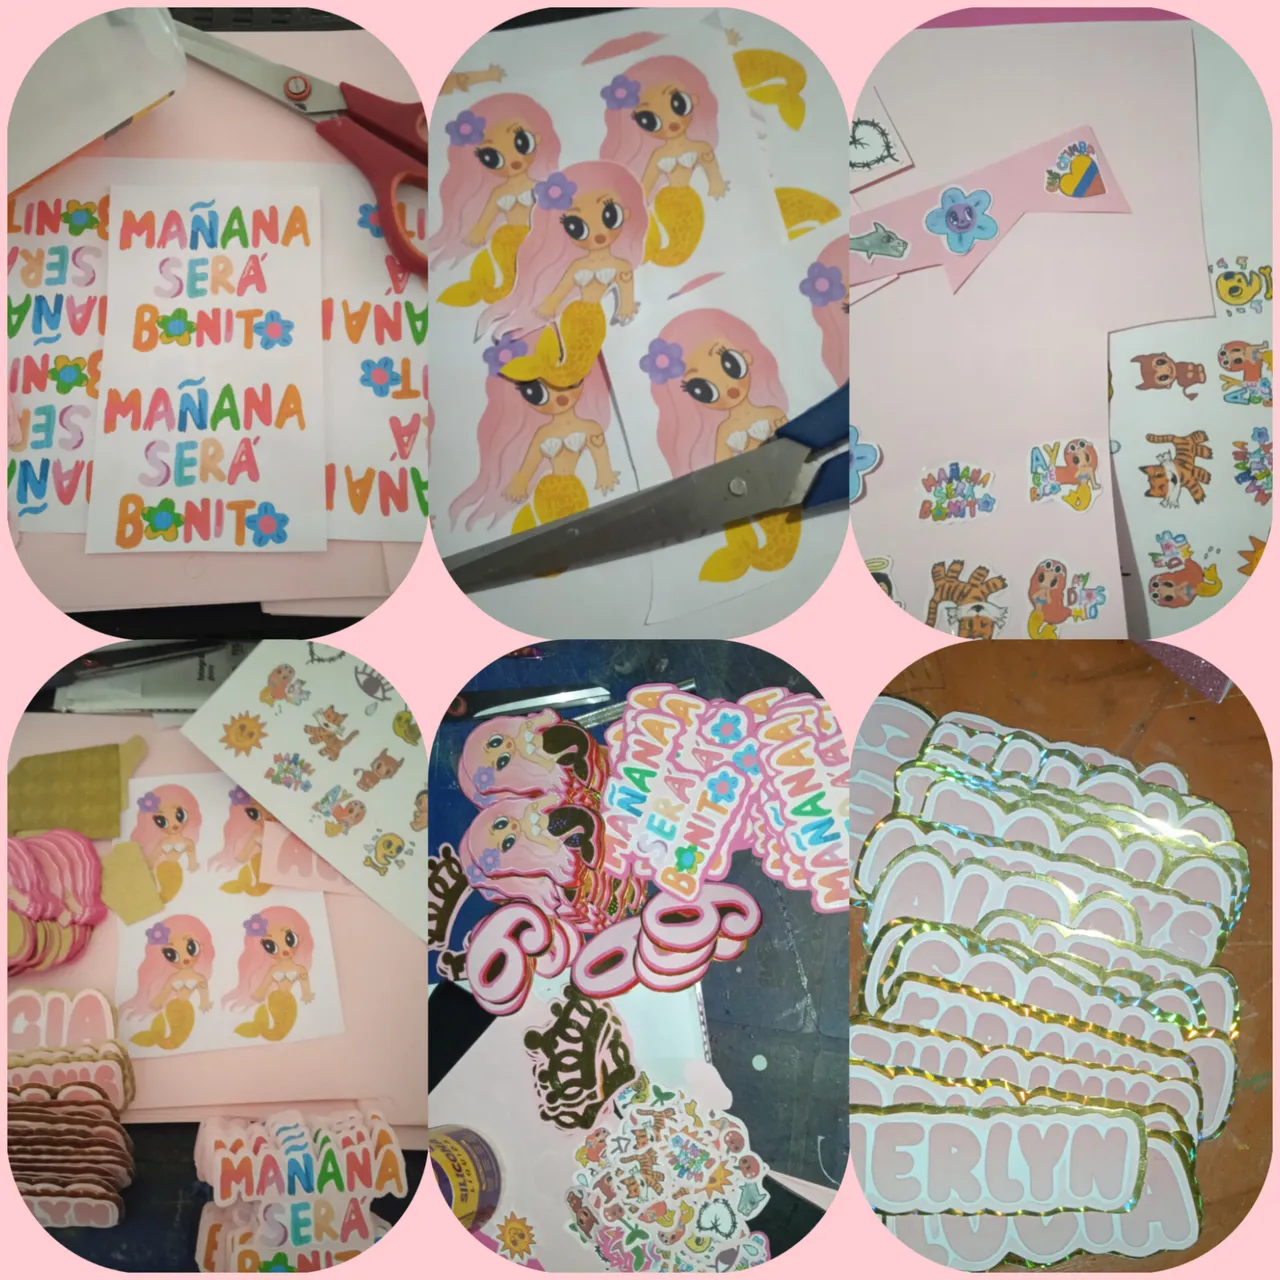
Ya tenemos la cajita armada, ahora tomamos las impresiones y comenzamos a cortar y a pegar según esta secuencia primero en la cartulina rosa, luego en la fucsia y por ultimo en la holografica , es para darle color y..si ven bien a la sirenita le coloque la colita de cartulina holografica y le da un toque distinto y muy brillante.
STEP 3.
We already have the box assembled, now we take the prints and begin to cut and paste according to this sequence first on the pink cardboard, then on the fuchsia and finally on the holographic one, it is to give it color and...if you see the little mermaid well, Place the holographic cardboard tail and it gives it a different and very bright touch.

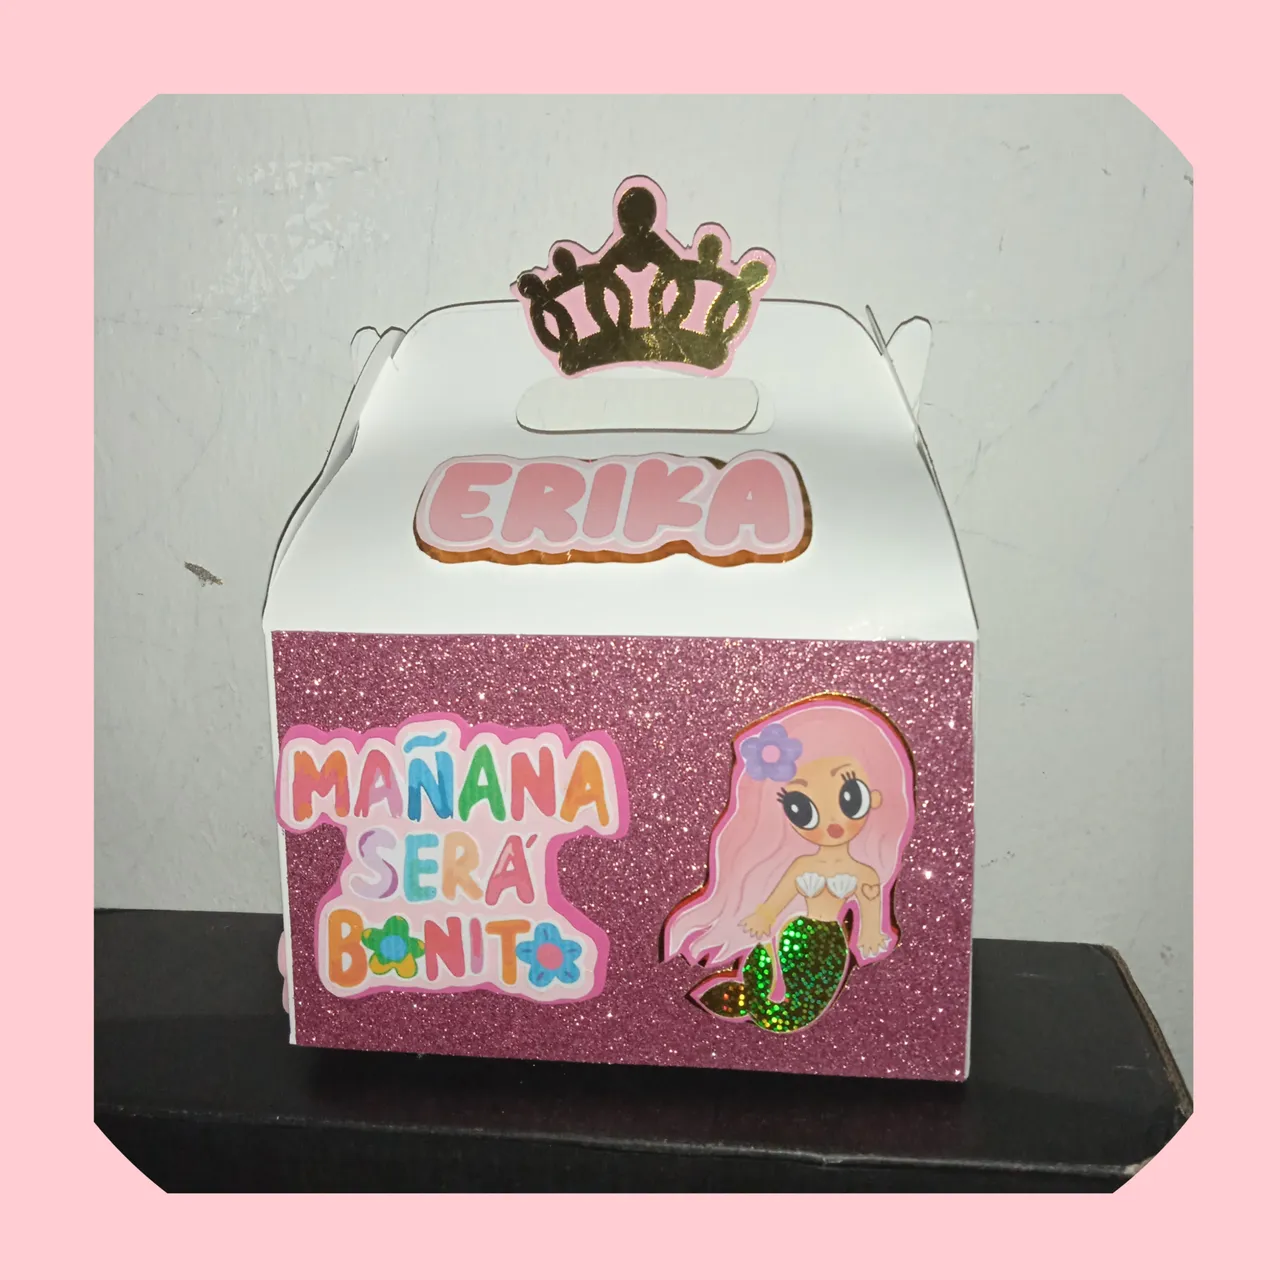
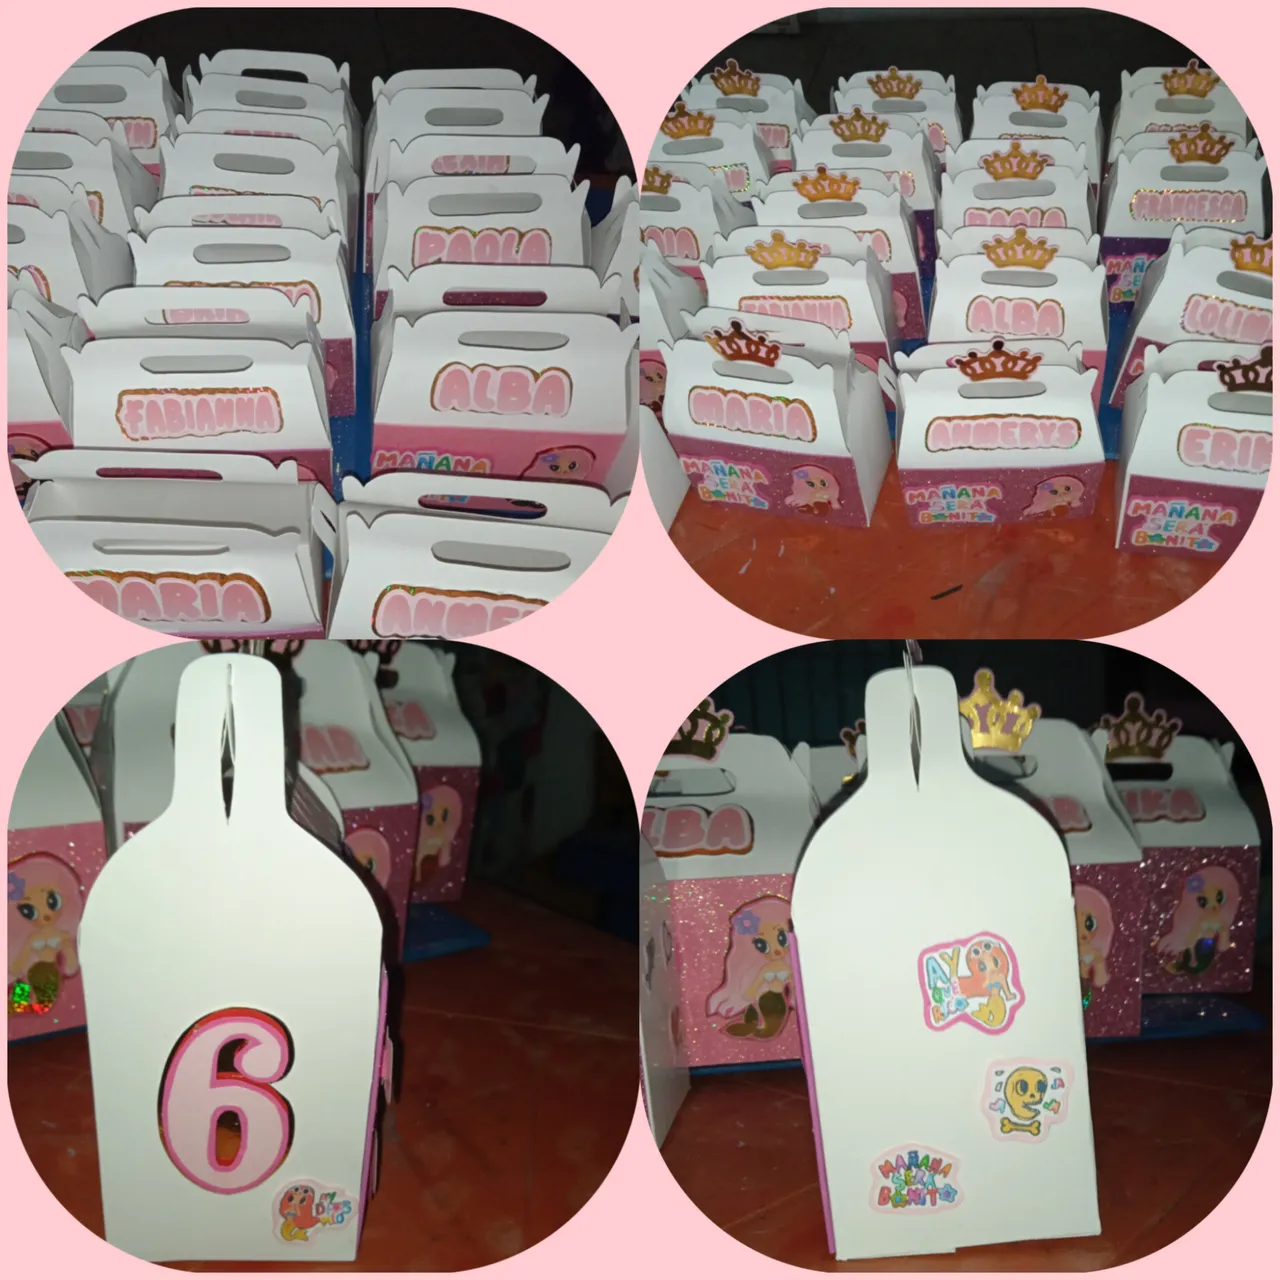
PASO 4.
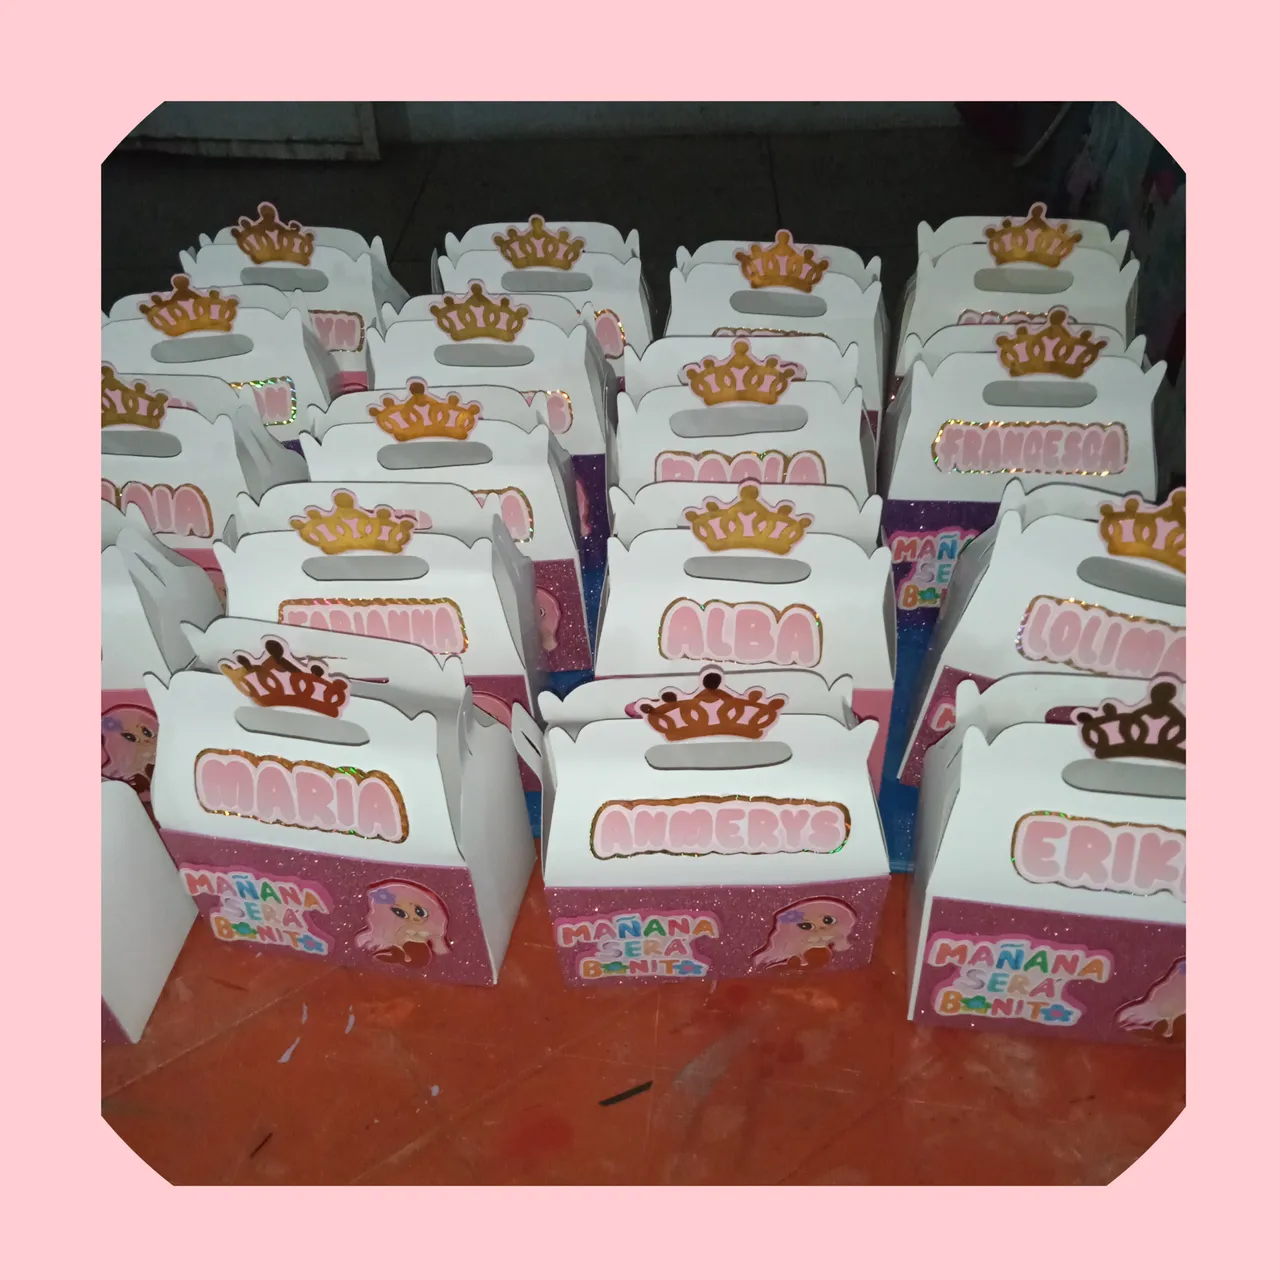
Ya tenemos las cajitas y las imágenes , ahora comenzamos a pegarlas para decorarlas , estas llevan el nombre cada niña, y el numero de años de la compleañera.
We already have the boxes and the images, now we begin to glue them to decorate them, these have the name of each girl, and the number of years of the companion.
y así quedan, muy bonitas, me gusto mucho este trabajo, y la niña muy contenta ..
and that's how they turn out, very pretty, I really liked this work, and the girl is very happy..
les comento , cuando me dicen cotillones pienso en lo tedoso que se puede volver un trabajo, lo digo por lo repetido de las imágenes sobre tod y mas cuando hay que hacerlas, hoy en día este trabajo se reduce cortar y pegar, pero hay personas que le gusta mas a la veja escuela, la construcción de las imagen como tal,.. pero como siempre dicen por ahí "EL CLIENTE SIEMPRE TIENE LA RAZON "
I tell you, when they call me party favors I think about how tedious a job can become, I say this because of the repetition of the images above all and even more so when they have to be made, nowadays this work is reduced to cutting and pasting, but there are people who The old school likes it more, the construction of the image as such,... but as they always say "THE CUSTOMER IS ALWAYS RIGHT"
Buenos nos vemos en otra manualidad, que dios los bendiga grandemente y agradecida por su aceptación.
Well, see you in another craft, may God bless you greatly and grateful for your acceptance.
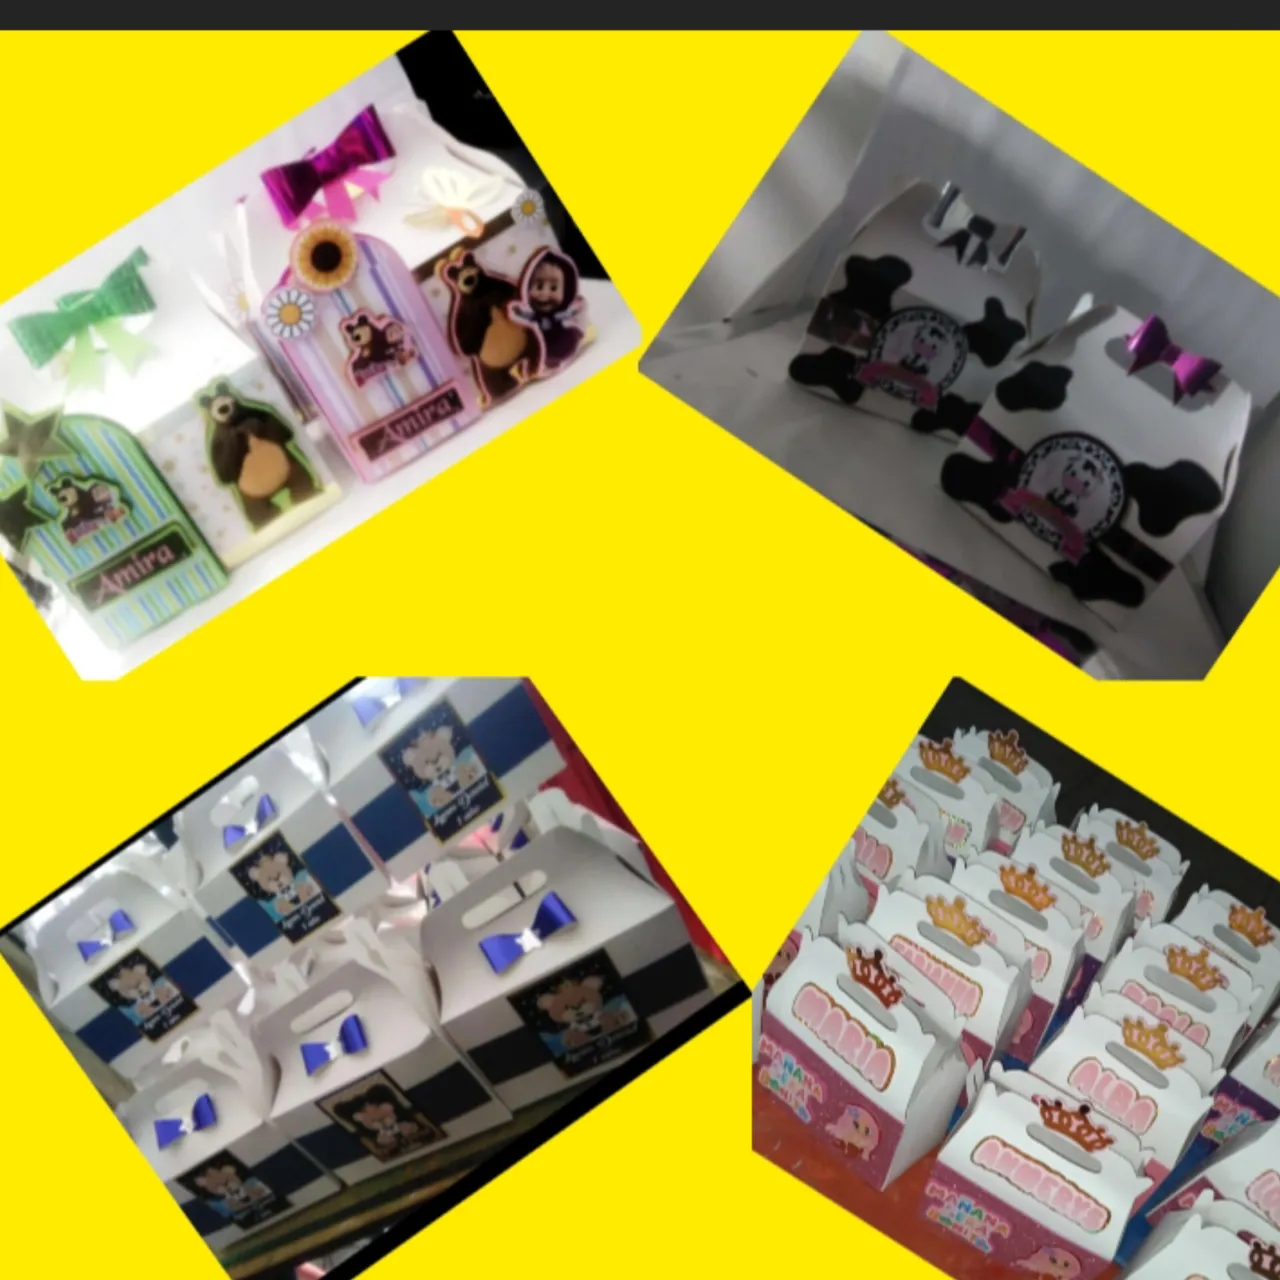
NOTA;Despues de que hice este modelo encargaron otras pero con otros modelos les muestro.
cajitas cajitas cajtas!
NOTE: After I made this model they ordered others but I will show you other models.
little boxes little boxes little boxes!