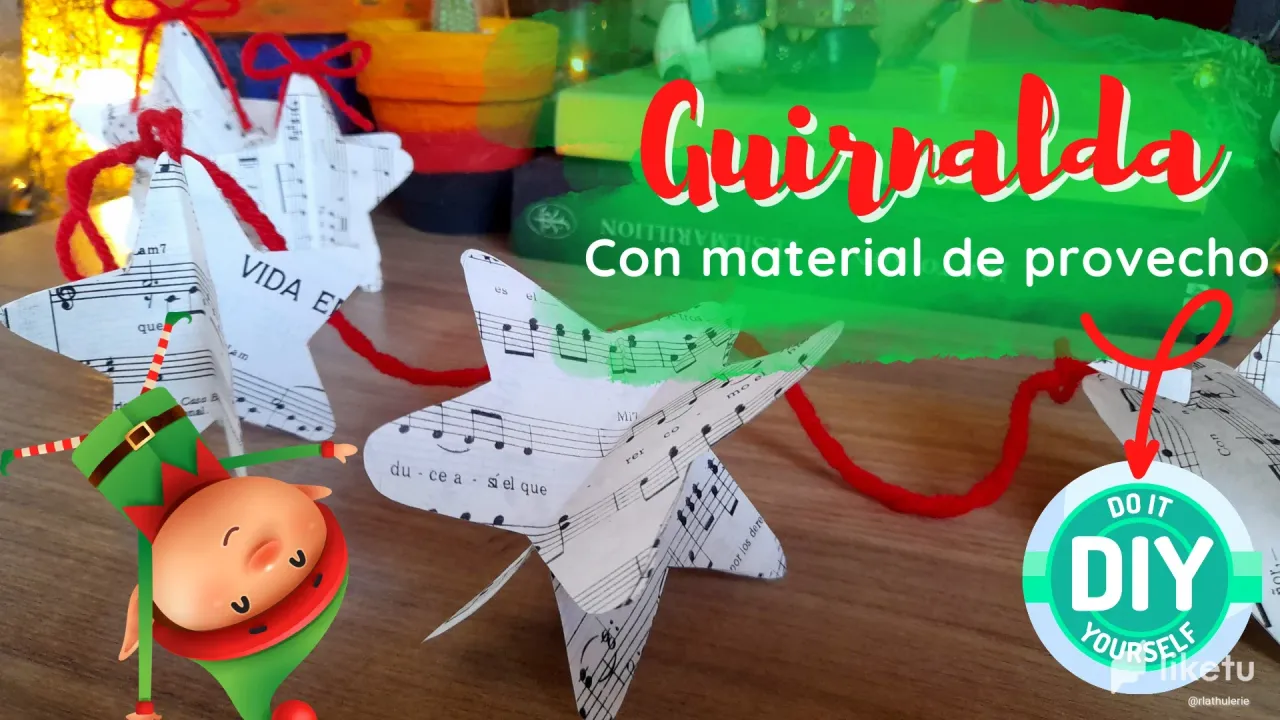

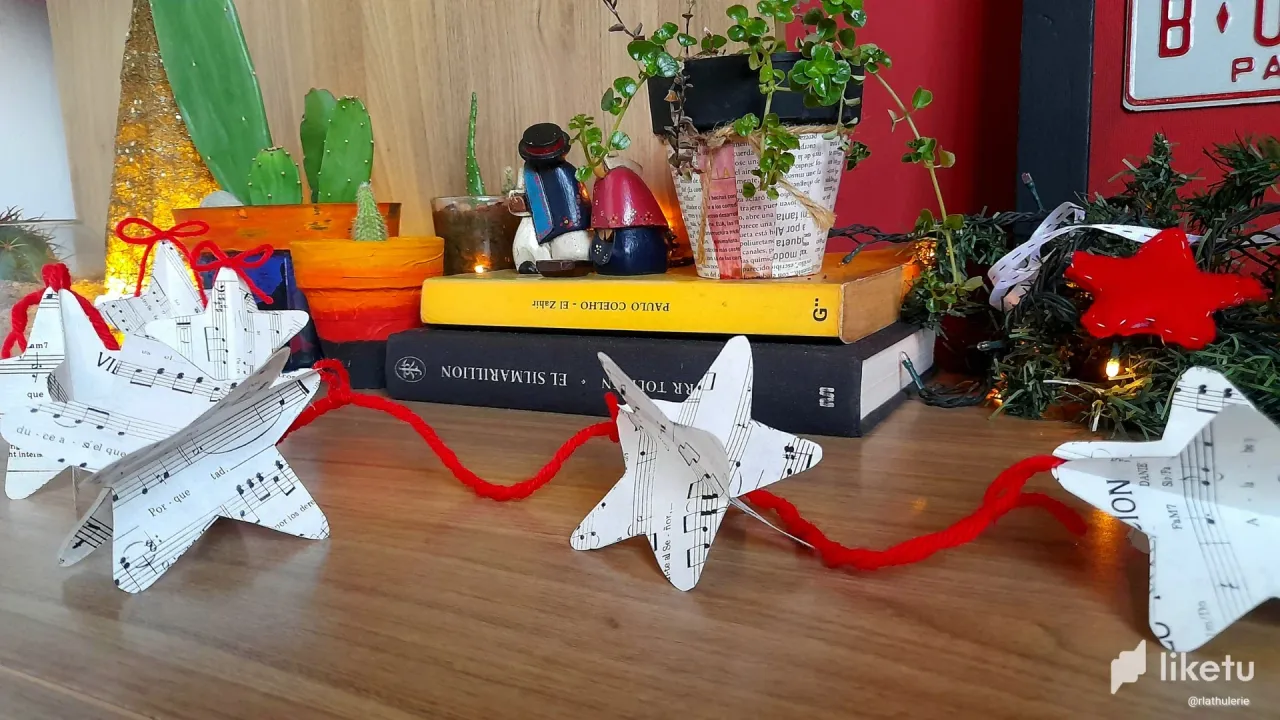
Las guirnaldas son de las decoraciones navideñas que más me gustan, de hecho en casa, tengo 4 que uso para el arbolito de navidad, y tienen con nosotros 14 años ya. Una es de gorritos de Santa y otra de pompones rojos y blancos.
Este año, como les comenté en publicaciones anteriores, no quería usar las mismas decoraciones de siempre, por eso puse manos a la obra para hacer unas nuevas, y entre esas están las estrellas musicales que me gustaron tanto que quise hacer unas guirnaldas con ellas.

La verdad son súper sencillas, y si buscan el enlace que les dejé arriba podrán ver qué fáciles son de hacer, sin embargo, aquí les dejo los materiales, y luego vamos al paso a paso.
MATERIALES
Partituras viejas o cualquier papel de su preferencia
Pega
Lápiz
Tijera
Estambre
PASO A PASO
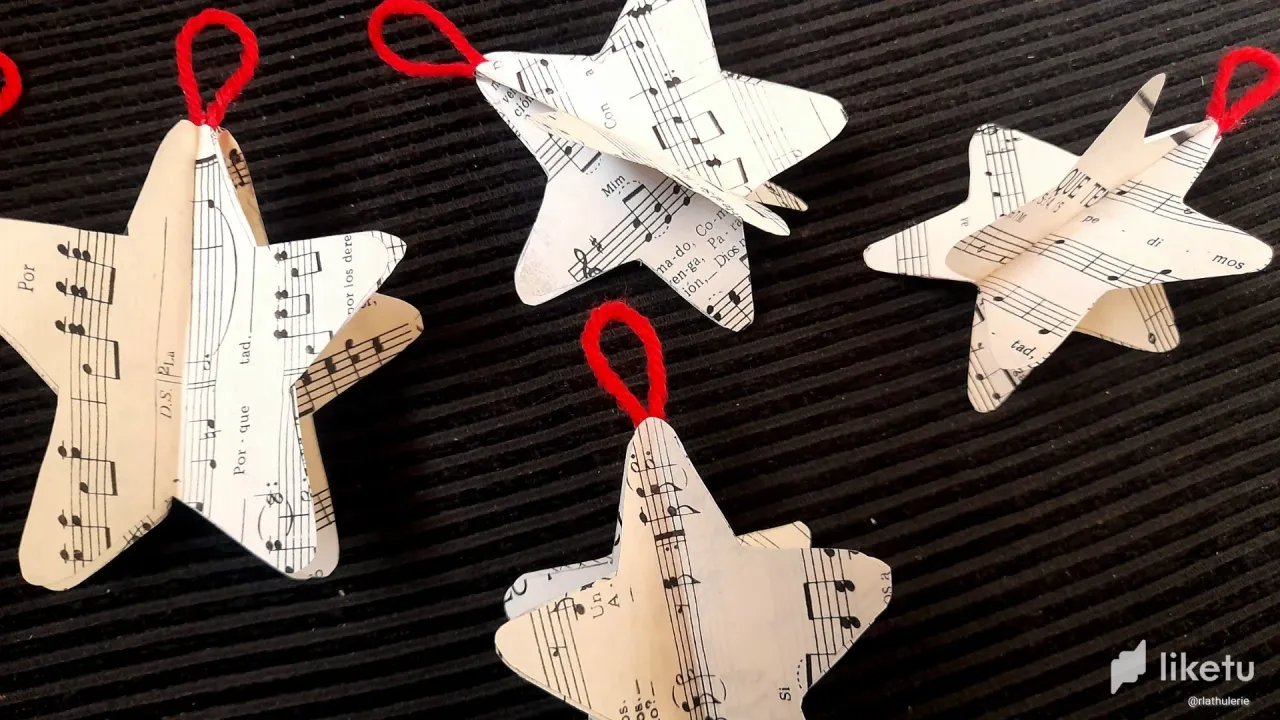
🎄Para armar una estrella 3D, vamos a necesitar 4 moldes de estrellas recortadas en el material seleccionado y dobladas a la mitad.
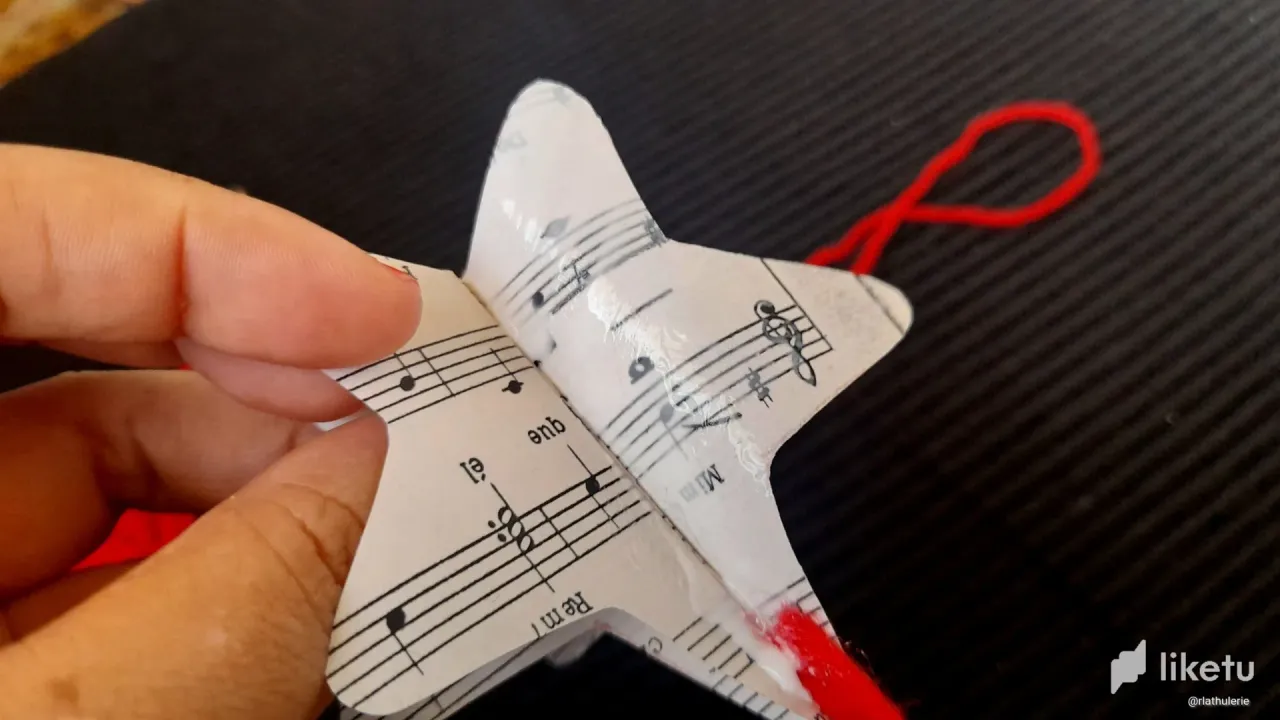
🎄Continuamos uniendo dos piezas de estrellas por uno de sus lados con pega blanca.
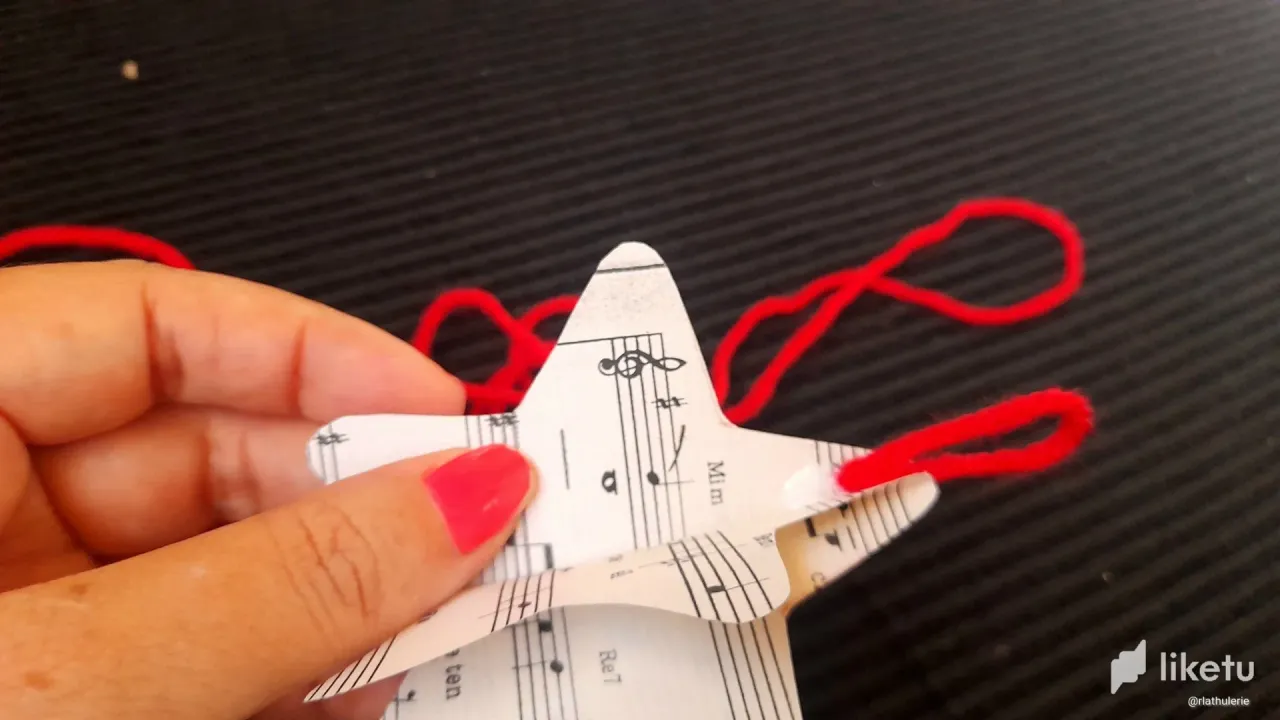
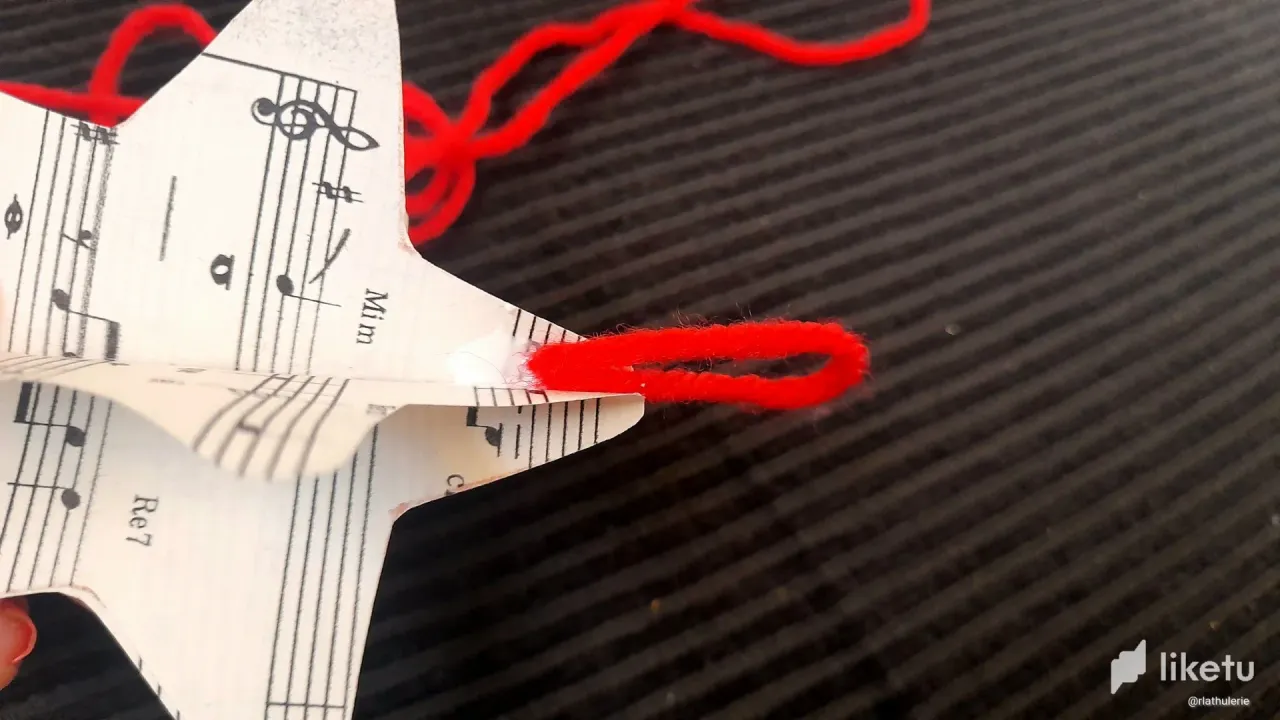
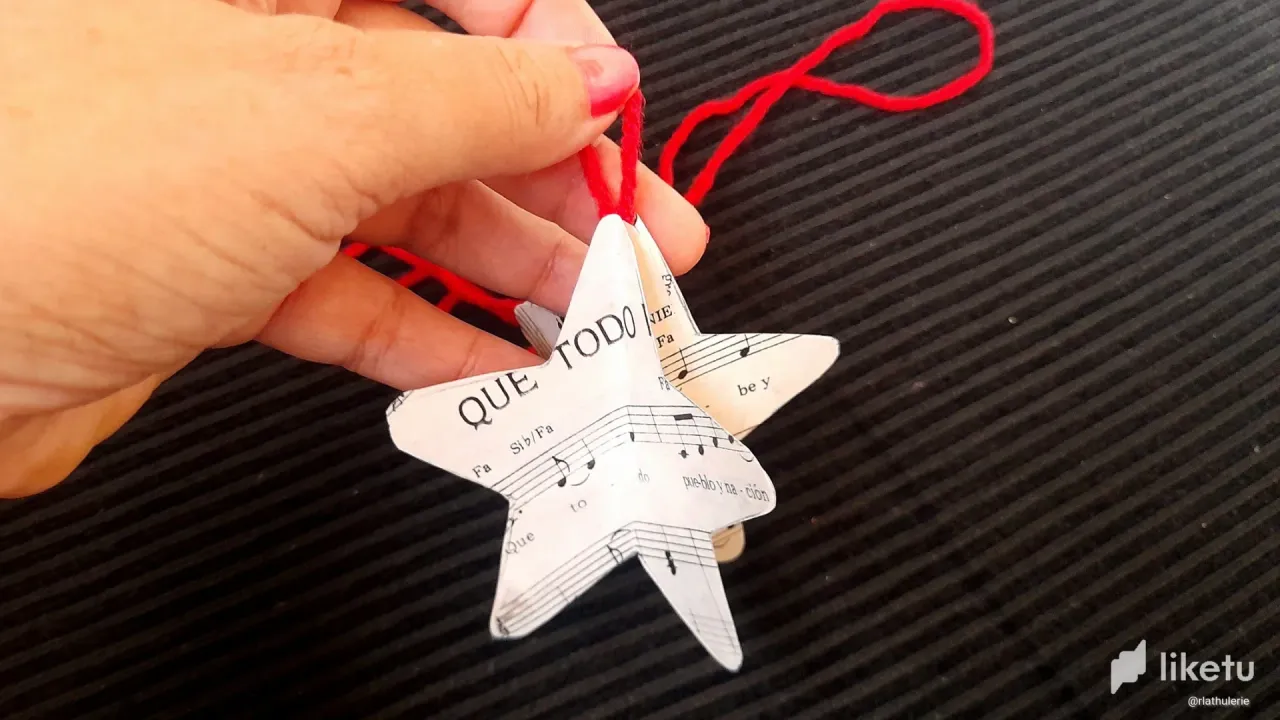
Listas las dos piezas de las estrellas, cortaremos un pedacito de estambre, con el que haremos la lazada para sujetar las estrellas al cordón de nuestra guirnalda.
Esta pieza de estambre la pegaremos en una de nuestras mitades de la estrella, en la parte superior, para finalmente pegar la otra mitad sobre ella.
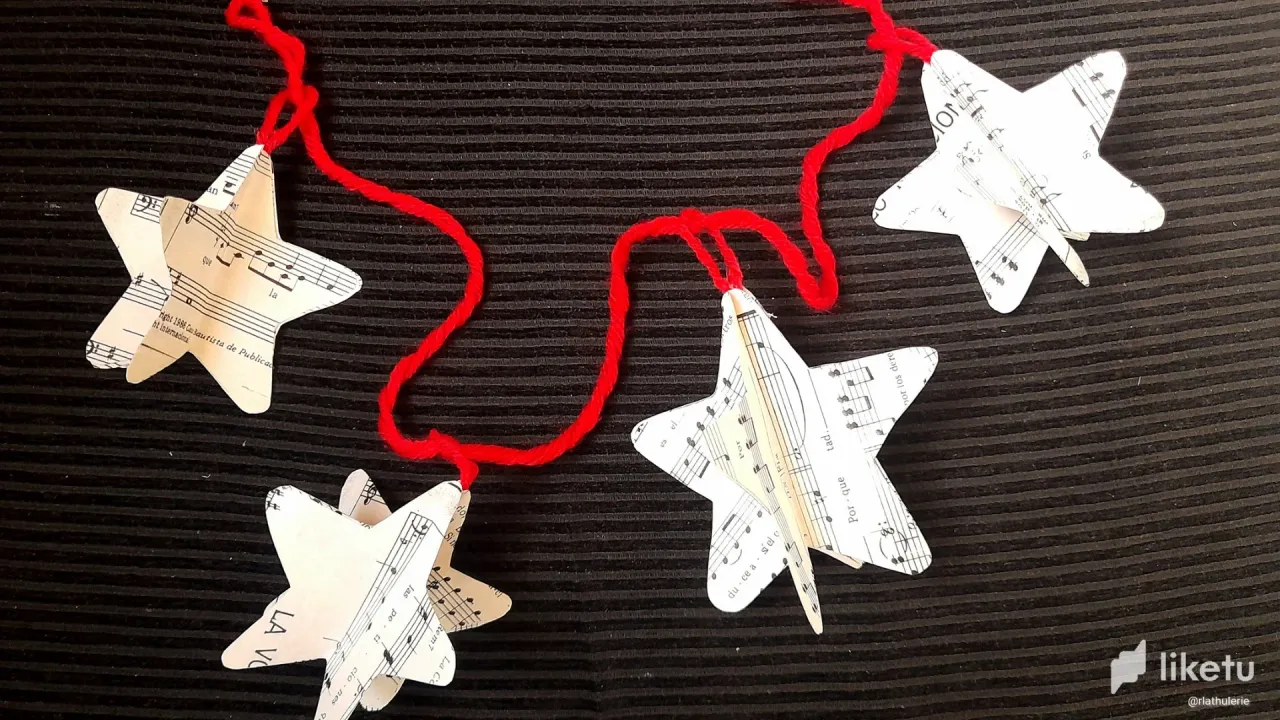
🎄Listo este paso procedemos a preparar el cordón de nuestra guirnalda, que no es más que estambre entorchado, al que le hice algunos nudos para saber donde fijaría casa estrella, además en cada extremo del cordón hice una pequeña lazada que nos va a servir para sujetar nuestra guirnalda.
🎄Y ahora que ya tenemos listas todas las piezas, vamos a armar la guirnalda. En mi caso, yo fijé las estrellas con hilo y aguja, pero con un punto de silicon caliente pueden hacer fácilmente este trabajo.
🎄Una vez que fijemos todas nuestras estrellas al cordón, la guirnalda está lista para ser usada, y como pueden ver, es un detalle súper sencillo, pero que no deja de ser hermoso.
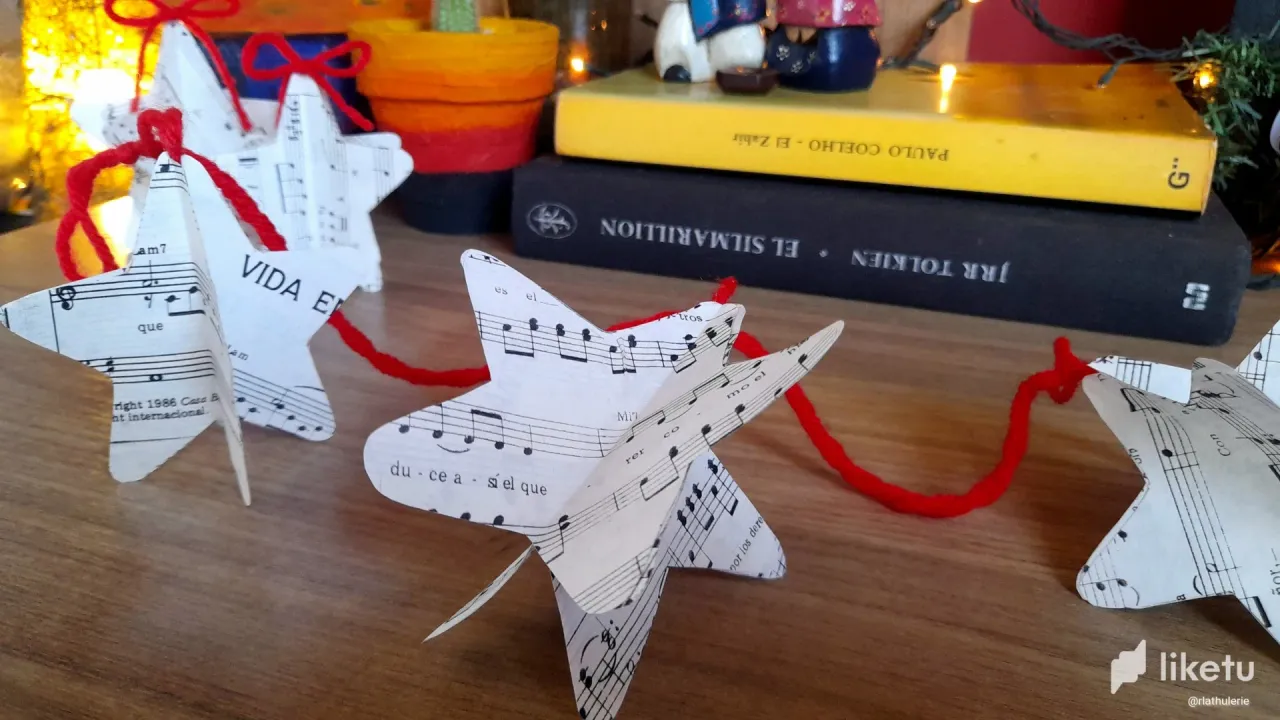
Como tip adicional, las estrellas, una vez que tengan la lazada, pueden utilizarlas para decorar el árbol de navidad. Yo lo hice y quedaron bellísimas, así que tengo estrellas musicales en mis repisas en dos modelos y en mi árbol de navidad.
Espero que puedan aprovechar esta genial idea y realizar algunas decoraciones por su cuenta para decorar su hogar sin tener que gastar.

Garlands are one of the Christmas decorations that I like the most, in fact at home, I have 4 that I use for the Christmas tree, and they have been with us for 14 years now. One is Santa's beanie and another one is red and white pompoms.
This year, as I told you in previous posts, I didn't want to use the same decorations as always, so I got to work to make some new ones, and among those are the musical stars
I liked them so much that I wanted to make some garlands with them.
The truth is that they are super simple, and if you look for the link I left above you can see how easy they are to make, however, here are the materials, and then let's go to the step by step.
MATERIALS
Old sheet music or any paper of your choice.
Glue
Pencil
Scissors
Yarn
STEP BY STEP
🎄To make a 3D star, we will need 4 star molds cut out of the selected material and folded in half.
🎄We continue by joining two pieces of stars on one side with white glue.
Once the two pieces of stars are ready, we will cut a small piece of yarn, with which we will make the loop to attach the stars to the cord of our garland.
We will glue this piece of yarn to one of our star halves, at the top, to finally glue the other half on top of it.
🎄Once this step is done, we proceed to prepare the cord of our garland, which is nothing more than twisted yarn, to which I made some knots to know where I would fix the star house.
At each end of the cord I made a small loop that will serve to hold our garland.
🎄And now that we have all the pieces ready, let's assemble the garland. In my case, I attached the stars with thread and needle, but with a hot silicon stitch you can easily do this job.
🎄Once we attach all our stars to the string, the garland is ready to be used, and as you can see, it is a super simple detail, but it is still beautiful.
As an additional tip, the stars, once you have the loop, you can use them to decorate the Christmas tree. I did it and they turned out beautifully, so I have musical stars on my shelves in two different models and on my Christmas tree.
I hope you can take advantage of this great idea and make some decorations on your own to decorate your home without having to spend.