Un saludo muy cordial queridos artesanos, espero estén siendo muy creativos y se encuentren súper bien en esta linda y cálida noche... Siento mucha alegría hoy poder acompañarlos y traerles un bonito tutorial de arte textil.
A very cordial greeting dear artisans, I hope you are being very creative and are feeling very well on this beautiful and warm night... I feel very happy today to be able to accompany you and bring you a beautiful textile art tutorial .
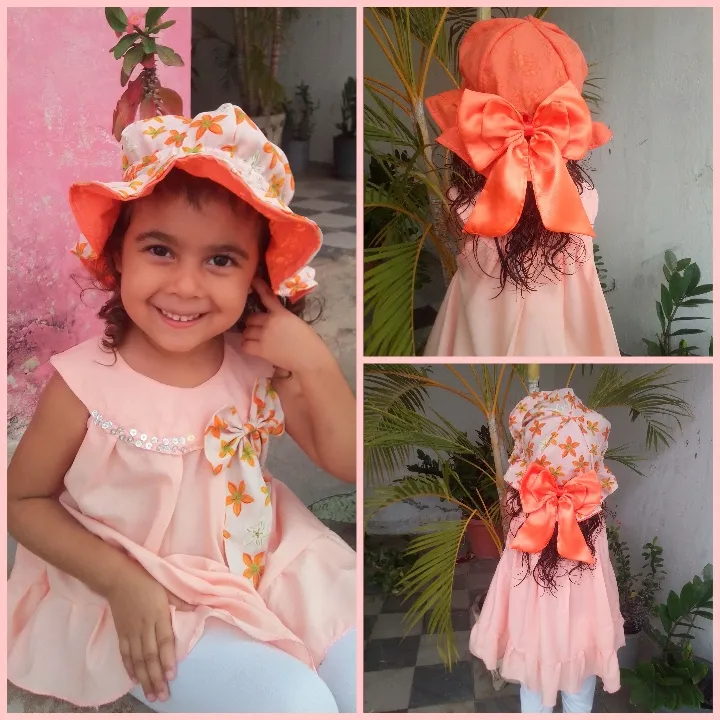
Siempre había querido hacer un gorro reversible, es decir, que puede usarse de ambos lados, me llamaba mucho la atención su diseño y creación, pero veía el proceso, me confundía y decía esto es mucho para mi 😅!! Pero me pasa que cuando más esquivo algo, me aparece por todos lados, podía ver este gorrito en redes sociales, niñas que pasaban por mi casa, en tiendas y pare de contar (risas), definitivamente tenia que hacerlo.. Y como estos últimos días me he propuesto a crear cosas que me llenen de conocimiento y experiencias, este accesorio es una excelente opción...Quise agregarle con un lazo grande de seda, un toque muy moderno al estilo coquette, una moda que me parece super encantadora. Si te gusta y quieres como yo practicar su creación, te invito a qué te quedes hasta el final.
I had always wanted to make a reversible hat, that is, one that can be used on both sides, its design and creation caught my attention, but I saw the process, I got confused and said this is too much for me 😅!! But it happens to me that the more I avoid something, it appears everywhere, I could see this little hat on social networks, girls who passed by my house, in stores and stop counting (laughs), I definitely had to do it... And like the latter days I have decided to create things that fill me with knowledge and experiences, this accessory is an excellent option...I wanted to add a large silk bow, a very modern touch to the coquette style, a fashion that I find super charming. If you like it and want to practice its creation like me, I invite you to stay until the end.
Materiales que necesitas:
- Tela estampada.
- Tela satén.
- Elástica fina.
- Hilo y aguja.
- Gancho sujetador.
- Máquina de coser.
- Cinta fina.
- Tijeras.
- Printed cloth.
- Satin fabric.
- Fine elastic.
- Thread and needle.
- Fastener hook.
- Sewing machine.
- Thin tape.
- Scissors.
(PROCEDIMIENTO)
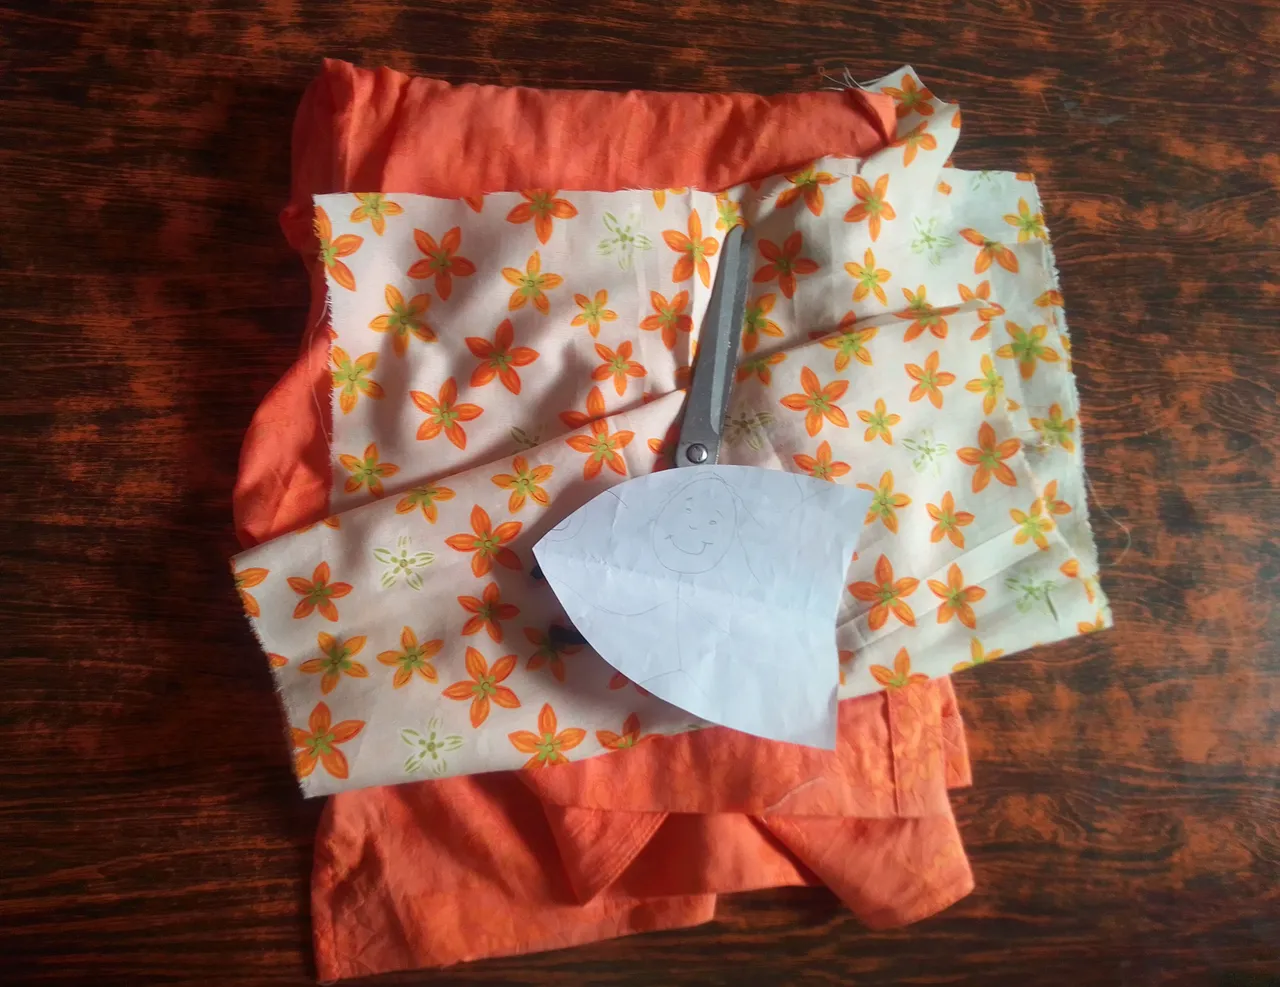
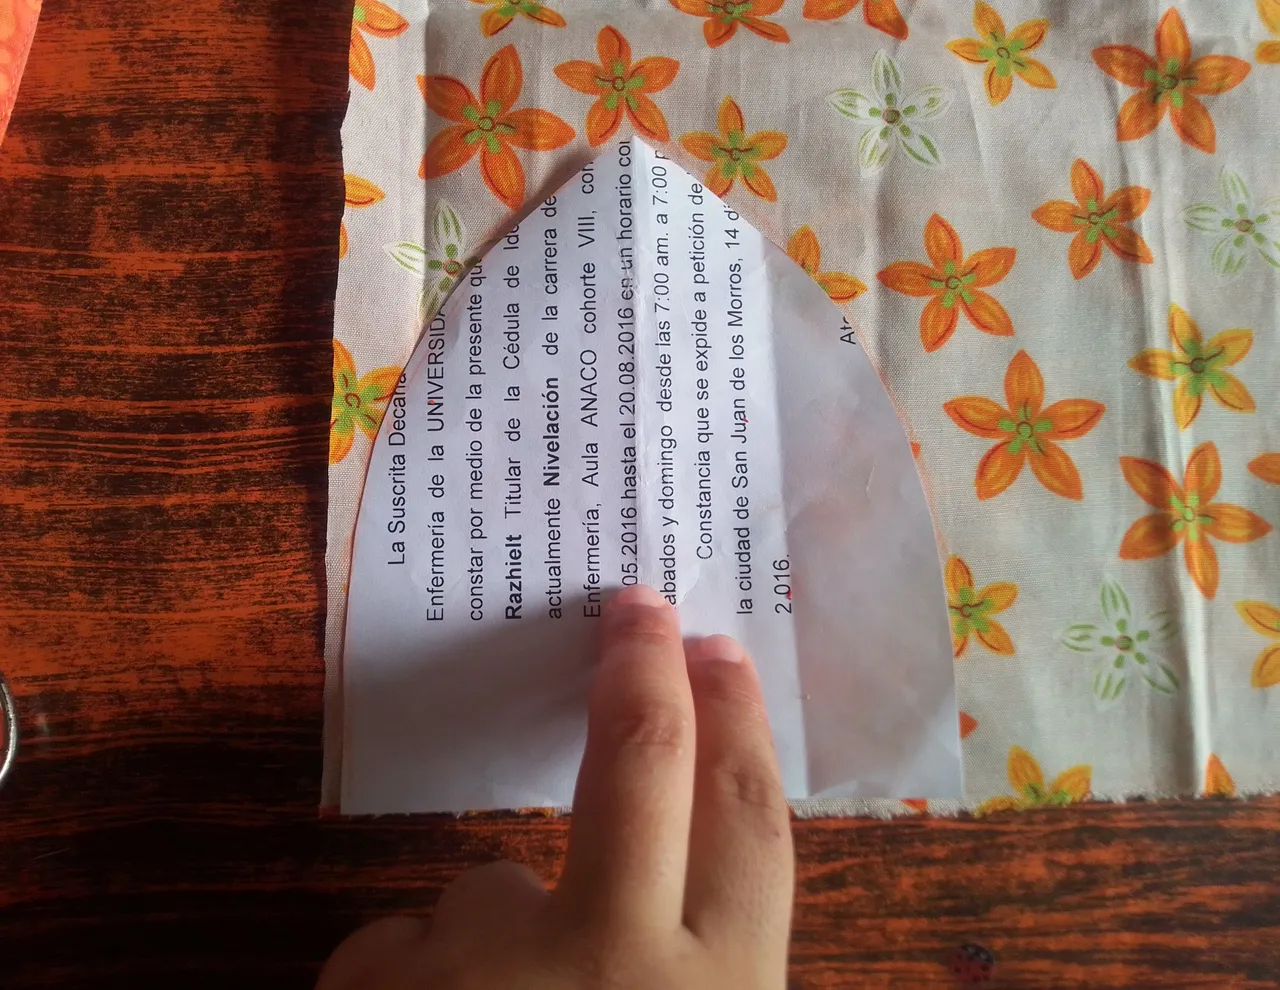
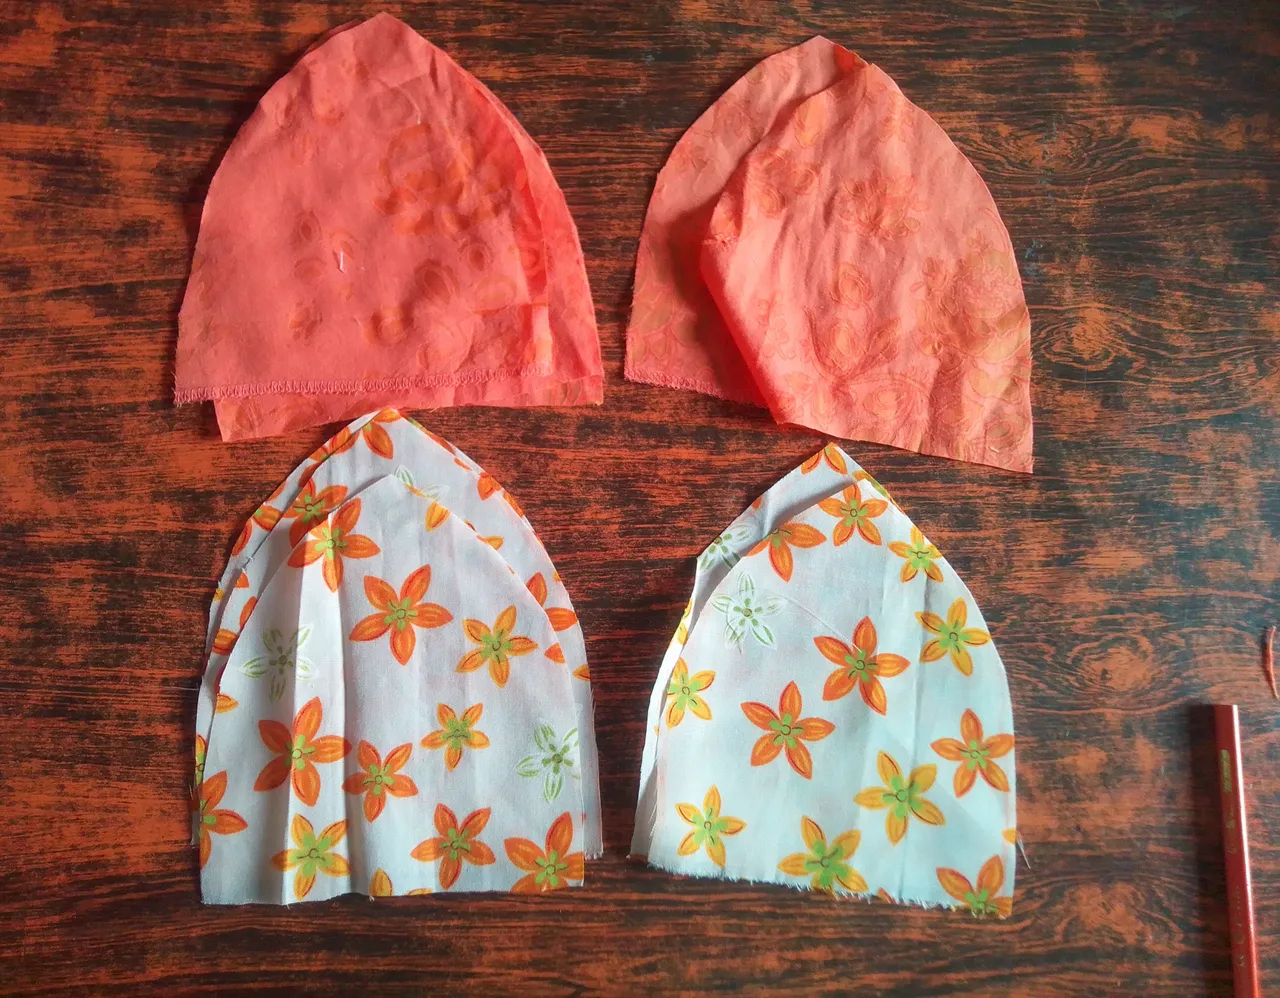
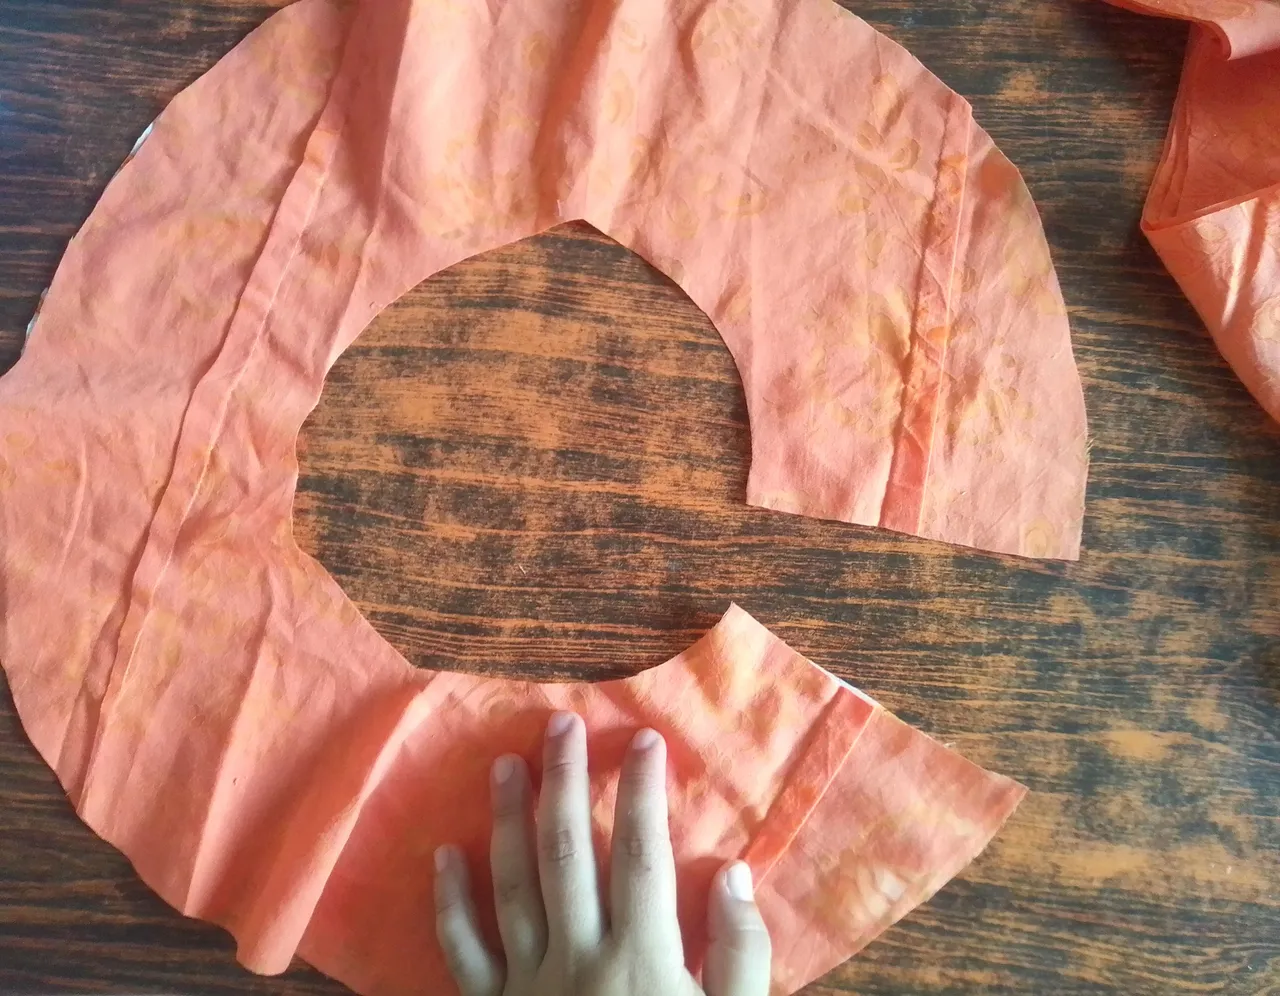
Paso 01
Mi patrón lo obtuve doblando una hoja de papel a la mitad y dibujando la mitad de una forma de un pétalo con punta, procuré que tuvieran las medidas de ancho del tamano de la cabeza de mi niña (50cm). Con este patrón sobre la tela obtuve 10 piezas de cada color de la tela. Corte dos cuadrados, y realicé dos dobles para hacer dos piezas circulares del mismo tamaño.El corte del circulo del centro de estas partes tenían 20 cm más que la medida. Luego hice corte para separar un extremo.
Step 01
I obtained my pattern by folding a sheet of paper in half and drawing half of a pointed petal shape, I made sure they had the width measurements of the size of my daughter's head (50cm). With this pattern on the fabric I got 10 pieces of each color of the fabric. I cut two squares, and made two doubles to make two circular pieces of the same size. The circle cut in the center of these parts was 20 cm longer than the measurement. Then I made a cut to separate one end.
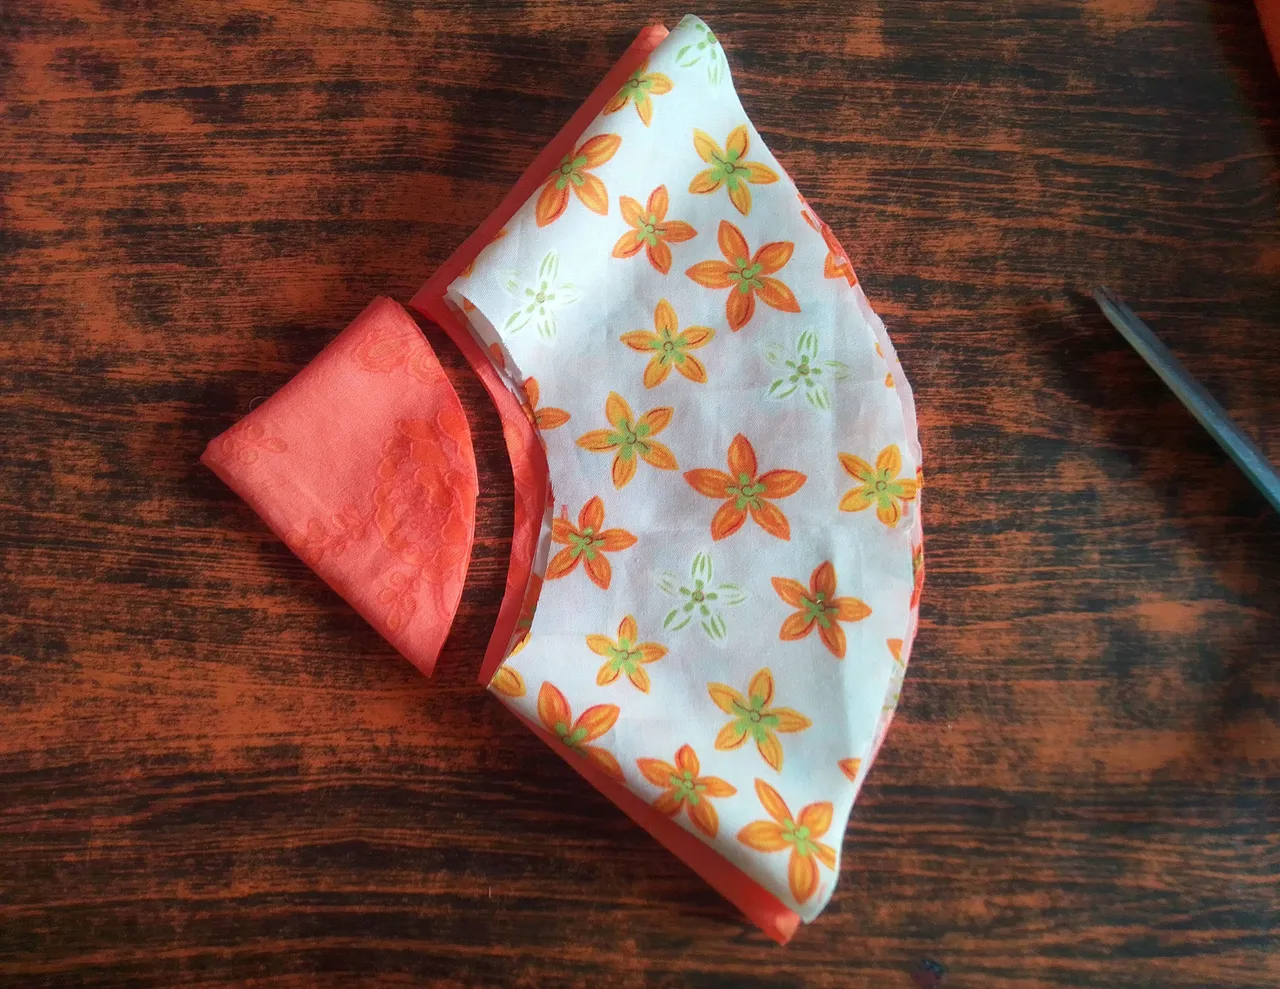
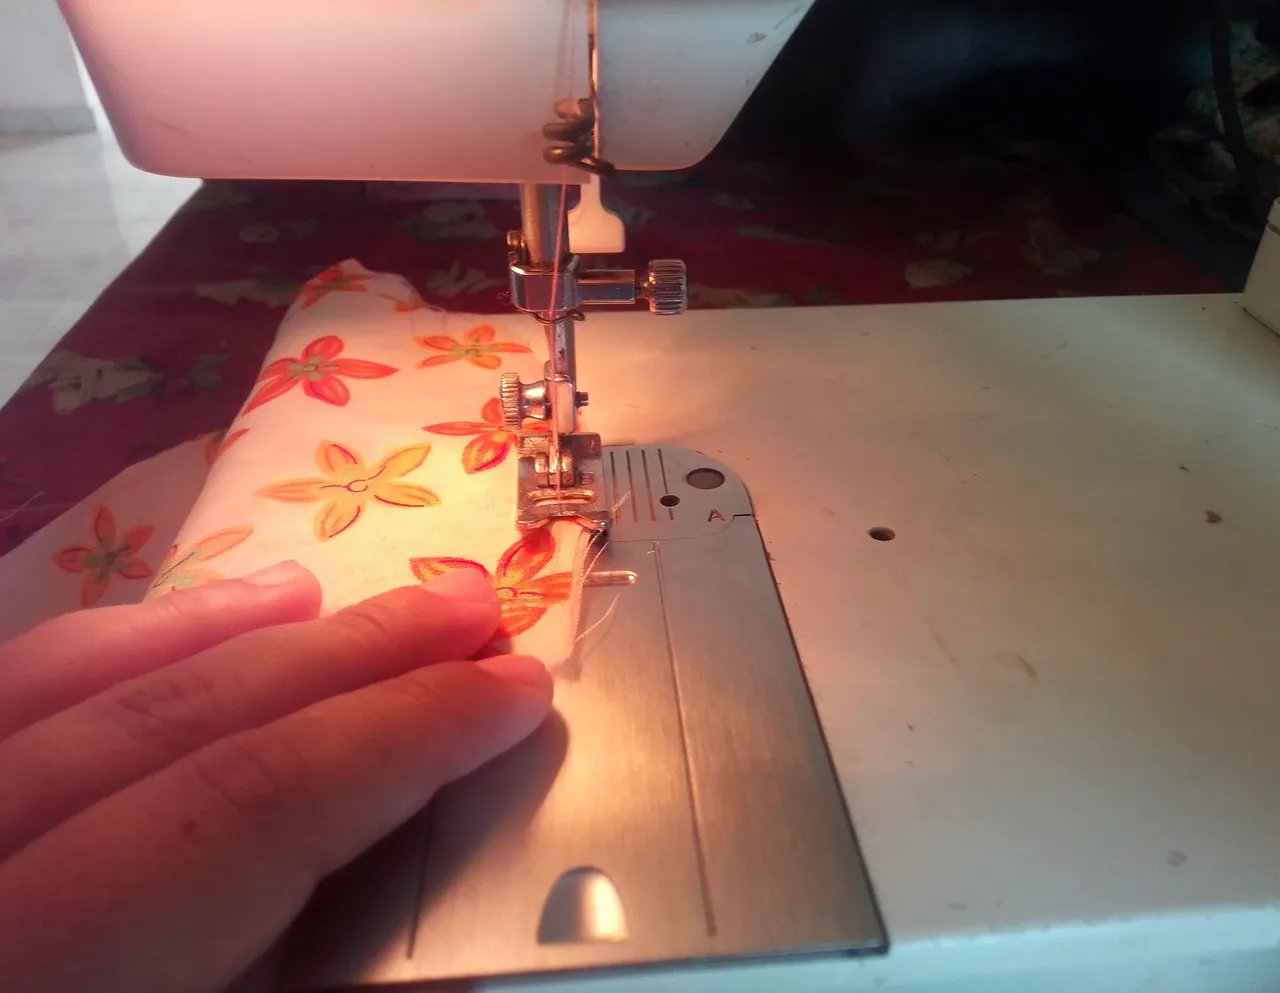
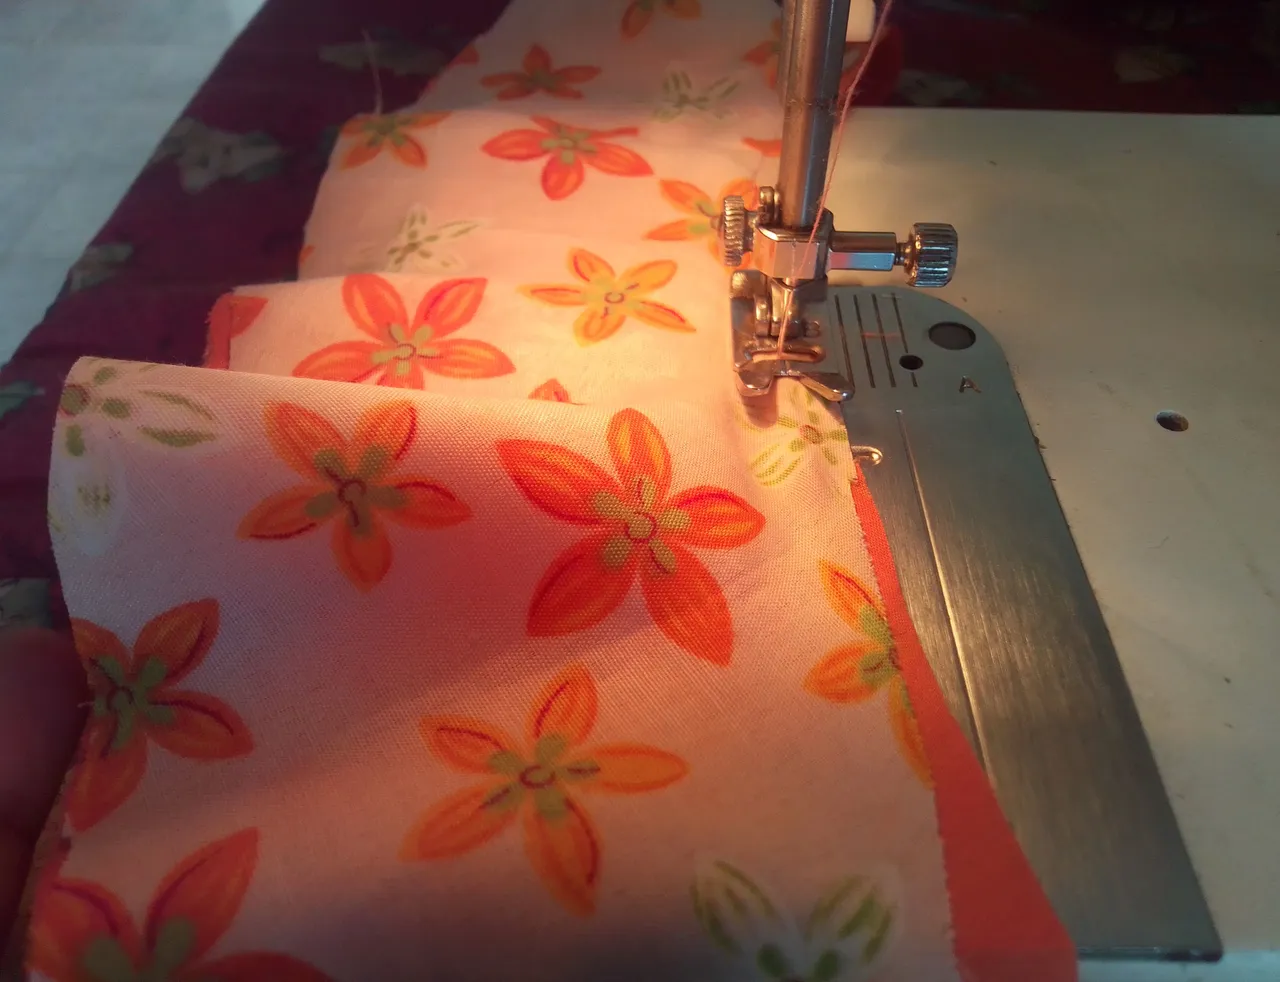
Paso 02
Con mi máquina en costura recta pase a coser pieza por pieza semi triangular de ambas telas manteniendo su forma.
Step 02
With my machine in straight sewing, I started sewing semi-triangular piece by piece of both fabrics, maintaining their shape.
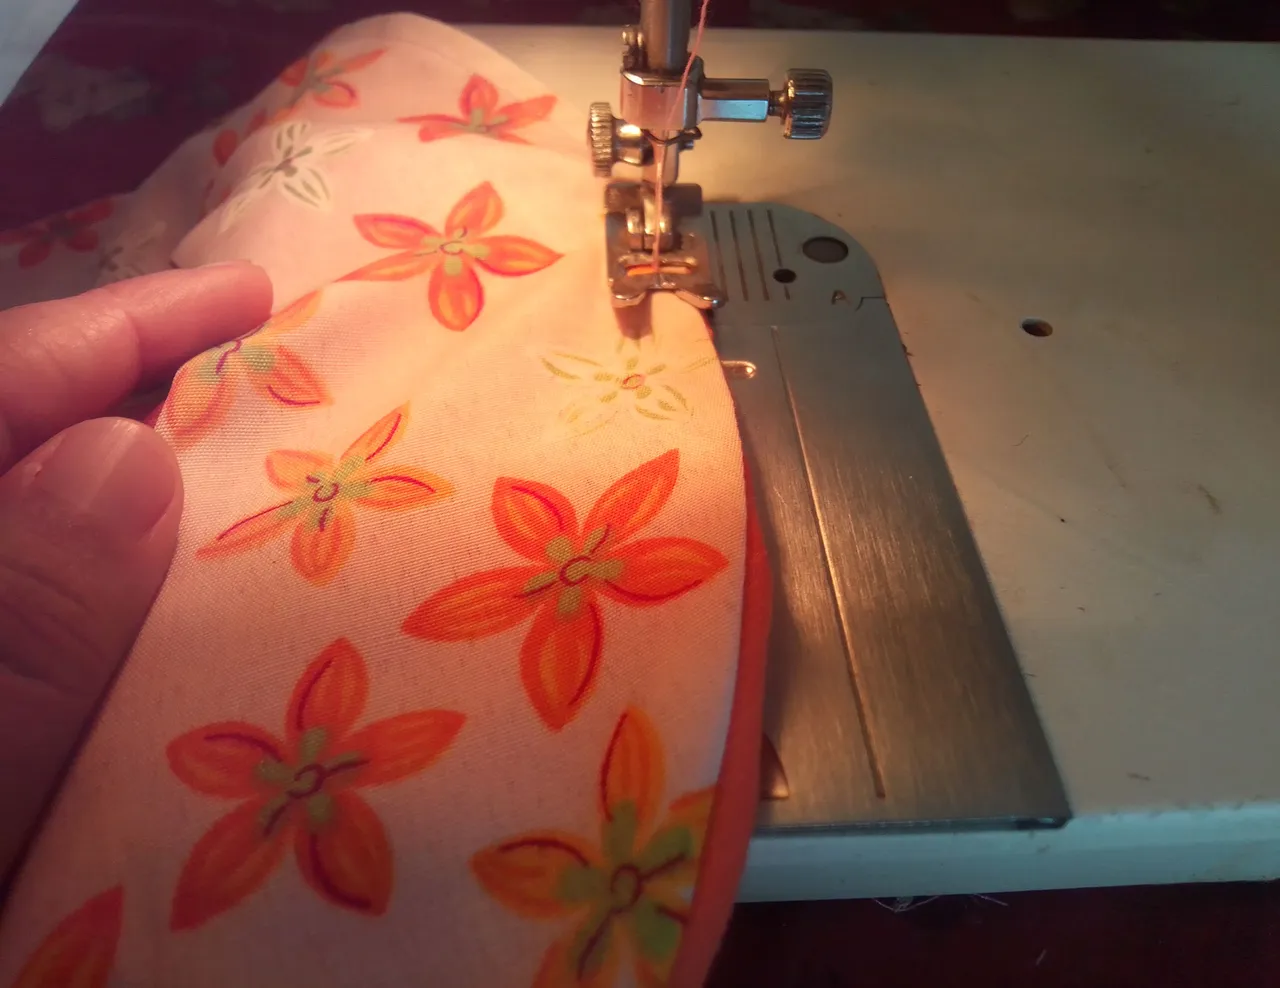
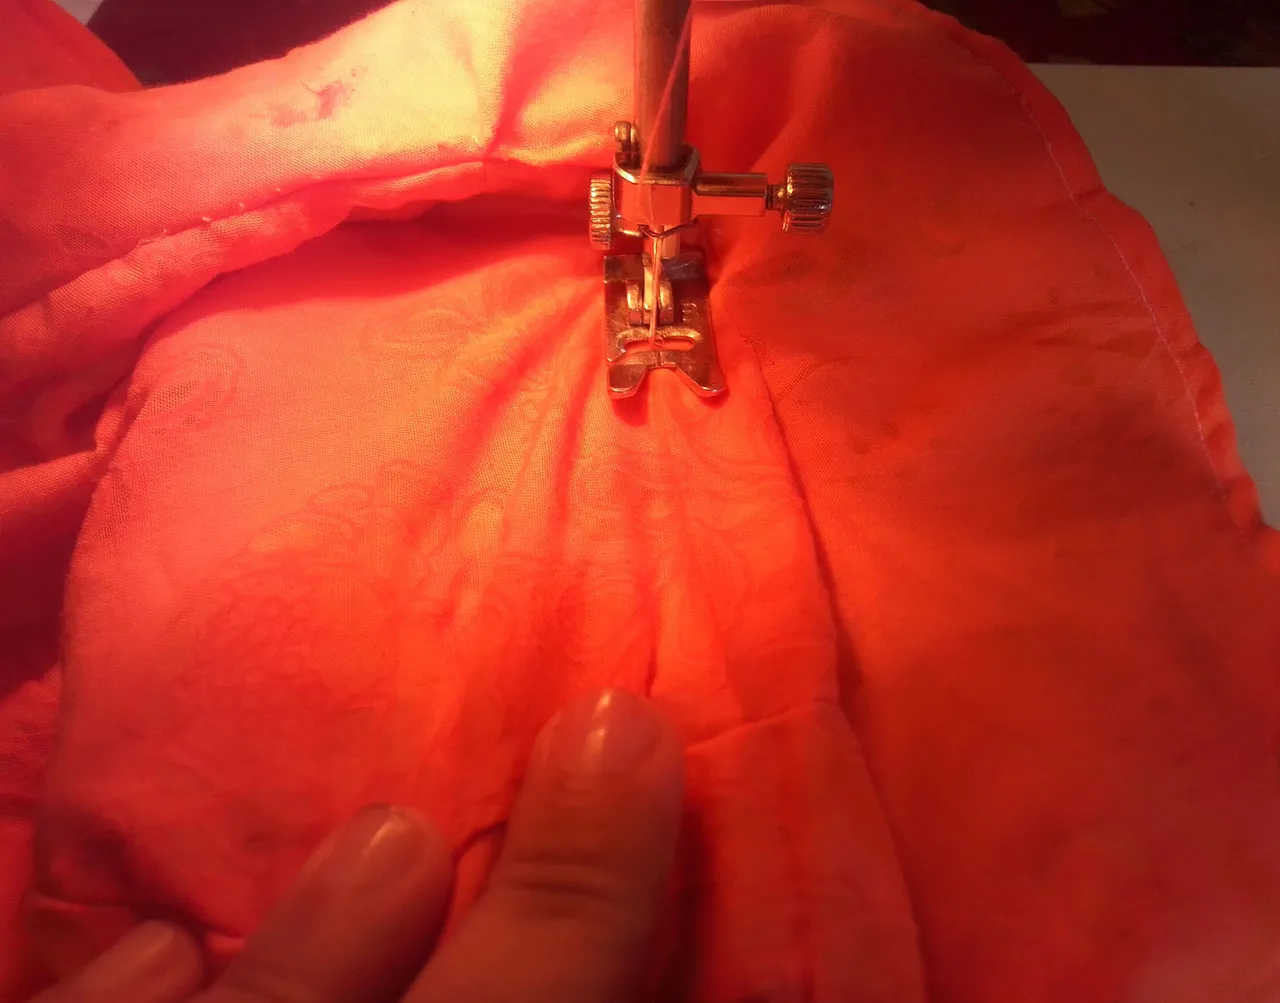
Paso 03
Volteo las piezas circulares y hago costura en toda la orilla del extremo largo, vuelvo a girar hacia su lado derecho y hago pespunte o costura por fuera.
Step 03
I turn the circular pieces over and sew along the entire edge of the long end, turn back to the right side and topstitch or sew on the outside.
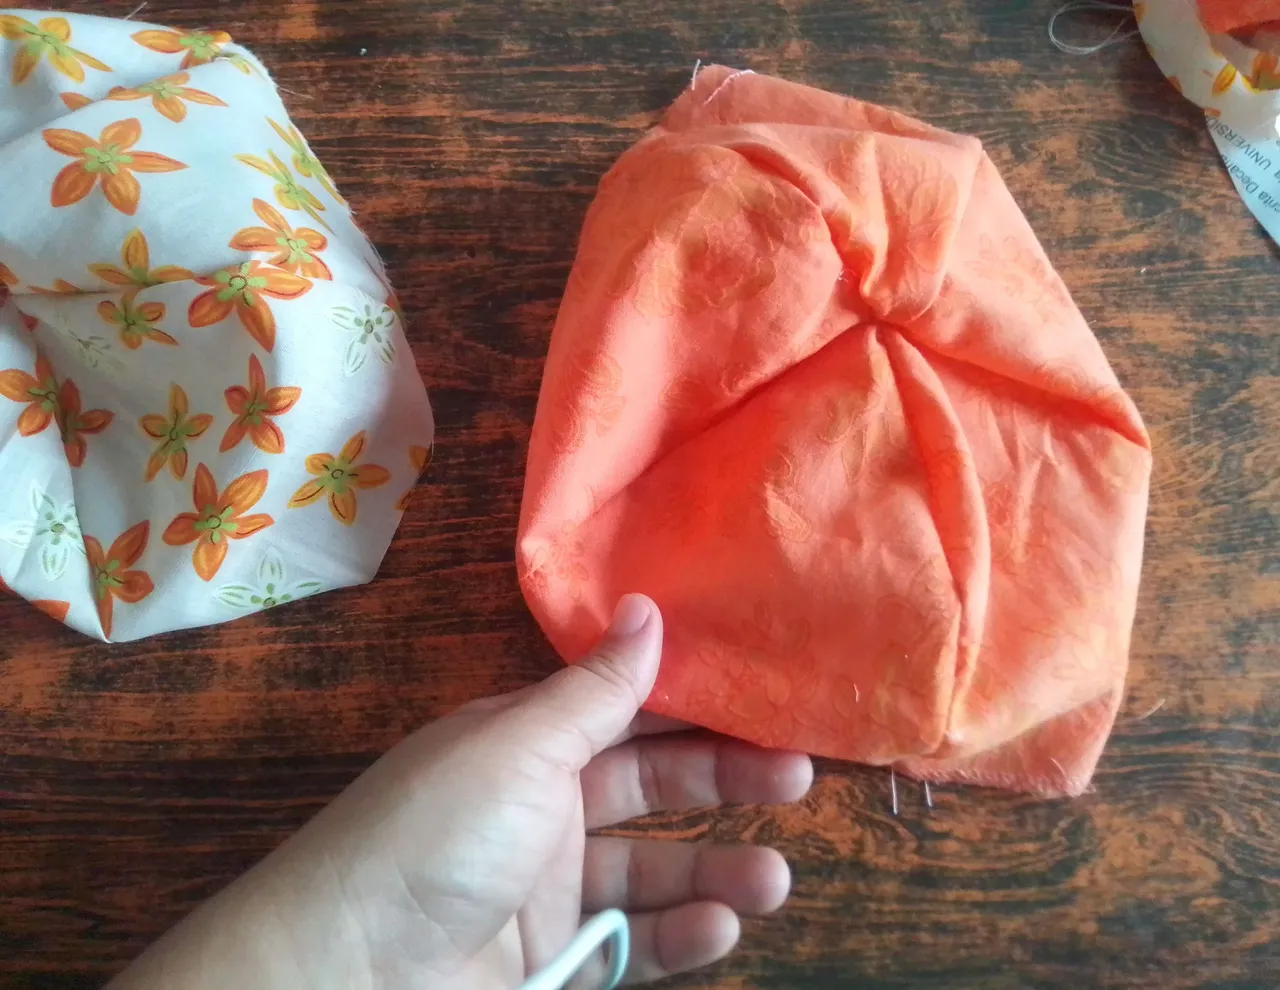
Paso 04
Acá voy a ubicarme en lado contrario de las piezas anteriores y de la pieza circular y voy pasar costura en todo el borde para unirlas. Repito el paso con el otro lado del gorro, recuerda todas piezas deben estar al revés.
Step 04
Here I am going to stand on the opposite side of the previous pieces and the circular piece and I am going to sew along the entire edge to join them. I repeat the step with the other side of the hat, remember all pieces must be upside down.

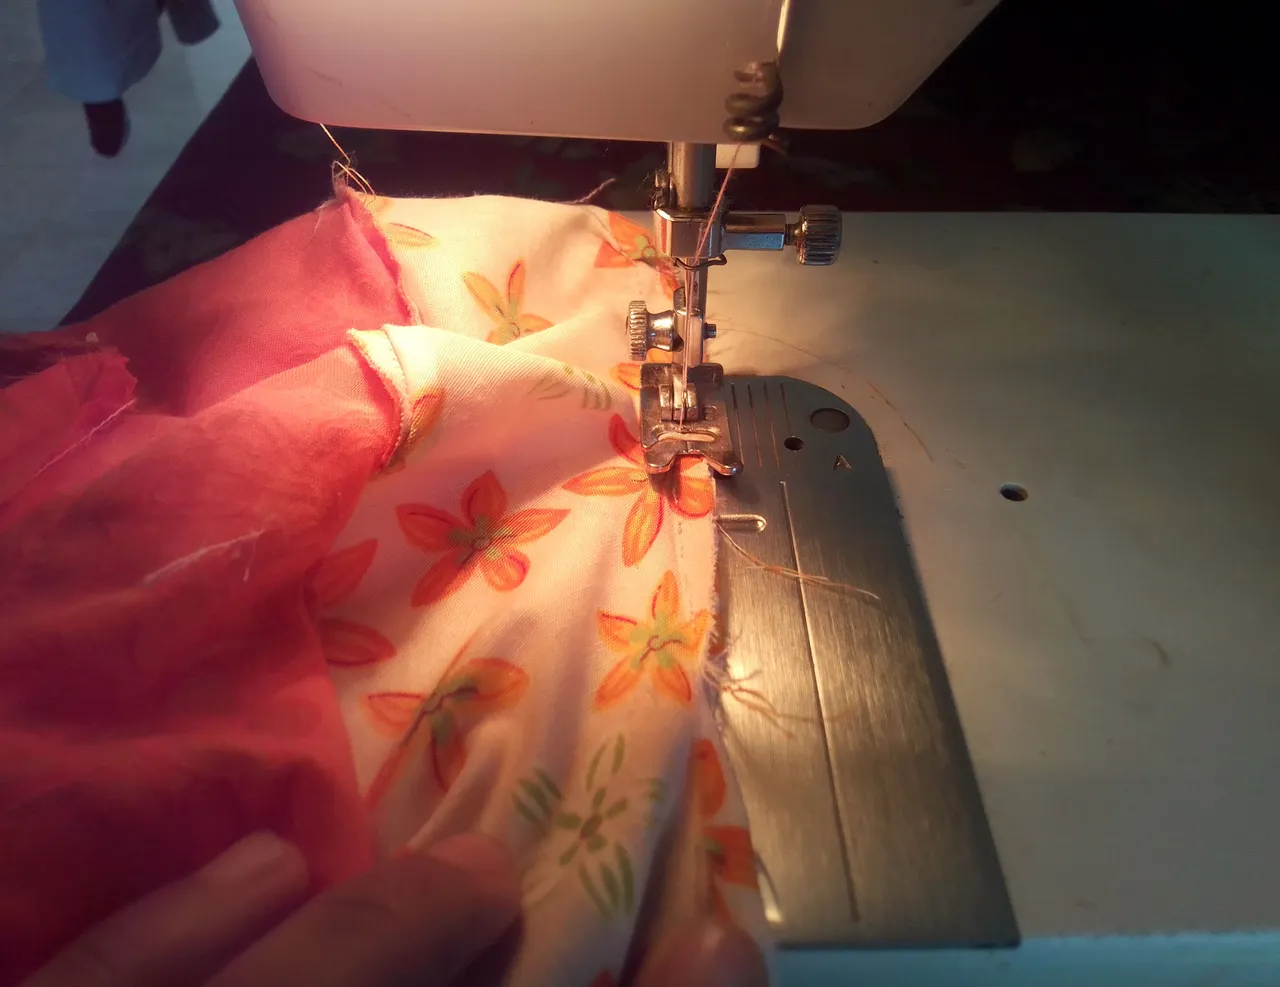
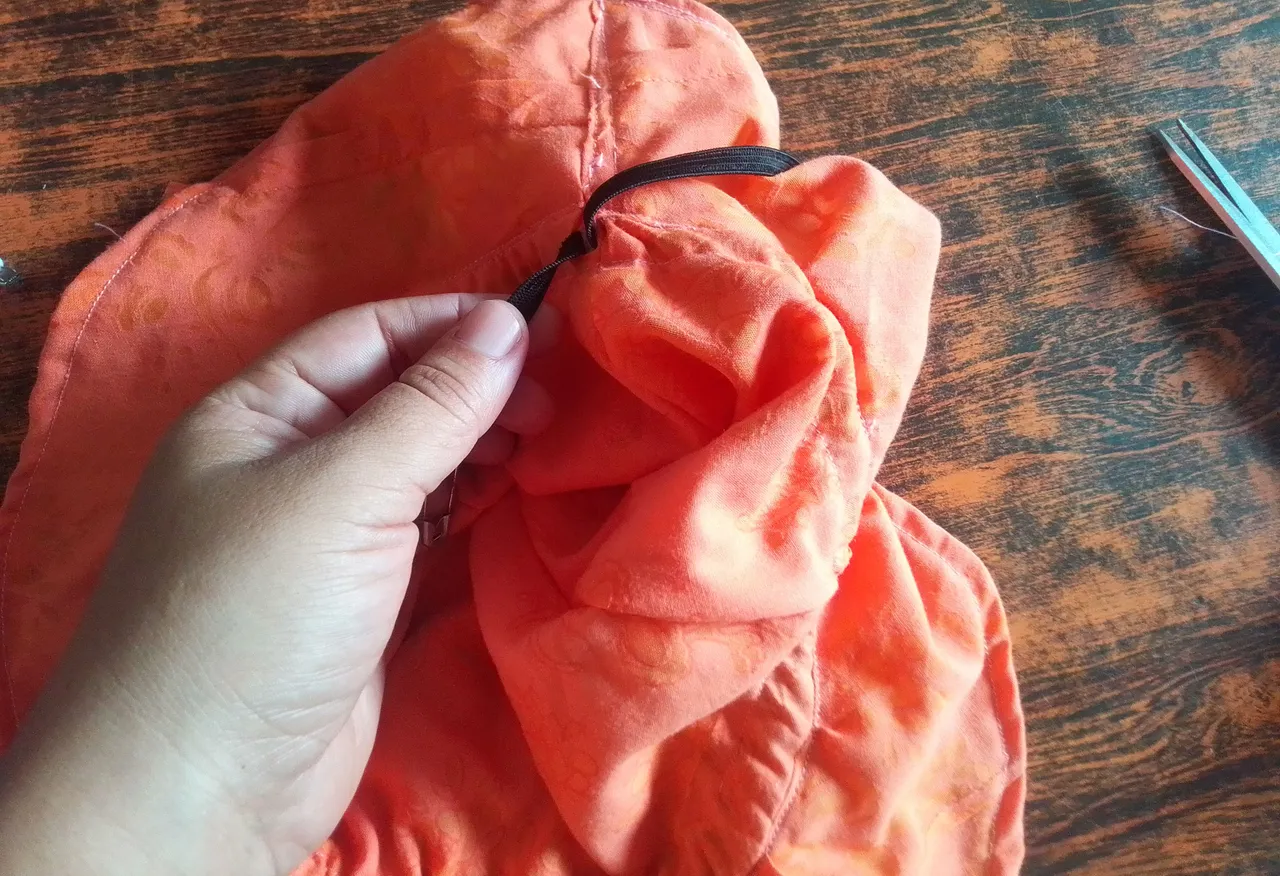
Paso 05
Por el extremo abierto que hicimos en la pieza circular vamos a voltear todo el forro y sellamos con una costura por fuera. Haré doble costura en ambas partes e introducir por un pequeño agujero una elástica para ajustar el gorrito.
Step 05
Through the open end that we made in the circular piece we are going to turn the entire lining over and seal it with a seam on the outside. I will double sew both parts and insert an elastic through a small hole to adjust the hat.
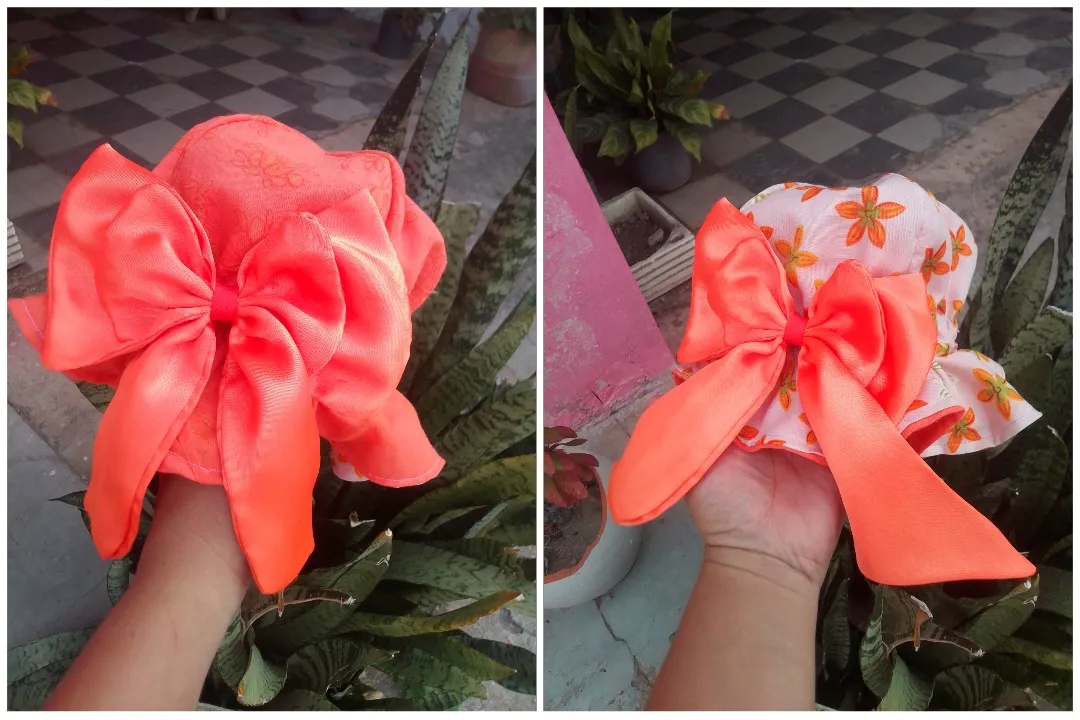
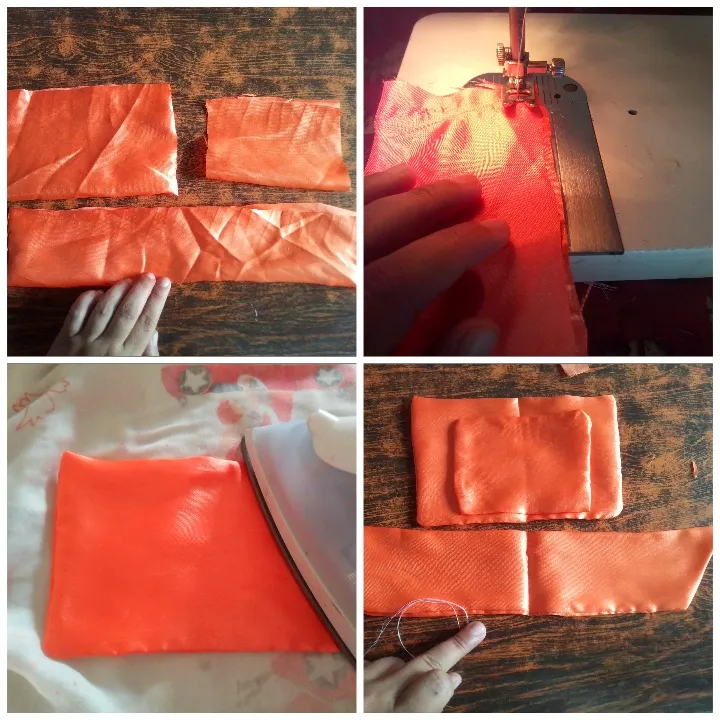
Paso 06
El detalle unido del gorro era algo que no me convencía del todo, así que elaboré un lazo al estilo coquette para cubrirlo. Corte dos rectángulos una mediano y uno pequeño, también una tira gruesa de 30cm de largo. Hice costura , utilicé la plancha para darle forma y marcar el centro.
Step 06
The united detail of the hat was something that didn't convince me at all, so I made a coquette-style bow to cover it. Cut two rectangles, one medium and one small, also a thick strip 30cm long. I did sewing, I used the iron to shape it and mark the center.
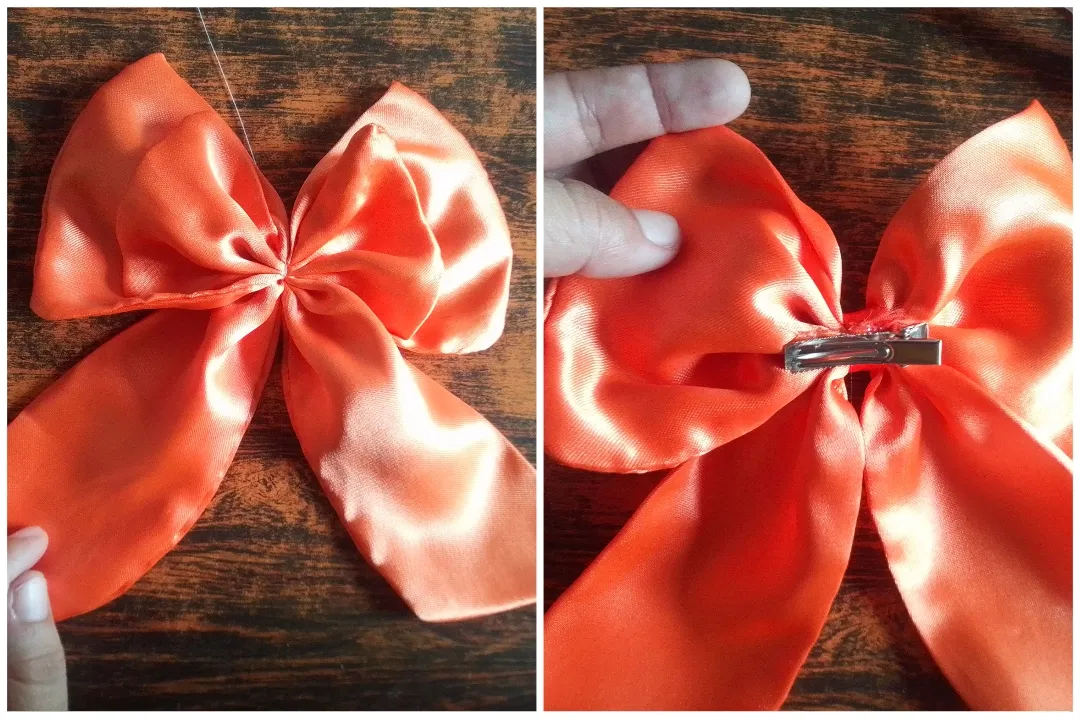
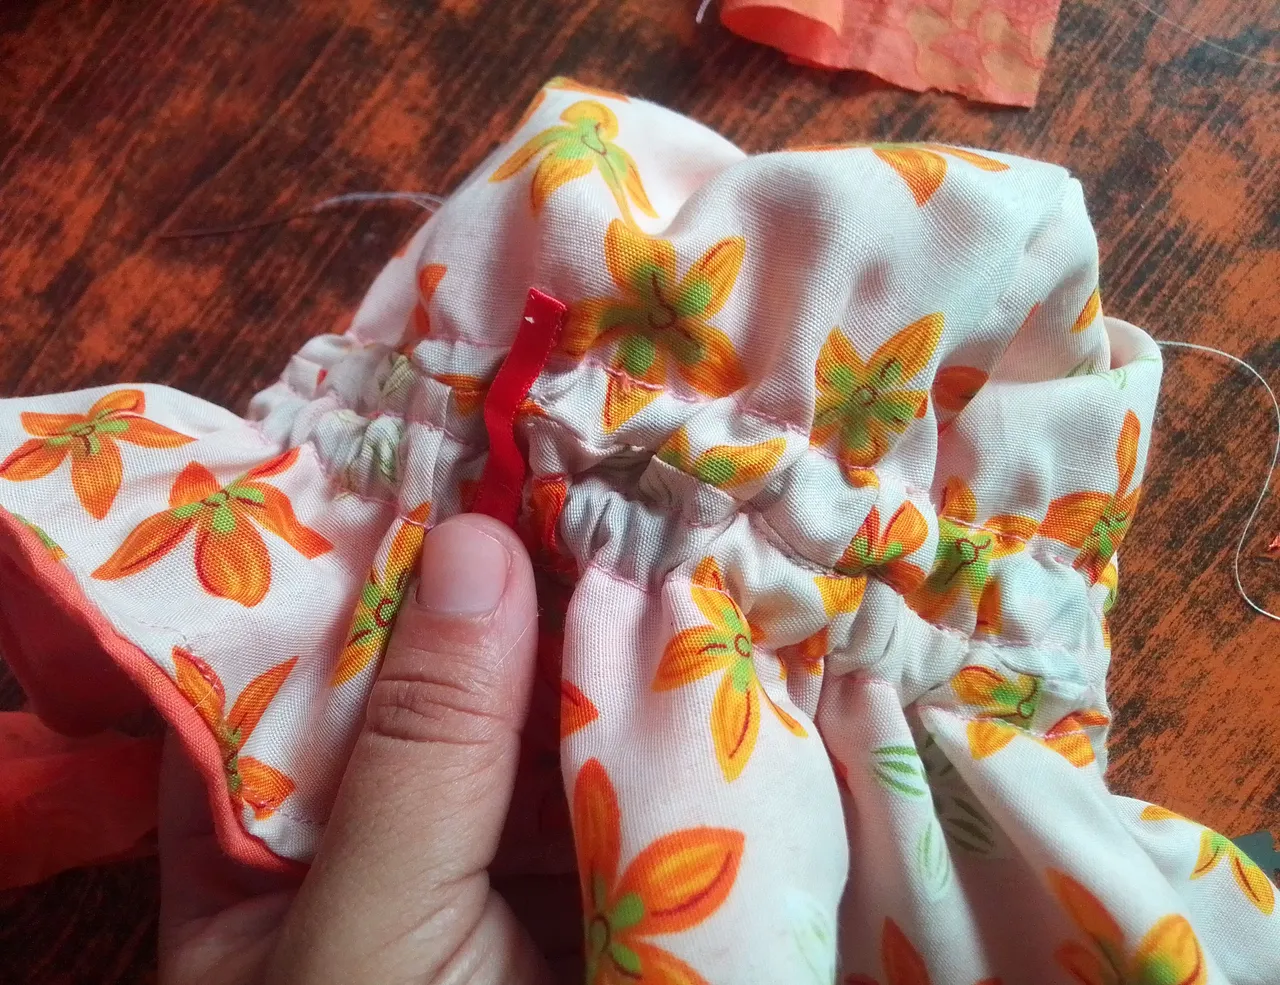
Paso 05
Continue arruchando en centro y cubriendo con una cinta, luego coloque un gancho sujetador en la parte posterior.
Step 05
Continue bunching in the center and covering with ribbon, then attach a clip to the back.
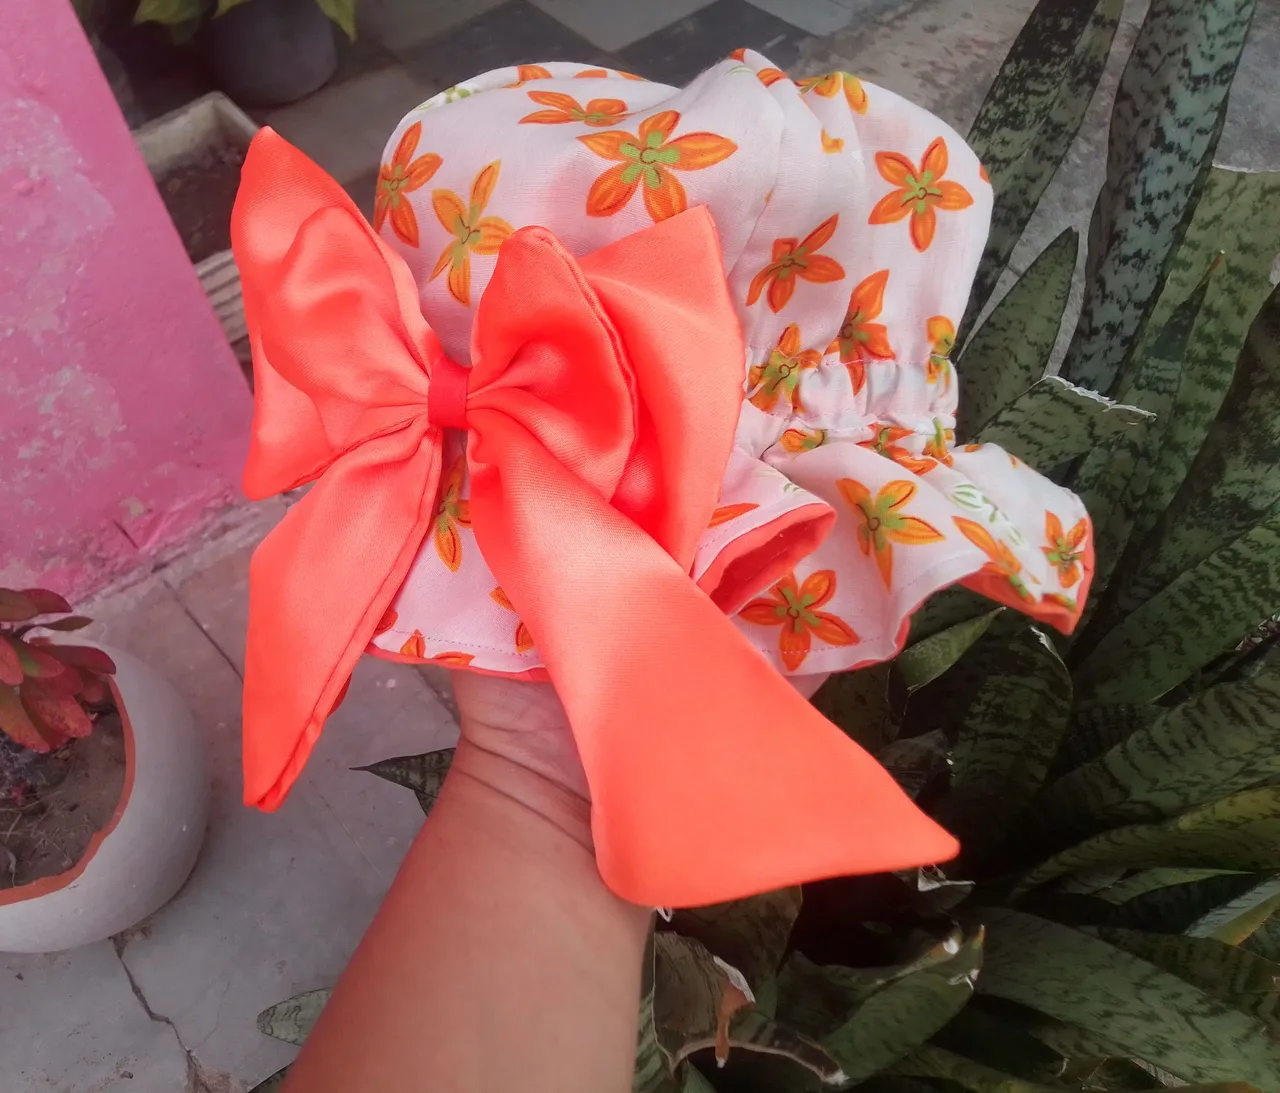
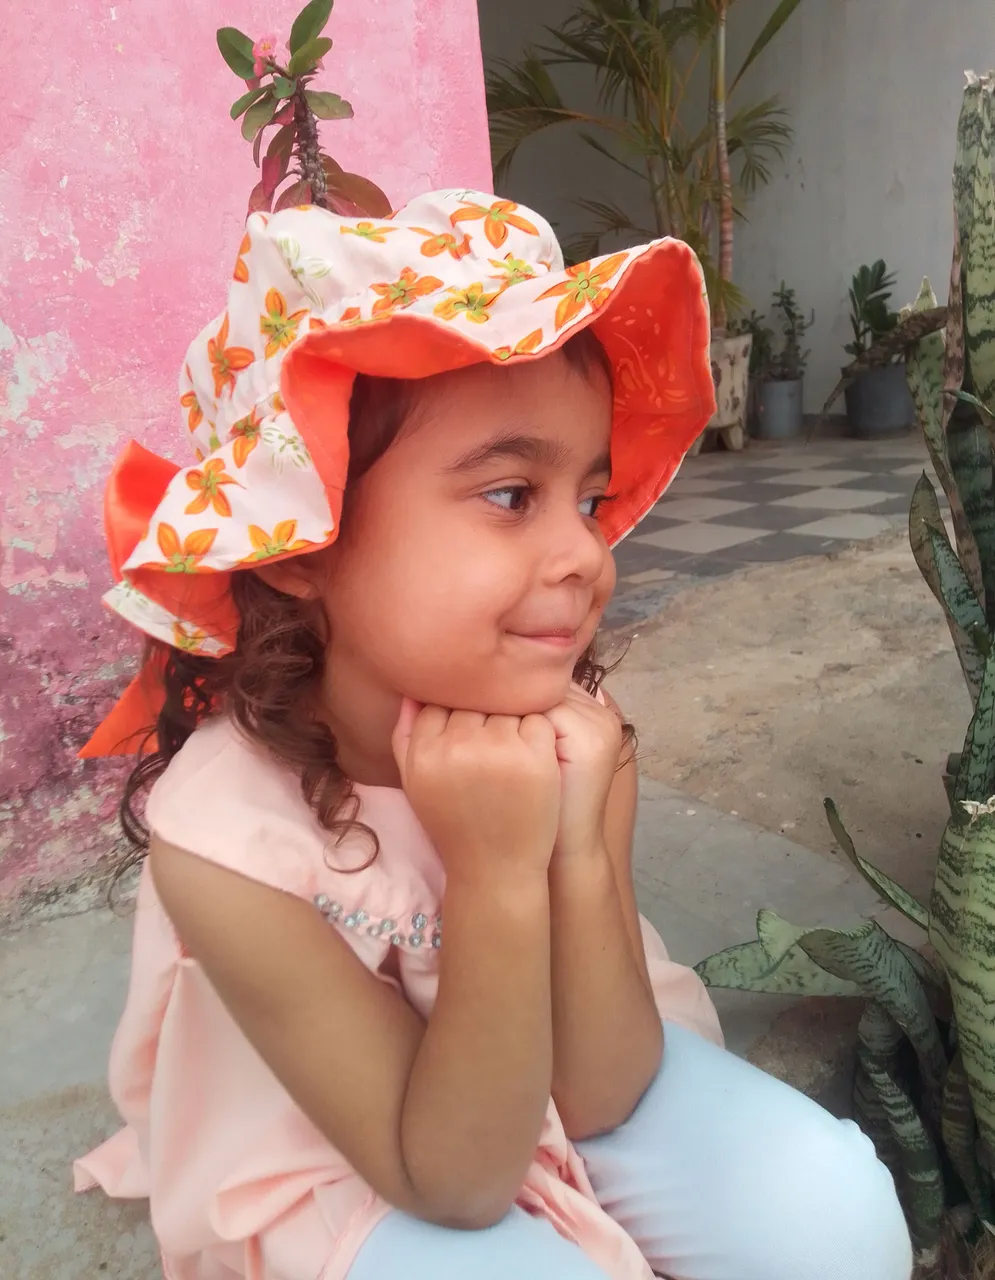
Paso 07
Ahora haré una pequeña trabilla en la zona del empate en ambos lados del gorro y coloco está linda pieza tan bonita que de verdad queda muy original y delicada.
Step 07
Now I will make a small loop in the tie area on both sides of the hat and place this beautiful piece, so pretty that it really looks very original and delicate.
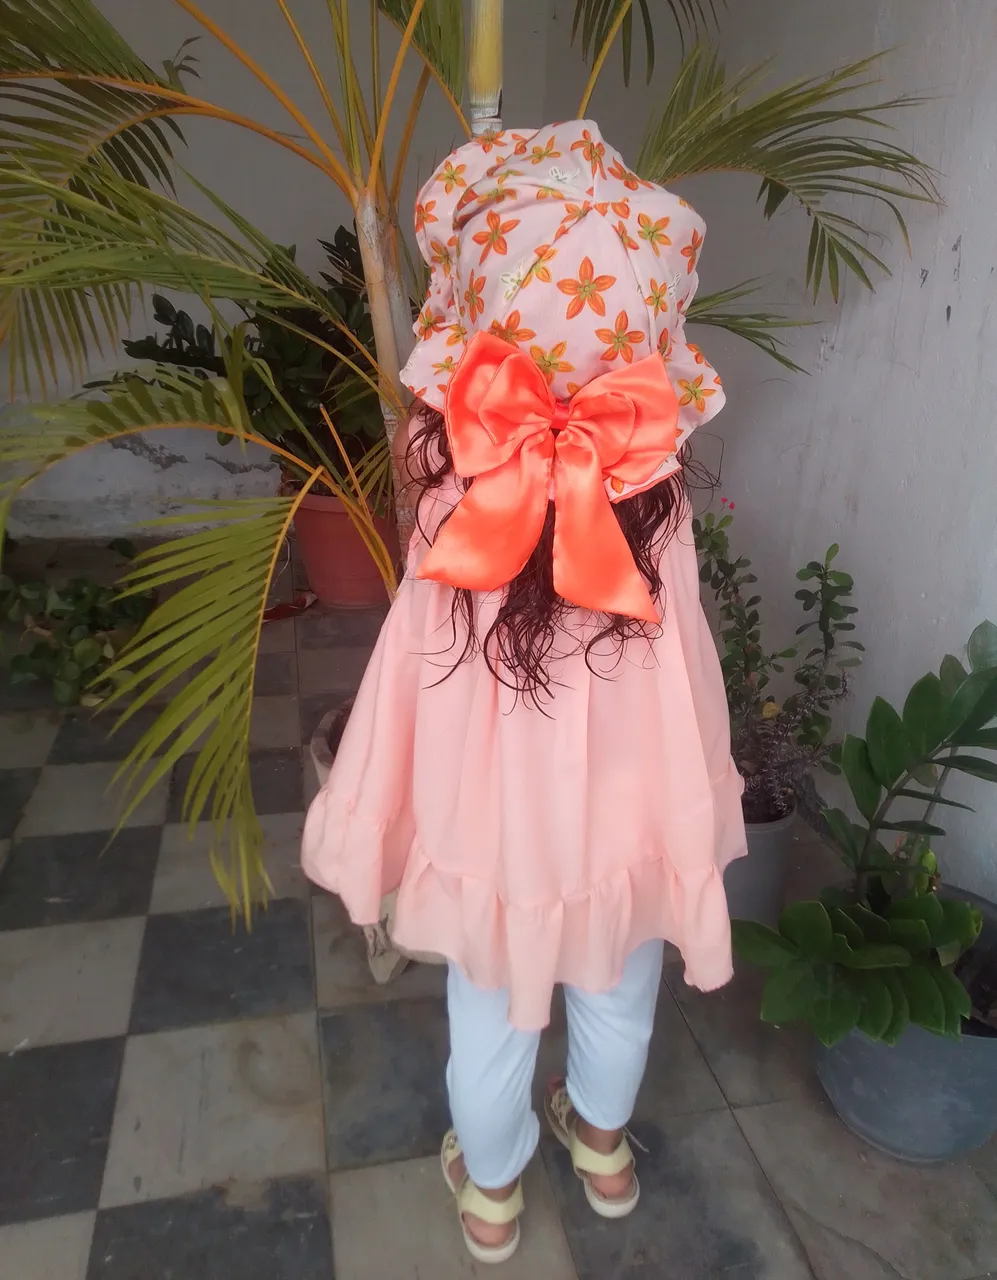
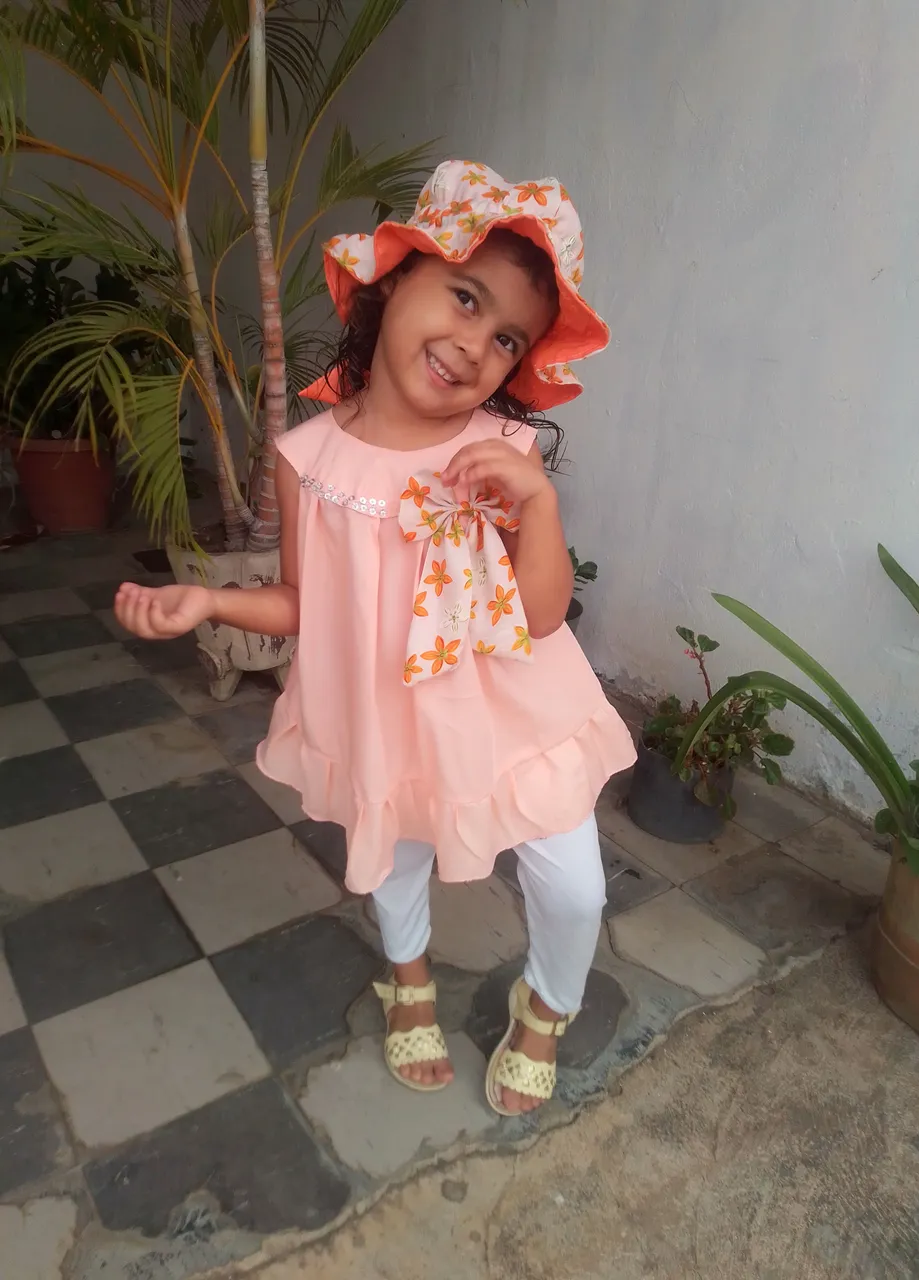
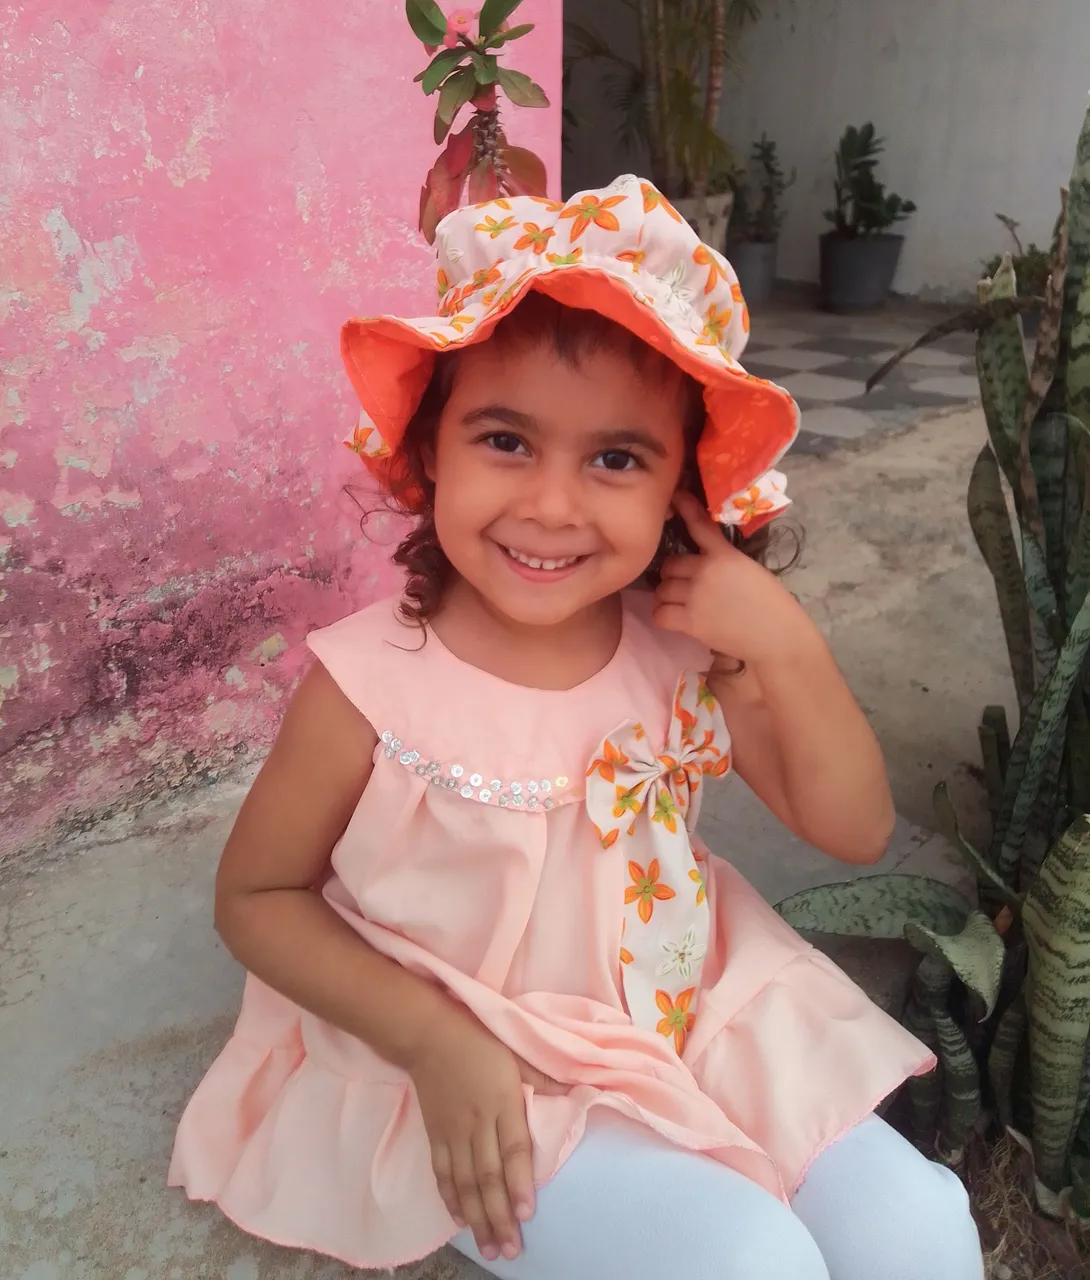
🎀Resultado!🎀
Fue difícil?? Si lo fué, en este arte la primera vez, todo es complicado, me confundí varias veces y me tocó descoser, pero de eso se trata de equivocarnos, corregir y aprender. Me encantó como ha quedado, valió la pena todo el empeño y el tiempo de trabajo porque hoy puedo mostrarte este lindo resultado.
Was it difficult?? Yes, it was, in this art the first time, everything is complicated, I got confused several times and had to unpick, but that's what it's about making mistakes, correcting and learning. I loved how it turned out, it was worth all the effort and time of work because today I can show you this beautiful result.

Muchas gracias por llegar hasta aquí, cuéntame que te pareció, me encantaria leer tu opinión, te mando un abrazo.. Hasta una proxima idea.
Thank you very much for coming this far, tell me what you thought, I would love to read your opinion, I send you a hug... Until the next idea.