ESPAÑOL:
Hola Hola amigos de hive, soy principiante dentro de esta comunidad y el día de hoy quiero compartir con ustedes un lindo trabajo hecho por mi con el asesoramiento de mi hijo. Se trata de un cuaderno para él con material reciclado.
Les cuento, estaba organizando libros, y enciclopedias que tengo dentro de mi closet en el cual también tengo todas las cartulinas, hojas y cualquier pedacito de papel que me consigo y lo guardo. Y me encontré con un cuaderno casi completo ( con 5 o 10 hojas utilizadas pero sin carátula, así que en el momento que este cuaderno cayó en mis manos obviamente no lo iba a desechar y mucho menos dejarlo así.
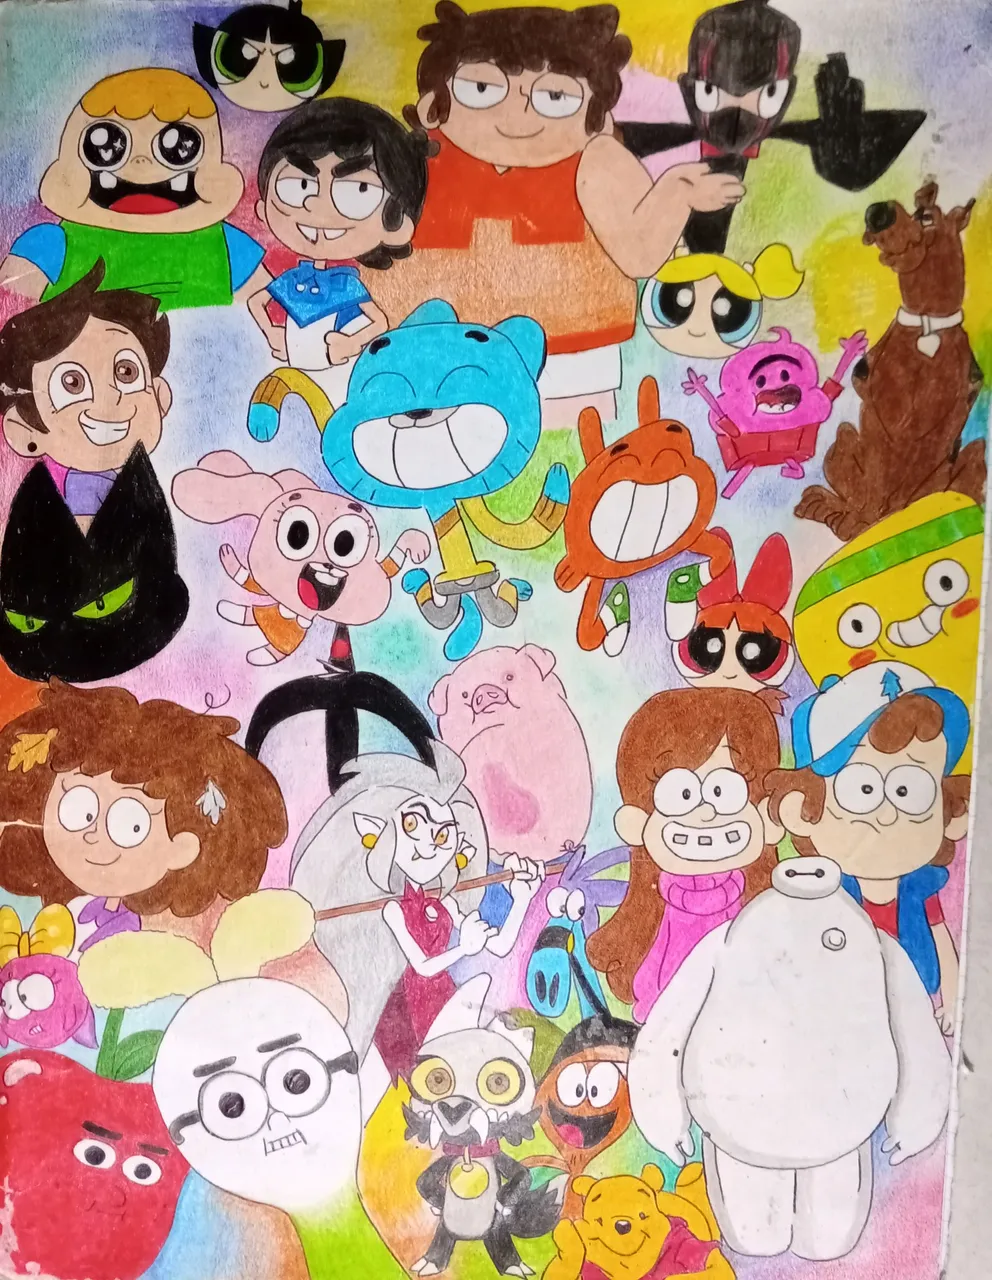
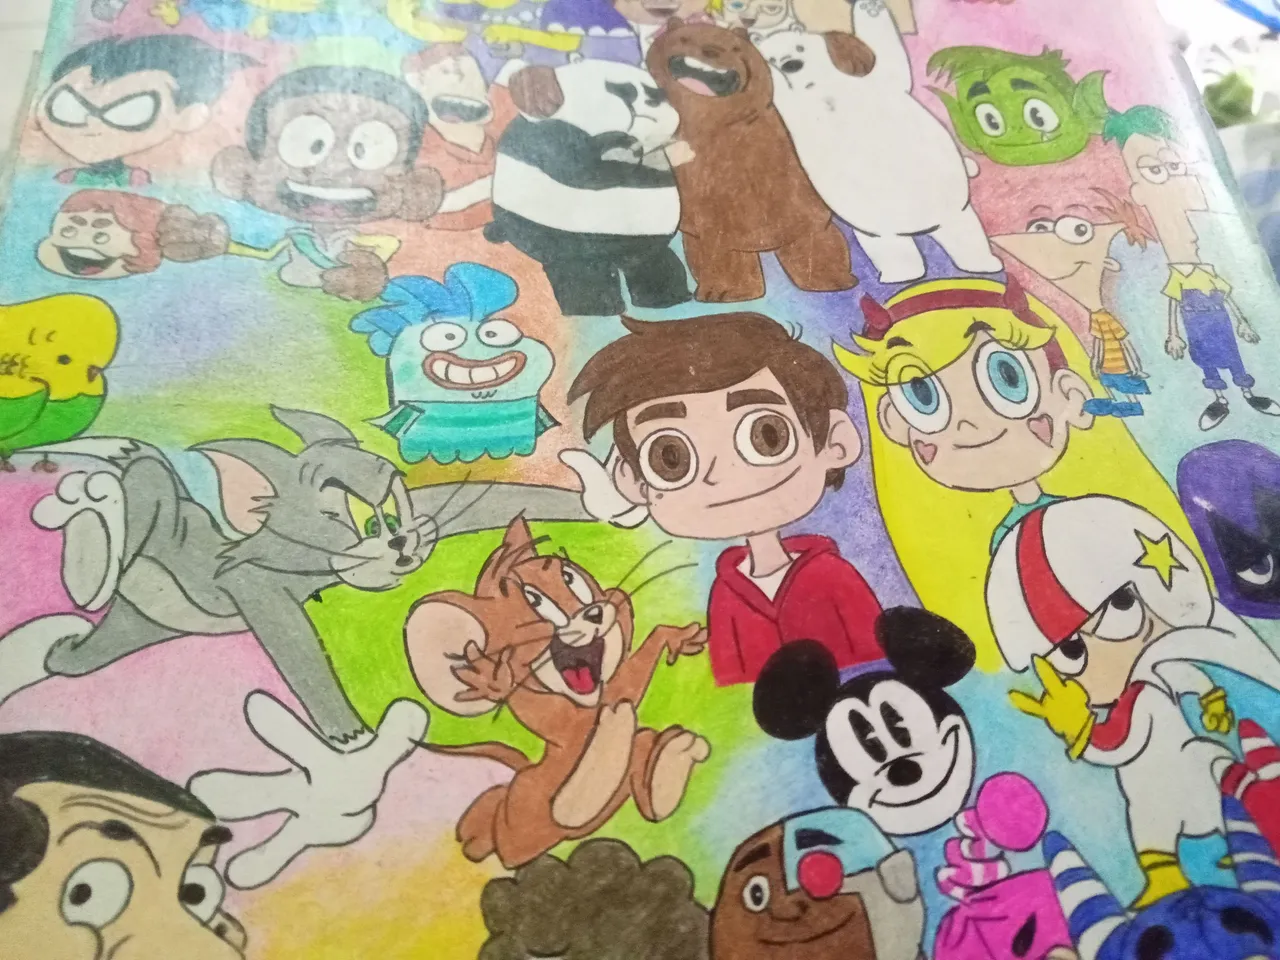
Entonces cómo se acercaba el regreso a clases en ese momento me puse manos a la obra, tomé una cartulina que tenía guardada ( yo jamás boto cartón o cartulina) y comencé a dibujar. Se me vino la idea de colocar en la carátula todos los personajes favoritos de las comiquitas que a mí hijo le gusta ver, bueno en realidad las comiquitas que a mí me gusta ver jajajaja y es que he notado que los programas para niños tienen ciertos contenidos, temas o chistes que se adaptan a toda la familia, aparte de que mi hijo es muy conversador, me gusta preguntarle qué piensa sobre ciertas situaciones que suceden mientras vemos los programas, como las interacciones entre amigos o familiares y me encantan sus respuestas, así que tal vez por eso tengo un lazo especial con las comiquitas.
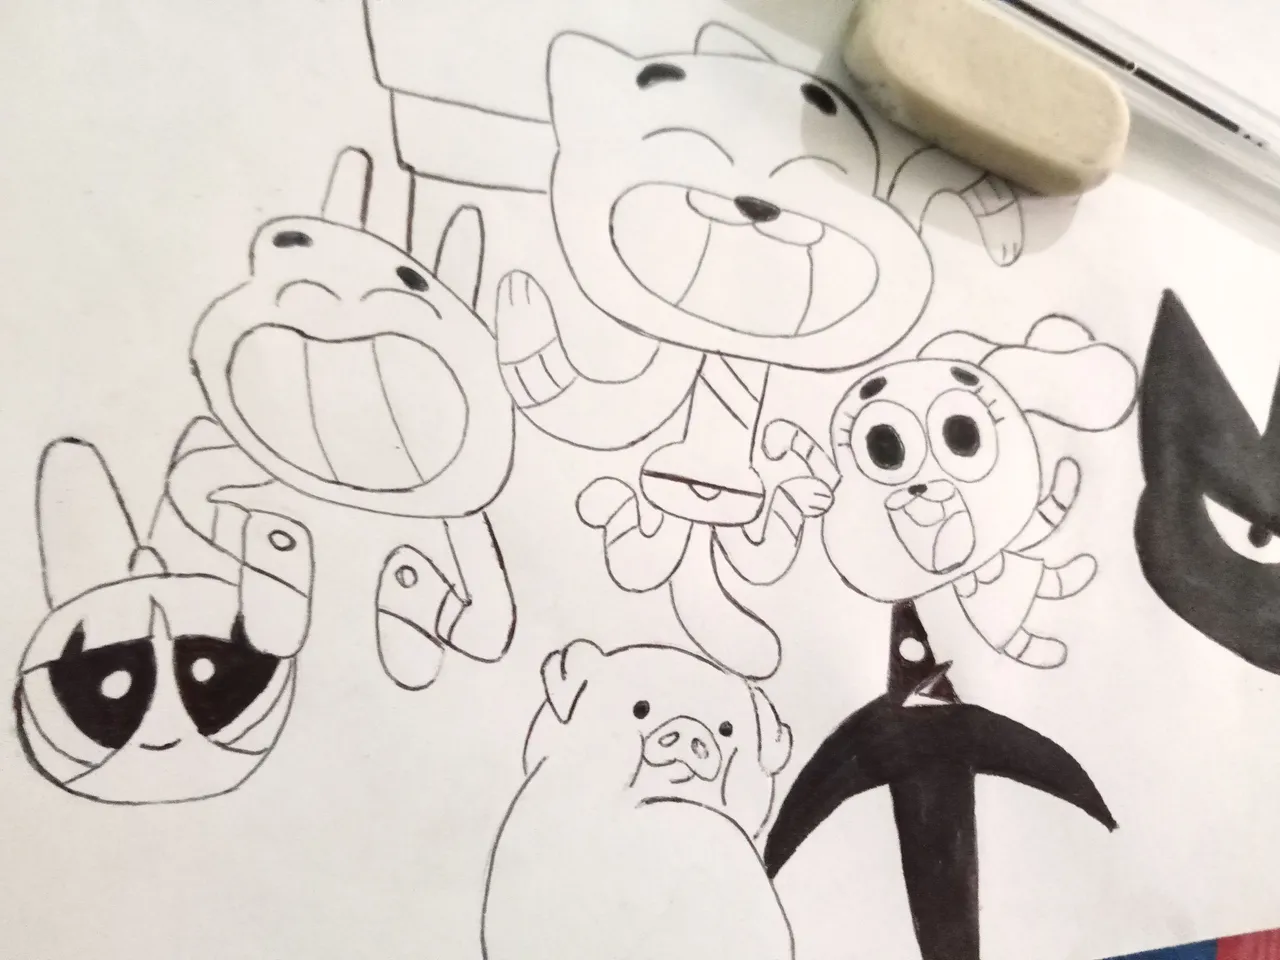
Lo primero que hice fue dibujar los personajes con lápiz muy suave para no marcar la cartulina, y luego repase cada uno de los dibujos con lapicero, me gusta pasar siempre los dibujos que voy a colorear a lapicero porque me permite borrar cualquier imperfección que deja el lápiz y hasta el creyon sin que se me borre el dibujo. Es muy importante que al repasar con lapicero sea con mucho cuidado para no equivocarse y arruinar todo el trabajo.
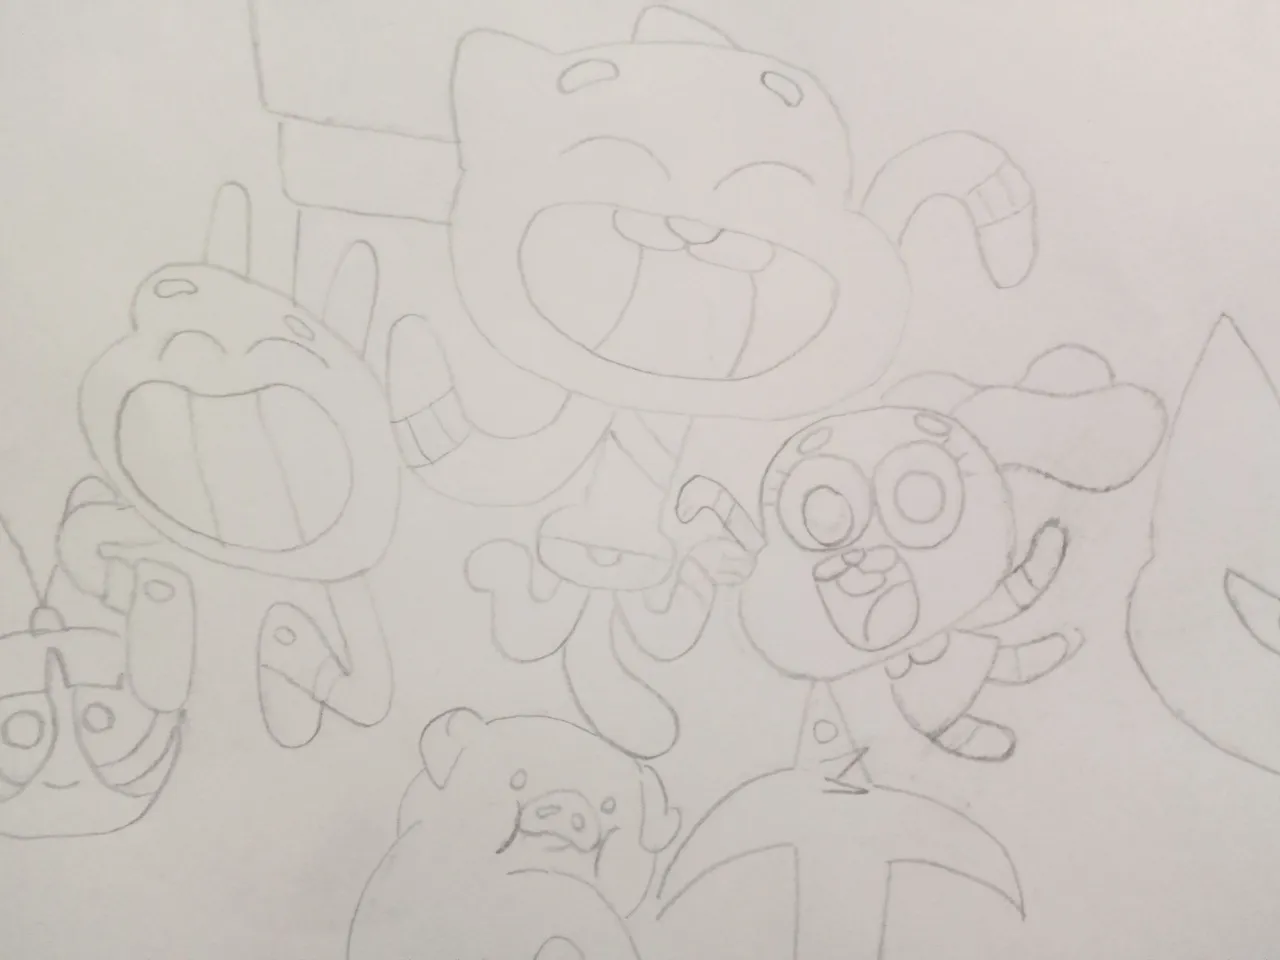
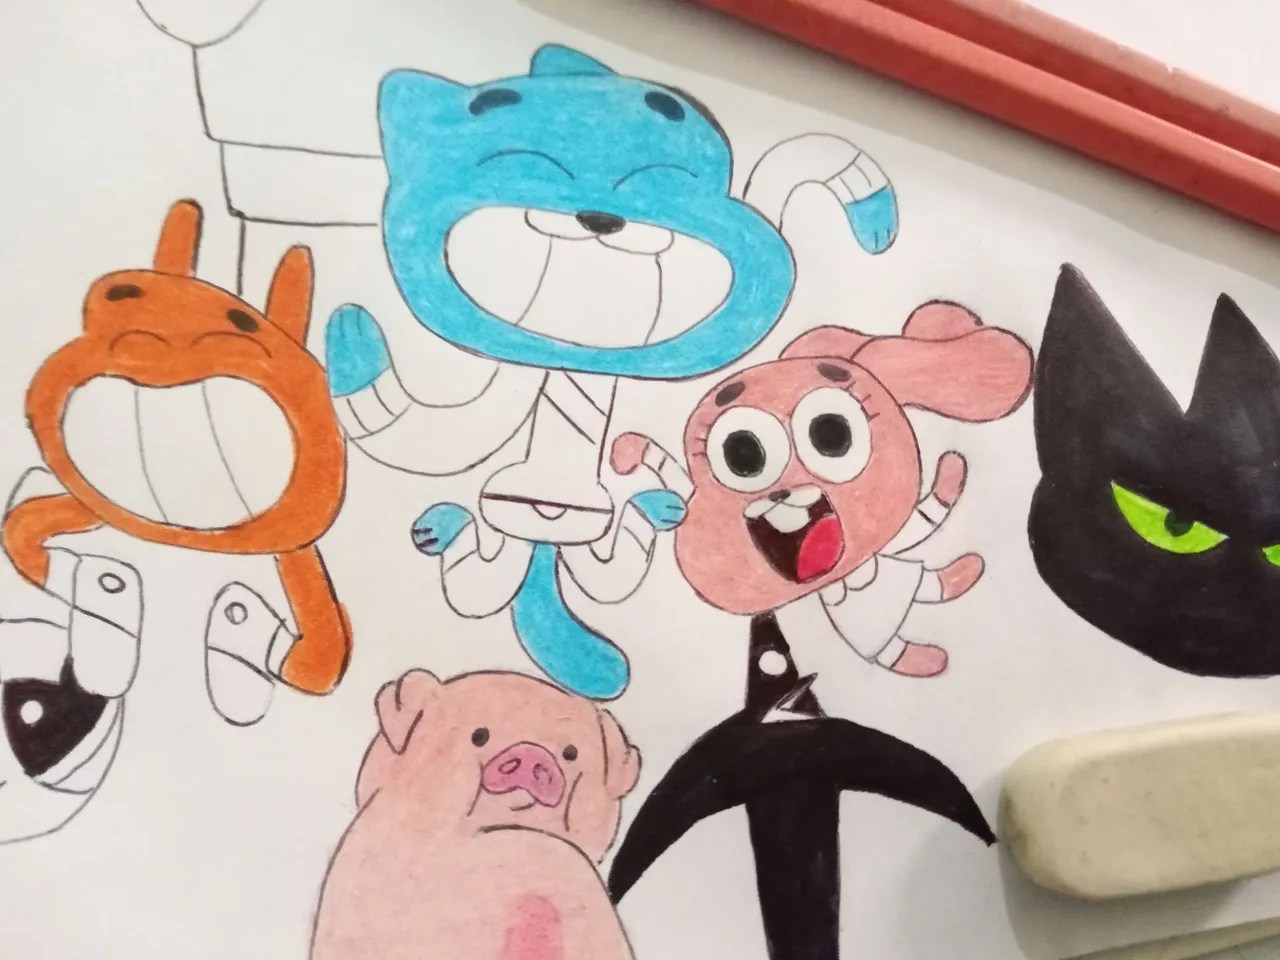
Luego de haber repasado todo empecé poco a poco a colorear todas las secciones pequeñas que eran de color negro igualmente con el lapicero, por ejemplo la pupila de los ojos de algunos personajes o la boca, las partes más grandes las pinte con marcador negro. Al terminar las partes negras borre todos los trazos a lápiz para empezar a colorear.
Poco a poco agregue color a cada personaje, agrupando los según el programa, si empezaba a colorear un personaje coloreaba también todos los que lo acompañan en esa comiquita y llevar un orden. Mi hijo estaba súper emocionado porque nadie iba a tener un cuaderno igual al de él, cada vez que se me olvidaba algún color de los personajes lo llamaba y él venía corriendo a decirme.
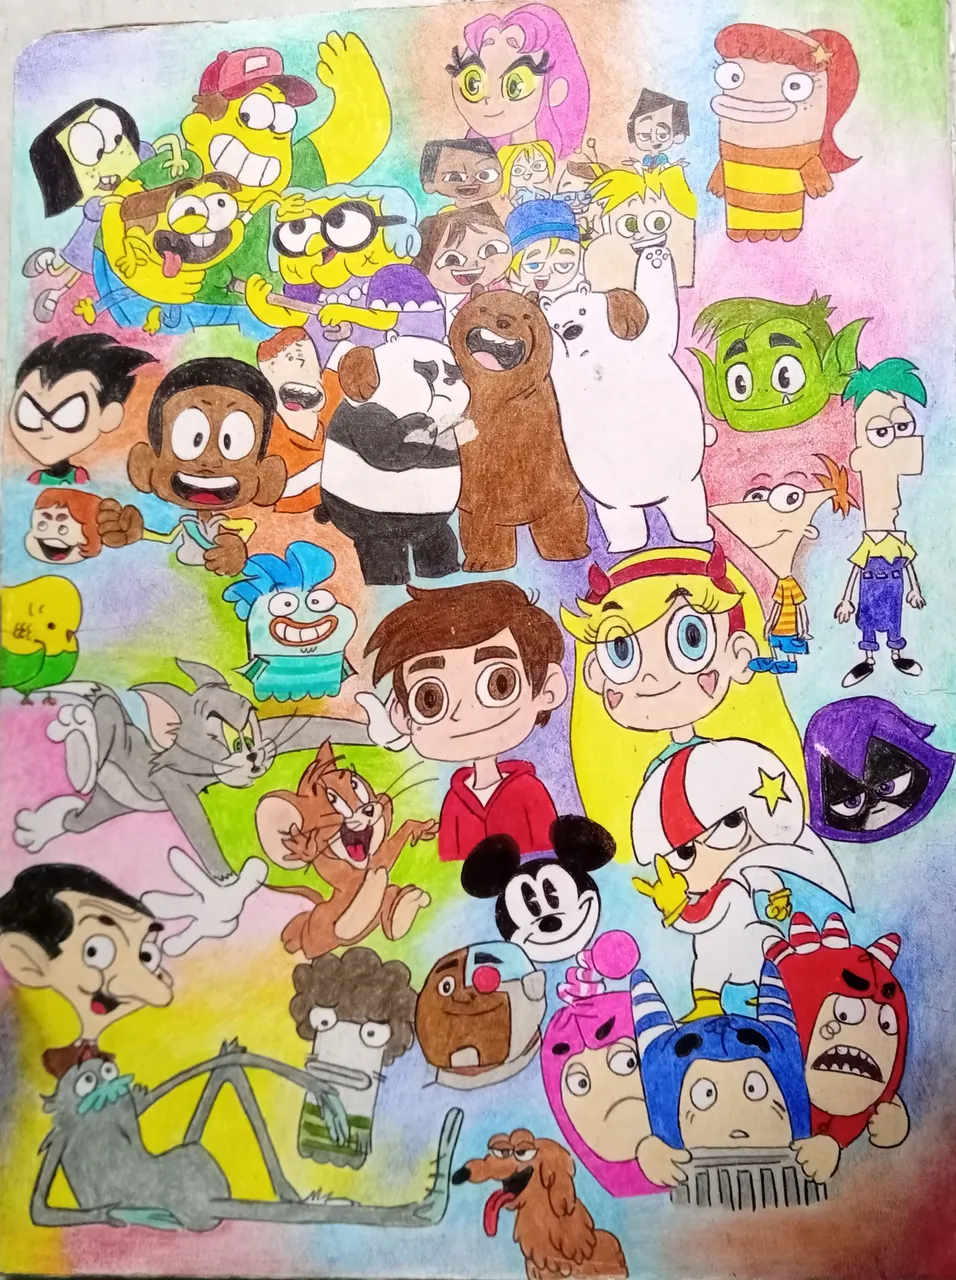
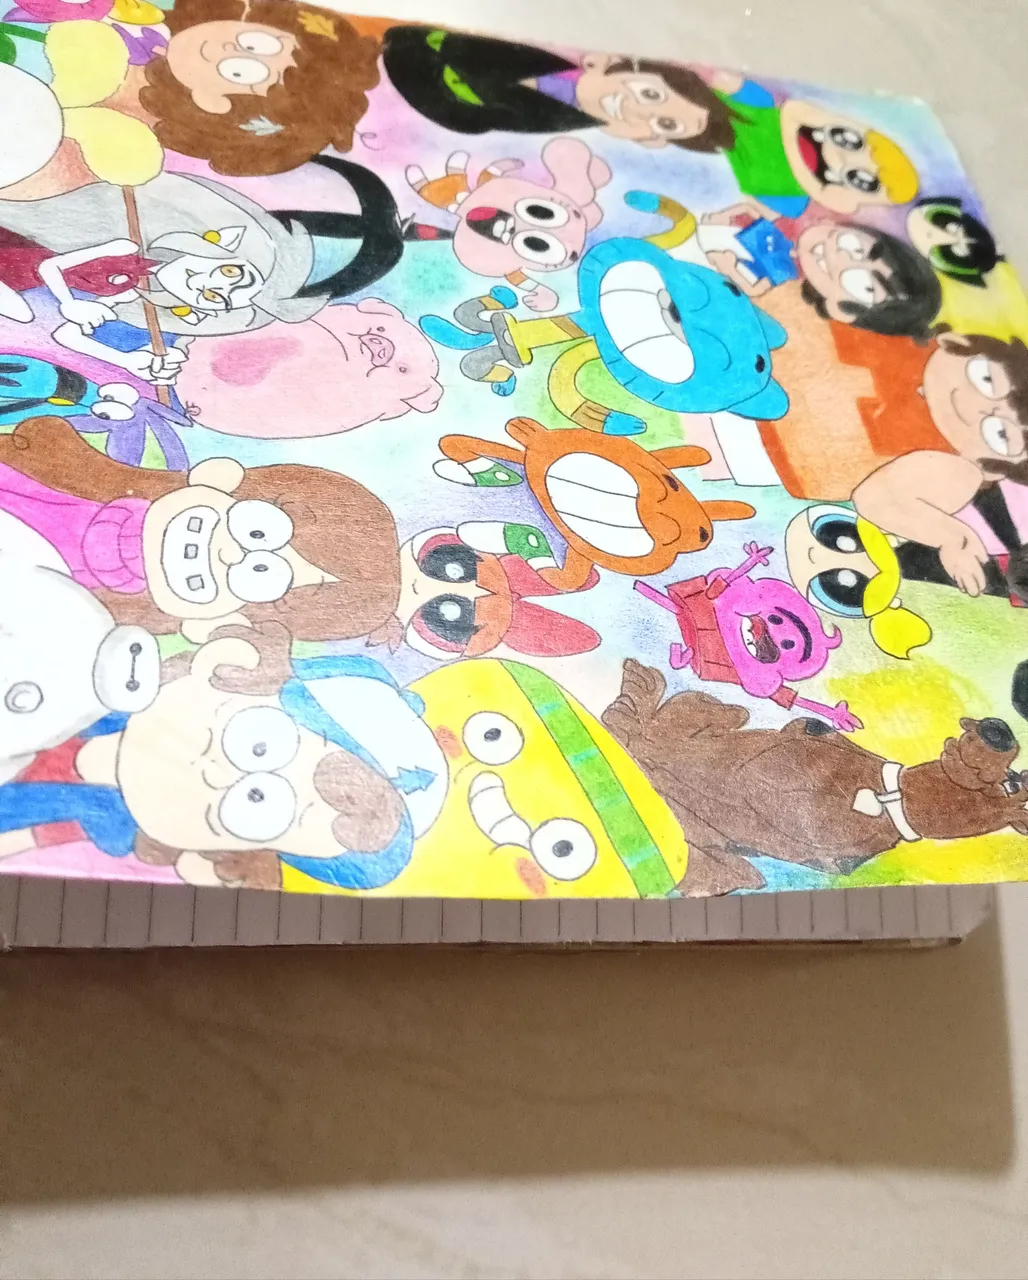
Este fue el resultado ya terminado, al final metí el cuaderno sin carátula dentro de la cartulina con los dibujos y pegue con pega blanca y engrape el cuaderno a la cartulina ( está parte fue un poco complicada pero lo logré ).
Cuando empezaron las clases la maestra me felicitó y me dijo que le encantó el cuaderno de mi hijo, fue muy lindo saber que no solo a los niños les gustó sino también a la maestra.
Me despido de ustedes y espero que les haya gustado está idea y que pueda servirles de inspiración para personalizar las carátulas de los cuadernos y darles un estilo propio, si desean reutilizar cosas que tengan, no lo duden y dejen volar su imaginación y creatividad.
Todas las imágenes de este post fueron tomadas con mi teléfono celular Alcatel 1v
ENGLISH:
Hello Hello friends of hive, I am a beginner in this community and today I want to share with you a nice work done by me with the advice of my son. It is a notebook for him with recycled material.
I was organizing books and encyclopedias that I have in my closet in which I also have all the cardboard, sheets and any piece of paper that I get and keep. And I found a notebook almost complete (with 5 or 10 pages used but without a cover, so the moment this notebook fell into my hands obviously I was not going to throw it away and much less leave it like that.
So, since it was getting close to back to school, I took a cardboard that I had saved (I never throw away cardboard or cardboard) and I started to draw. I came up with the idea of putting on the cover all the favorite characters of the cartoons that my son likes to watch, well actually the cartoons that I like to watch hahahaha and I have noticed that children's programs have certain content, themes or jokes that suit the whole family, besides my son is very talkative, I like to ask him what he thinks about certain situations that happen while we watch the shows, like interactions between friends or family and I love his answers, so maybe that's why I have a special bond with the comics.
The first thing I did was to draw the characters with a very soft pencil so as not to mark the cardboard, and then I went over each of the drawings with a pencil, I always like to go over the drawings I am going to color with a pencil because it allows me to erase any imperfections left by the pencil and even the creyon without erasing the drawing. It is very important that when I go over the drawing with a pencil I do it very carefully so as not to make a mistake and ruin the whole work.
After having gone over everything I started little by little to color all the small sections that were black also with the pencil, for example the pupil of the eyes of some characters or the mouth, the bigger parts I painted with black marker. After finishing the black parts erase all the pencil strokes to start coloring.
Little by little I added color to each character, grouping them according to the program, if I started coloring a character I also colored all the characters that go with him in that cartoon and keep an order. My son was super excited because no one was going to have a notebook like his, every time I forgot a color of the characters I called him and he came running to tell me.
This was the finished result, at the end I put the notebook without the cover inside the cardboard with the drawings and glued it with white glue and stapled the notebook to the cardboard (this part was a little complicated but I did it).
When the classes started the teacher congratulated me and told me that she loved my son's notebook, it was very nice to know that not only the children liked it but also the teacher.
I hope you liked this idea and that it can serve as inspiration to customize the covers of the notebooks and give them a style of their own, if you want to reuse things you have, do not hesitate and let your imagination and creativity fly.
All images in this post were taken with my Alcatel 1v cell phone.