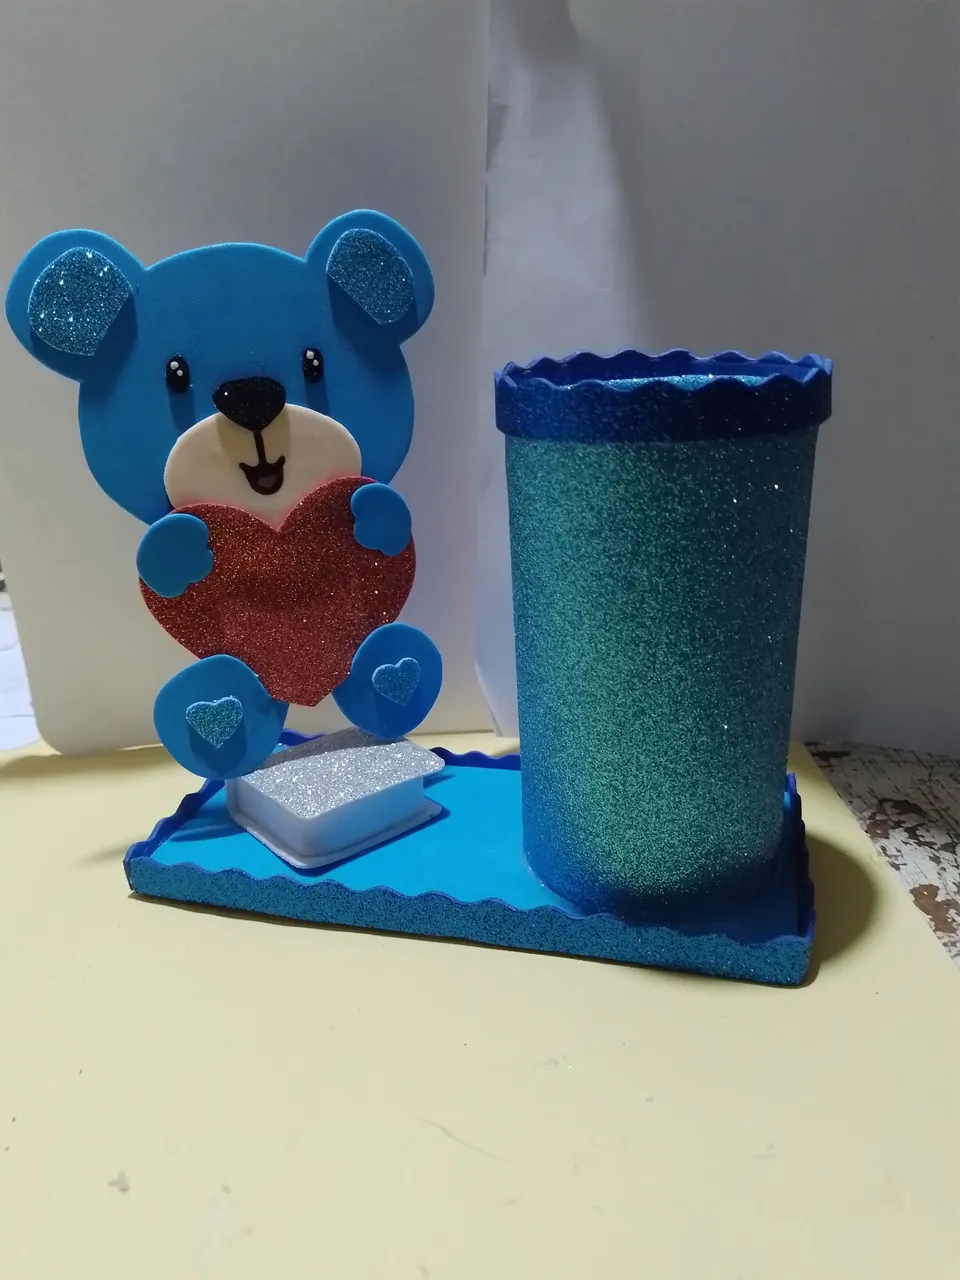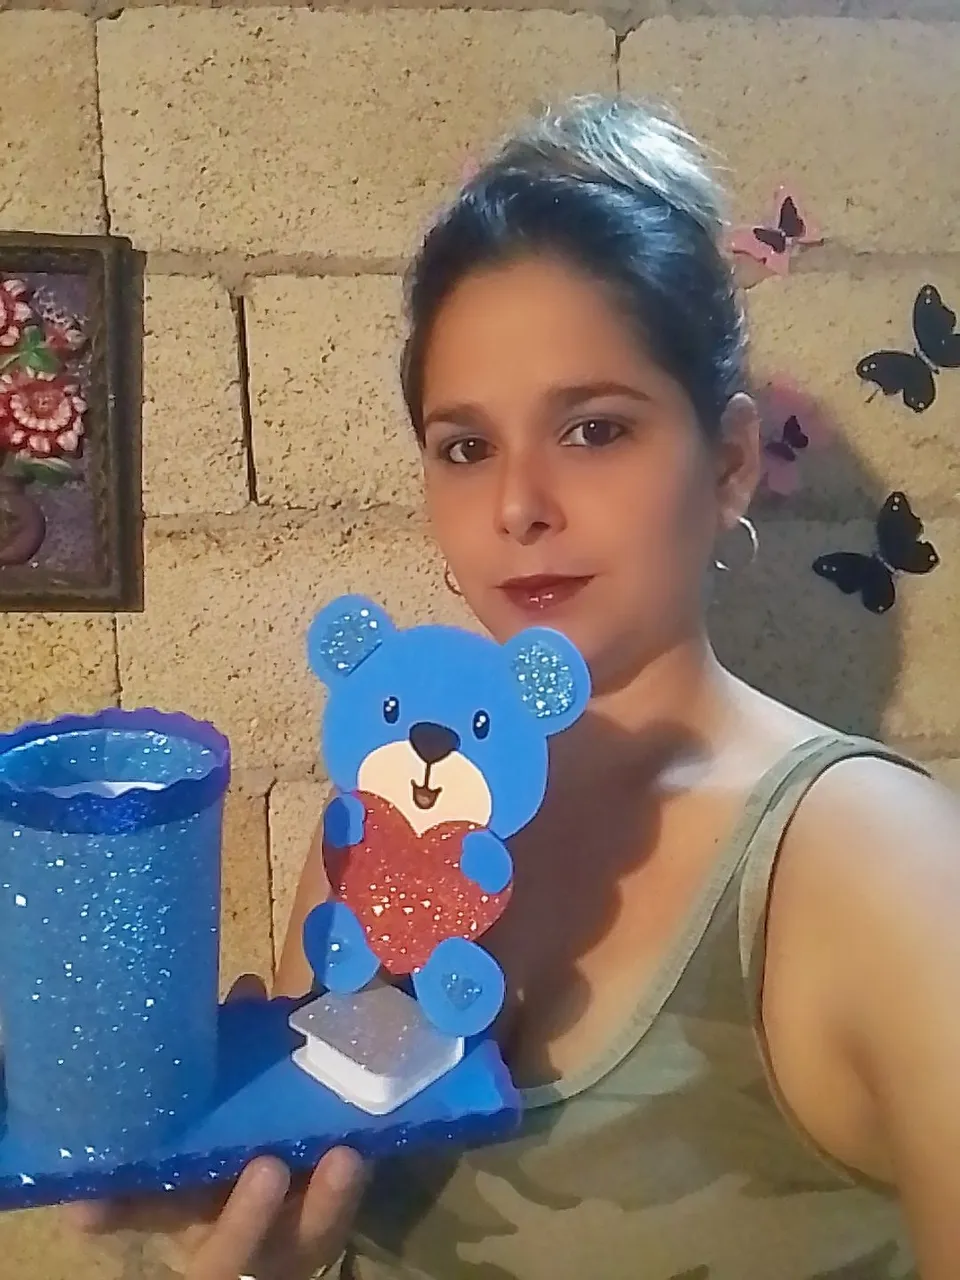
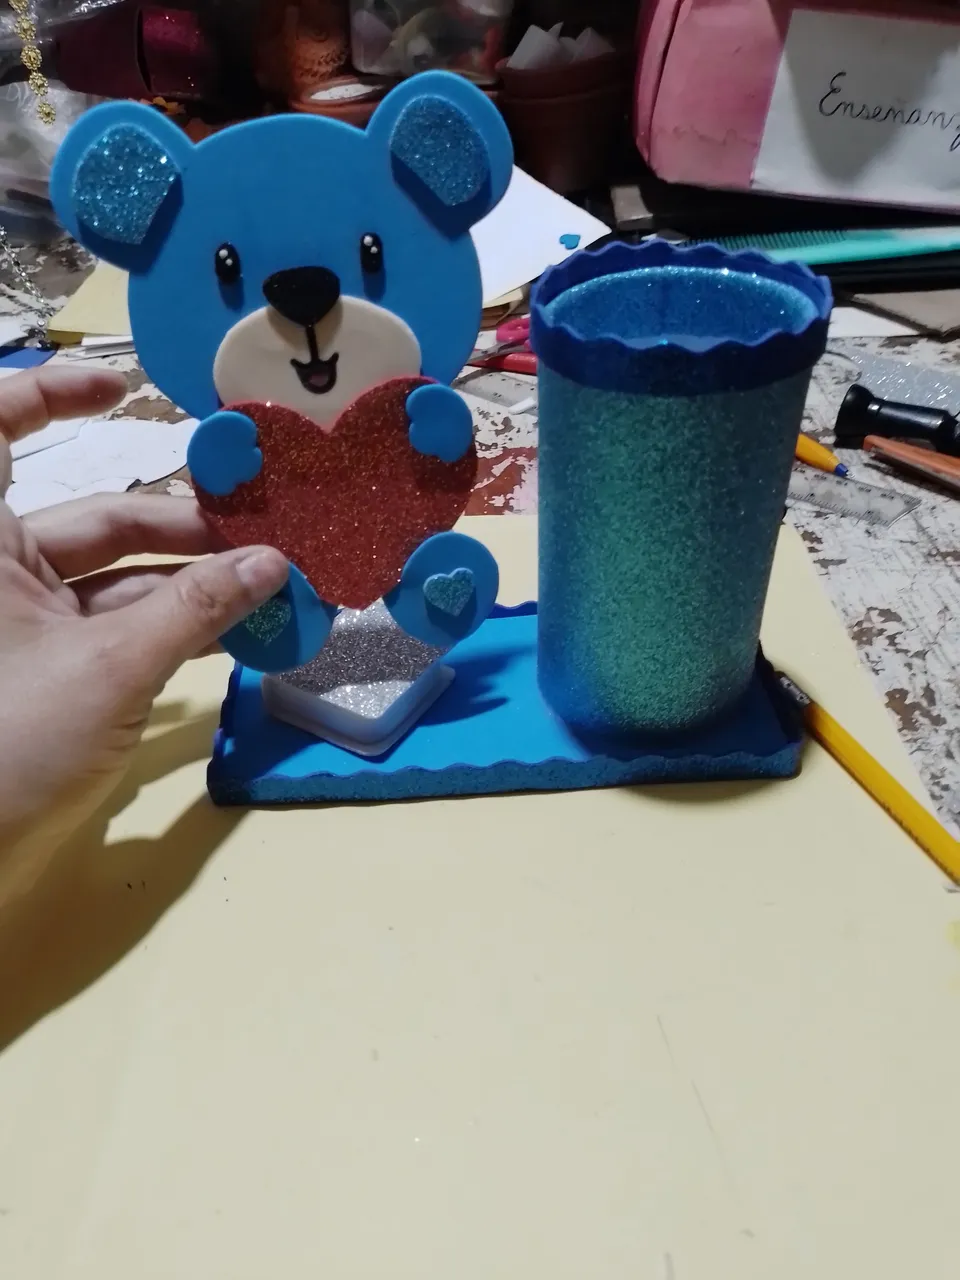
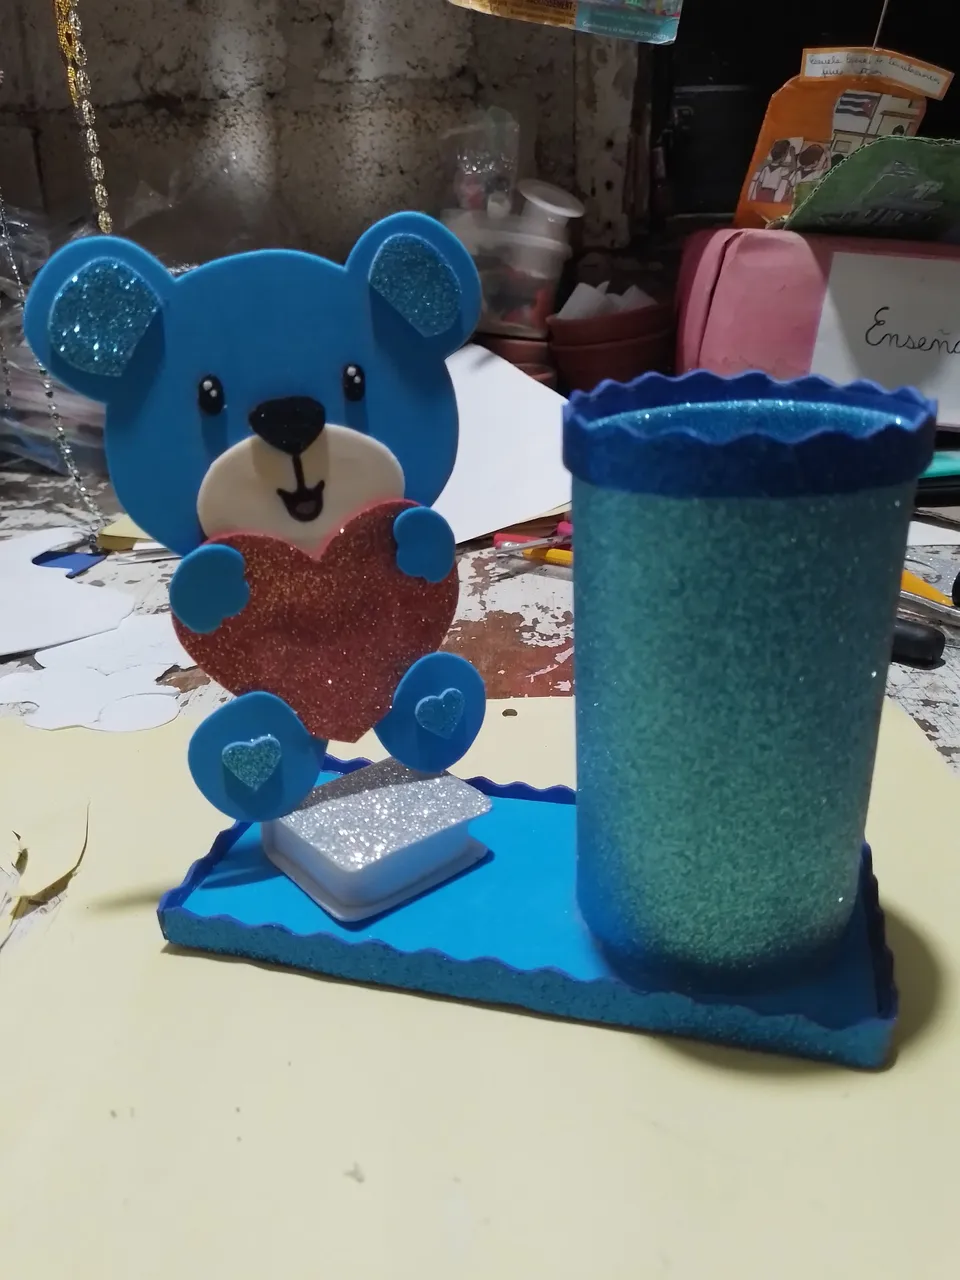
Hello creative friends, I was thinking about decorating my office with something useful and nice, and it came to my mind to make a pencil holder, as it is very useful both for decorating and to keep organized the work tools.
Hola amigos creativos, estaba pensando decorar mi oficina con algo útil y bonito, y me vino a la mente hacer un portalápiz, ya que es muy útil lo mismo para decorar, que para mantener organizada los útiles de trabajo.
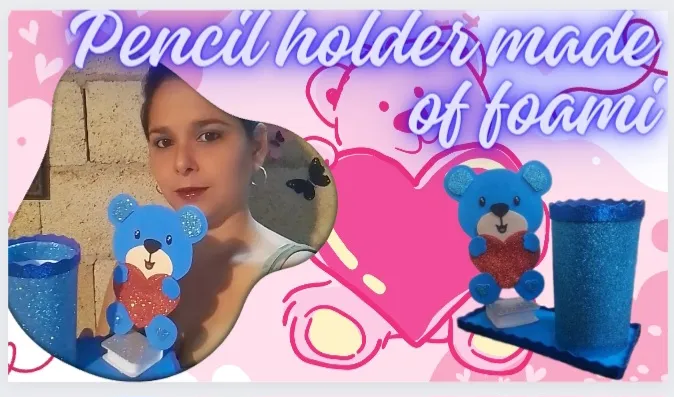
Next, I will explain how to make this beautiful pencil holder made of foami, as it is very simple and easy to do, I hope it will be very helpful.
A continuación, les explicare como confeccione este bello portalápiz hecho de foami, ya que es muy sencillo y fácil de hacer, espero les sea de mucha ayuda.
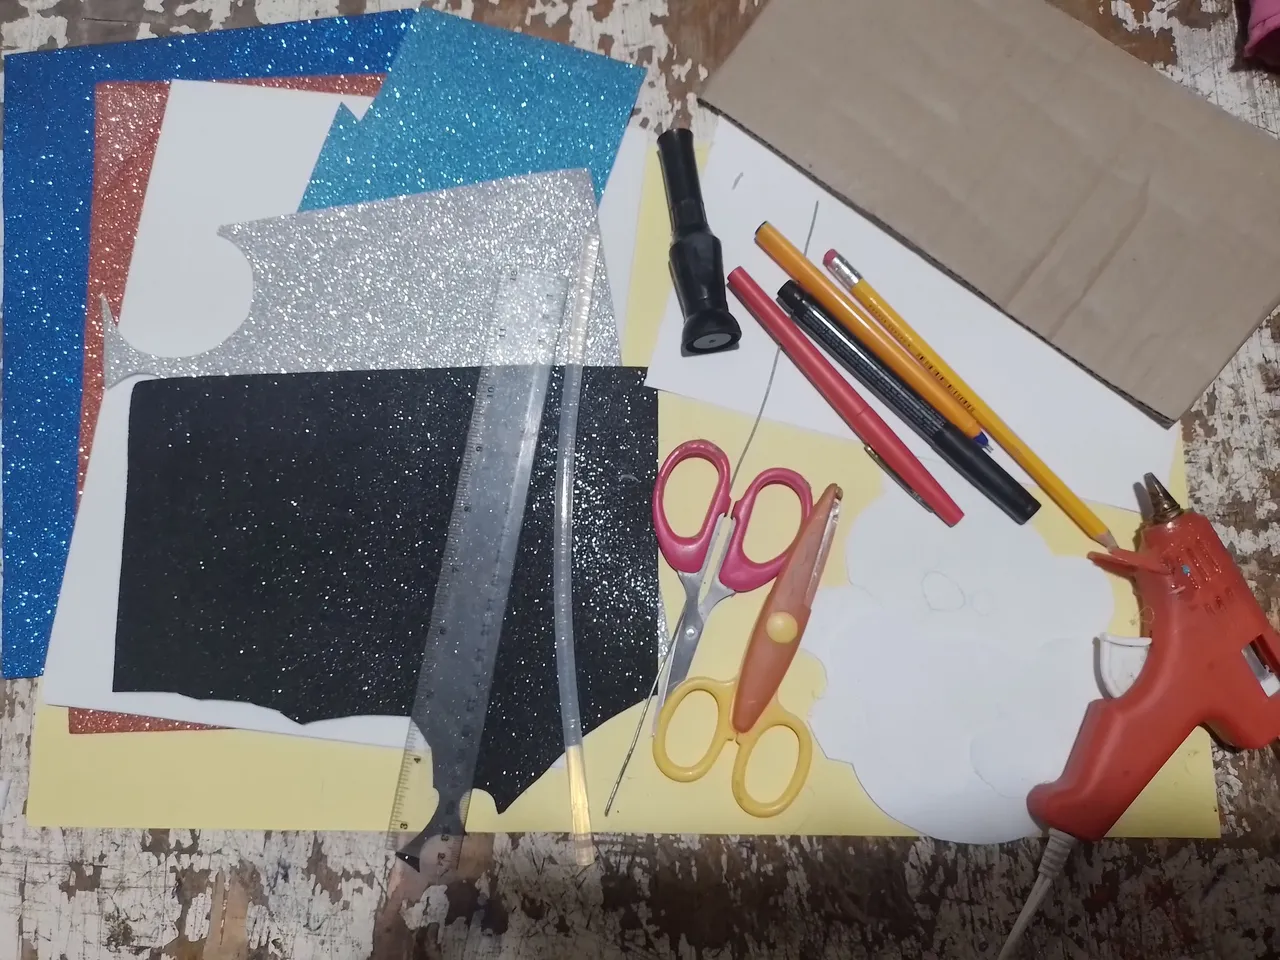
- Two shades of blue, red, flesh-colored, white, silver, and black Foami.
- White cardboard.
- Cardboard
- Ruler
- Silicone sticks
- A piece of thin wire
- Scissors
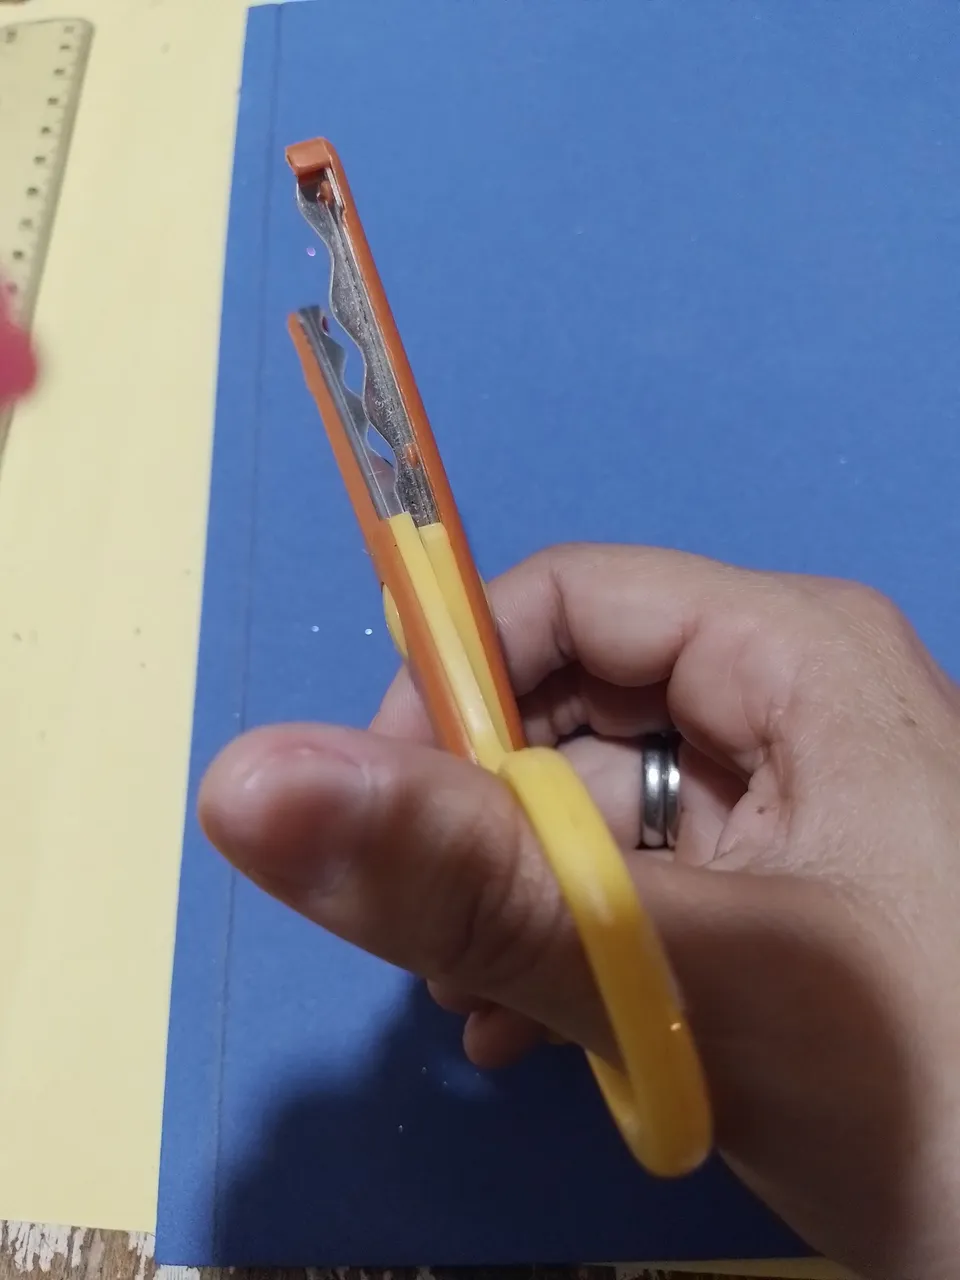
- Shape scissors
- Paper molds
- Black and red permanent markers
- Pencil
- Fine point pen without ink
- White paint
Materiales
- foami azul de dos tonalidades, rojo, color carne, blanco, plateado, y negro.
- Cartulina blanca.
- Cartón
- Regla
- Barras de silicona
- Un trozo de alambre fino
- Tijera
- Tijera de forma
- Moldes de papel
- Marcadores permanentes negro y rojo
- Lápiz
- Bolígrafo de punta fina sin tinta
- Pintura blanca
Step by step/Paso a paso
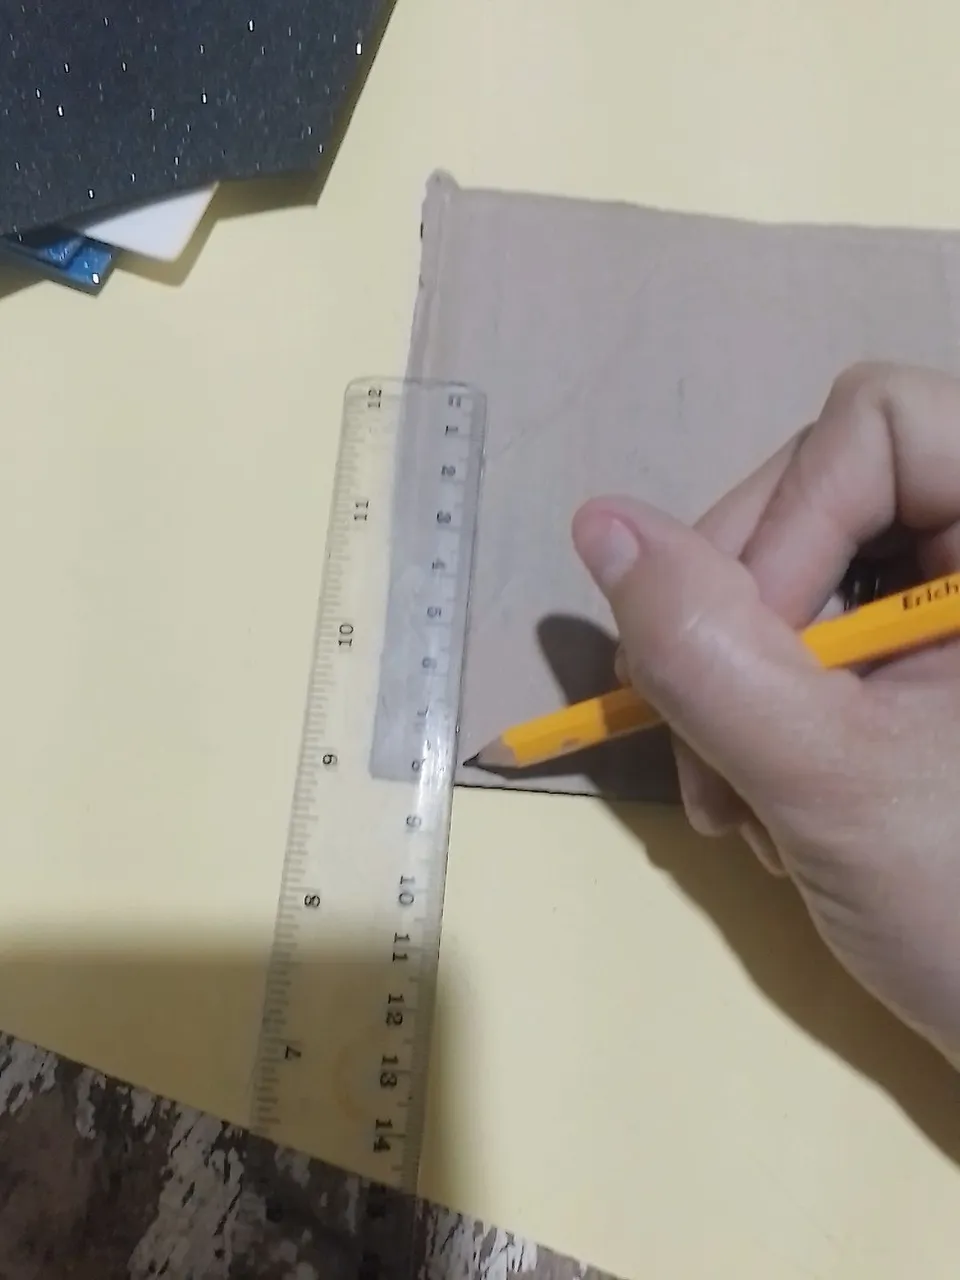
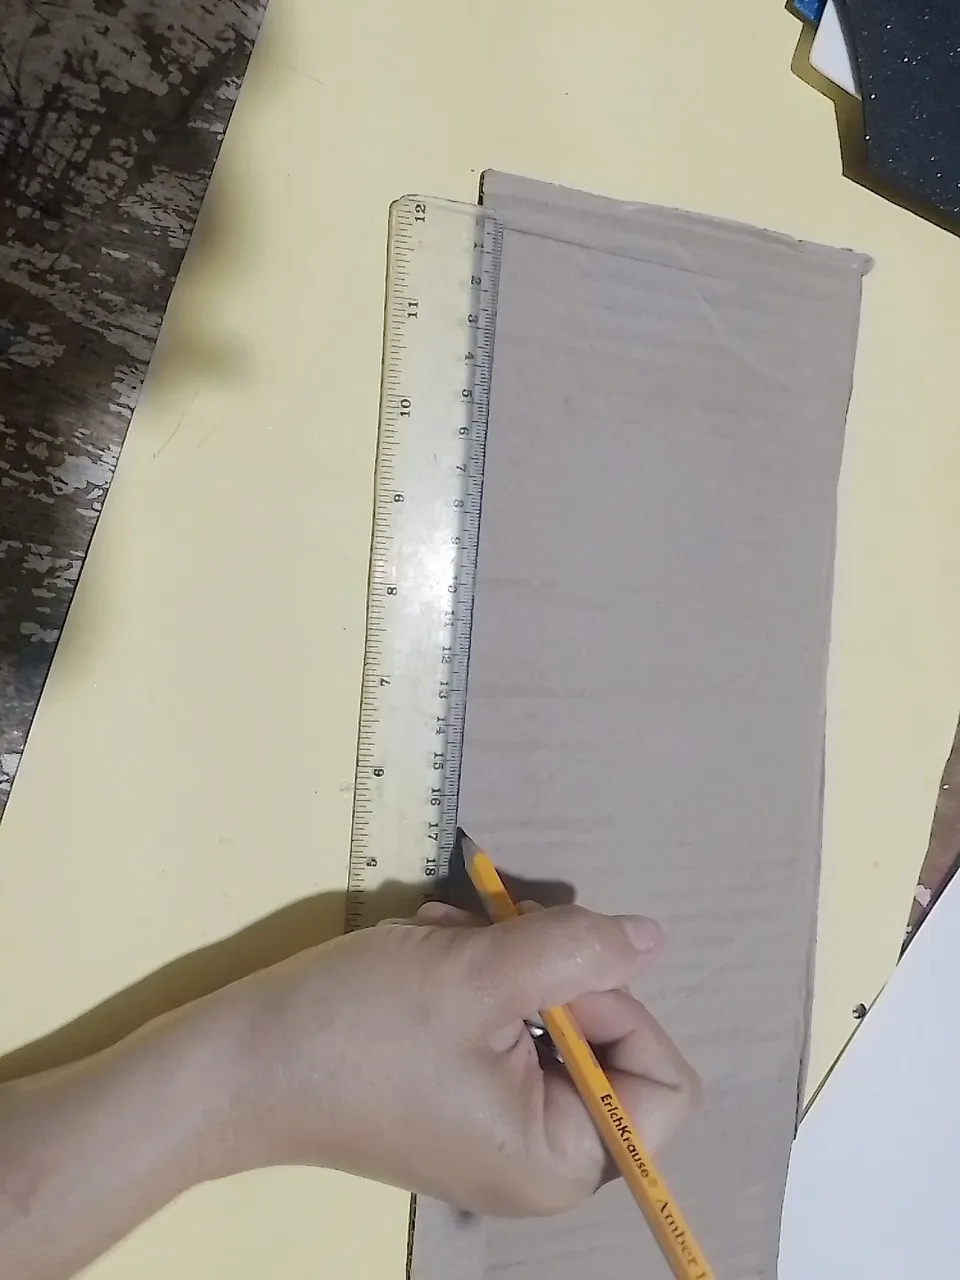
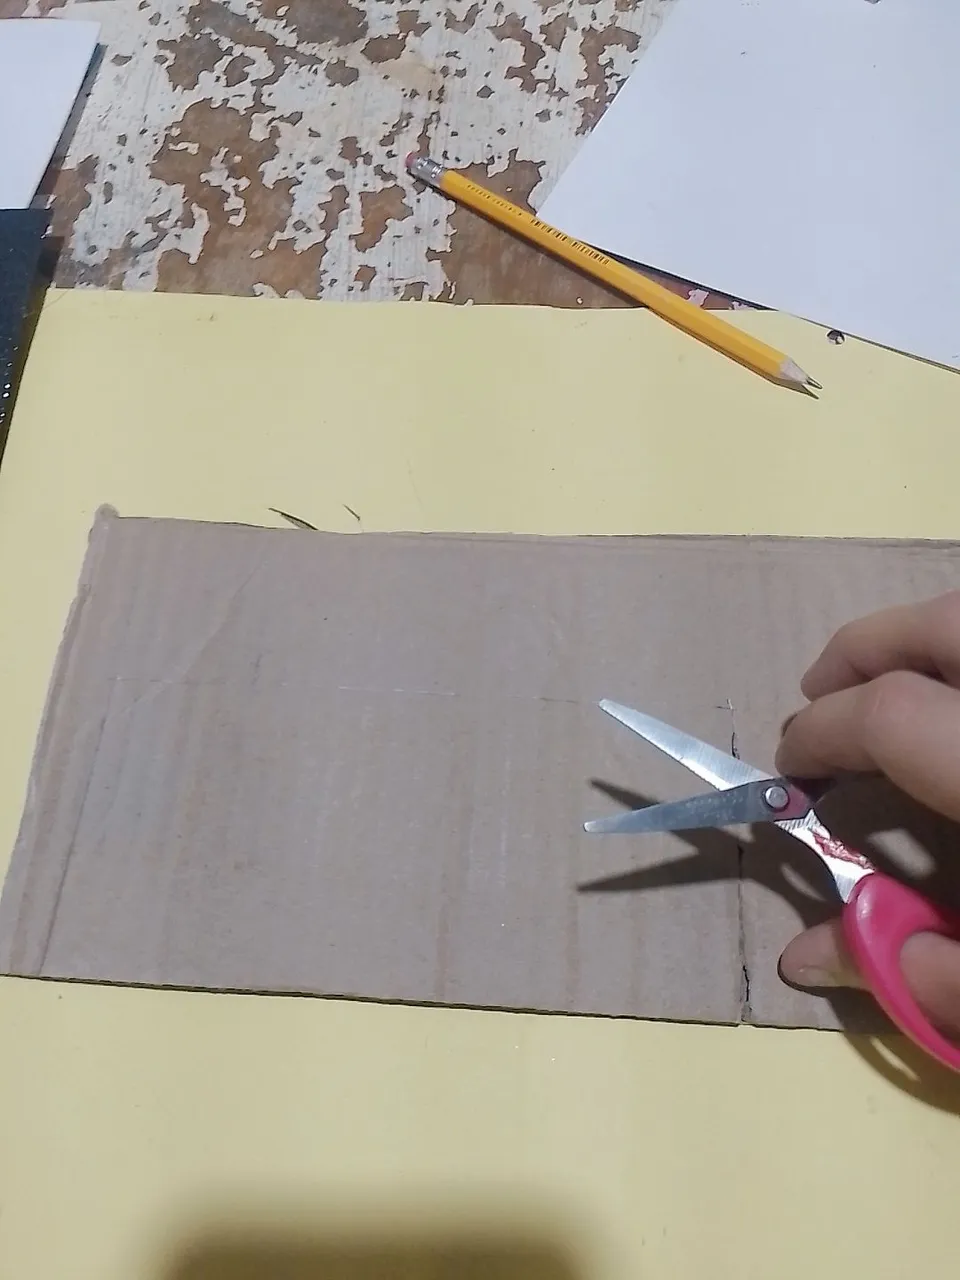
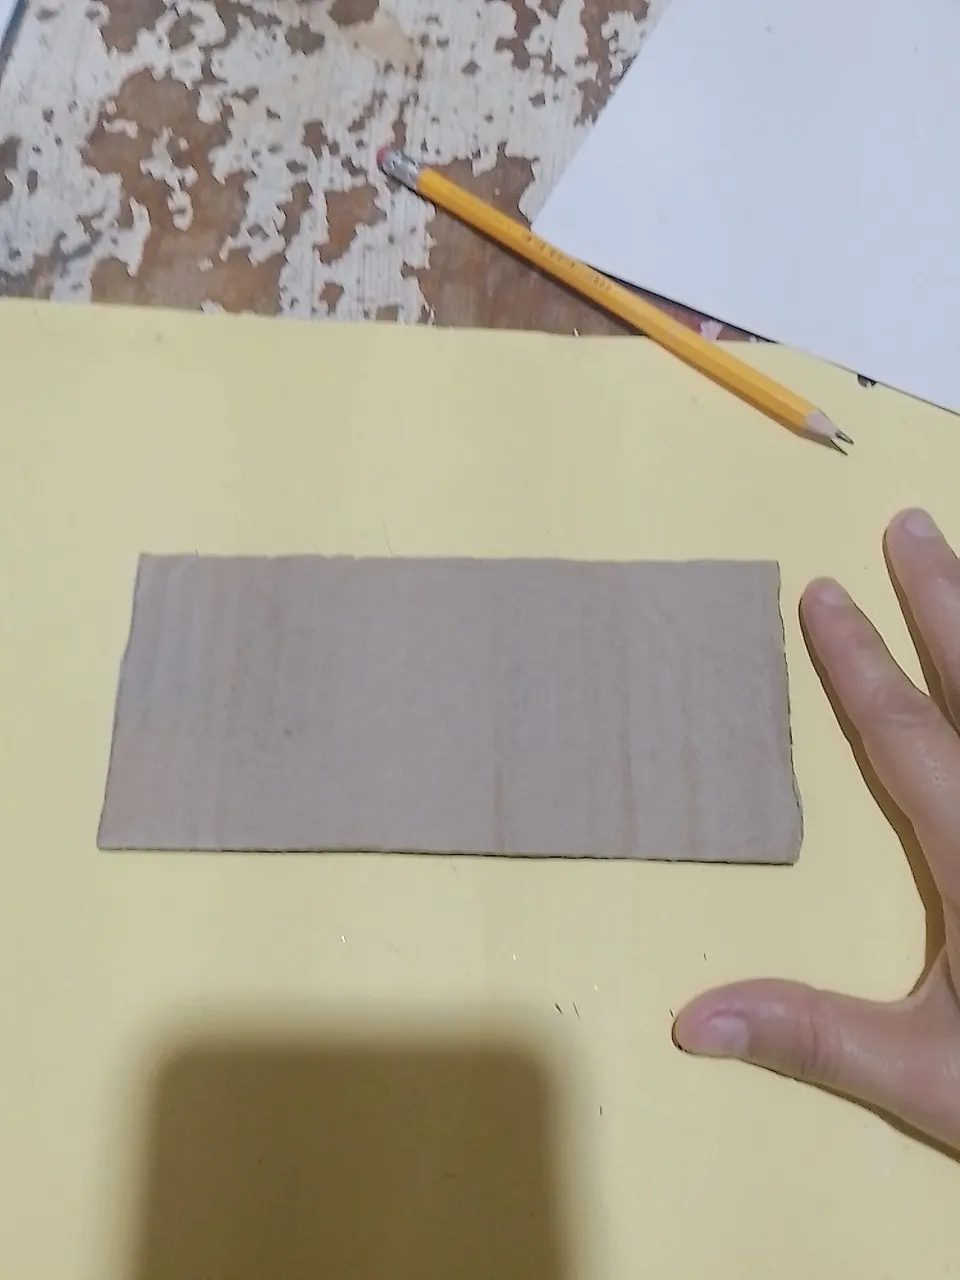
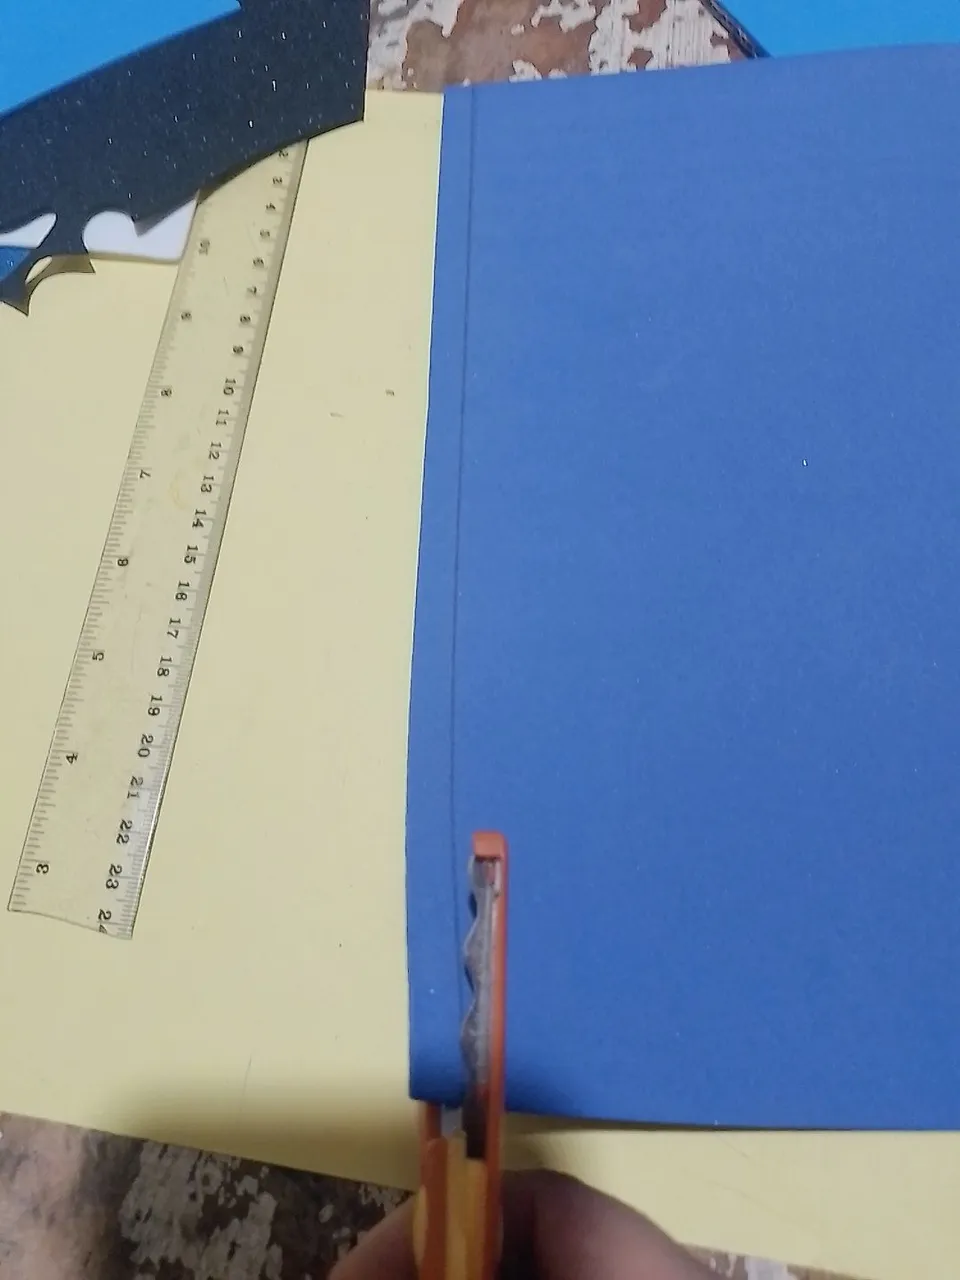
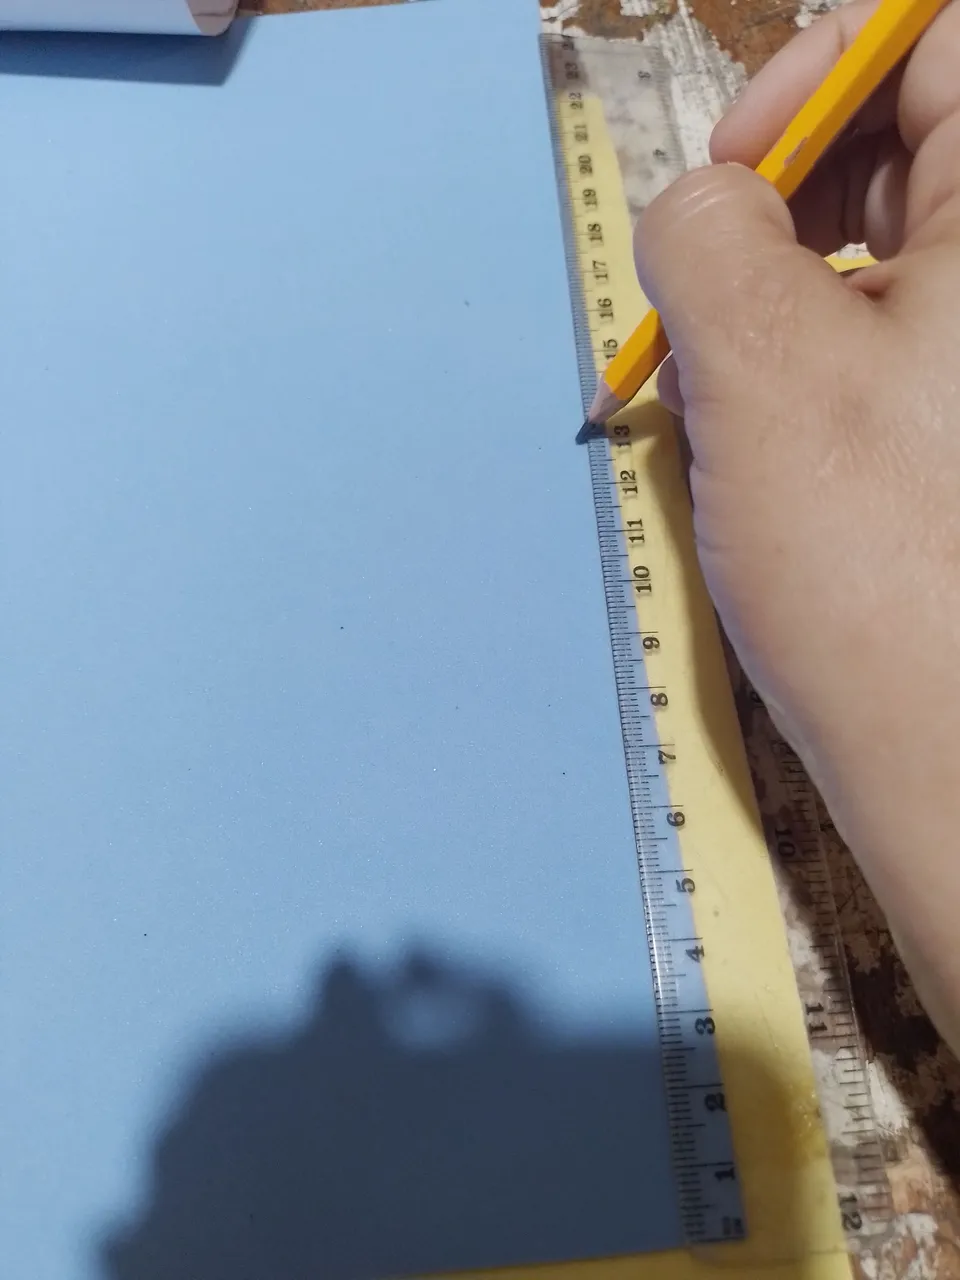
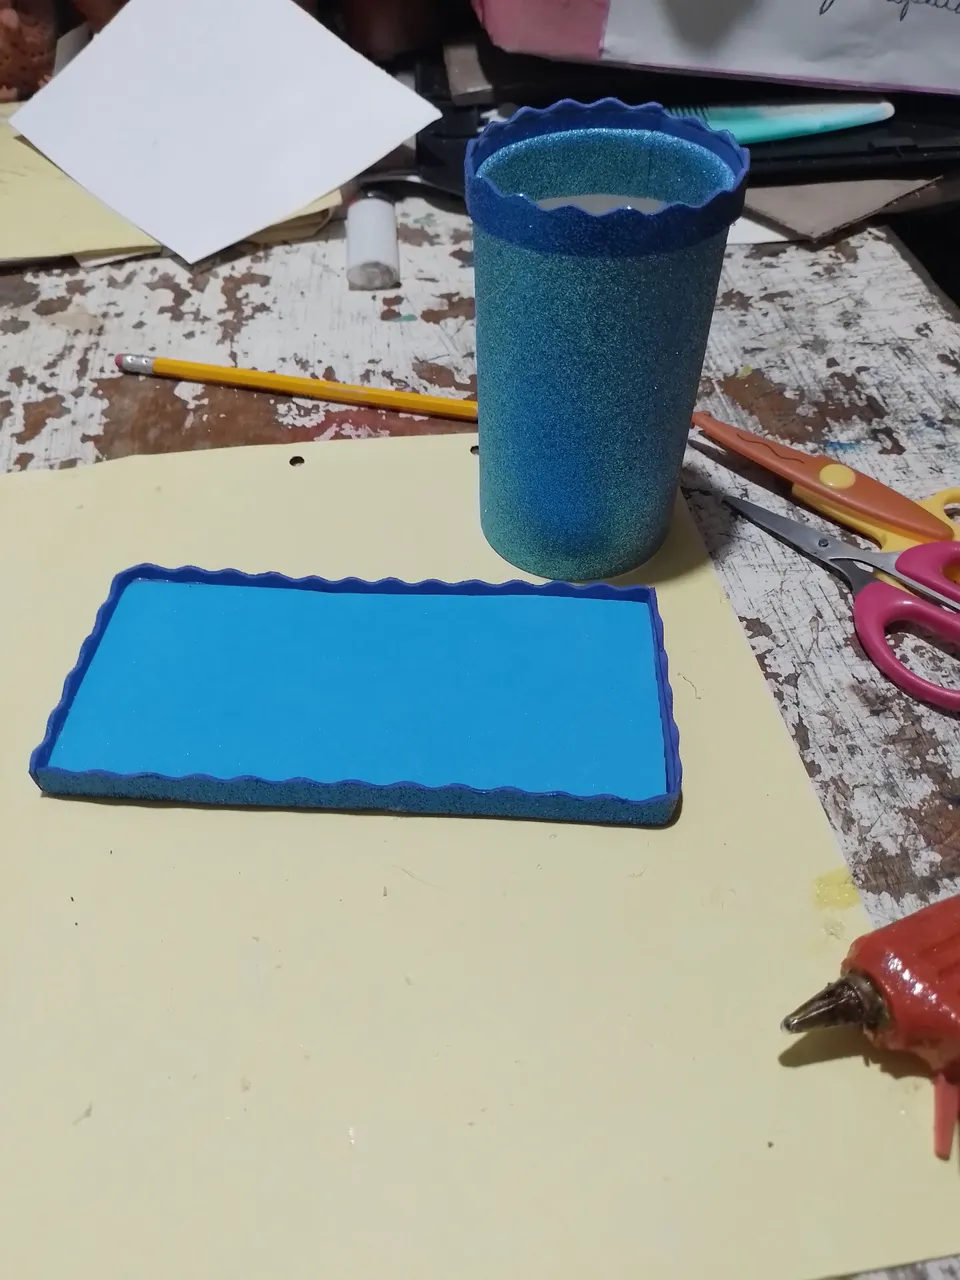
Step 1- first we start making the base of the pencil holder, for that we mark and cut a piece of cardboard 8 cm high by 17 cm wide.
Paso 1- primeramente empezamos hacer la base del portalápiz, para eso marcamos y recortamos un trozo de cartón de 8 cm de alto por 17 cm de ancho
|
|
|
|
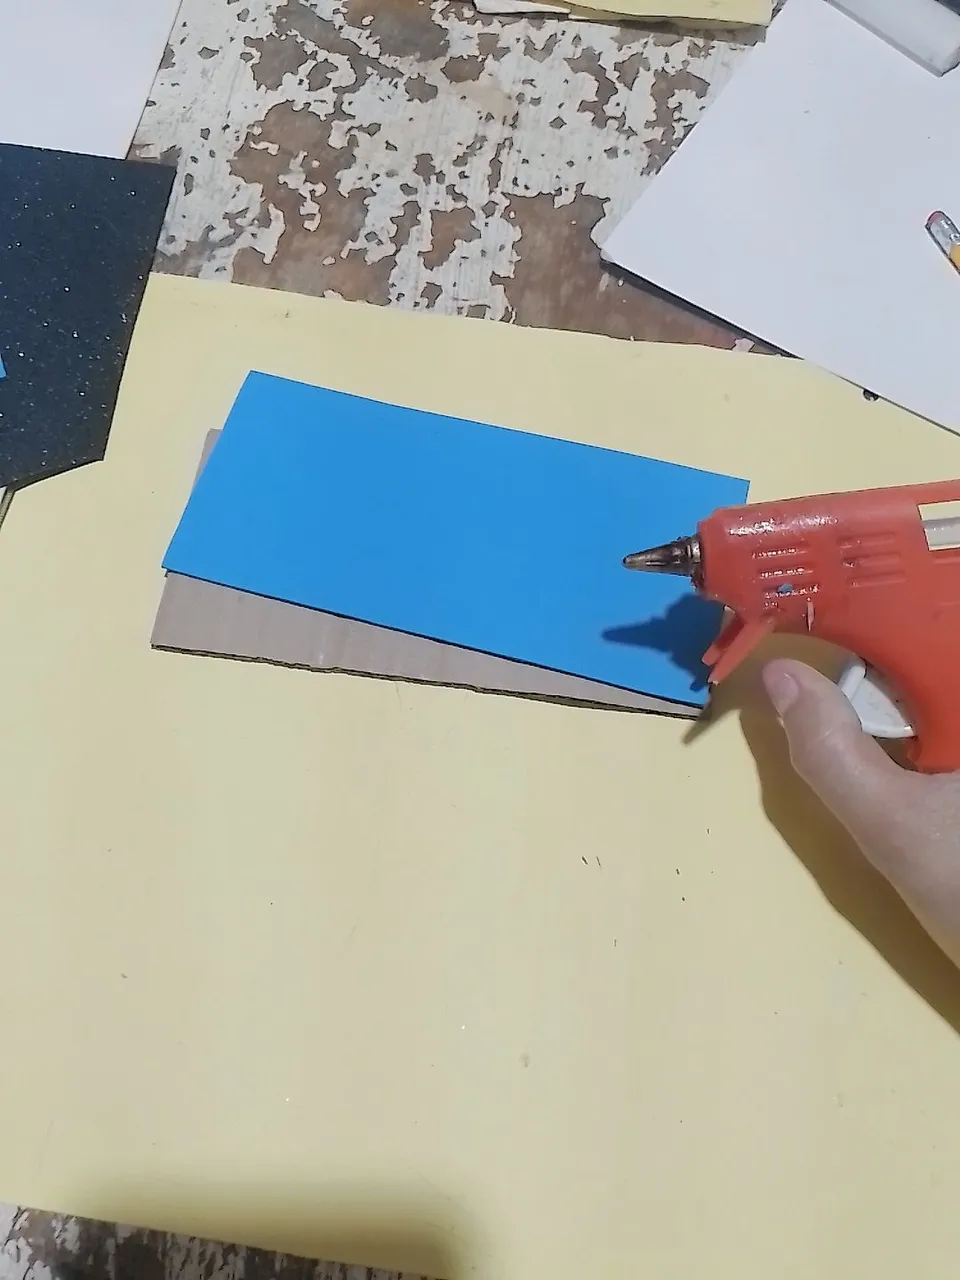
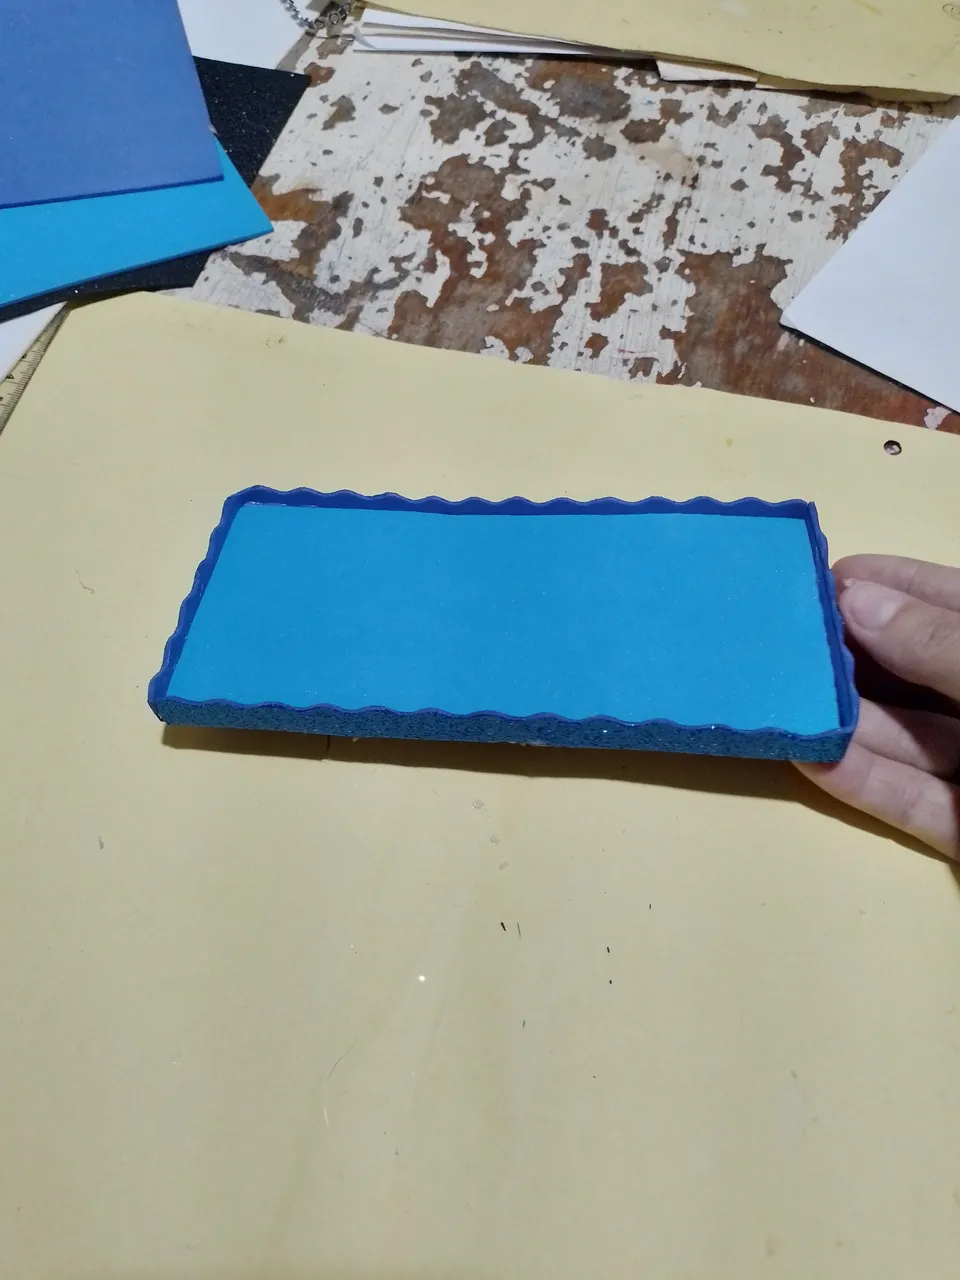
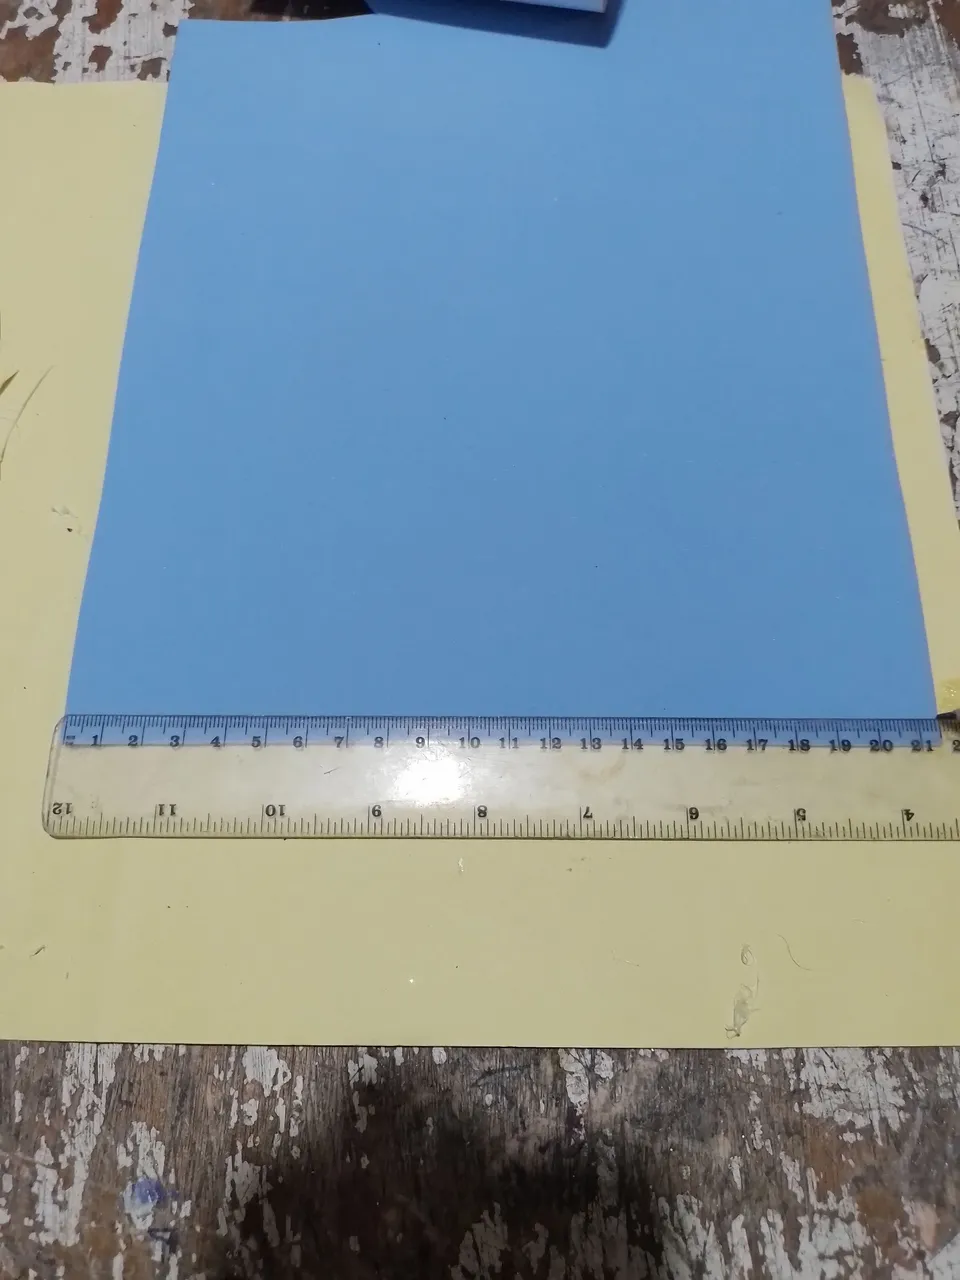
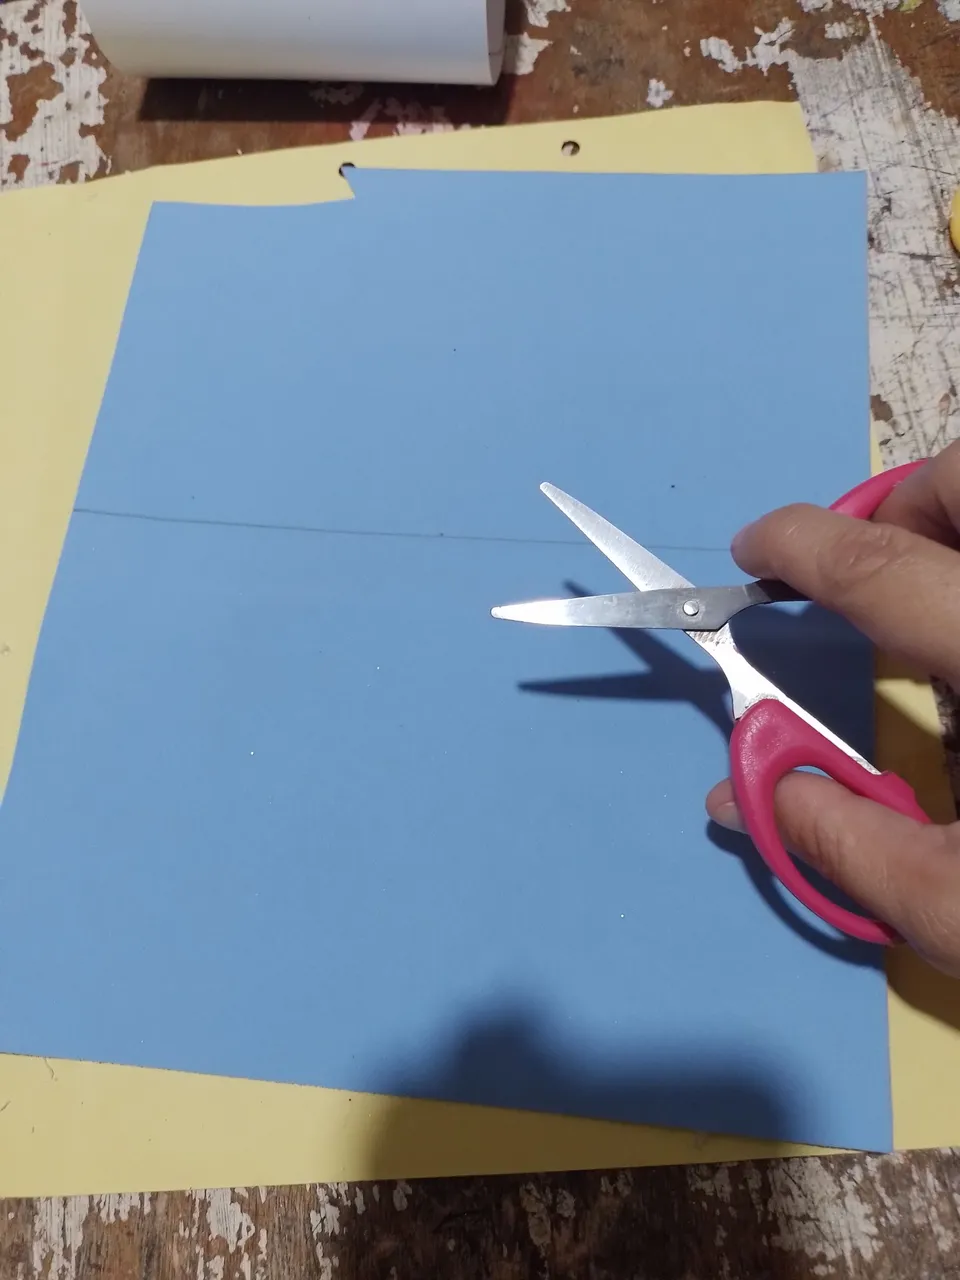
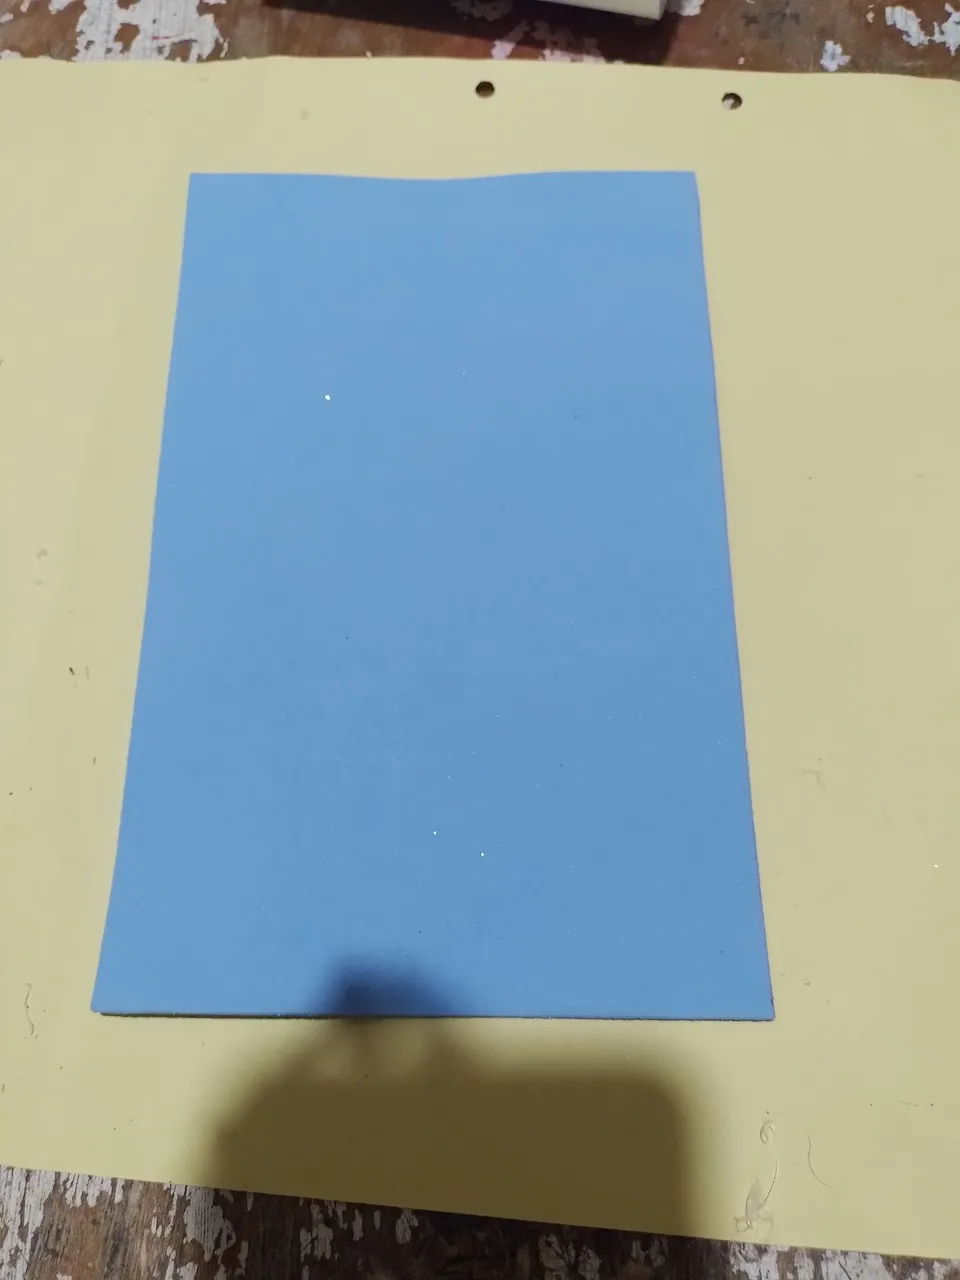
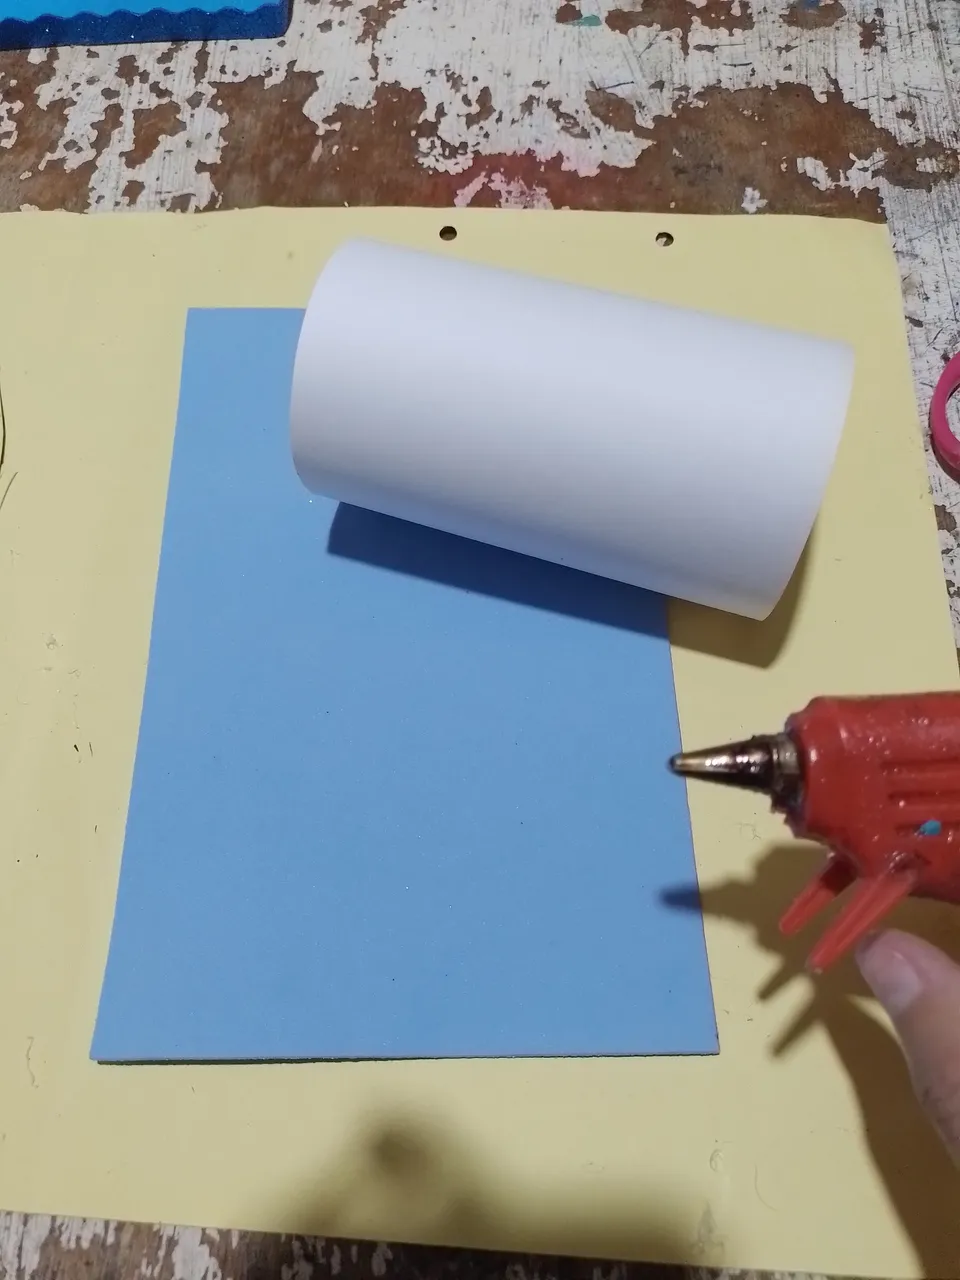
Step 2- once we have the piece of cardboard, we cover it with a plain foami of any color, I chose light blue, we mark it, cut it out and glue it with the silicone gun.
Paso 2- ya teniendo el pedazo de cartón lo forramos por encima con un foami liso de cualquier color, yo escogí el azul claro, lo marcamos, recortamos y lo pegamos con la pistola de silicona.
|
|
|
|
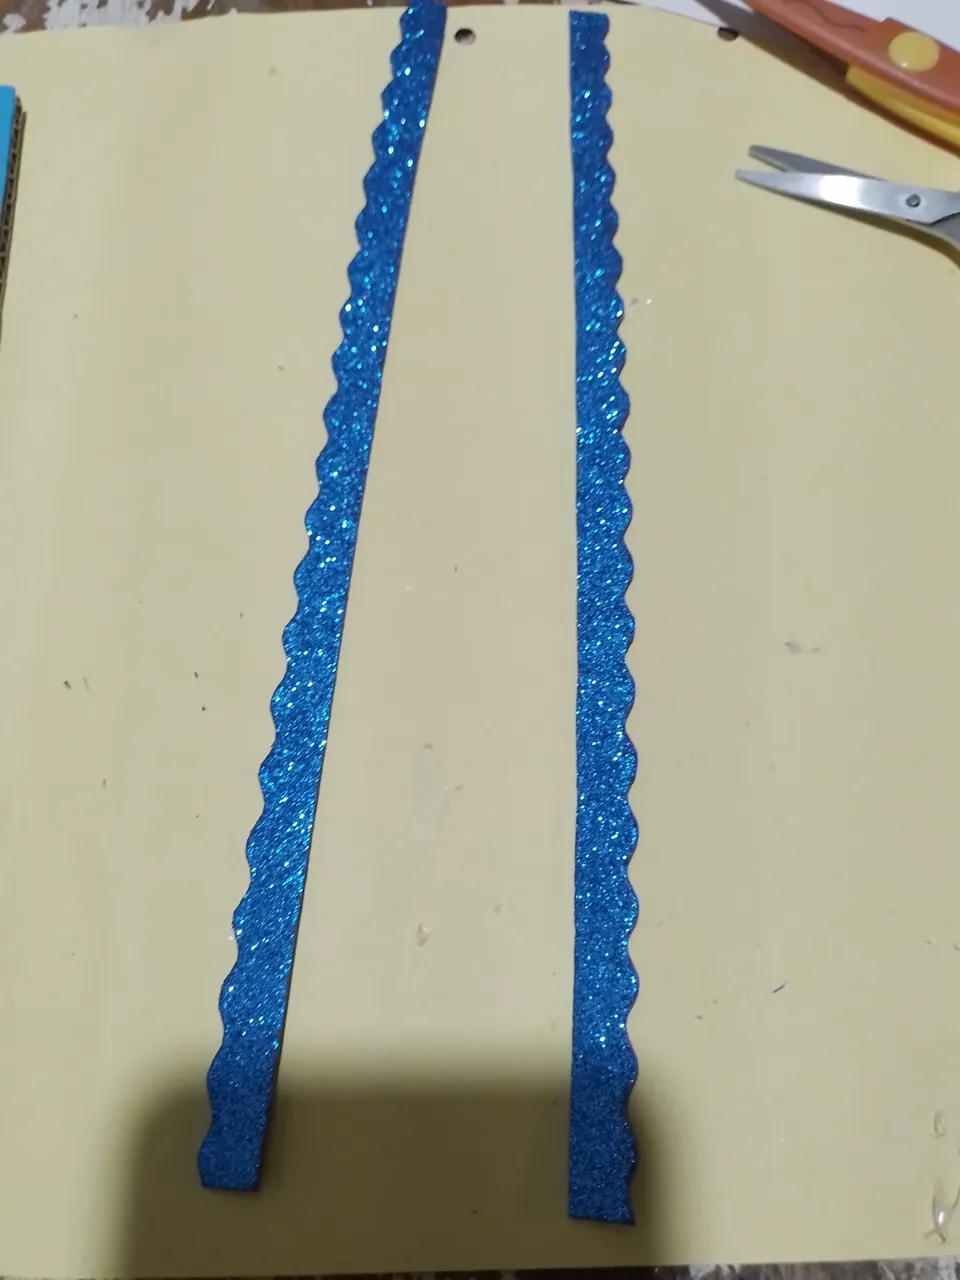
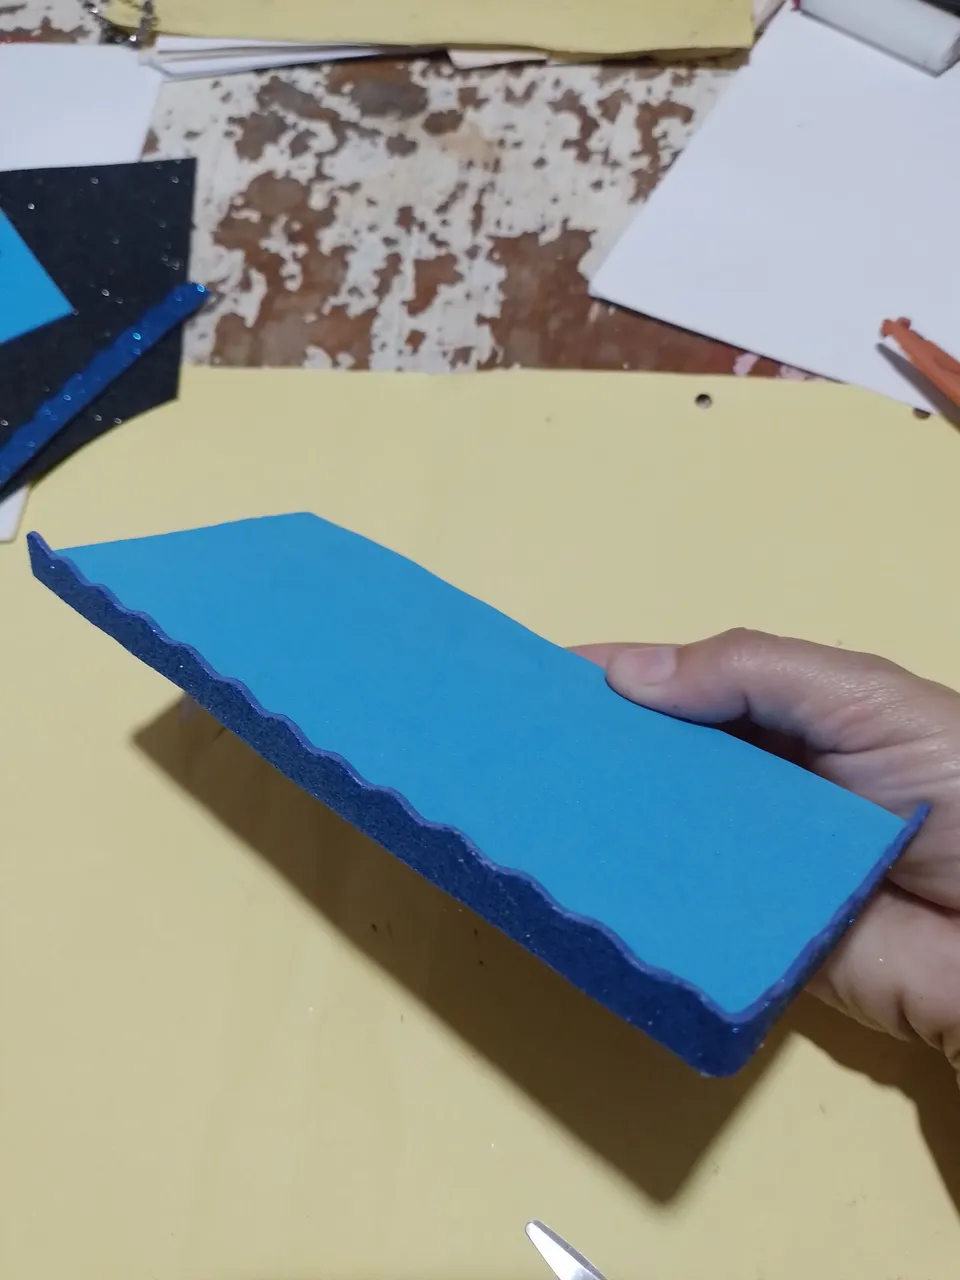
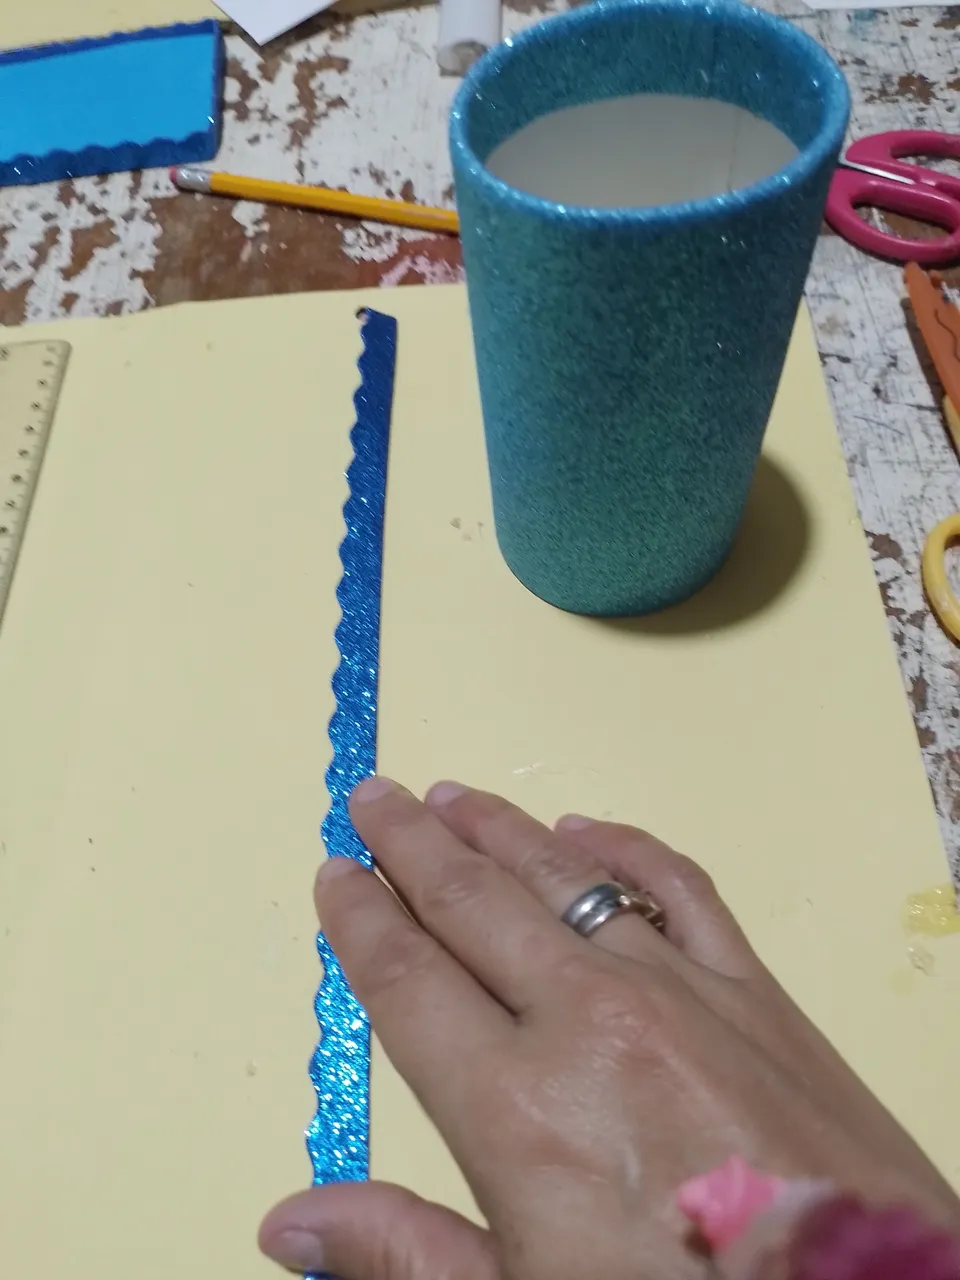
Step 3- Cut two 1 cm strips with the shape scissors and glue them along the contour of the base.
Paso 3- Recortamos dos tiras de 1 cm con la tijera de forma y las pegamos por el contorno de la base.
|
|
|
|
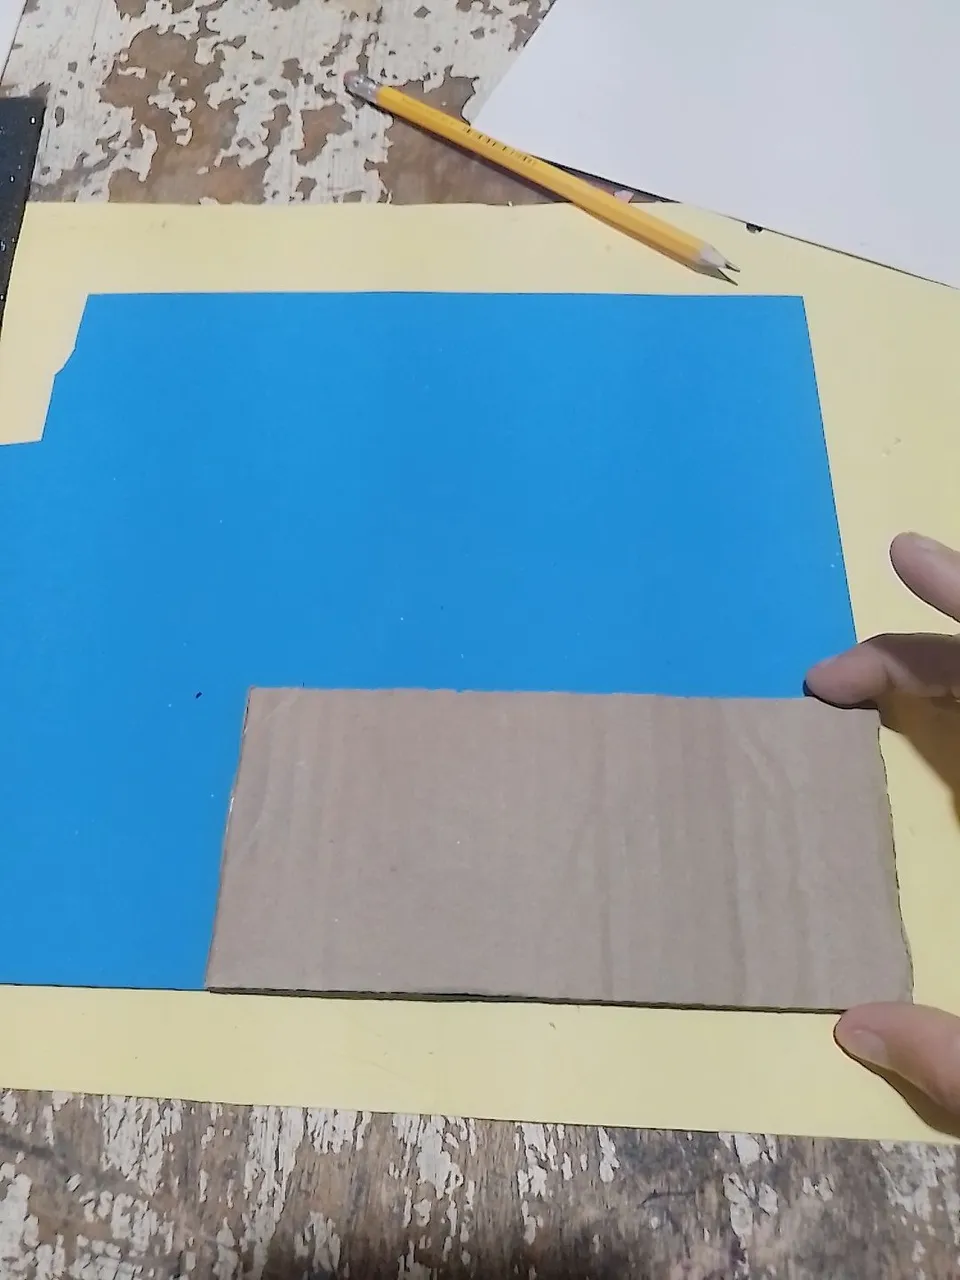
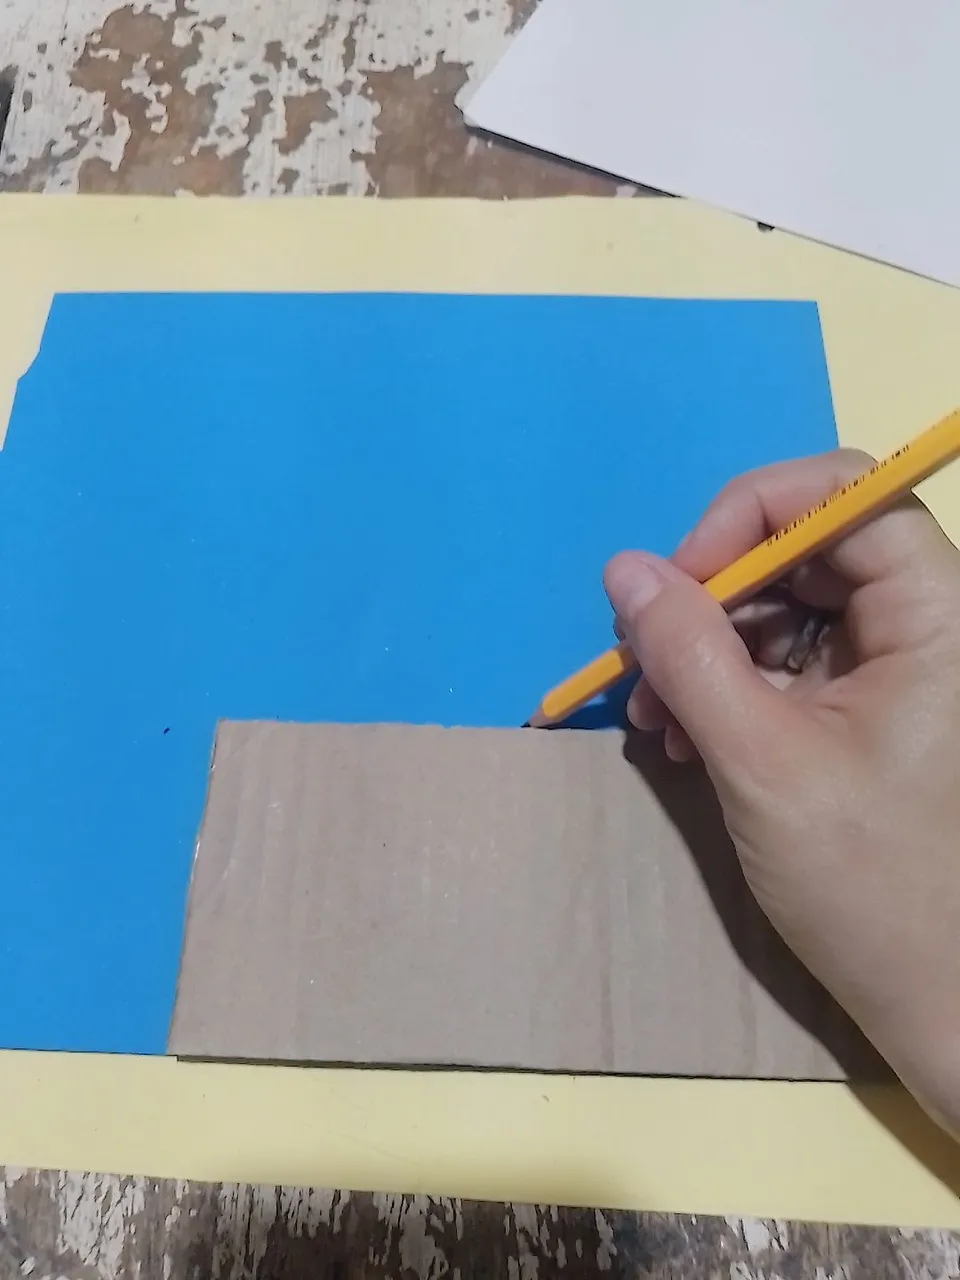
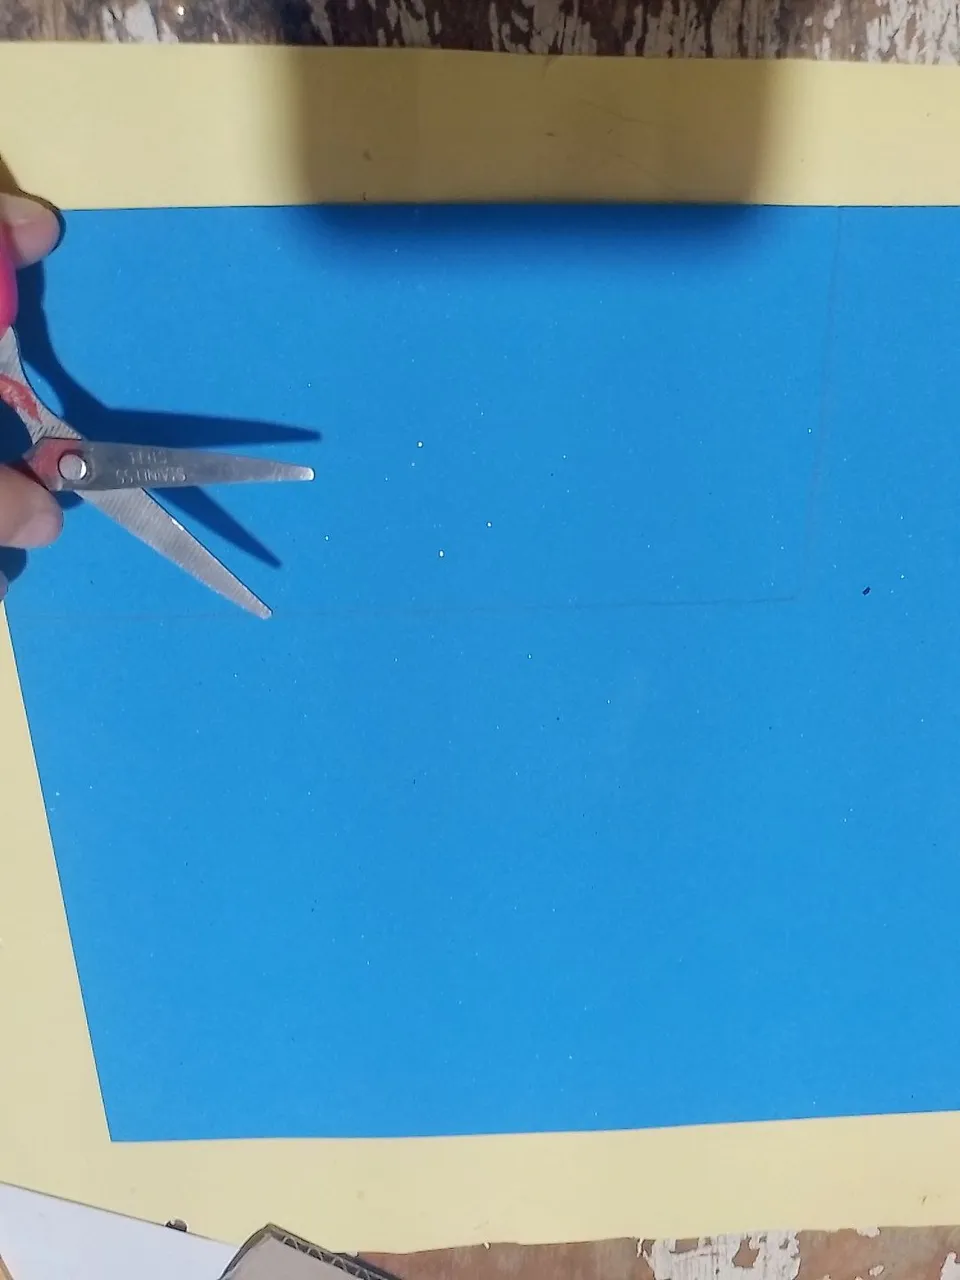
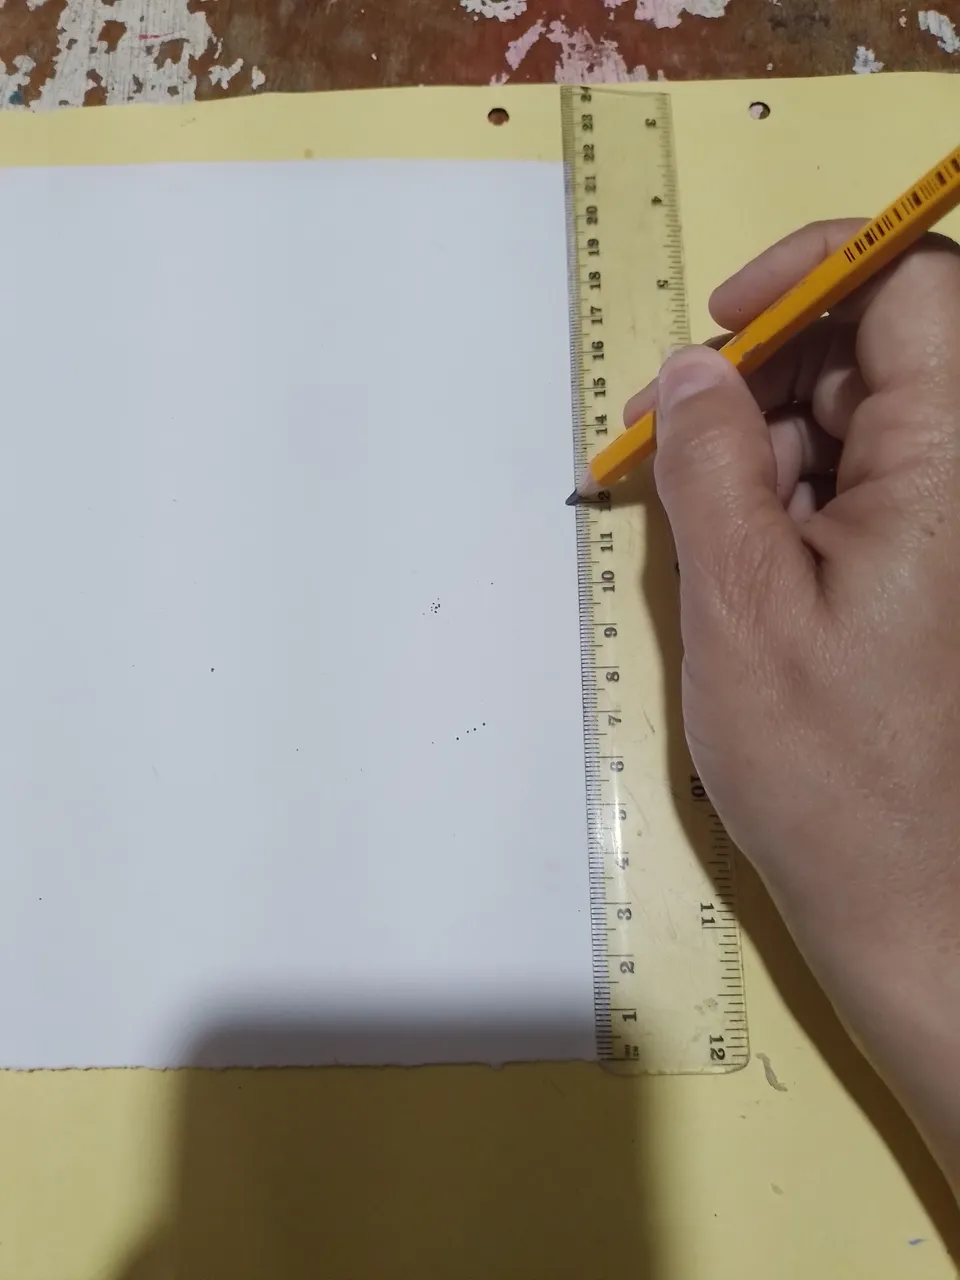
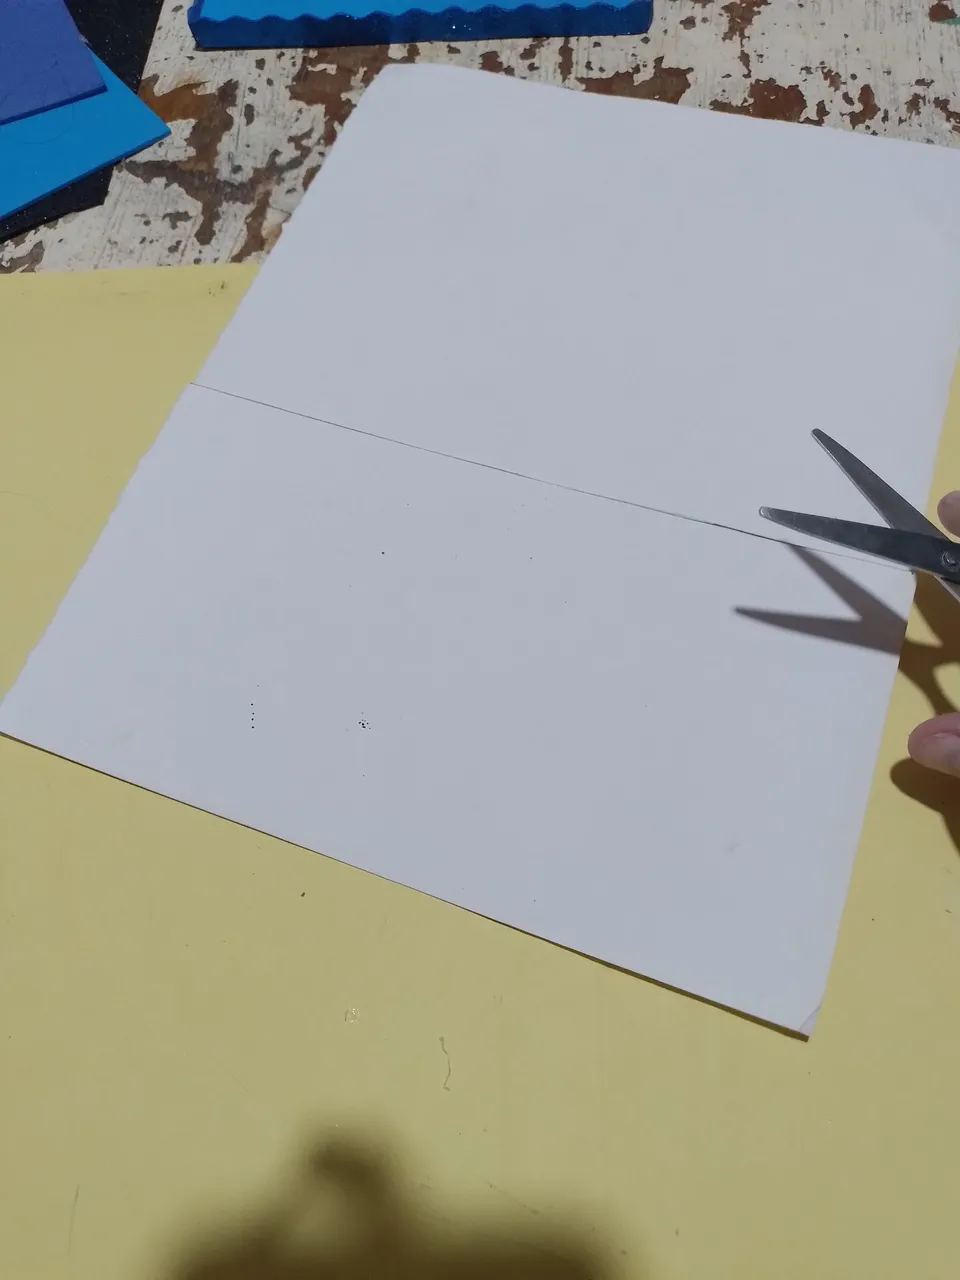
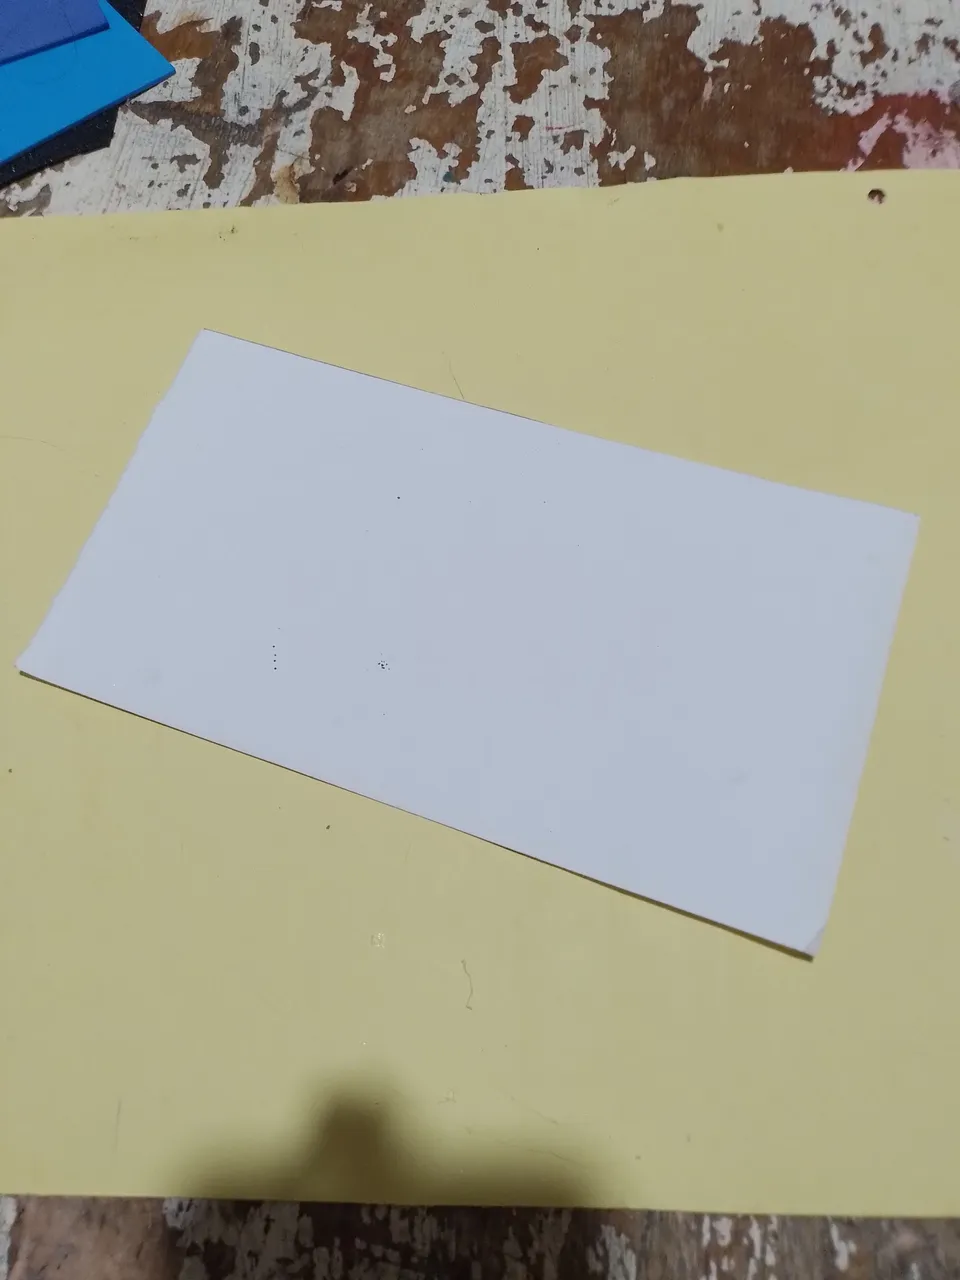
Step 4- Once the base is finished, we will make the part where the pencils will be placed and for this we need to mark and cut out a piece of white cardboard 12 cm high by 22 cm wide.
Paso 4- Ya terminada la base pasamos hacer la parte donde van colocado los lápices y para esto necesitamos marcar y recortar un trozo de cartulina blanca de 12 cm de alto por 22 cm de ancho.
|
|
|
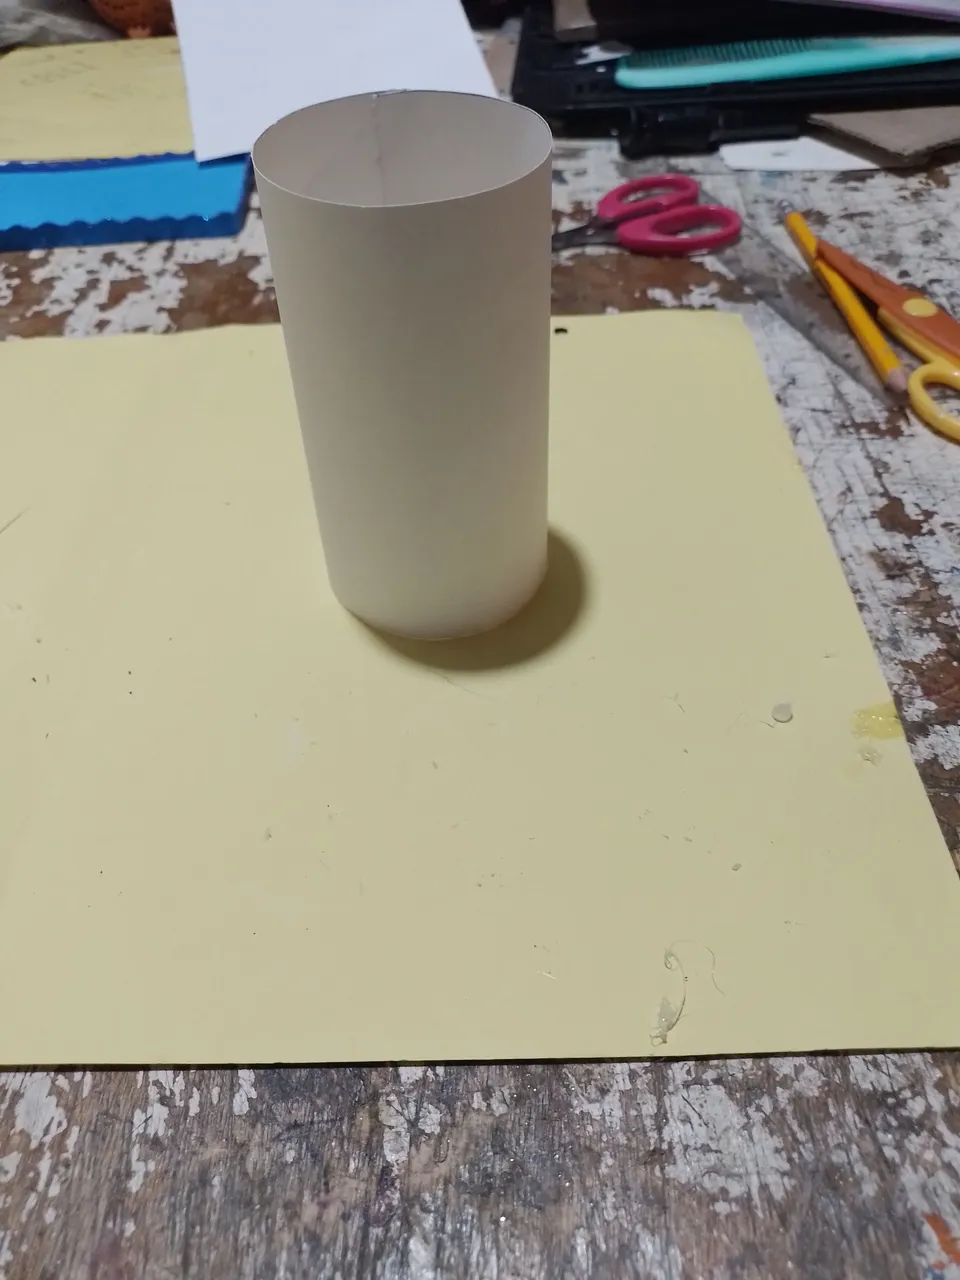
Step 5- Once we have this piece of cardboard cut out, we glue it to form a cylinder.
Paso 5- Ya teniendo este trozo de cartulina recortado lo pegamos q nos quede formado un cilindro.
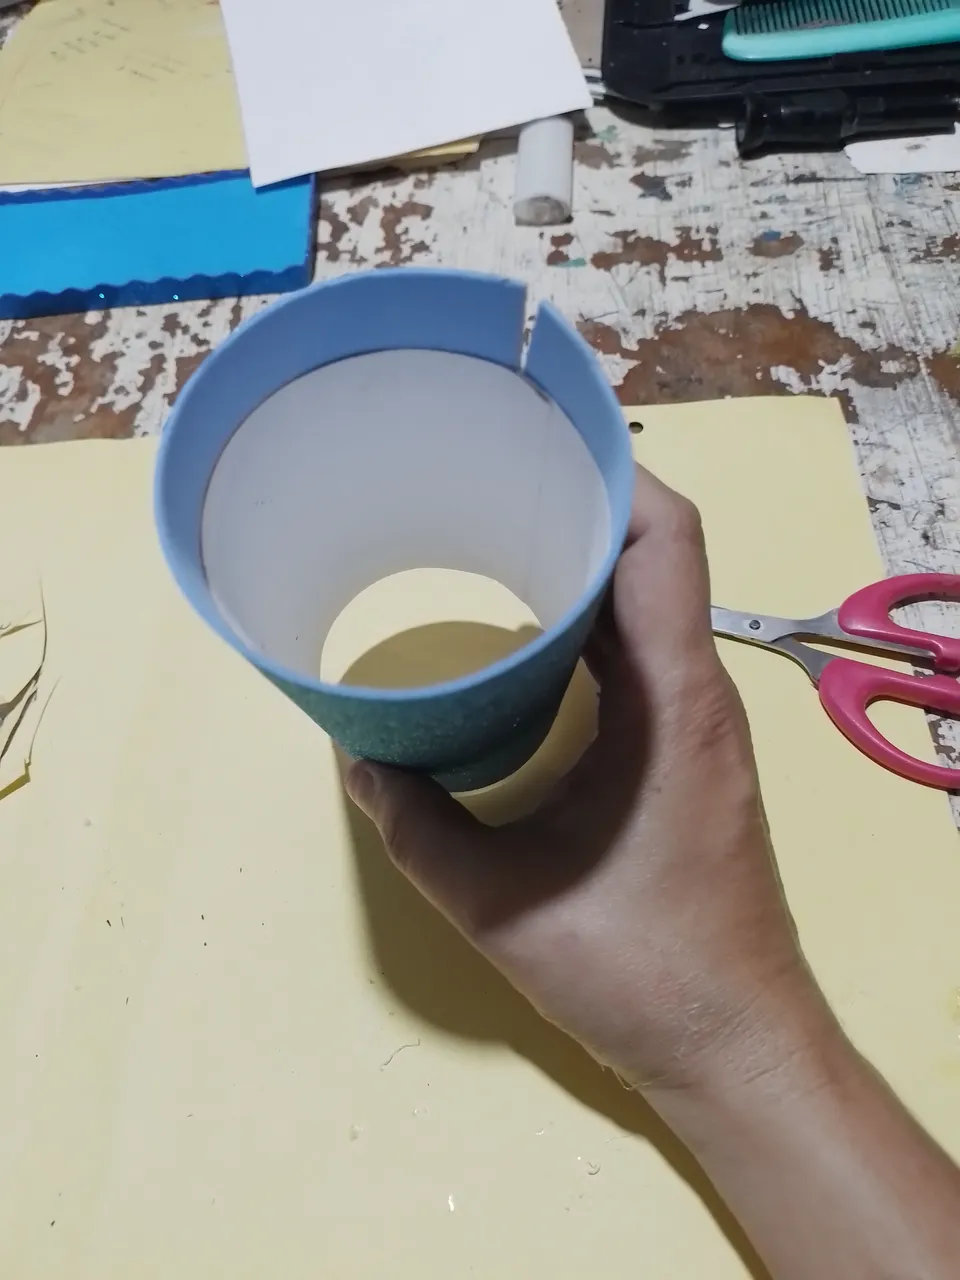
Step 6- Once the cylinder is made, cut out a piece of light blue foami 14 cm high by 21.5 cm wide.
Paso 6- Una ves hecho el cilindro recortamos un pedazo de foami azul claro de 14 cm de alto por 21.5 cm de ancho.
|
|
|
|
Step 7- Glue the light blue fomi piece around the cylinder.
Paso 7- Pegamos el pedazo de fomi de color azul claro al rededor del cilindro.
|

|
|
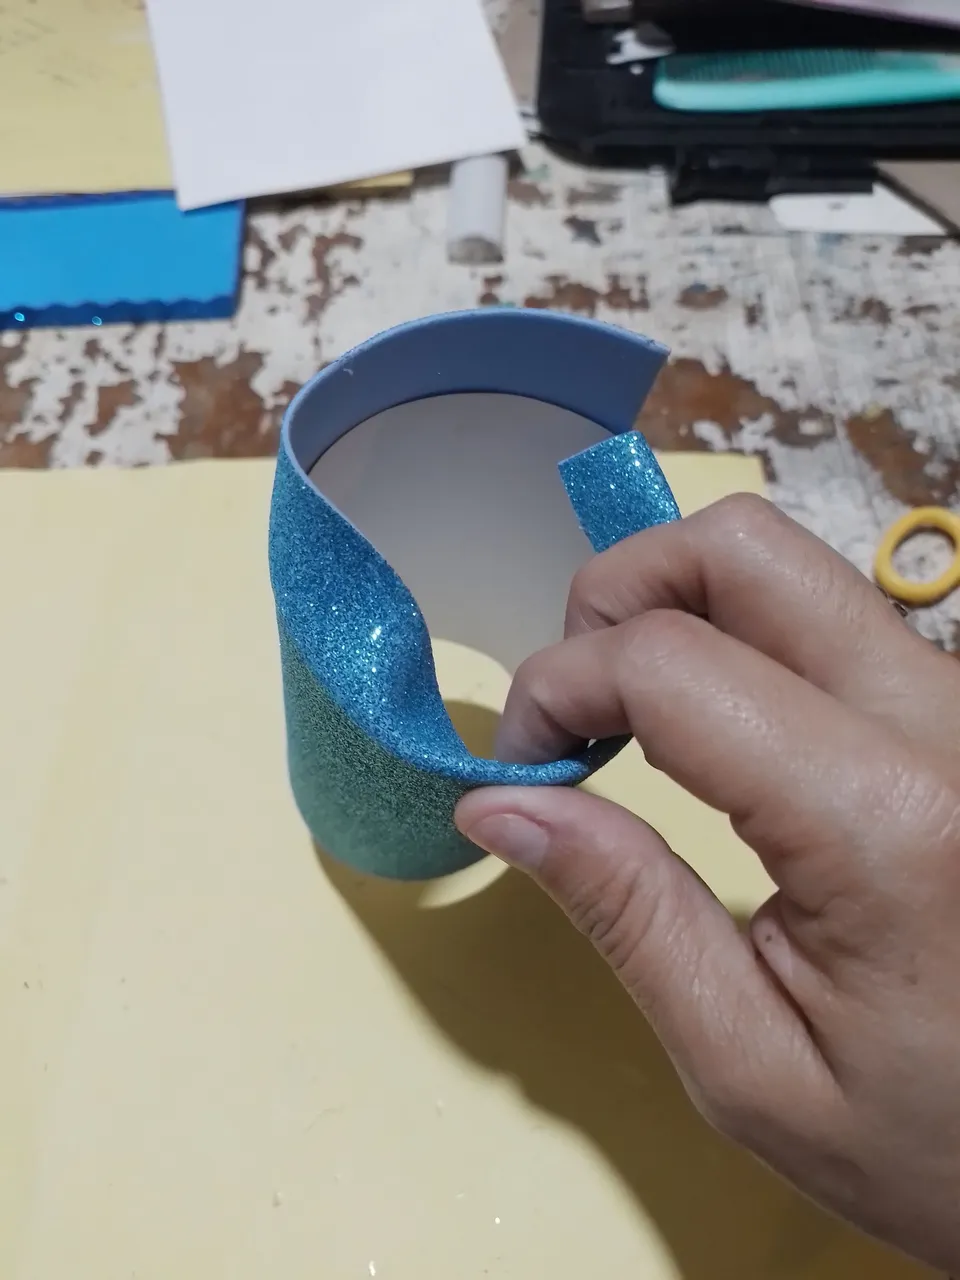
Step 8- We are going to fold the remaining fomi on the top so that it looks nice and the inside of the cylinder does not show too much.
Paso 8- El sobrante de fomi que nos queda arriba lo vamos a doblar hacia dentro para que este nos quede bonito y no se vea mucho el interior del cilindro.
|
|
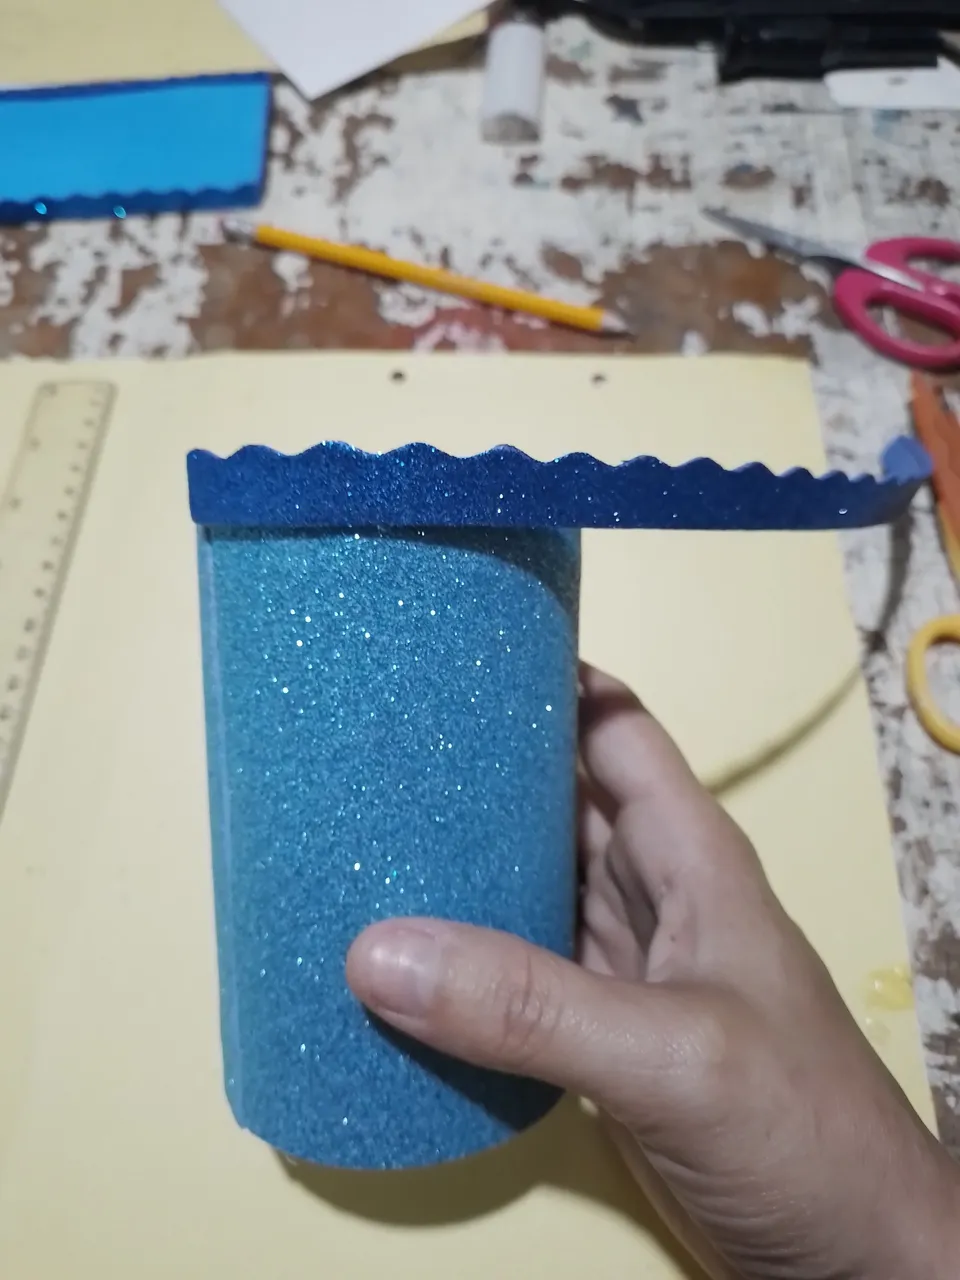
Step 9- then cut a strip of dark blue foami with the shape scissors, this will be 1.5 cm wide, and glue it all around the top edge of the cylinder.
Paso 9- luego recortamos una tira de foami color azul oscuro con la tijera de forma, este será de 1.5 cm de ancho, y la pegamos por todo el borde de arriba del cilindro.
|
|
|
|
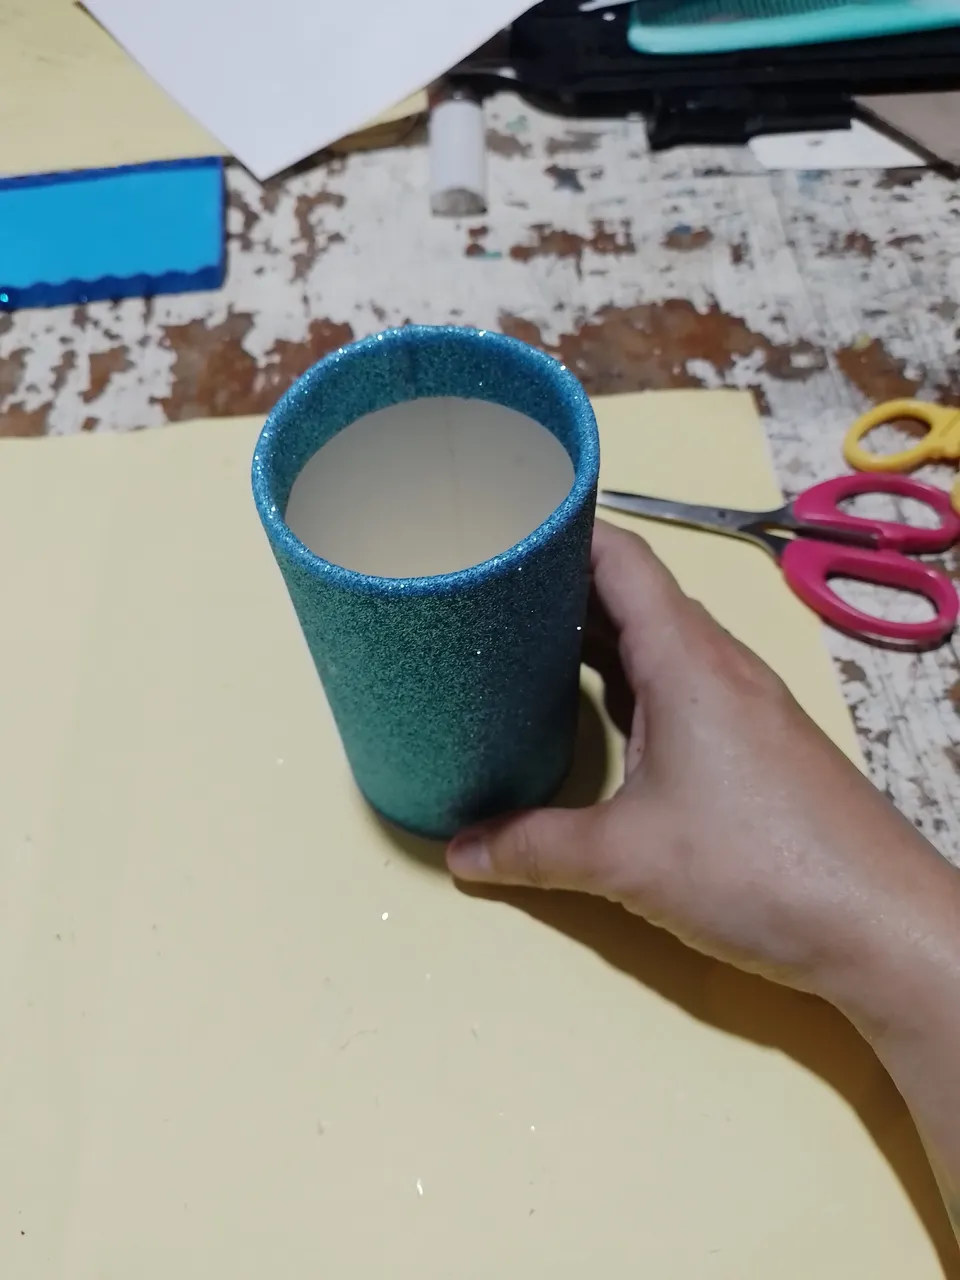
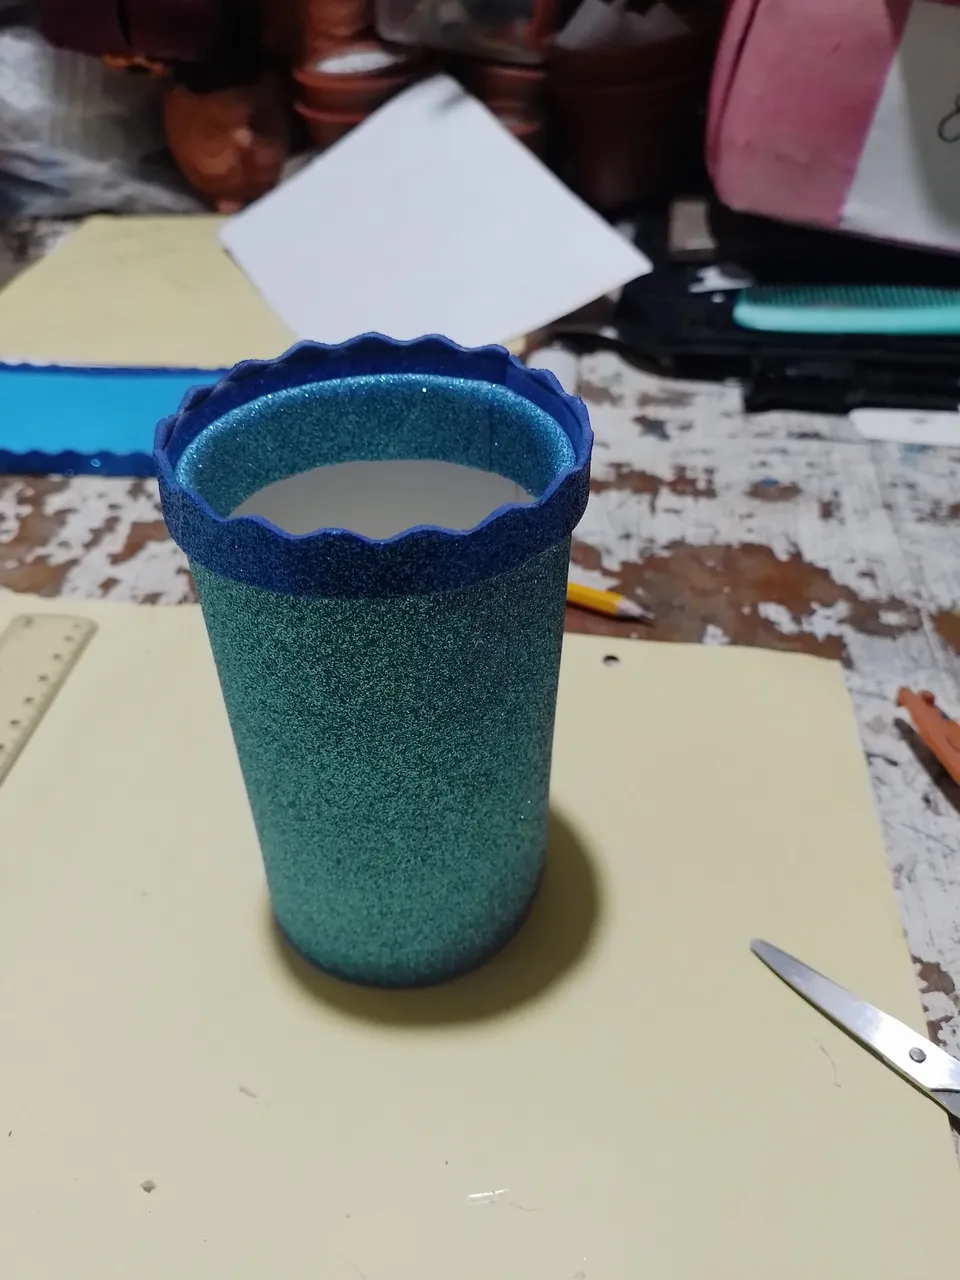
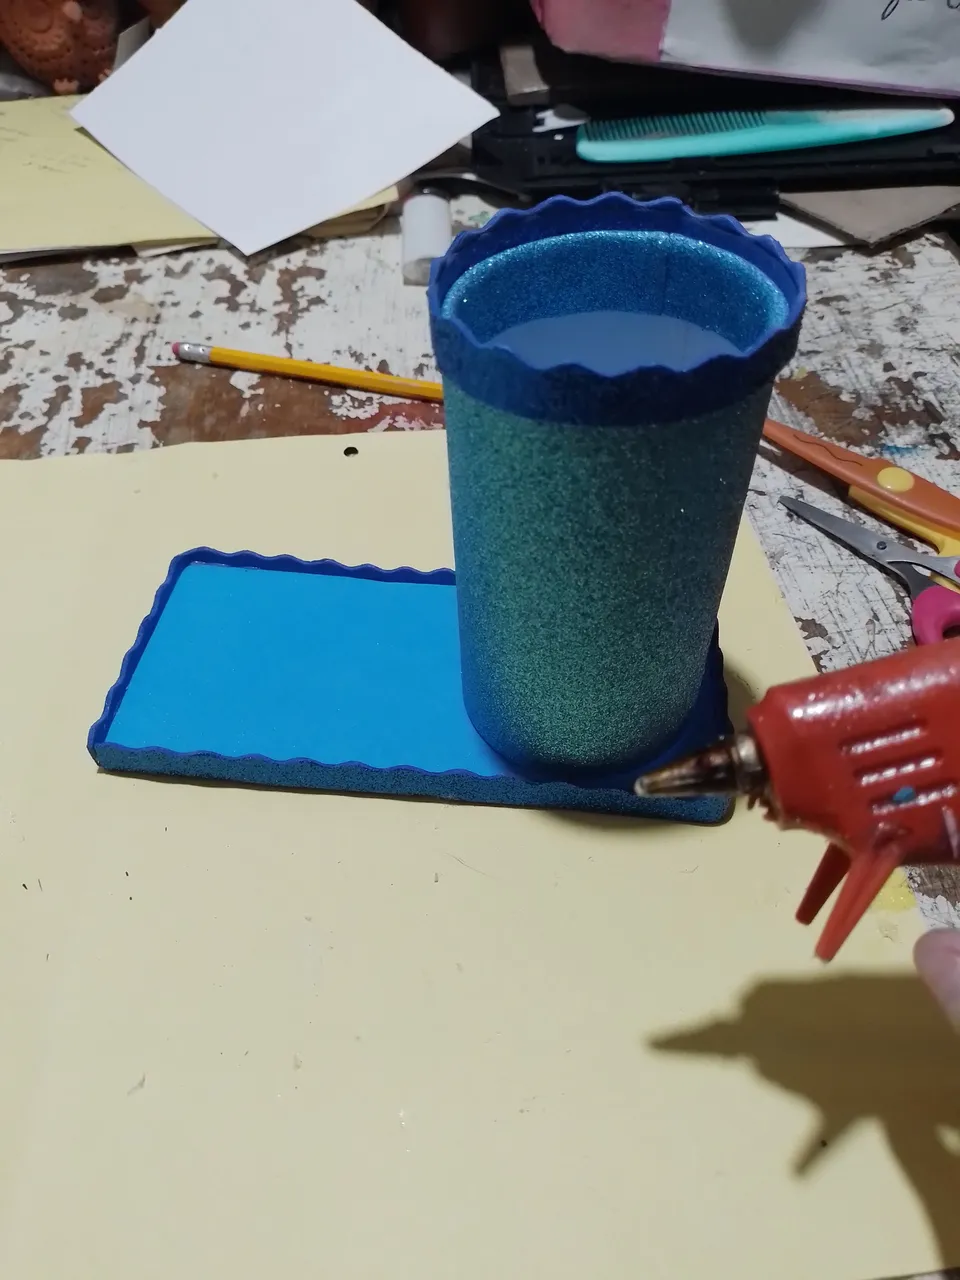
Step 10- once the cylinder of the pencil holder is finished, we glue it on the base we made previously, and we leave it aside to continue to the next step.
Paso 10- ya terminado el cilindro del portalápiz lo pegamos en la base que hicimos anteriormente, y lo dejamos al lado para seguir al siguiente paso
|
|
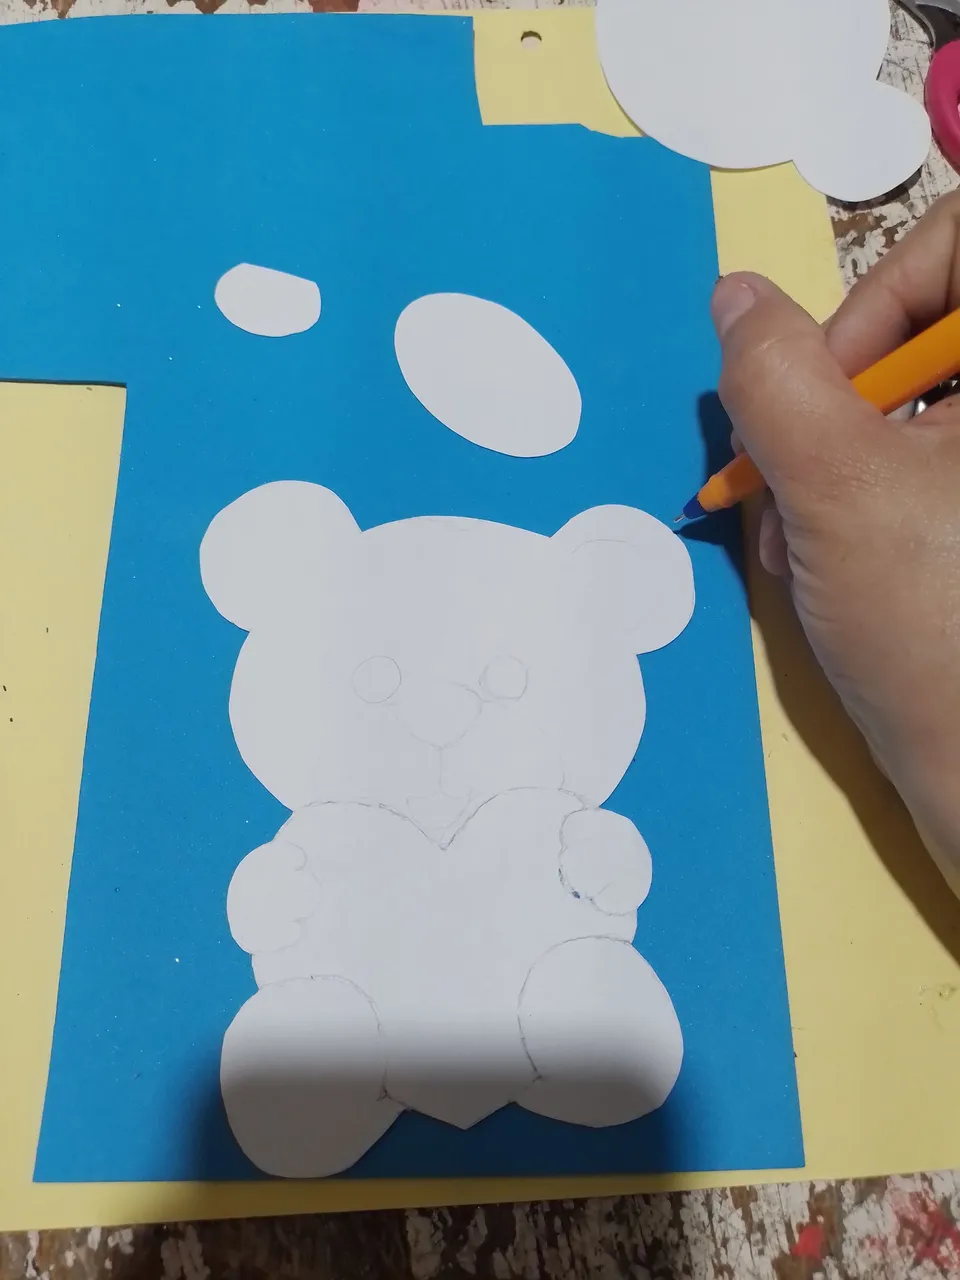
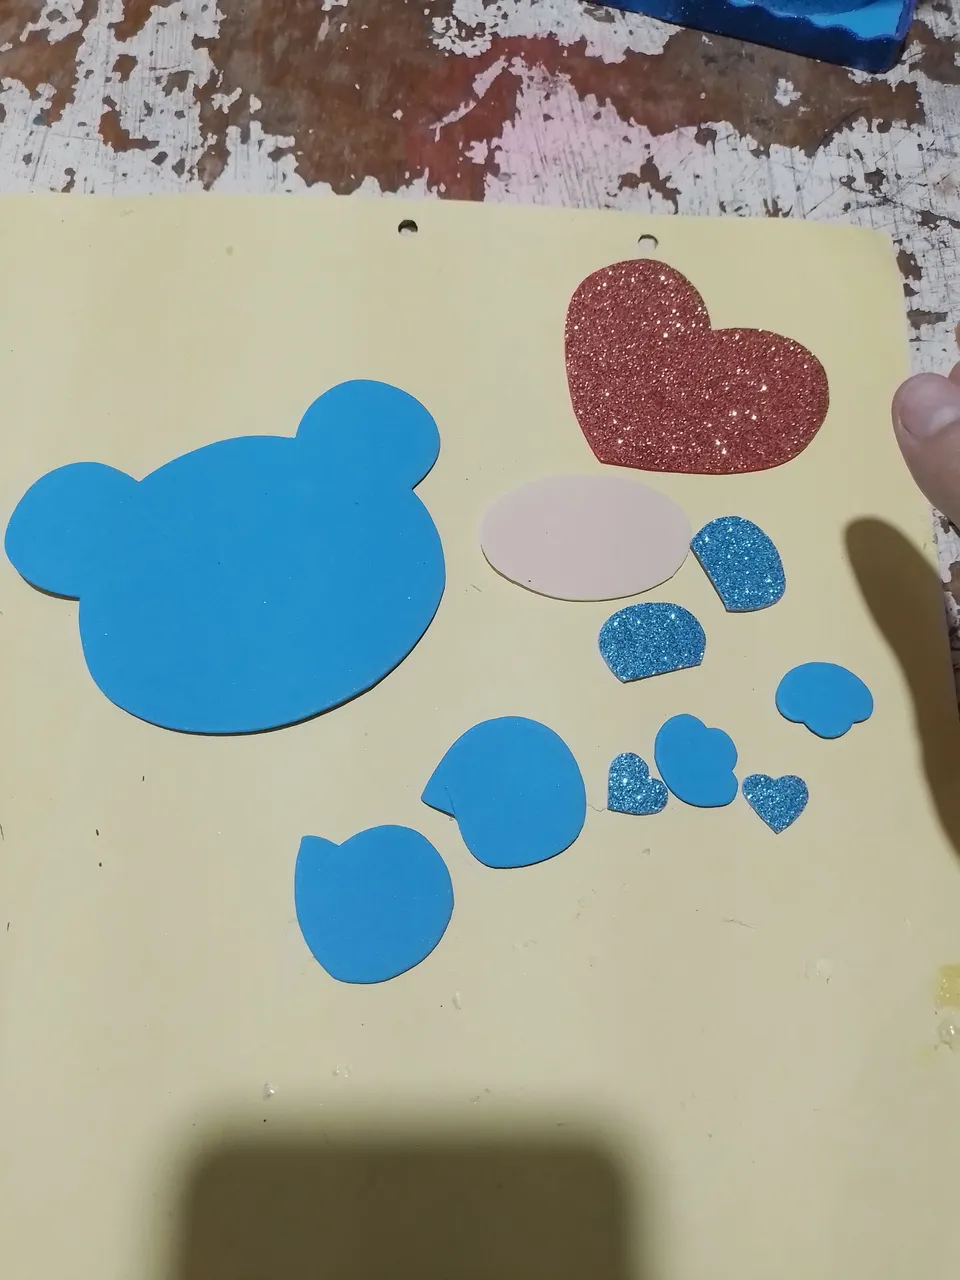
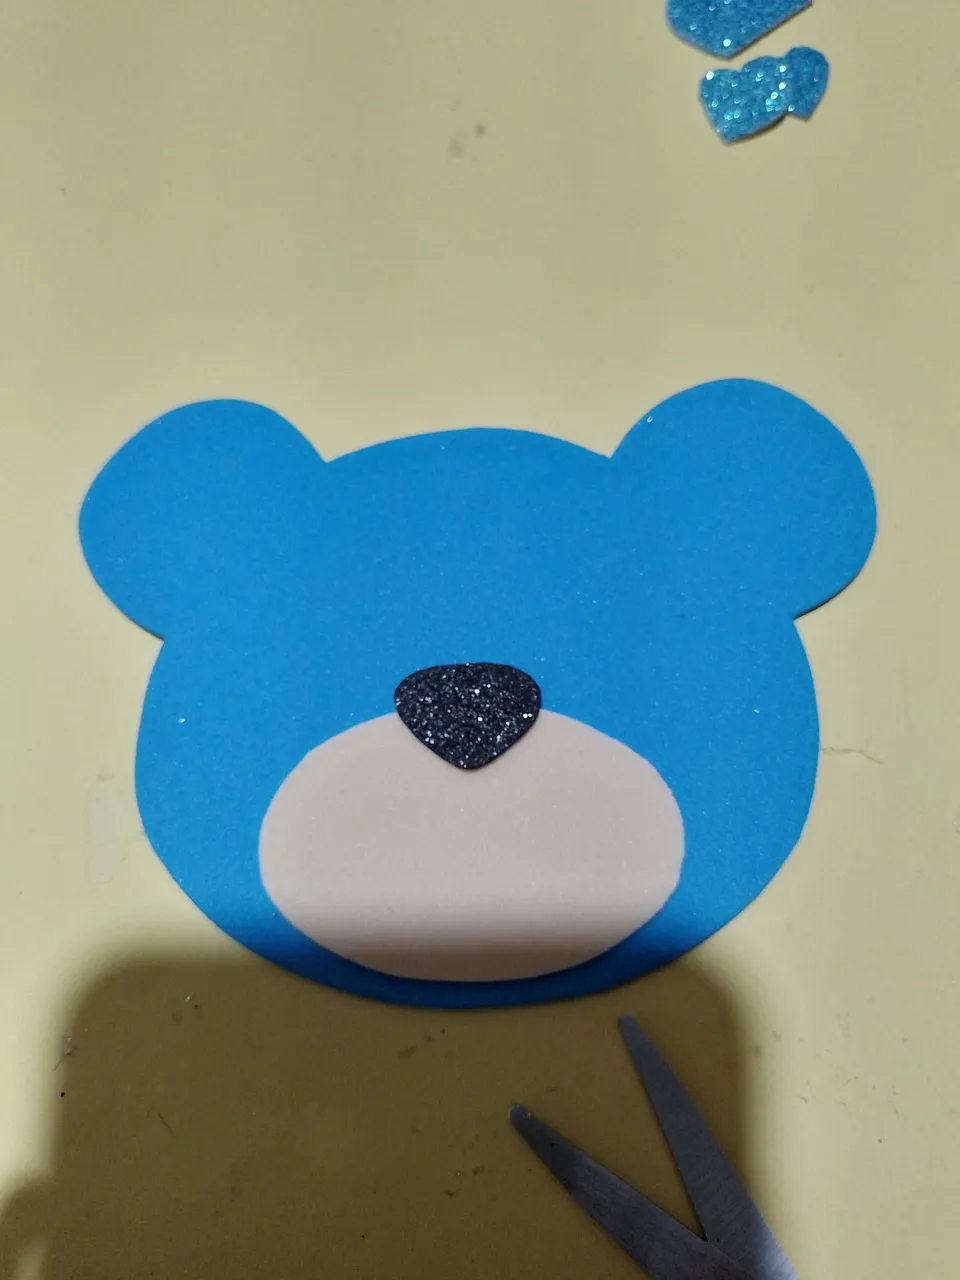
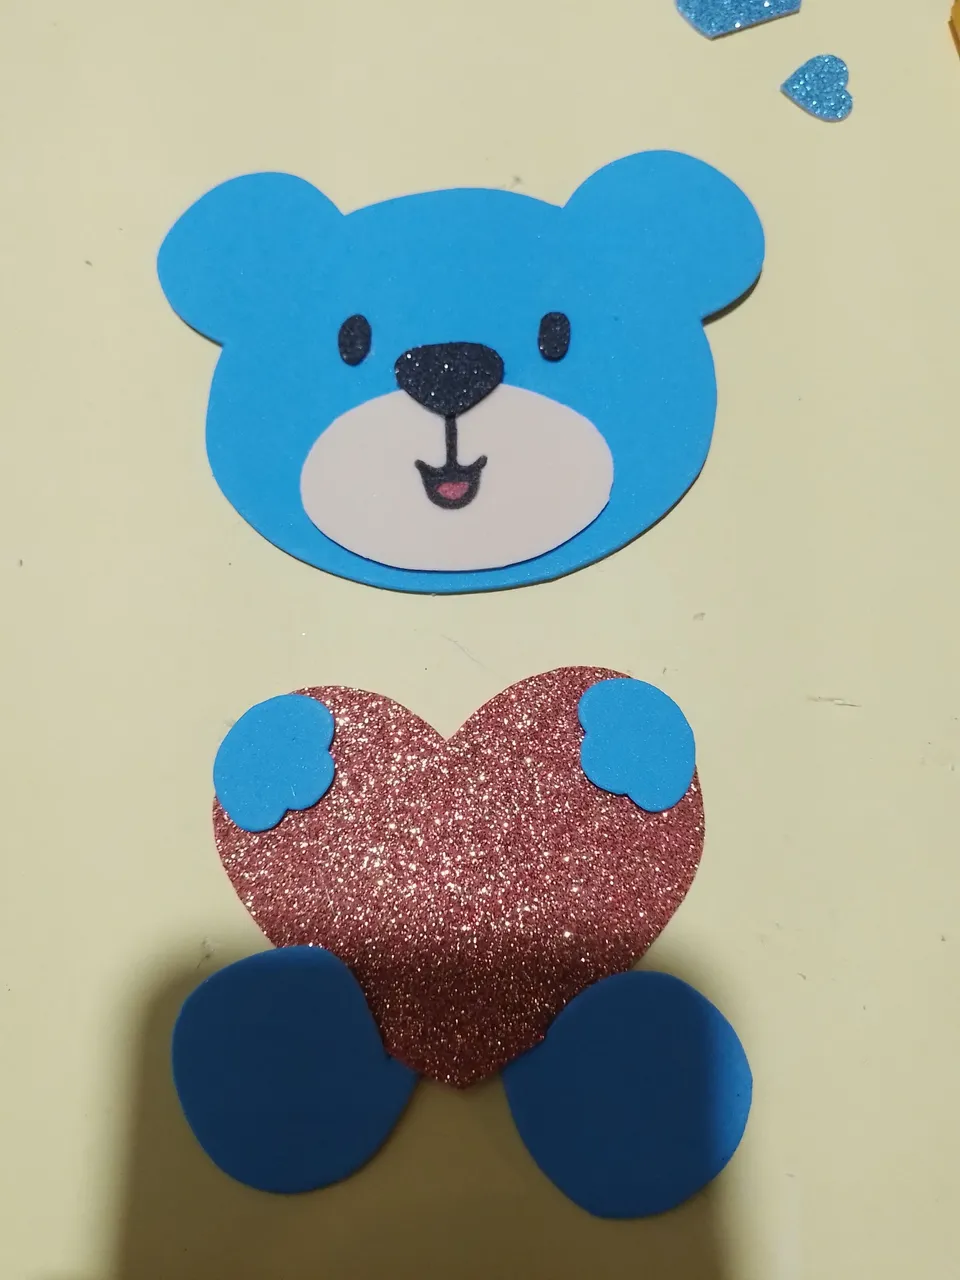
Step 11- Now we are going to make the ornament on the side of the pencil holder and I chose a teddy bear on top of a book and for this we take the paper molds and place it on top of the fomi and mark it with the fine tip pen without ink, and then we cut it out.
Paso 11- Ahora vamos hacer el adorno del lado del portalápiz y yo escogí un osito encima de un libro y para esto cogemos los moldes de papel y lo colocamos encima del fomi y lo marcamos con el bolígrafo de punta fina sin tinta, y luego lo recortamos.
 |
|

|
|
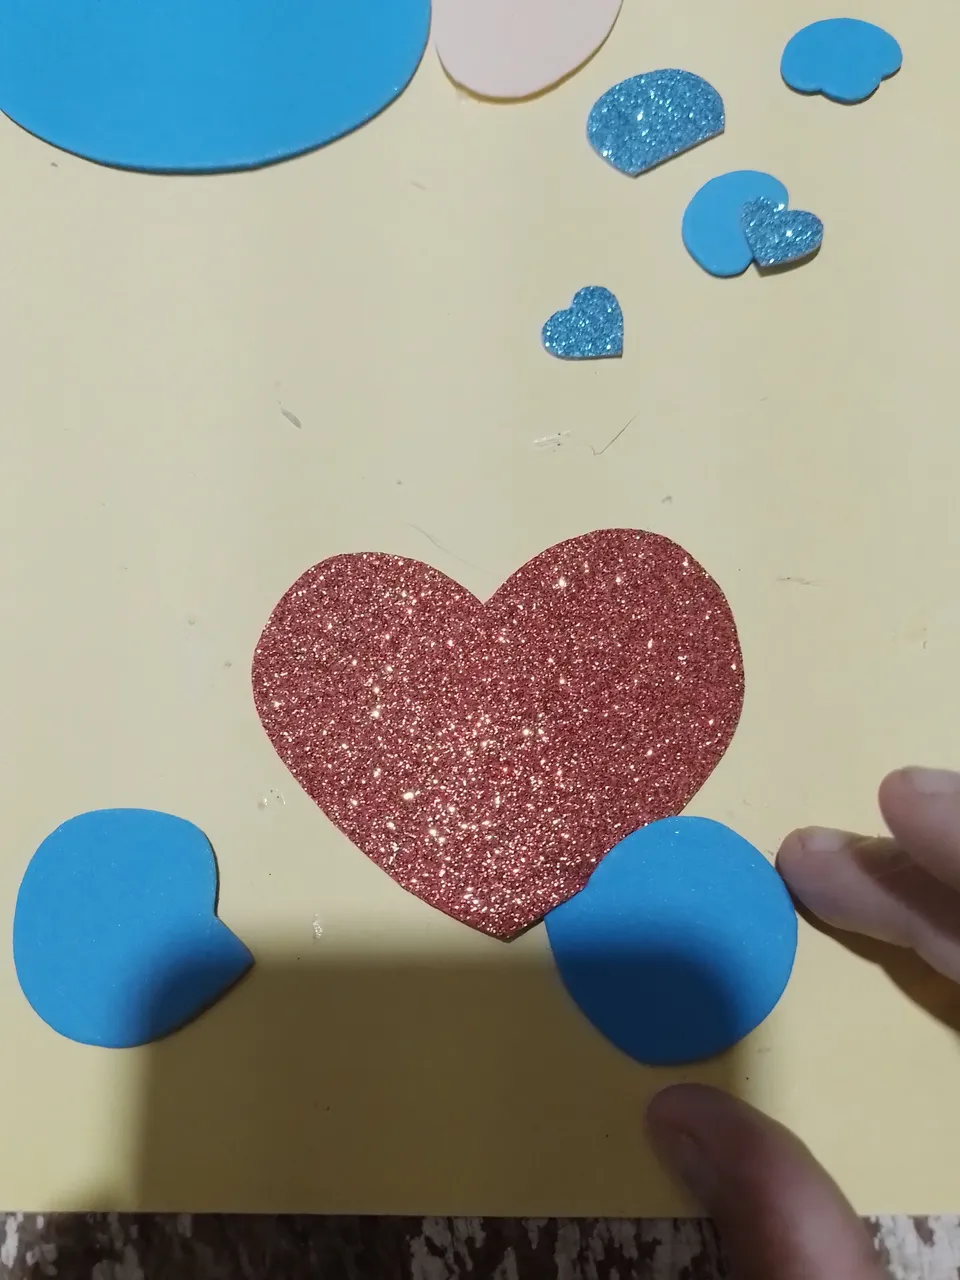
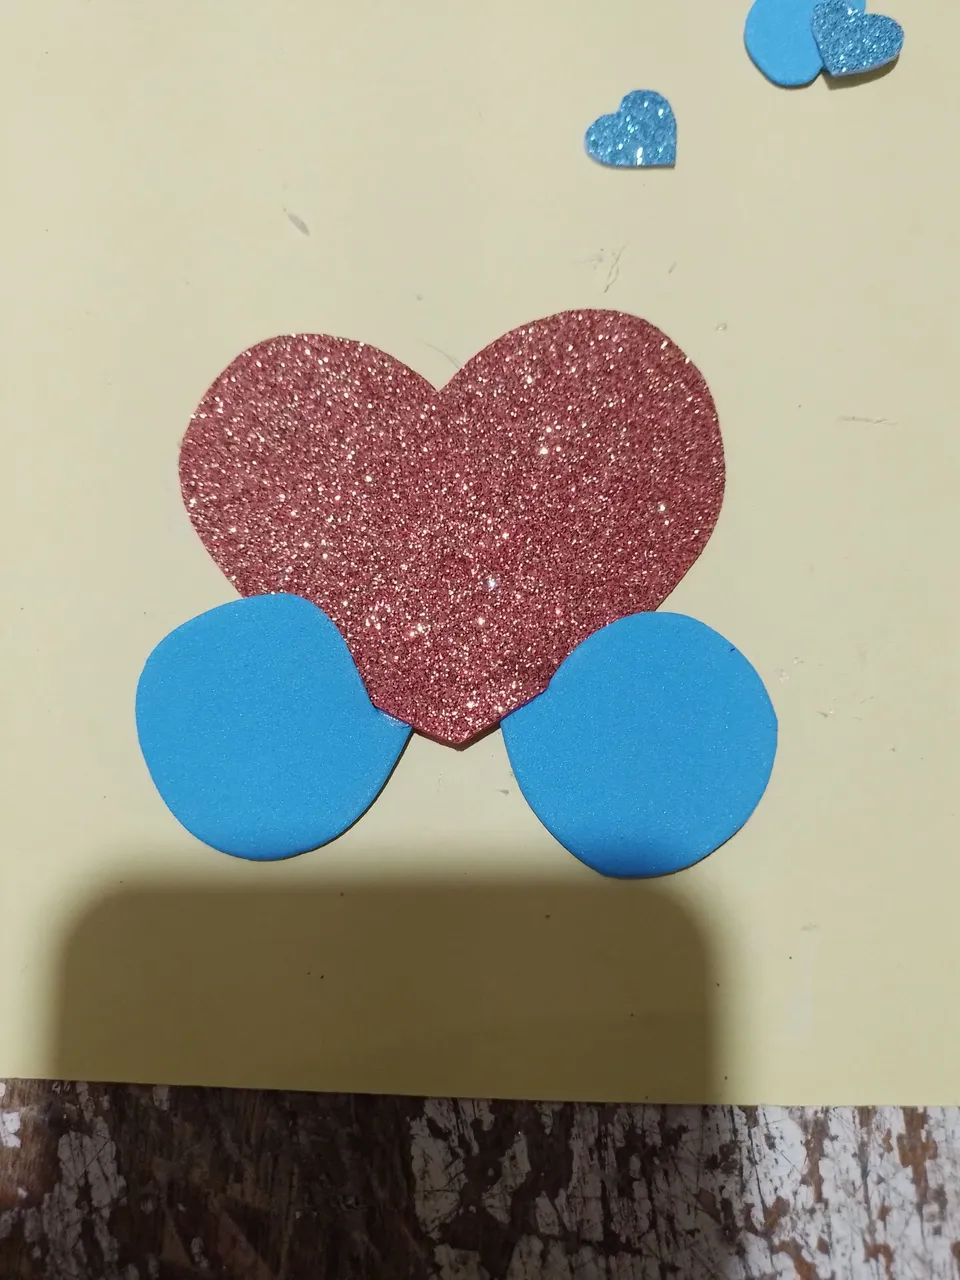
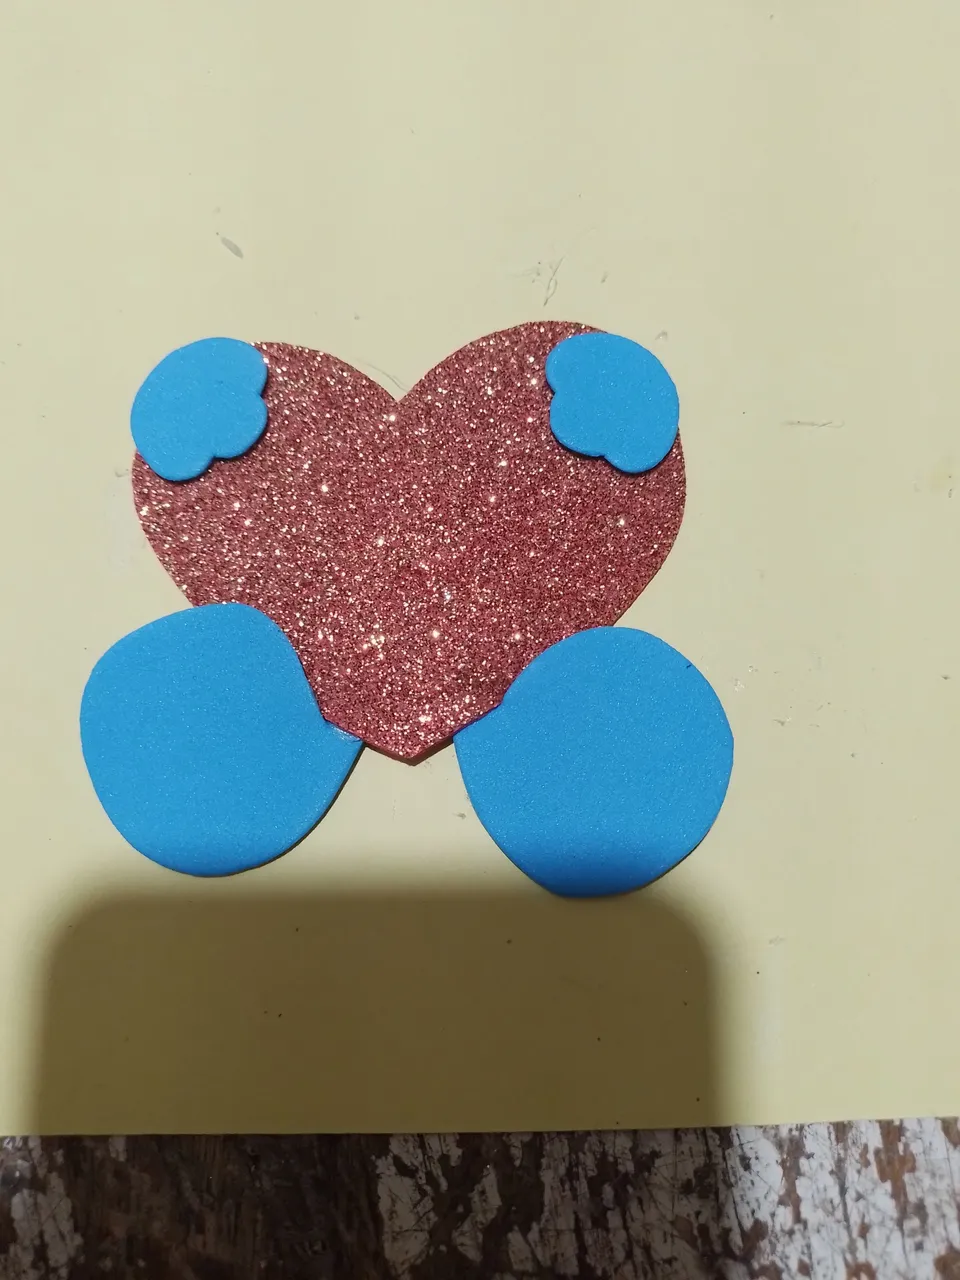
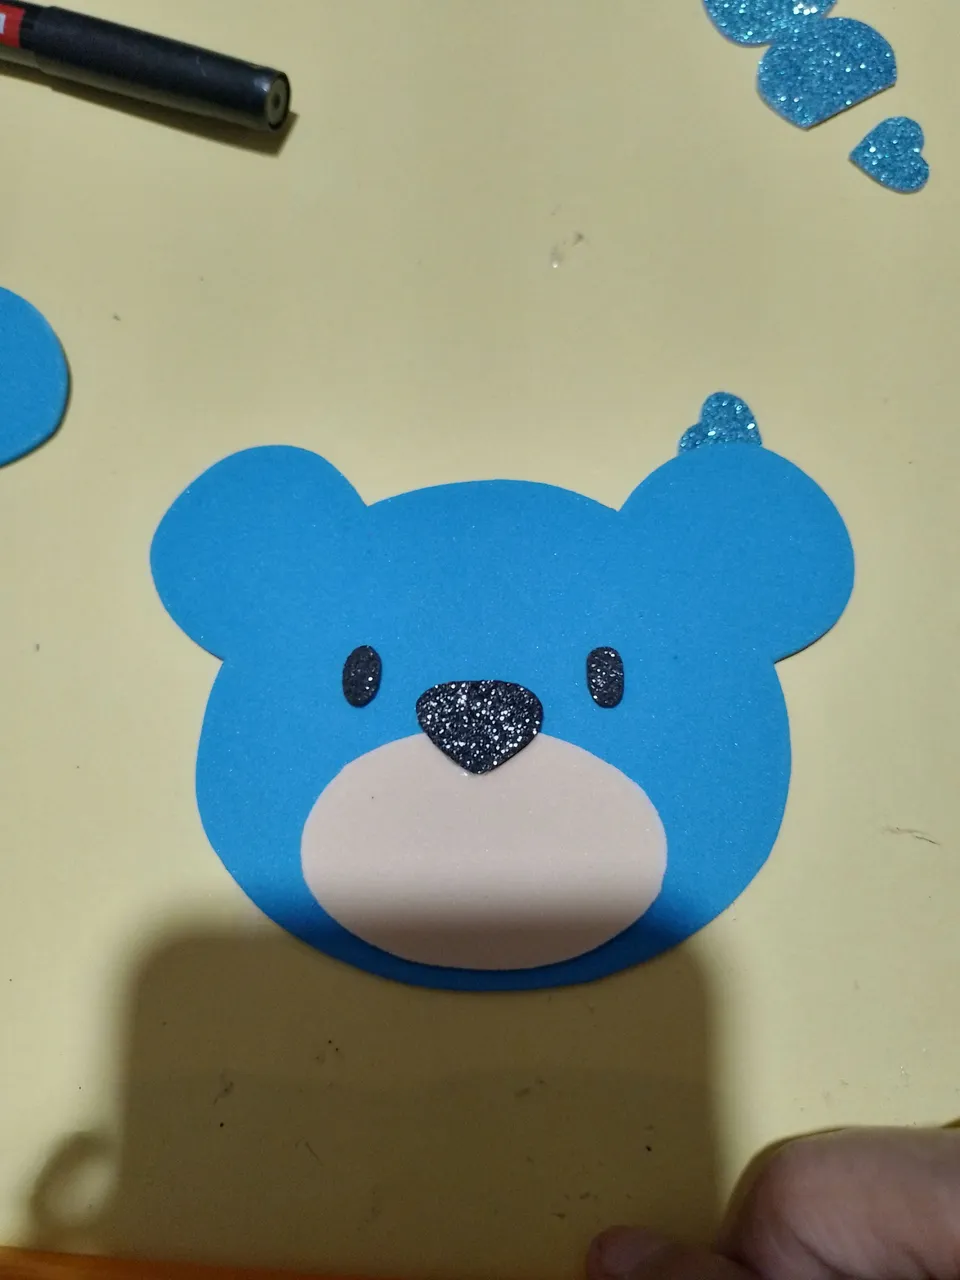
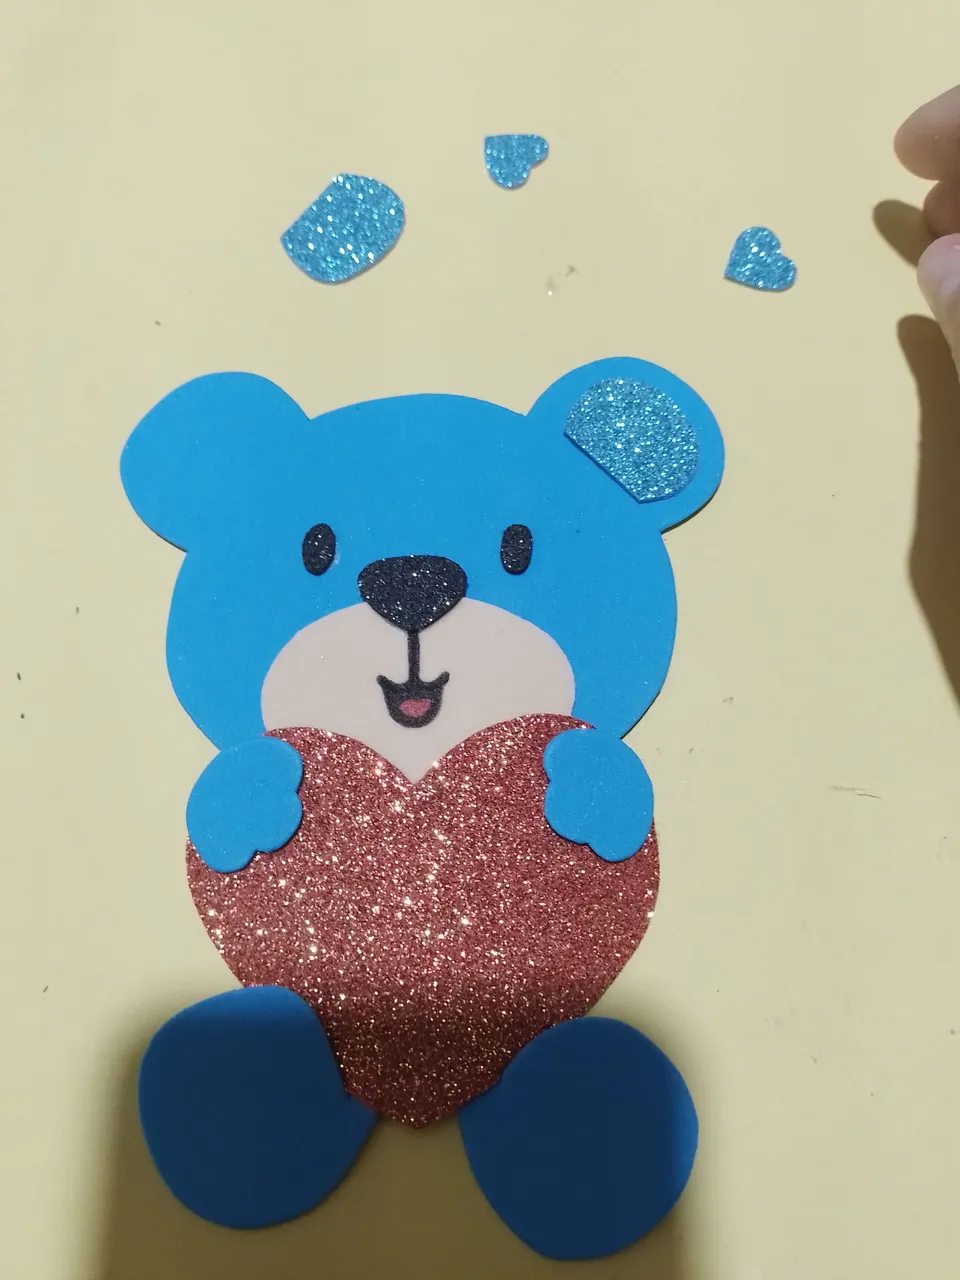
Step 12-Once all the parts of the bear have been marked and cut out, we proceed first to glue the parts of the body and then the corresponding parts of the head.
Paso 12- Ya marcado y recortadas todas las partes del osito procedemos primero a pegar las partes del cuerpo y luego las que corresponden en la cabeza
|
|
|

|
|
|
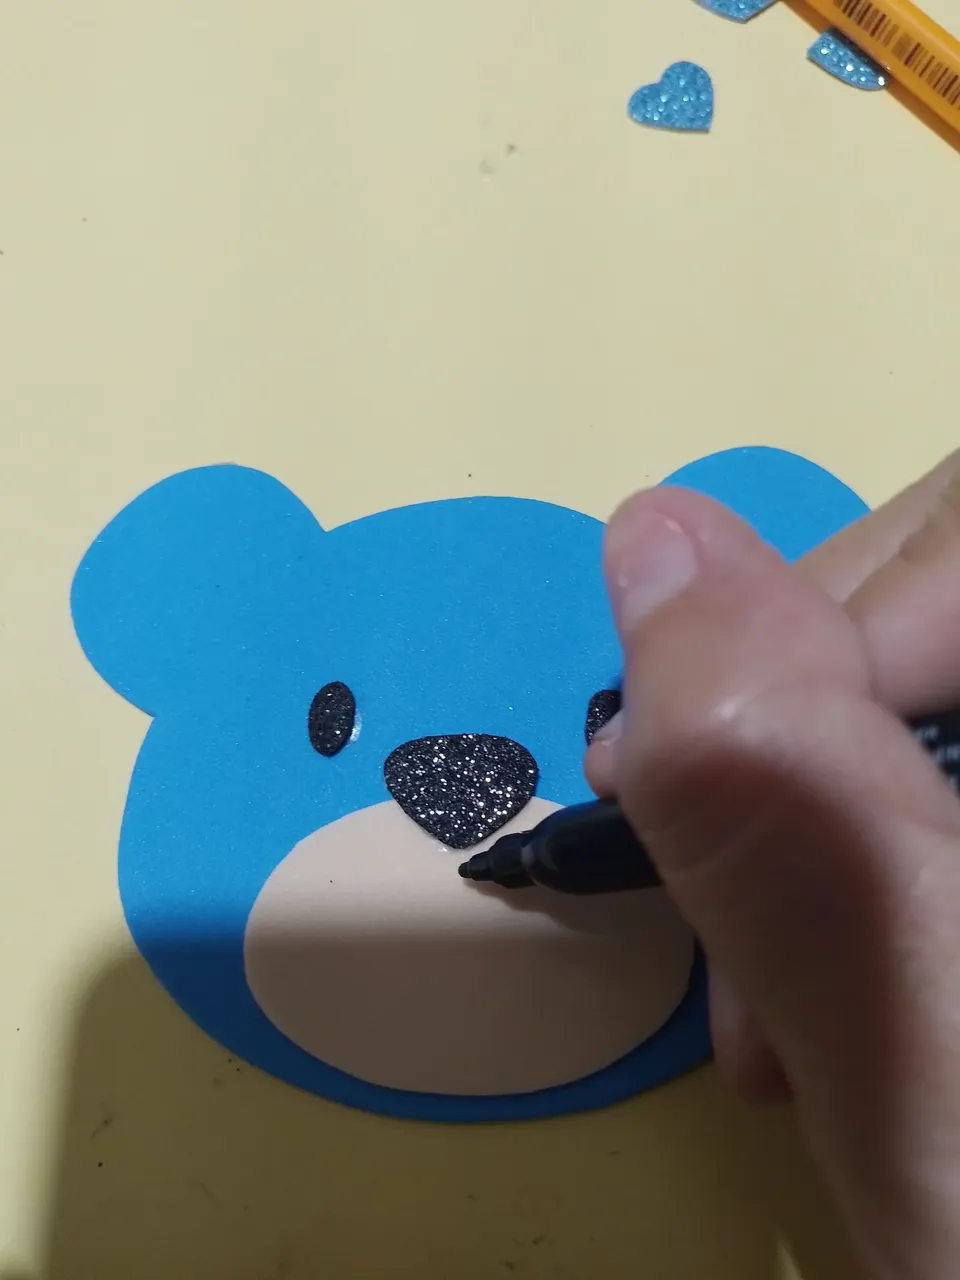
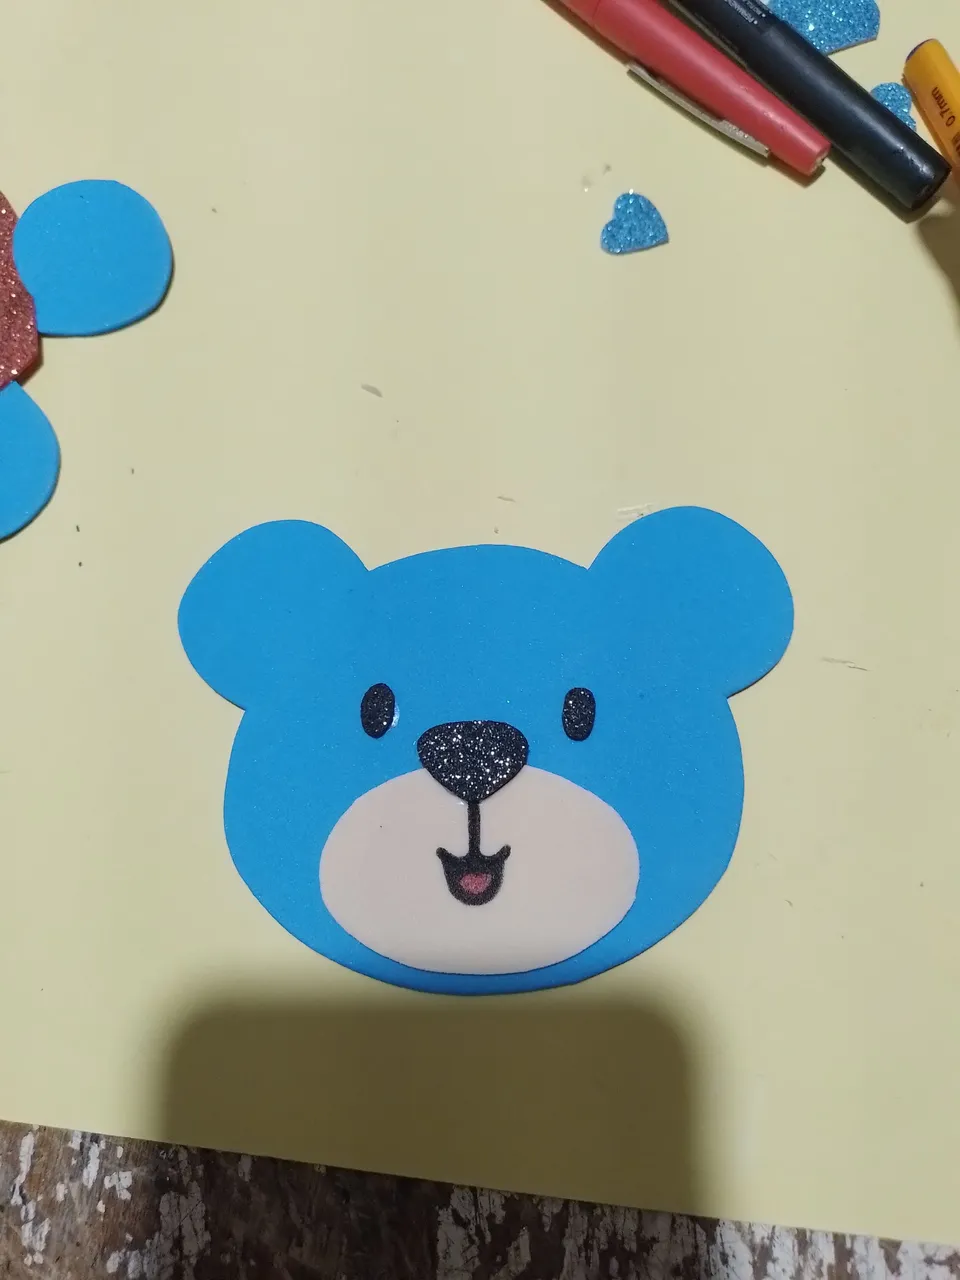
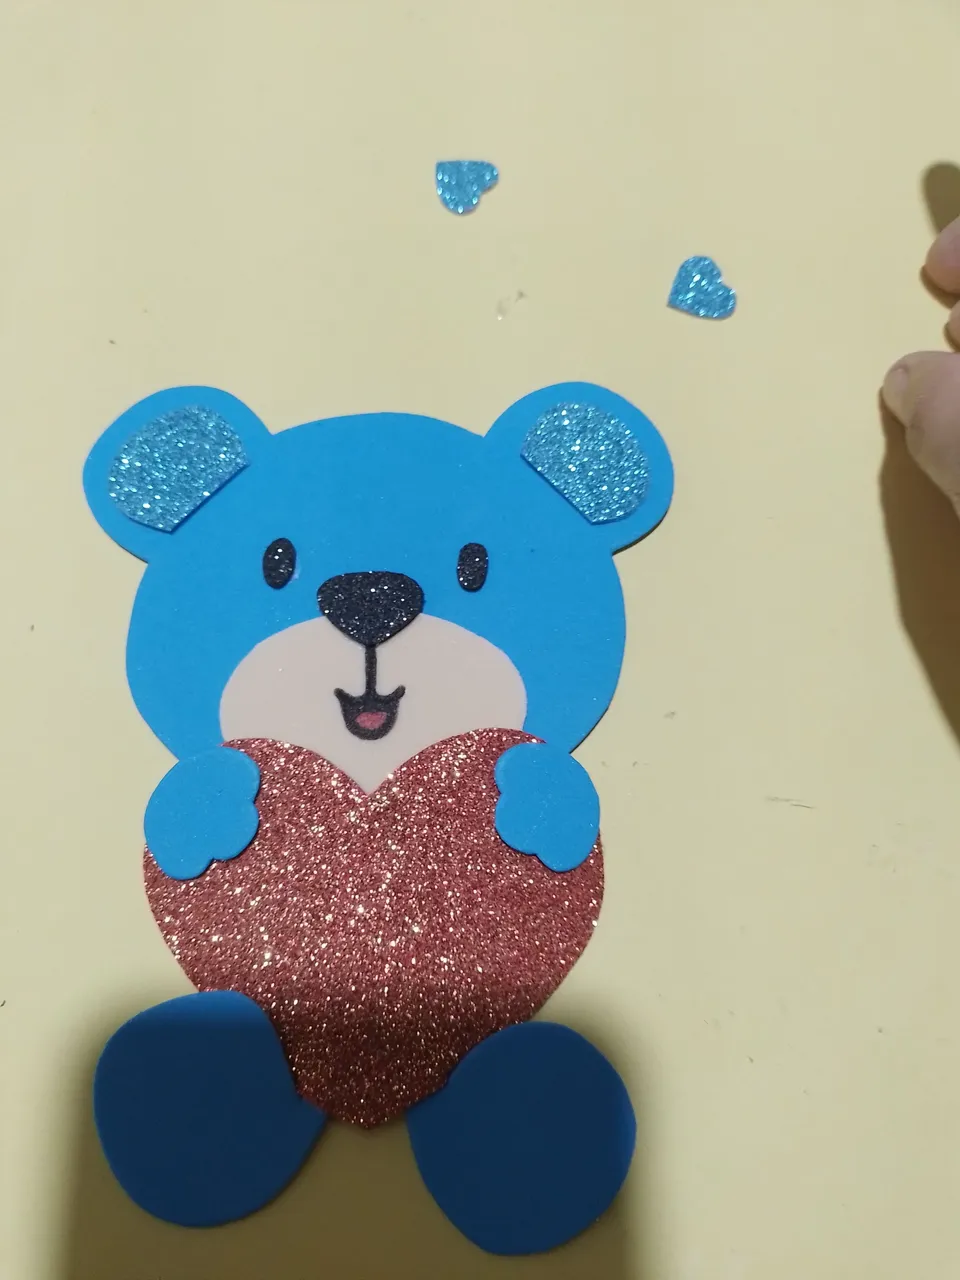
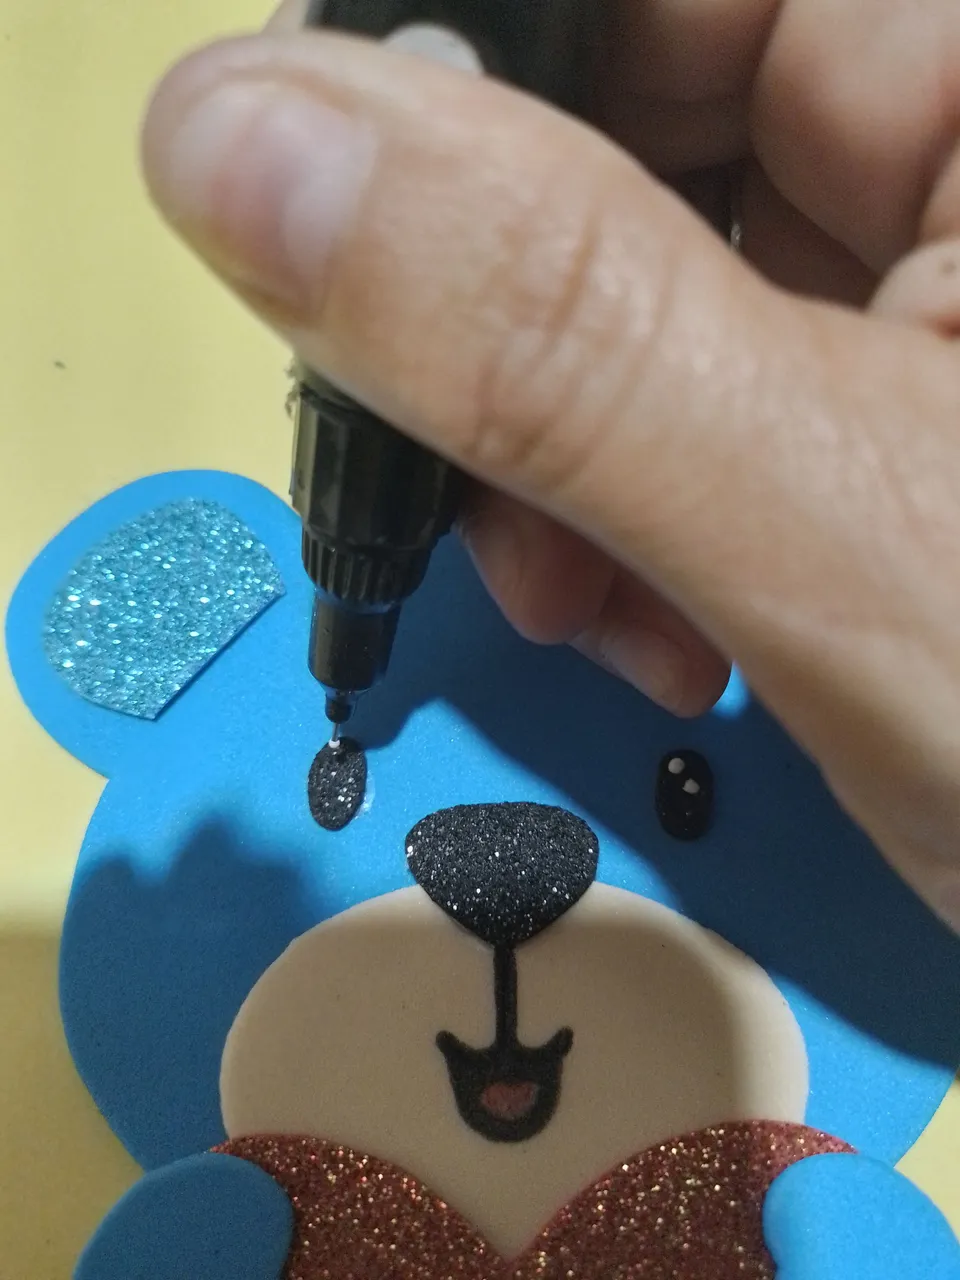
Step 13- when we finish gluing the parts that make up the face we mark the details of the mouth with the black and red permanent marker.
Paso 13- cuando terminemos de pegar las partes que confeccionan la cara marcamos los detalles de la boca con el marcador permanente negro y rojo.
|
|
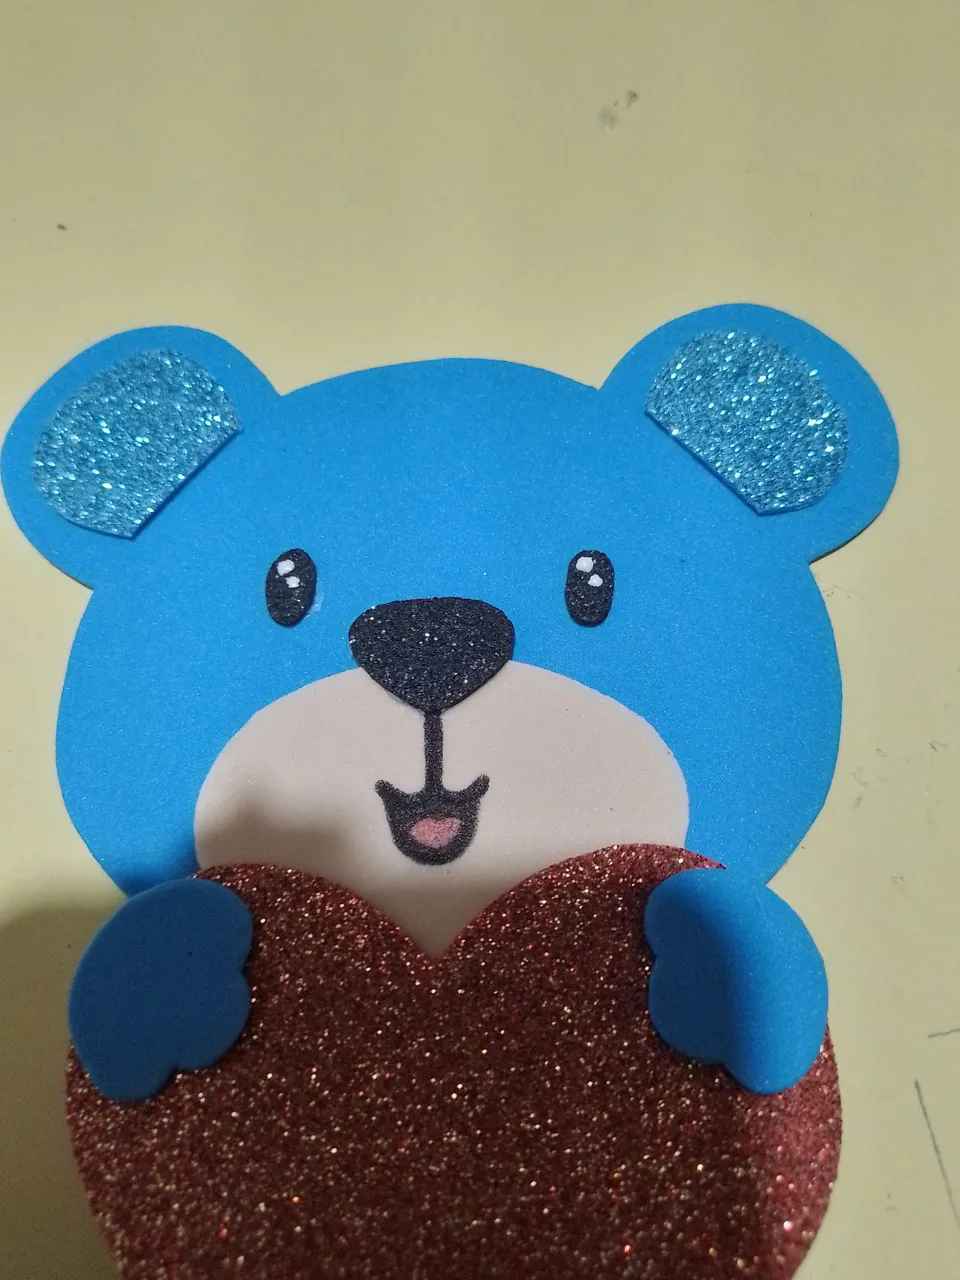
Step 14- Once the details have been marked and the parts of the bear have been glued, we glue the body with the head and the last details.
Paso 14- Ya marcado los detalles y pegado las partes del osito pegamos el cuerpo con la cabeza y los últimos detalles.
|
|
|
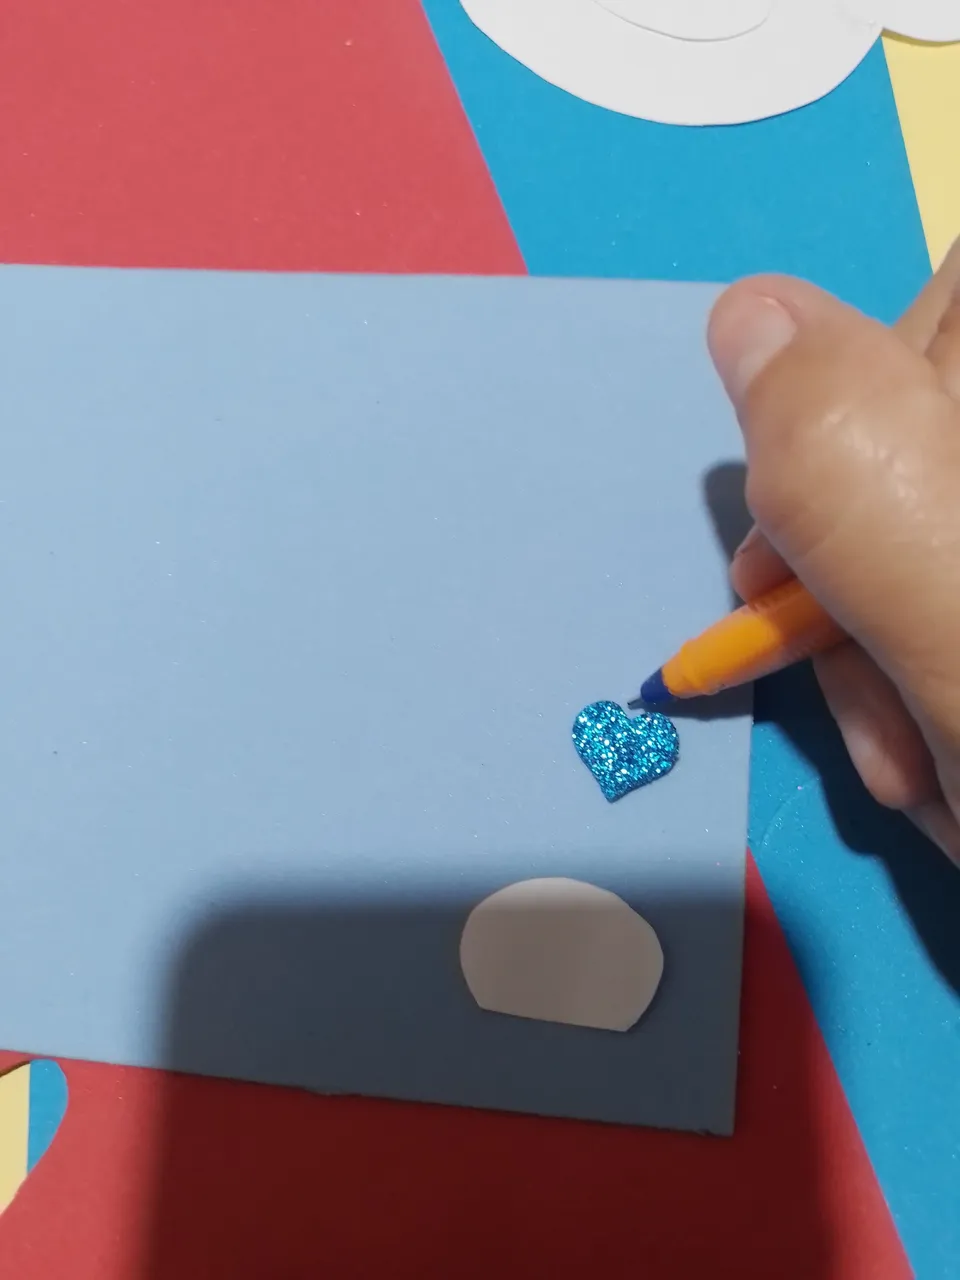
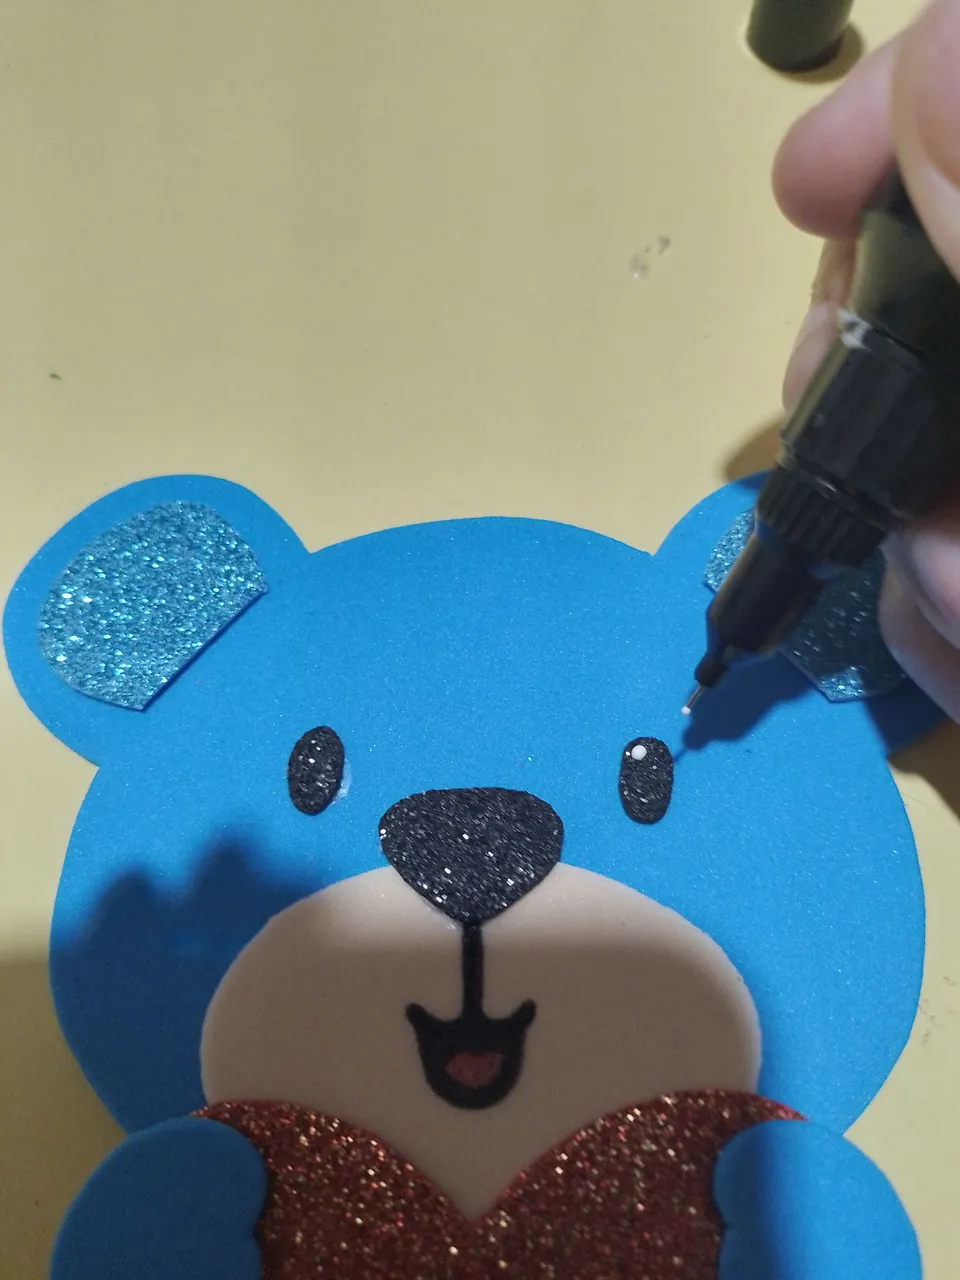
Step 15- once the teddy bear is finished, we will add the details of the glitter in the eyes with the white paint.
Paso 15- ya terminado el osito le asemos los detalles del brillo de los ojos con la pintura blanca.
|
 |
|
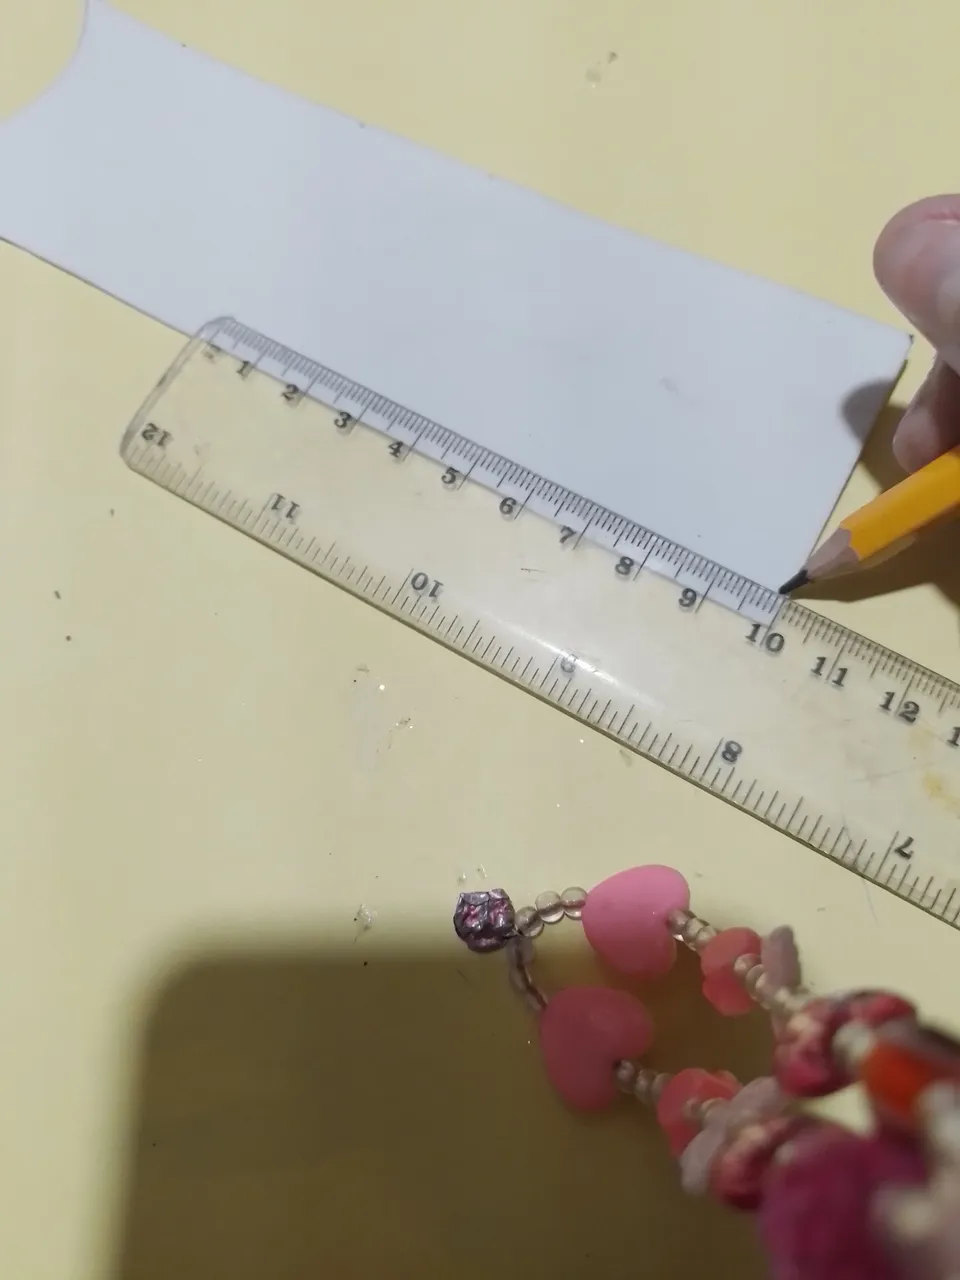
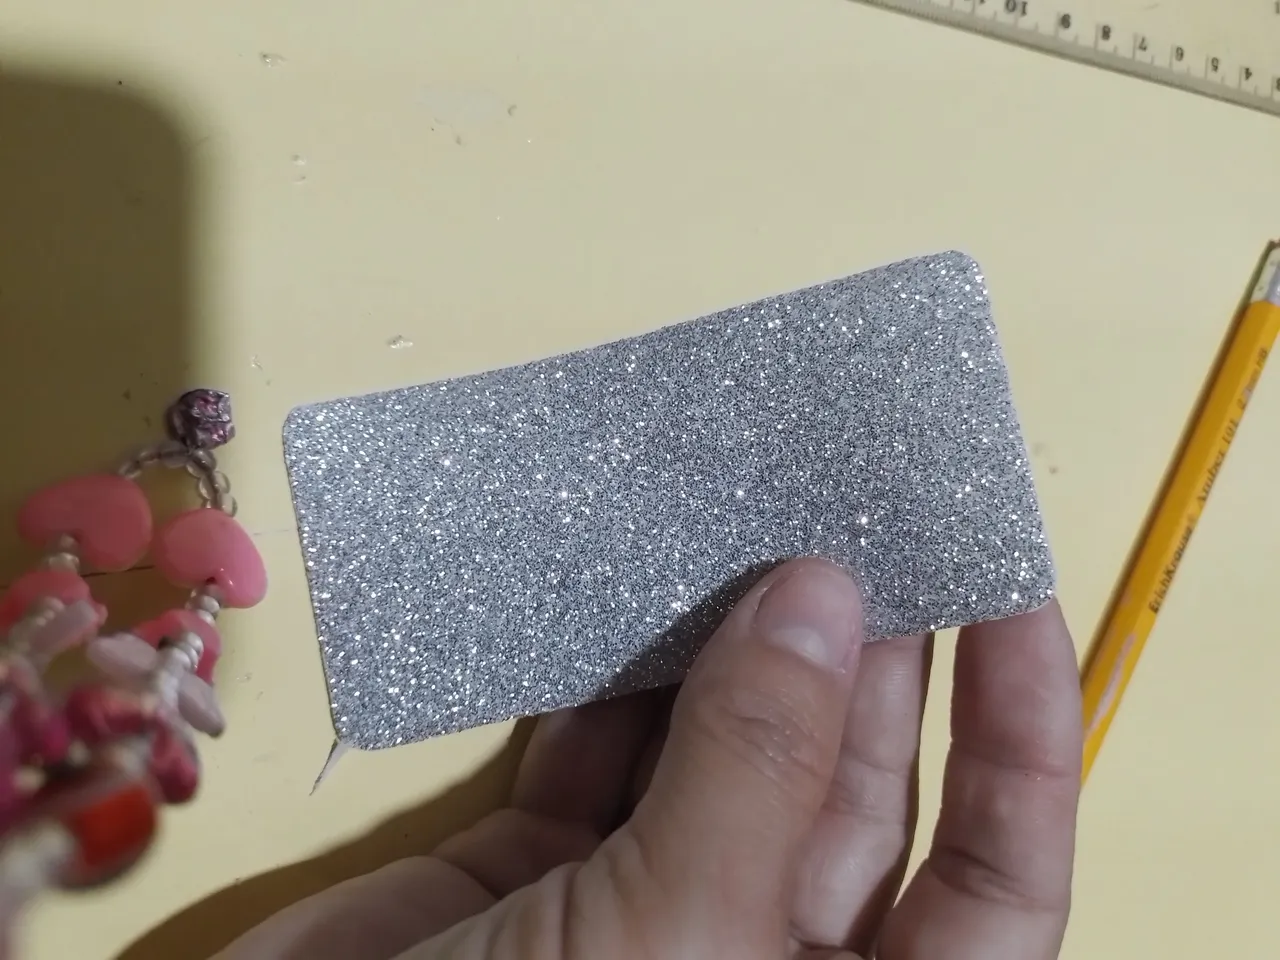
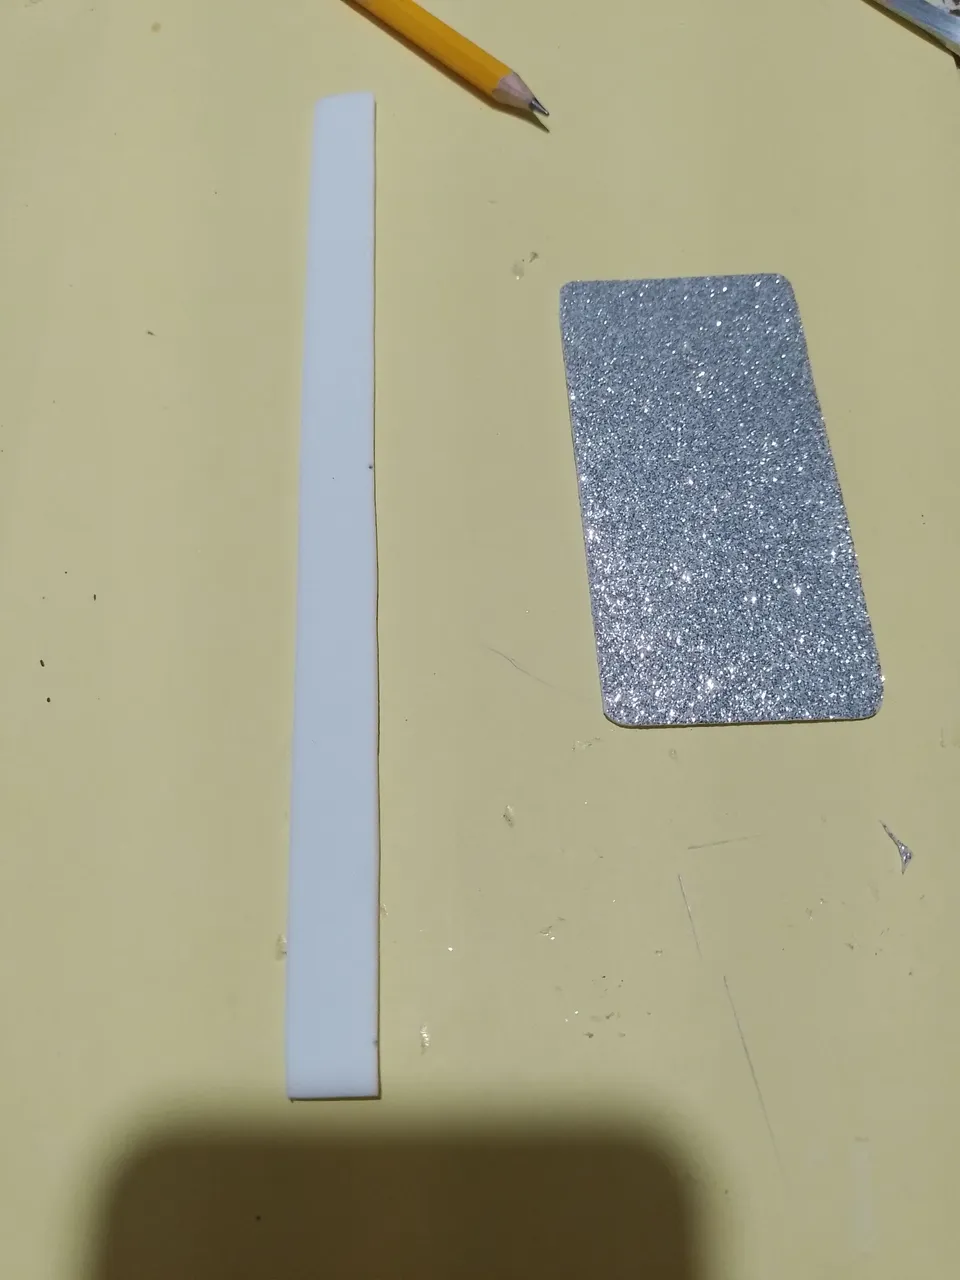
Step 16- now we are going to make the book for this we need a piece of silver foami and we cut it to 5 cm high by 10 cm wide and we circle the corners a little bit.
Paso16- ahora vamos hacer el libro para esto necesitamos un pedazo de foami plateado y lo recortamos a 5 cm de alto por 10 cm de ancho y le circulamos un poco las esquinas.

|
|
|
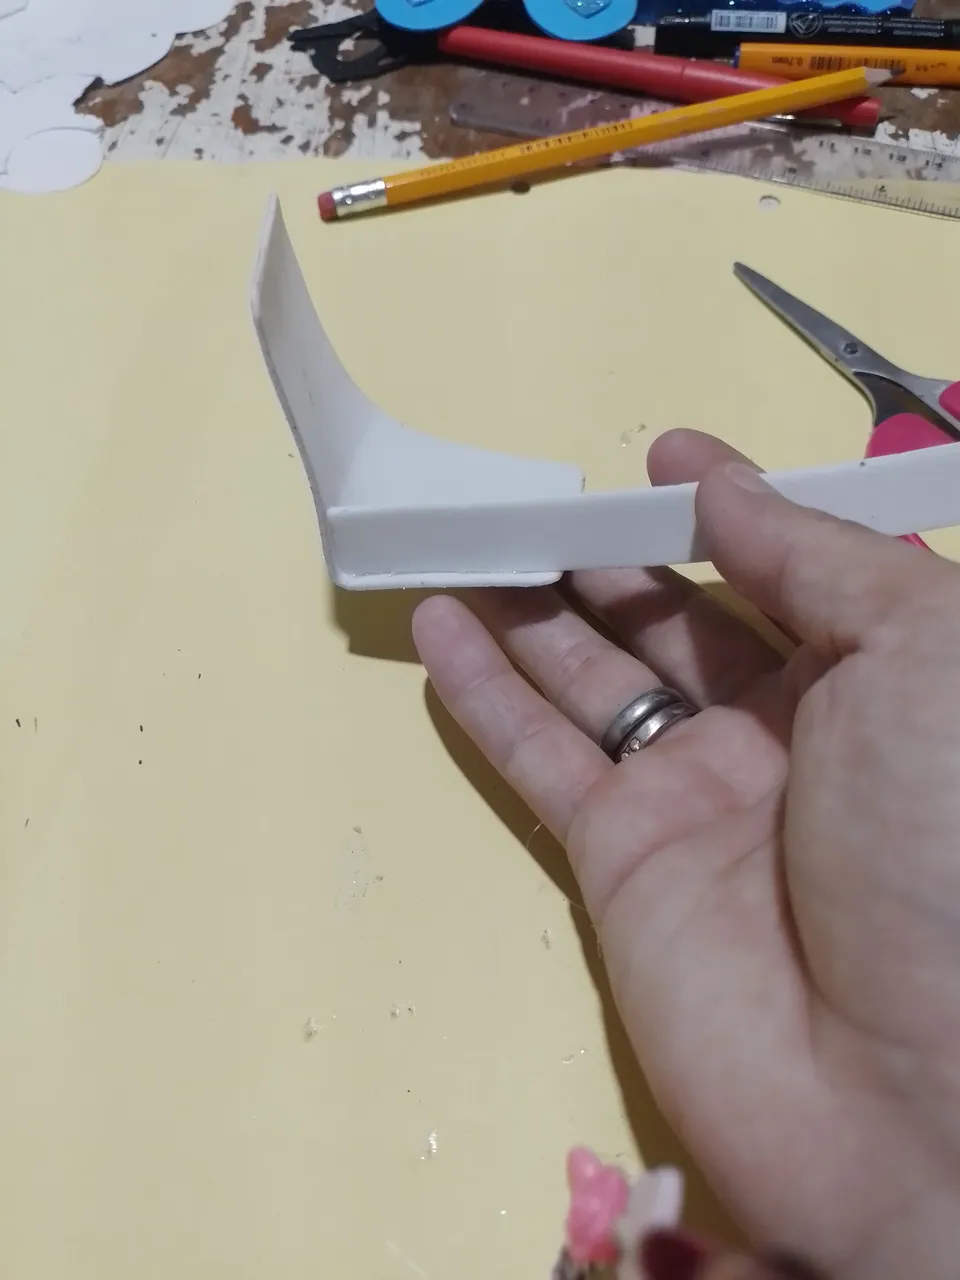
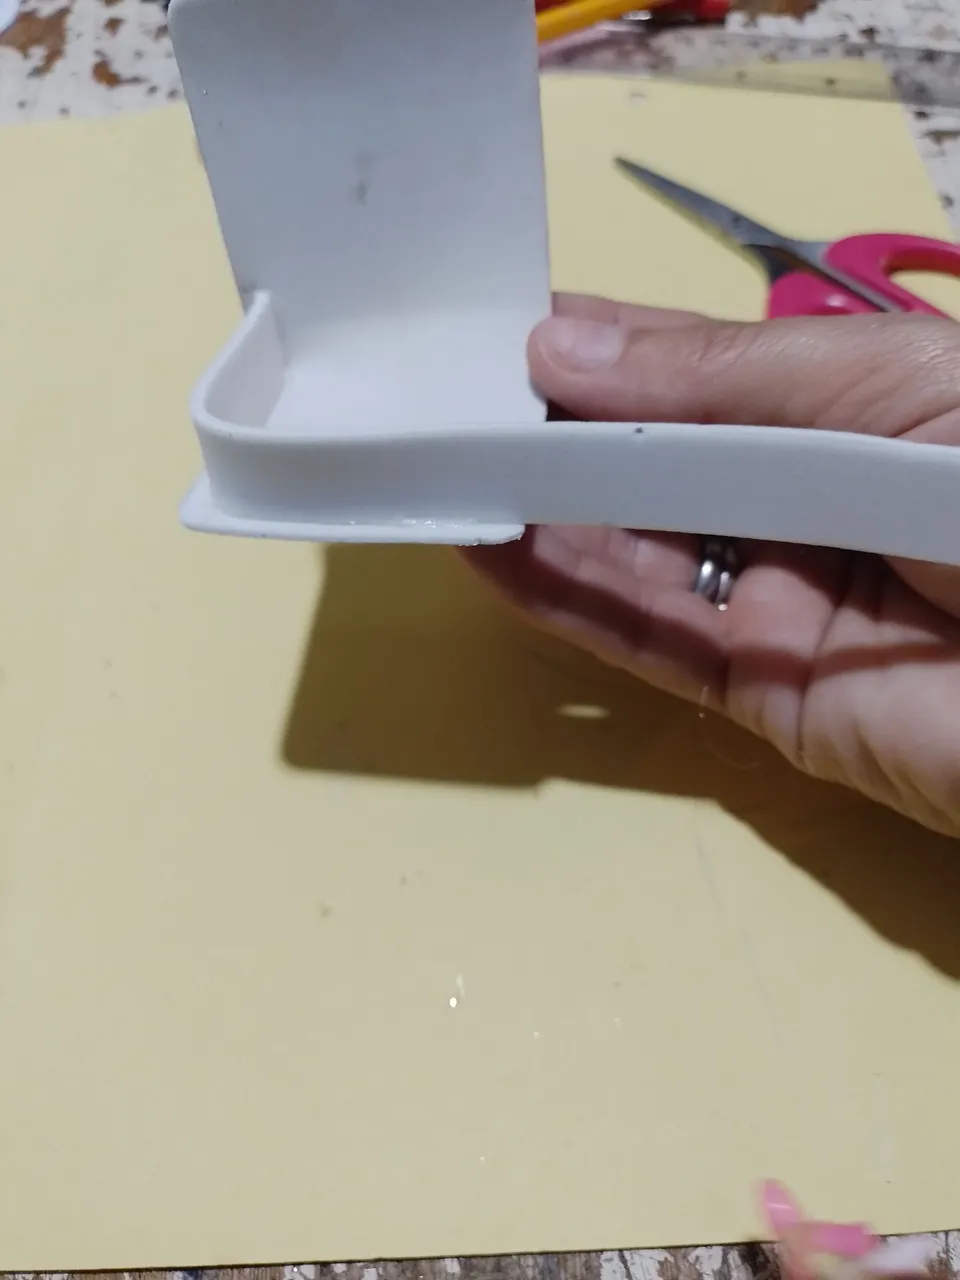
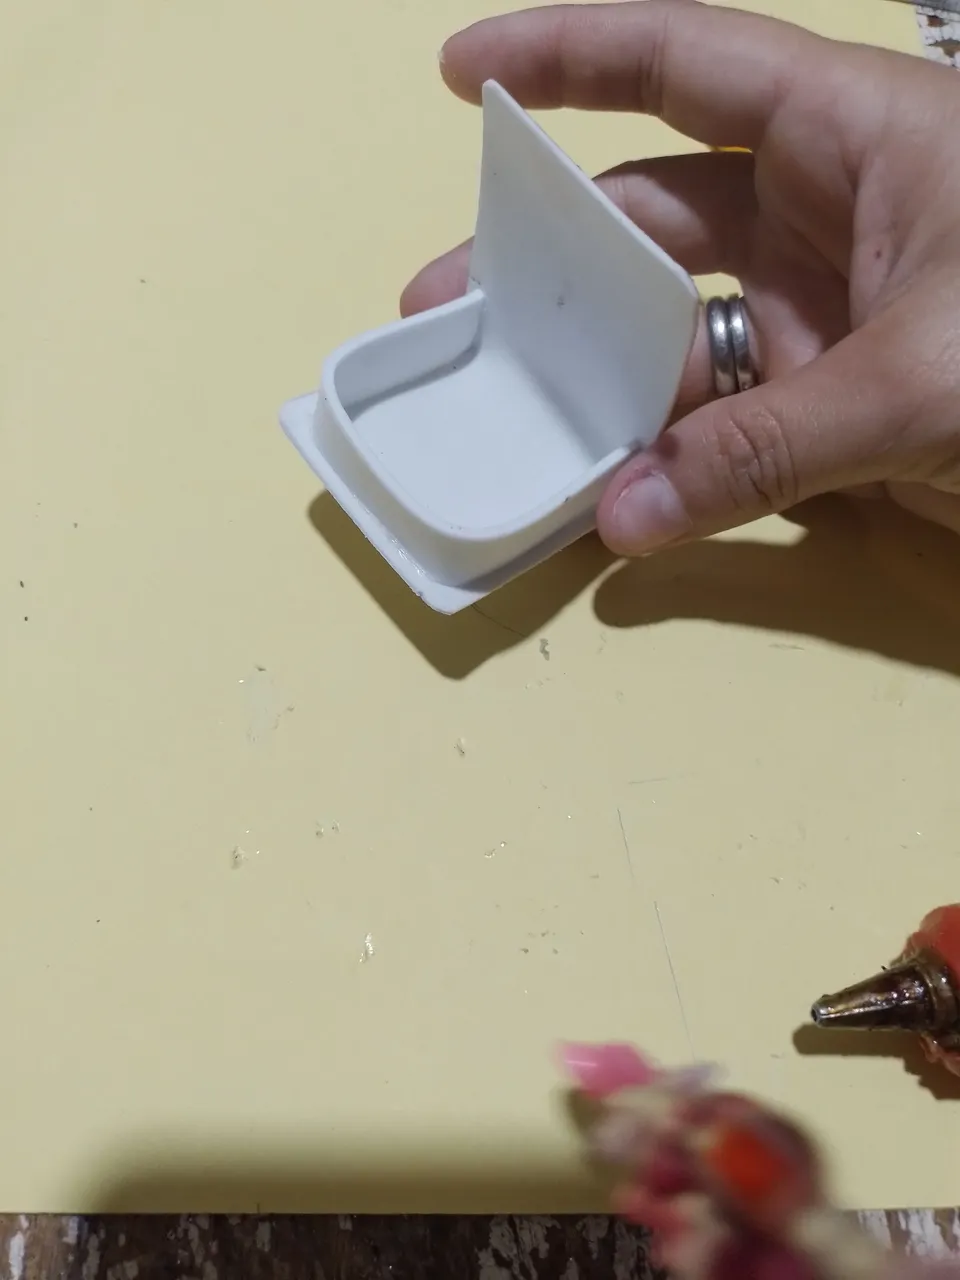
Step 17 then cut out a 1.5 cm wide strip of white foami. after having these cut-outs, we start forming the book and for this we glue the white foami strip from the middle of the white foami piece all along the edge until we reach the other half, and then we glue the top part all along the edge of this strip that we glued at the bottom and thus the booklet is ready.
Paso 17- Después recortamos una tira de foami blanco de 1.5 cm de ancho. Luego de tener estos recortes pasamos a formar el libro y para esto vamos pegando la tira del foami blanco desde la mitad del pedazo de foami blanco por todo el borde asta llegar asta la otra mitad, y después pegamos la parte de arriba por todo el borde de esta tira que pegamos en la parte de abajo y así queda echo ya el librito.
|
|
|
|

|
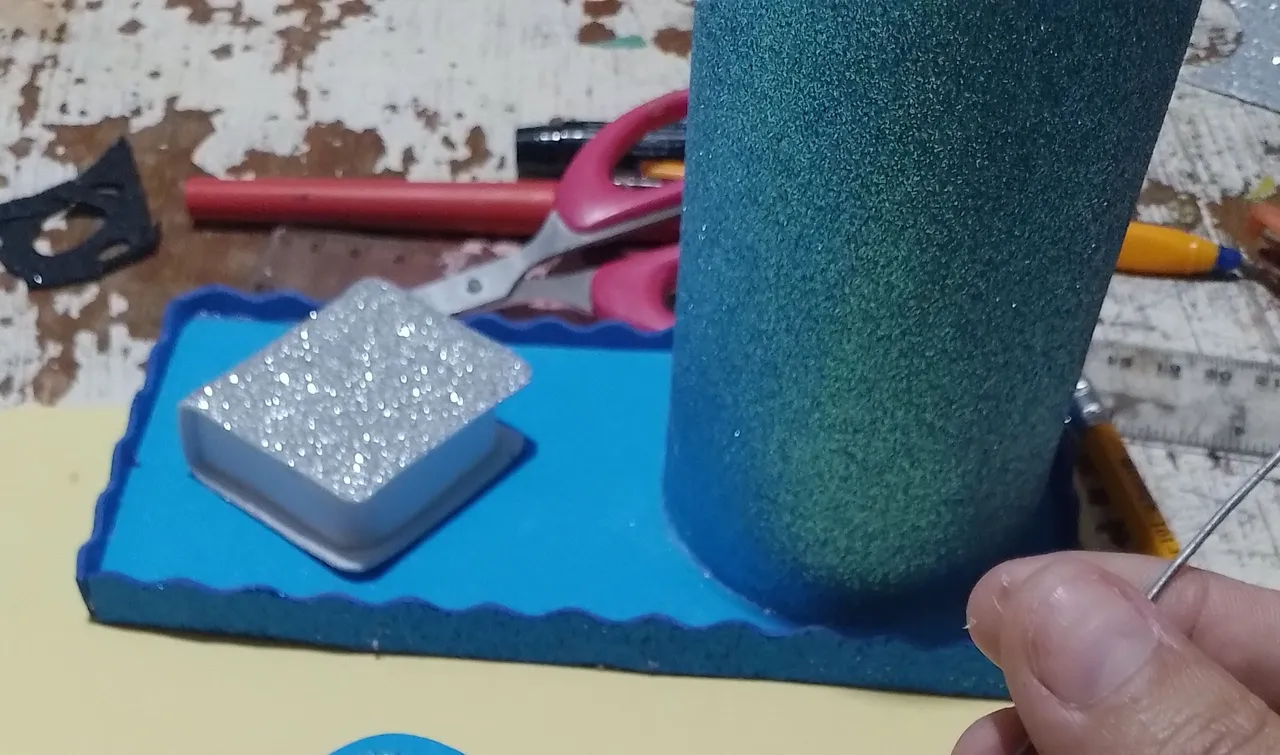
Step 18- Once the book is finished, glue it in the space on the side of the cylinder of the pencil holder.
Paso 18- Ya terminado el libro lo pegamos en el espacio del lado del cilindro del portalápiz.
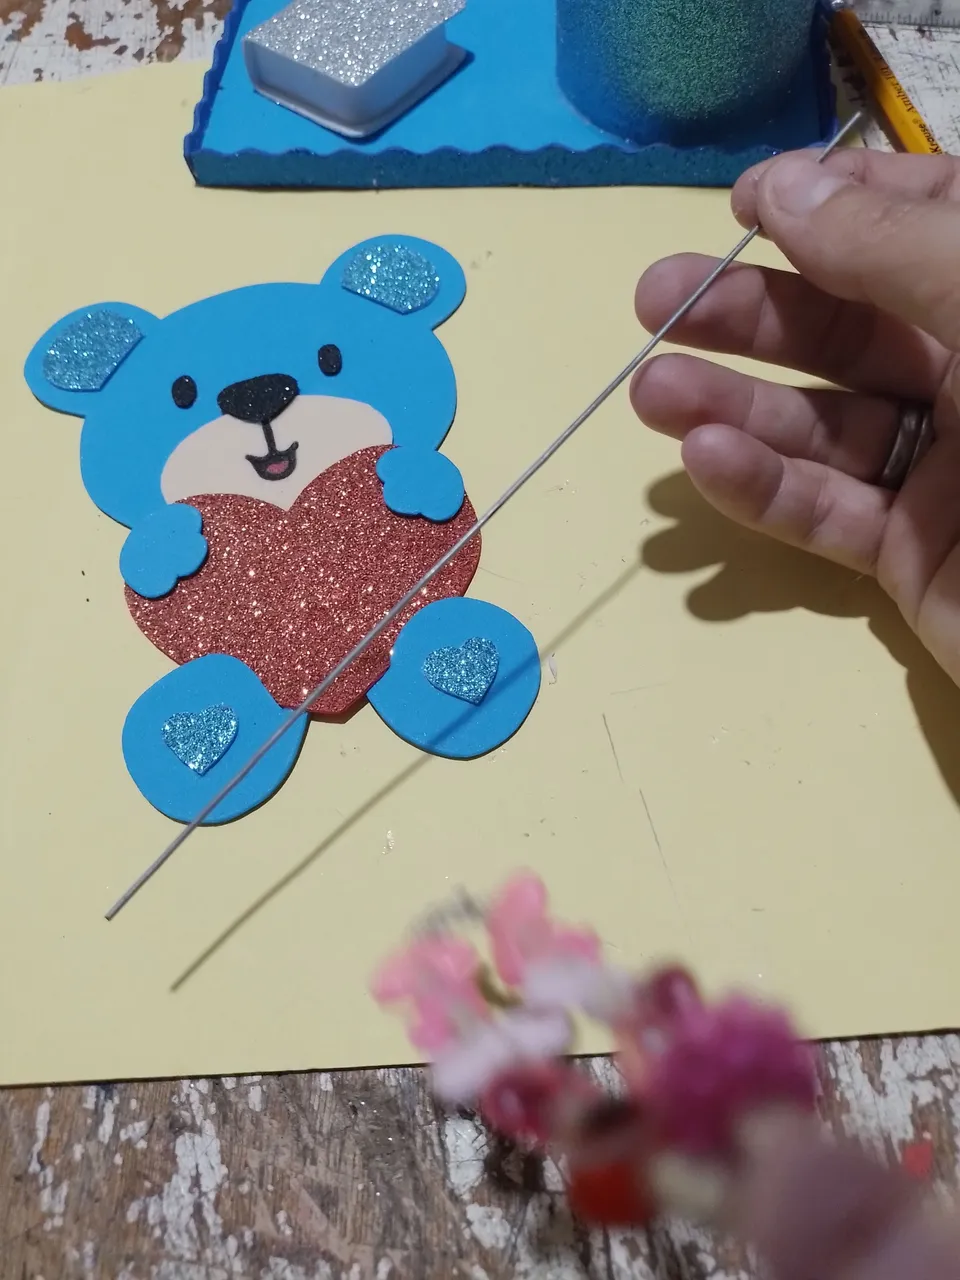
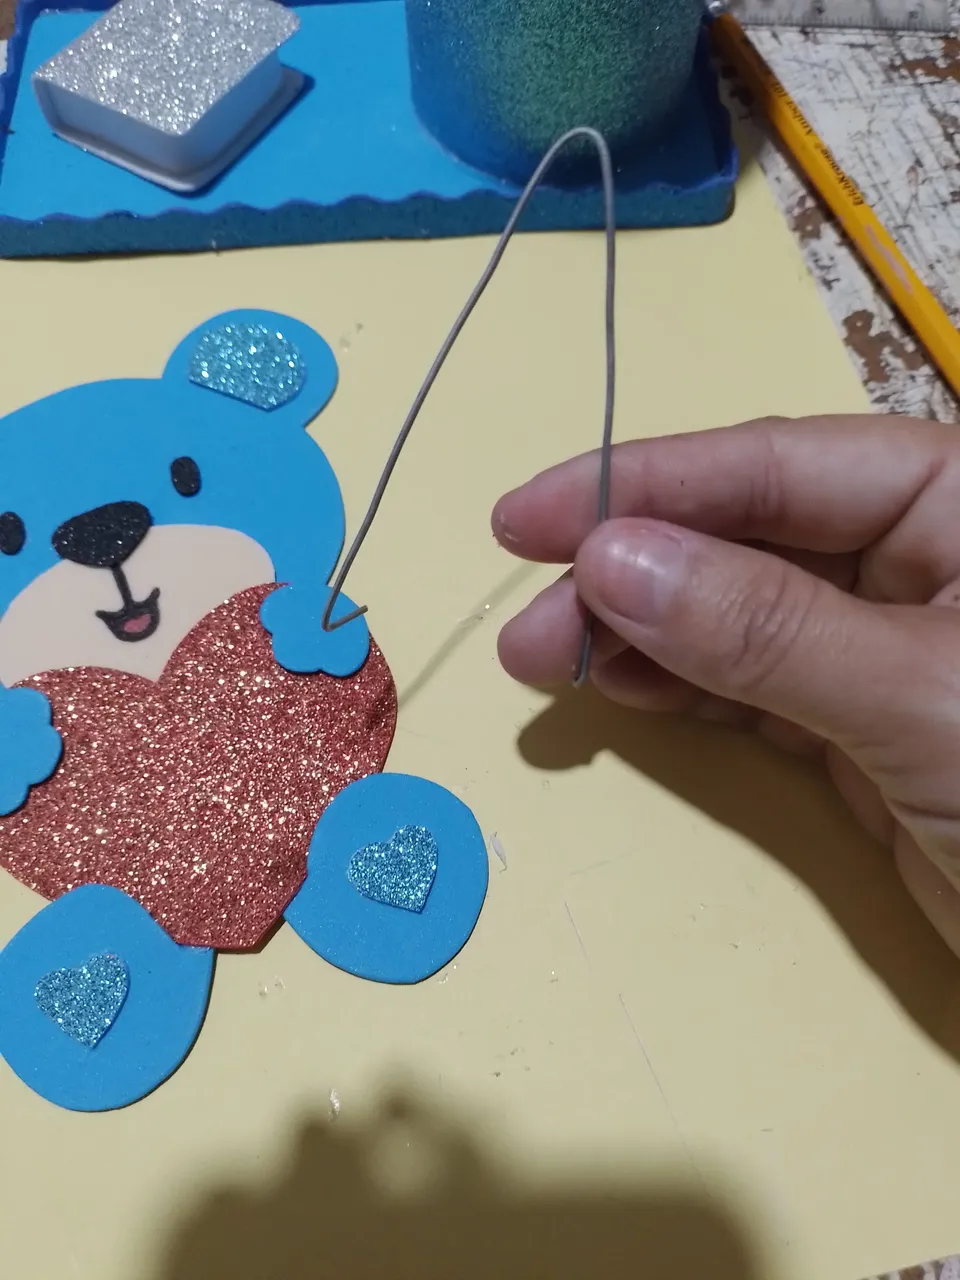
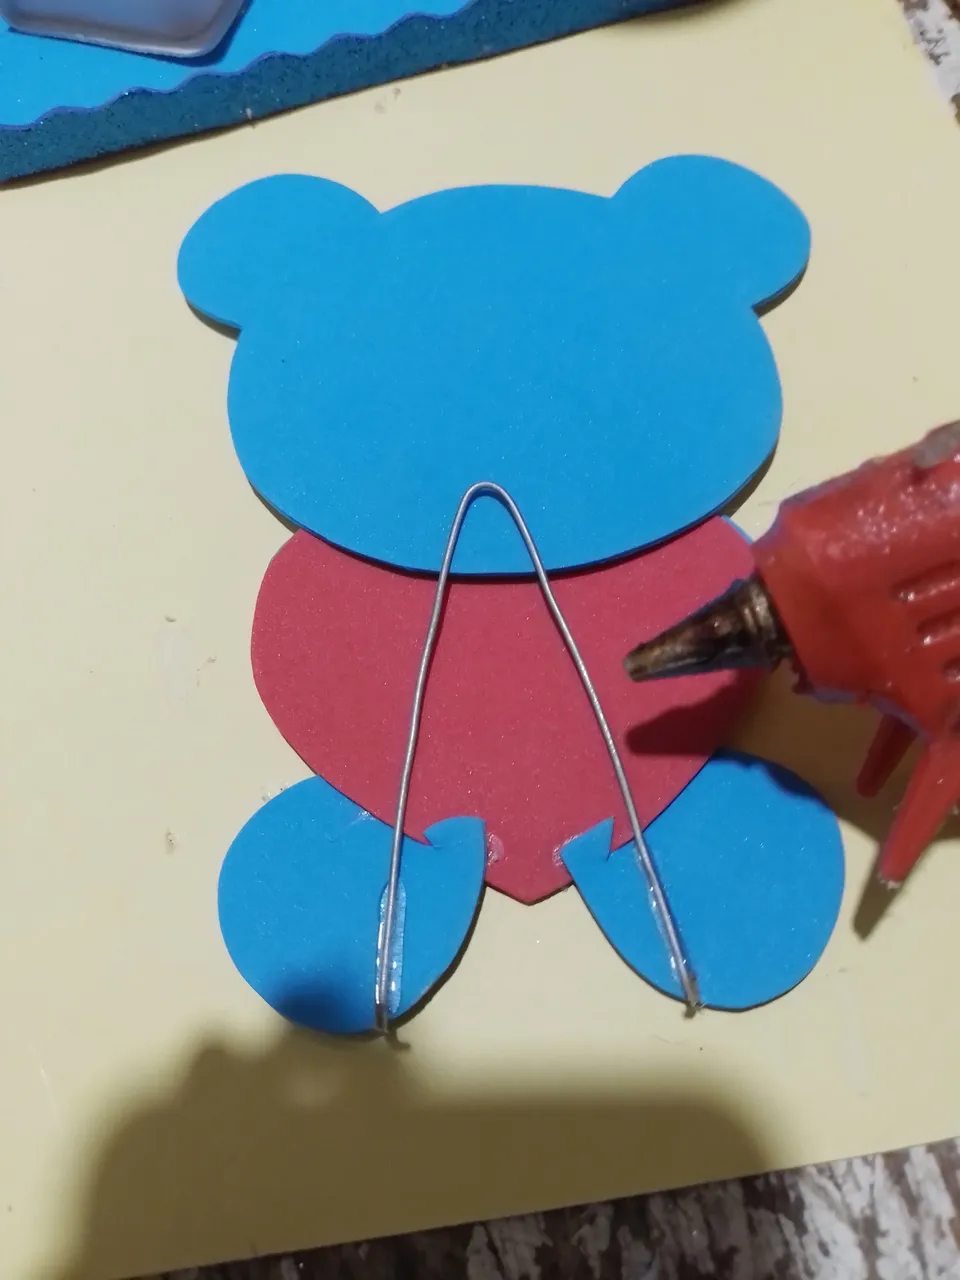
Step 19- Finally, take the piece of thin wire and bend it in half and then bend a piece of the ends and glue it behind the bear so that when you glue it on top of the book, it will stand upright and strong.
Paso 19- Ya para terminar cogemos el pedazo de alambre fino y lo doblamos a la mitad y luego le doblamos un pedazo de las puntas y lo pegamos atrás del osito para que a la ora de pegarlo arriba del libro este quede parado y resistente.
|
|
|
Step 20- And finally we glue the teddy bear on top of the book and thus we have the pencil holder.
Paso 20- Y ya por ultimo pegamos el osito enzima del libro y así nos queda el portalápiz.
|
|
I hope you liked the result and that the step-by-step has been useful for new ideas.
Espero les haya gustado el resultado y les haya servido el paso a paso para nuevas ideas.