Saludos y bendiciones a esta hermosa familia de hive
Este es mi segunda publicación y quisiera mostrarle lo fácil que se realizan estos lindos zarcillos en alambrismo.

Greetings and blessings to this beautiful hive family. This is my second post and I would like to show you how easy these cute tendrils are to be made in wire rope.
El alambrismo es una expresión artística, que representa originalidad y lo mejor es que no hay límites al momento de crear. Podemos elaborar piezas hermosas tanto accesorios como objetos de decoración. Es un arte y las herramientas más poderosas son las manos.
Alambrismo is an artistic expression, which represents originality and the best thing is that there are no limits when creating. We can make beautiful pieces, both accessories and decorative objects. It is an art and the most powerful tools are the hands.
Welcome to the world of this wonderful Art.
Para realizar este paso a paso vamos a necesitar 👇
To carry out this step by step we will need
MATERIALES:
• Alambre para bisuteria calibre #22
• Alambre calibre #26
• Un mandril (cualquier objeto de forma cilíndrica ) en este caso use un marcador
• Pinza plana
• Pinza de corte (cortauñas)
• Una perlita o cuenta de tu gusto
MATERIALS:
• # 22 gauge jewelry wire
• # 26 gauge wire
• A mandrel (any cylindrical shaped object) in this case use a marker
• Flat clamp
• Cutting pliers (nail clippers)
• A pearl or bead of your choice
Empezamos con nuestro alambre #22 dando 6 vueltas y media alrededor de nuestro marcador o mandril.
STEP 1
We start with our # 22 wire by going 6 and a half turns around our marker or mandrel.
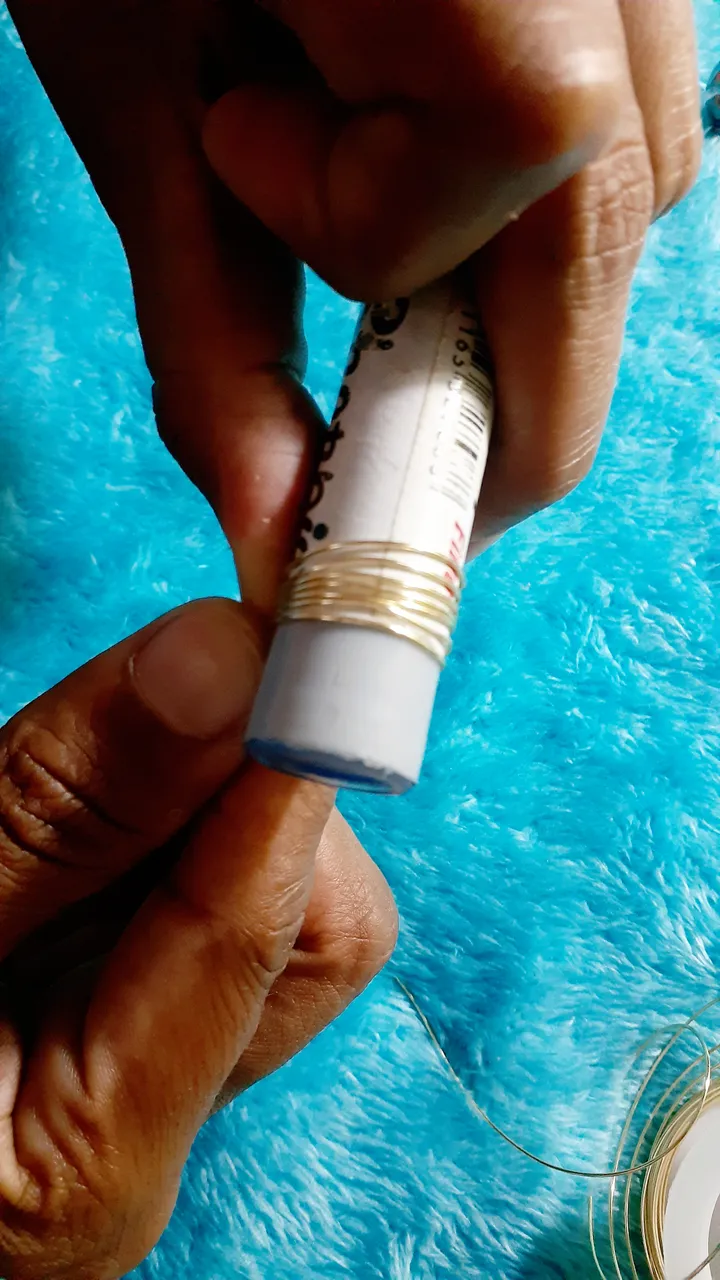
Una vez listas nuestras vueltas, sacamos el alambre del marcador o mandril.
STEP2
Once our laps are ready, we remove the wire from the marker

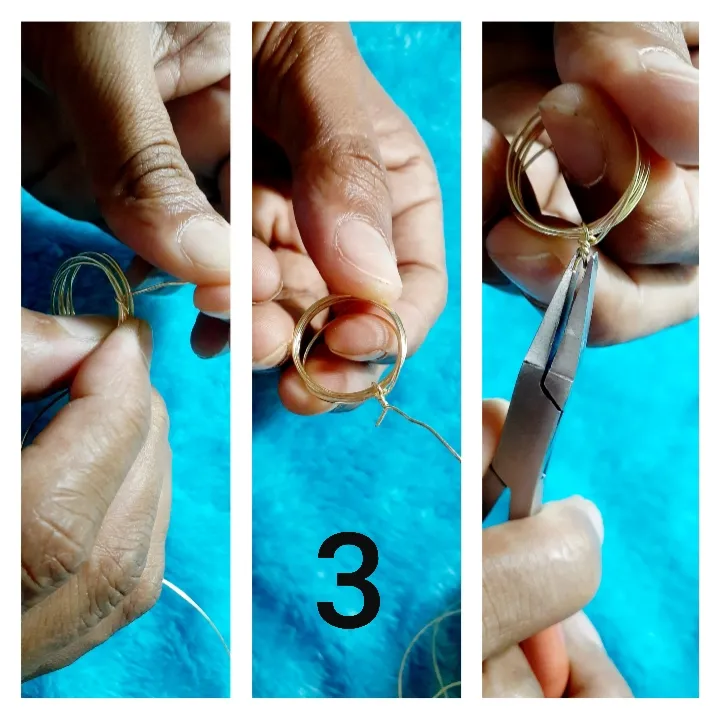
Sin soltar nuestro espiral con el alambre calibre #26 sujetamos en la parte del centro, cortamos el alambre y fijamos bien con la pinza plana
STEP 3
Without releasing our spiral with the # 26 gauge wire we hold in the center part, cut the wire and fix well with the flat clamp
Ahora con la ayuda de nuestras manos comenzamos a abrir las vueltas del espiral, despacio, con mucho amor y paciencia.
STEP 4
Now with the help of our hands we begin to open the turns of the spiral, slowly, with a lot of love and patience.

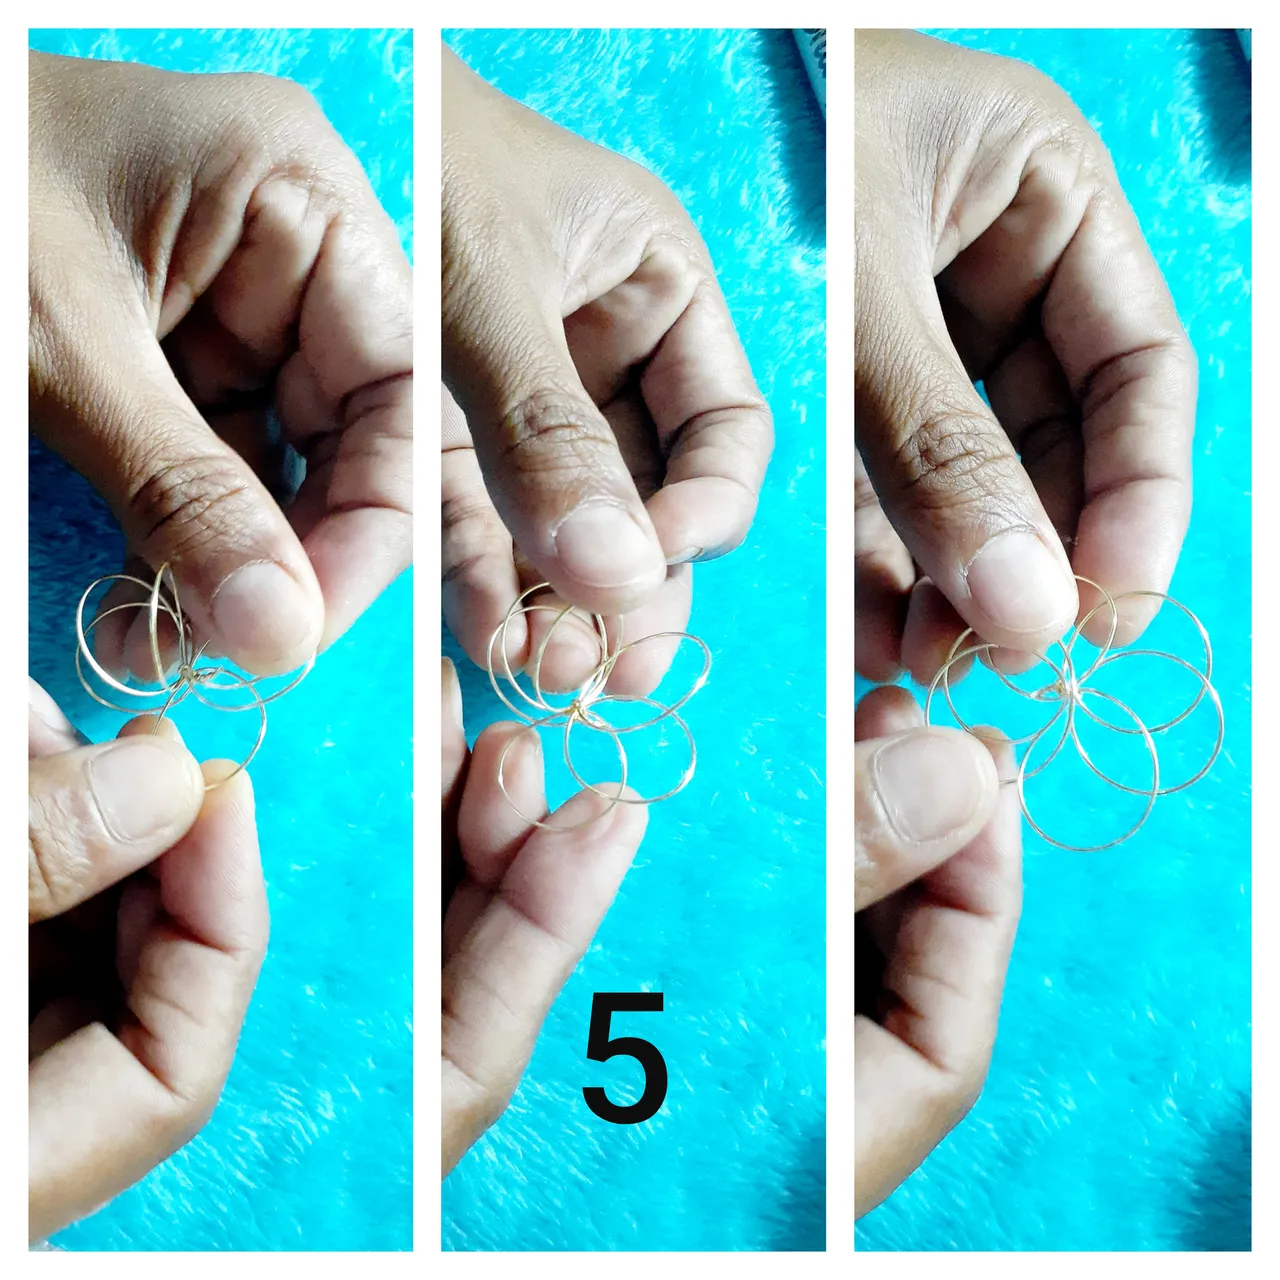
En este paso procedemos a abrir los círculos de manera que nos queden 3 círculos para cada lado y luego lo ubicamos hasta darle la forma de flor.
STEP 5
In this step we proceed to open the circles so that we have 3 circles for each side and then we place it until it gives it the shape of a flower.
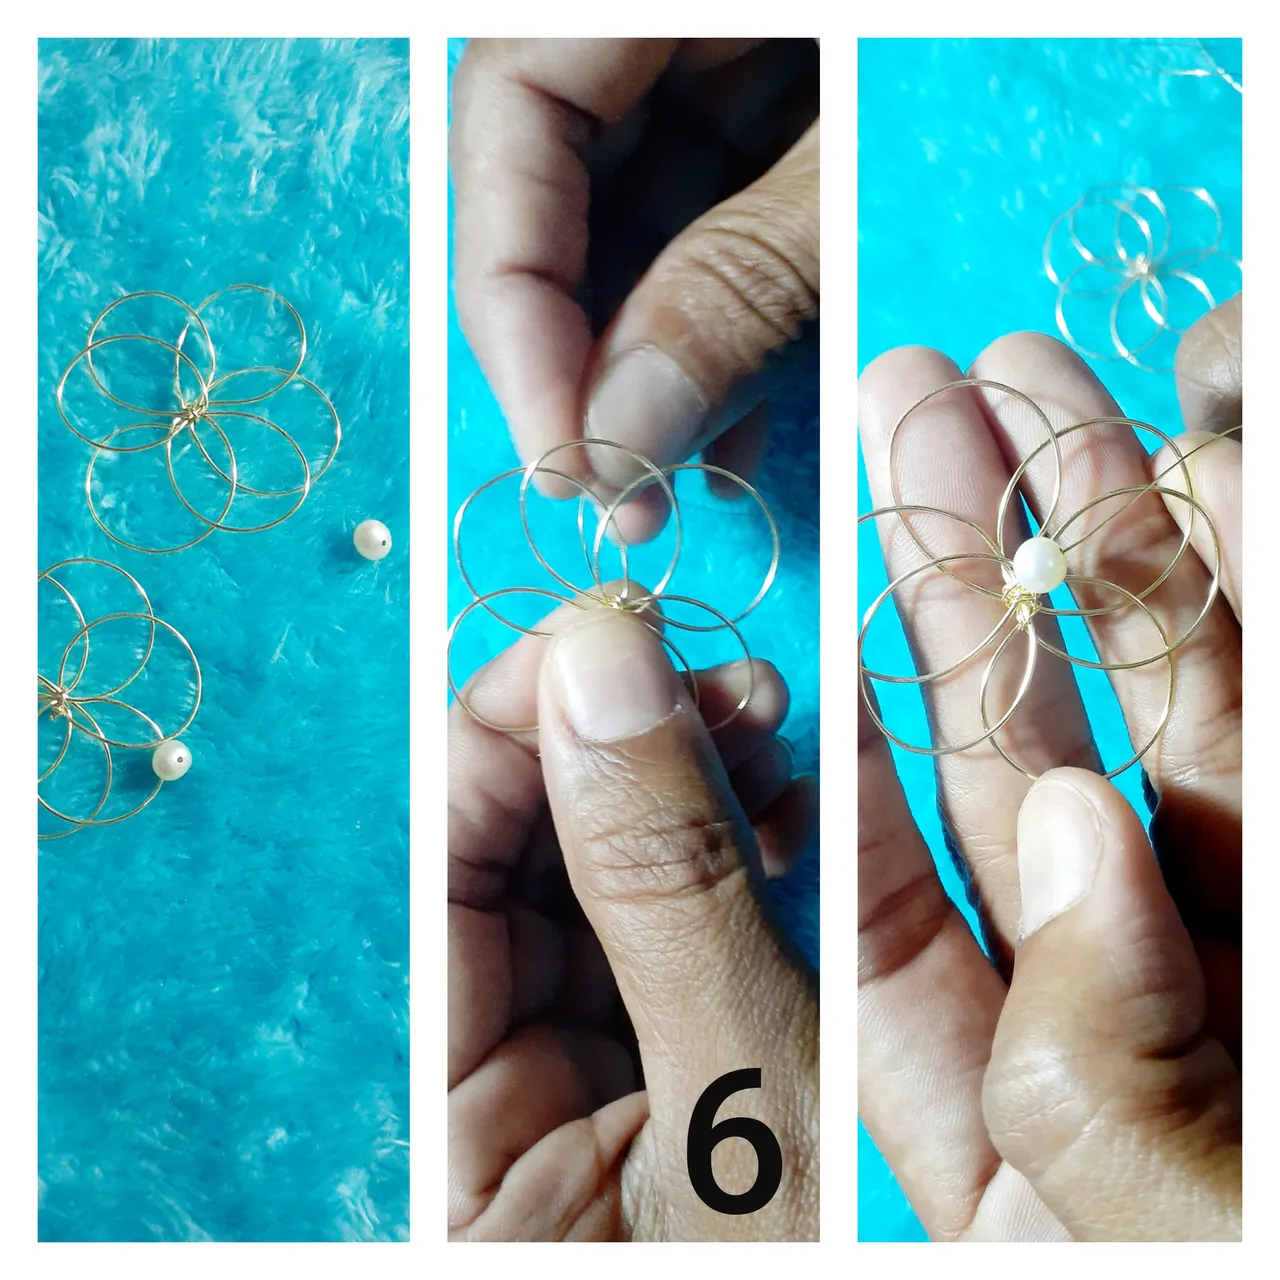
Listas nuestra 2 flores, tomamos nuestra perlita y con el alambre calibre #26 la fijamos a la flor. Esto se hace pasando el alambre alrededor del centro de la flor. Cortamos y sellamos con la pinza plana
STEP 6
We ready our 2 flowers, we take our pearlite and with the # 26 gauge wire we fix it to the flower. This is done by passing the wire around the center of the flower. We cut and seal with the flat clamp
Por último colocamos nuestros anzuelos y listos nuestros zarcillos de flores en alambrismo
STEP 7

Finally we place our hooks and ready our flower tendrils in wire rope
Y esta fue mi creación de hoy, hecha con mucho cariño para ustedes. Gracias por leerme, Espero les guste y se animen a hacerlos.
And this was my creation today, made with a lot of love for you. Thanks for reading, I hope you like it and are encouraged to do it.

Las fotos son de mi autoría, tomada con un A20, editadas en picsart y el texto traducido en traductor Google
The photos are my own, taken with an A20, edited in picsart and the text translated in Google translator