Greetings and blessings to all my #hive friends! Wishing you all a nice day. This time I want to show you a super easy step by step of a very practical accessory in this Pandemic season, a cute mouth cover holder, very useful for the little ones at home who always lose their mouth covers. I hope you like my project today, let's get started!
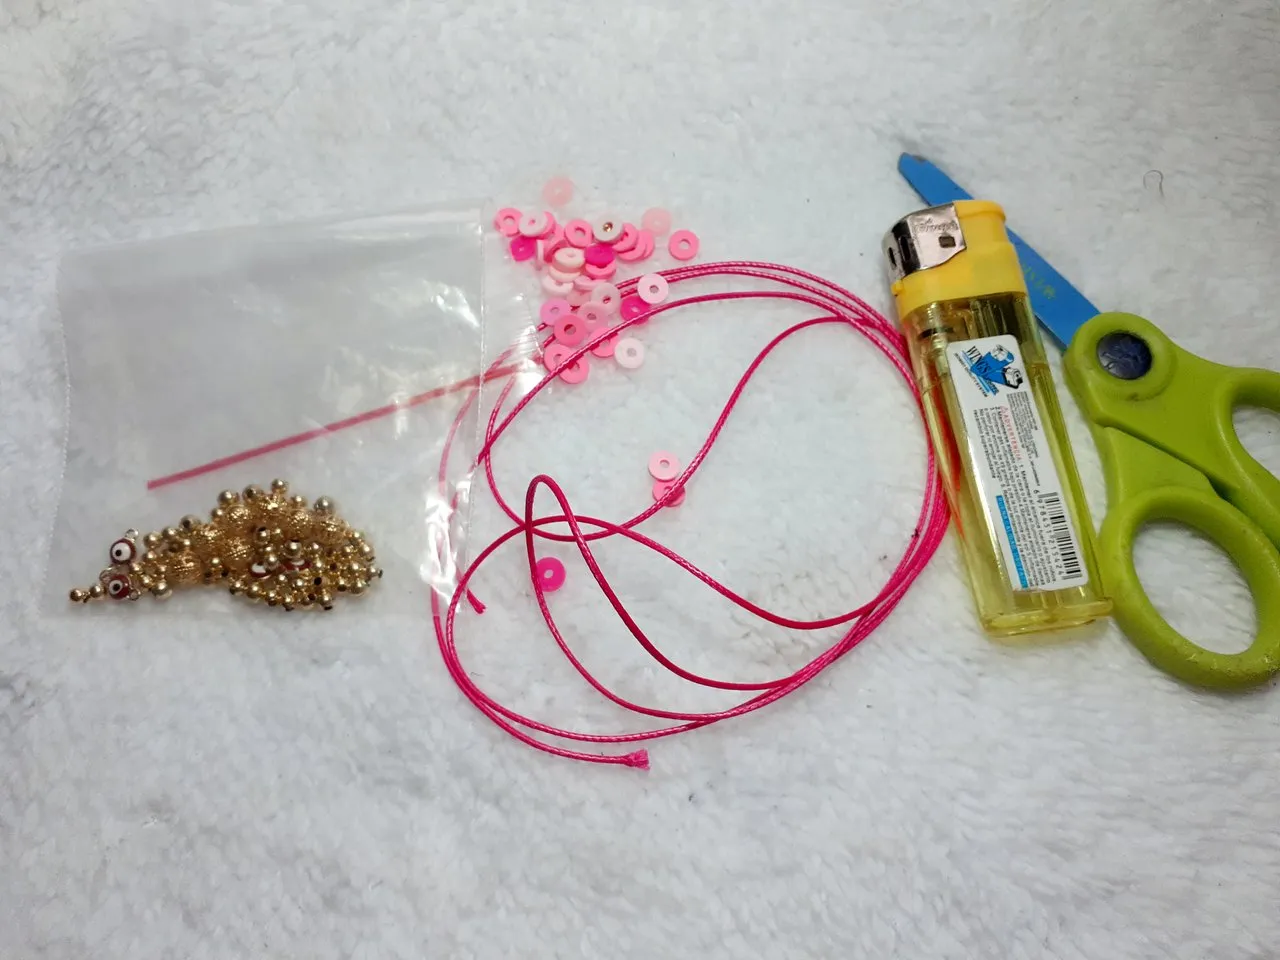
- Cordón piel de serpiente "color opcional"
- Puccas o fimo "color opcional"
- Alambre N°20 o N°18
- Pinza punta fina
- Tijera
- Encendedor
- Balines dorados 4mm boca ancha
- Snakeskin cord "optional color"
- Puccas or fimo "optional color"
- Wire N°20 or N°18
- Fine tip tweezers
- Scissors
- Lighter
- Golden pellets 4mm wide mouth
Procedimiento/Procedure
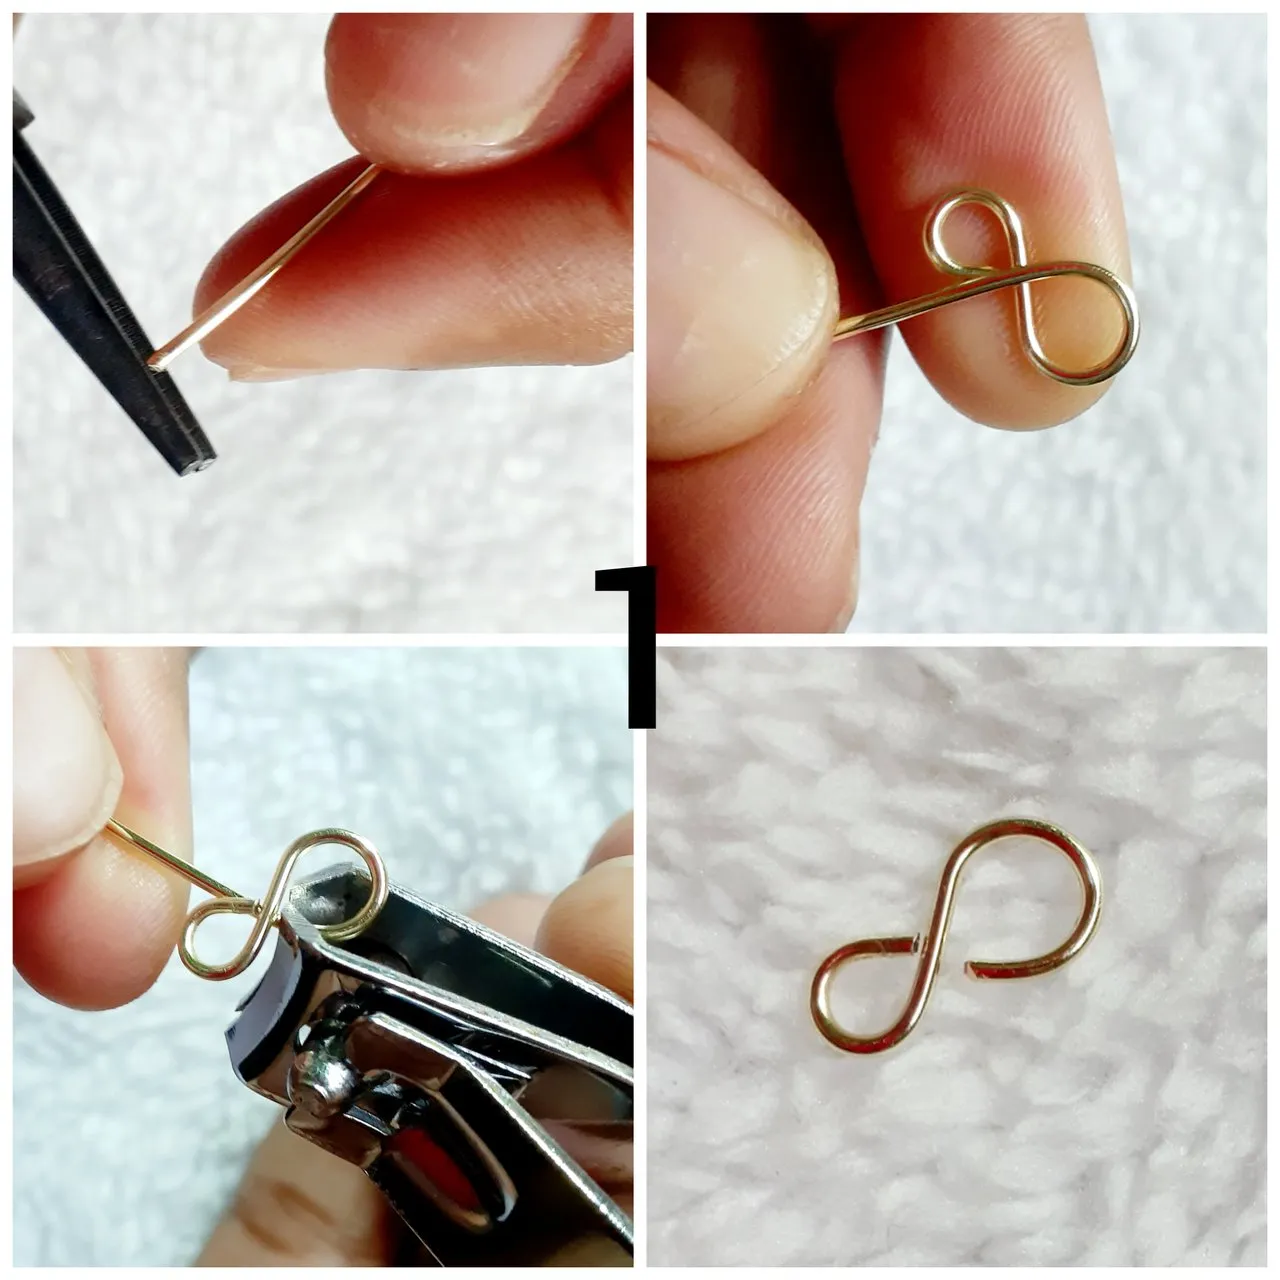
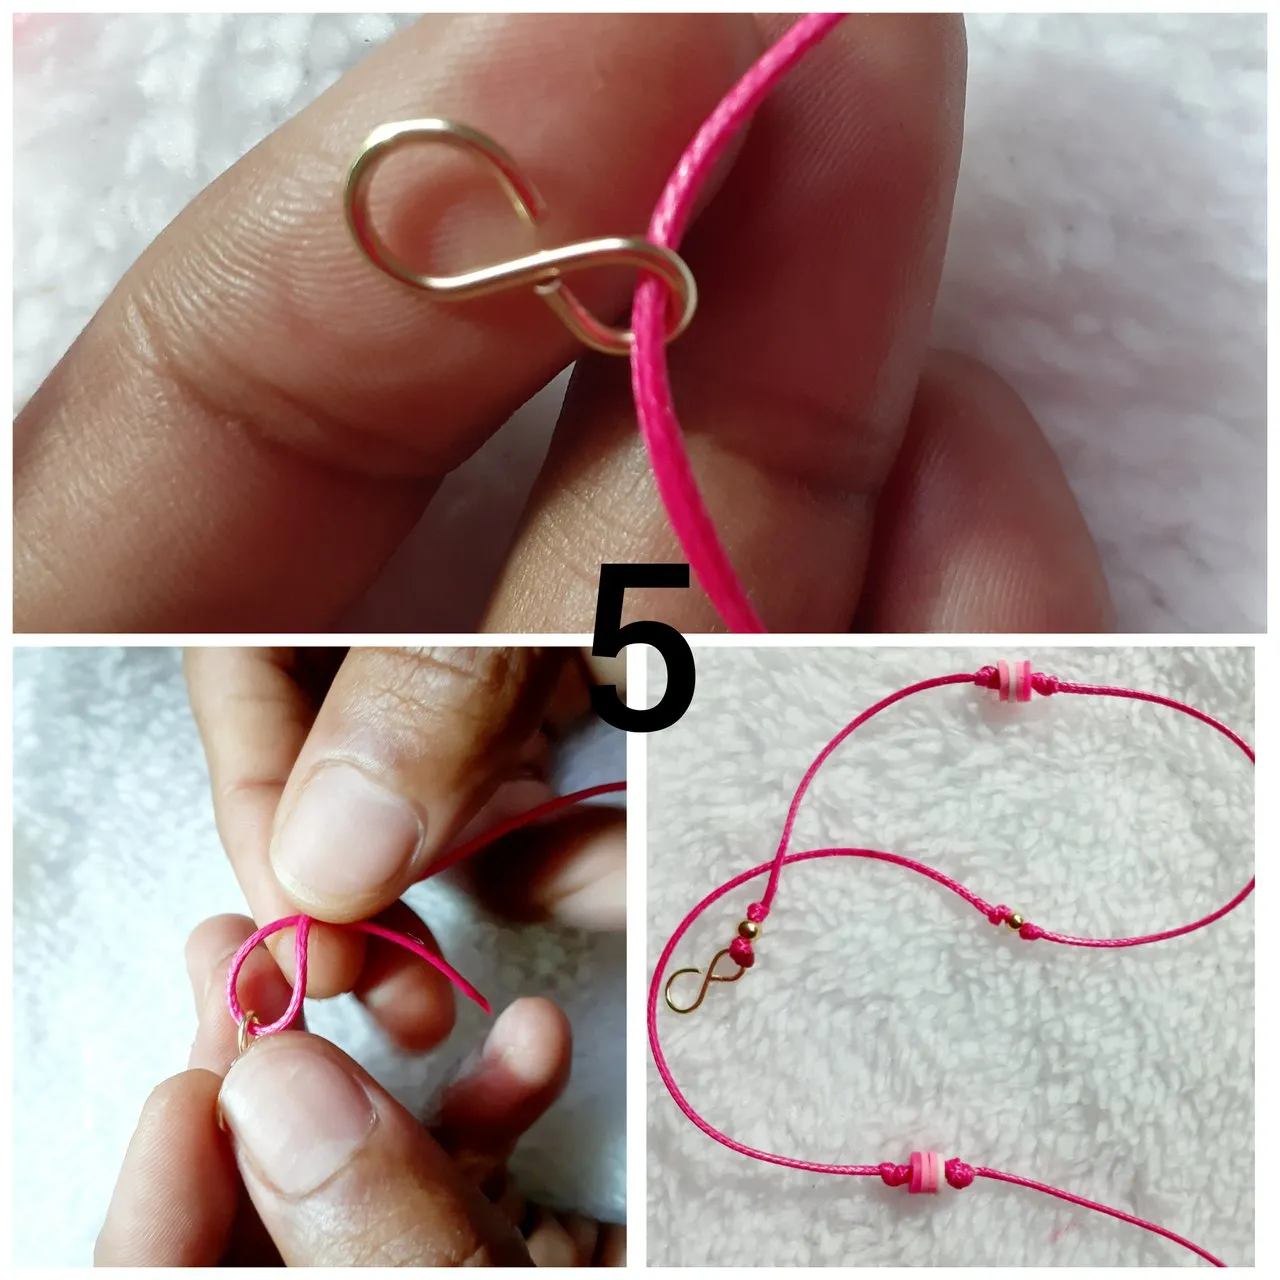
Con el alambre N°20 y la pinza realizamos una figura en forma de infinito, pero que un aro nos quede más grande que el otro. Tratemos de semejar un broche tipo pico de loro. Cortamos el excedente y abrimos un poco el aro más grande. Necesitamos 2 piezas una para cada extremo de nuestro portacubrebocas.
With the wire N° 20 and the pliers, we make a figure in the shape of infinity, but one ring should be bigger than the other. Let's try to resemble a parrot's beak brooch. Cut the excess and open the larger ring a little. We need 2 pieces, one for each end of our mouth-ring holder.
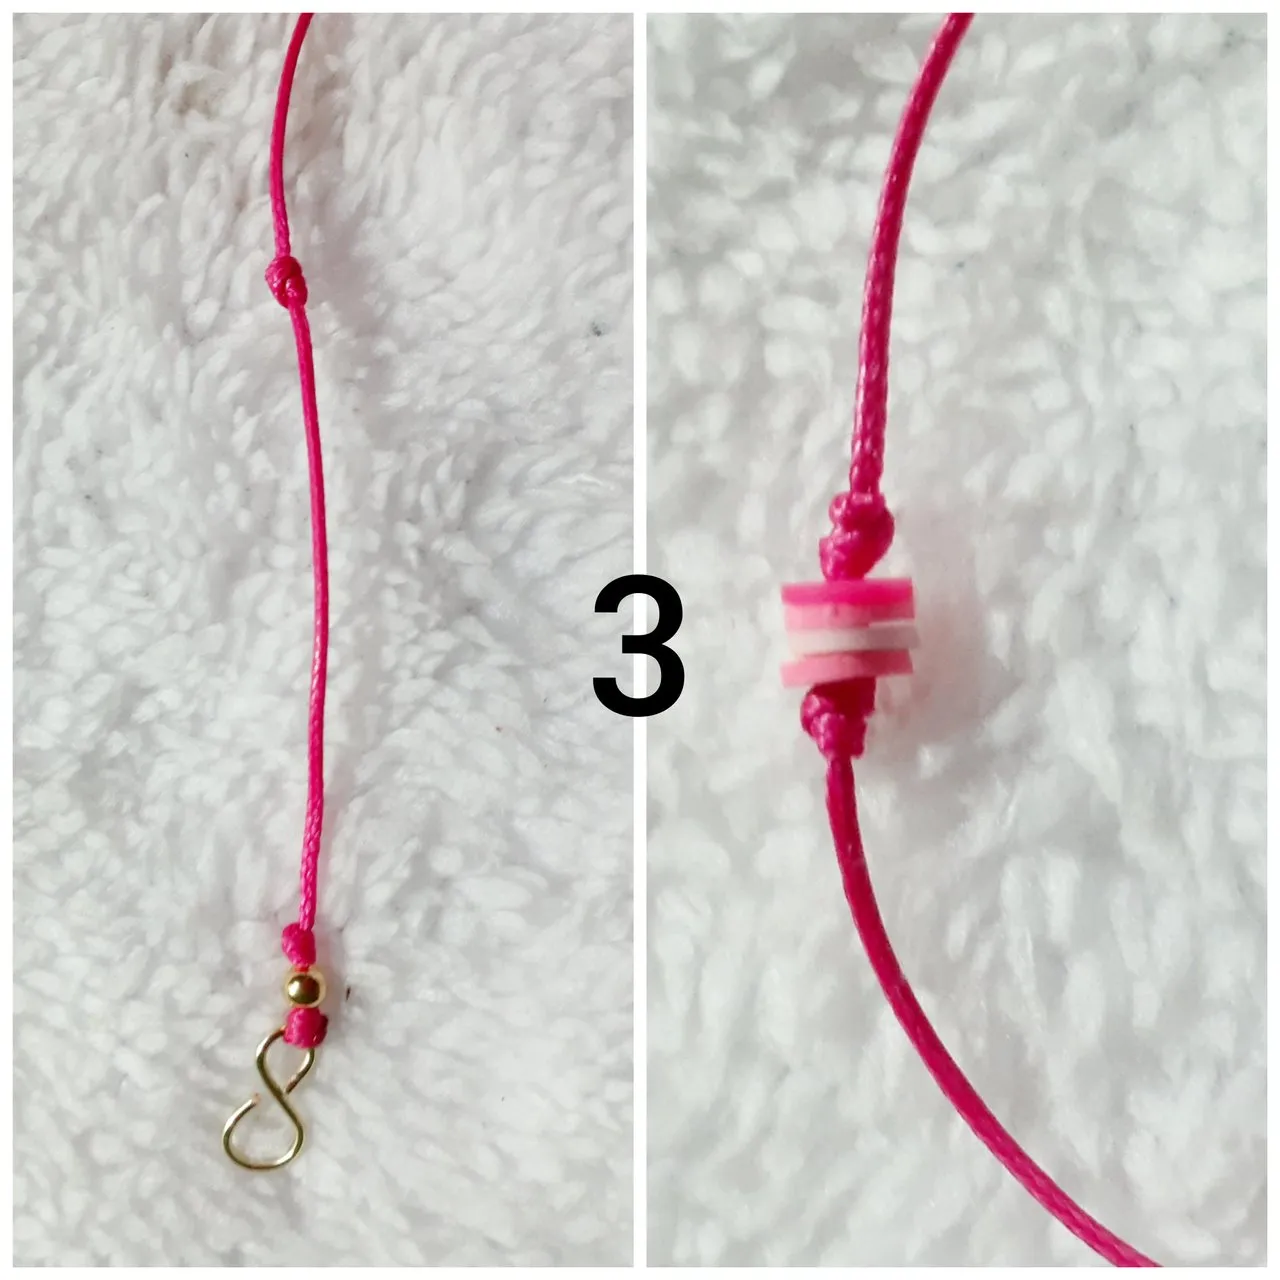
Con el encendedor quemamos la punta de nuestro cordón para que sea más fácil trabajar, pasamos el cordón por nuestra pieza de alambre y realizamos un nudo, cortamos y quemamos para sellar. colocamos un balín dorado y hacemos un nudo simple o doble. Si lo quieren más elaborado pueden realizar un nudo franciscano.
With the lighter we burn the tip of our cord to make it easier to work, we pass the cord through our piece of wire and make a knot, cut and burn to seal. We place a golden ball and make a simple or double knot. If you want it more elaborate you can make a Franciscan knot.

Dejando aproximadamente 10 cm de separación desde el nudo que hicimos, realizamos un nudo doble e insertamos 3 puccas o fimo y seguidamente realizamos otro nudo para que no se corran las piezas.
Leaving approximately 10 cm of separation from the knot we made, we make a double knot and insert 3 puccas or fimo and then we make another knot so that the pieces do not run.
Aquí podemos seguir un patrón o dejar que nuestra imaginación nos guíe. Yo coloqué nuevamente a 10cm de separación un balín y luego seguí el patrón colocando las puccas o fimo hasta llegar al extremo del cordón. Debemos terminar el diseño como comenzamos.
Here we can follow a pattern or let our imagination guide us. I again placed a ball 10cm apart and then followed the pattern by placing the puccas or fimo until I reached the end of the cord. We must finish the design as we started.
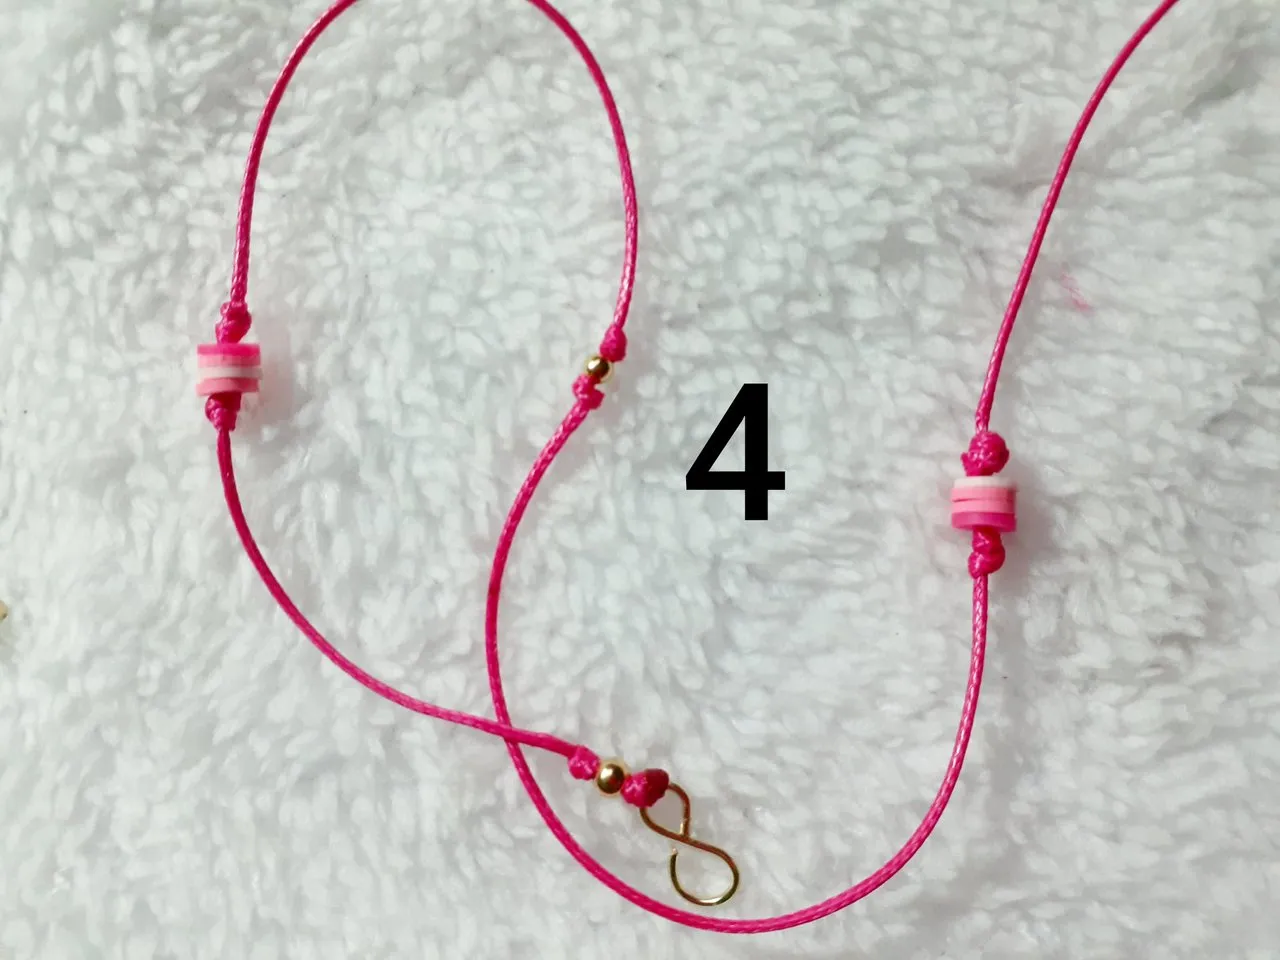
Por último colocamos nuestra otra pieza que hicimos al inicio con alambre, anudamos y listo. Esta pieza es la que sujetará nuestro cubreboca. En caso de no tener alambre para realizarlas, pueden usar broches para pulseras.
Finally we place our other piece that we made at the beginning with wire, knot it and that's it. This piece is the one that will hold our mouth cover. In case you don't have wire to make them, you can use brooches for bracelets.
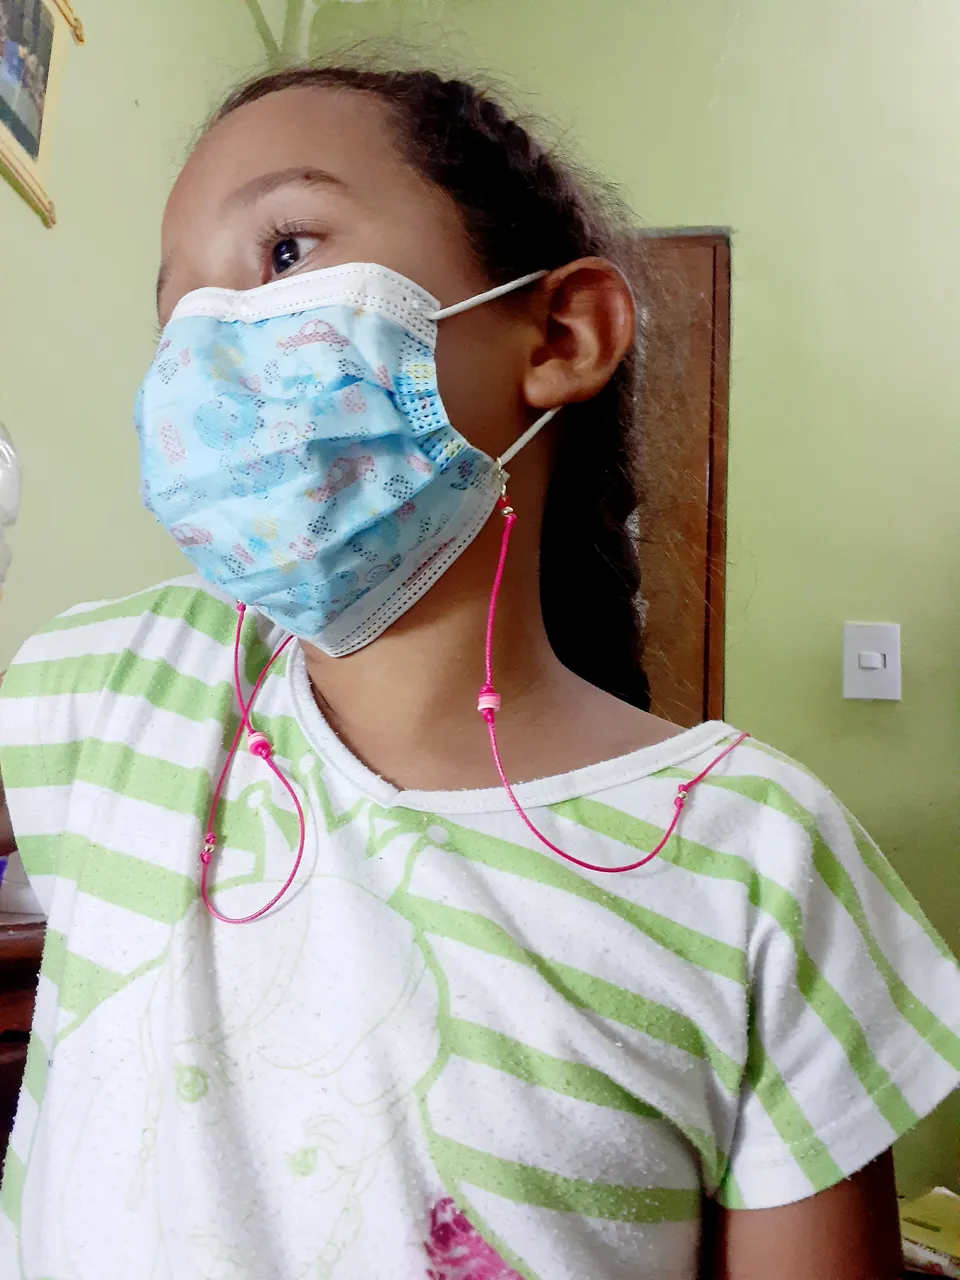
Y así de práctico, cómodo y lindo queda este maravilloso y útil accesorio en esta época de pandemia.
And this is how practical, comfortable and cute this wonderful and useful accessory is in this time of pandemic.
Gracias por visitar mi blog y espero les haya gustado este tutorial
Las fotos son de mi Propiedad tomadas con un Samsung A20 y el texto traducido al Inglés con rl traductor Deepl
Thanks for visiting my blog and I hope you liked this tutorial.
The photos are from my Property taken with a Samsung A20 and the text translated to English with Deepl translator.