Hello friends of this wonderful community. Blessing you first🙏 Today I want to share with you this nice and easy step by step of some tendrils made in wire wrap In the shape of flowers like polka dots.
- Pinza de silicon "opcional"
- Pinza de punta fina
- Lapiz o mandril "depende del tamaño que lo desees"
- Cortauñas
- Alambre n°20
- Alambre n°28
- Mostacilla
- Ojos turcos de 6mm
- Silicone tweezers "optional".
- Fine tip tweezers
- Pencil or mandrel "depends on the size you want".
- Nail clippers
- Wire n°20
- Wire n°28
- Clay mustard
- Turkish eyes 6mm
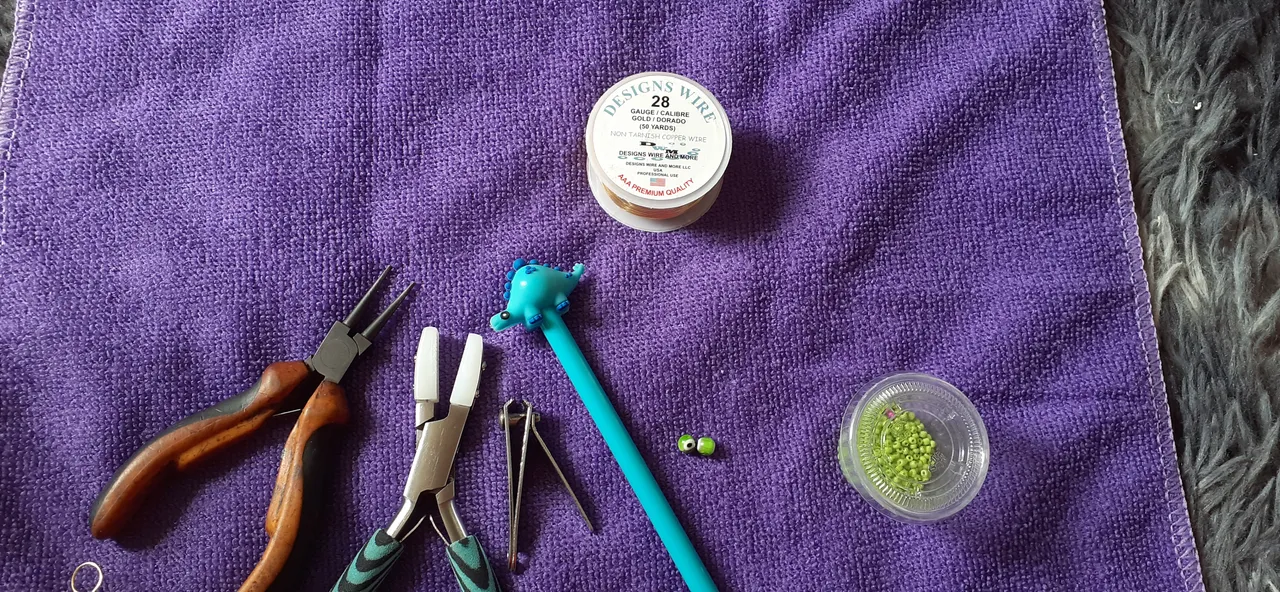
Primero con la pinza de silicon estiramos nuestro alambre N°20. Una vez hecho esto, procedemos a realizar las bases, dejando 1,5 cm del inicio del alambre, realizamos una vuelta y media alrededor del lapiz o mandril.
First with the silicone tweezers we stretch our wire N°20. Once this is done, we proceed to make the bases, leaving 1.5 cm from the beginning of the wire, we make a turn and a half around the pencil or mandrel.
Sacamos el alambre del lapiz, cortamos el excedente y doblamos en el centro para que queden forma de pin. Listas nuestras bases
Remove the wire from the pencil, cut the excess and bend in the center to form a pin shape. Ready our bases
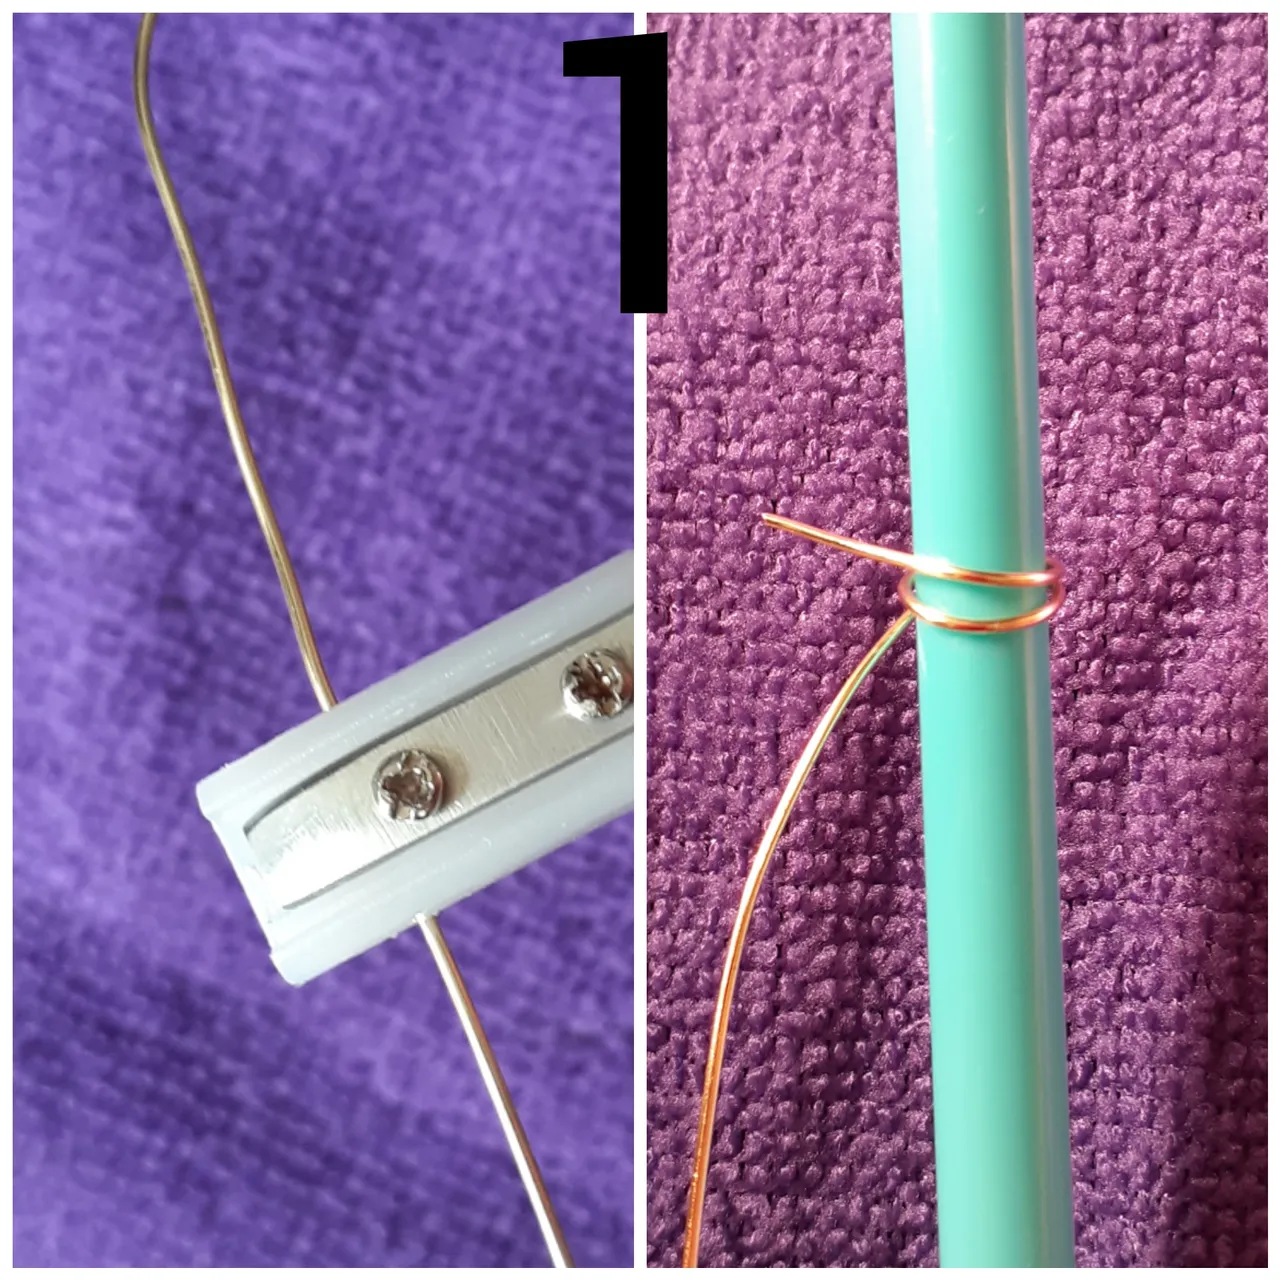
Con el Alambre n° 20 y nuestra pinza punta fina, realizamos círculos seguidos en forma de cadena hasta lograr el largo necesario para sus bases. En este caso realicé 11 círculos para este tamaño. Luego le damos forma de circulo con la pinza de silicon o las manos hasta cerrar.
With the wire n° 20 and our fine-tipped pliers, we make circles in a chain until we reach the necessary length for the bases. In this case I made 11 circles for this size. Then we shape the circles with the silicone tweezers or our hands until we close them.

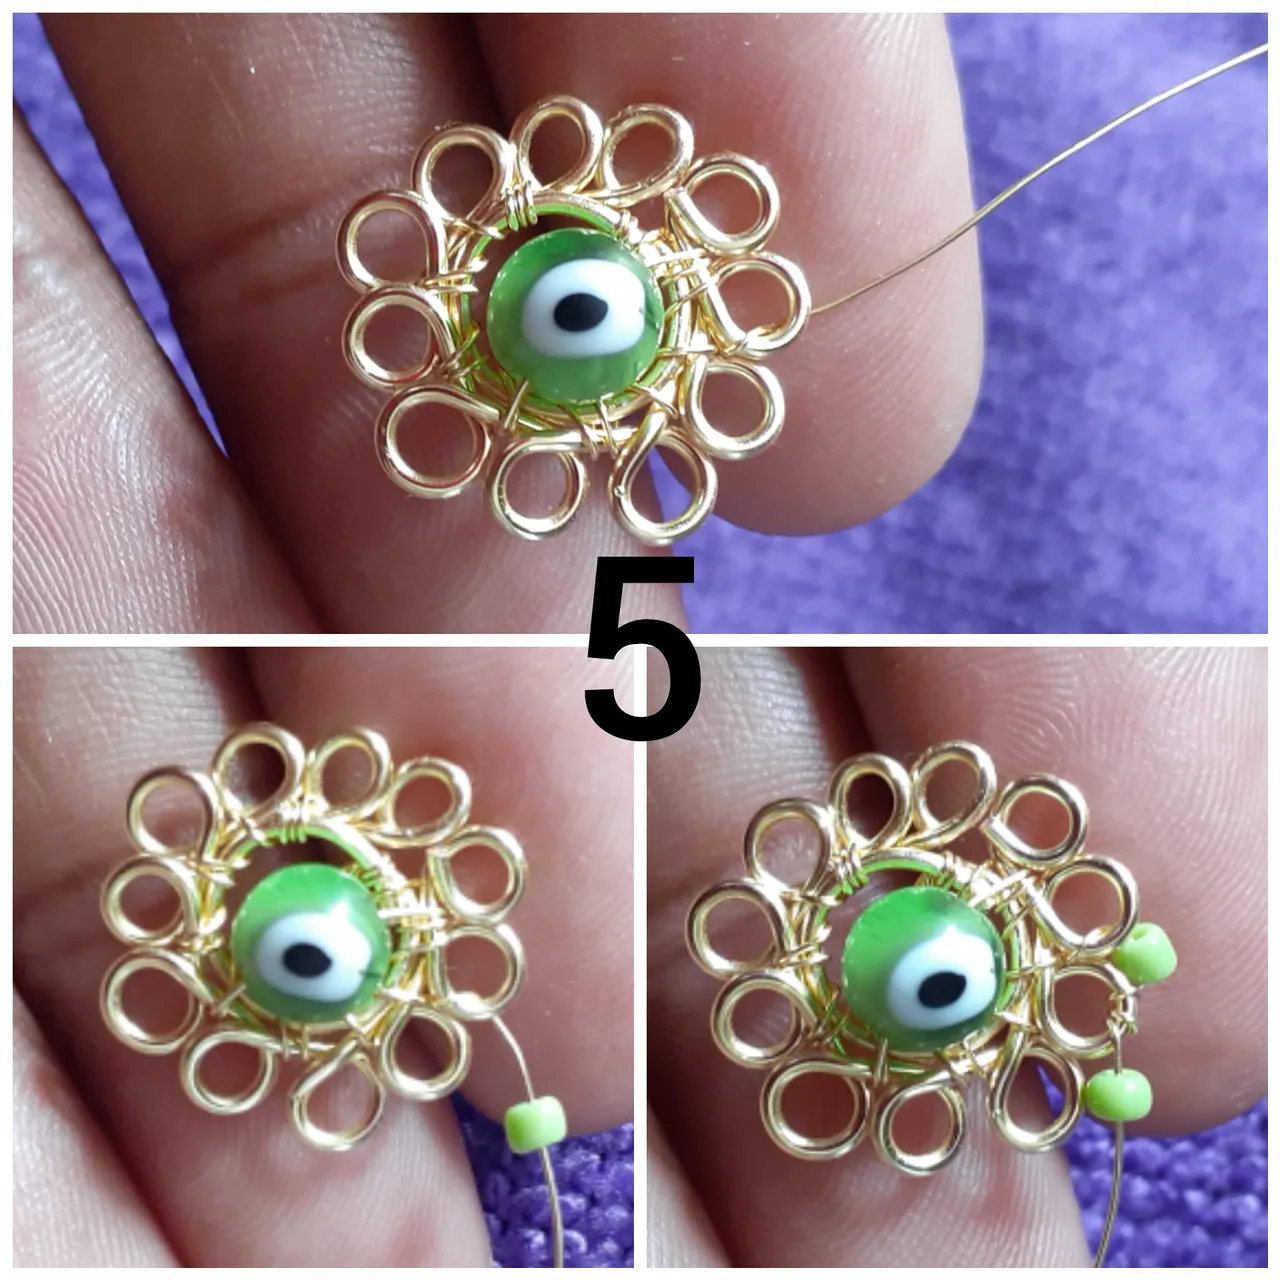
En este paso con el alambre N°28 fijamos a la base hasta que formemos una flor. Una vez realizado esto procedemos a decorar.
In this step we fix the wire N°28 to the base until we form a flower. Once this is done we proceed to decorate.
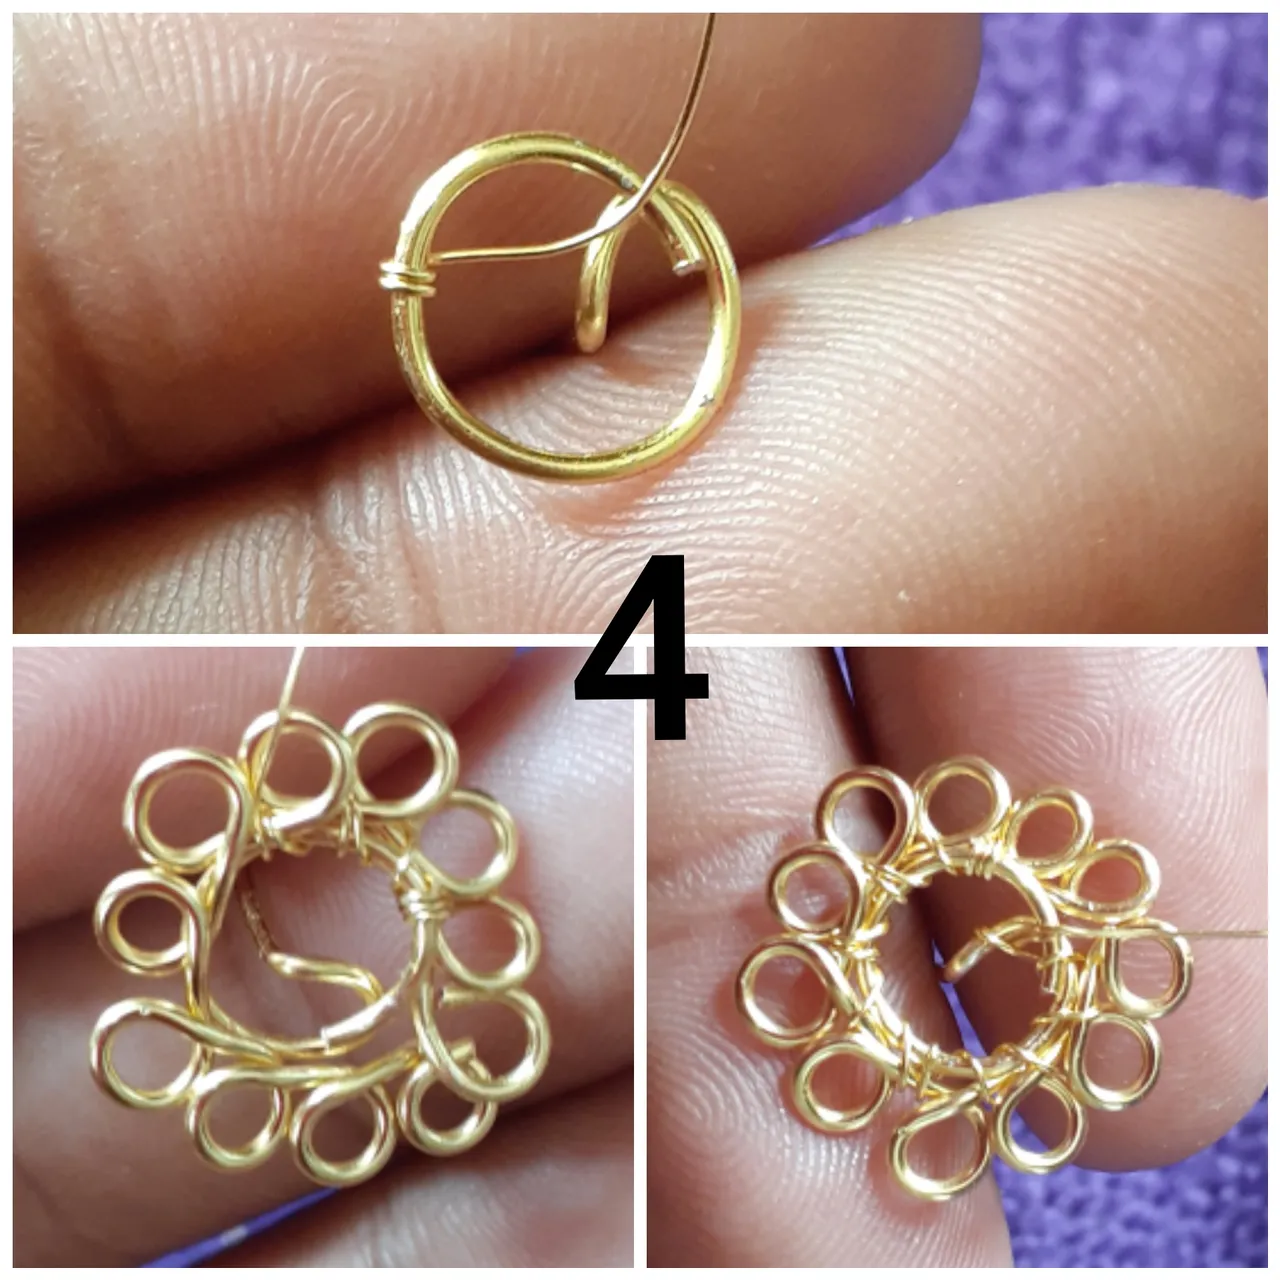
Tomamos el alambre n°28 realizamos 3 vueltas alrededor de las bases, fijamos y procedemos a colocar nuestro ojo turco en el centro. Empezamos a colocar las mostacillas en el espacio que está entre círculo y círculo hasta decorar toda la flor.
We take the wire n°28, we make 3 turns around the bases, we fix it and we proceed to place our Turkish eye in the center. We begin to place the beads in the space between the circles until we decorate the whole flower.
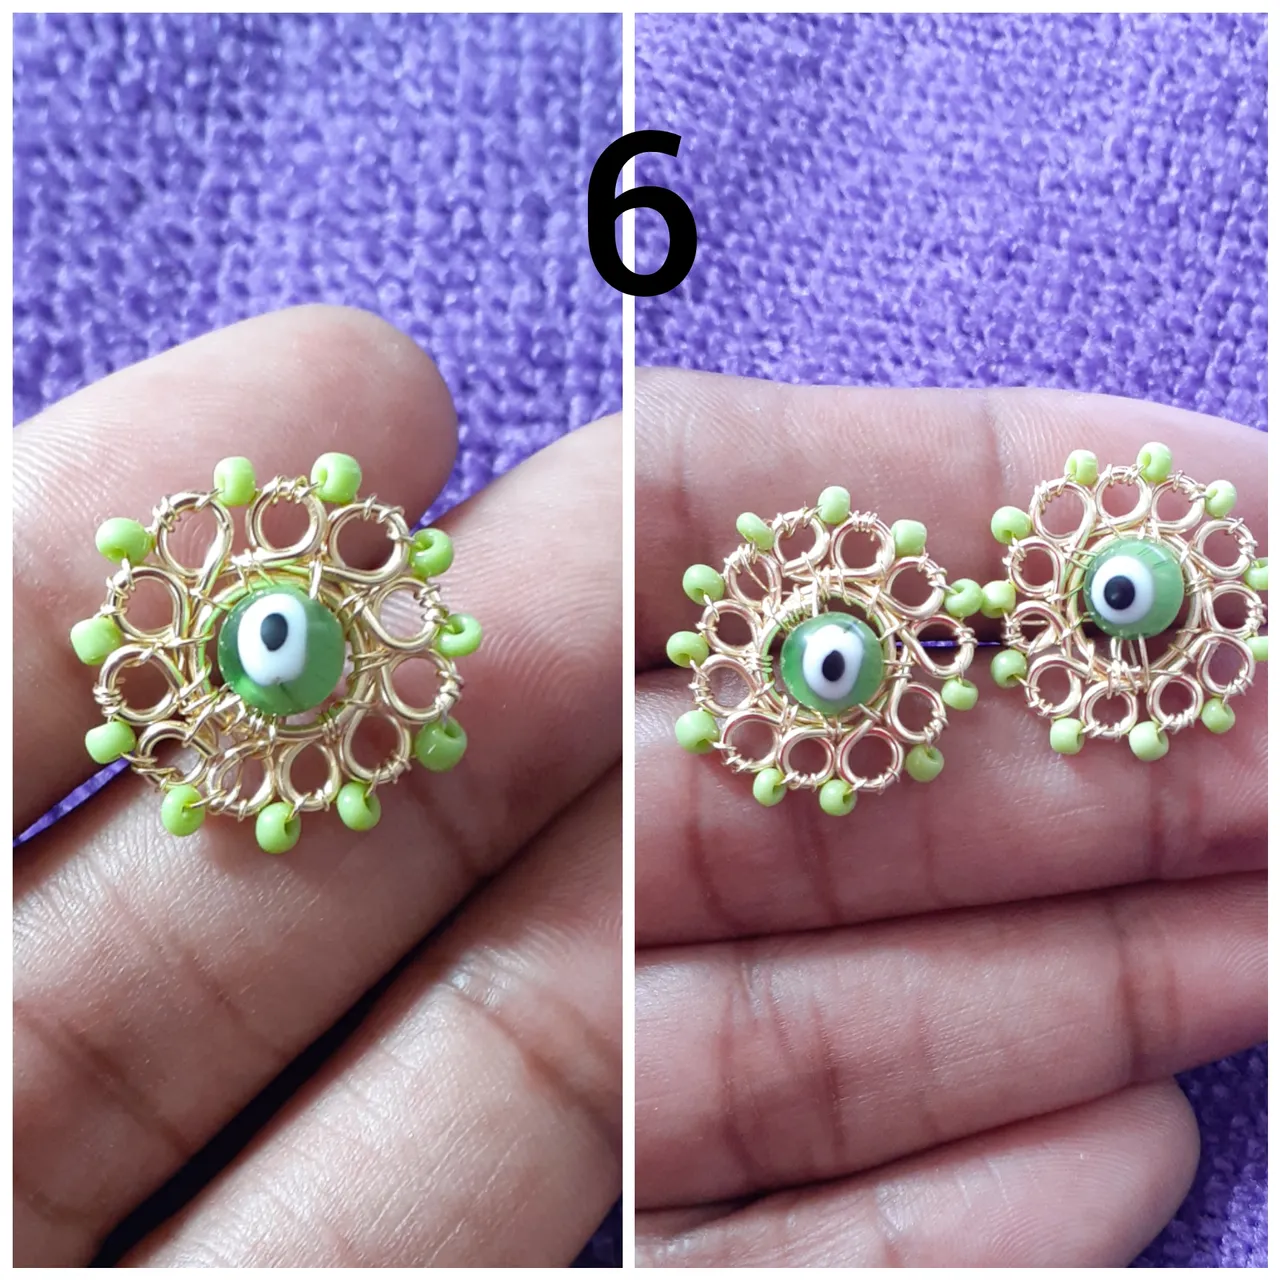
Realizamos el mismo procedimiento en nuestra otra base. Y así nos quedan estos hermosos y fáciles zarcillos en alambrismo en forma de flores.
We perform the same procedure on our other base. And so we have these beautiful and easy wire wrap tendrils in the shape of flowers.
Espero les guste este tutorial y se animen a realizarlos, ya sea para lucir los, para obsequiarlos o para emprender en este mundo del alambrismo.
Las fotos fueron tomadas por mí con mi teléfono Samsung A20

I hope you like this tutorial and are encouraged to make them, either to wear them, to give them as a gift or to undertake in this world of wire wrapping
The photos were taken by me with my Samsung A20 phone.