¡Hola, amigos de Hive! Espero que todos estén muy bien y tengan un lindo día.
Hello Hive friends! I hope you are all very well and have a nice day.
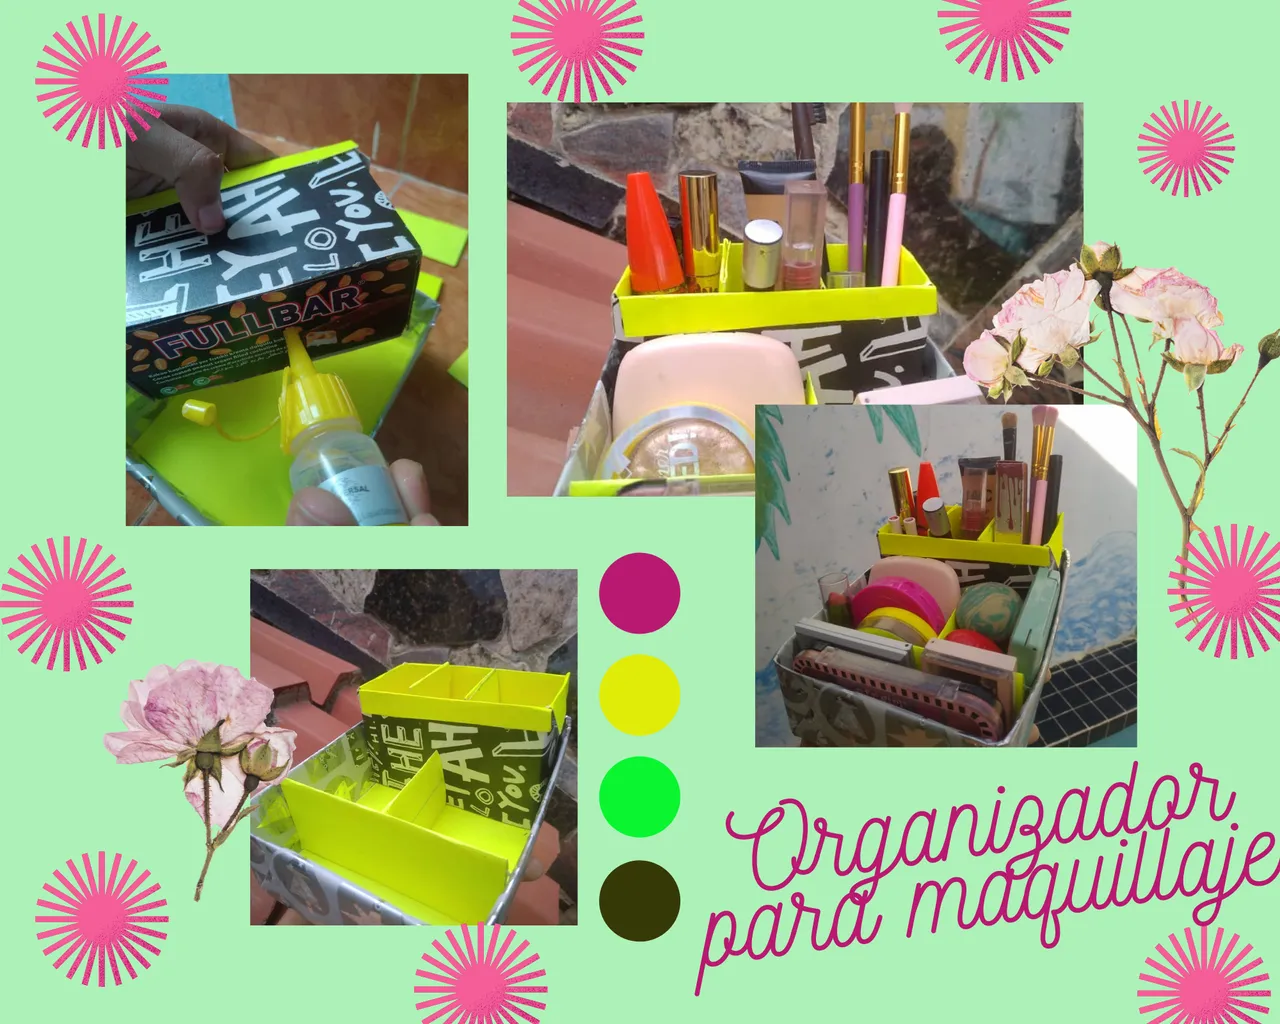
En esta ocasión quiero mostrarles este organizador para maquillaje que realicé con unas viejas cajas que tenía en mi casa. Desde hace un tiempo necesitaba un lugar donde colocar mi maquillaje y como vi unas cuantas cositas que podía reutilizar dije: “¿por qué no hacer algo lindo con esto?” y heme aquí. Es algo funcional, ya que para las personas que no tienen mucho espacio, les queda perfecto.
💜💜💜💜💜💜💜
Esto es lo que necesitamos para hacer nuestro organizador.
This time I want to show you this makeup organizer that I made with some old boxes that I had at home. For a long time I needed a place to put my makeup and as I saw a few little things that I could reuse I said: "why not do something nice with this?" and here I am. It is something functional, since for people who do not have much space, it is perfect.
This is what we need to make our organizer.
- Dos cajas pequeñas de cartón
- Cartulina
- Papel de regalo
- Carpetas con estampado
- Silicón liquido
- Tijeras
- Two small cardboard boxes
- Card stock
- Gift wrap
- Patterned folders
- Liquid silicone
- Scissors
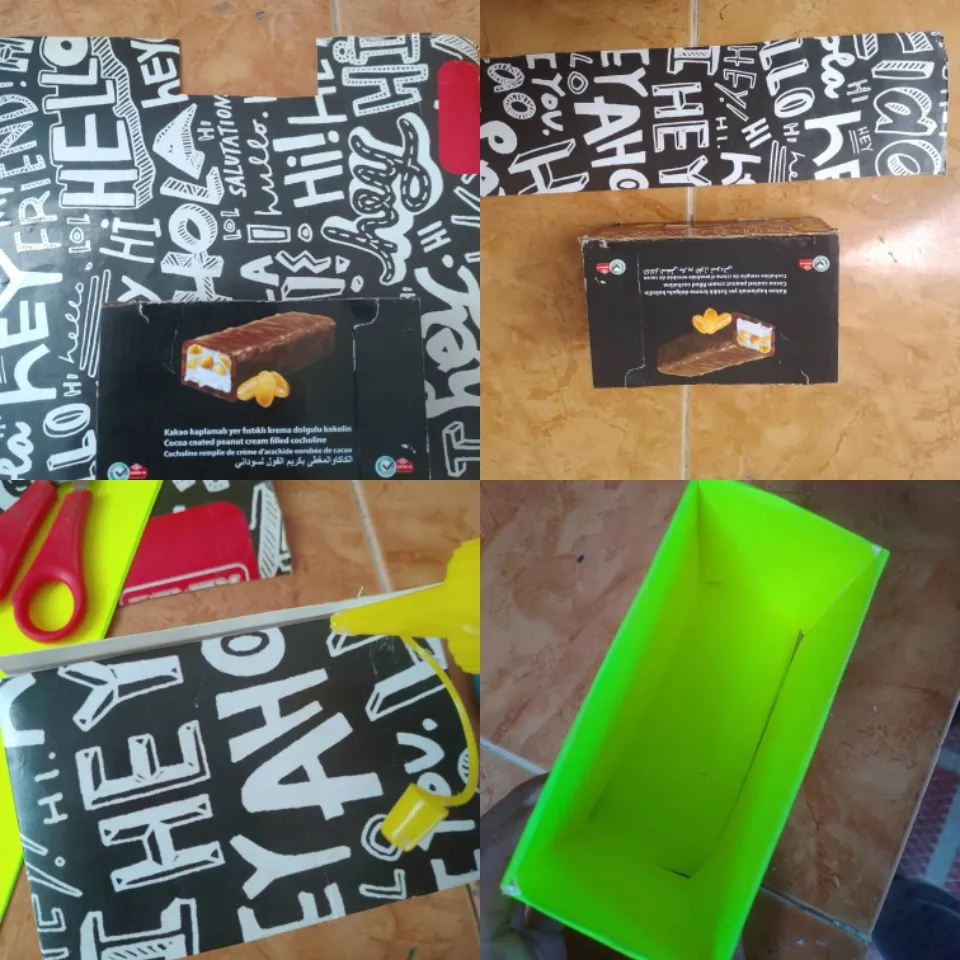
1✨
Tomamos una de las cajas y con una tijera cortamos la tapa de esta, doblamos las pestañas hacia afuera y pegamos con silicón hasta que nos quede de este modo.
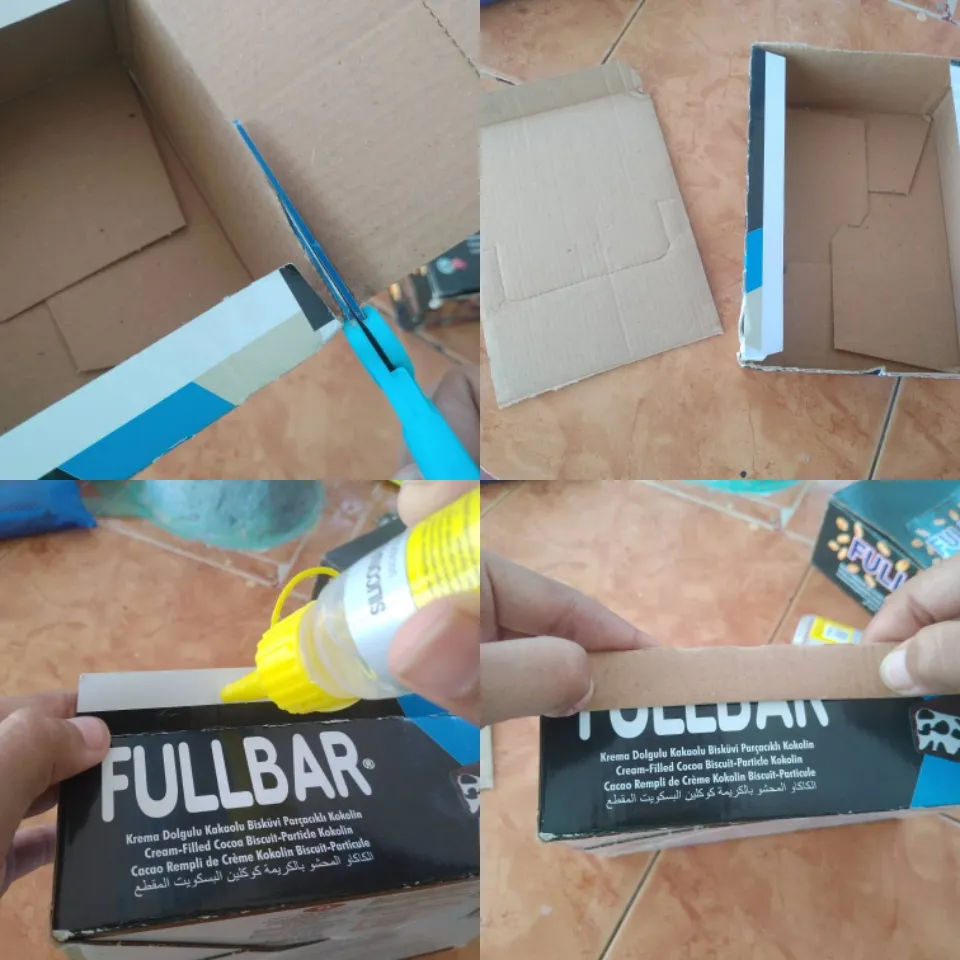
We take one of the boxes and with a scissors we cut the lid of it, we fold the tabs outwards and we glue with silicone until we are in this way.
2✨
Reforzamos la base de la caja pegando con silicón las pestañas del fondo, para que de este modo no se abra la caja. Insertamos la otra caja solo para sacar la medida de lo que recortaremos para hacer una cajita. Trazamos con un marcador lo necesario y recortamos todo muy bien.
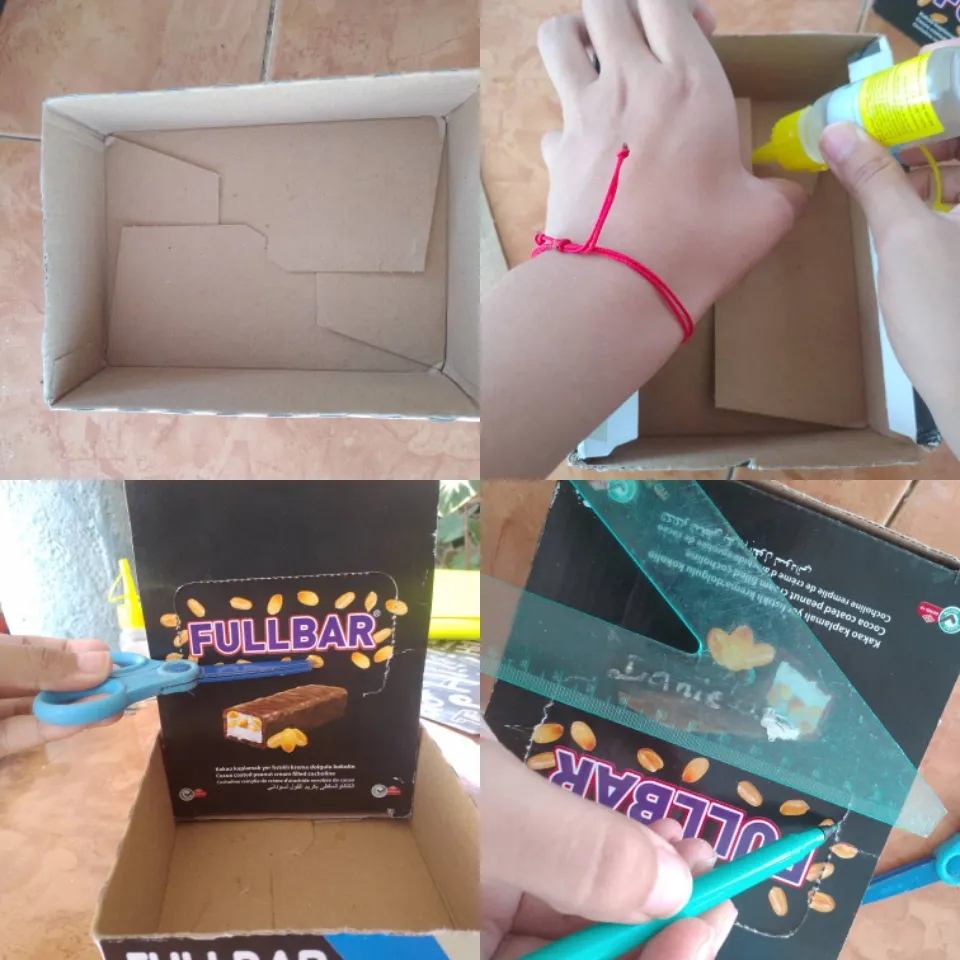
We reinforce the base of the box by gluing the bottom tabs with silicone, so that the box does not open. We embed the other box just to get the measure of what we will cut out to make a box. We trace what is necessary with a marker and cut everything very well.
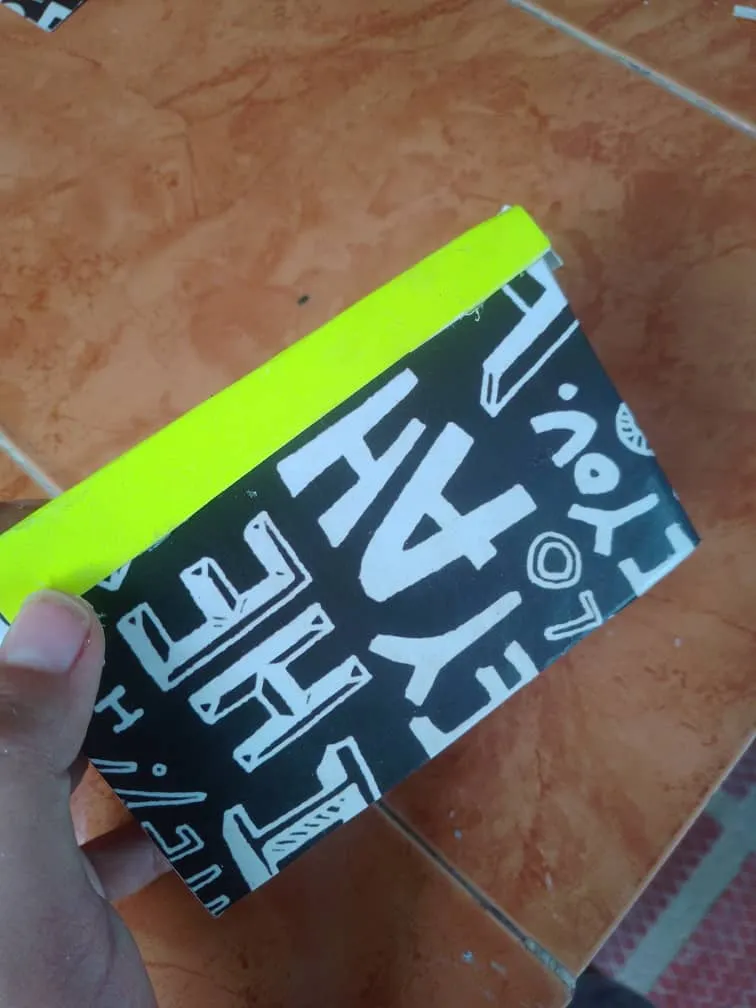
3✨
Para las divisiones, usamos la tapa de la caja que cortamos anteriormente. Sacamos la medida de la caja, organizando cada pestaña del modo en que queremos que quede al final.
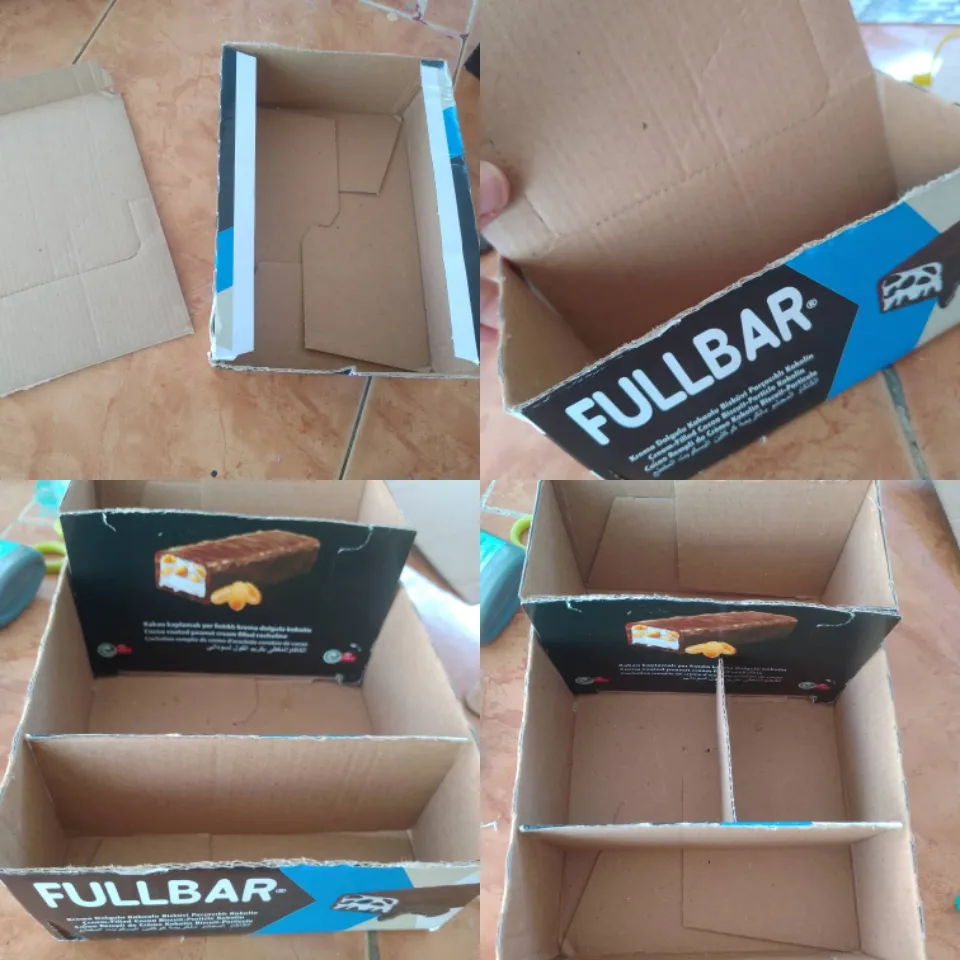
For the divisions, we use the lid of the box that we cut earlier. We take the measurement out of the box, organizing each tab the way we want it to be at the end.
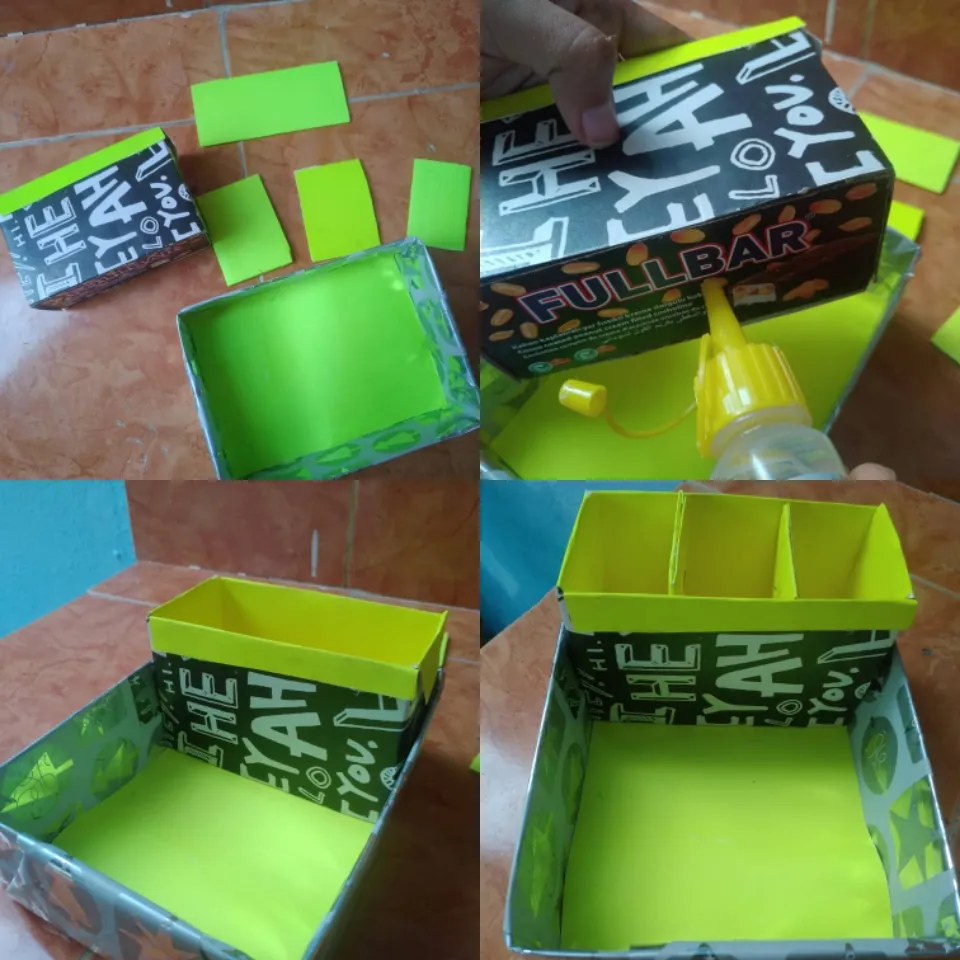
4✨
Para decorar nuestra base, tomamos un papel de regalo del color que deseen, recortamos un rectángulo mucho más grande que la caja y forramos todo muy bien, asegurándose de pegar cada extremos con silicón o cinta adhesiva. Marcamos el contorno de la base en un trozo de cartulina para sacar lo que será el fondo del organizador.
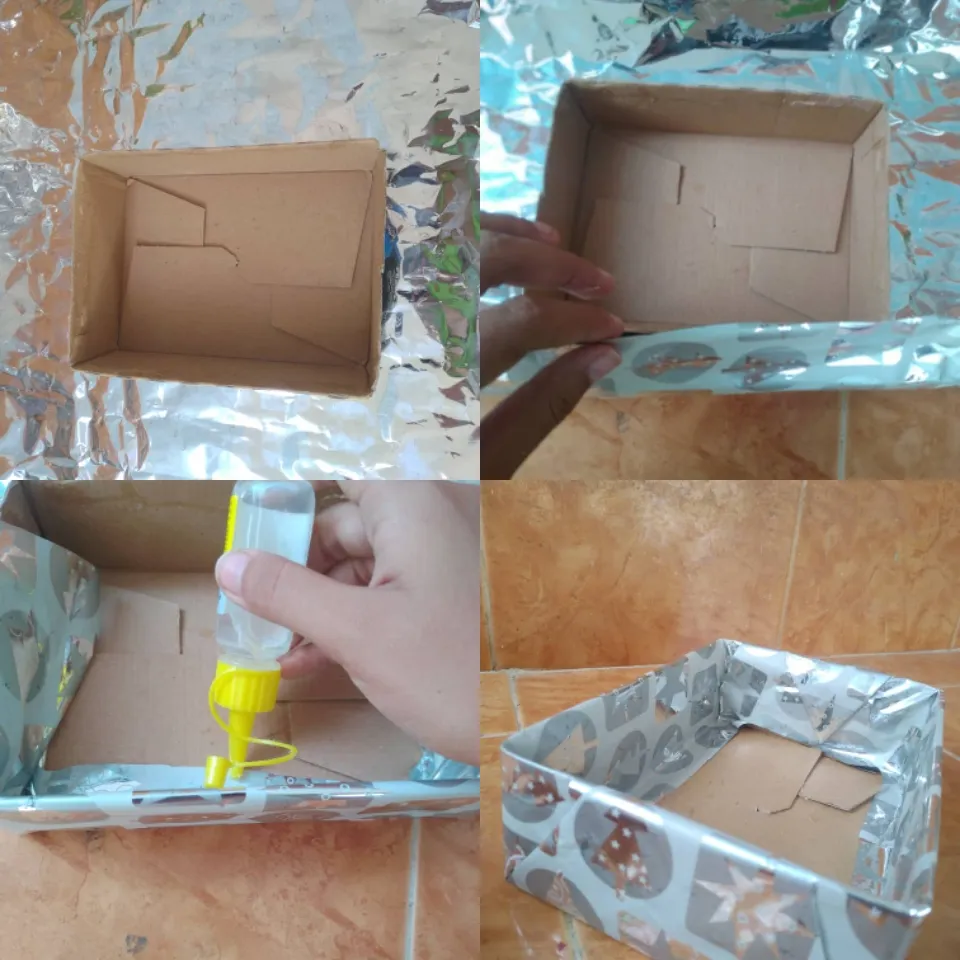
To decorate our base, we take a wrapping paper of the desired color, cut out a rectangle much larger than the box and cover everything very well, making sure to glue each end with silicone or adhesive tape. We mark the outline of the base on a piece of cardboard to remove what will be the bottom of the organizer.
5✨
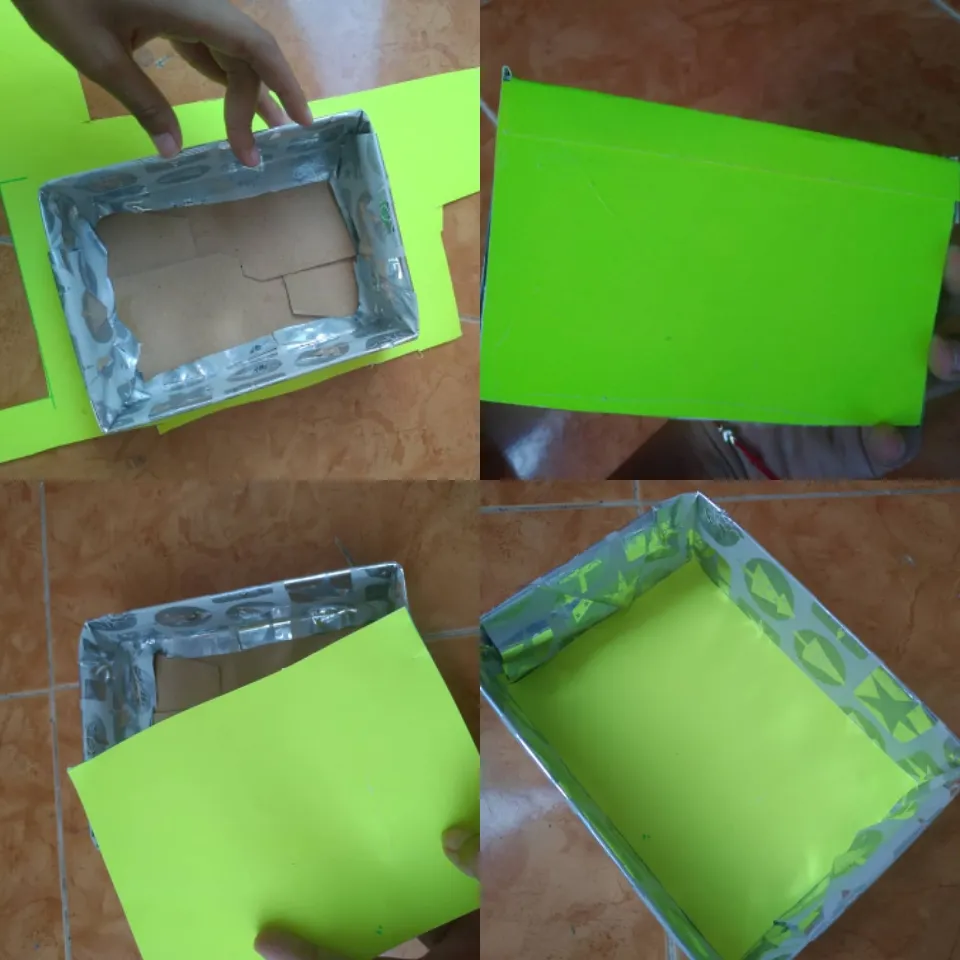
En el caso de las divisiones, tomamos los trozos de cartón y trazamos el doble del tamaño de estos en la cartulina, para que de esta forma podamos envolver por completo el cartón.
Hacemos el mismo procedimiento con el resto.

In the case of divisions, we take the pieces of cardboard and trace twice their size on the cardboard, so that in this way we can completely wrap the cardboard.
We do the same procedure with the rest.
6✨
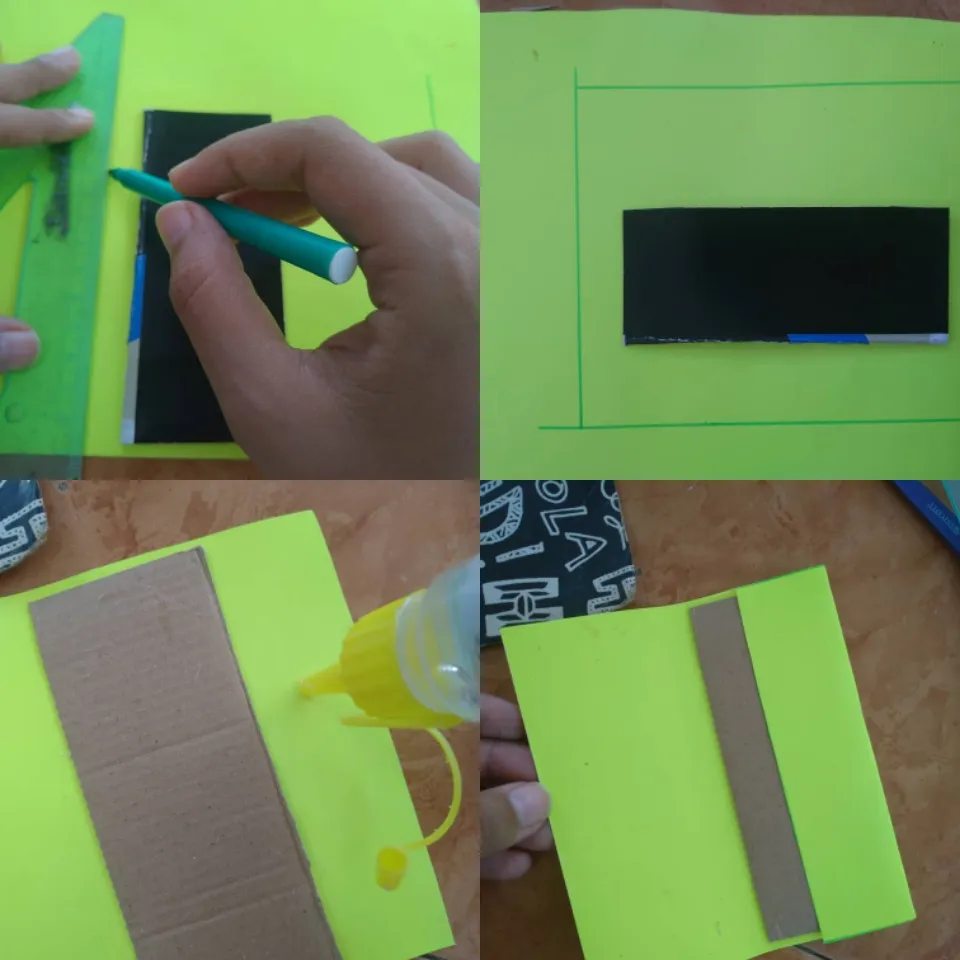
Para la cajita donde colocaremos las brochas, use la tapa de una carpeta estampada. Recorte una tira del mismo tamaño de la cajita, para forrarla por completo. Y con cartulina, cubrimos toda la parte de adentro dejado una pestaña que sobresalga hasta el borde de la caja
For the box where we will place the brushes, use the cover of a stamped folder. Cut a strip the same size as the box, to line it completely. And with cardboard, we cover the entire inside, leaving a tab that protrudes to the edge of the box.
7
Por último, pegamos todas las piezas con silicón y dejamos secar todo muy bien.
Finally, we glue all the pieces with silicone and let everything dry very well.
¡Y listo!, así quedó nuestro organizador.
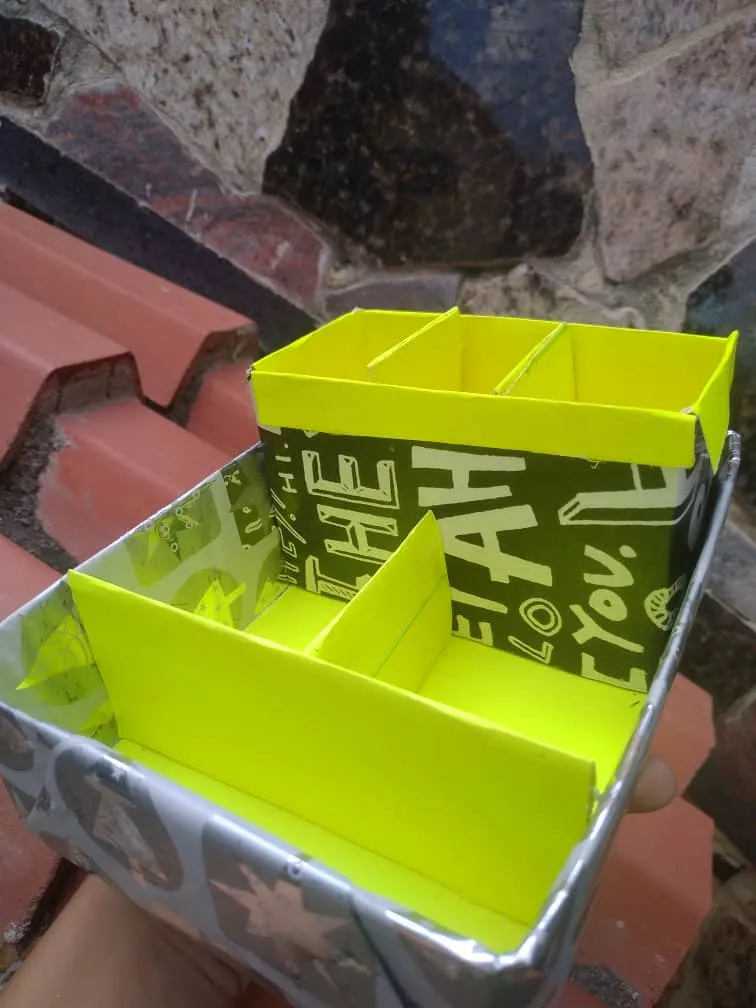
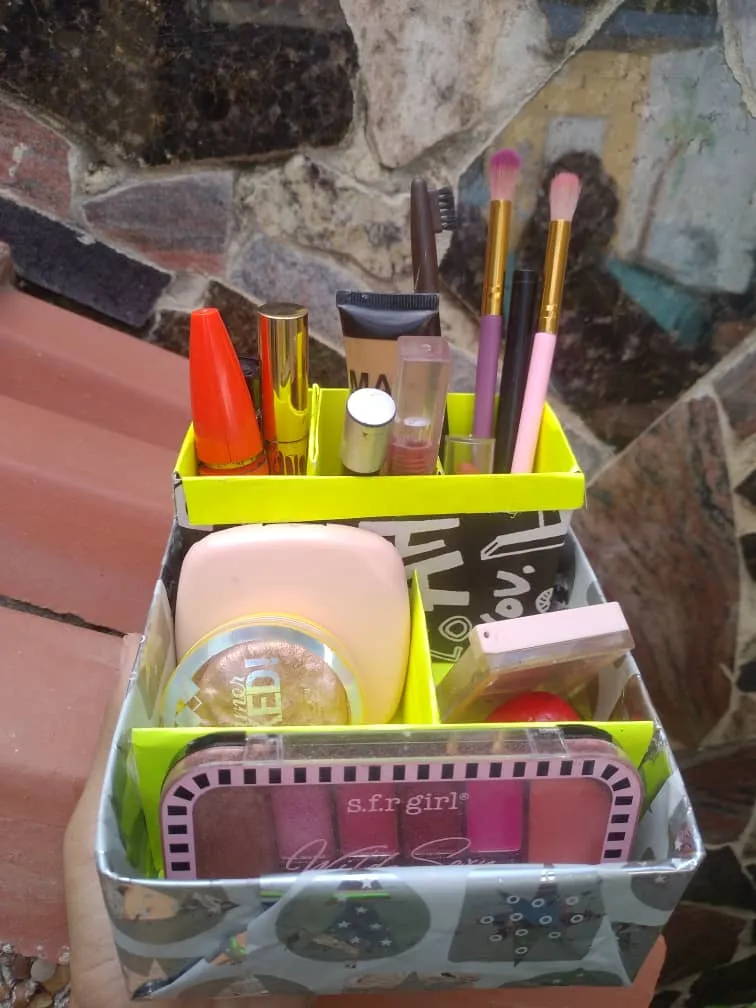
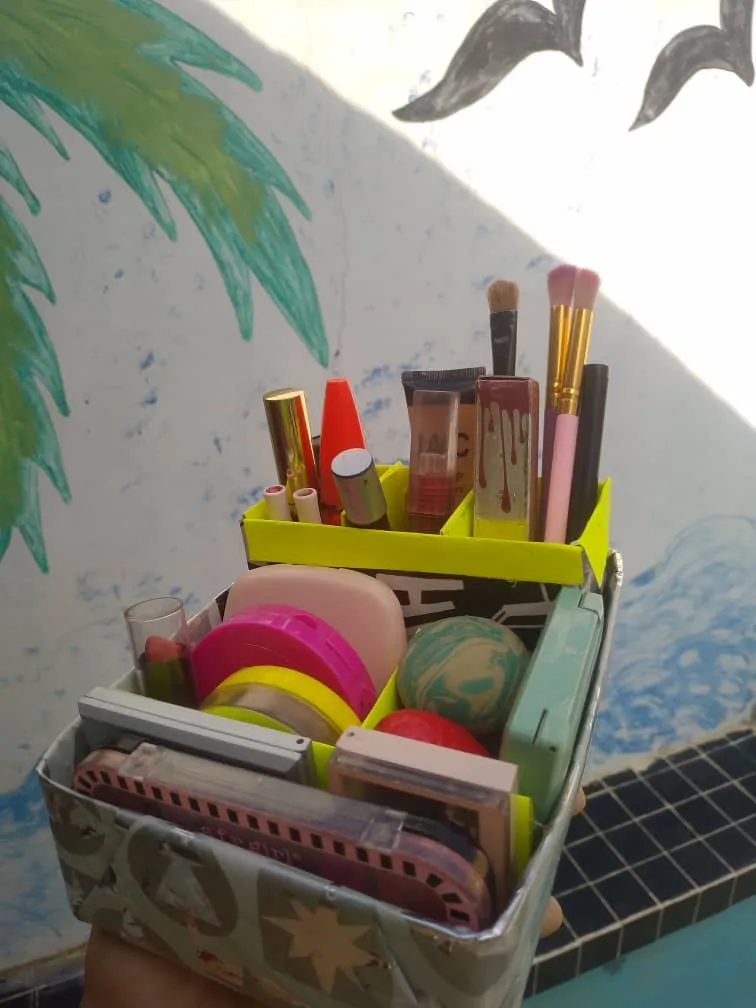
And voila!, this is our organizer.
💖Espero que les guste y les sirva de ayuda.💖
I hope you like it and it helps you.