
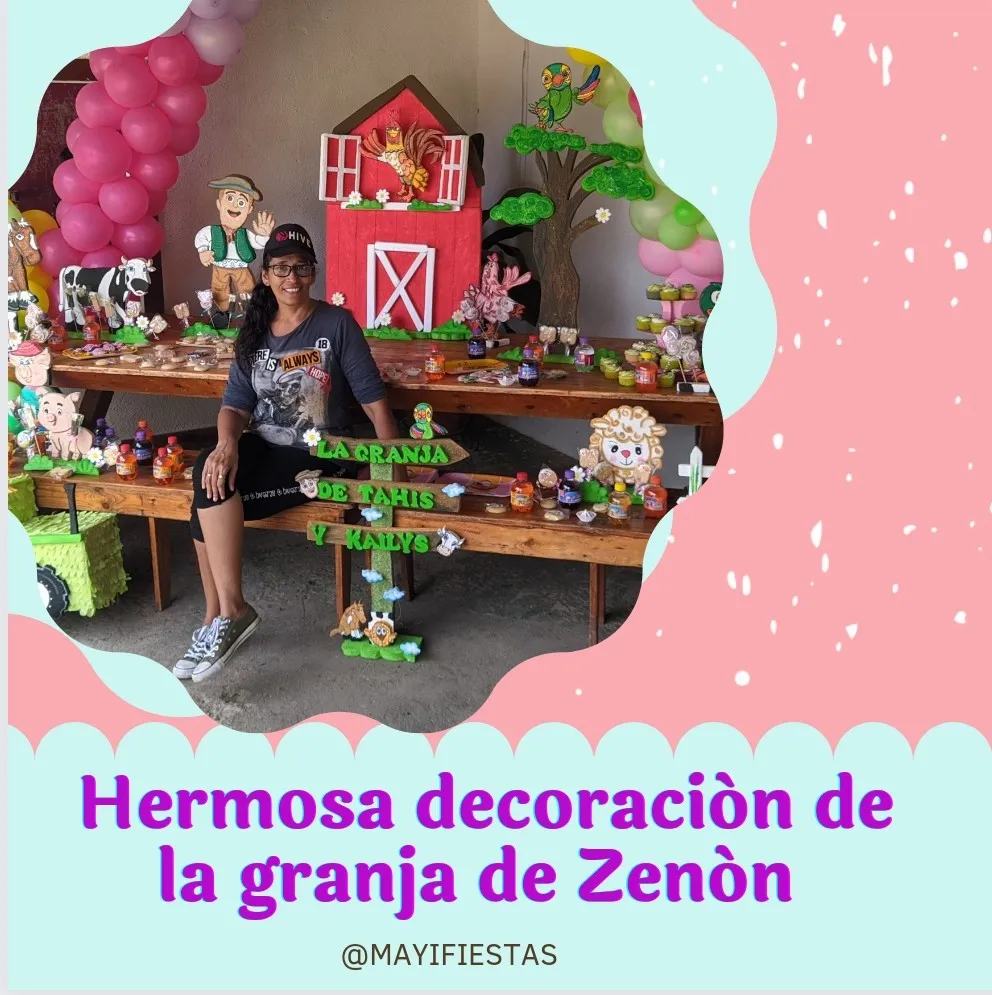
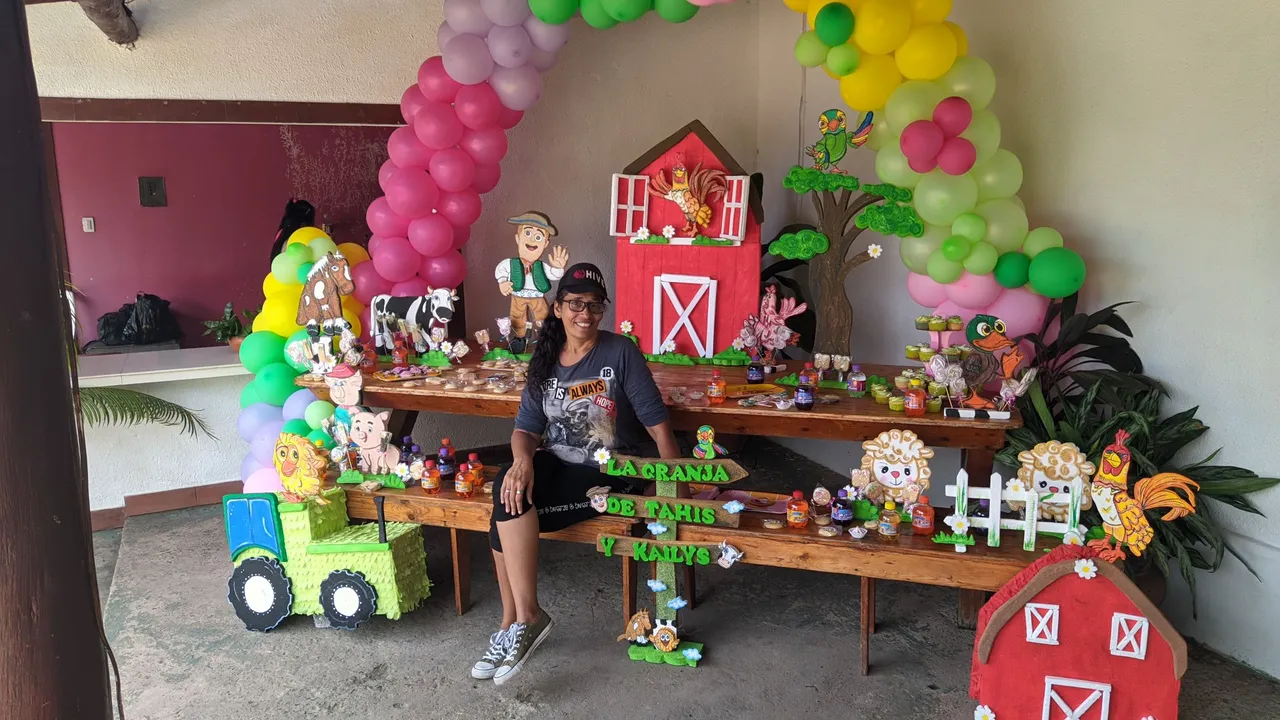
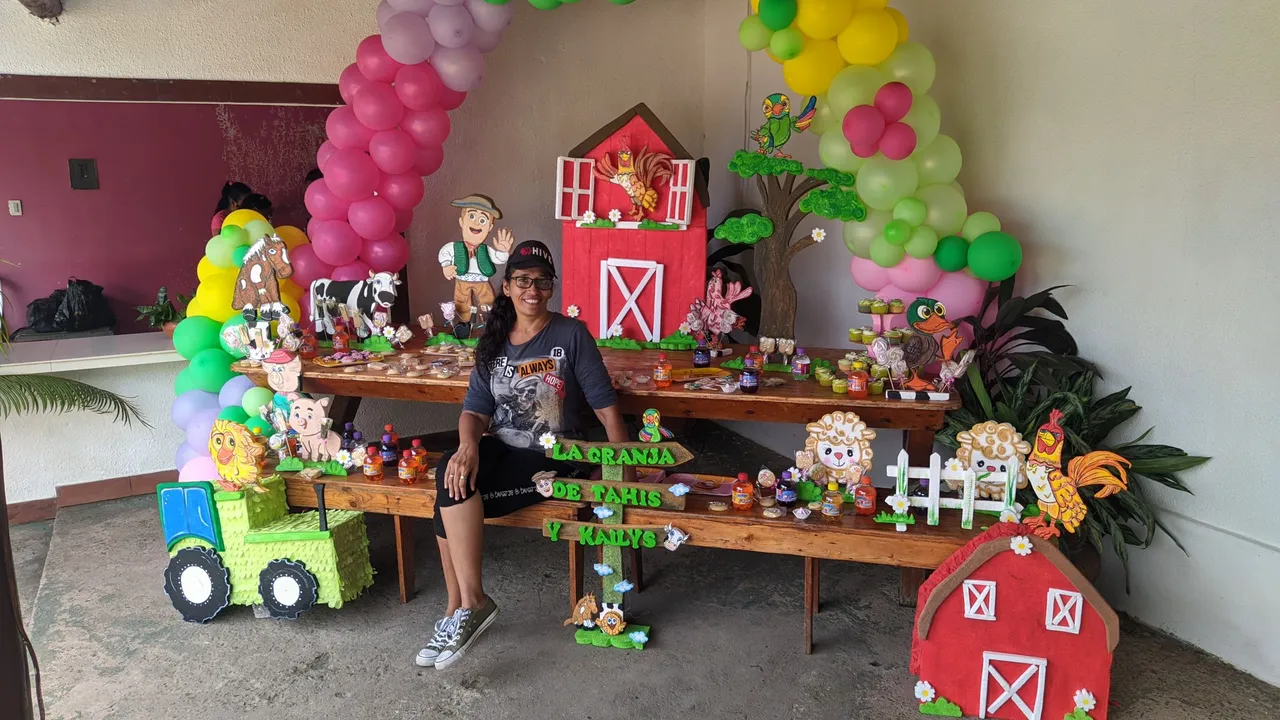
Hola amigos de #hive espero que todos se encuentren bien, a pesar de toda la situación que estoy atravesando sigo adelante, y aunque en ocasiones no sienta los ánimos de continuar debo hacerlo, y ahora más que nunca, por ese motivo cuando tuve la oportunidad de trabajar decorando una fiesta no dudé en hacerlo., Y de eso se trata mi post, de explicar cómo fue el proceso para lograr la decoración que hice para una fiesta de un primer añito de las gemelas Kaily y Thais con la temática de la granja de Zenón, pero no hablemos más, vamos a iniciar la explicación.
🐓Proceso creativo🐓
Cuando me enteré de que la fiesta era de la temática de granja de Zenón inicié por comprar los materiales para elaborar las figuras con las que hice la decoración, aquí te digo cuál fue la lista de materiales que utilicé para elaborar las figuras .
🐓 Materiales para elaborar las figuras 🐓
🐓 Anime de 3 mm y de 2.5 mm.
🐓 Pinturas al frío de colores.
🐓 Silicón liquido.
🐓 cortador de anime.
🐓 Cuchilla.
🐓 Lija suave.
🐓Pinceles.
🐓 Brillo.
🐓 Papel de reciclaje.
🐓 lápiz.
🐓 Alfileres.
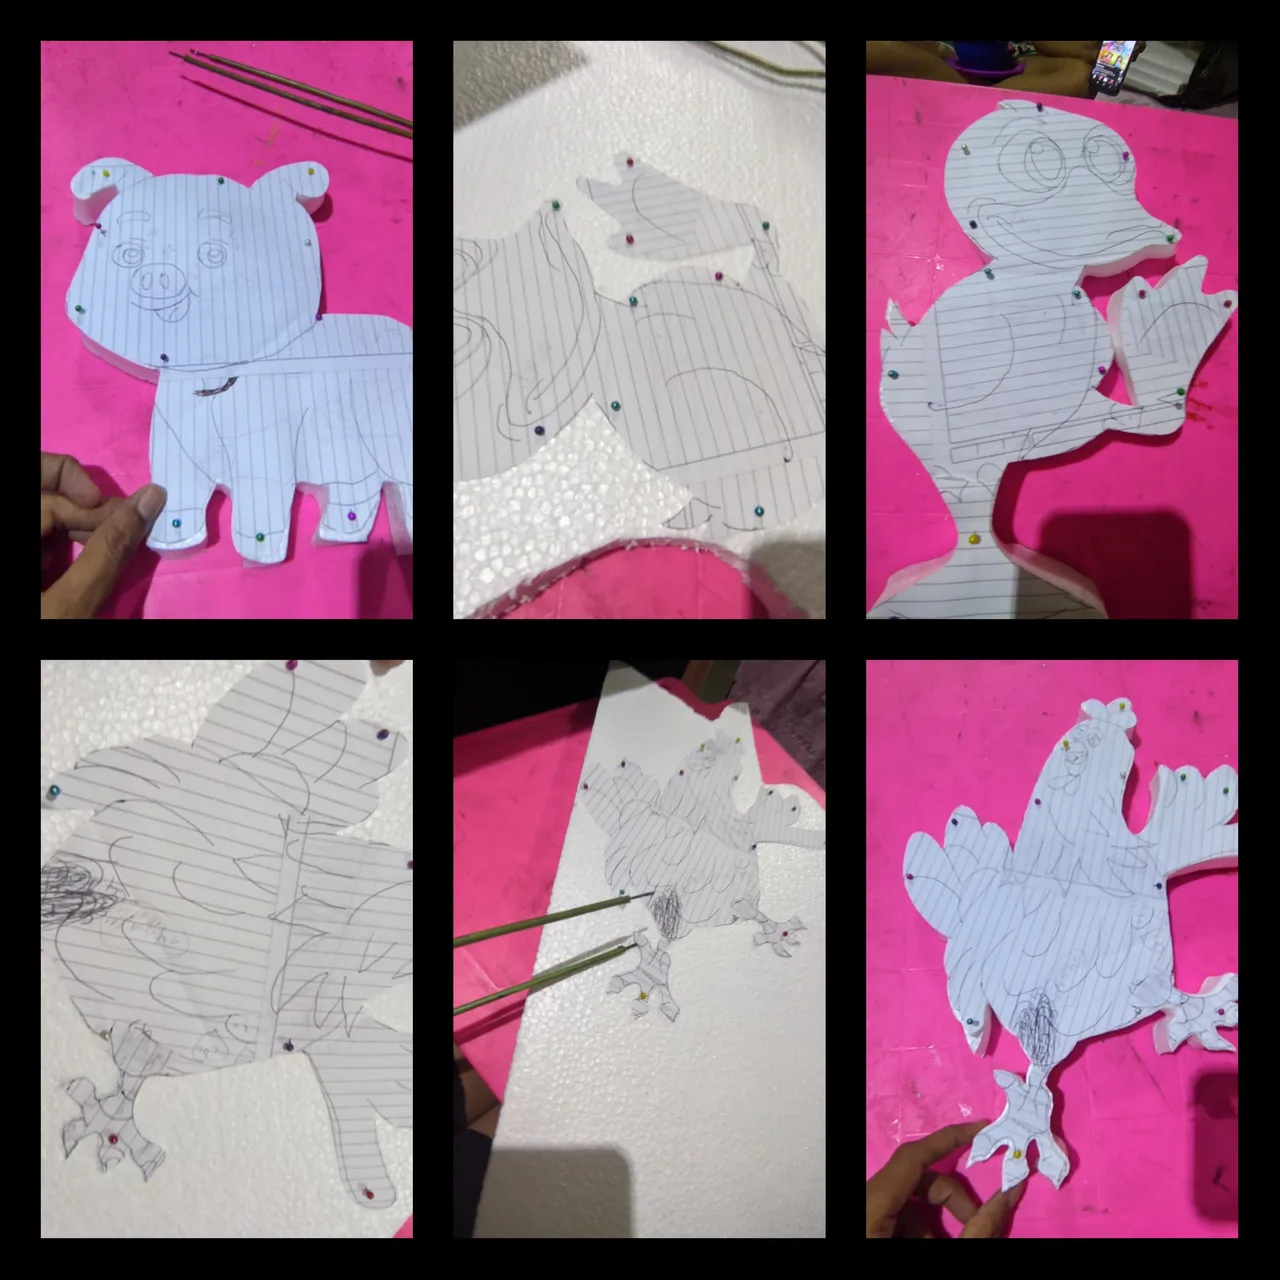
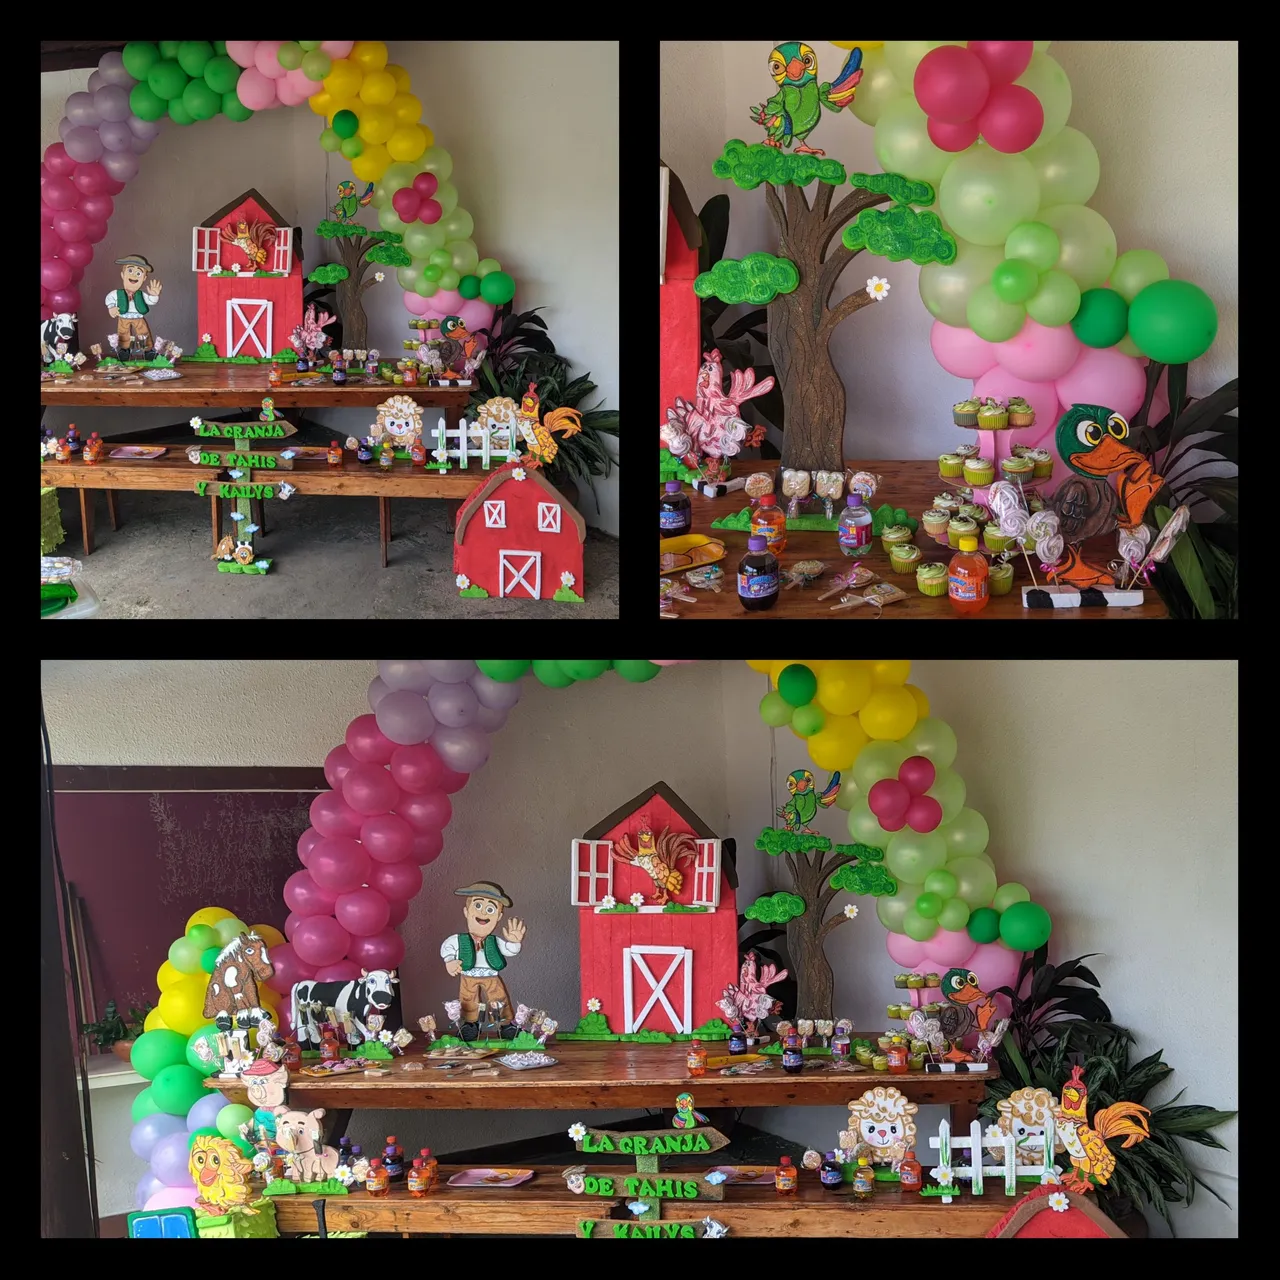
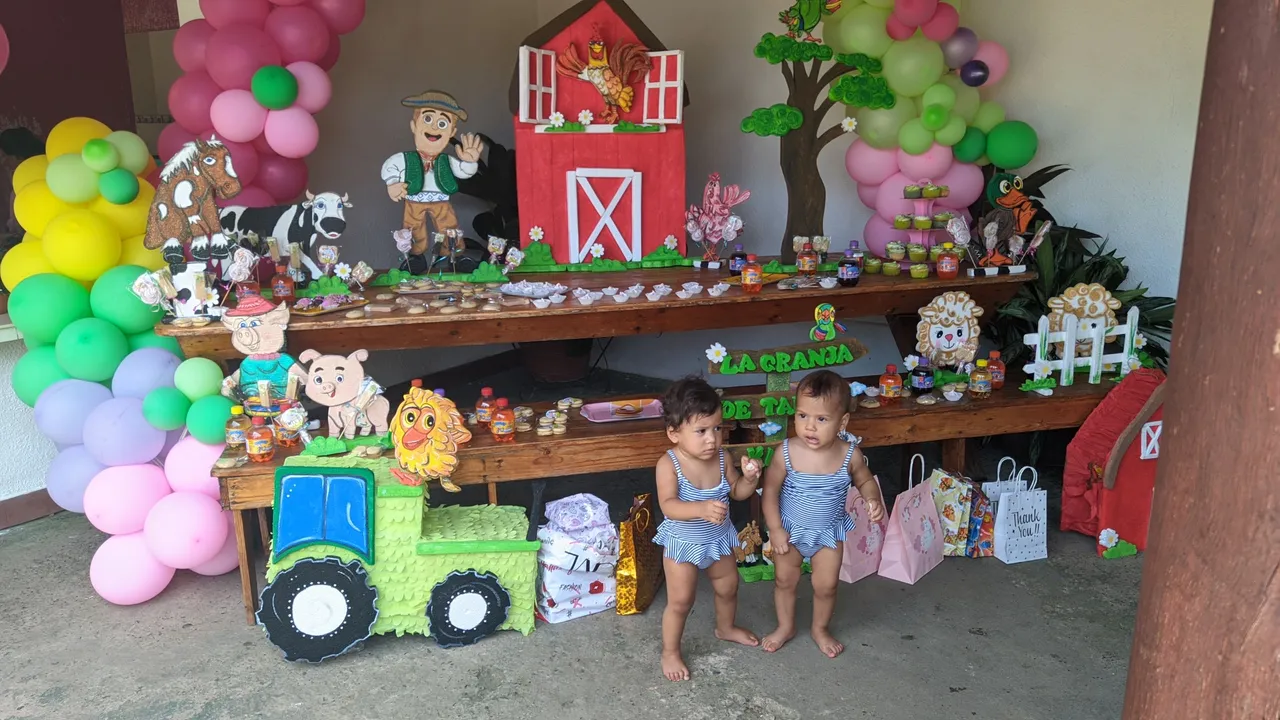
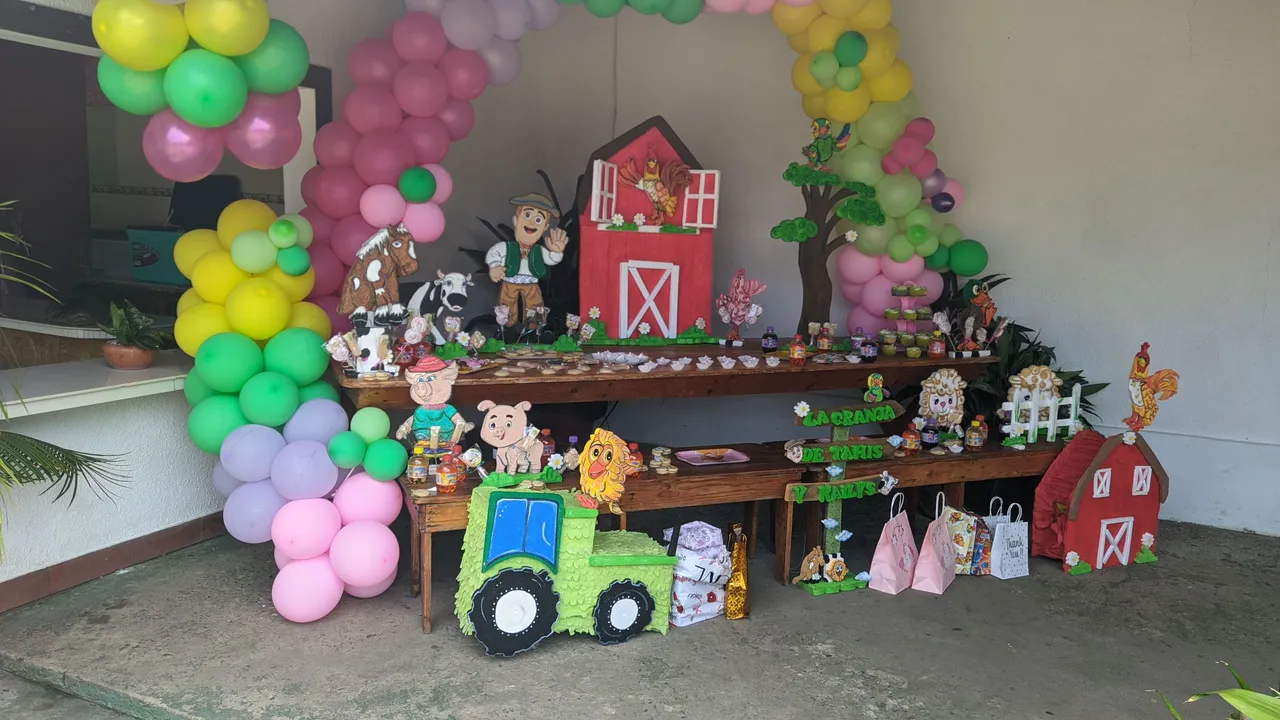
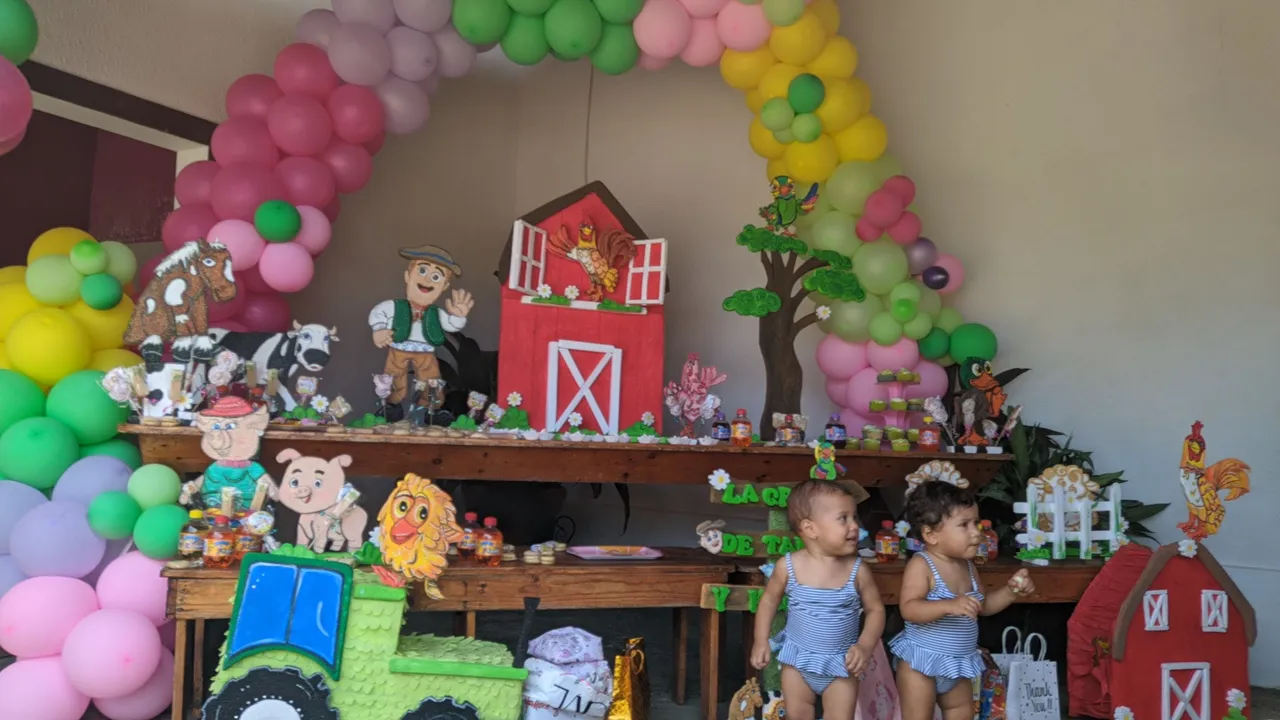
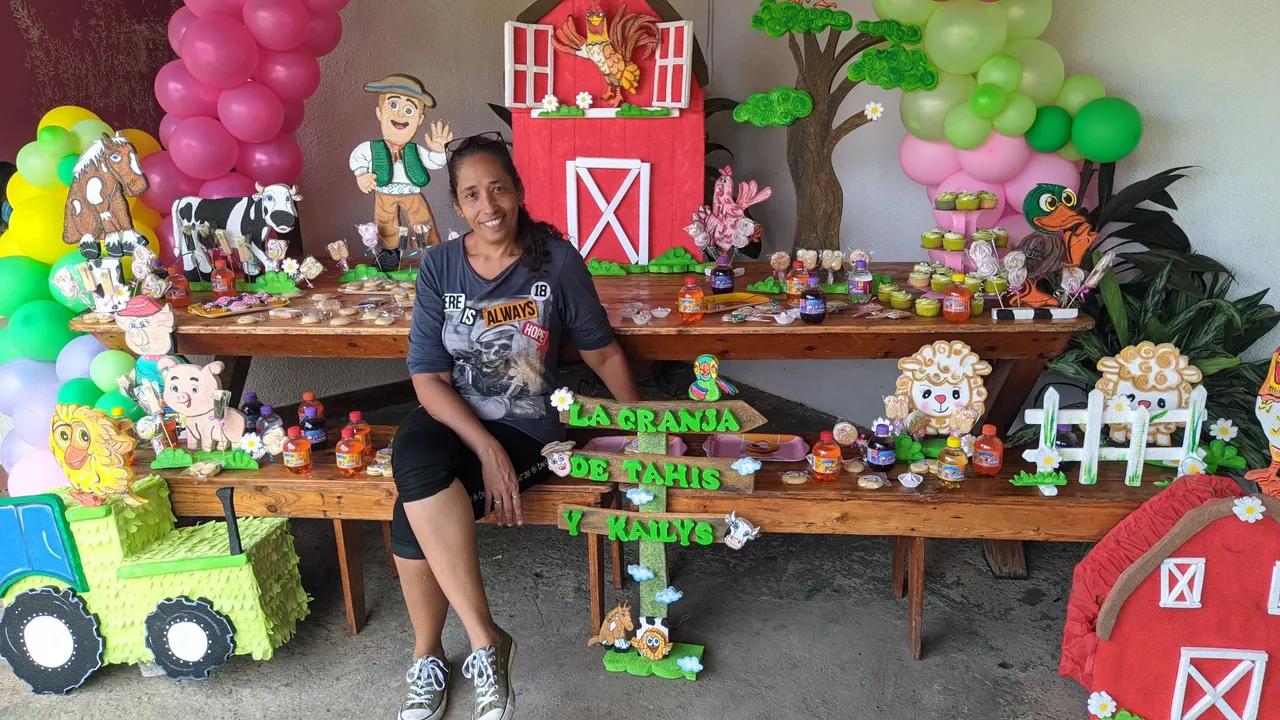
Primero saque los diferentes patrones en las hojas de reciclaje y luego las recorté cuando las tengo listas, tome una por una y las fui colocando encima del anime, fijando con los Alfileres, luego me ayude con el corta anime y fui recortando todas las figuras que voy a utilizar para decorar: Zenón el granjero, Bartolito, el pato cua-cua, la chancha, el pollito pio, la gallinita Pancha, el loro Pepe, el caballo percherón, la vaca Lola, los ovejitas y el cerdito, también recorté un árbol y la fachada de la granja.
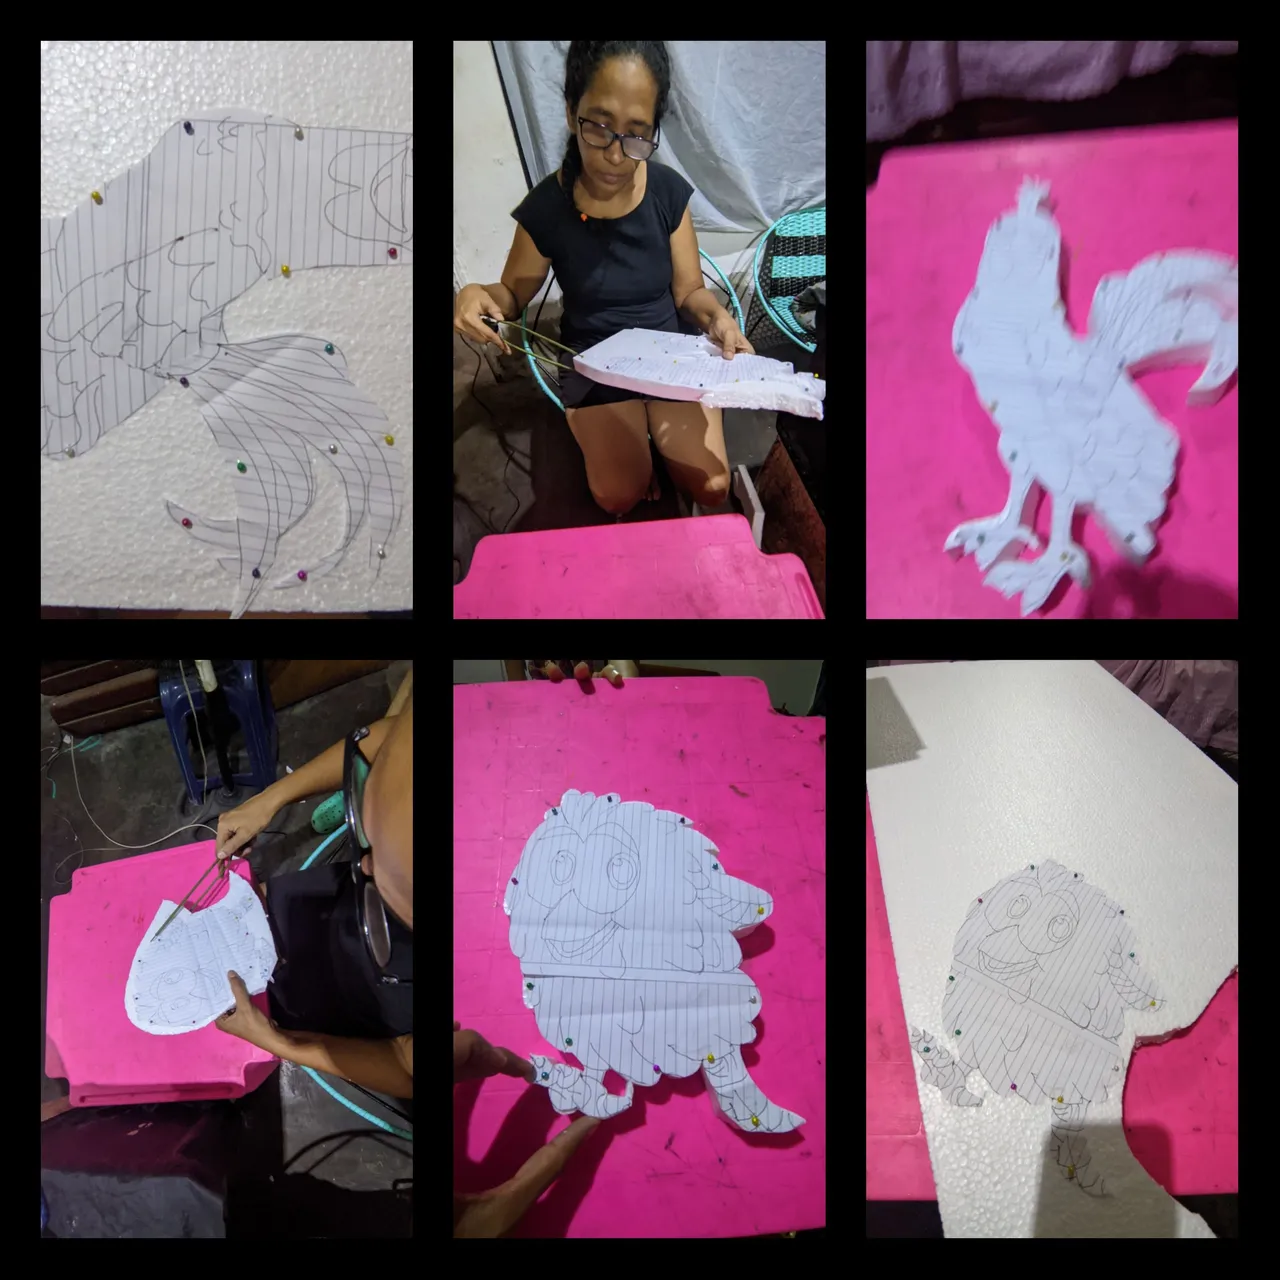
También saqué unas especie de tablillas con las que voy a formar una especie de letrero, que lleva los nombres de las niñas, y también saqué en anime las piezas de las diferentes figuras con las que haremos los detalles de relieve de las figuras.
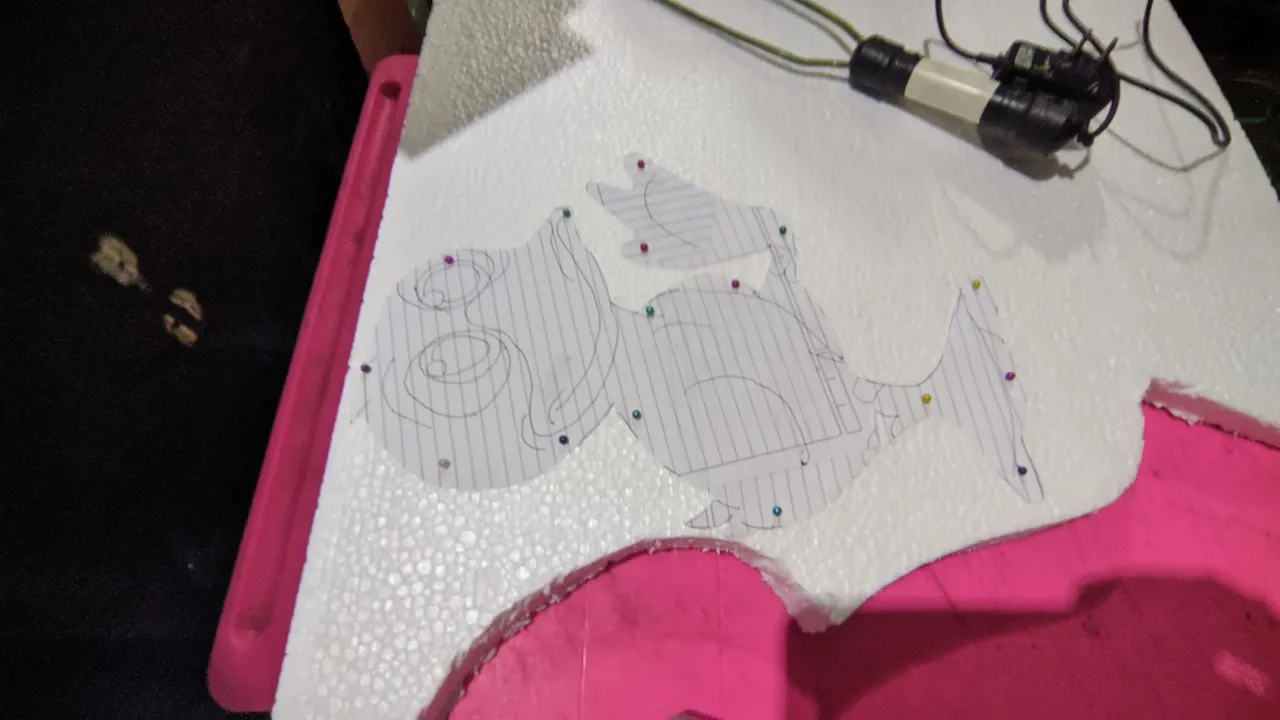
Luego de sacarlas en anime llegó el momento de lijar las piezas para luego finalmente pintarlas todas y cada una de ellas, y las dejé secar por uno o dos días algunas, para asegurarme de que la pintura esté bien seca, cuando revisamos que está bien le aplicamos el brillo al frío y dejamos secar bien, y listo. Este proceso le llevó una semana completa tener todas listas.
Para el día de la decoración y las figuras estaban listas y trasladas hasta el club donde realice la decoración, y para esta utilice los siguientes materiales.
🎈 Materiales para la decoración🎈
🎈 Figuras decorativas.
🎈 Globos de color: rosado, fucsia, lila, verde manzana, amarillo y verde bosque.
🎈 Hilo pabilo.
🎈 Silicón líquido.
🎈 Dulces y golosinas.
Primero atamos el hilo pabilo a una superficie fija y dimos inicio a inflar los globos los cuales fui uniendo en cuartetos del mismo color, luego fui anudando cuarteto sobre cuarteto, y así lo hicimos con todos los colores de globos.
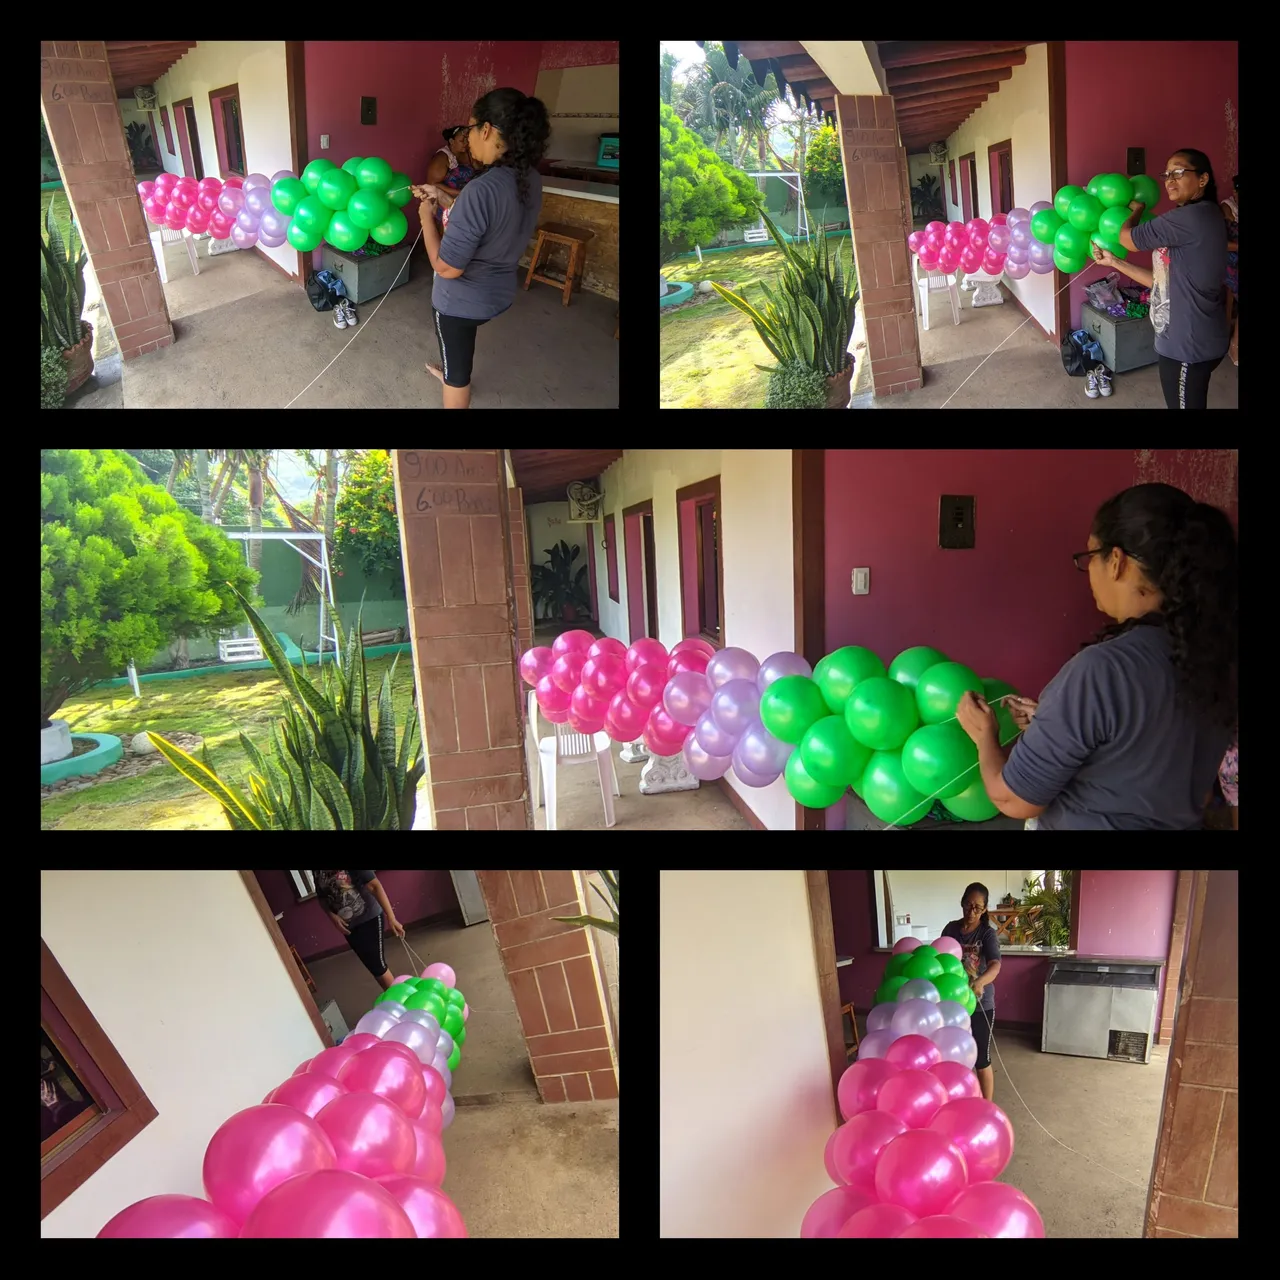
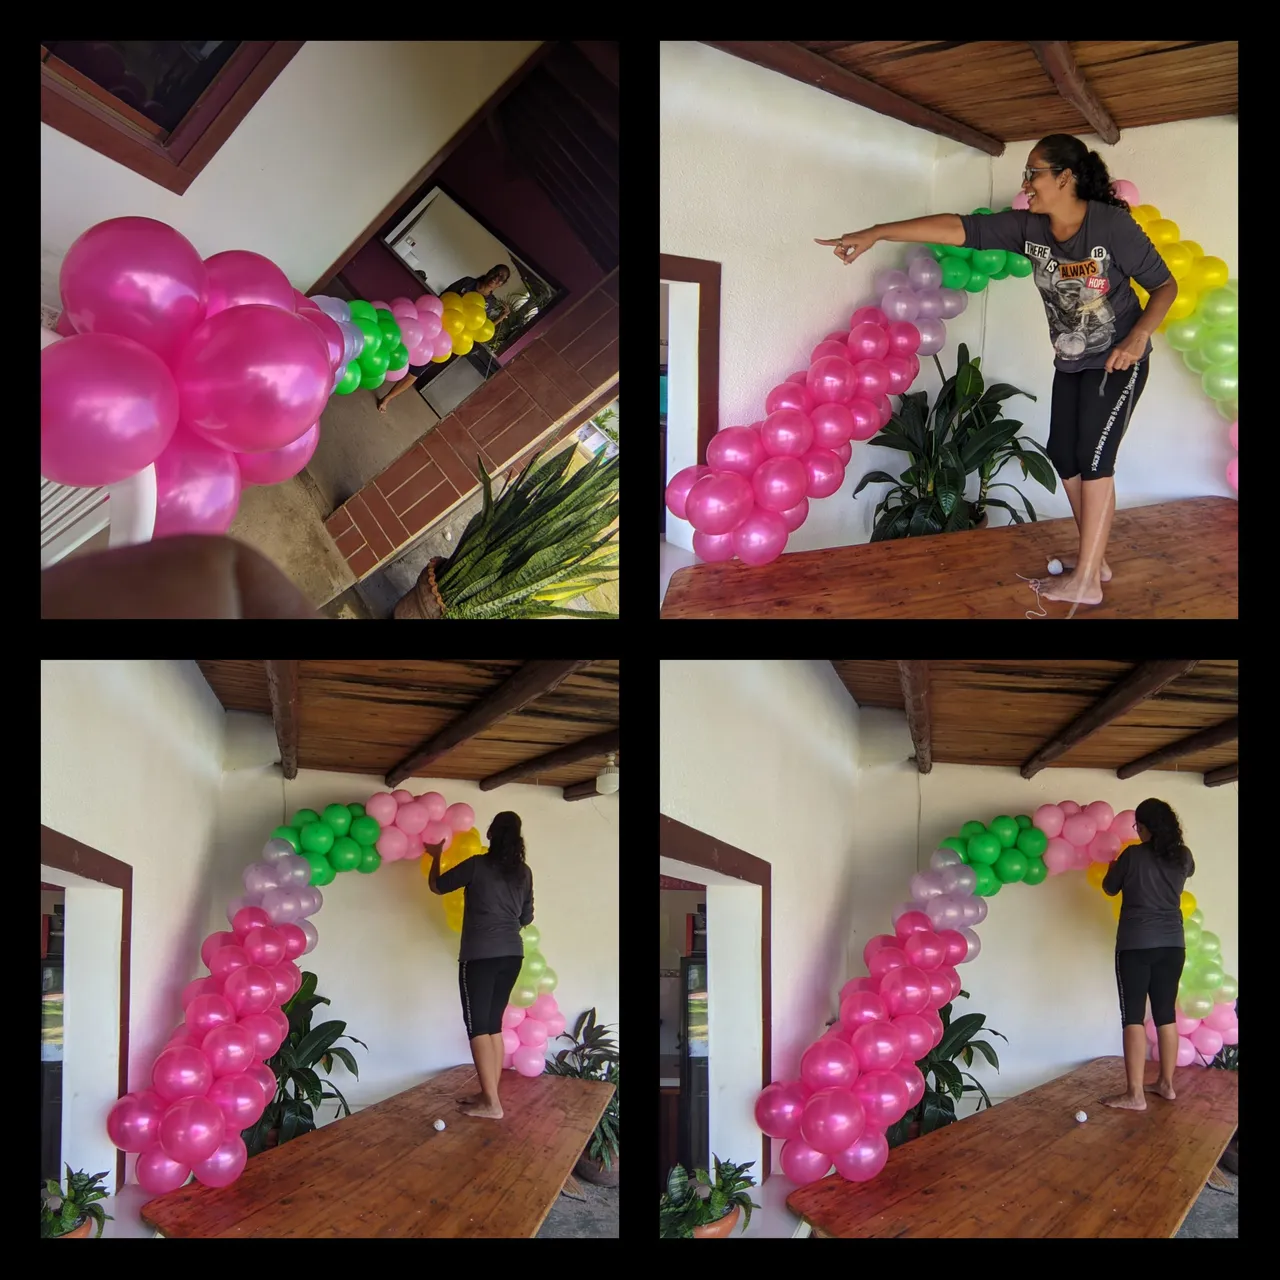
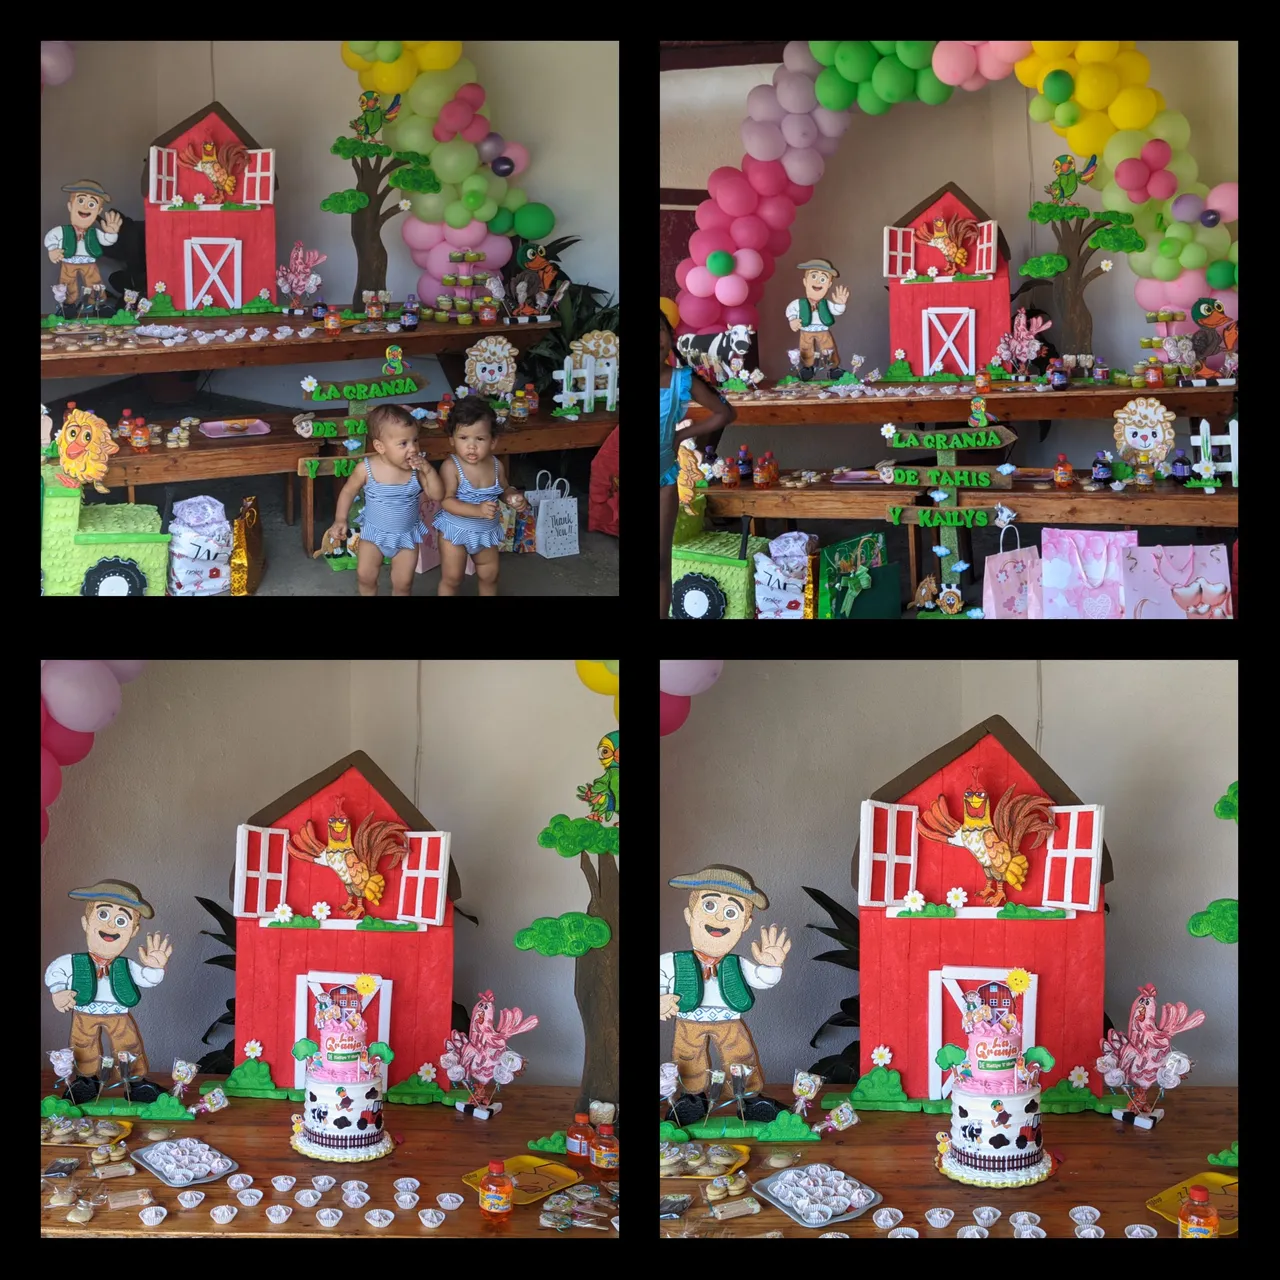
Cuando ya tenemos los globos apilados, procedió a colocarlos encima de la mesa y lo fijamos bien, para esta decoración los globos no deben quedar de manera uniforme, muy por el contrario.

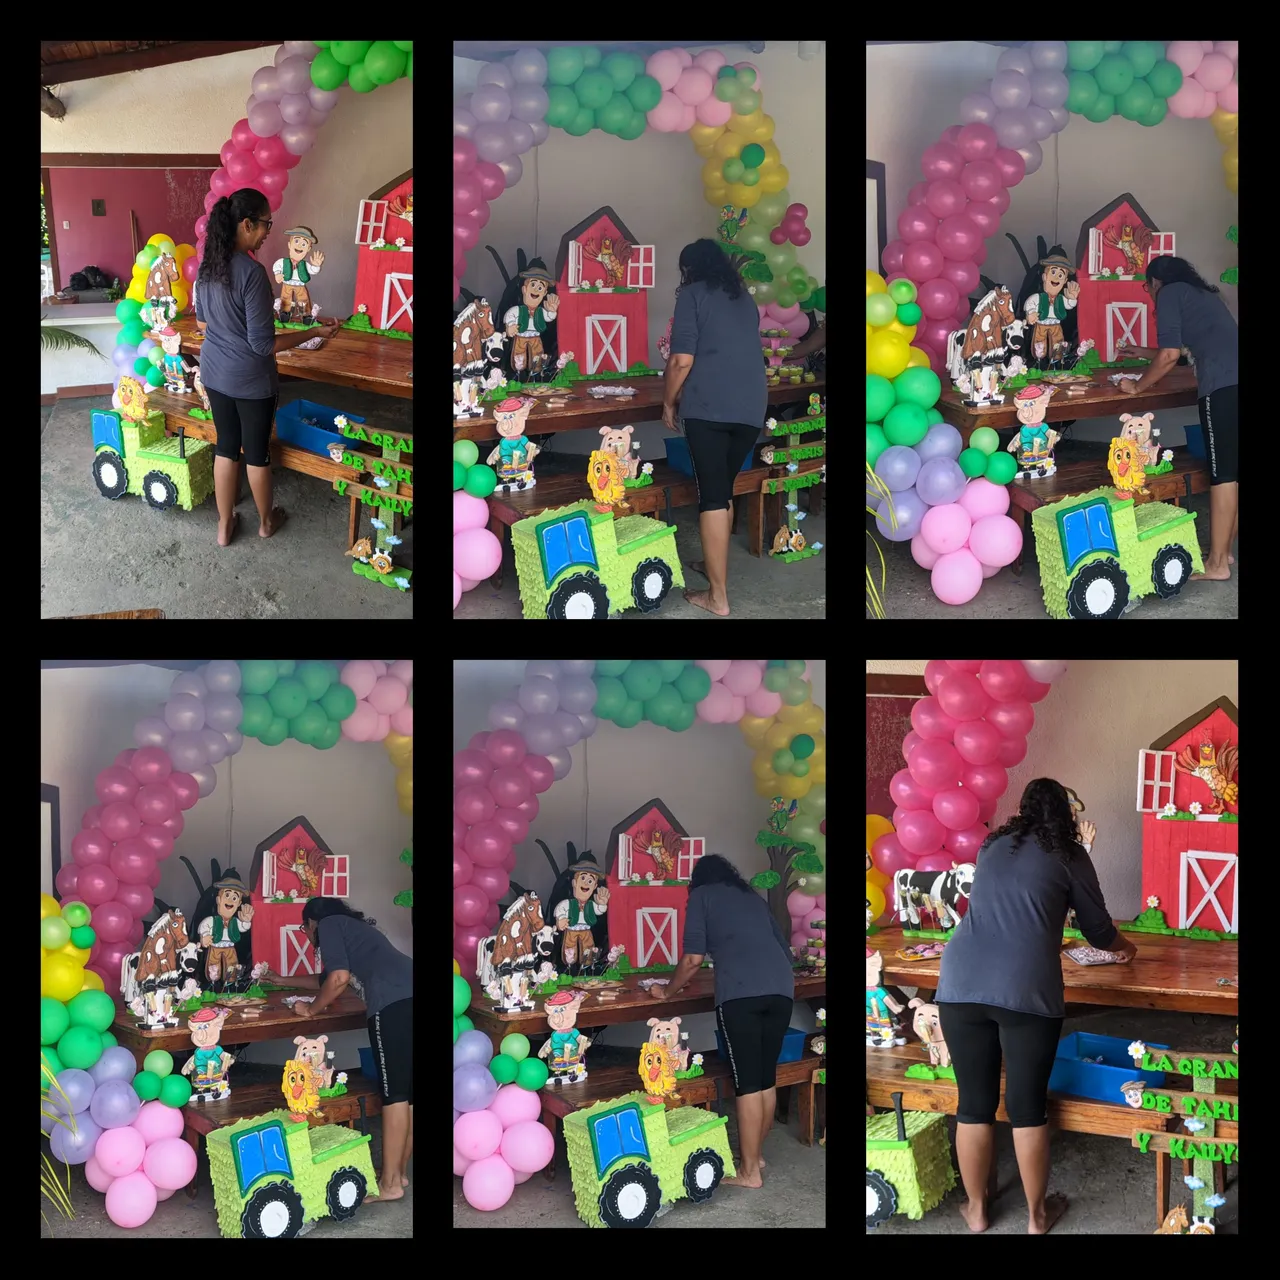
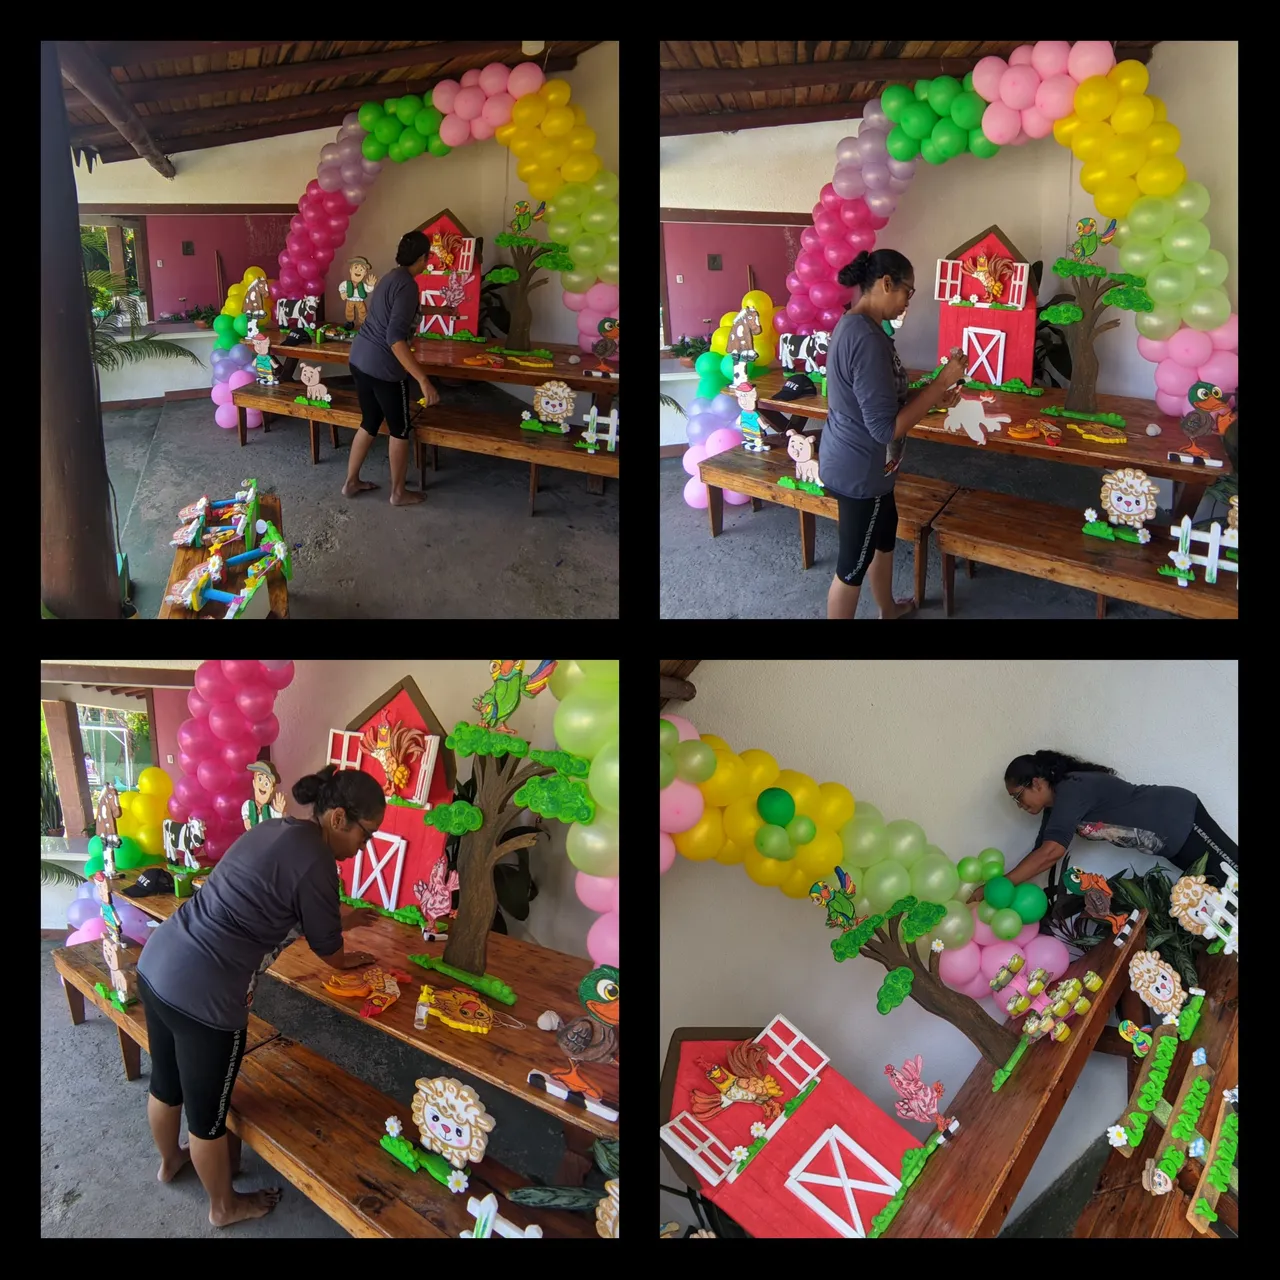
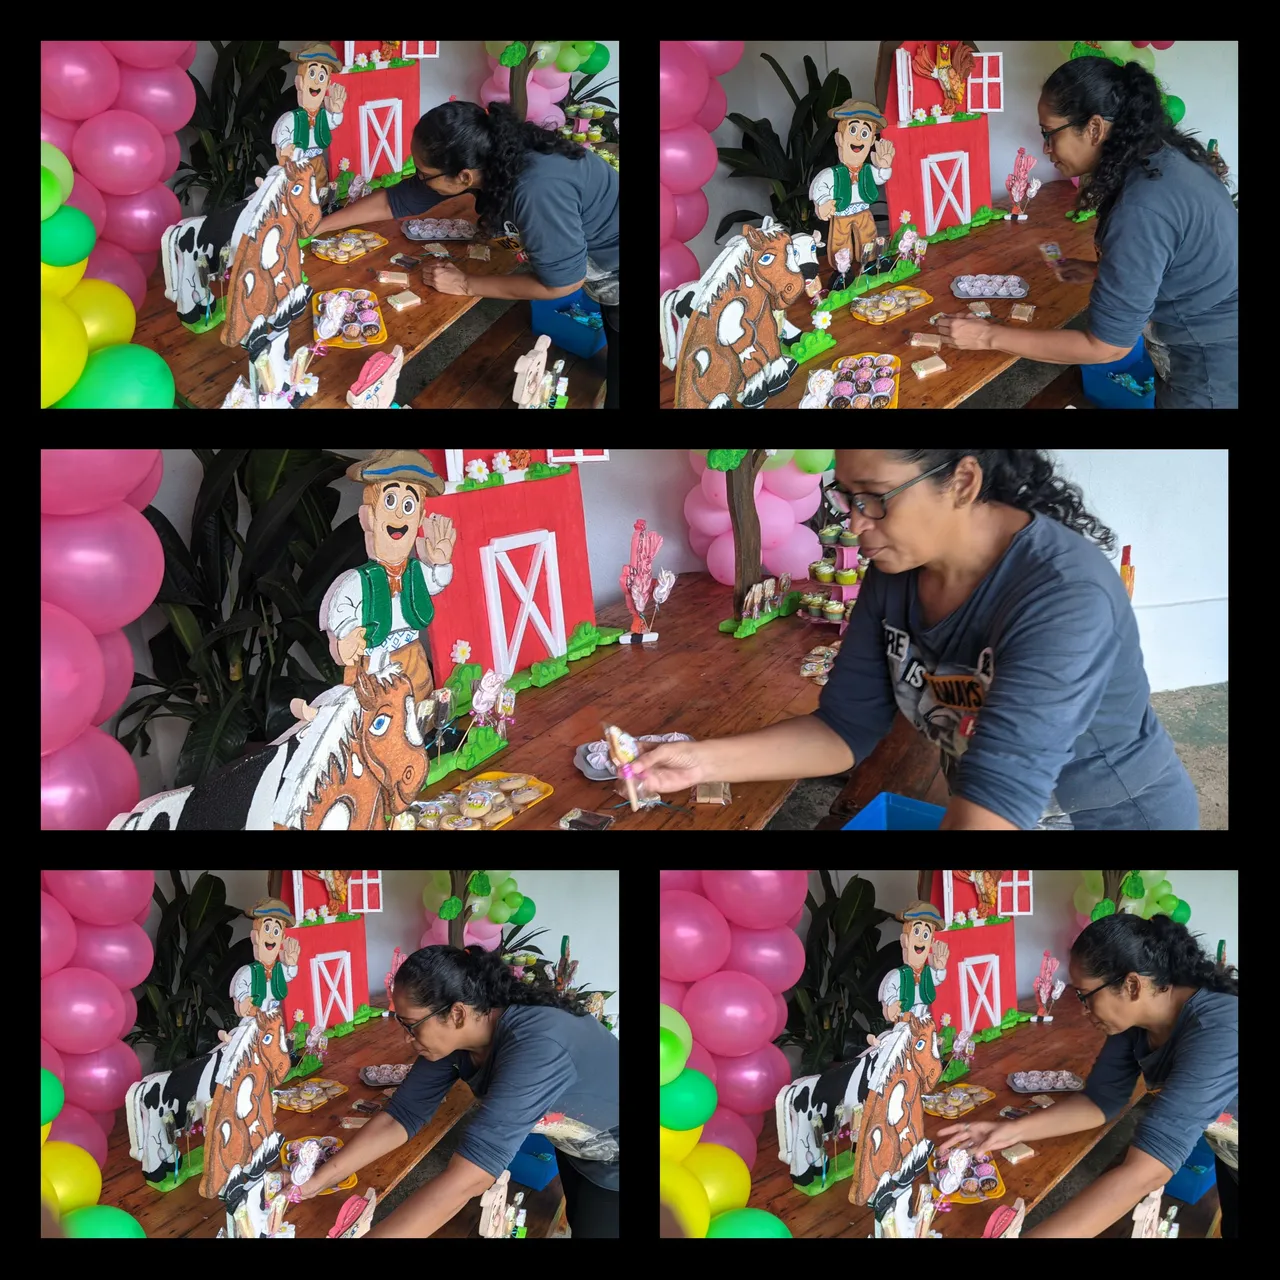
Luego fui agregando las diferentes figuras de anime y las fijó a la mesa aplicando silicón líquido en la base de las figuras, cuando ya coloque todas, termine dándole un toque, agregándole los diferentes dulces y golosinas, lo último que se colocó en la mesa fue la torta y listo hemos terminado.
🐓Resultado final🐓

🐓 Créditos 🐓
Todas las fotografías fueron tomadas con mi teléfono Xiaomi redmi 9T y son de mi propiedad.
Utilice el programa polish y canvas para editar las fotografías y el traductor Deepl.
Club la arenera, Cumaná Estado Sucre-Venezuela.
La música utilizada es del programa polish que trae mi teléfono Xiaomi redmi 9T.


Hello #hive friends I hope you all are well, despite all the situation I'm going through I'm still going ahead, and although sometimes I don't feel like continuing, I must do it, and now more than ever, that's why when I had the opportunity to work decorating a party I didn't hesitate to do it..., And that's what my post is about, to explain how was the process to achieve the decoration I did for a first birthday party for the twins Kaily and Thais with the theme of Zenon's farm, but let's not talk more, let's start the explanation.
🐓Creative process 🐓
When I found out that the party was Zenon's farm themed I started by buying the materials to make the figures with which I made the decorations, here is the list of the materials I used to make the figures.
🐓 Materials to make the figures 🐓
🐓 3mm and 2.5mm anime.
🐓 Coloured cold paints.
🐓 Liquid silicone.
🐓 anime cutter.
🐓 Blade.
🐓 Soft sandpaper.
🐓 Brushes.
🐓 Gloss.
🐓 Recycling paper.
🐓 pencil.
🐓 Pins.
First I took out the different patterns on the recycling sheets and then I cut them out when I had them ready, I took them one by one and placed them on top of the anime, fixing them with the pins, then I helped myself with the anime cutter and I cut out all the figures that I was going to use to decorate: Zenon the farmer, Bartolito, the duck cua-cua, the pig, the chick pio, the hen Pancha, the parrot Pepe, the horse percherón, the cow Lola, the sheep and the pig, I also cut out a tree and the facade of the farm.
I also cut out some slats with which I am going to make a kind of sign, which bears the names of the girls, and I also cut out in anime the pieces of the different figures with which we will make the relief details of the figures.
After anime them out it was time to sand the pieces and then finally paint each and every one of them, and I let them dry for one or two days some of them, to make sure that the paint is well dry, when we check that it is well we apply the cold gloss and let it dry well, and that's it. This process took a full week to get them all done.
By the day of the decoration and the figures were ready and moved to the club where I made the decoration, and for this I used the following materials.
🎈 Materials for the decorations🎈
🎈 Decorative figures.
🎈 Coloured balloons: pink, fuchsia, lilac, apple green, yellow and forest green.
🎈 Wicker thread.
🎈 Liquid silicone.
🎈 Sweets and treats.
First we tied the wick twine to a fixed surface and started blowing up the balloons, which I joined into quartets of the same colour, then I knotted quartet upon quartet, and so we did with all the balloon colours.
When we have the balloons stacked, we proceeded to place them on the table and we fixed them well, for this decoration the balloons should not be uniform, on the contrary.
Then I added the different anime figures and fixed them to the table by applying liquid silicone on the base of the figures, when I placed them all, I finished giving it a touch, adding the different sweets and candies, the last thing that was placed on the table was the cake and we are done.
🐓 Credits 🐓
All photos were taken with my Xiaomi redmi 9T phone and are my property.
Use polish and canvas to edit the photos and the Deepl translator.
Club la arenera, Cumaná Estado Sucre-Venezuela.
▶️ 3Speak