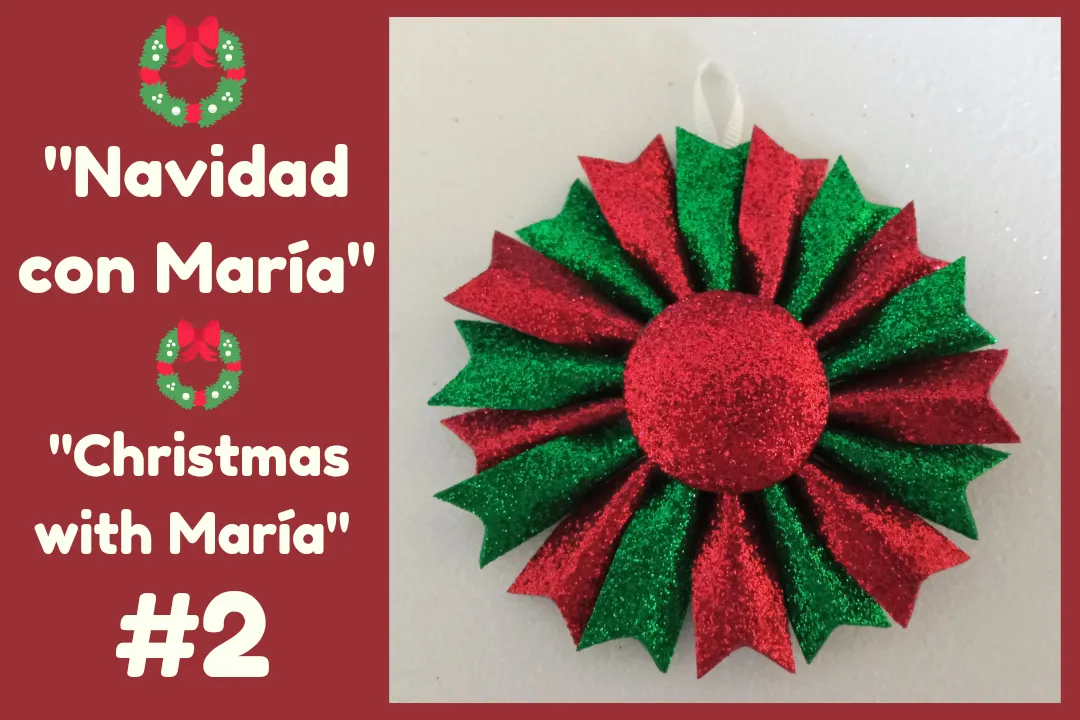
Espero que estén pasando un lindo sábado!!❤️ En esta oportunidad les compartiré el segundo capítulo de mi serie navideña, para este quise elaborar una flor de navidad con foami escarchado. Este año haré lo mismo que hice el año pasado, decoraré el arbolito con los adornos que realice para este proyecto y con algunas decoraciones que ya tengo en casa. Para los que no saben esta es una serie navideña en la que les presentaré posts de manualidades, recetas, decoraciones, entre otros muchos contenidos. Bueno chicos, espero que les guste este post, a continuación les indicaré los materiales y cómo lo hice:
I hope you are having a nice Saturday!!!❤️ This time I will share with you the second chapter of my Christmas series, for this one I wanted to make a Christmas flower with frosted foami. This year I will do the same as I did last year, I will decorate the tree with the ornaments I made for this project and with some decorations I already have at home. For those who don't know this is a Christmas series in which I will present you posts of crafts, recipes, decorations, among many other contents. Well guys, I hope you like this post, below I will tell you the materials and how I did it:
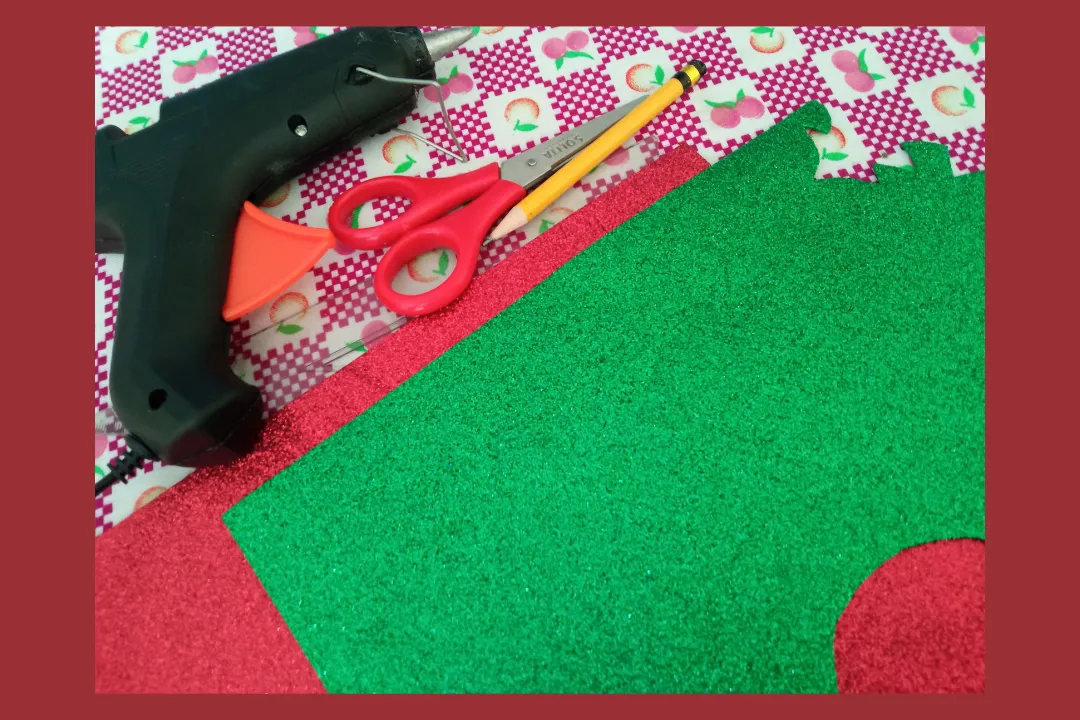
📌 Materiales:
- Foami (goma EVA) escarchado, colores: rojo y verde.
- Silicón caliente.
- Tijera.
- Lápiz.
- Regla.
- Cinta blanca delgada.
📌 Materials:
- Foami (EVA rubber) frosted, colors: red and green.
- Hot glue.
- Scissors.
- Pencil.
- Ruler.
- Thin white tape.
📌 Paso a paso:
📌 Step by step:
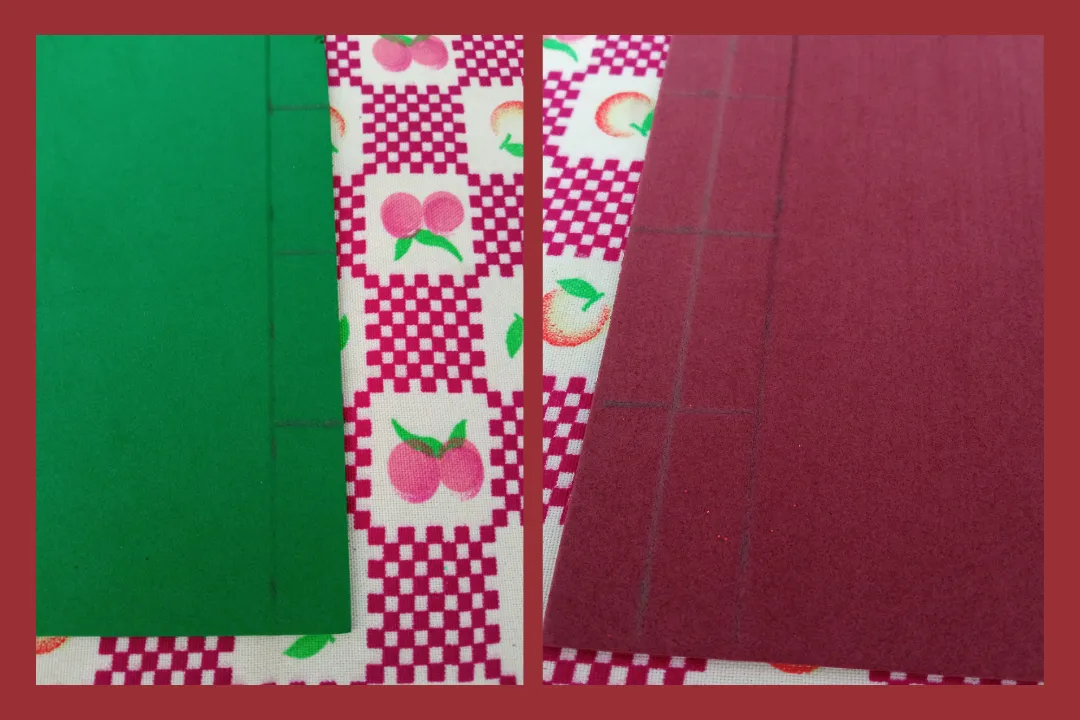
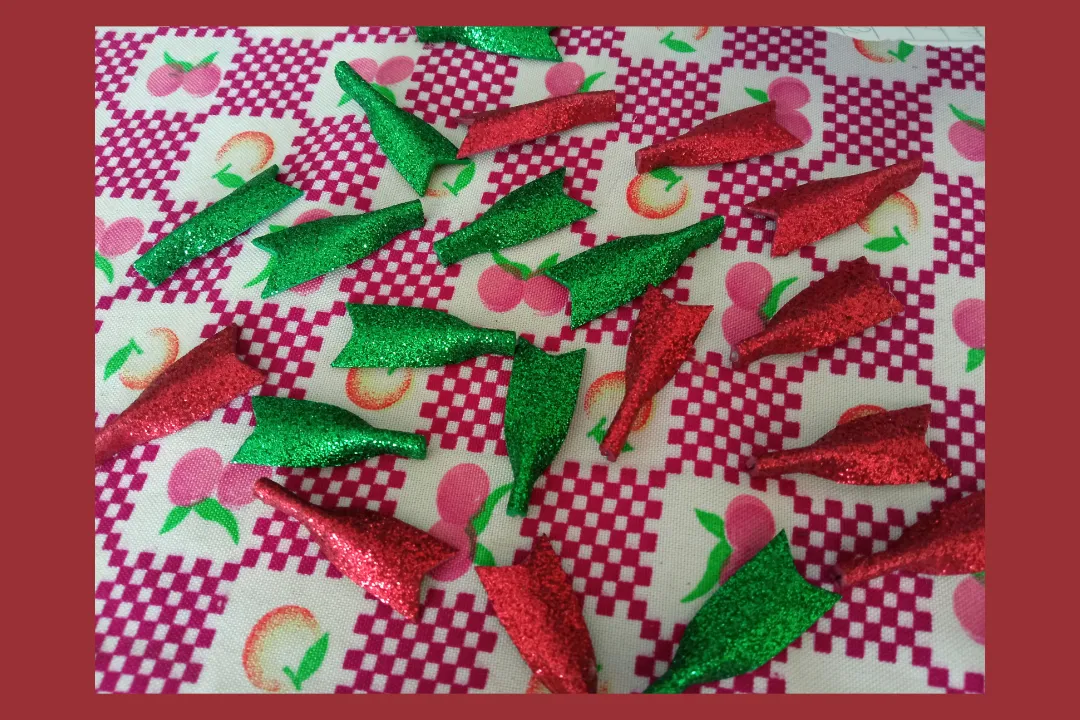
Primero, marcamos los rectángulos en el foami verde y rojo, cada pieza mide 4 centímetros de largo y 1,5 centímetros de ancho.
First, we mark the rectangles on the green and red foami, each piece is 4 centimeters long and 1.5 centimeters wide.
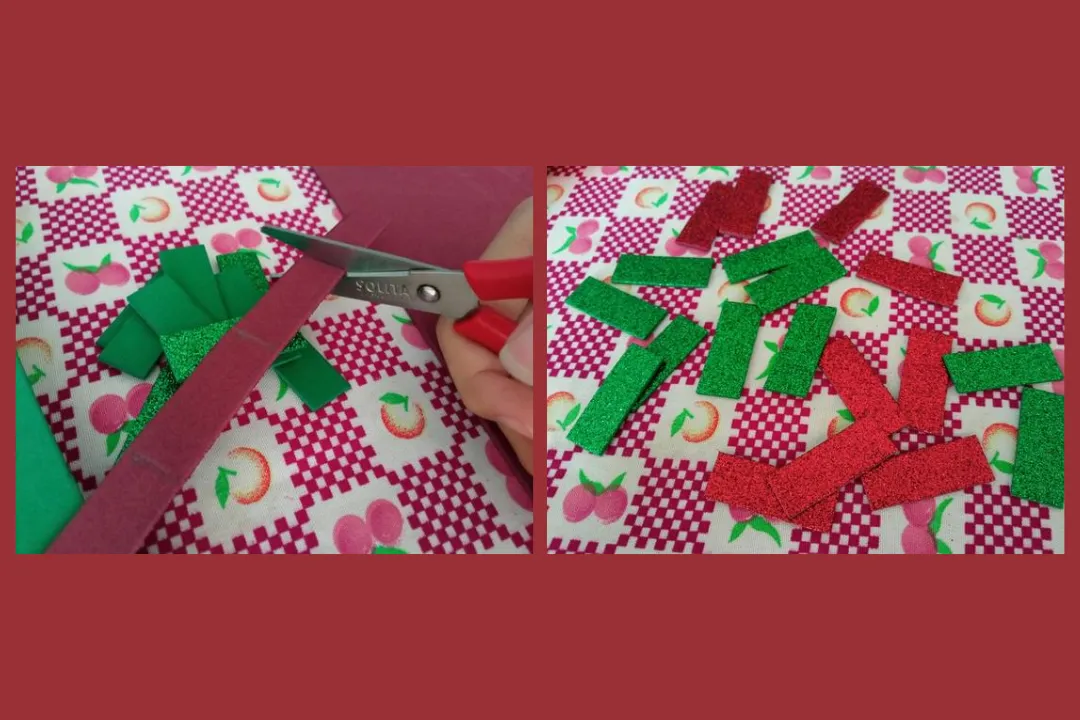
Cortamos, y en total tienen que salir aproximadamente como diez de cada color.
We cut, and in total there should be approximately ten of each color.
Luego, por la parte del foami que no tiene escarcha colocamos una gotita de silicón caliente y pegamos un extremo, como se muestra en la imagen. Y así hacemos con cada una de las piezas.
Then, on the part of the foami that does not have frosting, place a drop of hot silicone and glue one end, as shown in the image. And so we do with each of the pieces.
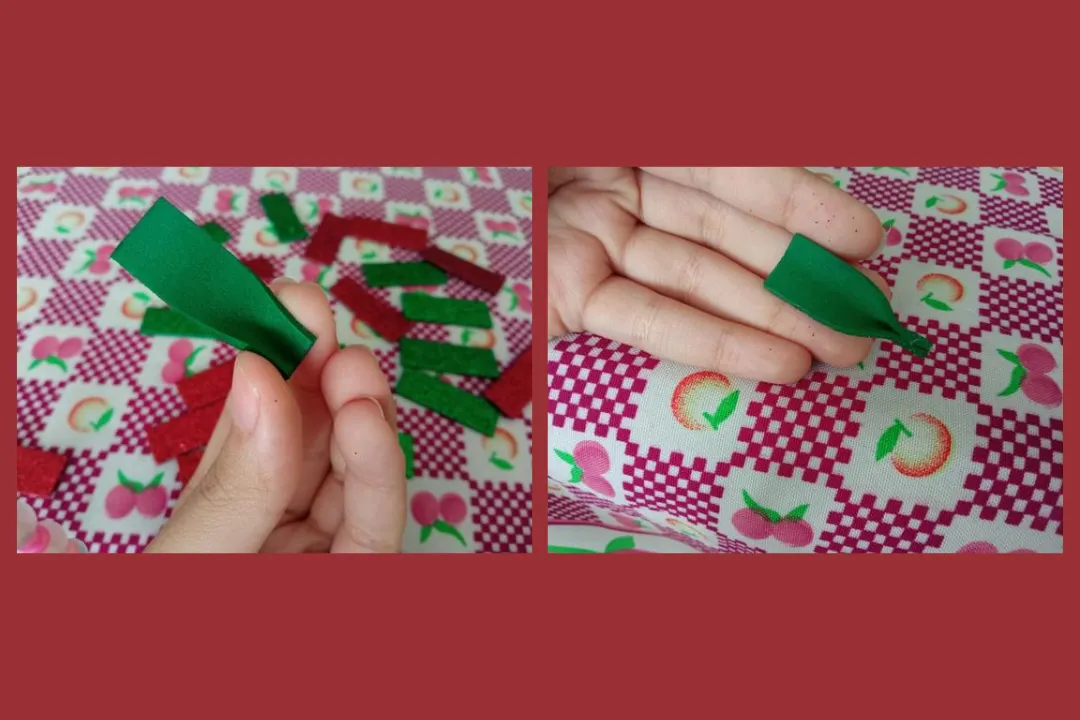
Luego doblamos a la mitad dejando a la vista la parte escarchada del foami, y hacemos un corte en diagonal en el otro extremo de la pieza.
Then we fold in half, leaving the frosted part of the foami visible, and we make a diagonal cut at the other end of the piece.
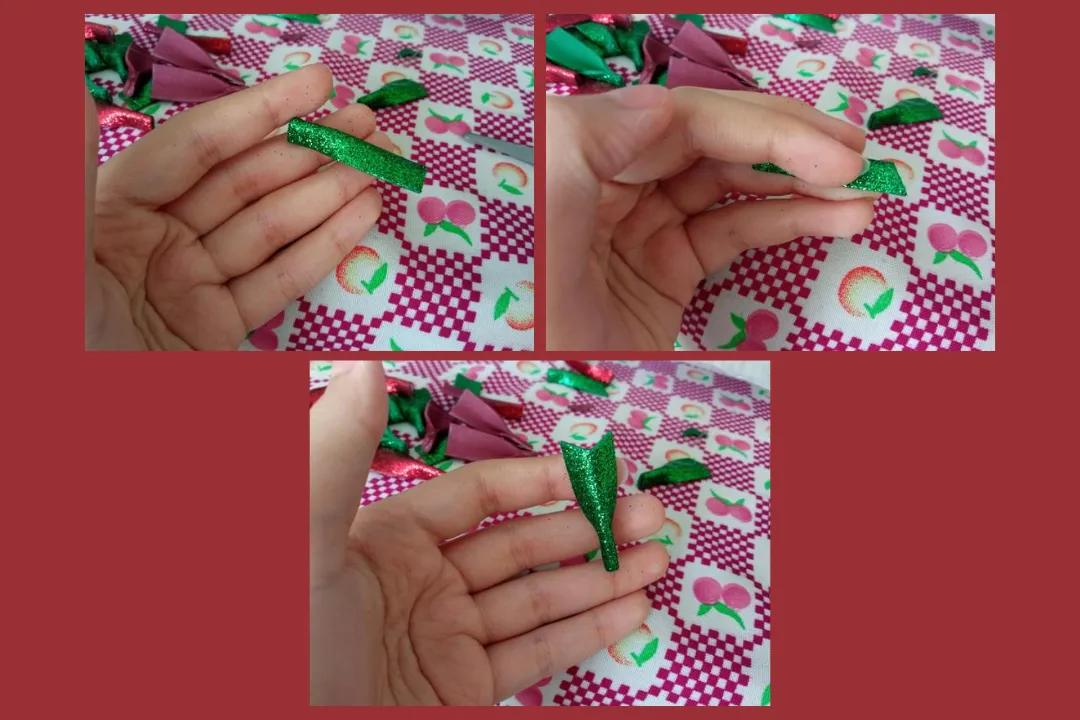
Así es como quedan los pétalos de la flor.
This is how the petals of the flower look like.
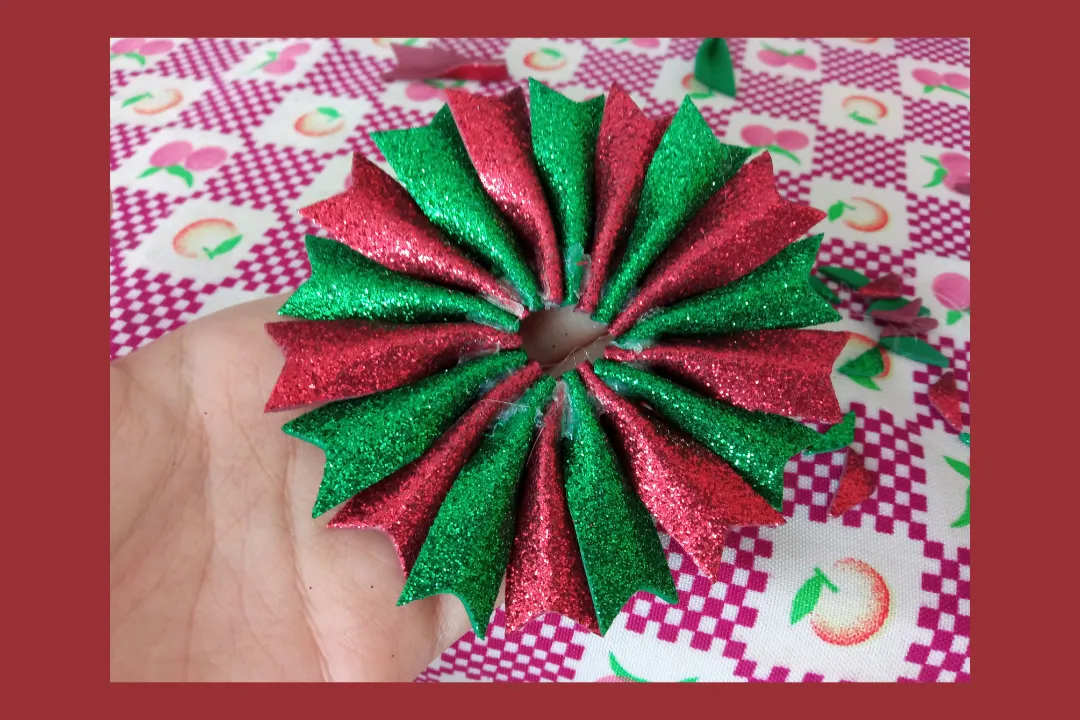
Pasamos a armarla, pegamos con ayuda de silicón un pétalo al lado del otro, intercalando los colores, uno rojo, uno verde, uno rojo y uno verde, así sucesivamente.
Next, we glue one petal next to the other with silicone, alternating the colors, one red, one green, one red and one green, and so on.
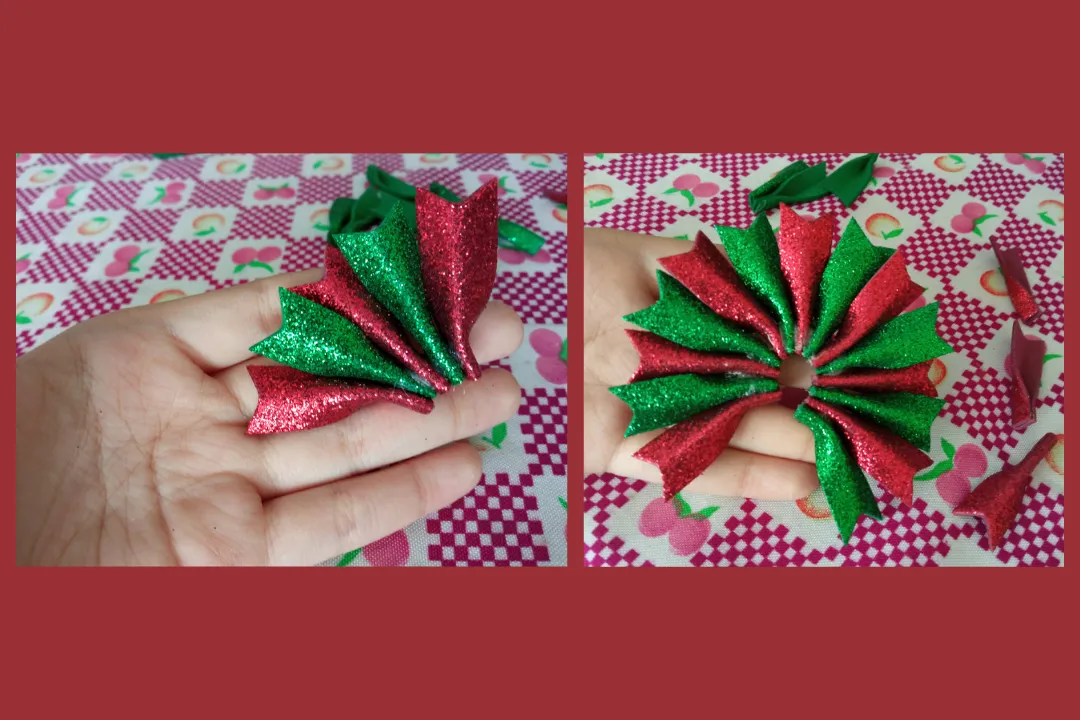
Así quedará cuando esté armada.
This is how it will look when assembled.
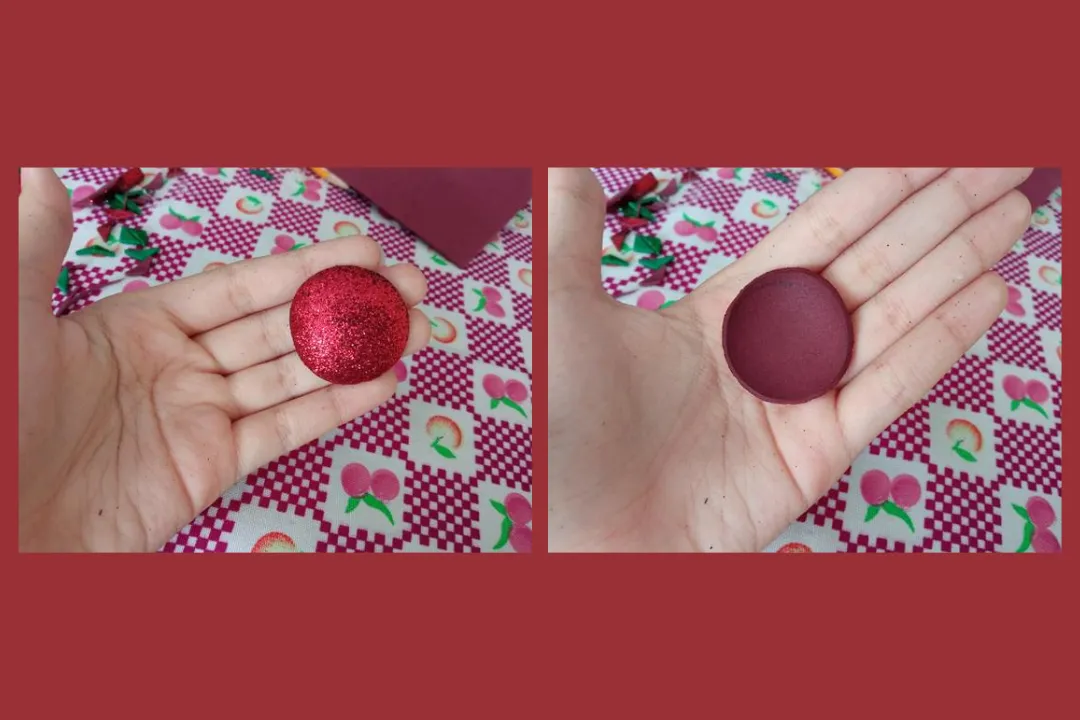
Para el centro, cortamos un círculo, puede ser con el foami rojo o verde, esta vez yo usé el rojo y con ayuda de una plancha para ropa se ablandó y lo pude moldear.
For the center, we cut a circle, it can be with red or green foami, this time I used the red one and with the help of a clothes iron it softened and I could mold it.
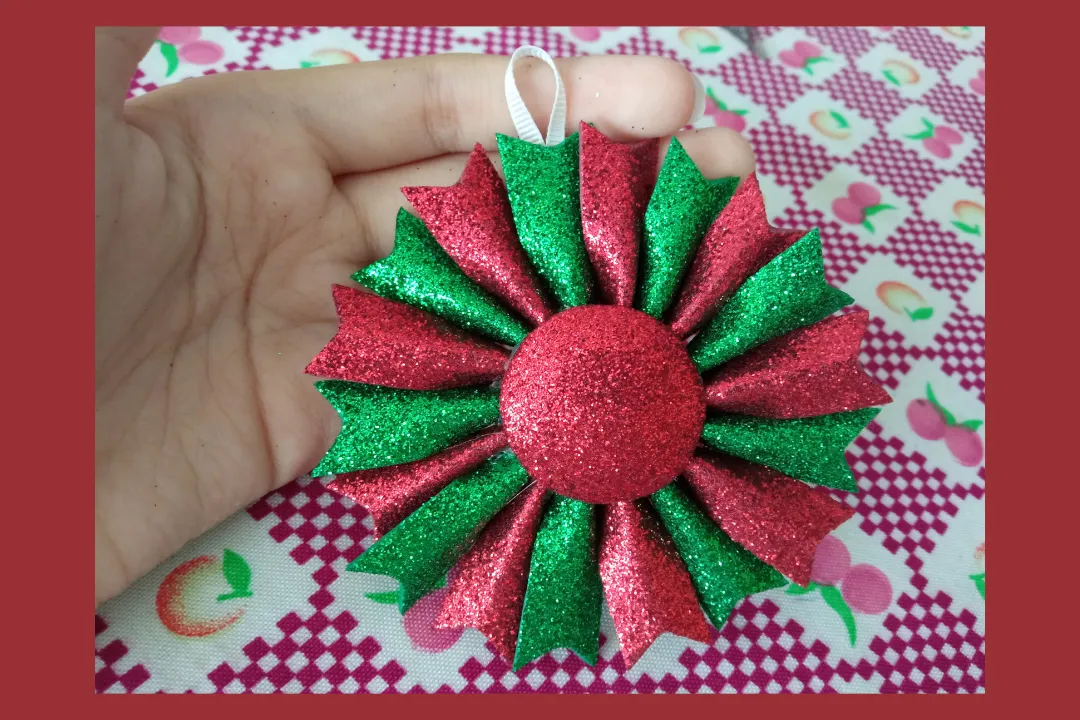
Pegamos el círculo en la flor, y también un pequeño trozo de cinta blanca para poder colgarlo en el árbol después.
We glued the circle on the flower, and also a small piece of white ribbon to hang it on the tree later.
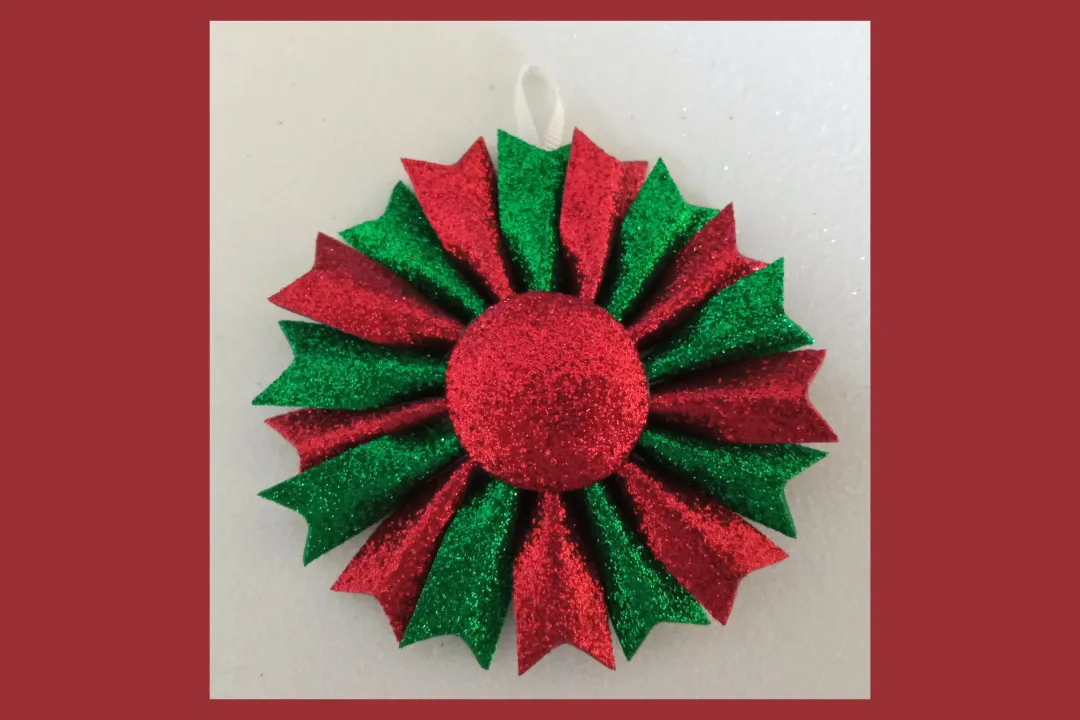
Y así fue como quedó la flor navideña!!💚❤️ Me encantó este proyecto, es uno de mis favoritos hasta ahora de la serie, aunque lo que se viene está mejor, no sé los puedo contar aún porque son sorpresas. Este proyecto es especial e importante para mí, por eso todo lo que hago es con mucho cariño, los que me conocen muy bien saben que la navidad es mi época favorita del año, y por eso acá en Hive no puedo dejar pasar por alto estas fechas sin compartirles algo bonito. Y a esta comunidad la considero significativa, porque también publiqué para ustedes a través de ella el año anterior, me alegra ver que nuevamente se va activando y más creadores se van uniendo. Chicos, espero que les haya gustado bastante este post, gracias por leer, hasta una próxima oportunidad!!!💚❤️💚❤️
And this is how the Christmas flower turned out!!!💚❤️ I loved this project, it is one of my favorites so far in the series, although what is coming is even better, I can't tell you yet because they are surprises. This project is special and important to me, that's why everything I do is with love, those who know me very well know that Christmas is my favorite time of the year, and that's why here at Hive I can't let these dates pass by without sharing something nice with you. And I consider this community significant, because I also published for you through it last year, I'm glad to see that it is becoming active again and more creators are joining. Guys, I hope you liked this post enough, thank you for reading, until next time!!!💚❤️💚❤️

Todas las imágenes son de mi autoría @mariamglow, tomadas con mi teléfono Redmi 9, editadas en Canva, texto traducido en DeepL.
All images authored by me @mariamglow, taken with my Redmi 9 phone, edited in Canva, text translated at DeepL.